Portrait photography masterclass Part 4: Using gels with flash
Natasha J Bella gives a masterclass in gel lighting for colorful portraits at her home studio
Watch video: Using gels with flash
Adding color with gels is a great way to bring some extra flair to portraits. Gels are pieces of colored plastic that you can place over your light source to change the color of the light. They come in different shapes and sizes and can also be cut to size. You will see the effects of gels being used regularly in movies, theater, TV and photography for color correcting, to emphasize a particular mood, or enhance the scene.
In portraiture, you can use acetate gels to change the color of the backdrop giving you a wide choice of background colors; and you can also light your subject with them for creative and dramatic effects. Gels come in many colors so that you can find the perfect combination.
You could go for vibrant, punchy colors or subtle pastel shades. Looking at a color wheel is a quick way to help you choose complimentary colors. Let’s get creative and have fun with it!
01 Get set up
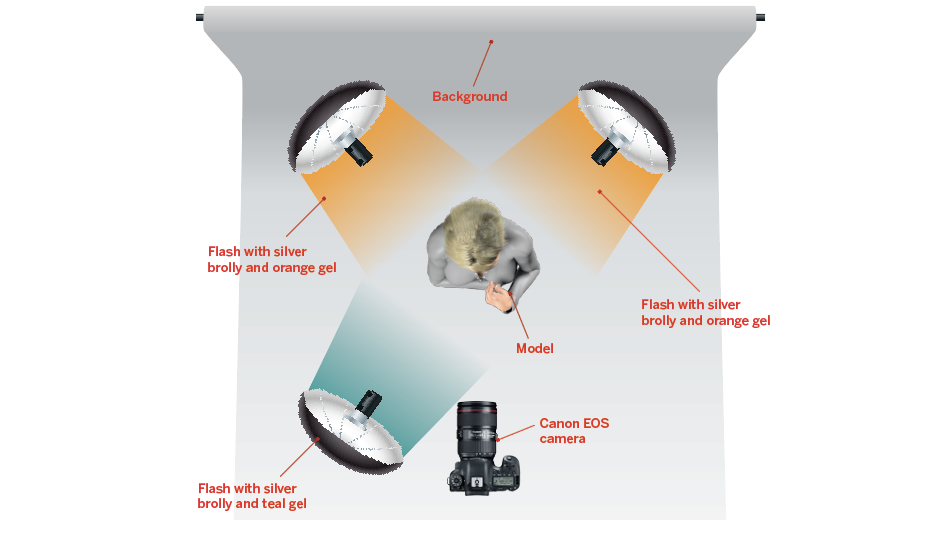
Select your colour gel combinations by using a colour wheel (see right) to choose colours that work well together, such as the orange and teal that we used. Opposites on the colour wheel are complimentary to one another. I have Jake Hicks’s Definitive Colour Pack and used the vibrant orange gel as a rim light on the model to highlight her hair and teal as the opposite complimentary colour to light her from the front.
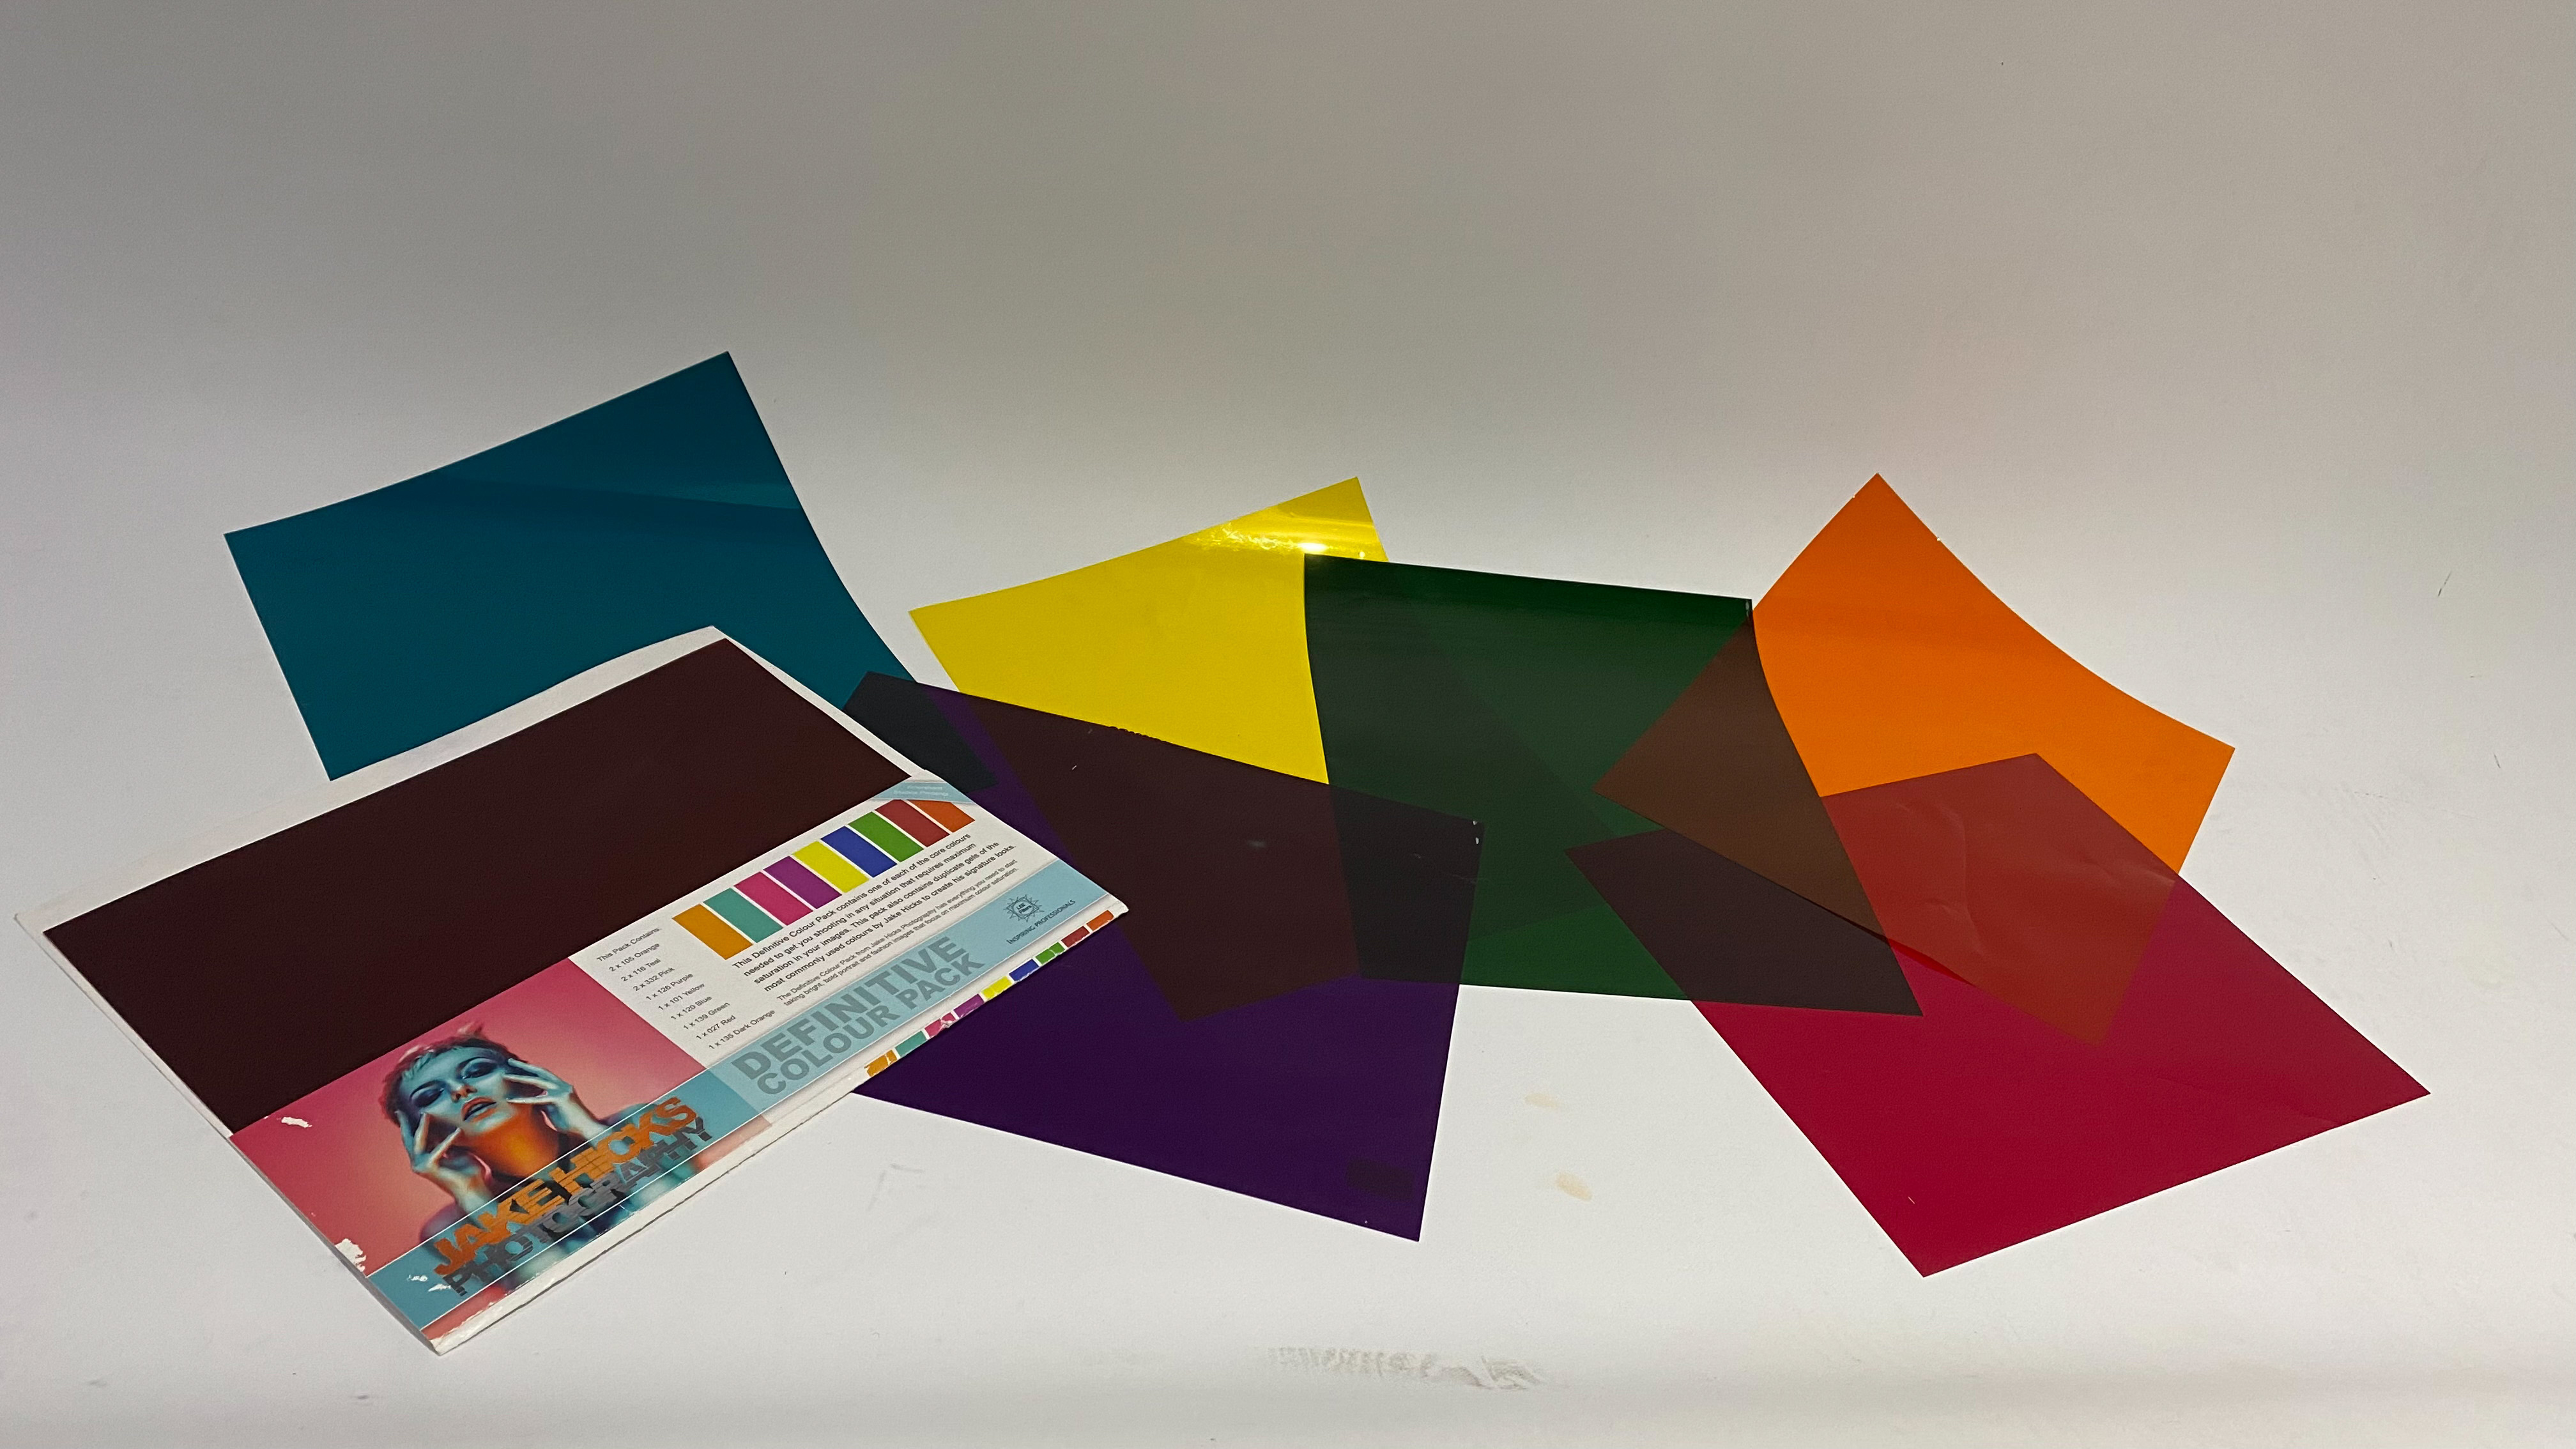
Choose your gels and attach them to your light source, ensuring that no white light will spill. Position your lights into a similar position as we have here, we used three inexpensive silver umbrellas to reflect the light back towards the model which is less harsh than the direct flash bulb light.
02 Dial in the flash and camera settings
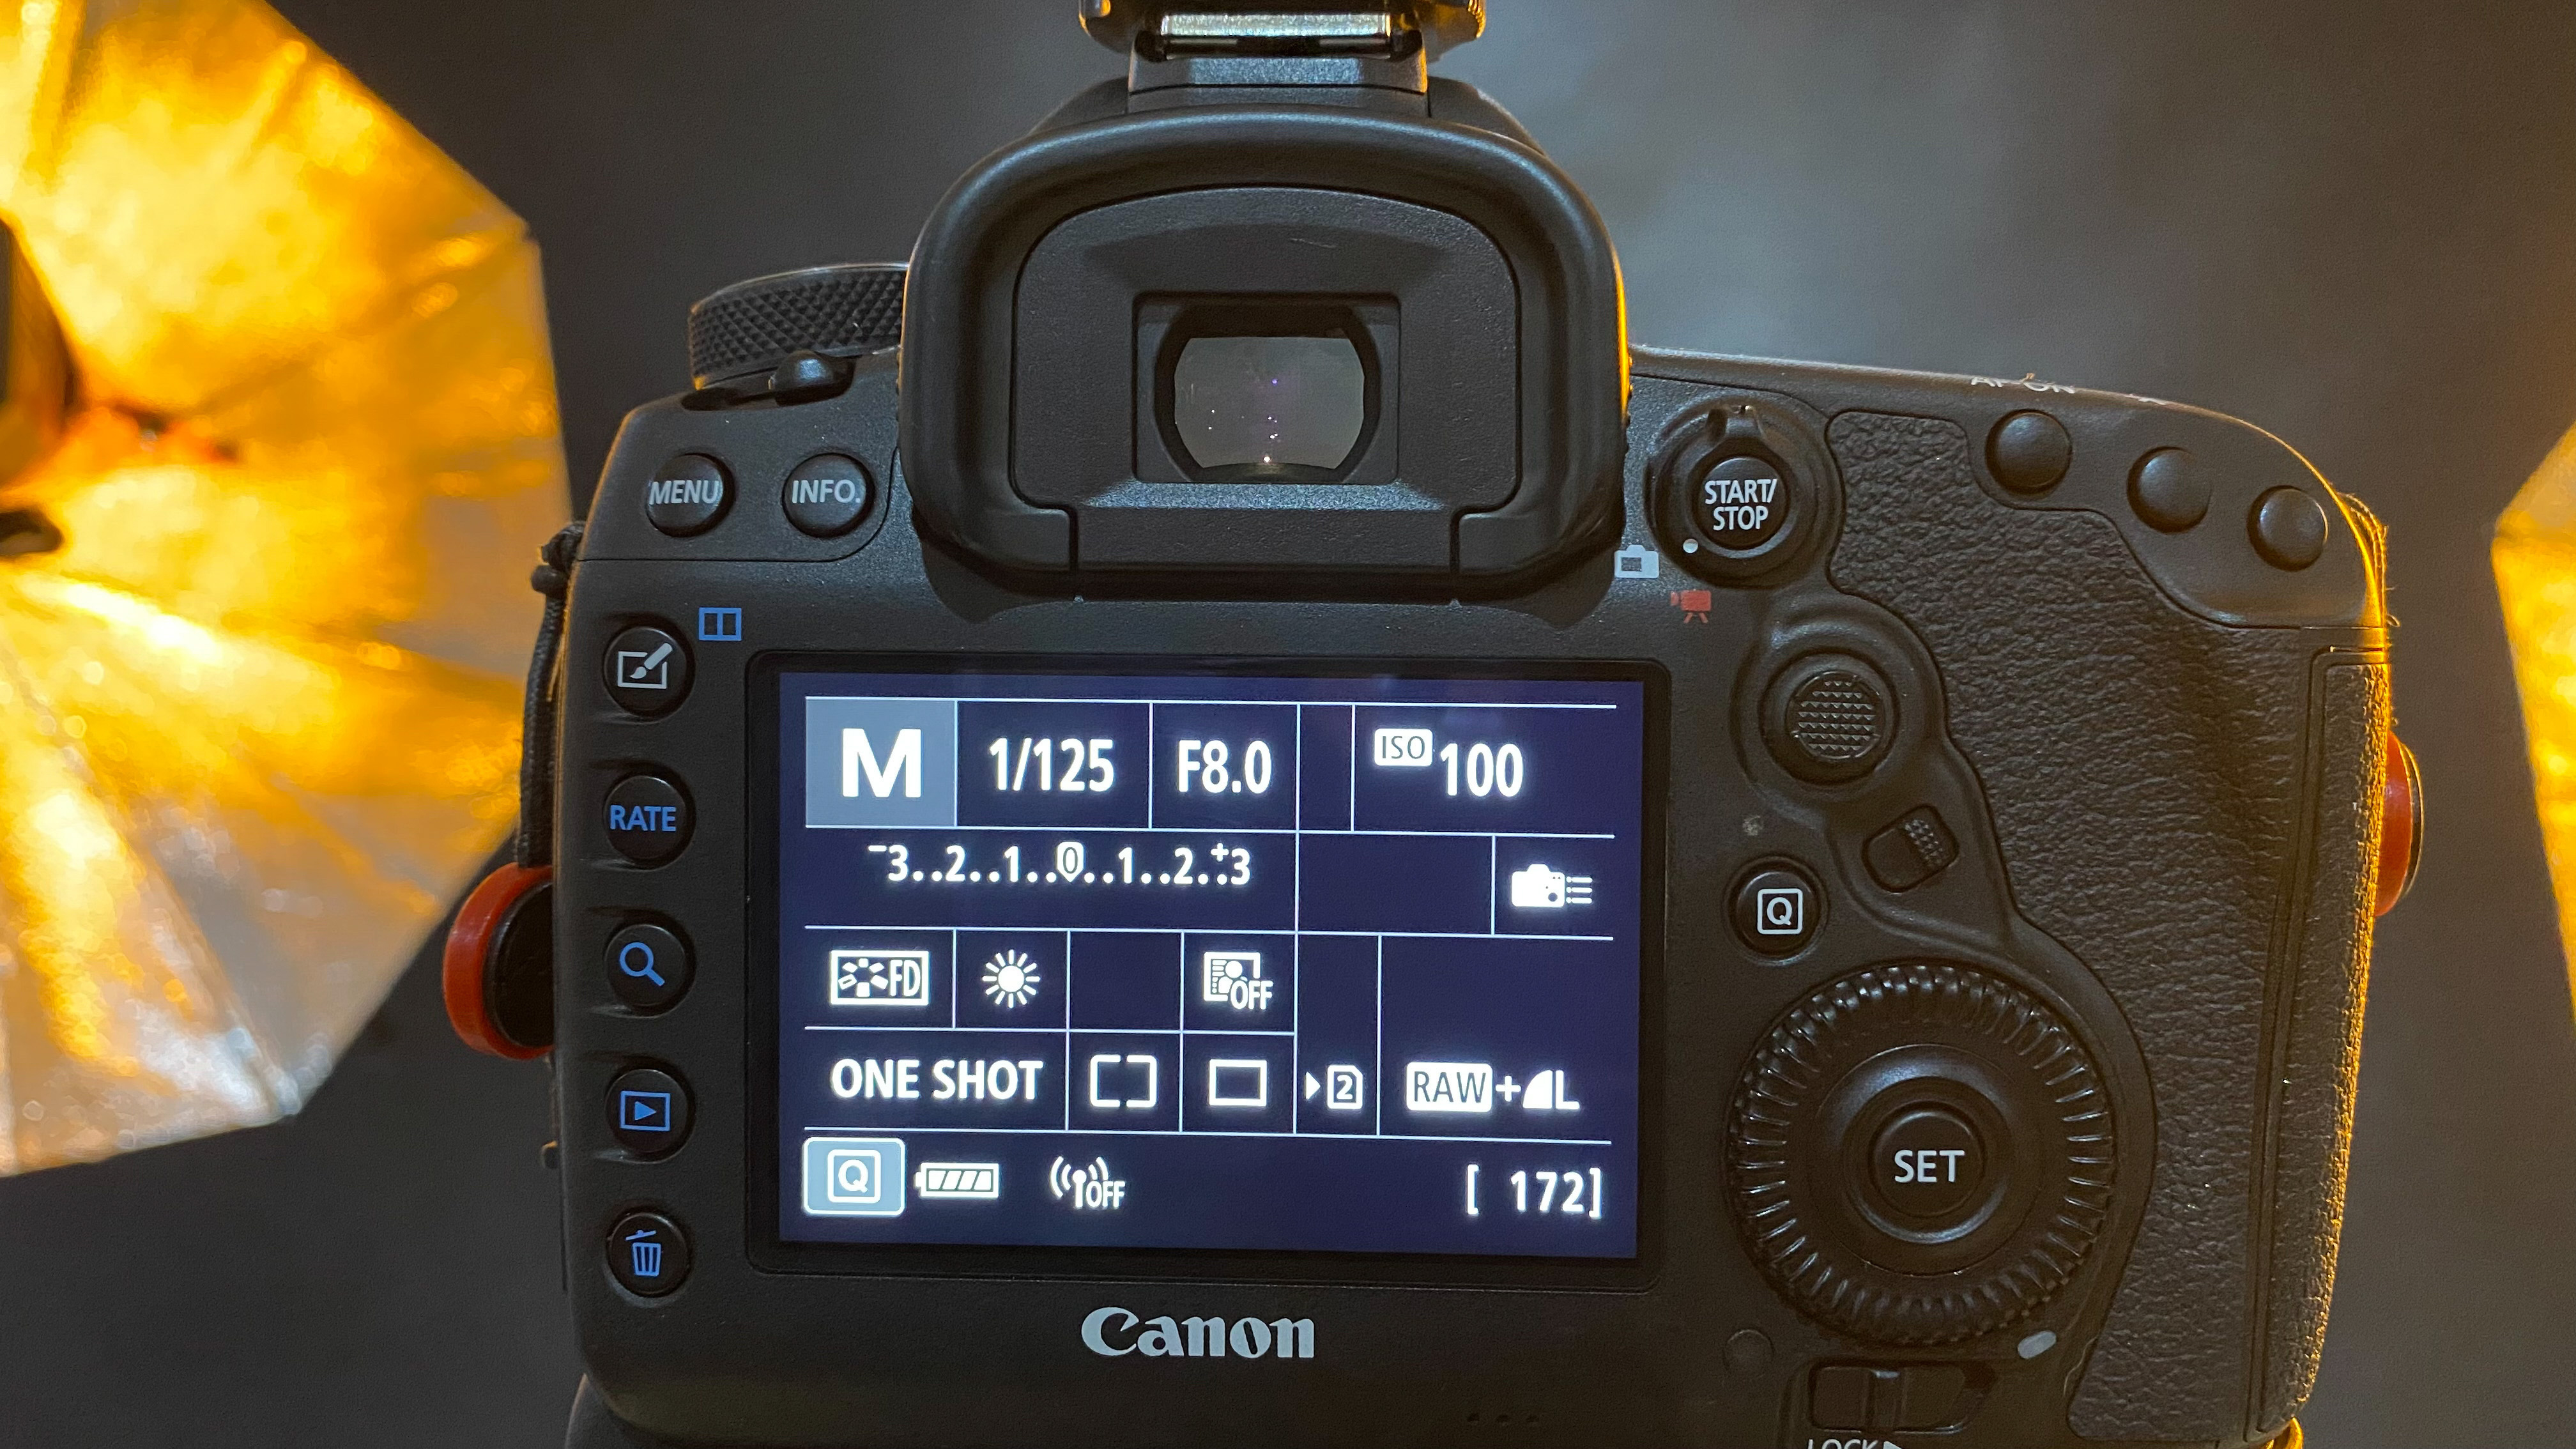
Using your favourite portrait lens, put your camera in Manual mode and dial in these go-to settings for studio flash portraits: a shutter speed of 1/125 sec, an aperture of f/8 for good sharpness, an ISO of 100 for best image quality and a custom White Balance of 5200K. With two of the lights at 45º behind the model the aim is to achieve a rim light around the edge of the model.
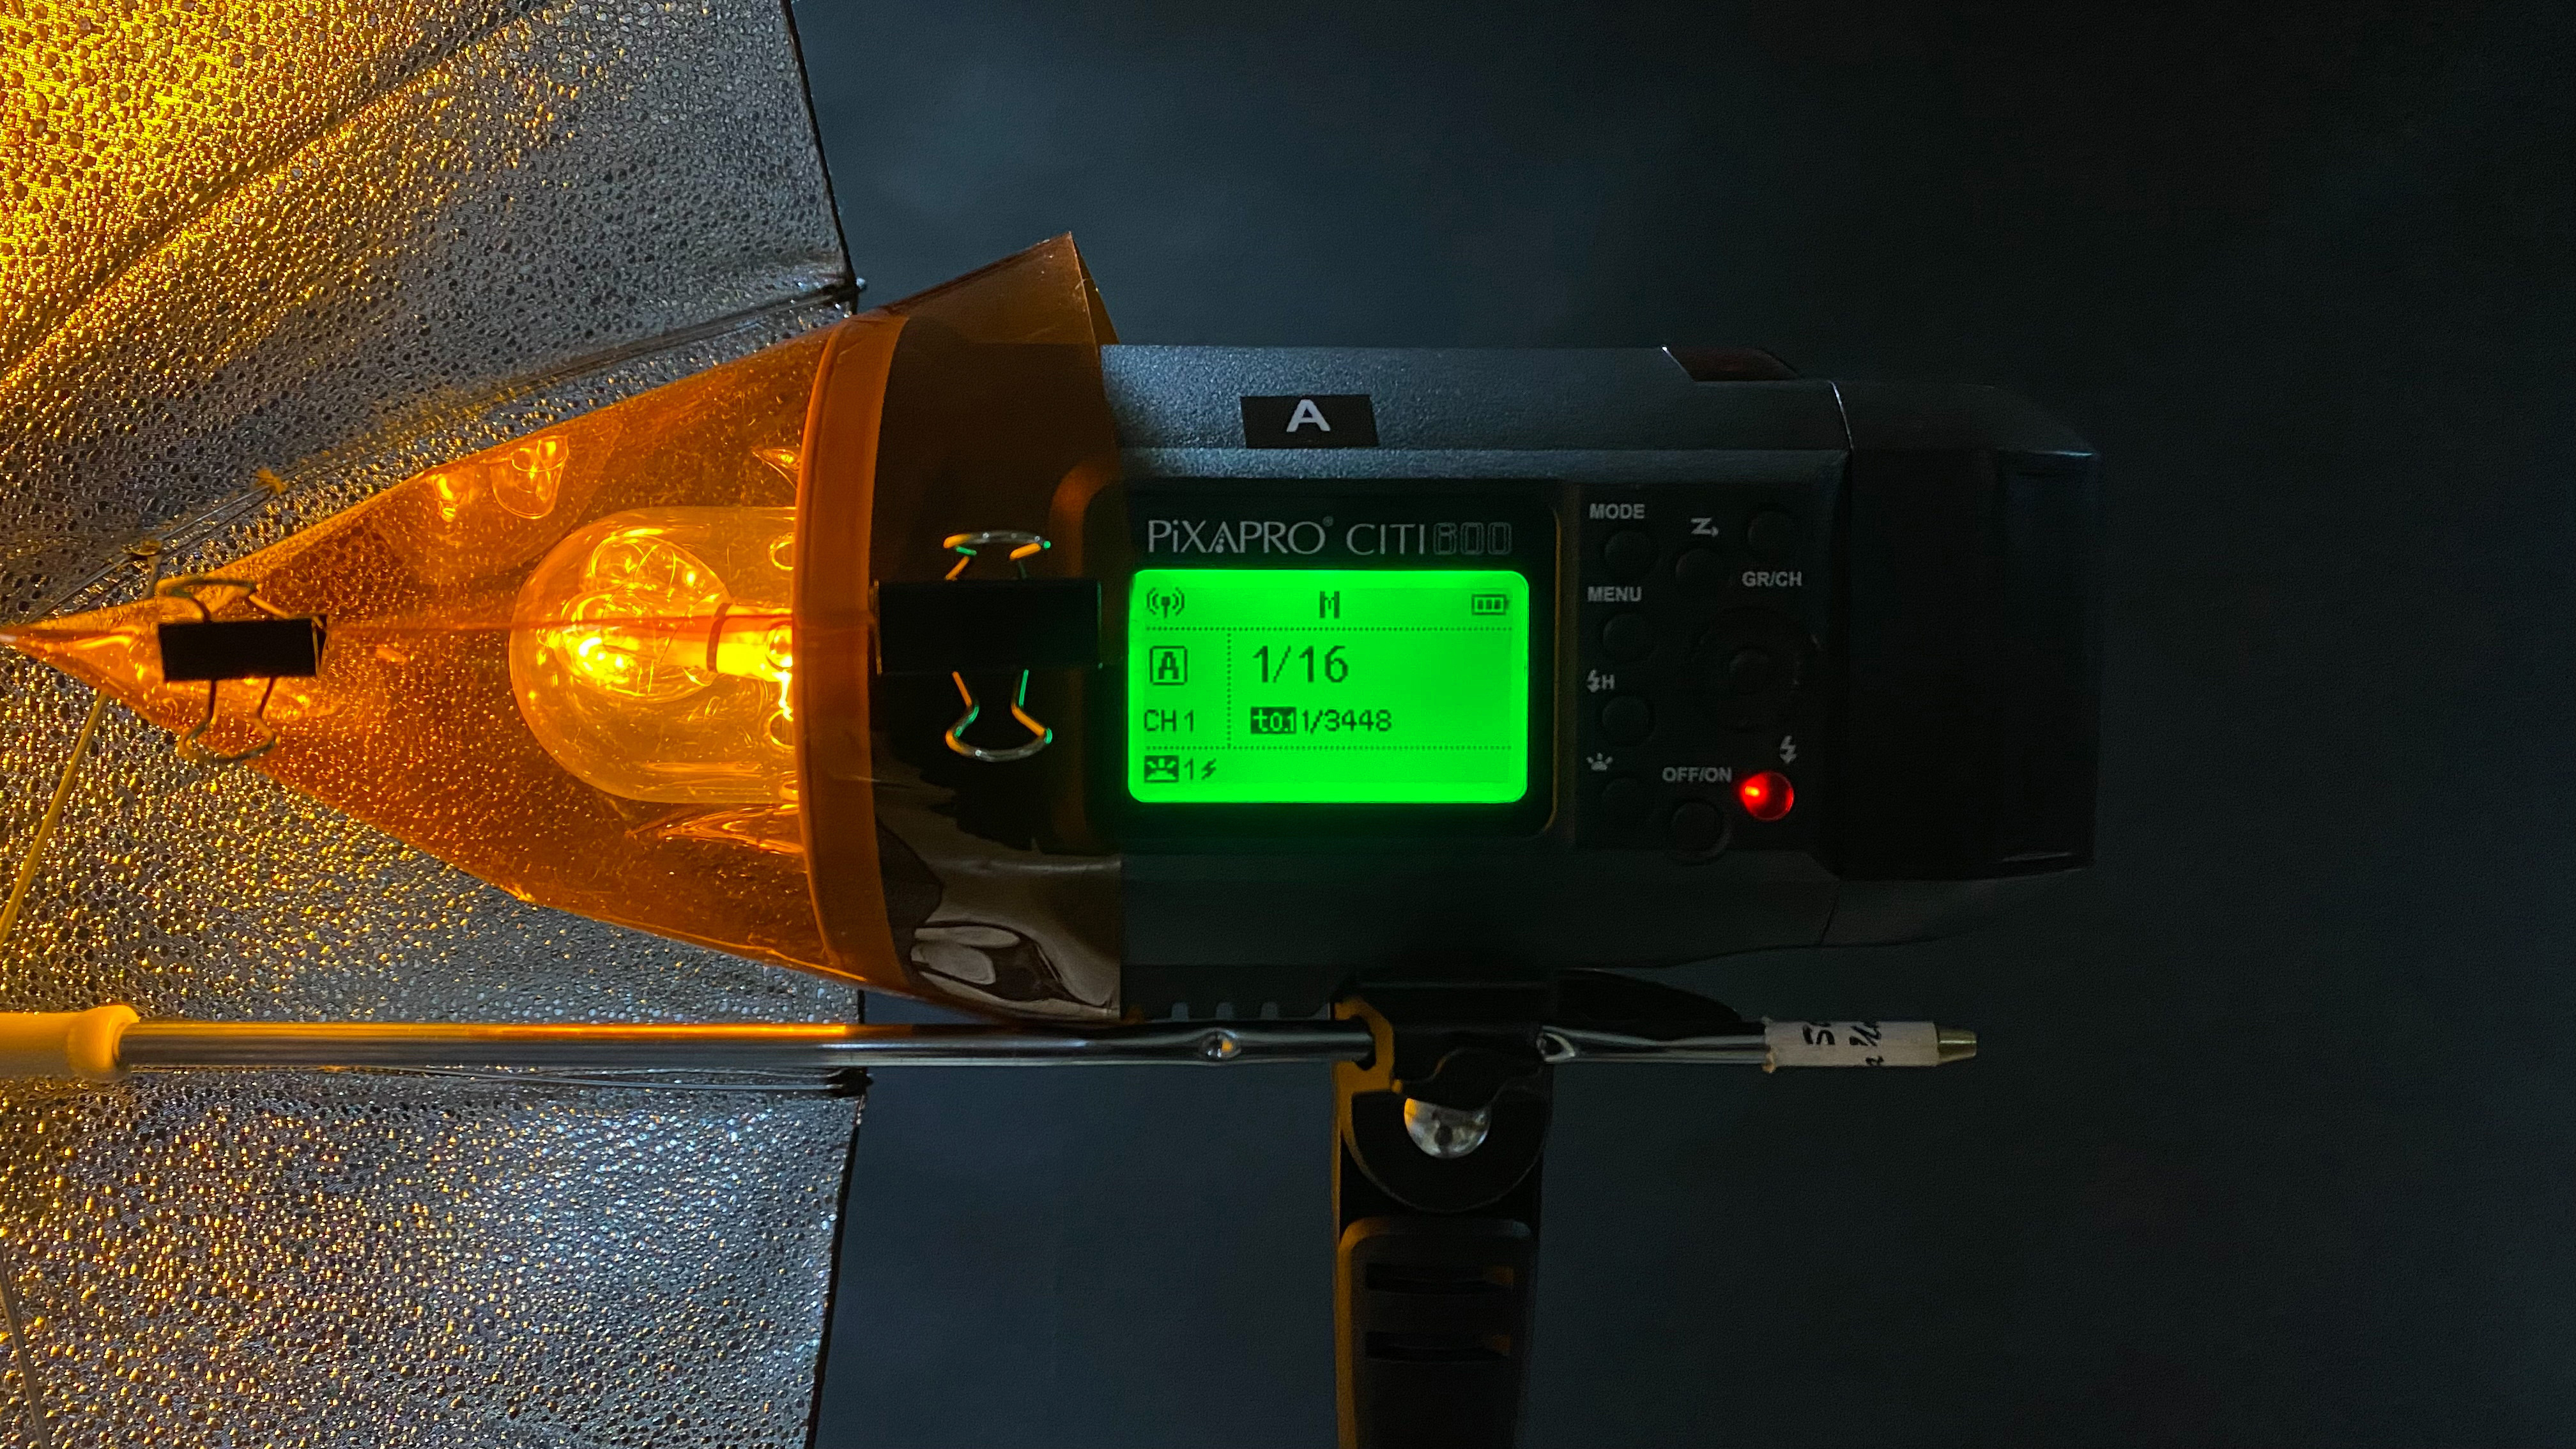
I set the flash heads to 1/16 power, then took a test shot with only these lights on. Adjust the position of the light until you have color on the sides of the model and very little at the front.
03 Play with shadows
Now that you have the rear rim lights set that give the model a lovely colorful outline, the front of your model is still mostly in darkness at this point. It’s time to use our third silver umbrella positioned in front of the model with another color gel, this time a complimentary color to lift the shadows.
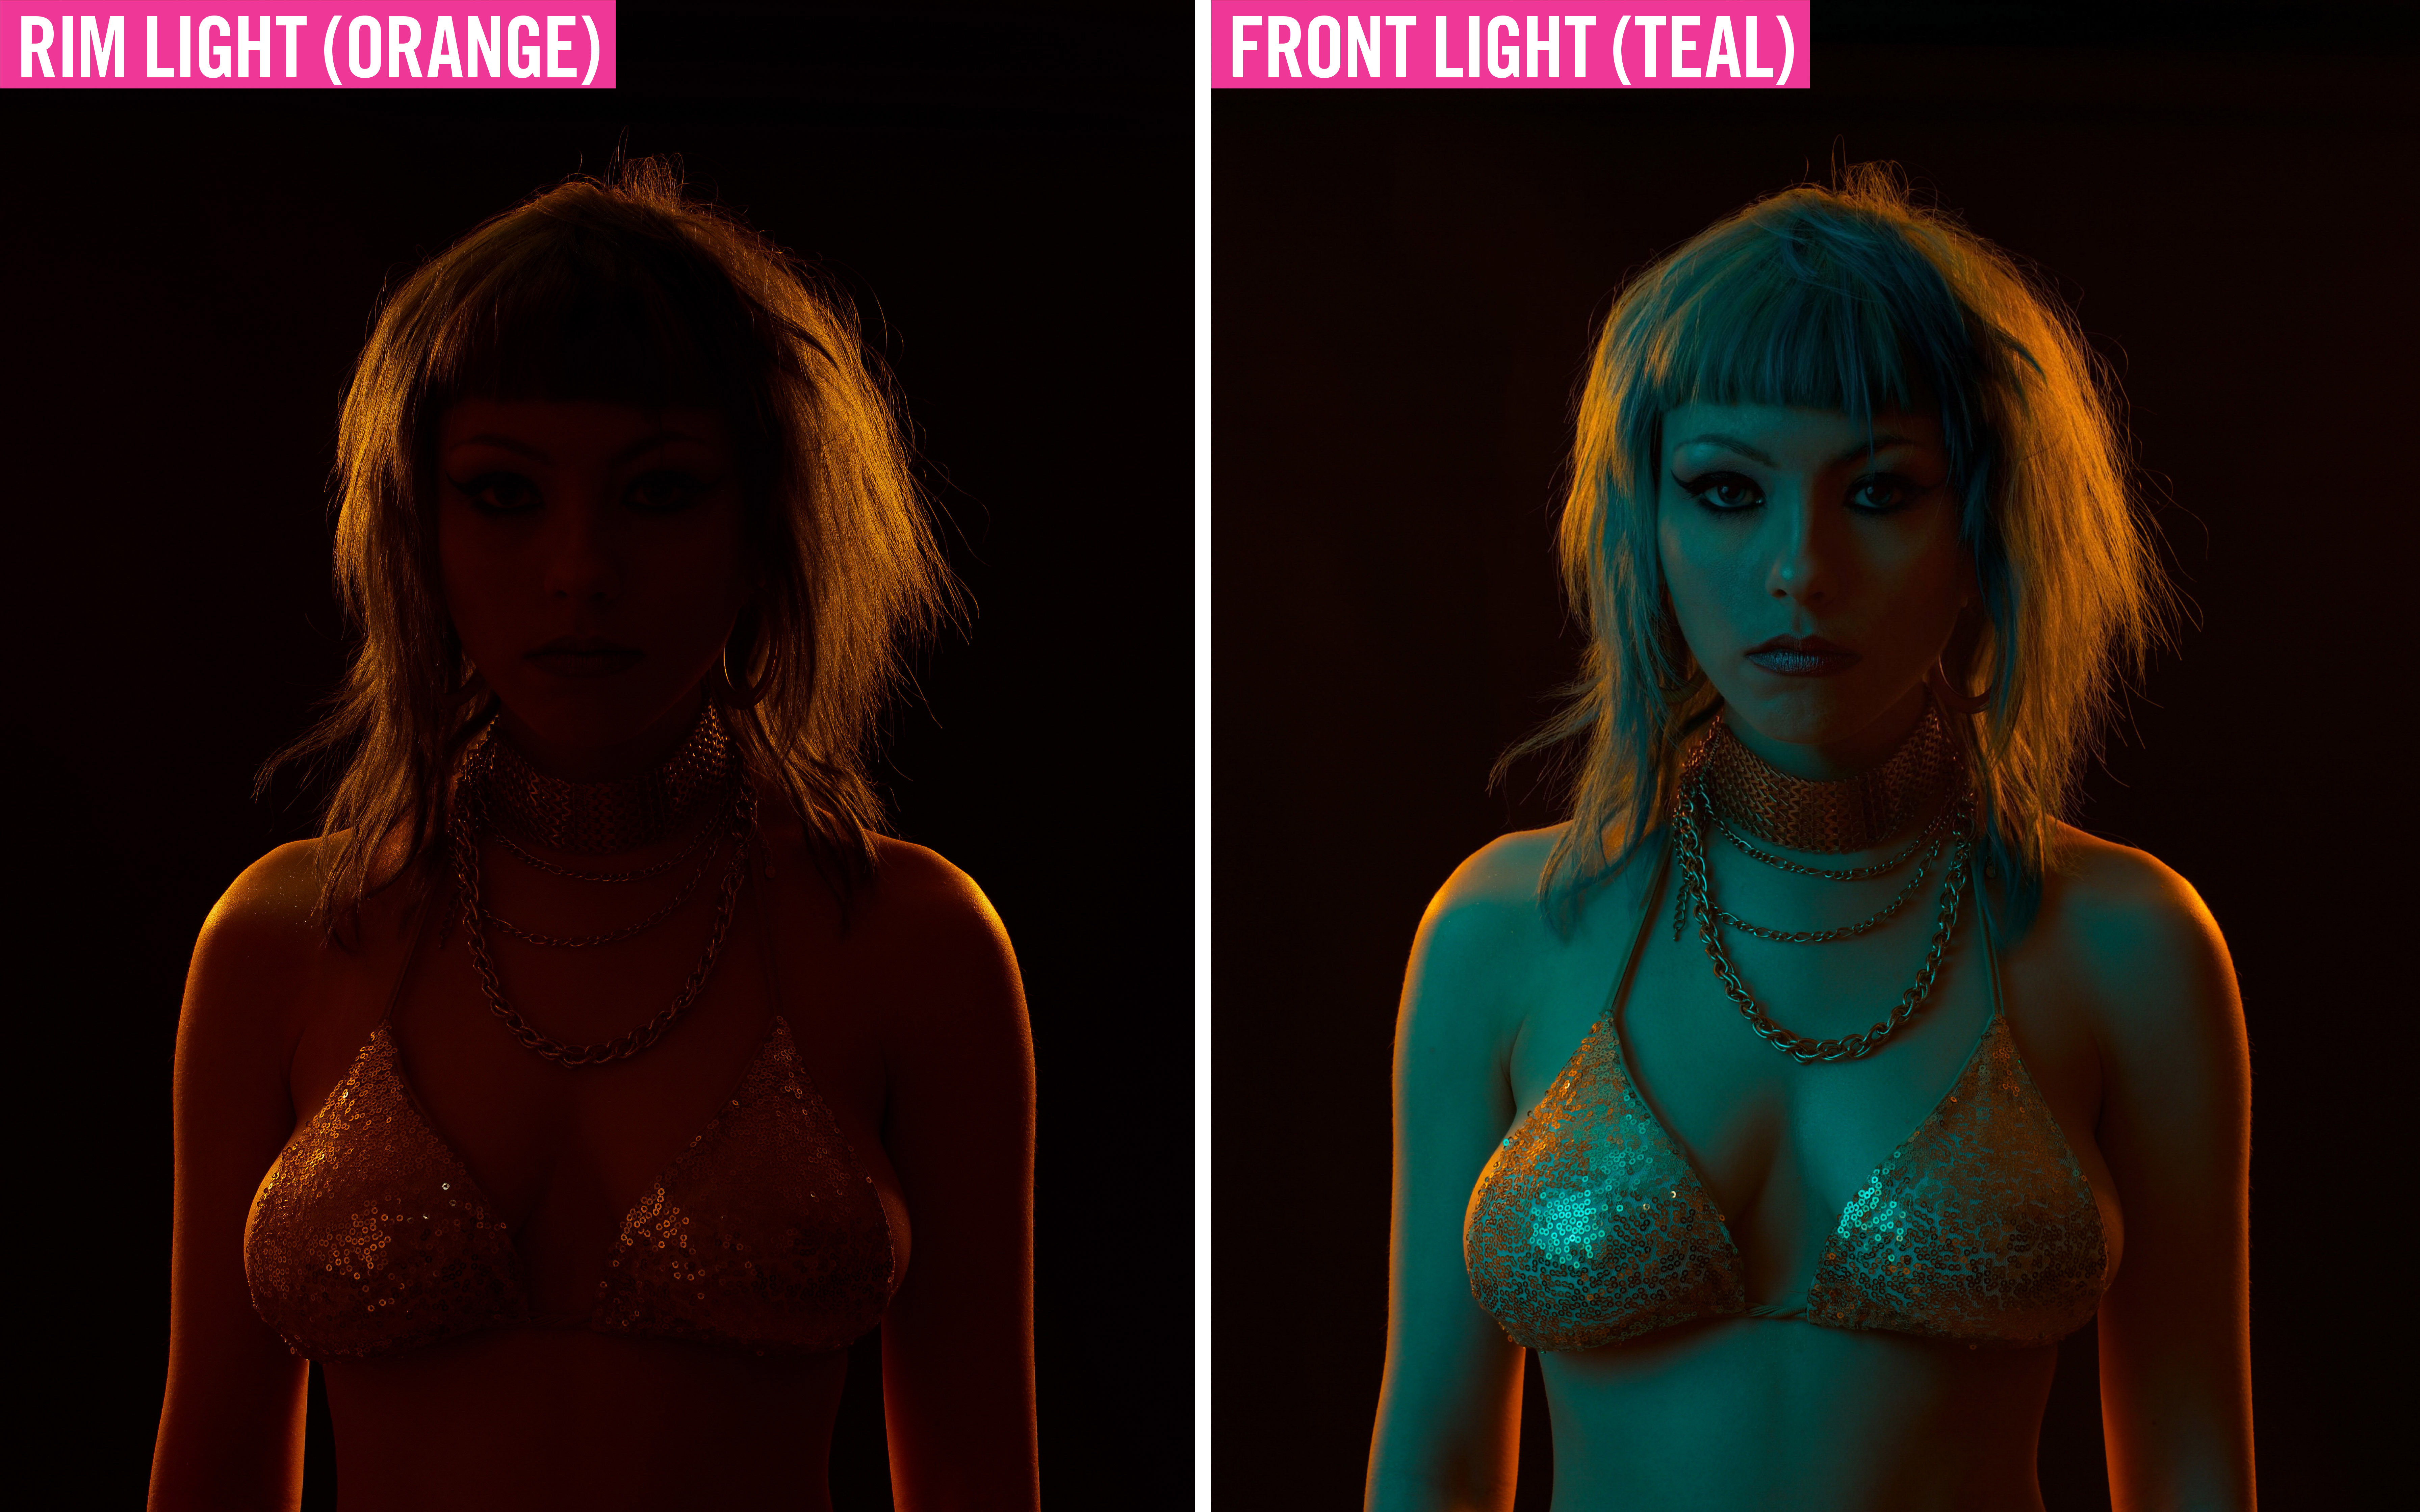
Position your ‘key’ light source somewhere between 60-70º across the front of the model. You want to light the model’s front, but not interfere with the rim light. We took multiple test shots to get the flash power balance and lighting position just right. Using modelling lamps on your flash heads also makes it a little easier to see where the light is falling on your model. In the end we set our key light to 1/16 power for a moody portrait.
04 Edit your portrait to perfection
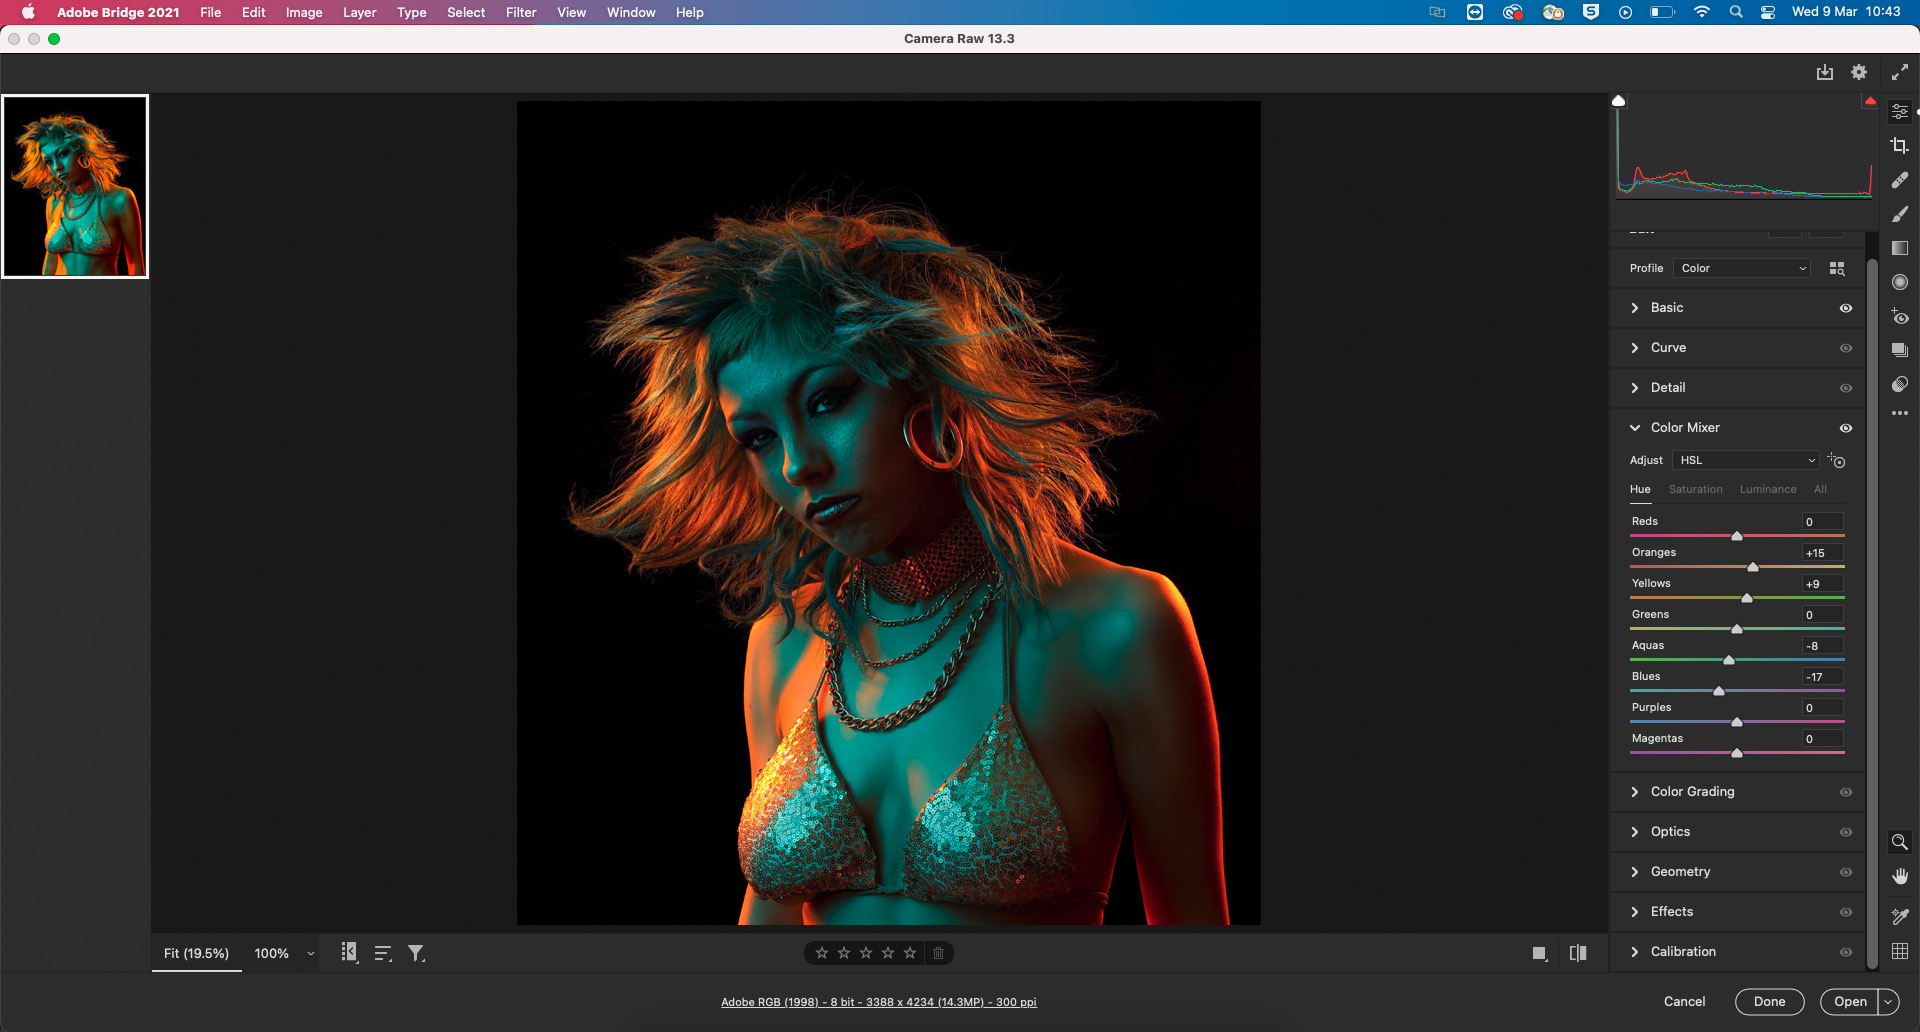
The last step is make the colors really pop by editing the Raw file in Adobe Camera Raw or Lightroom. Shooting in Raw we have access to loads of the exposure information so we can give the Vibrance, Saturation and Clarity a good boost to make the colors really punchy, and ,of course, tweak Exposure and White Balance until these look perfect.
To take full control of the colors go to the Color Mixer panel and you’ll be able to change the Hue, Saturation and Luminance of each color channel, so we have a fine level of control getting the blues and oranges in our shot just right. Hue will shift the color, Saturation changes how intense the colors are and Luminance changes how light or dark those colors are. Try it out for yourself and have fun playing with these settings!
Read more:
Best cameras for portraits
Best portrait photography tips
The best flashgun or strobe
The best Canon flashguns
The best flash triggers for your camera
10 best online photography courses – from beginner guides to masterclasses
PhotoPlus: The Canon Magazine is the world's only monthly newsstand title that's 100% devoted to Canon, so you can be sure the magazine is completely relevant to your system. Every issue comes with downloadable video tutorials too.
Get the Digital Camera World Newsletter
The best camera deals, reviews, product advice, and unmissable photography news, direct to your inbox!
PhotoPlus: The Canon Magazine is the world’s only 100% Canon-focused title on the newsstand. Launched in 2007, for 14 years it has delivered news, reviews, buying guides, features, inspirational projects and tutorials on cameras, lenses, tripods, gimbals, filters, lighting and all manner of photography equipment.
Aimed squarely at enthusiast photographers who use the Canon DSLR or mirrorless camera systems, all content is tailored to Canon users – so everything from techniques to product tests are tailored to those using the EOS camera system.
Editor Peter Travers brings 14 years of experience as both a journalist and professional photographer, with Technique Editor Dan Mold shoring up the magazine with his 6 years of expertise.
