Raw power! Edit your Raw files in Affinity Photo to make them look their best
Get the most out of editing your portraits, with Affinity Photo's powerful processing tools
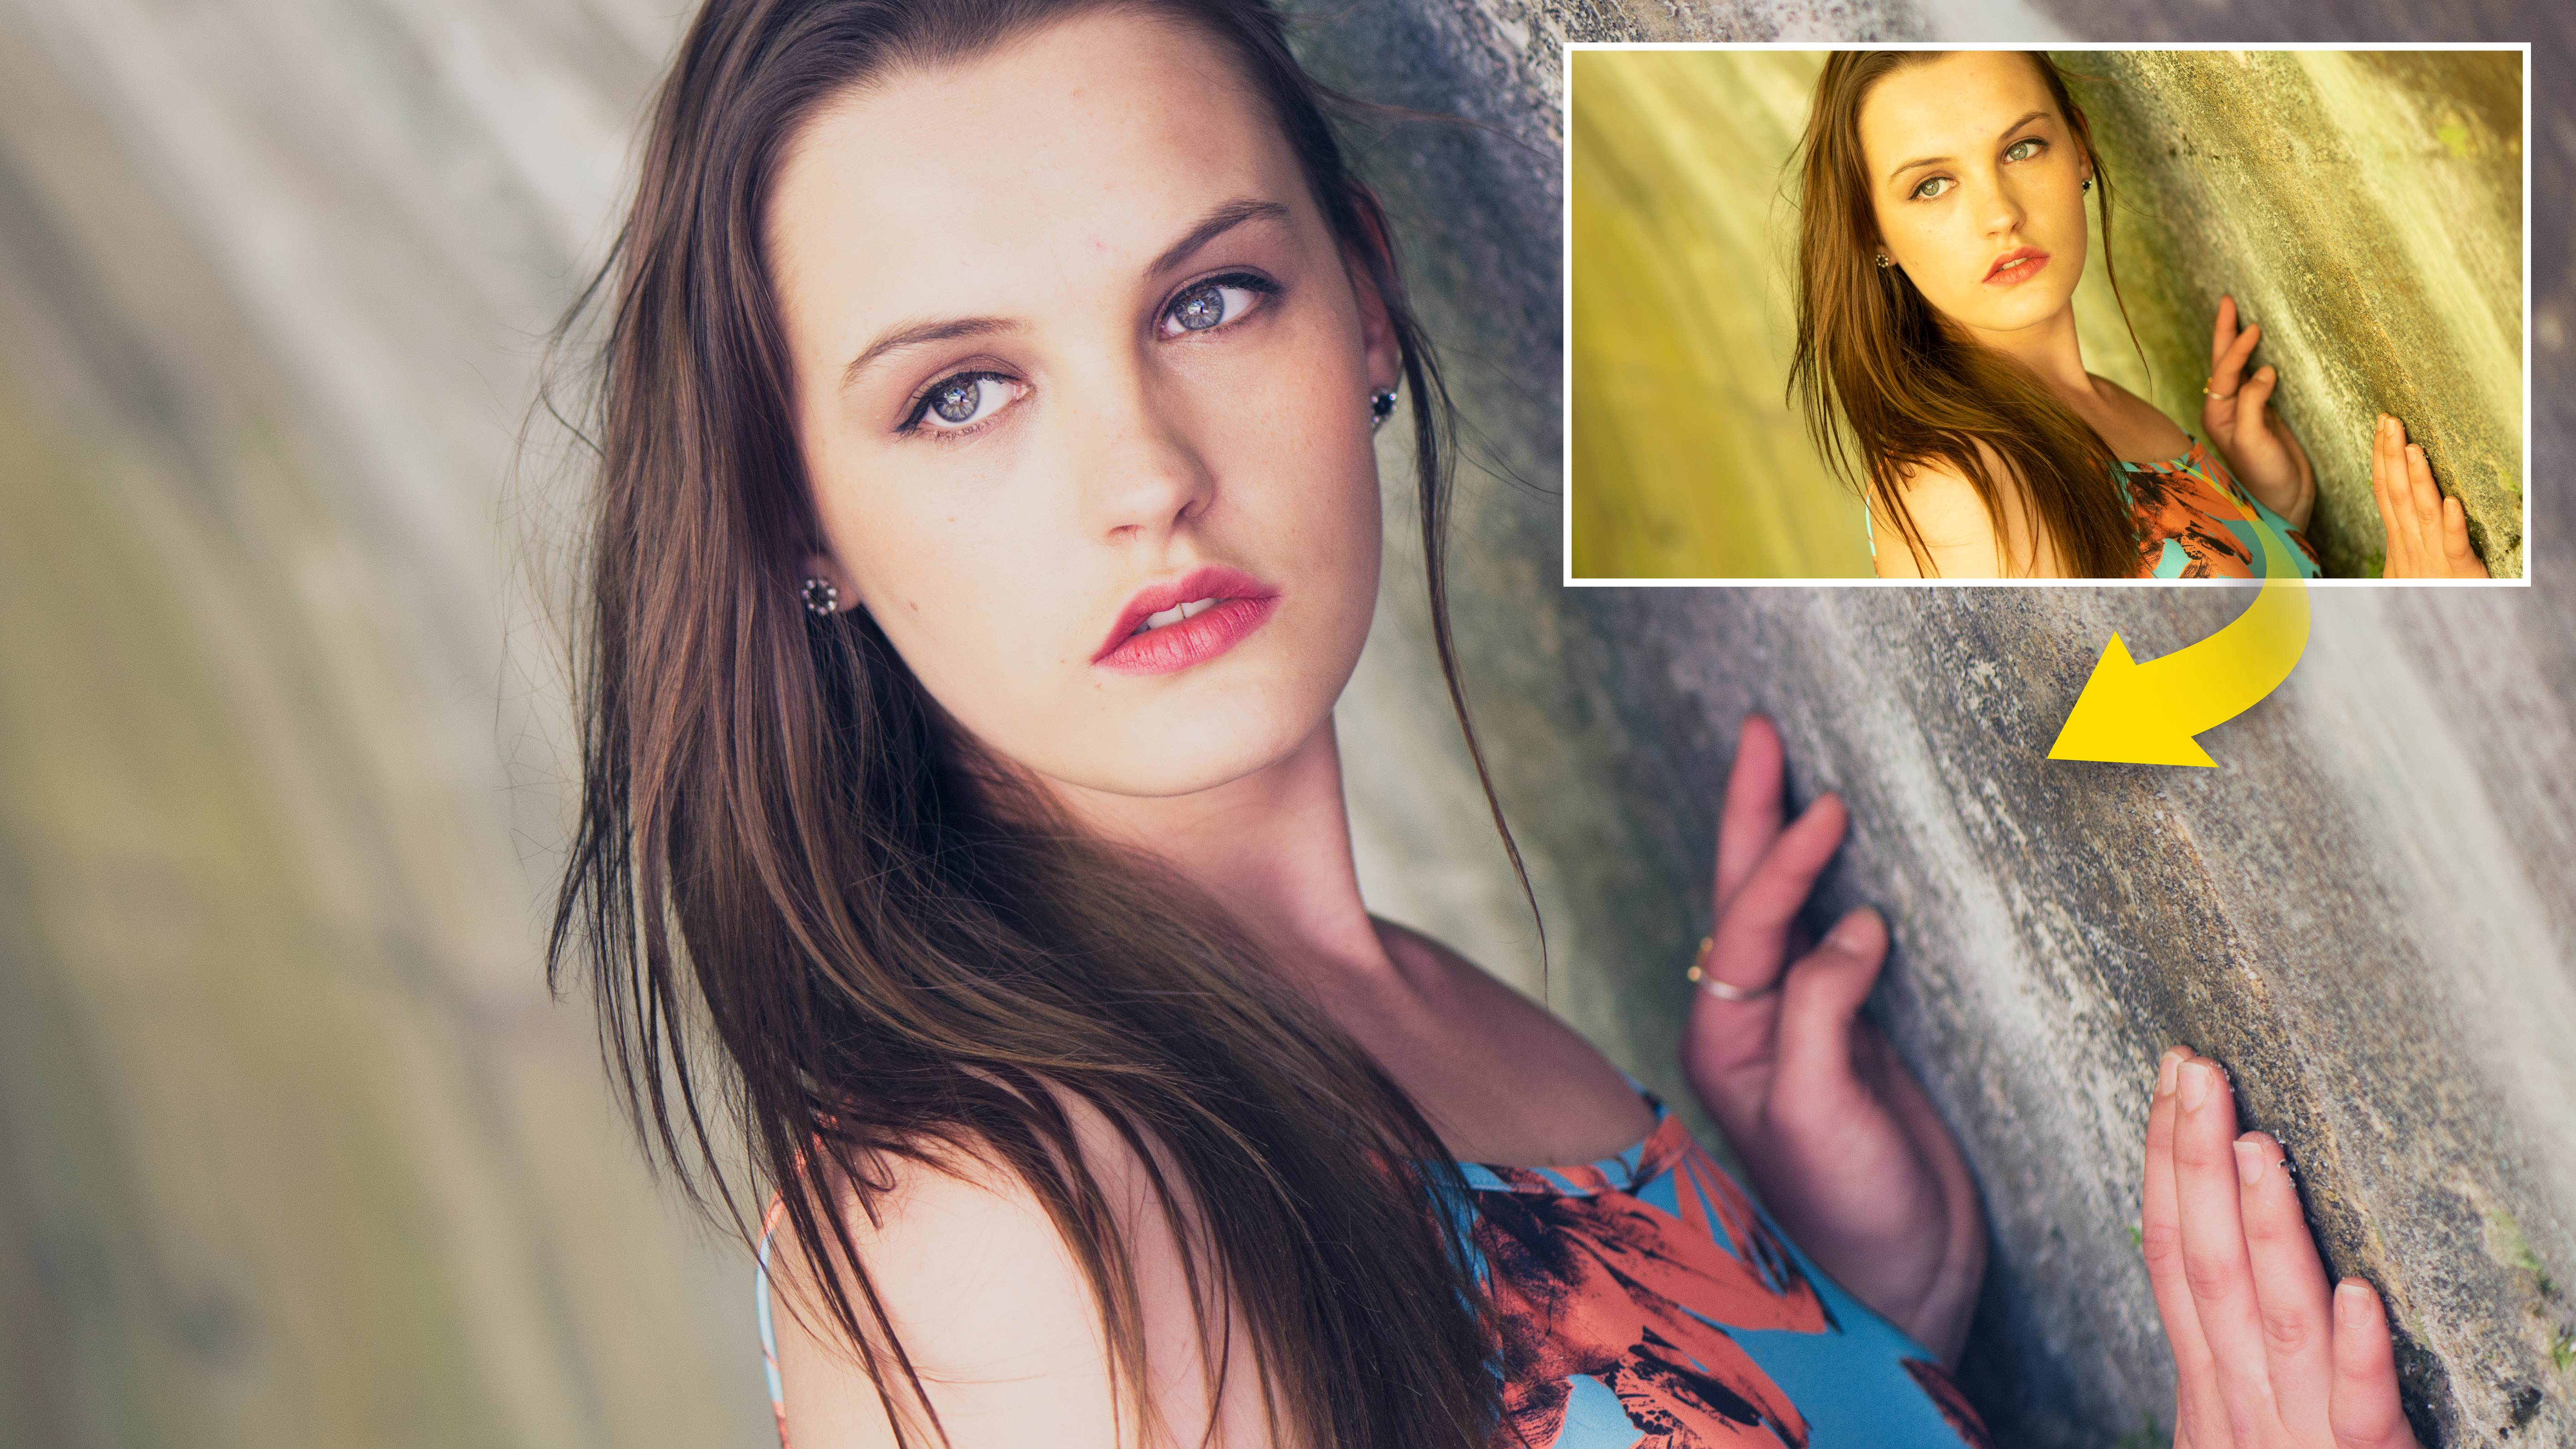
Watch video: Raw power to the people!
If you want to get more out of your portraits, shoot in Raw image format. Not only does this give greater editing headroom, it also gives you more control over colors – though it does mean that you need extra editing time to process the Raw file.
Thankfully, Affinity Photo’s Raw workspace – the Develop Persona – offers powerful Raw tools to enhance portraits with ease. Raw files do tend to look slightly flat and soft to begin with – especially compared to jpegs, which go through in-camera processing to boost their colours and detail – but this is actually one of the benefits of Raw editing.
Rather than relying on generic processing, you make your own decisions about how you would like your finished portrait to look, whether that means tweaking the colors, boosting contrast or shifting white balance. These kinds of edits are best done at the Raw processing stage, when you have maximum dynamic range and color data to work with.
In this project, we explore a range of Raw edits and effects for you to try on Raw portrait files. Whether you want to prepare them for presentation, perfect the tones or add stylish color shifts, the tools in the Develop Persona are up to the job. Of course, if you like, you can progress to the Photo Persona and use a host of other tools and filters. But for those crucial initial edits, the Develop Persona is the place to begin…
To follow along download the start image here or use one of your own portraits.
1. Boost the tones
Open your Raw portrait in Affinity Photo. The Develop Persona opens automatically (you can also edit jpegs by clicking the hexagonal persona icon, top-left). Start in the Basic panel on the right. Tweak exposure, boost contrast and fine-tune the black point as shown.
2. Fix the colors
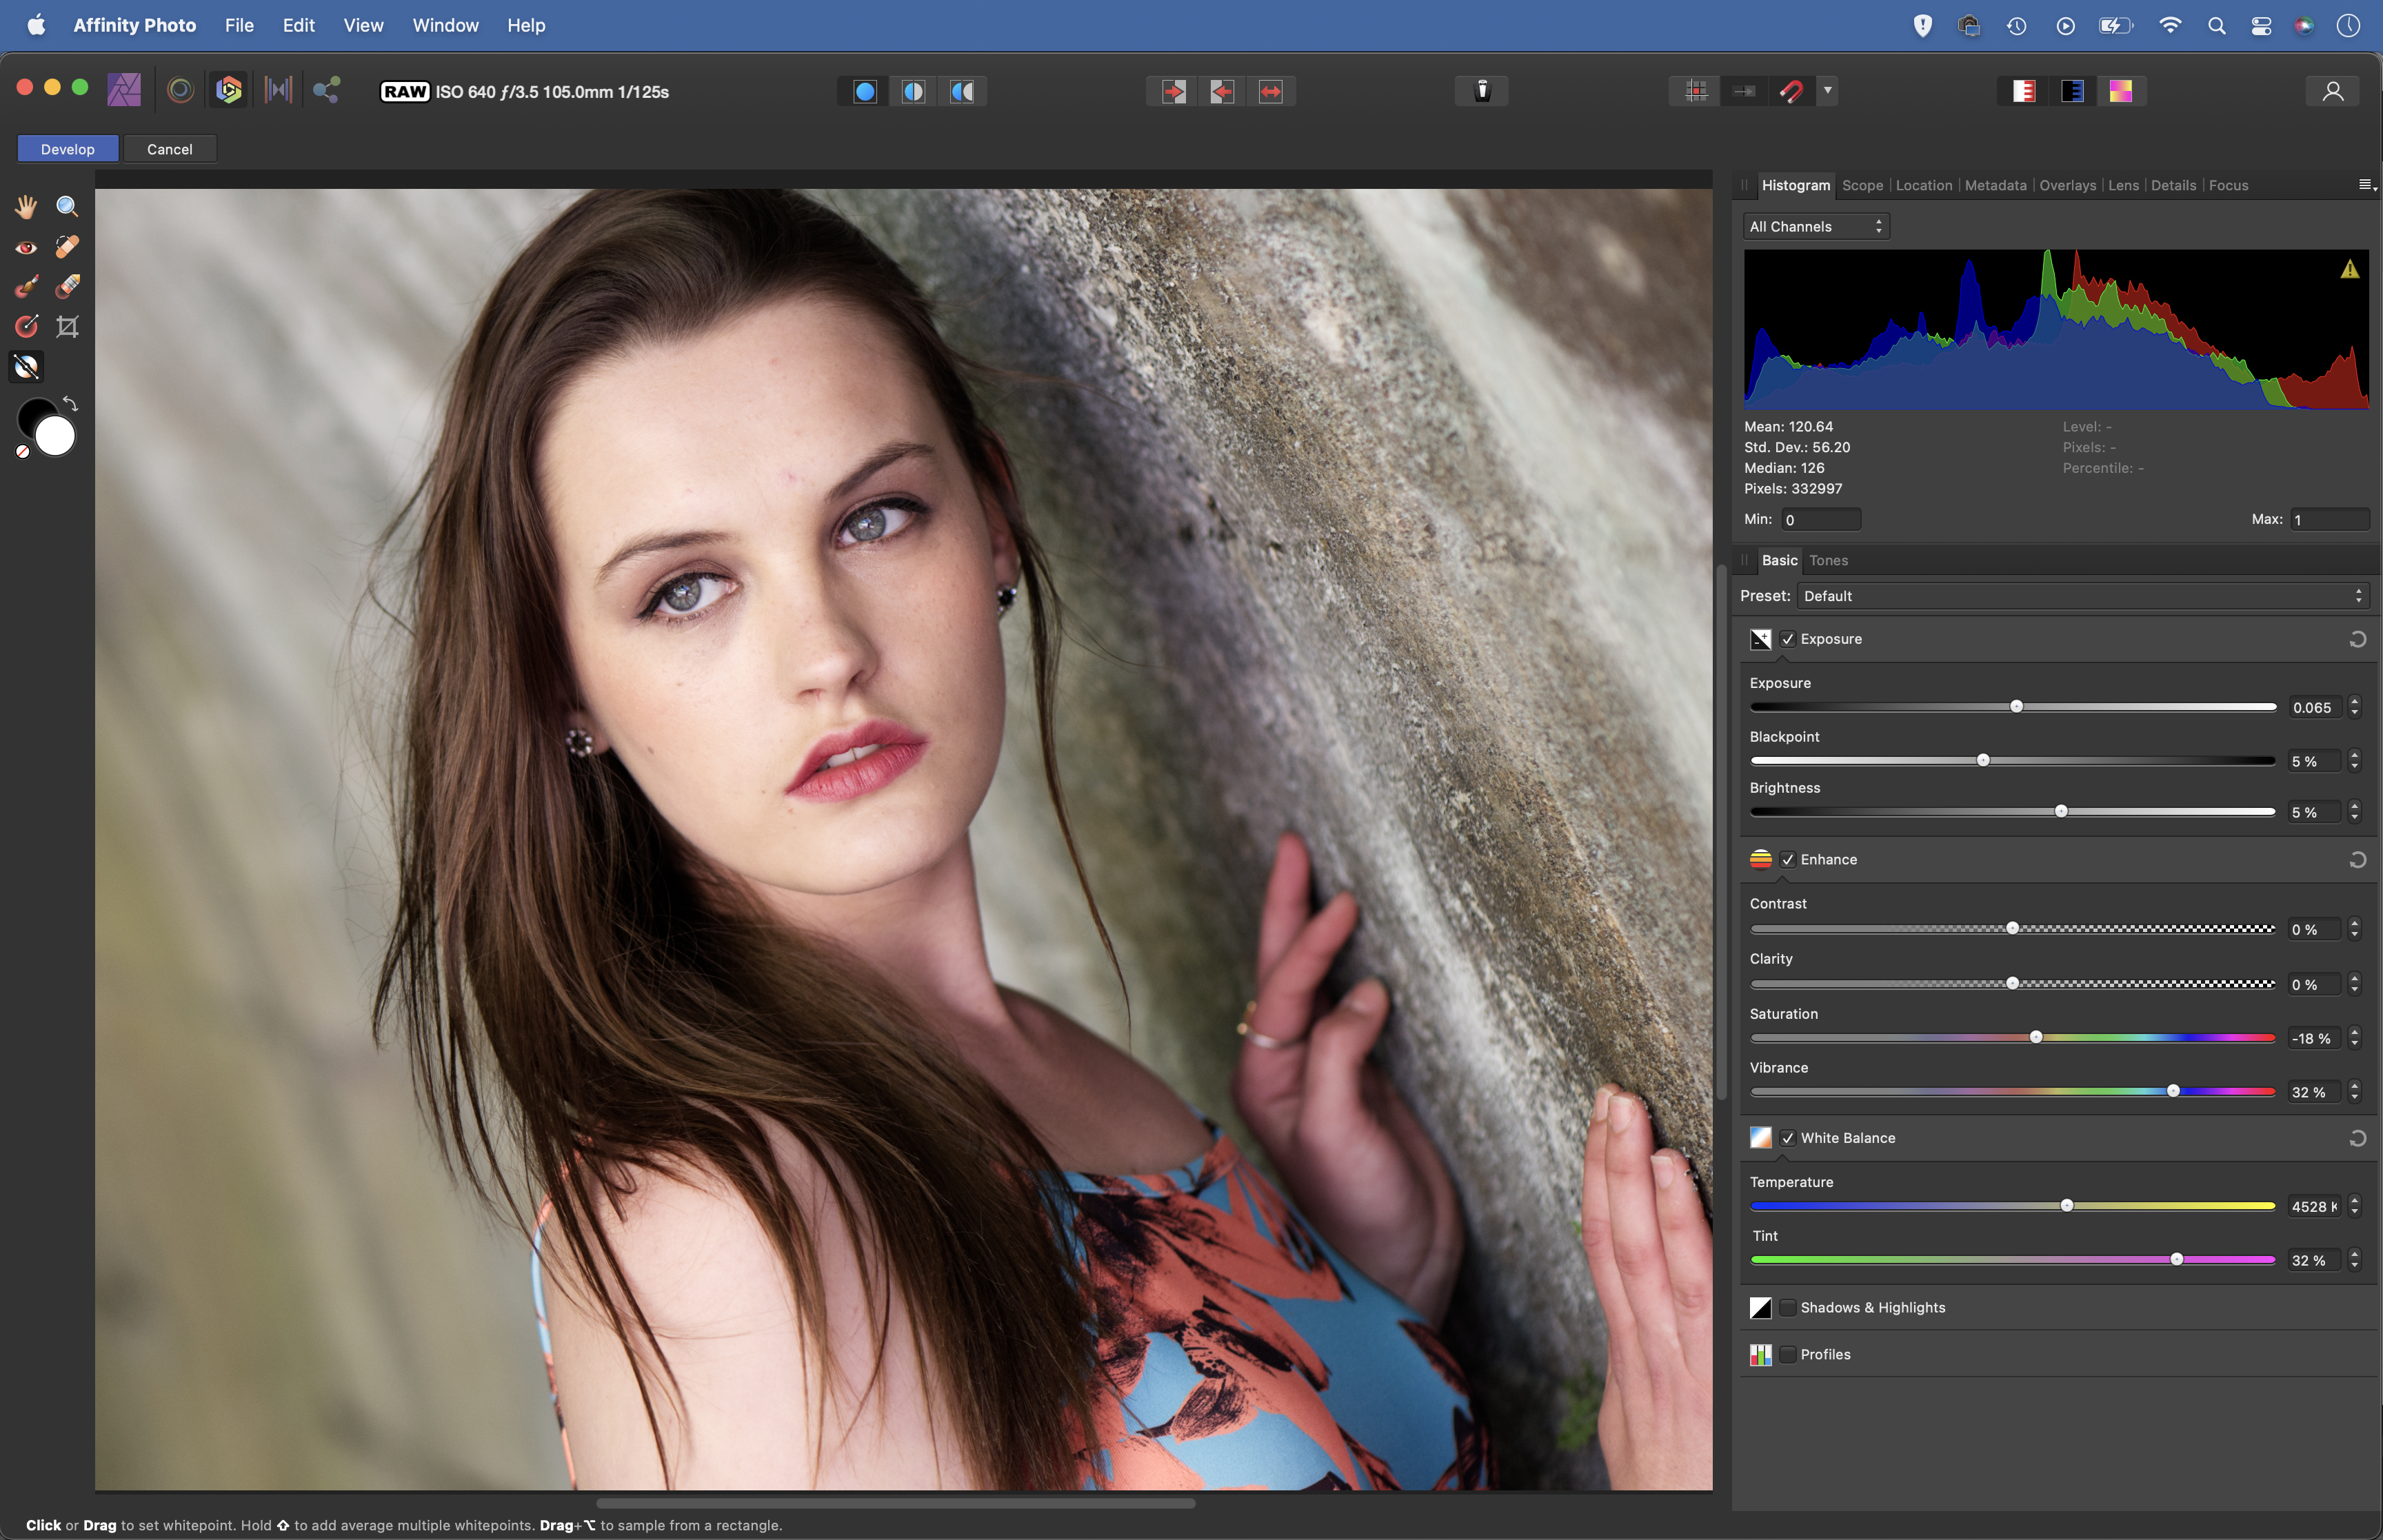
Grab the White Balance tool and click over a neutral point – like the wall – to fix the color cast. Next boost Vibrance. This strengthens less-saturated colors and excludes those that are already strong. Try reducing Saturation, too, to give the image a more muted feel.
3. Make an S-curve
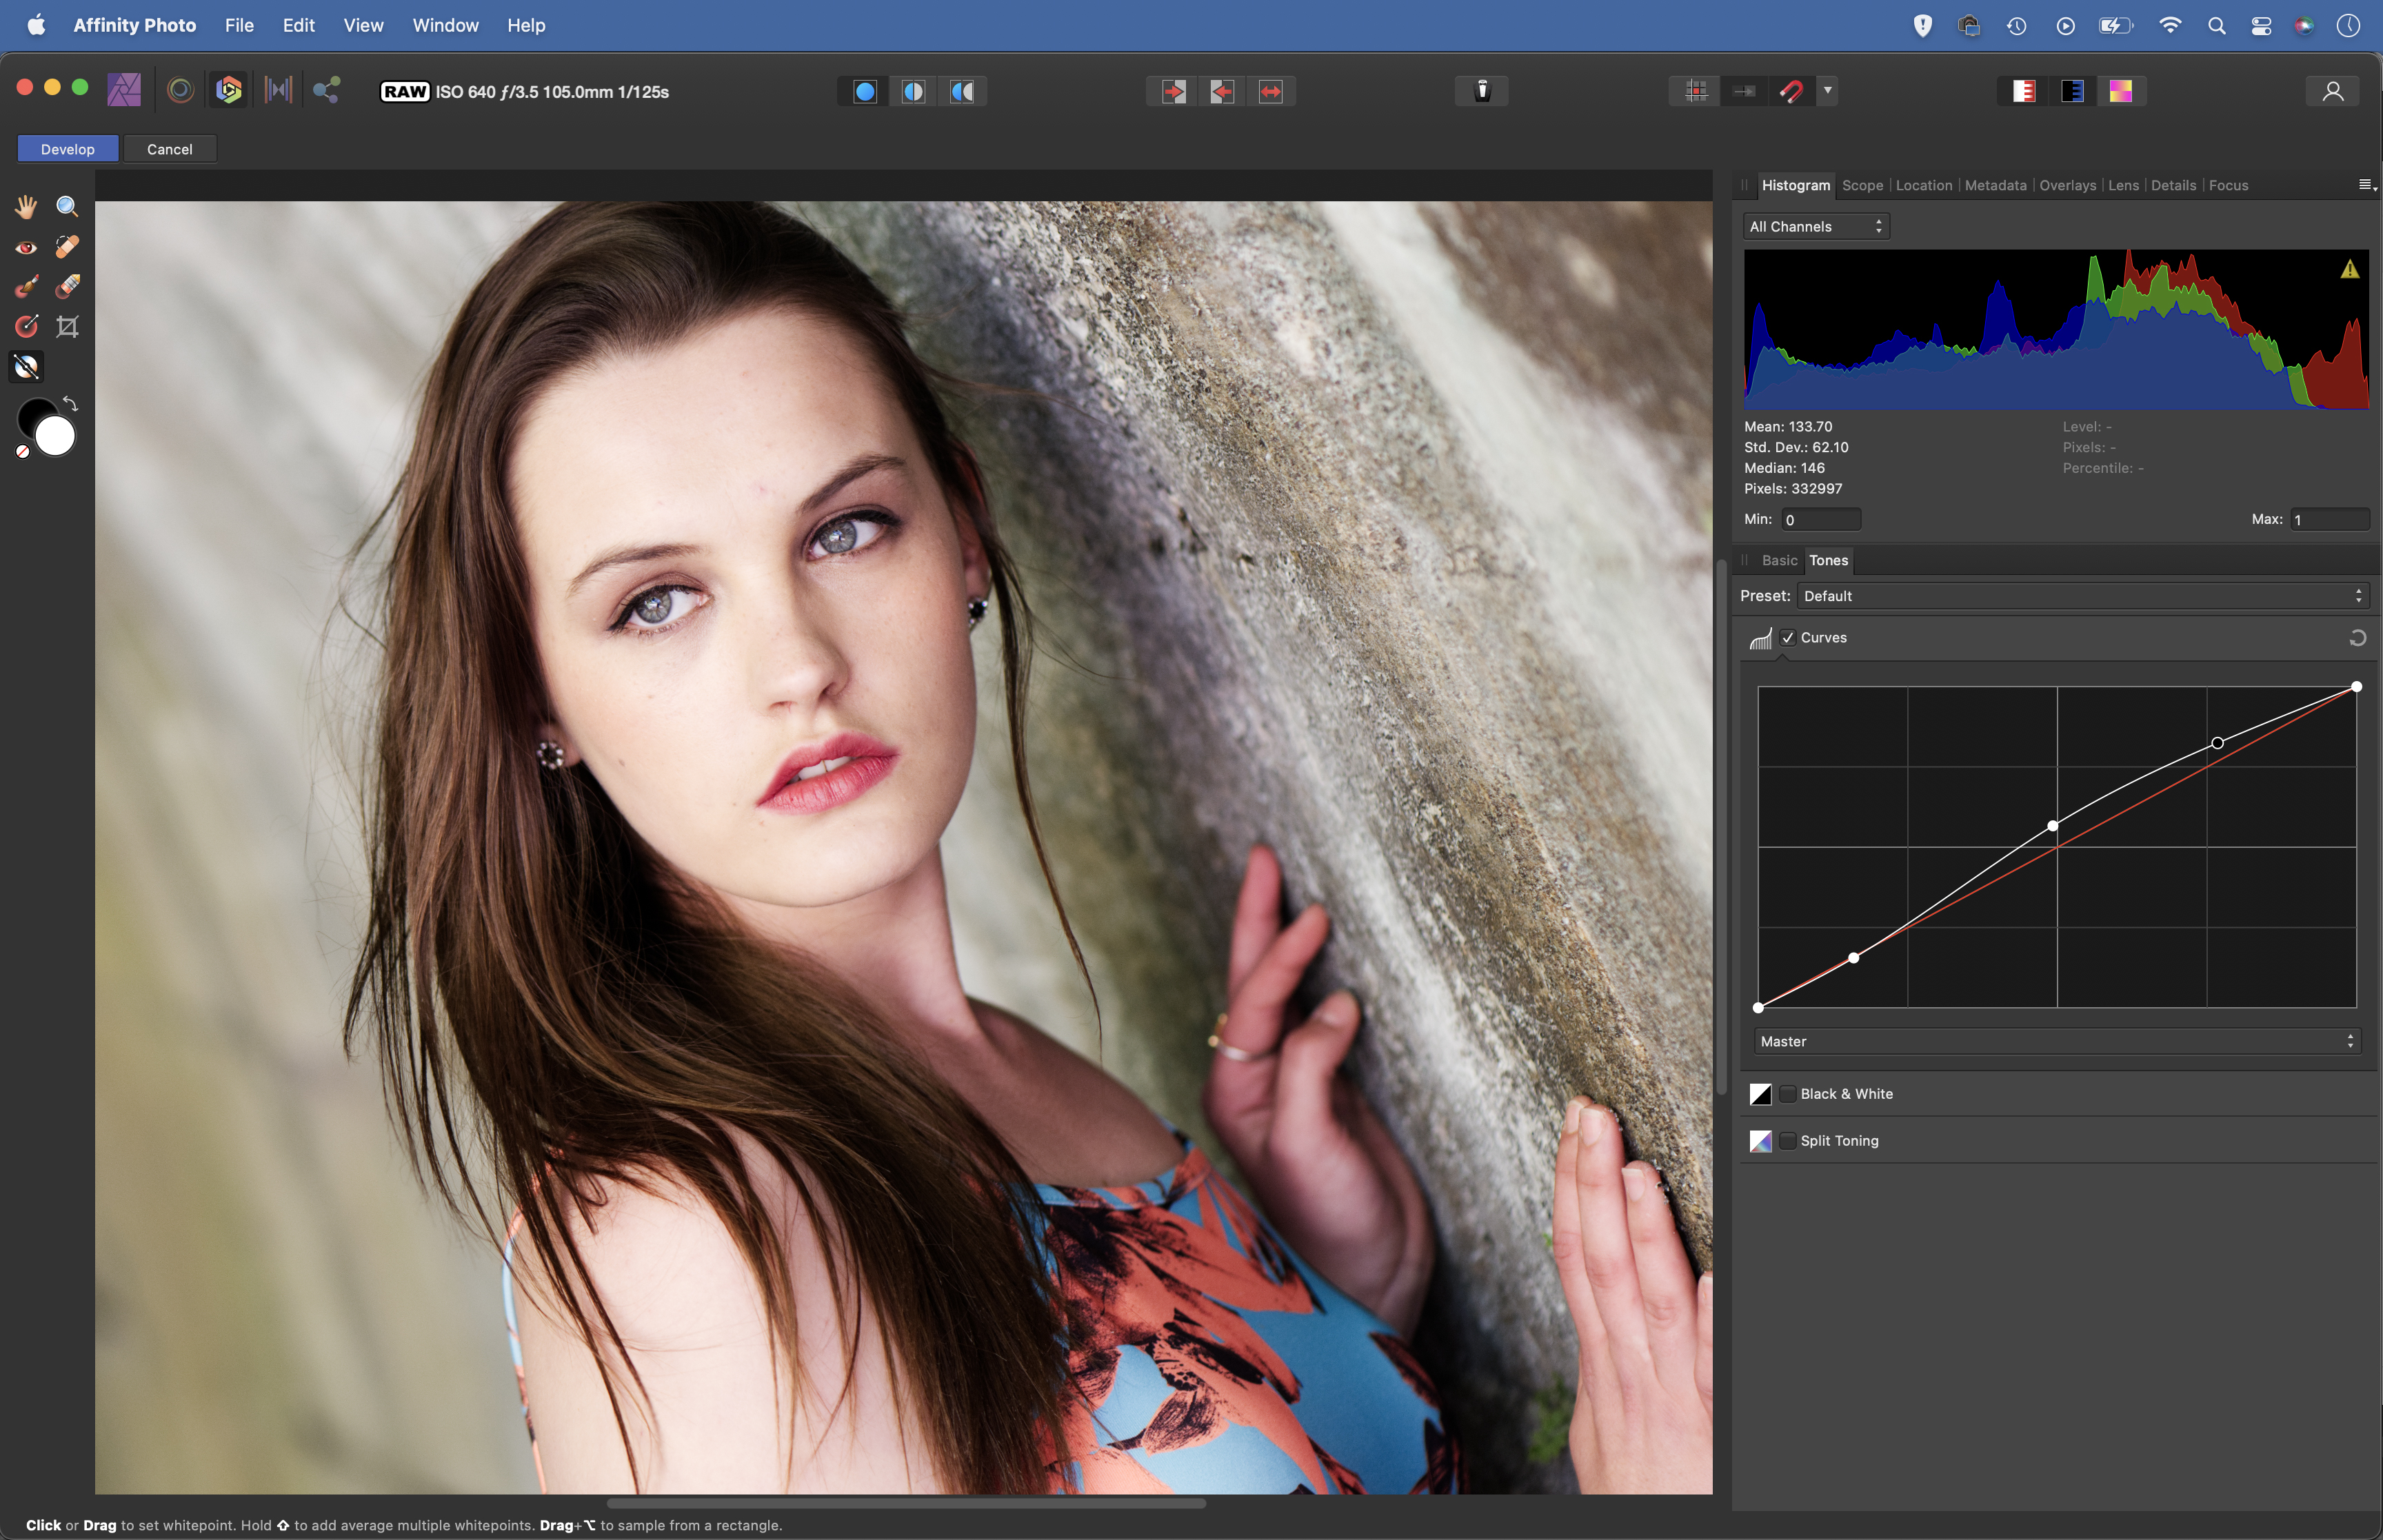
Go to the Curves panel in the Tones tab. Drag one point upwards near the top of the diagonal curve line – this sets highlights. Drag a second point downwards near the bottom – this deepens the shadows. A third point in the center enables you to control the midtones.
4. Enhance details
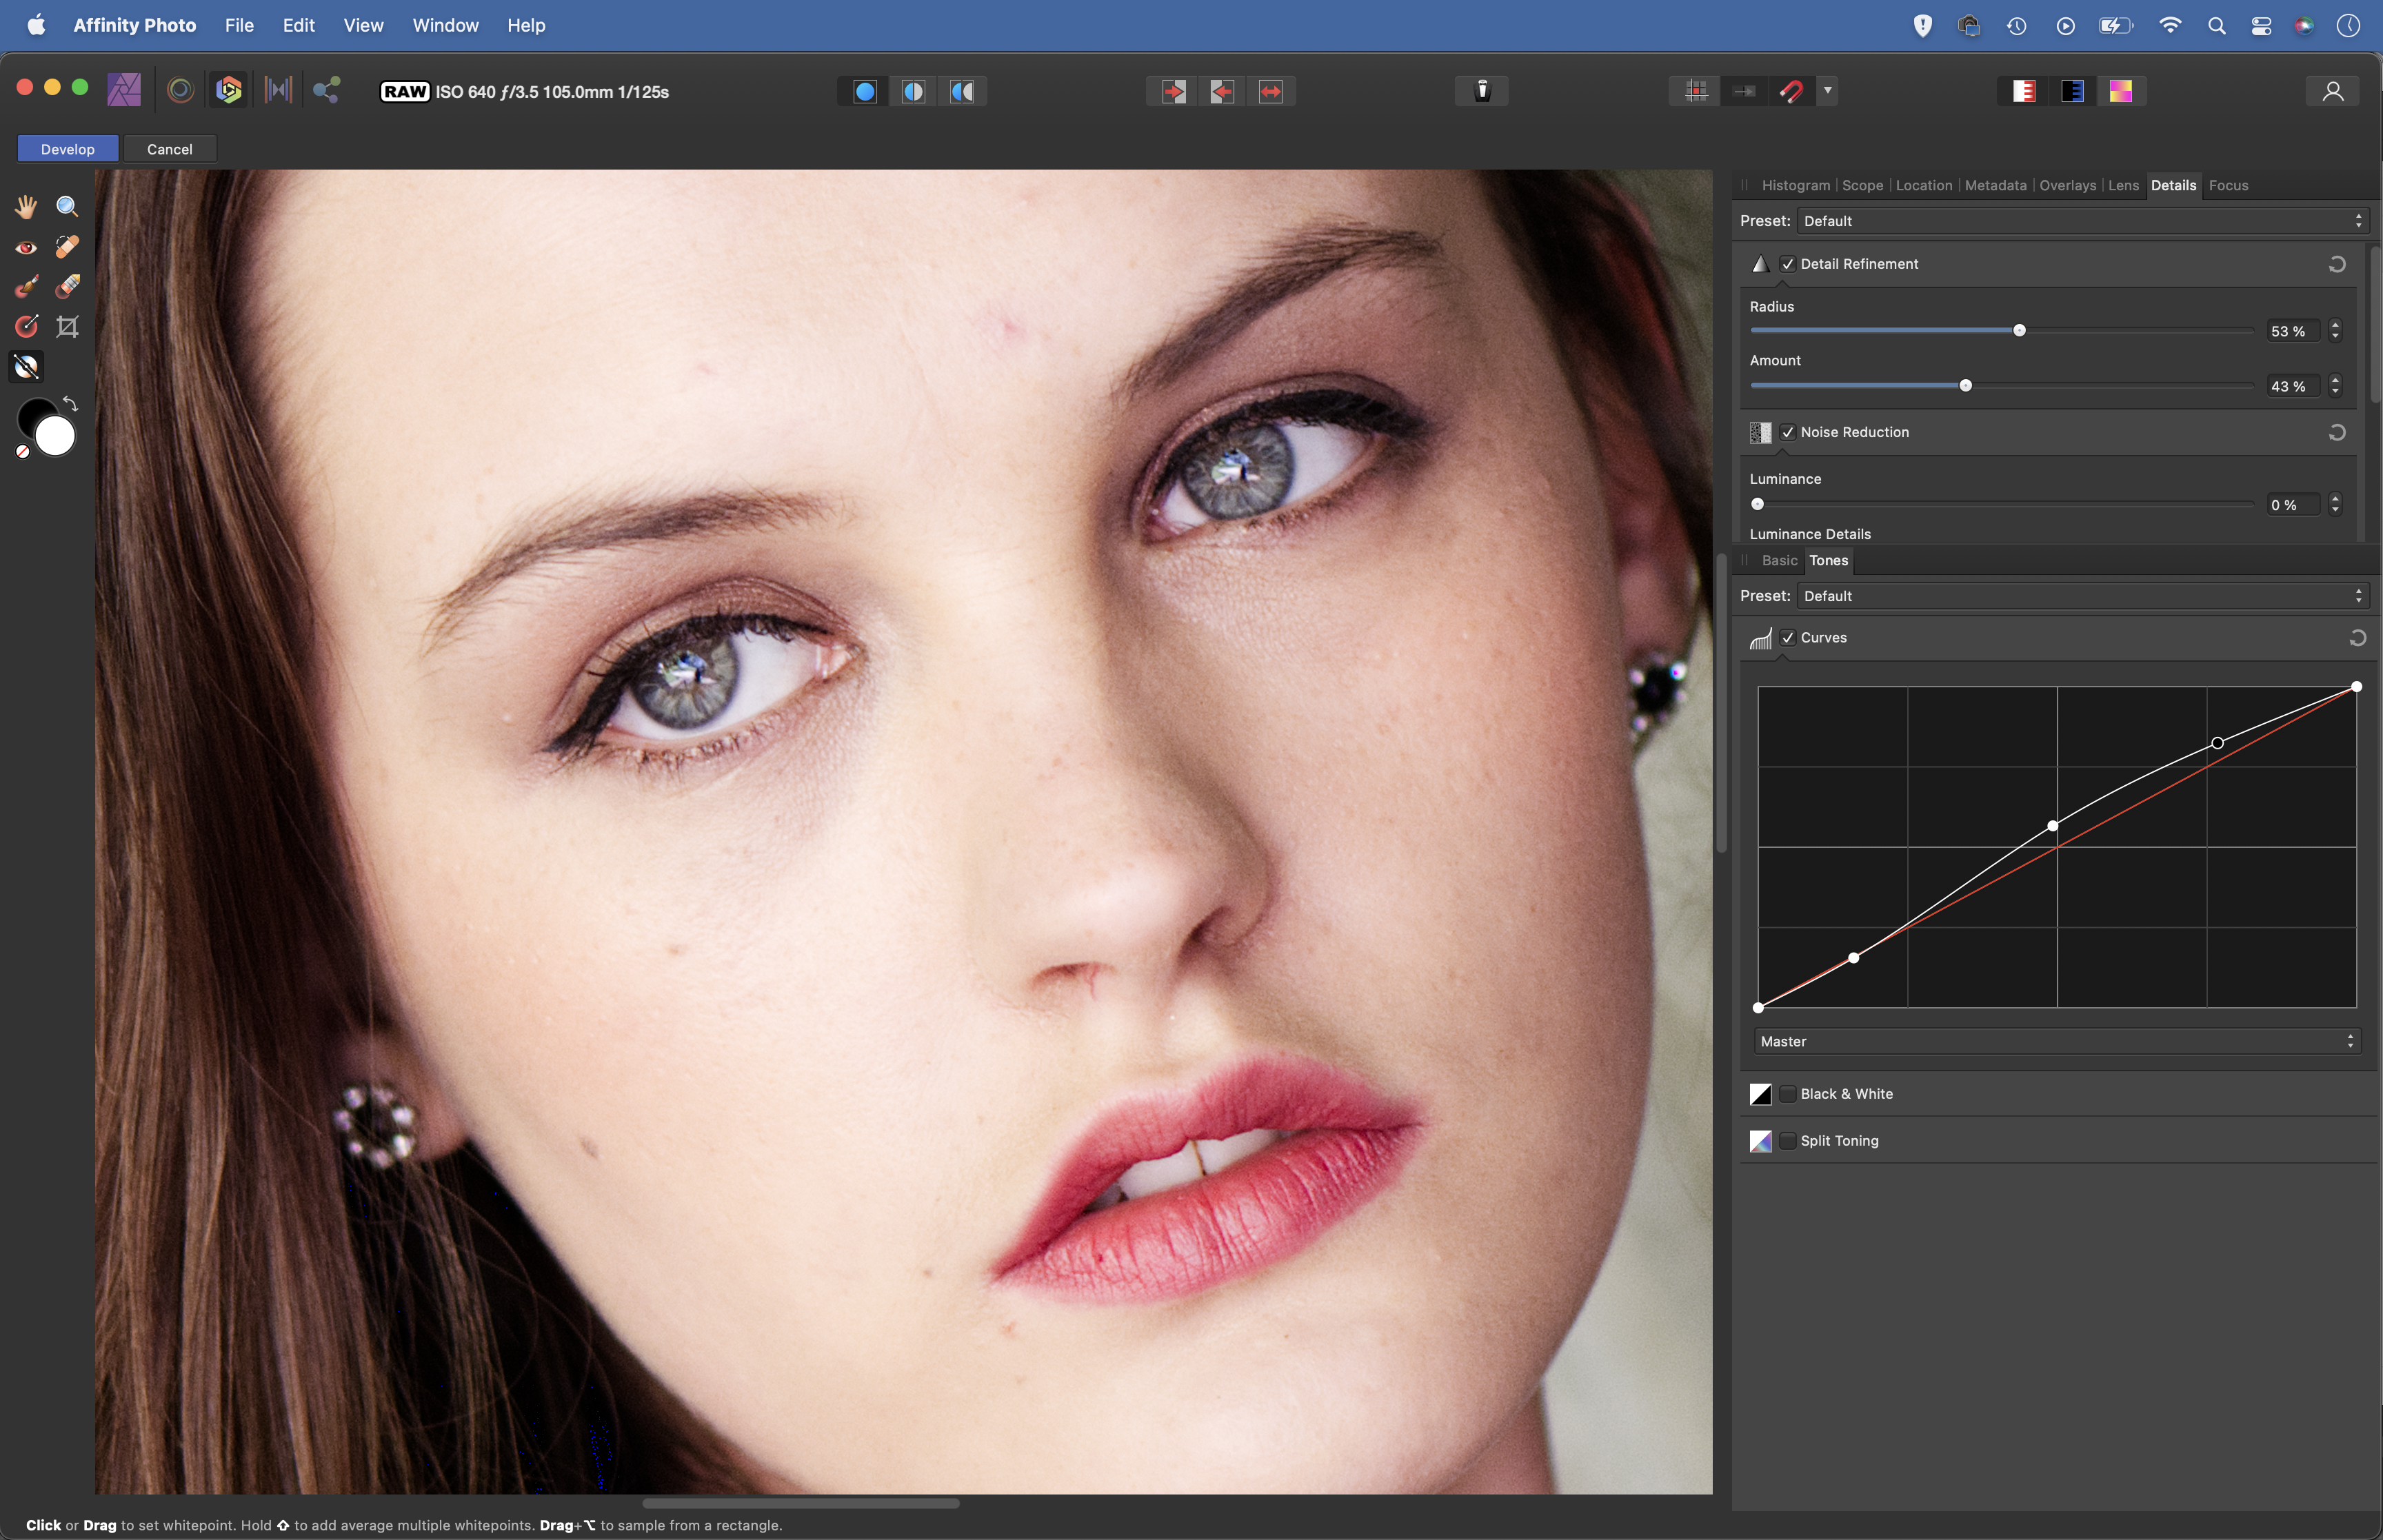
The Details panel enables you to sharpen the image. Zoom in close to the face and then try increasing Radius and Amount in tandem to apply sharpening. A fairly high radius is usually better for portraits, as they tend to have less high-frequency fine details.
5. Boost eyes
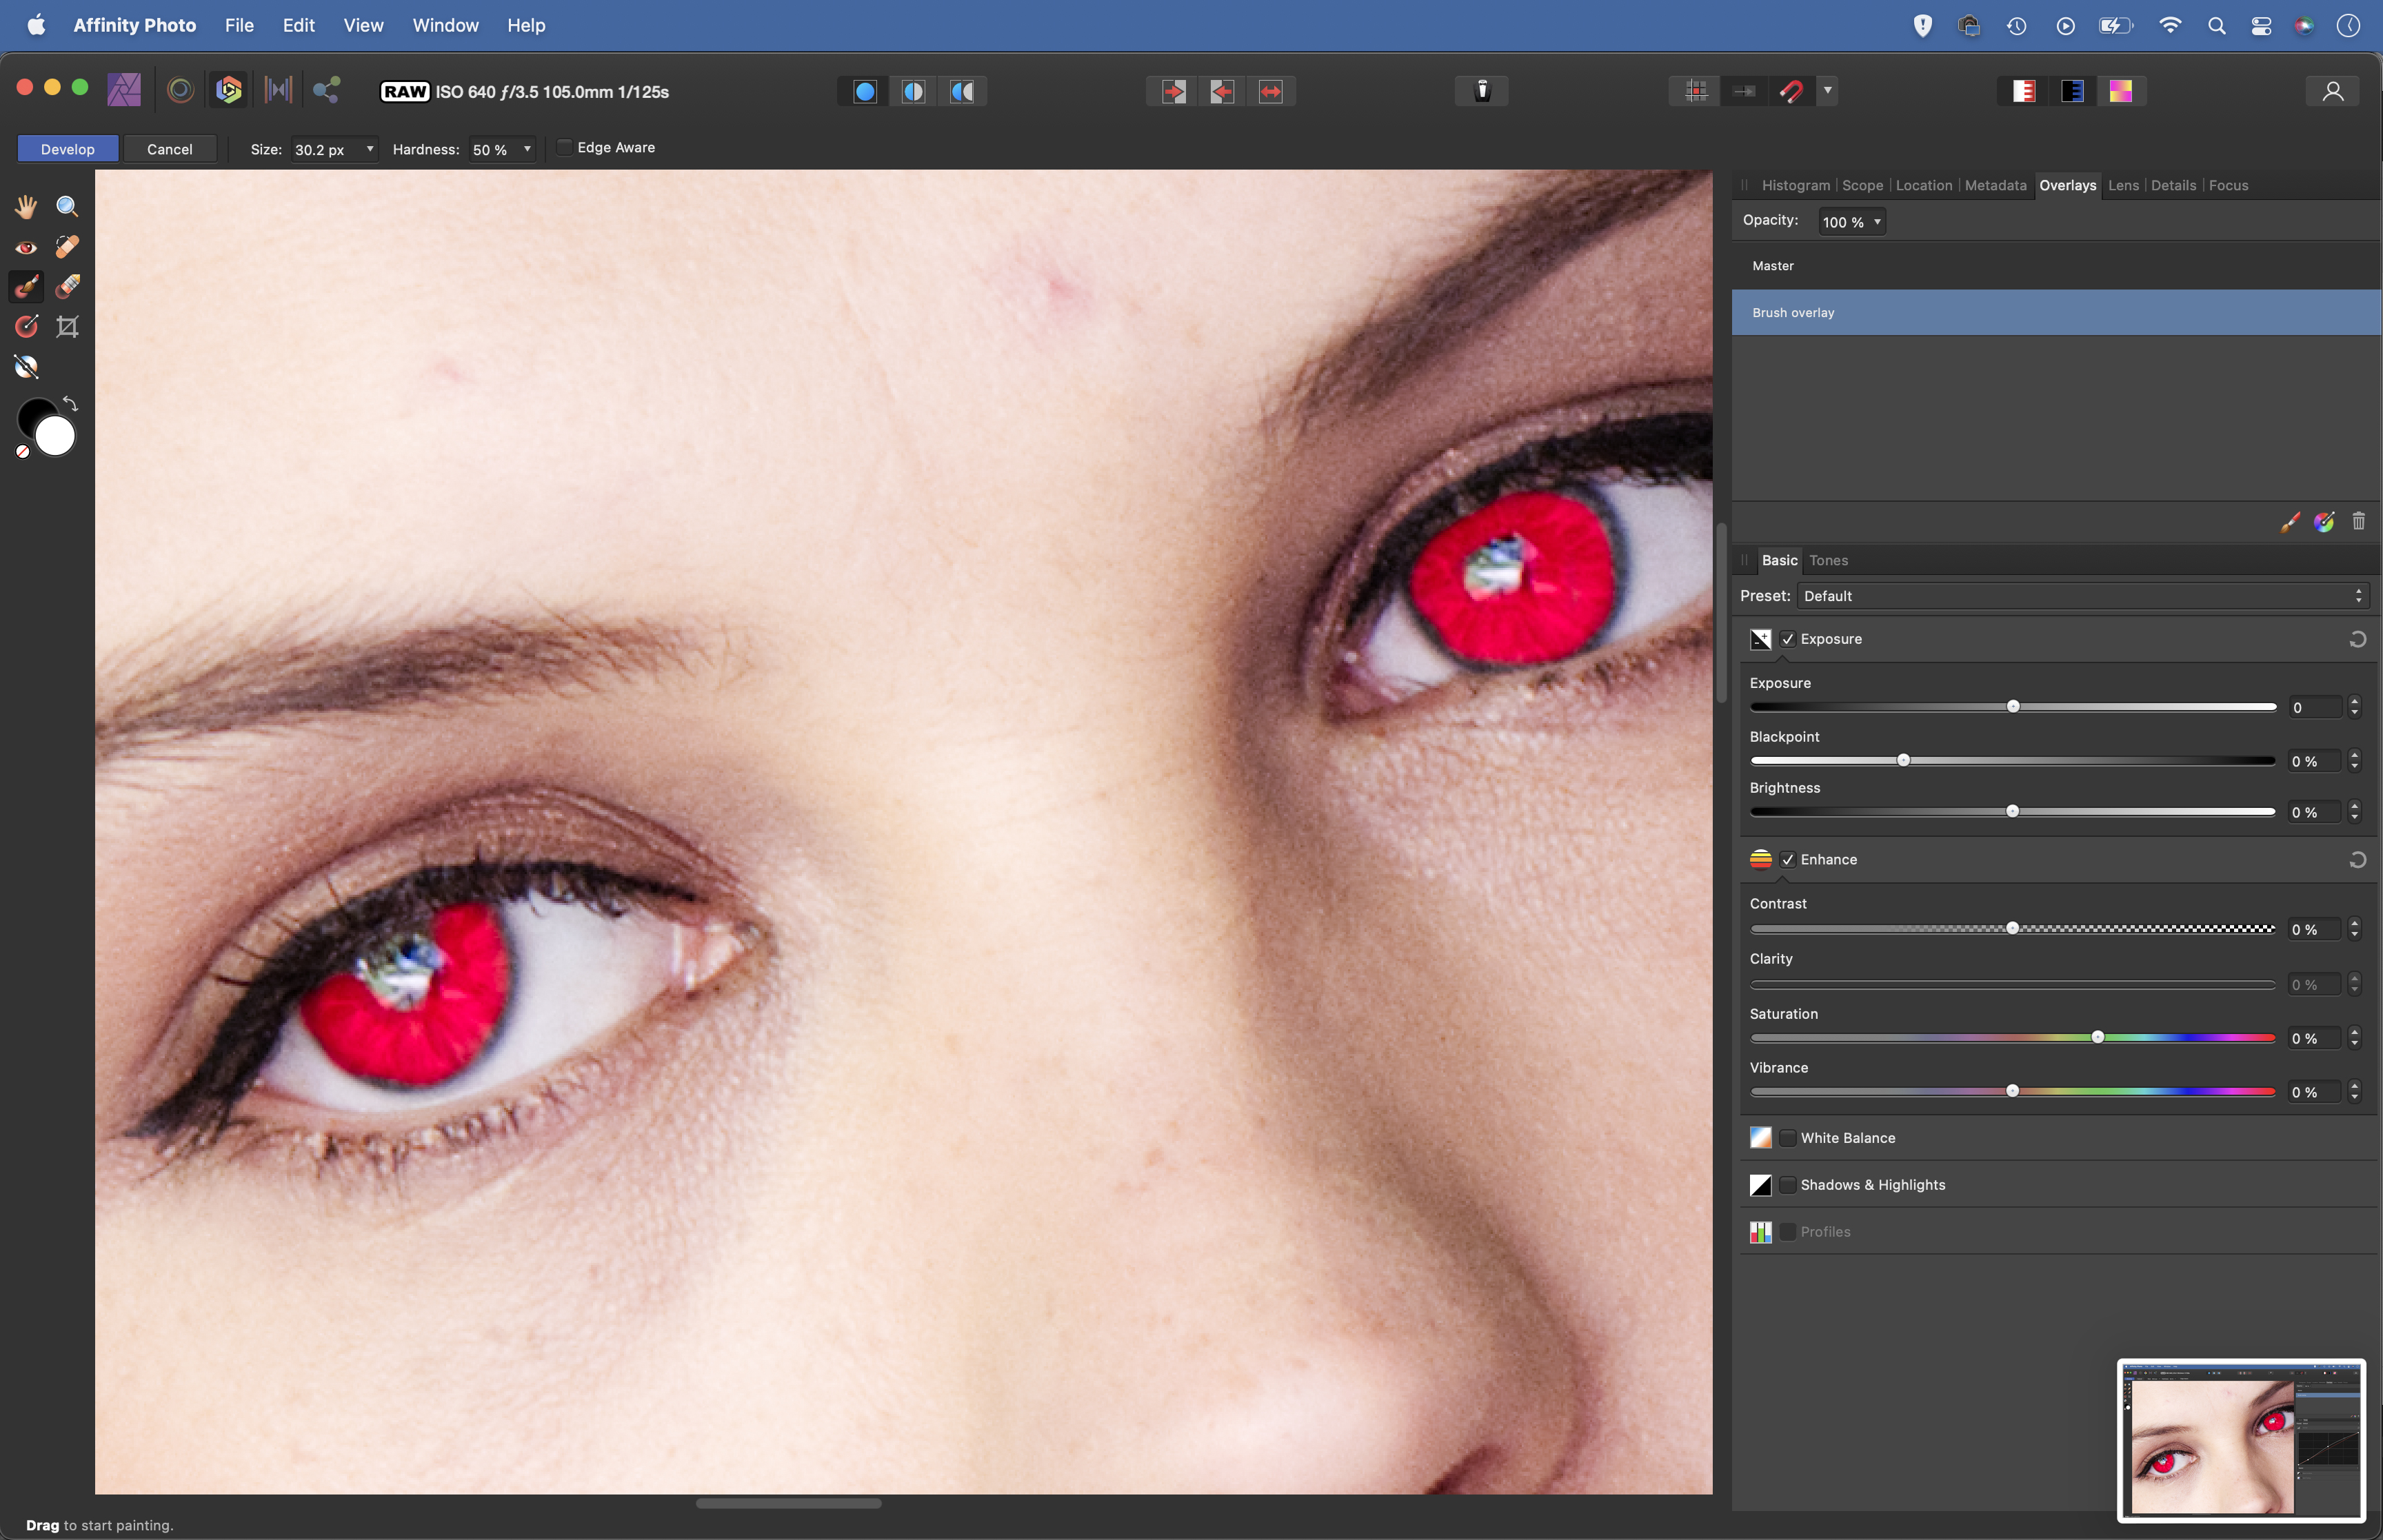
Use Brush Overlay to paint areas to isolate them, then use tonal sliders to boost them. Click the brush icon to make a new overlay. Paint the irises, then increase Saturation, Contrast and Exposure. Click the brush again, paint the eye whites and increase Exposure.
6. Add a retro tone
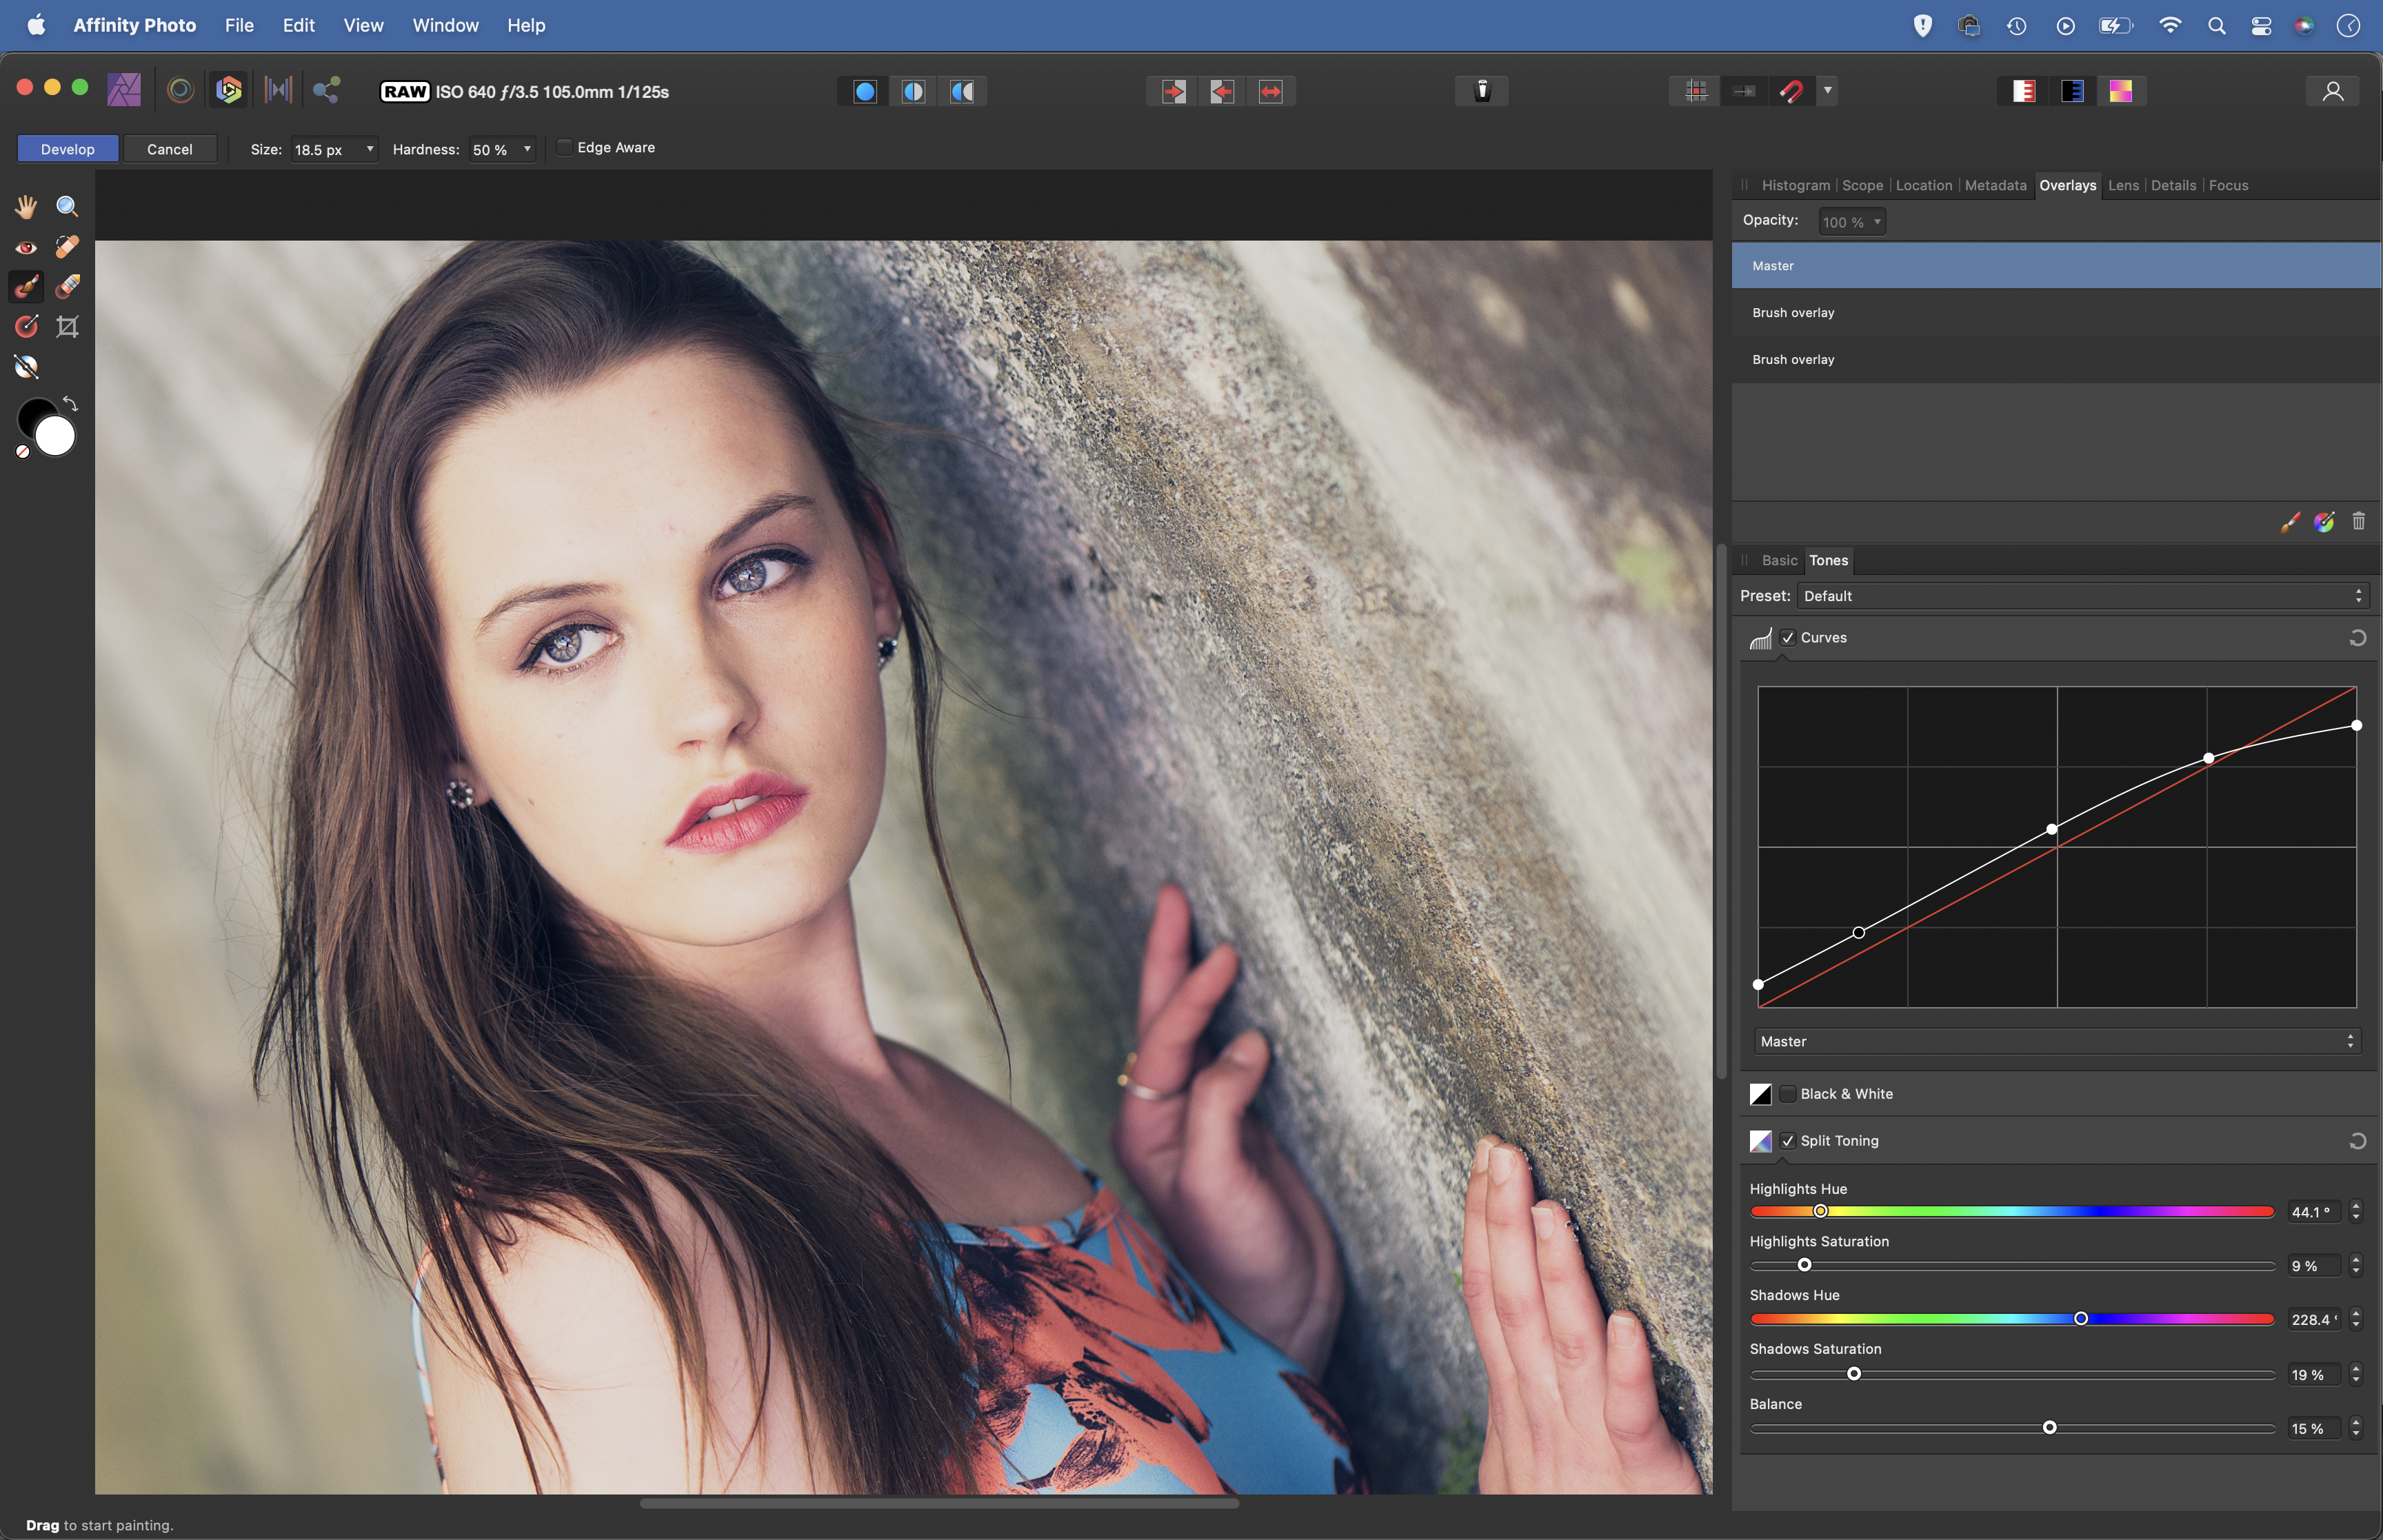
Open the Split Toning panel and use the sliders to add yellow to the highlights and blue to the shadows. Go to the Curves panel. Drag the top-right corner down slightly to fade the highlights, and drag the bottom-left point up to open the shadows for a matte finish.
PhotoPlus: The Canon Magazine is the world's only monthly newsstand title that's 100% devoted to Canon, so you can be sure the magazine is completely relevant to your system.
If you enjoyed this tutorial but want a bit more power from your laptop, why not look at the best photo-editing laptops? If you're really keen to improve your skills further than online photography courses could be the way to go.
Get the Digital Camera World Newsletter
The best camera deals, reviews, product advice, and unmissable photography news, direct to your inbox!
The lead technique writer on Digital Camera Magazine, PhotoPlus: The Canon Magazine and N-Photo: The Nikon Magazine, James is a fantastic general practice photographer with an enviable array of skills across every genre of photography.
Whether it's flash photography techniques like stroboscopic portraits, astrophotography projects like photographing the Northern Lights, or turning sound into art by making paint dance on a set of speakers, James' tutorials and projects are as creative as they are enjoyable.
He's also a wizard at the dark arts of Photoshop, Lightroom and Affinity Photo, and is capable of some genuine black magic in the digital darkroom, making him one of the leading authorities on photo editing software and techniques.


