Recolor backdrops for your portraits the easy way in Photoshop CC
Selectively shift the color of a backdrop, or anything else you like, using some handy tips and tricks in Photoshop CC
Watch video: How to recolor backdrops in Photoshop CC
Bold colors can help your portraits to pop, but you might not always find the colors you want while shooting. Thankfully, recoloring parts of a scene is easily done in post-production. We’ll use simple Photoshop CC tools here to change the backdrop to a bold blue tone. You can adapt this technique to change the color of pretty much anything.
We found a convenient red wall next to a large window which was ideal for our portrait. But after the shoot the reds seemed overpowering, especially as the skin tones and hair also have varying shades of red. So instead, we isolated and recolored the background in Photoshop. You download our portrait start image here if you'd like to use the same pic as a starting point.
Shifting colors is a fairly simple task, but it’s best to do it so you can choose another color later on if you want. We’ll use Adjustment Layers here, which allow us to alter the colors on the layer/layers underneath, while remaining editable throughout the process. As well as coloring the backdrop, we also need to think about reflected color. Light takes on some of the color of the surfaces it bounces off, so here the light from the original red wall has bounced back to the subject, subtly shifting the skin tones and clothing around the edges of her figure. We need to correct for this with a subtle shift in color. Here's how...
01 Select the subject
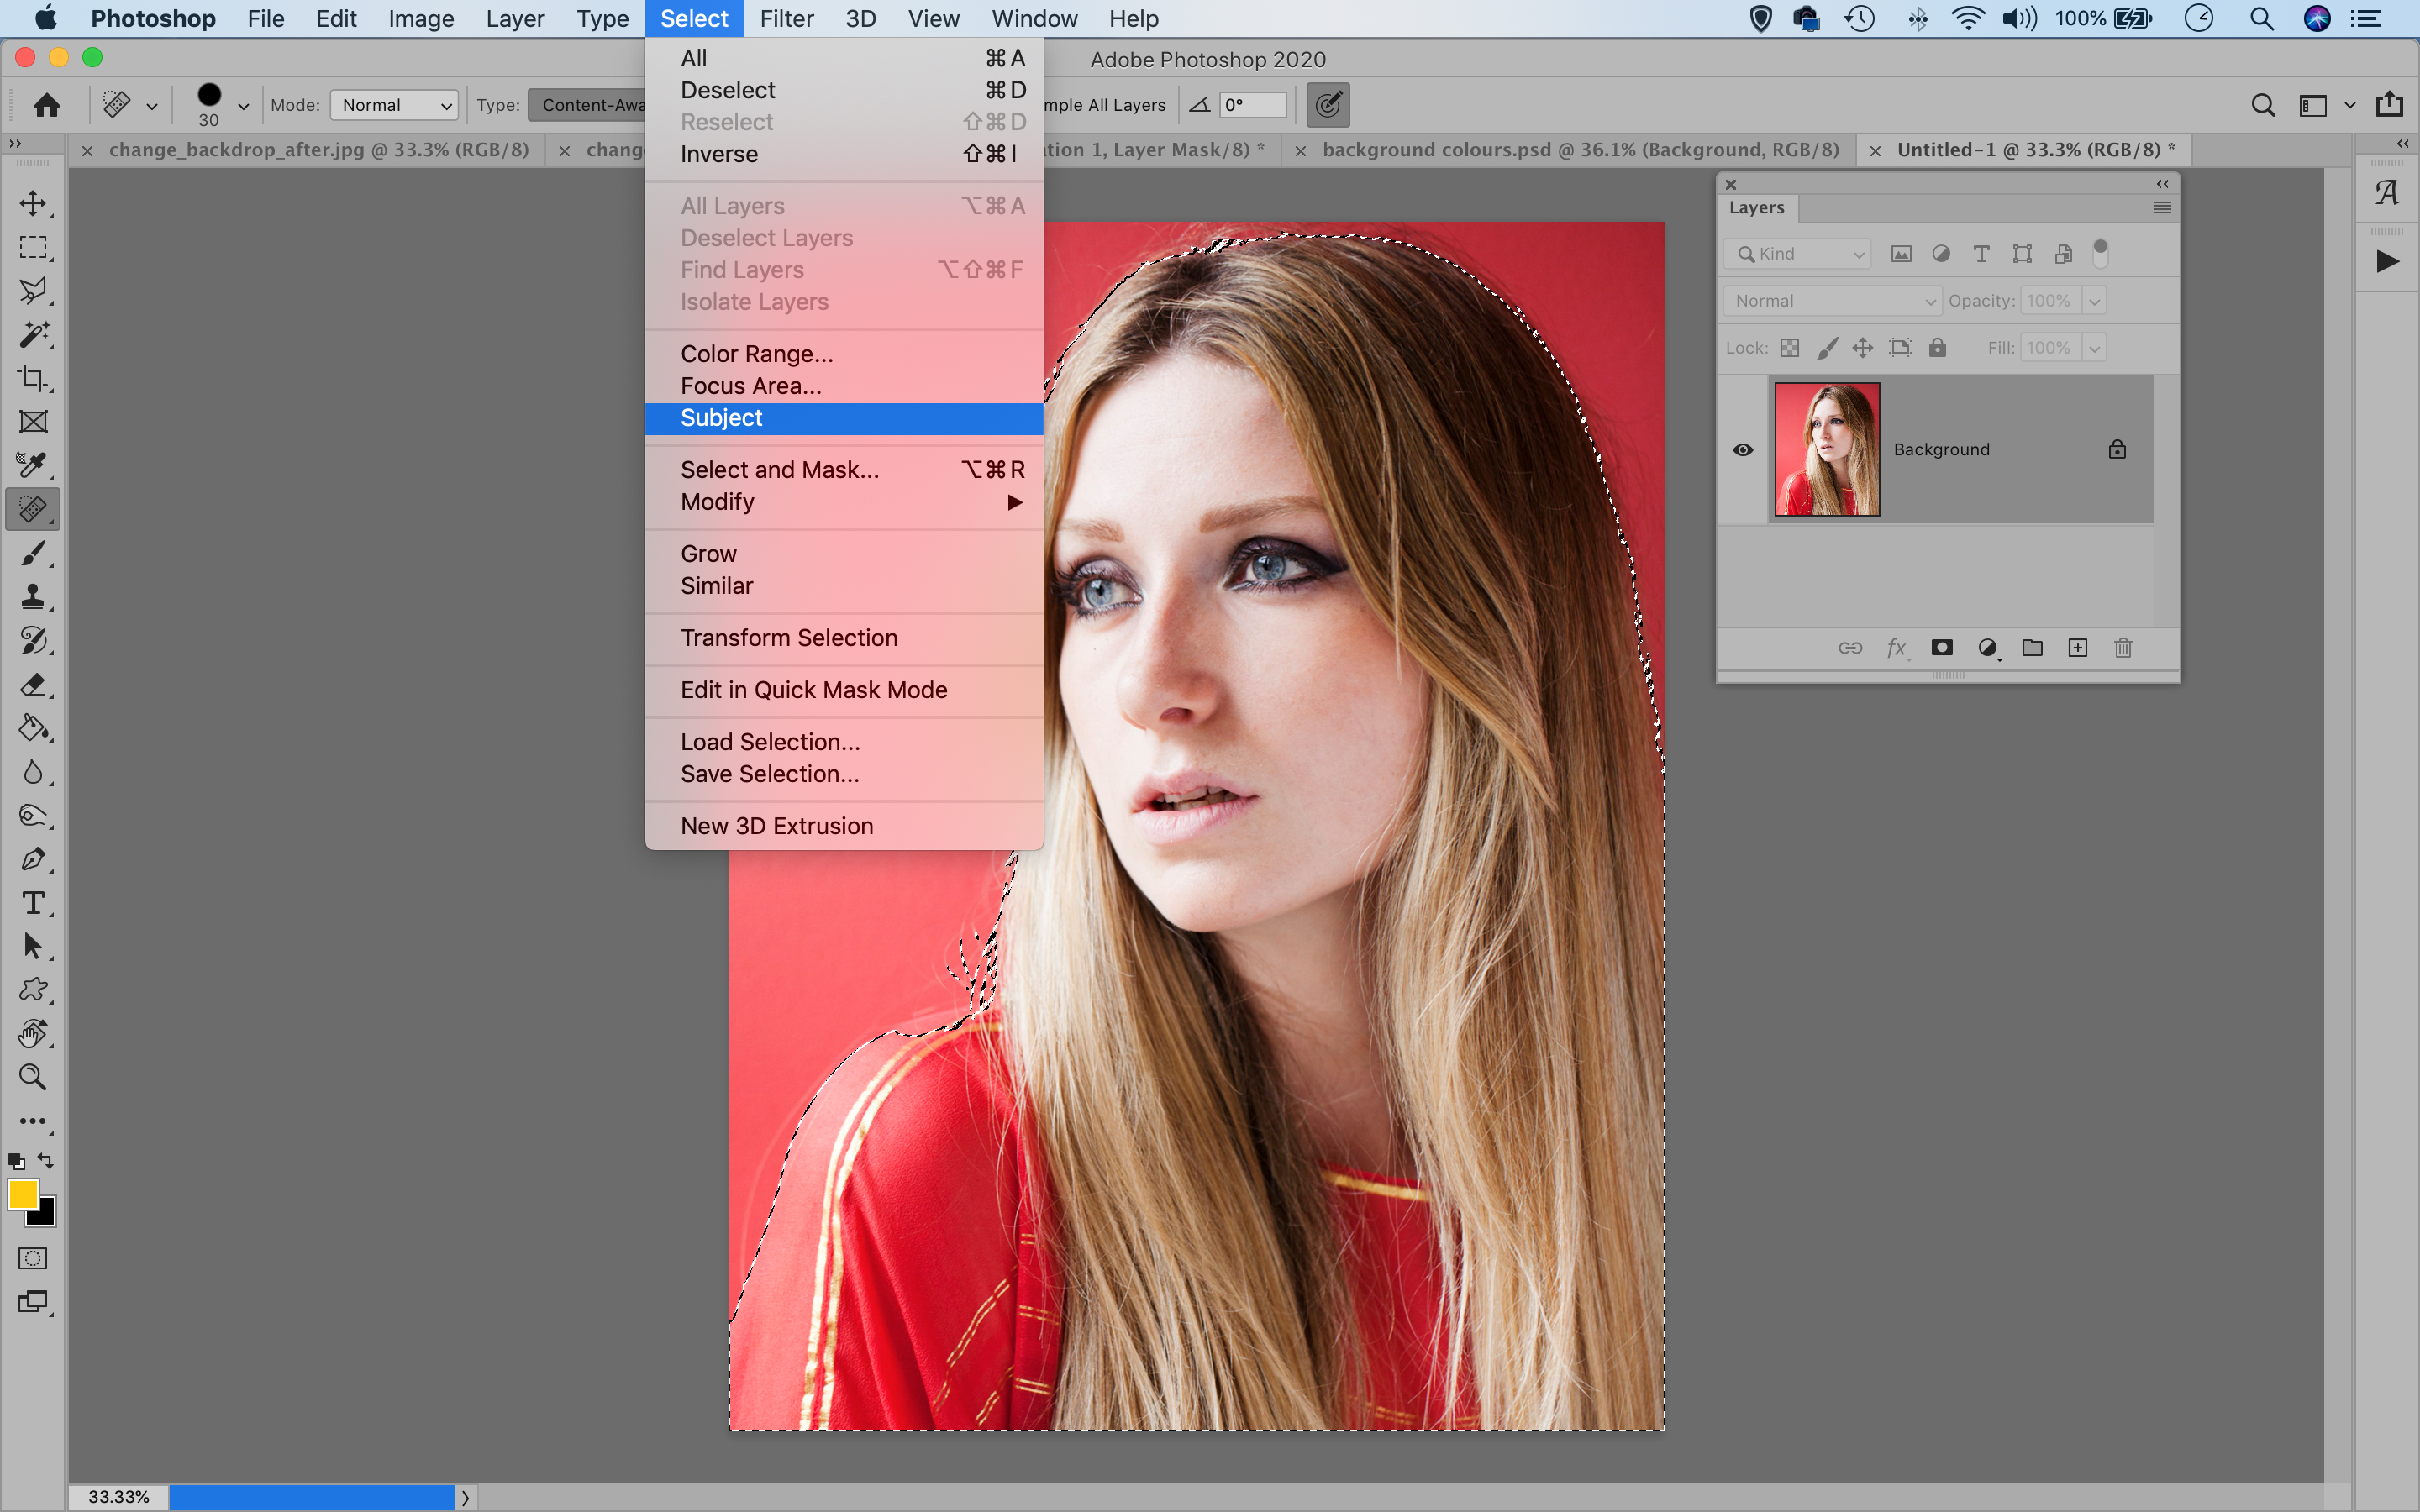
Open the ‘change_backdrop_before.jpg’ (download here) and go to Select>Subject, then Select>Inverse. This should give you a decent selection of the background (we can fine-tune it later if necessary). Next, click the Create Adjustment Layer icon at the bottom of the Layers panel and choose Hue/Saturation.
02 Change the hue
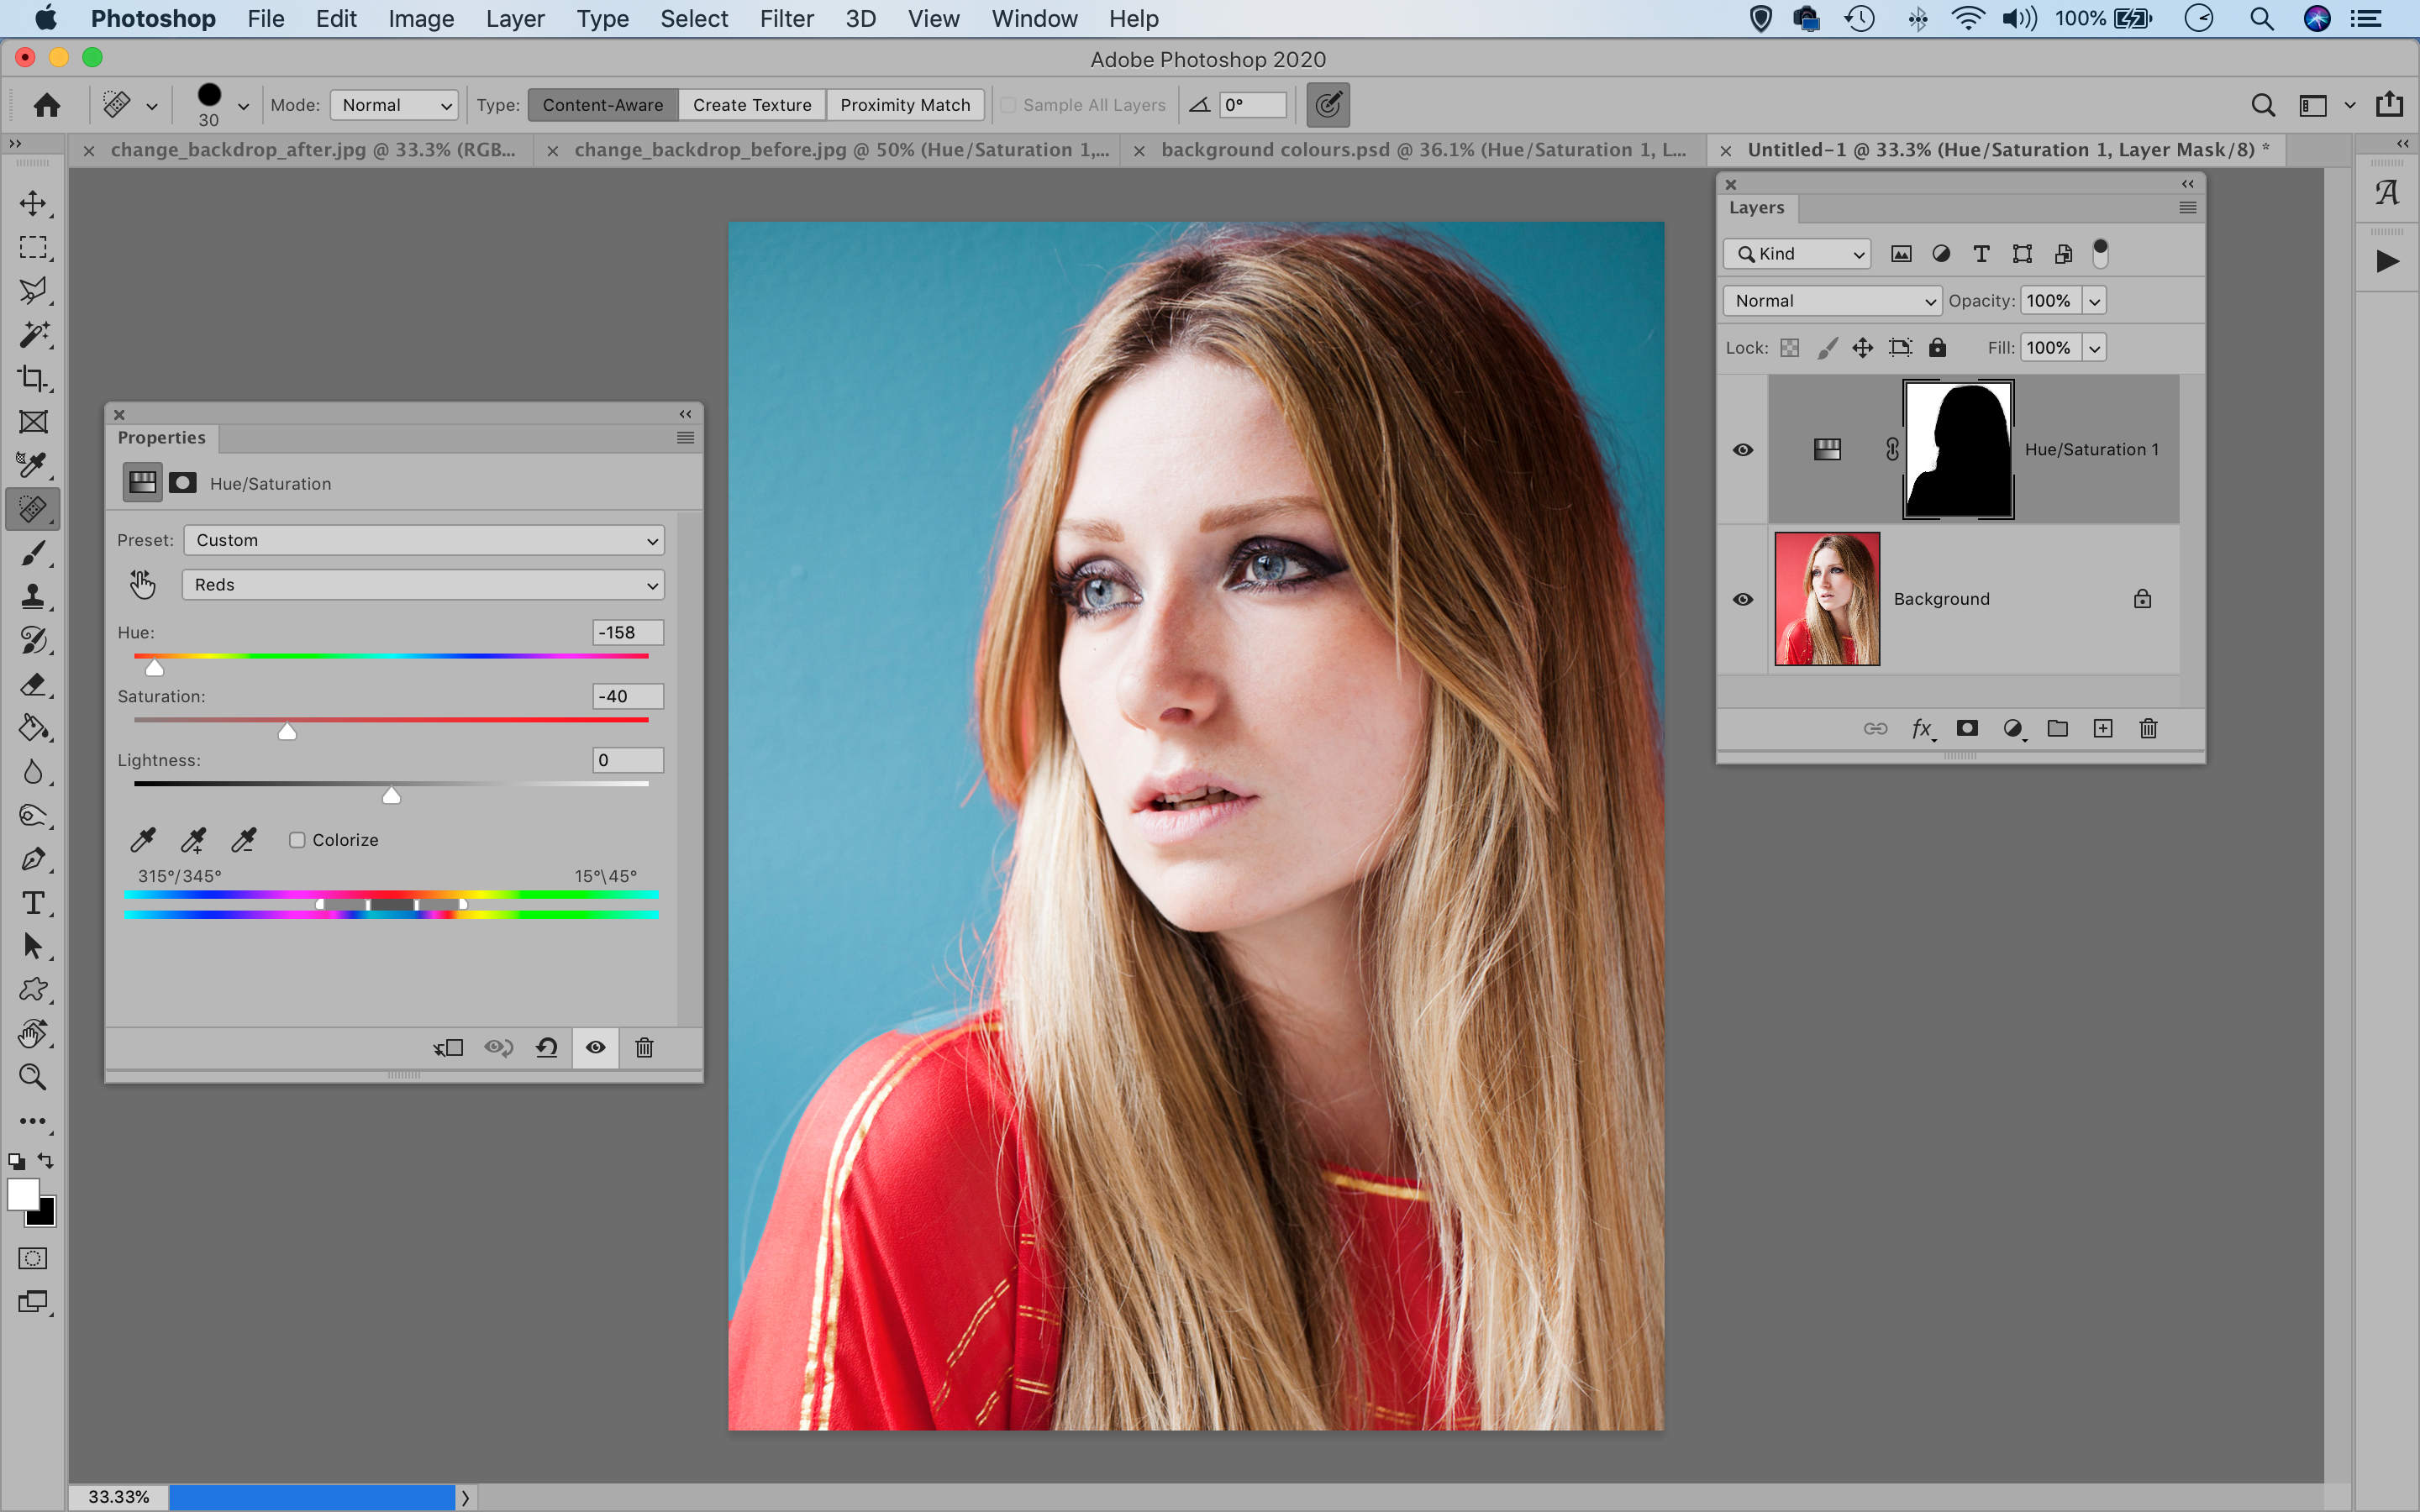
The Hue slider enables you to alter colors, but you can also selectively change them with the Hand tool in the Hue/Saturation command. Click on it, then hold Cmd/Ctrl and drag left over the backdrop to target and change the reds. Fine-tune the Saturation slider too. Here we set Hue -158, Saturation -40.
03 Perfect the mask
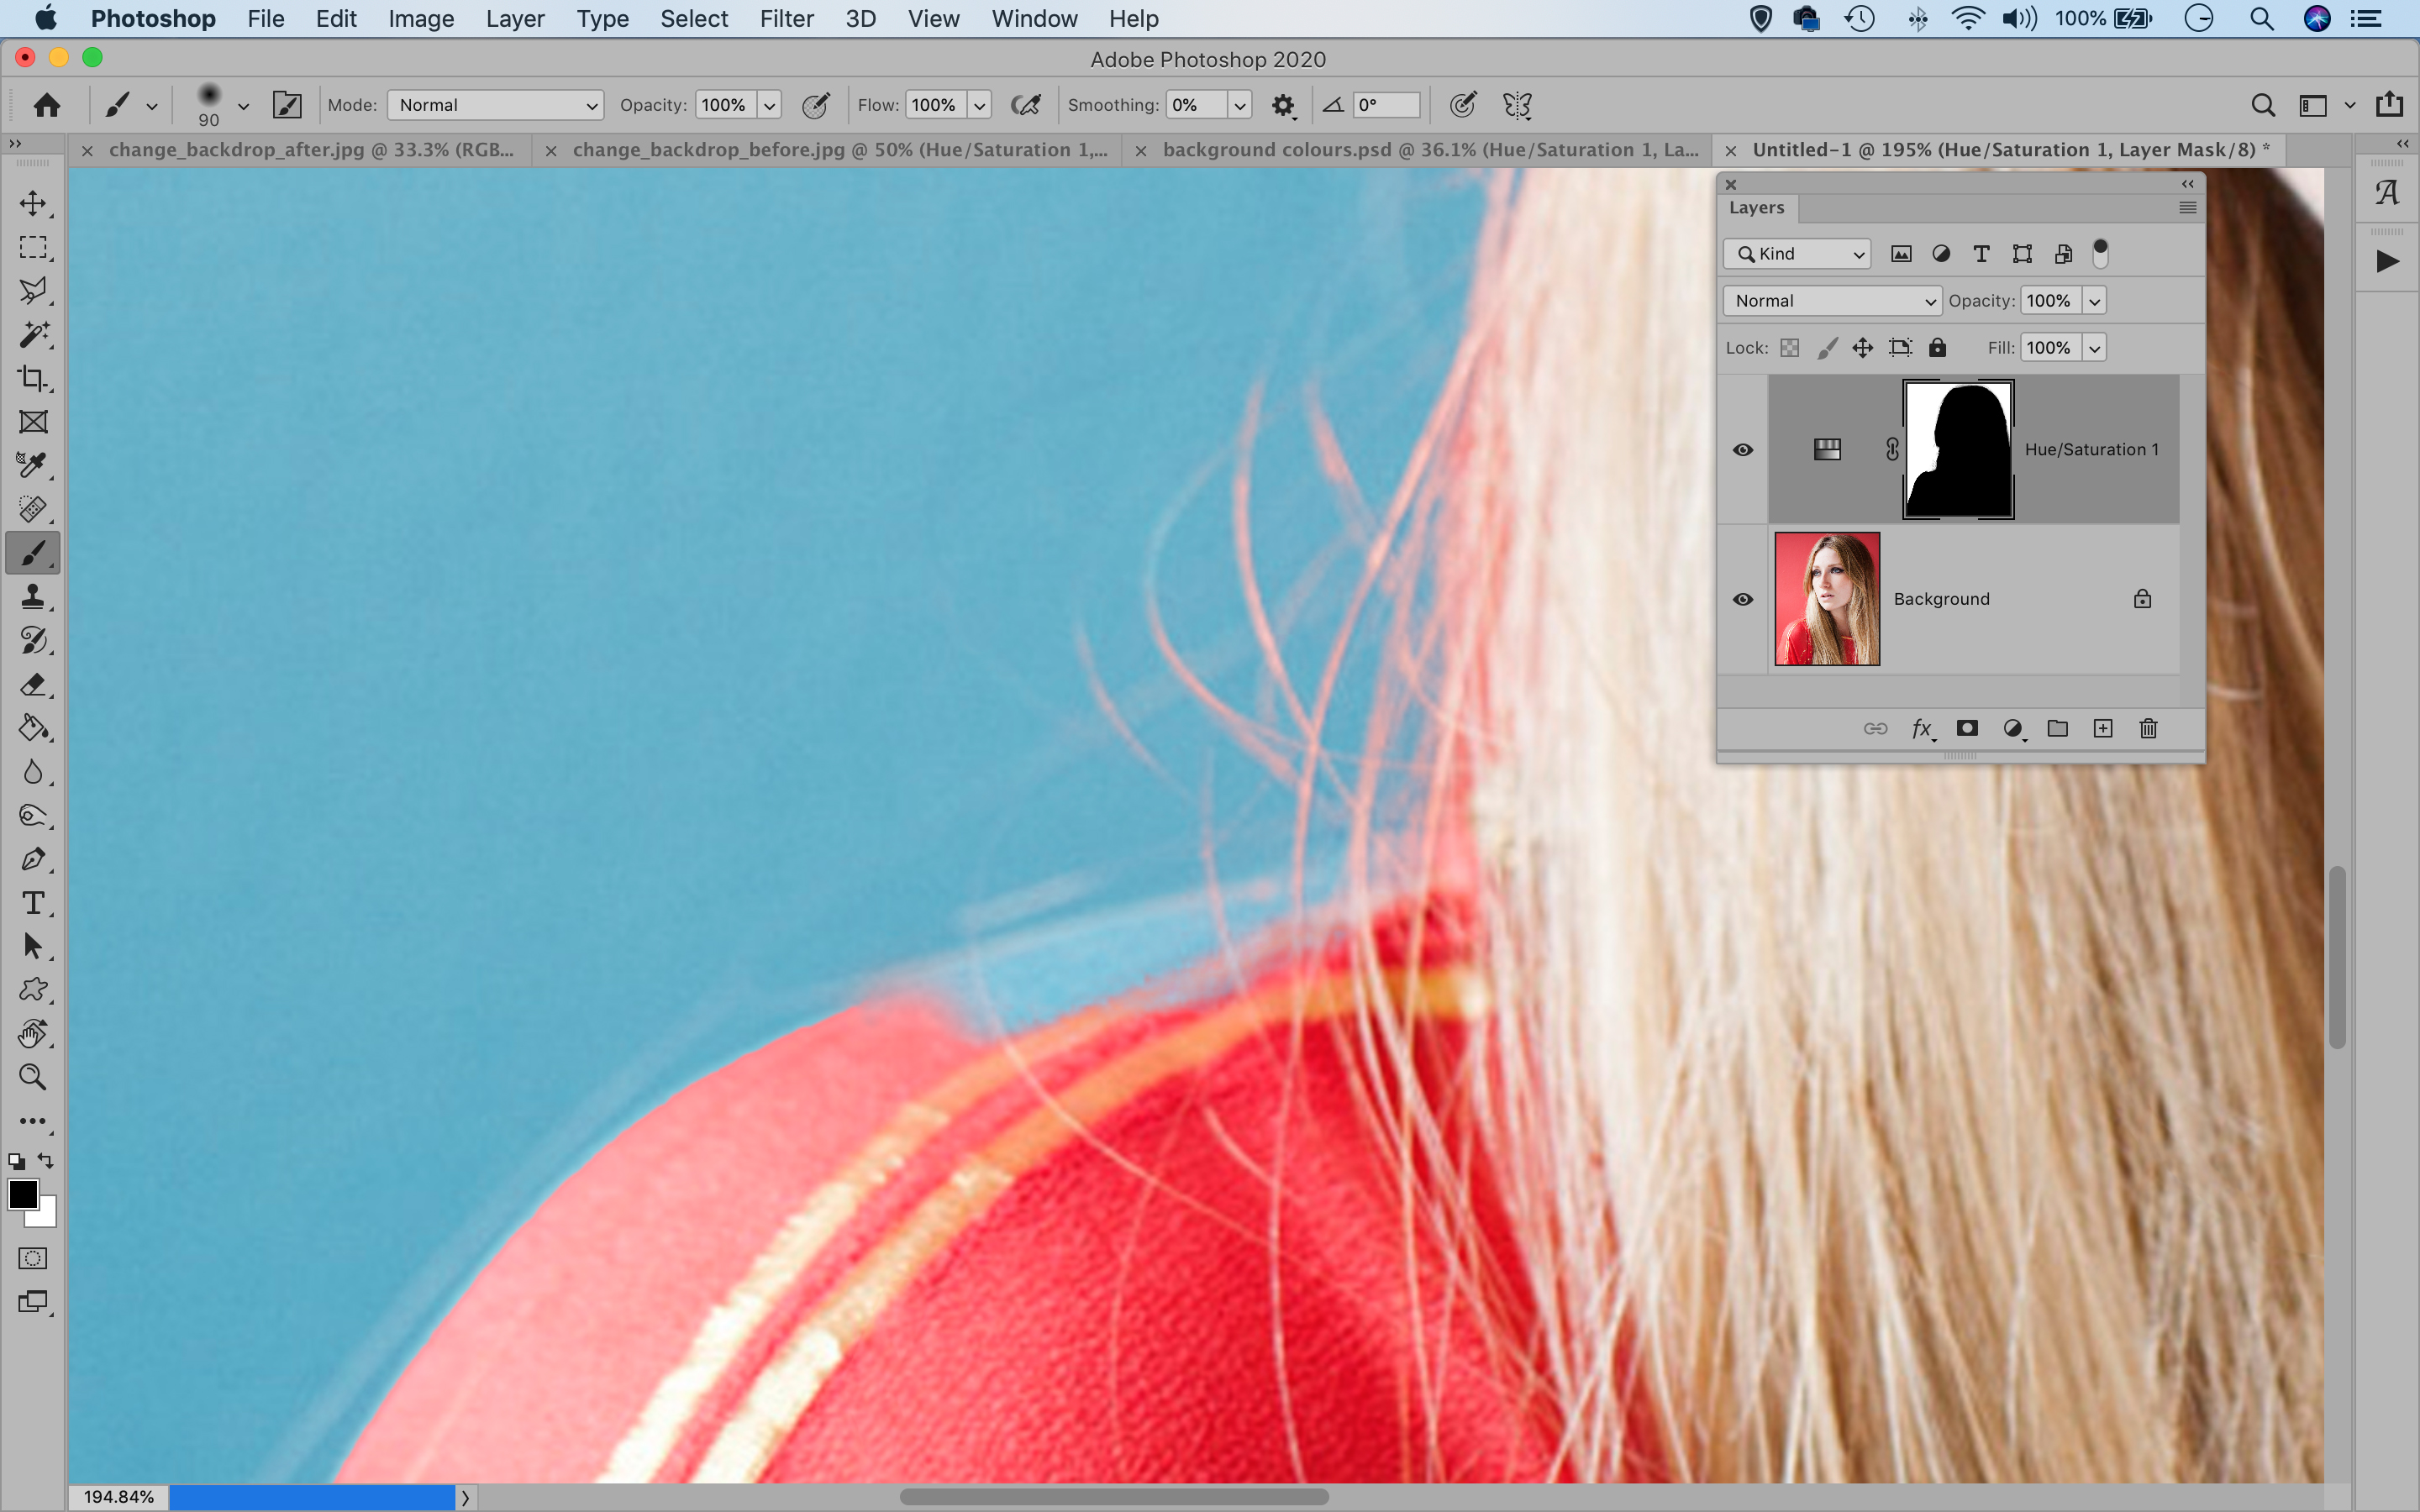
Our selection wasn’t ideal, so we need to tweak the layer mask on the Hue/Saturation layer. Click the mask thumbnail to highlight it, grab the brush tool, zoom in close and paint with black to hide the color change where not wanted, or paint white to reveal it. You can also lower the opacity to slowly hide or reveal.
04 Fix the fringing
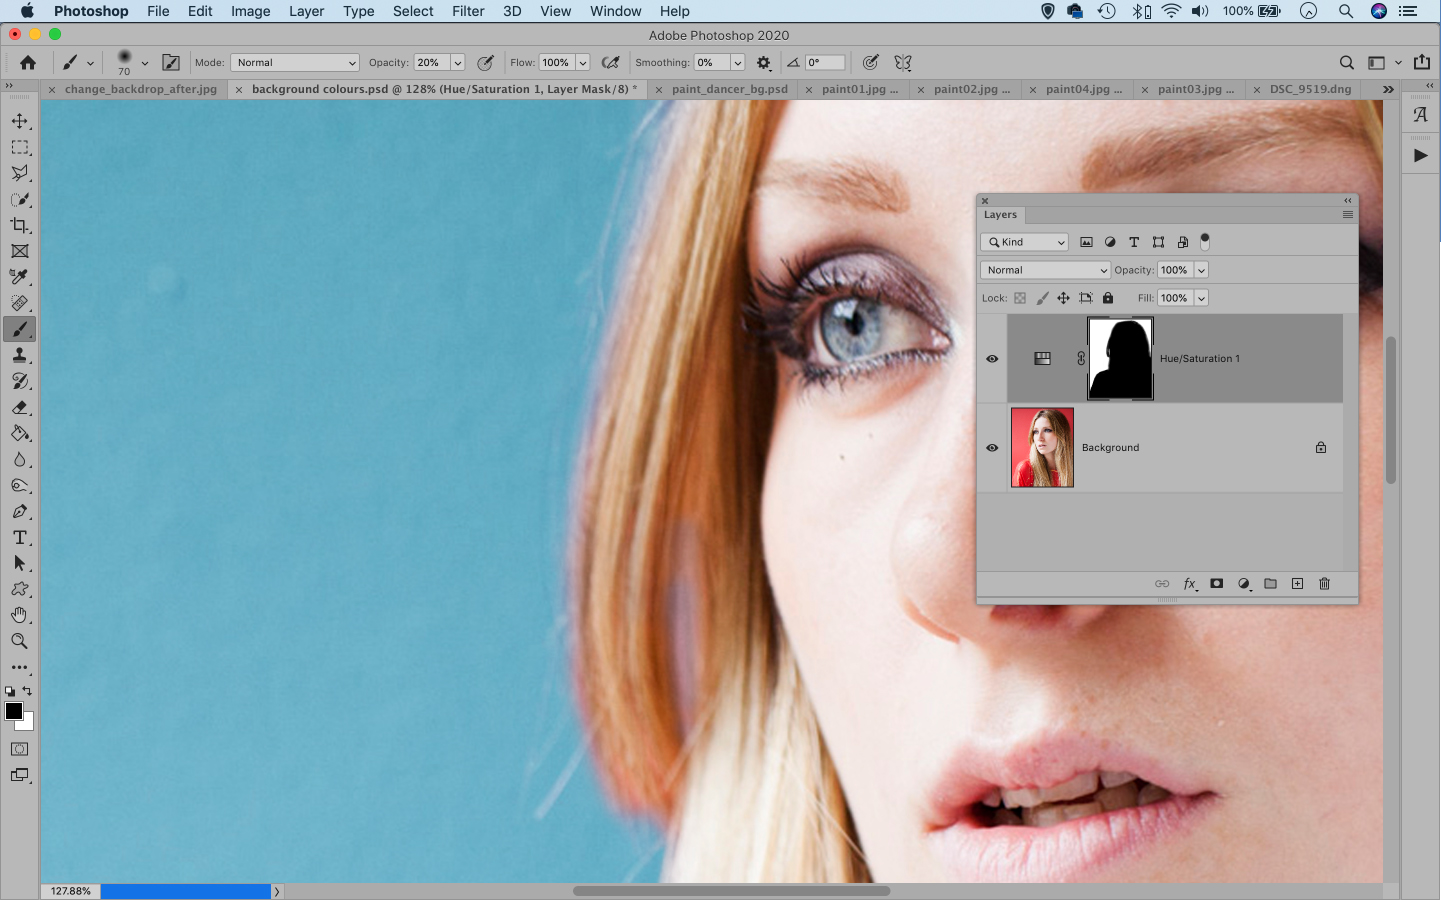
Set the brush opacity to 10 and paint with white on the mask to reveal the color change in any areas where the edges of the subject look overly red (due to light reflecting off the red wall), like the hair here. You can also add a second Hue/Saturation layer to reduce the red saturation, then use a mask to make it selective.
05 Add a vignette
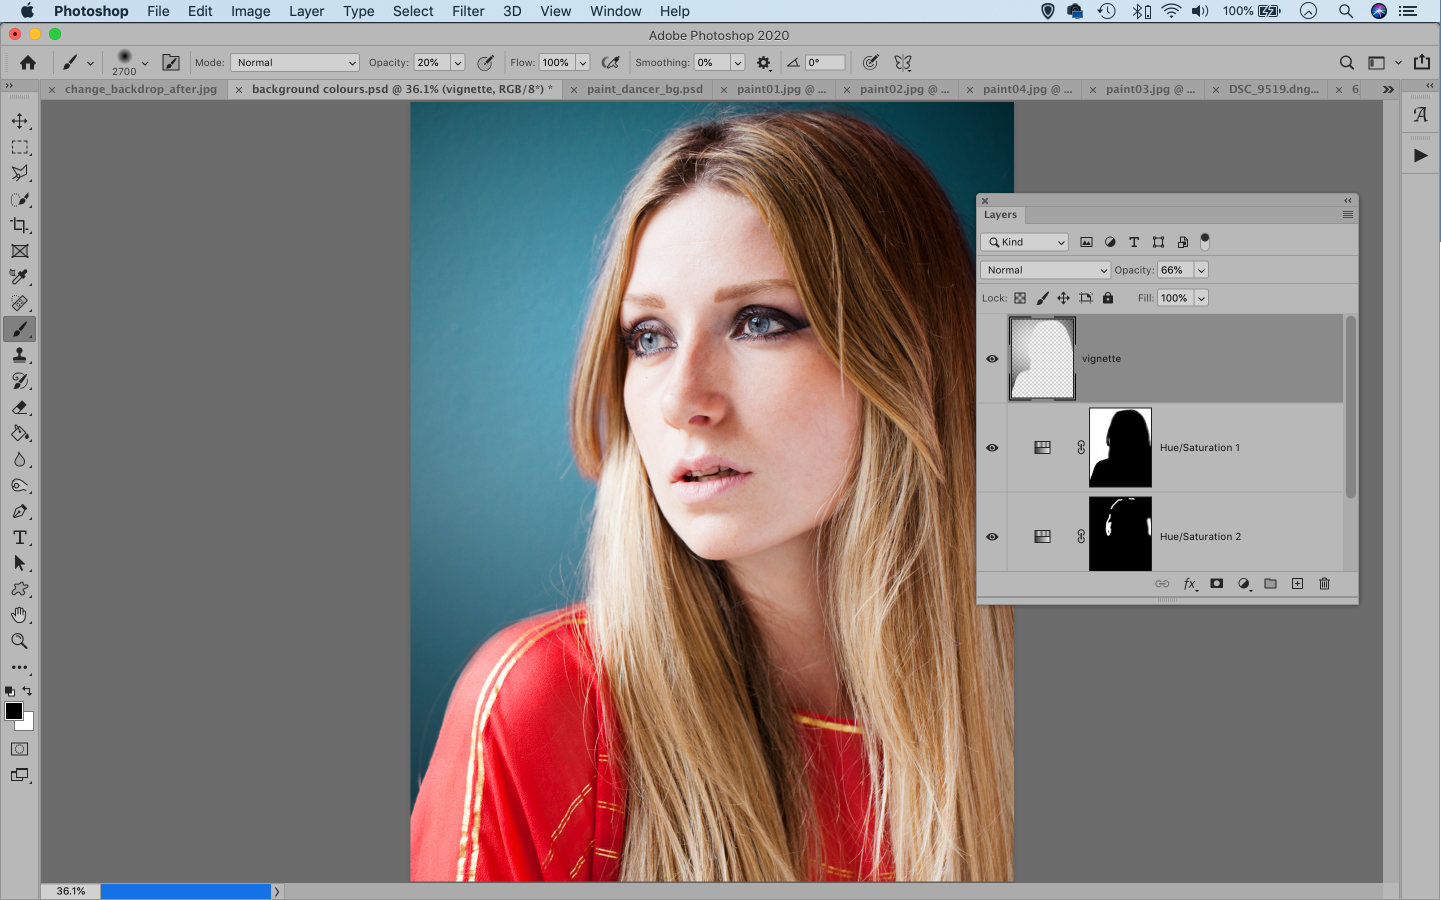
Click the New Layer icon in the Layers panel to make a new empty layer, then hold Cmd/Ctrl and click on the mask thumbnail of the Hue/Saturation layer. Grab the Brush tool, set the color to black and hit 1 for 10% brush opacity, then use a large brush tip and paint to darken the edges of the backdrop.
06 Finish in Adobe Camera Raw
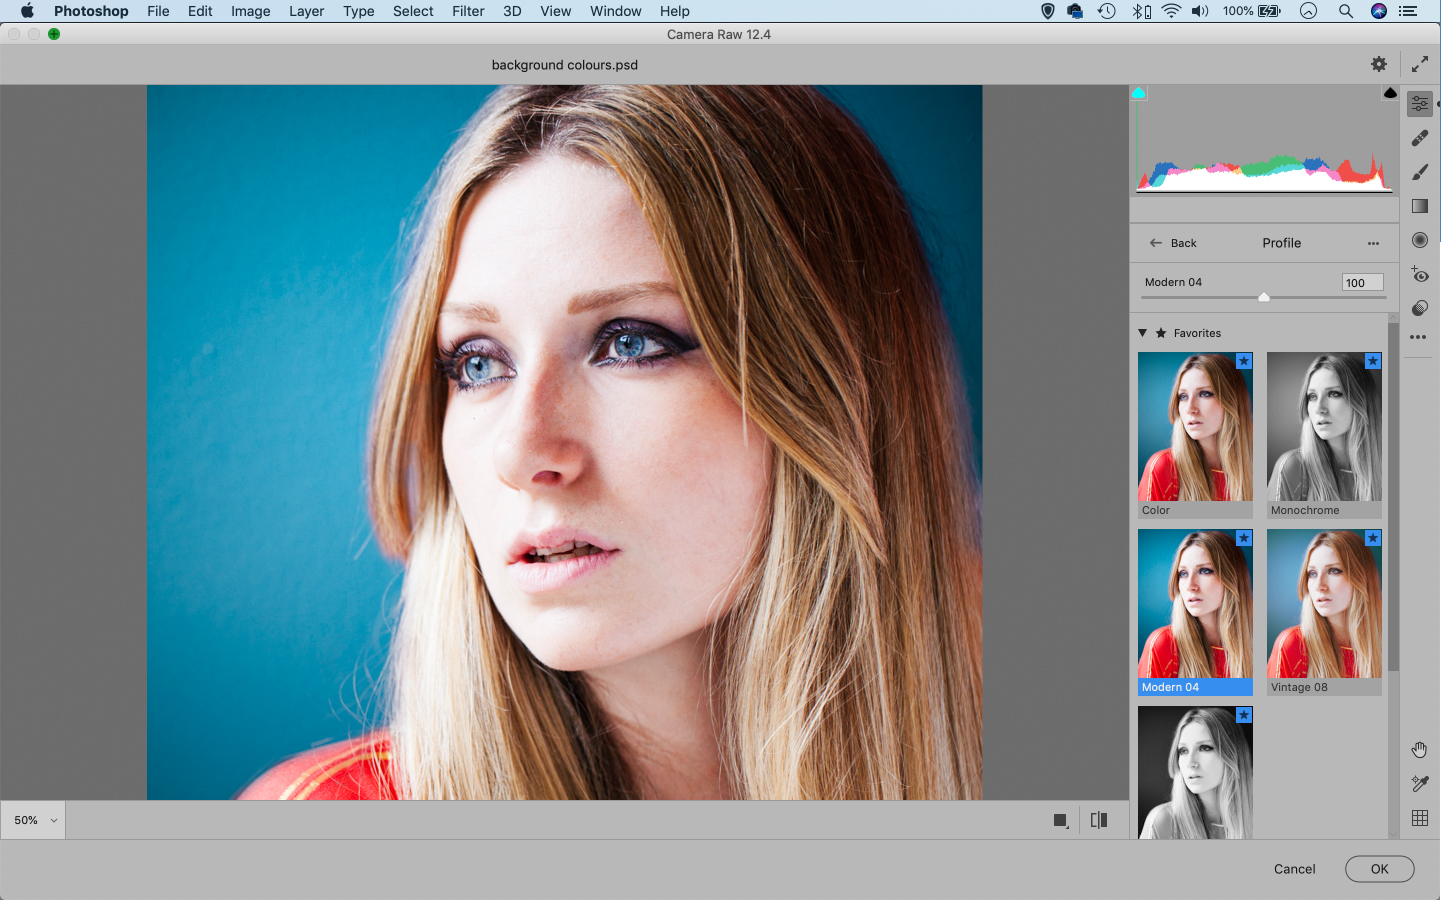
Press Cmd/Ctrl+Shift+Alt+E to merge a copy of all the layers, then go to Filter>Camera Raw filter. We can use the tonal tools here to finish off our portrait. Click the Profile Browser to choose a profile effect (we used Modern 04 here), then adjust the sliders to finish off the photograph.
PhotoPlus: The Canon Magazine is the world's only monthly newsstand title that's 100% devoted to Canon, so you can be sure the magazine is completely relevant to your system.
Read more:
The best photo editing software: image editors for novices through to pros
The best photo-editing laptops in 2020: top laptops for photographers
10 best online photography courses – from beginner guides to masterclasses
Get the Digital Camera World Newsletter
The best camera deals, reviews, product advice, and unmissable photography news, direct to your inbox!
The lead technique writer on Digital Camera Magazine, PhotoPlus: The Canon Magazine and N-Photo: The Nikon Magazine, James is a fantastic general practice photographer with an enviable array of skills across every genre of photography.
Whether it's flash photography techniques like stroboscopic portraits, astrophotography projects like photographing the Northern Lights, or turning sound into art by making paint dance on a set of speakers, James' tutorials and projects are as creative as they are enjoyable.
He's also a wizard at the dark arts of Photoshop, Lightroom and Affinity Photo, and is capable of some genuine black magic in the digital darkroom, making him one of the leading authorities on photo editing software and techniques.


