Shoot a dynamic 'fast food' photograph
Claire Gillo reveals how to throw food into the frame using flash and a few props from around the home
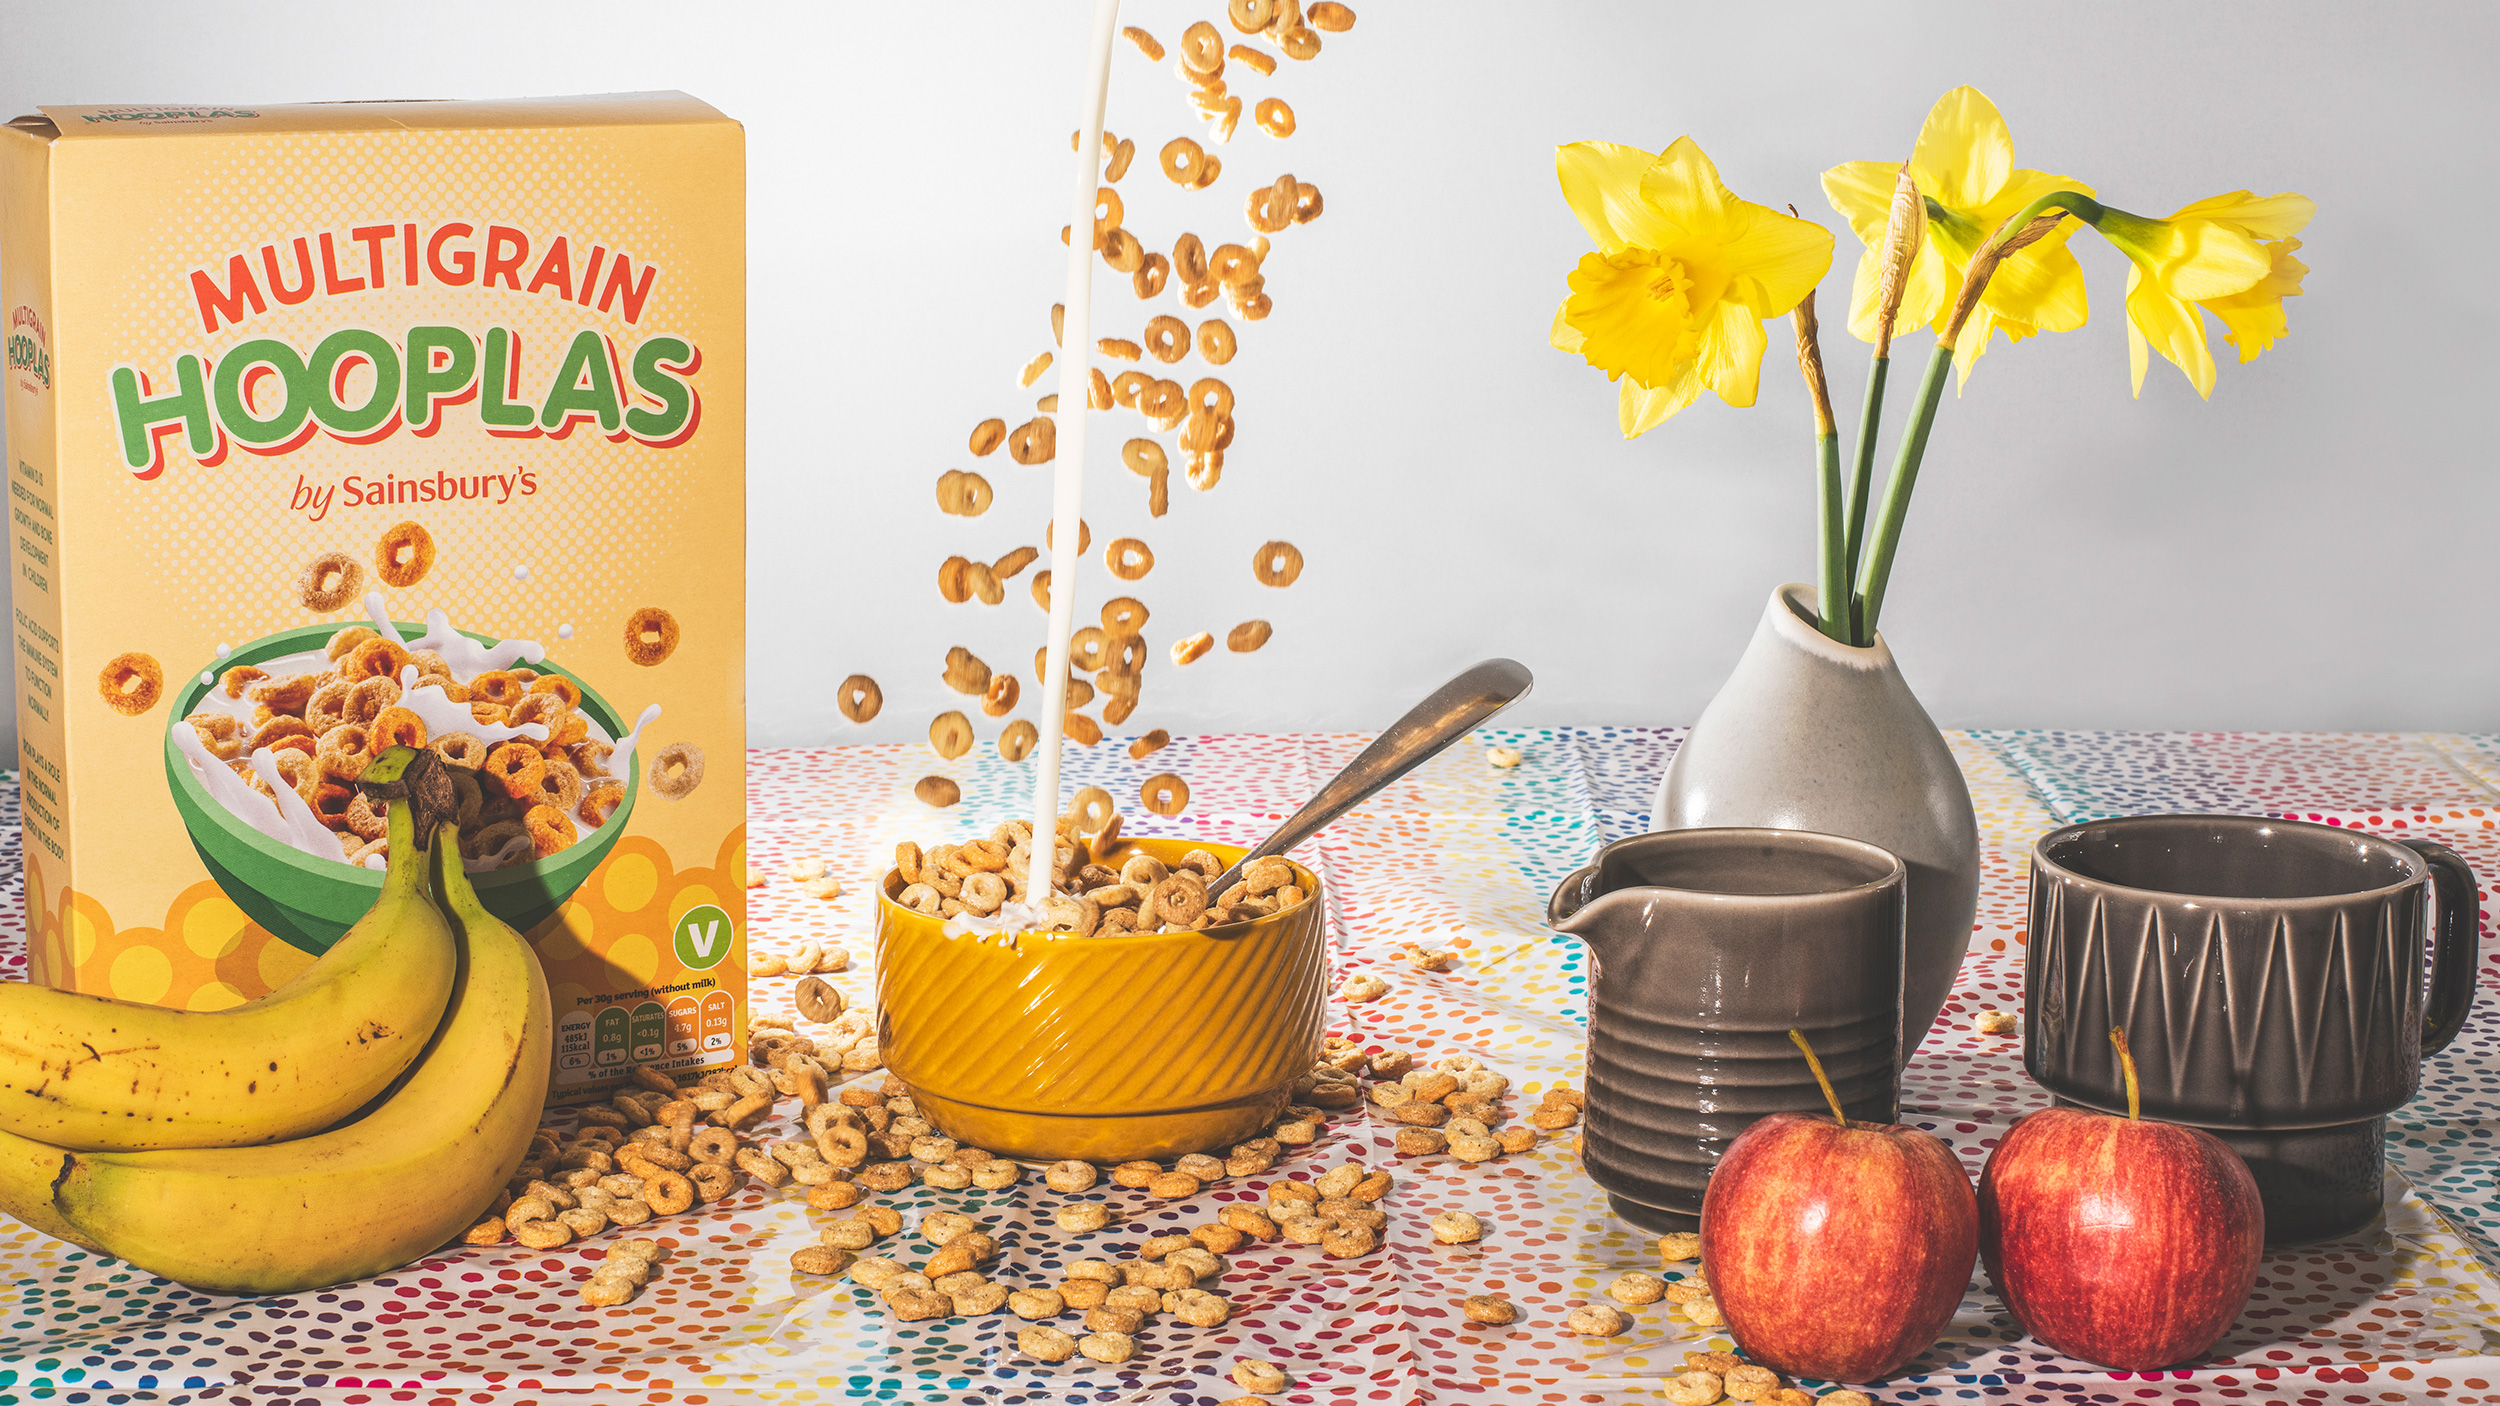
If you enjoy setting up shots in the comfort of your own home, this is the perfect project for you! Not only will it test your technical skills, but it’s also a fun creative challenge that will push you to be experimental with your photography.
First you'll need a backdrop – this could be a piece of card or a sheet. You'll also need two flashguns. You can make do with one if you don’t have two, but you will need another light source like a lamp to light the backdrop.
• Read more: Best lens for food photography
You'll need a reflector, or you can use a make-shift one by wrapping some tin foil around card, if you don’t have one. You'll require a diffuser panel; again if you don’t have one, don't worry, just wrap some greaseproof paper over a cardboard frame – that will do the trick. And finally, you'll need some food and props.
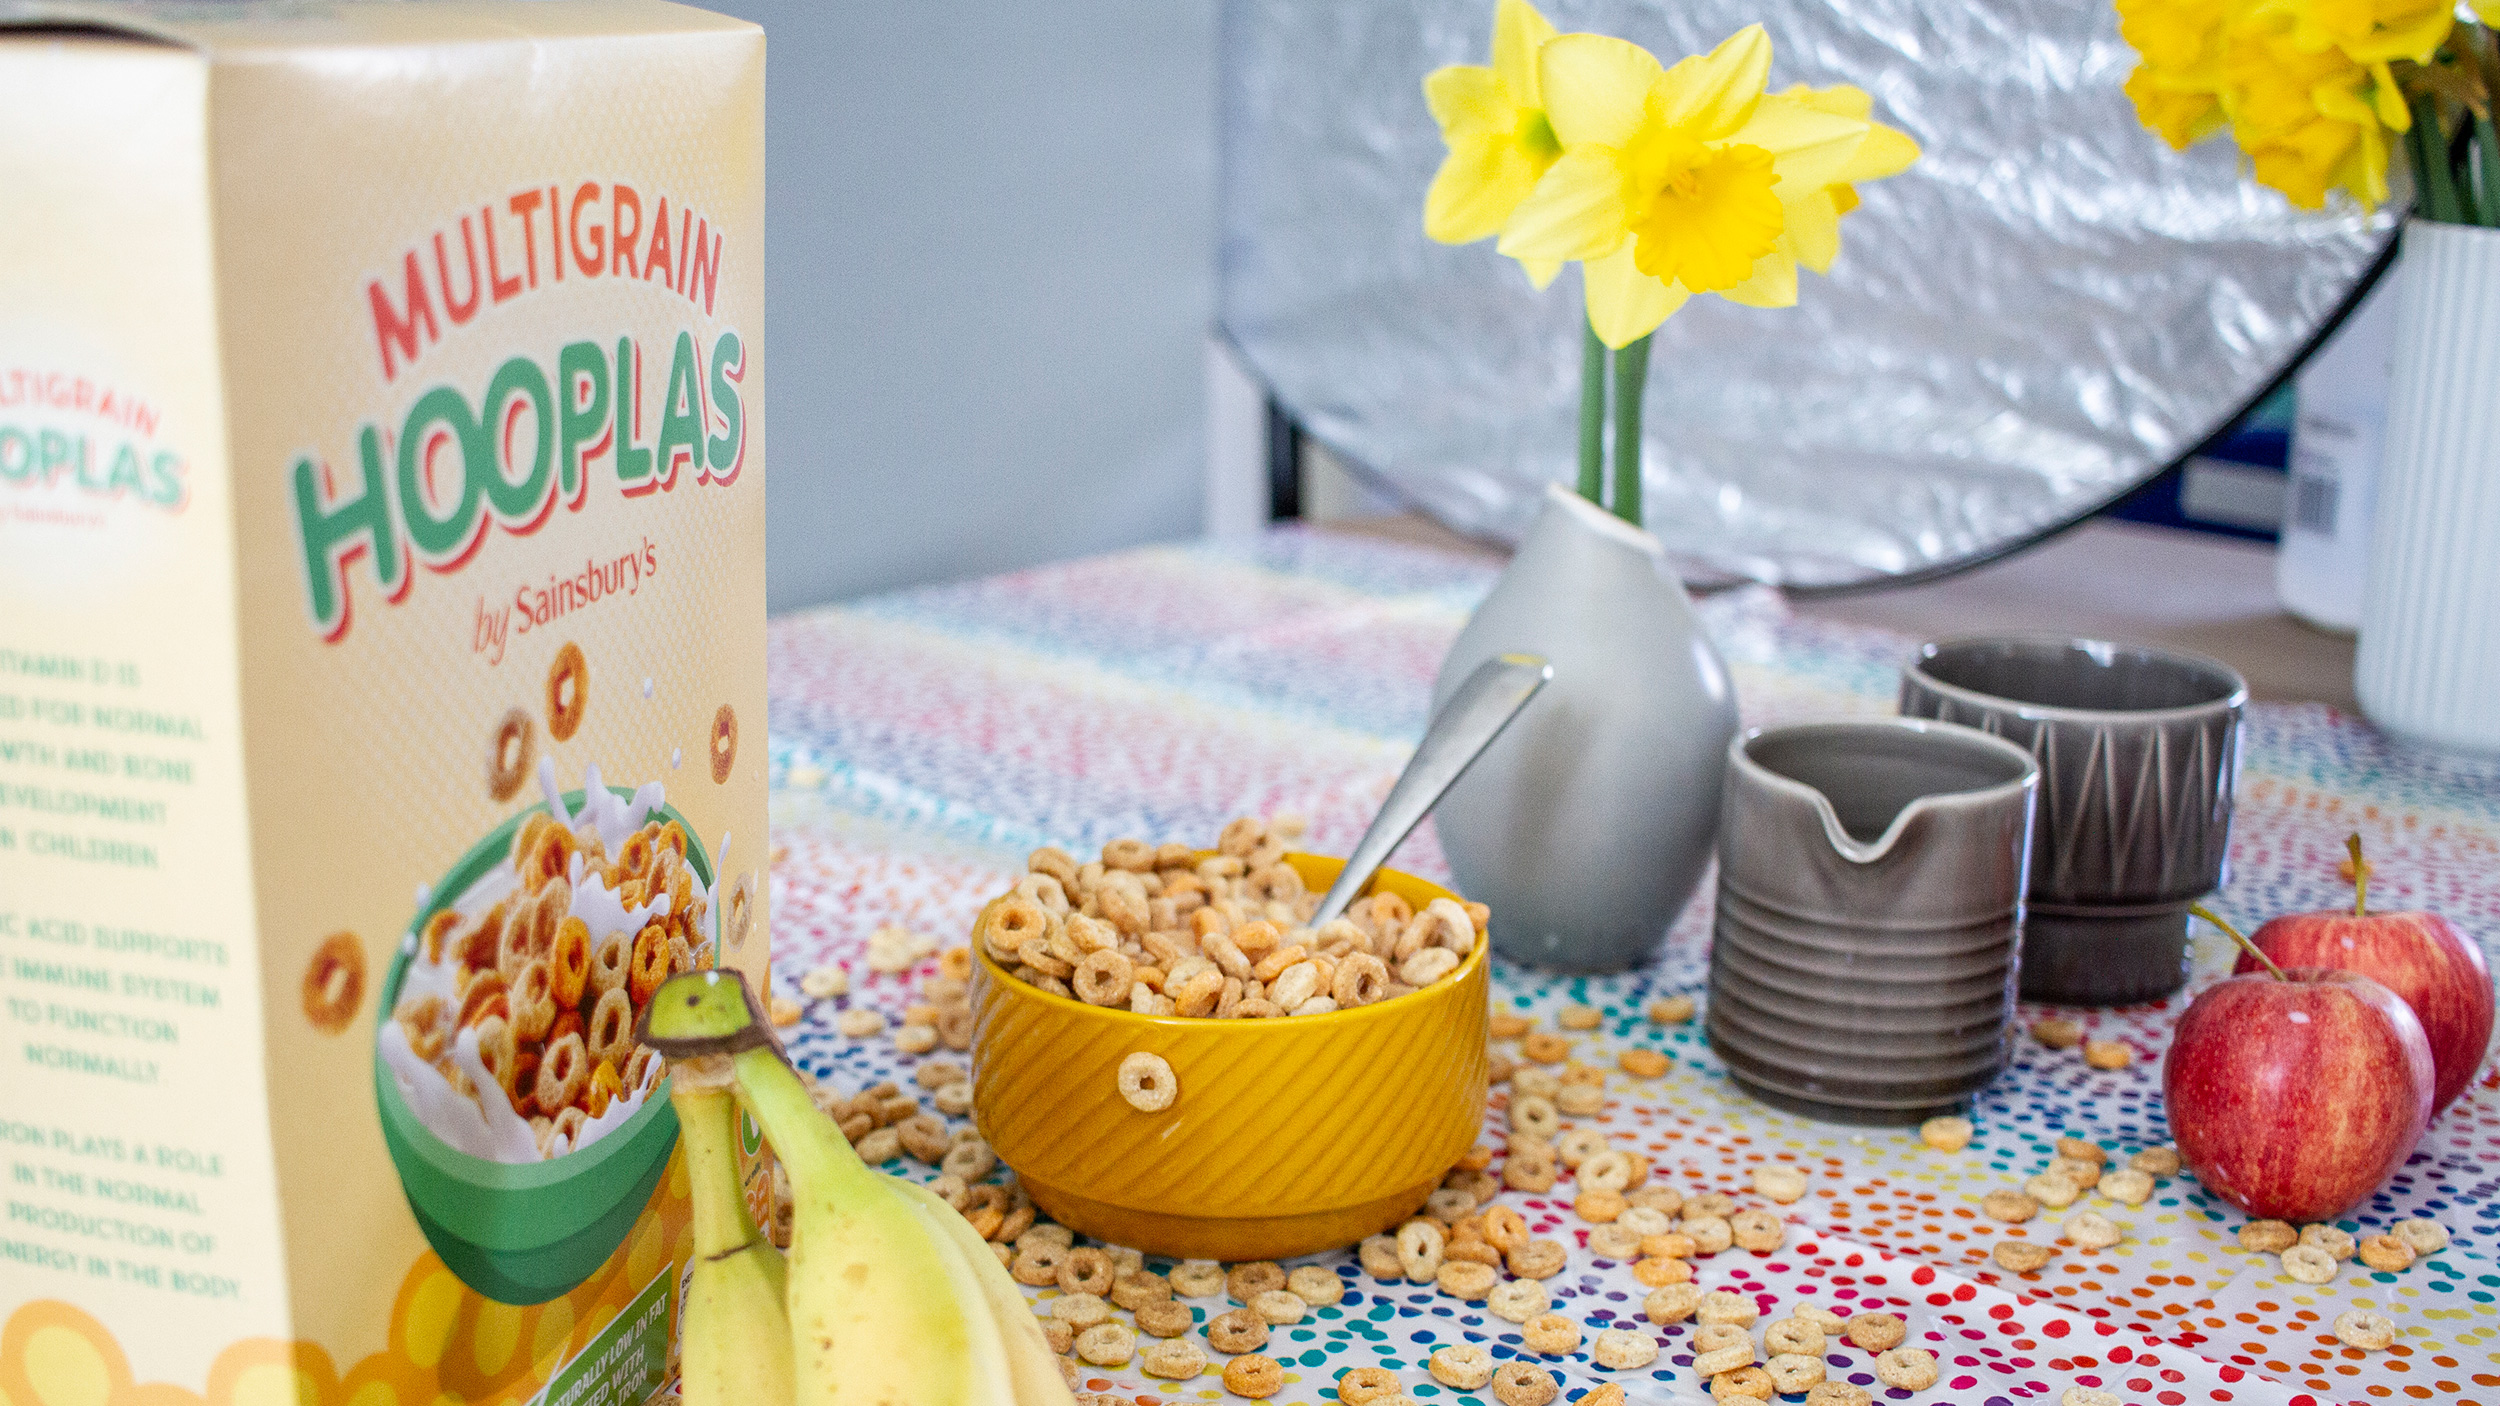
I fired my flash units using a remote trigger, but if you don’t have one of these, you can use on-camera flash. I fired the flashes through two separate channels, as they were set to different strengths.
Finally, just a word of warning: as you are throwing food around, it will get messy, so a cloth and a vacuum cleaner are essential after your shoot!
01. The setting
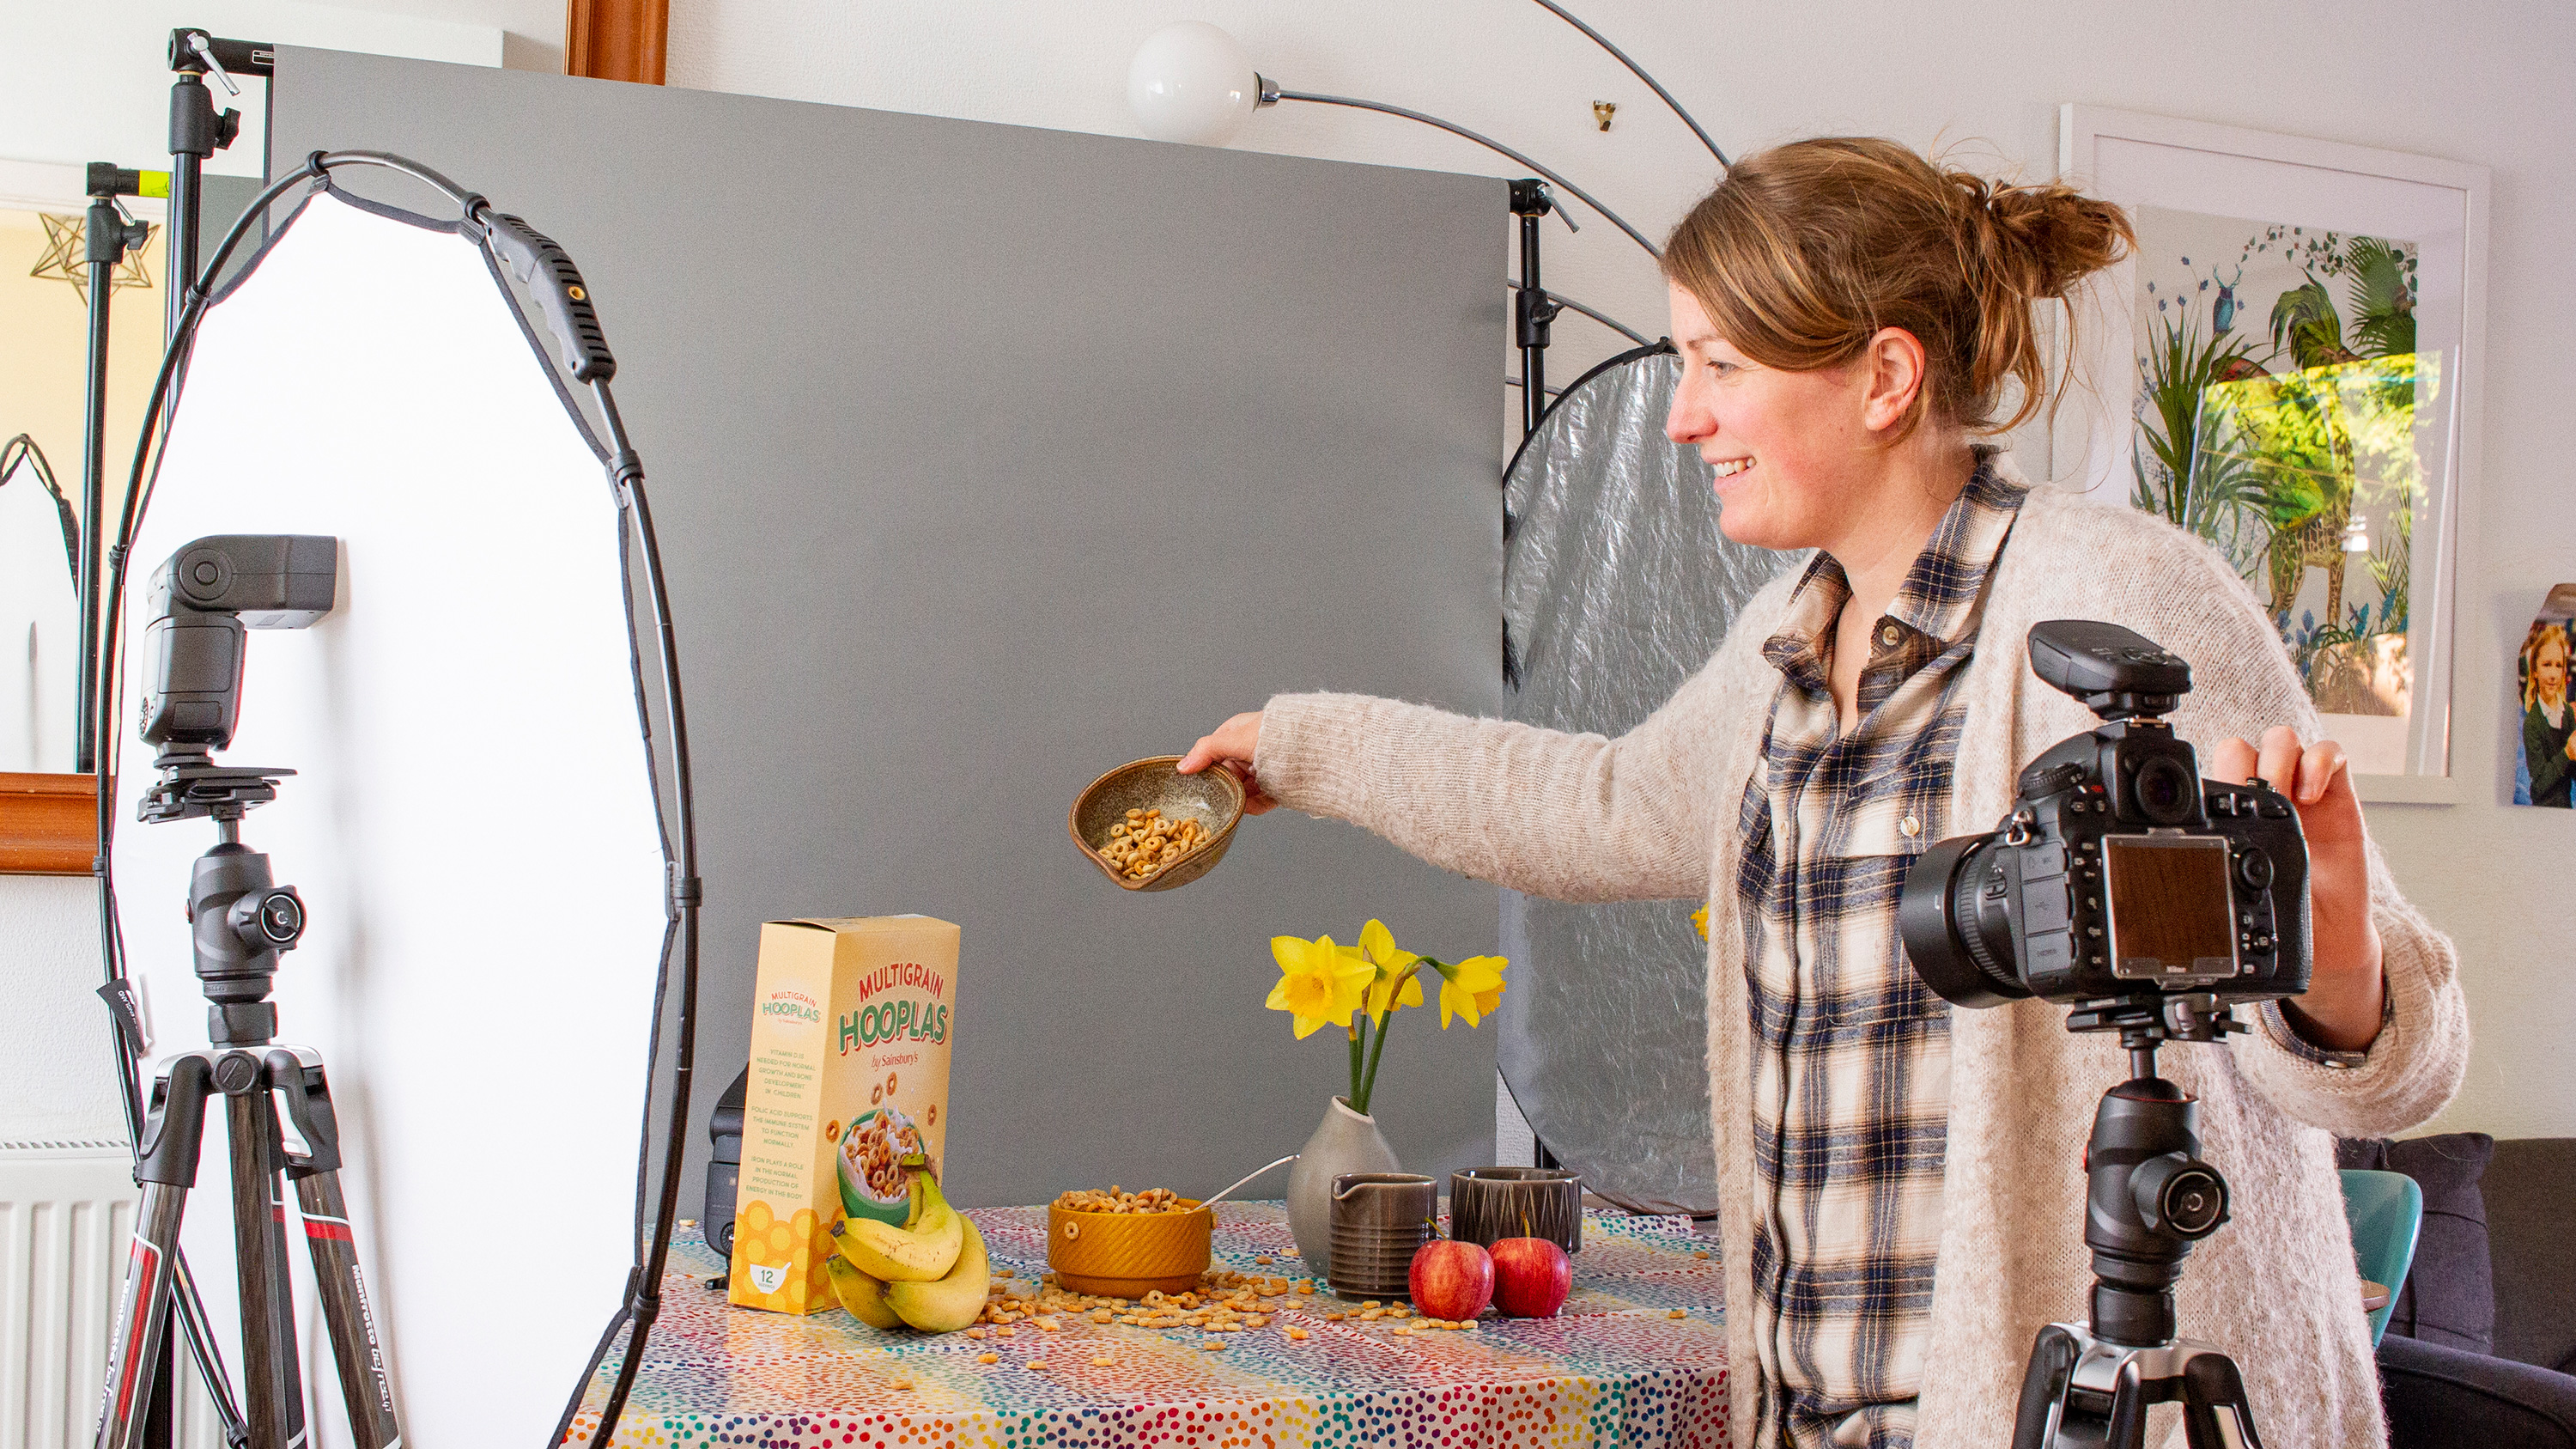
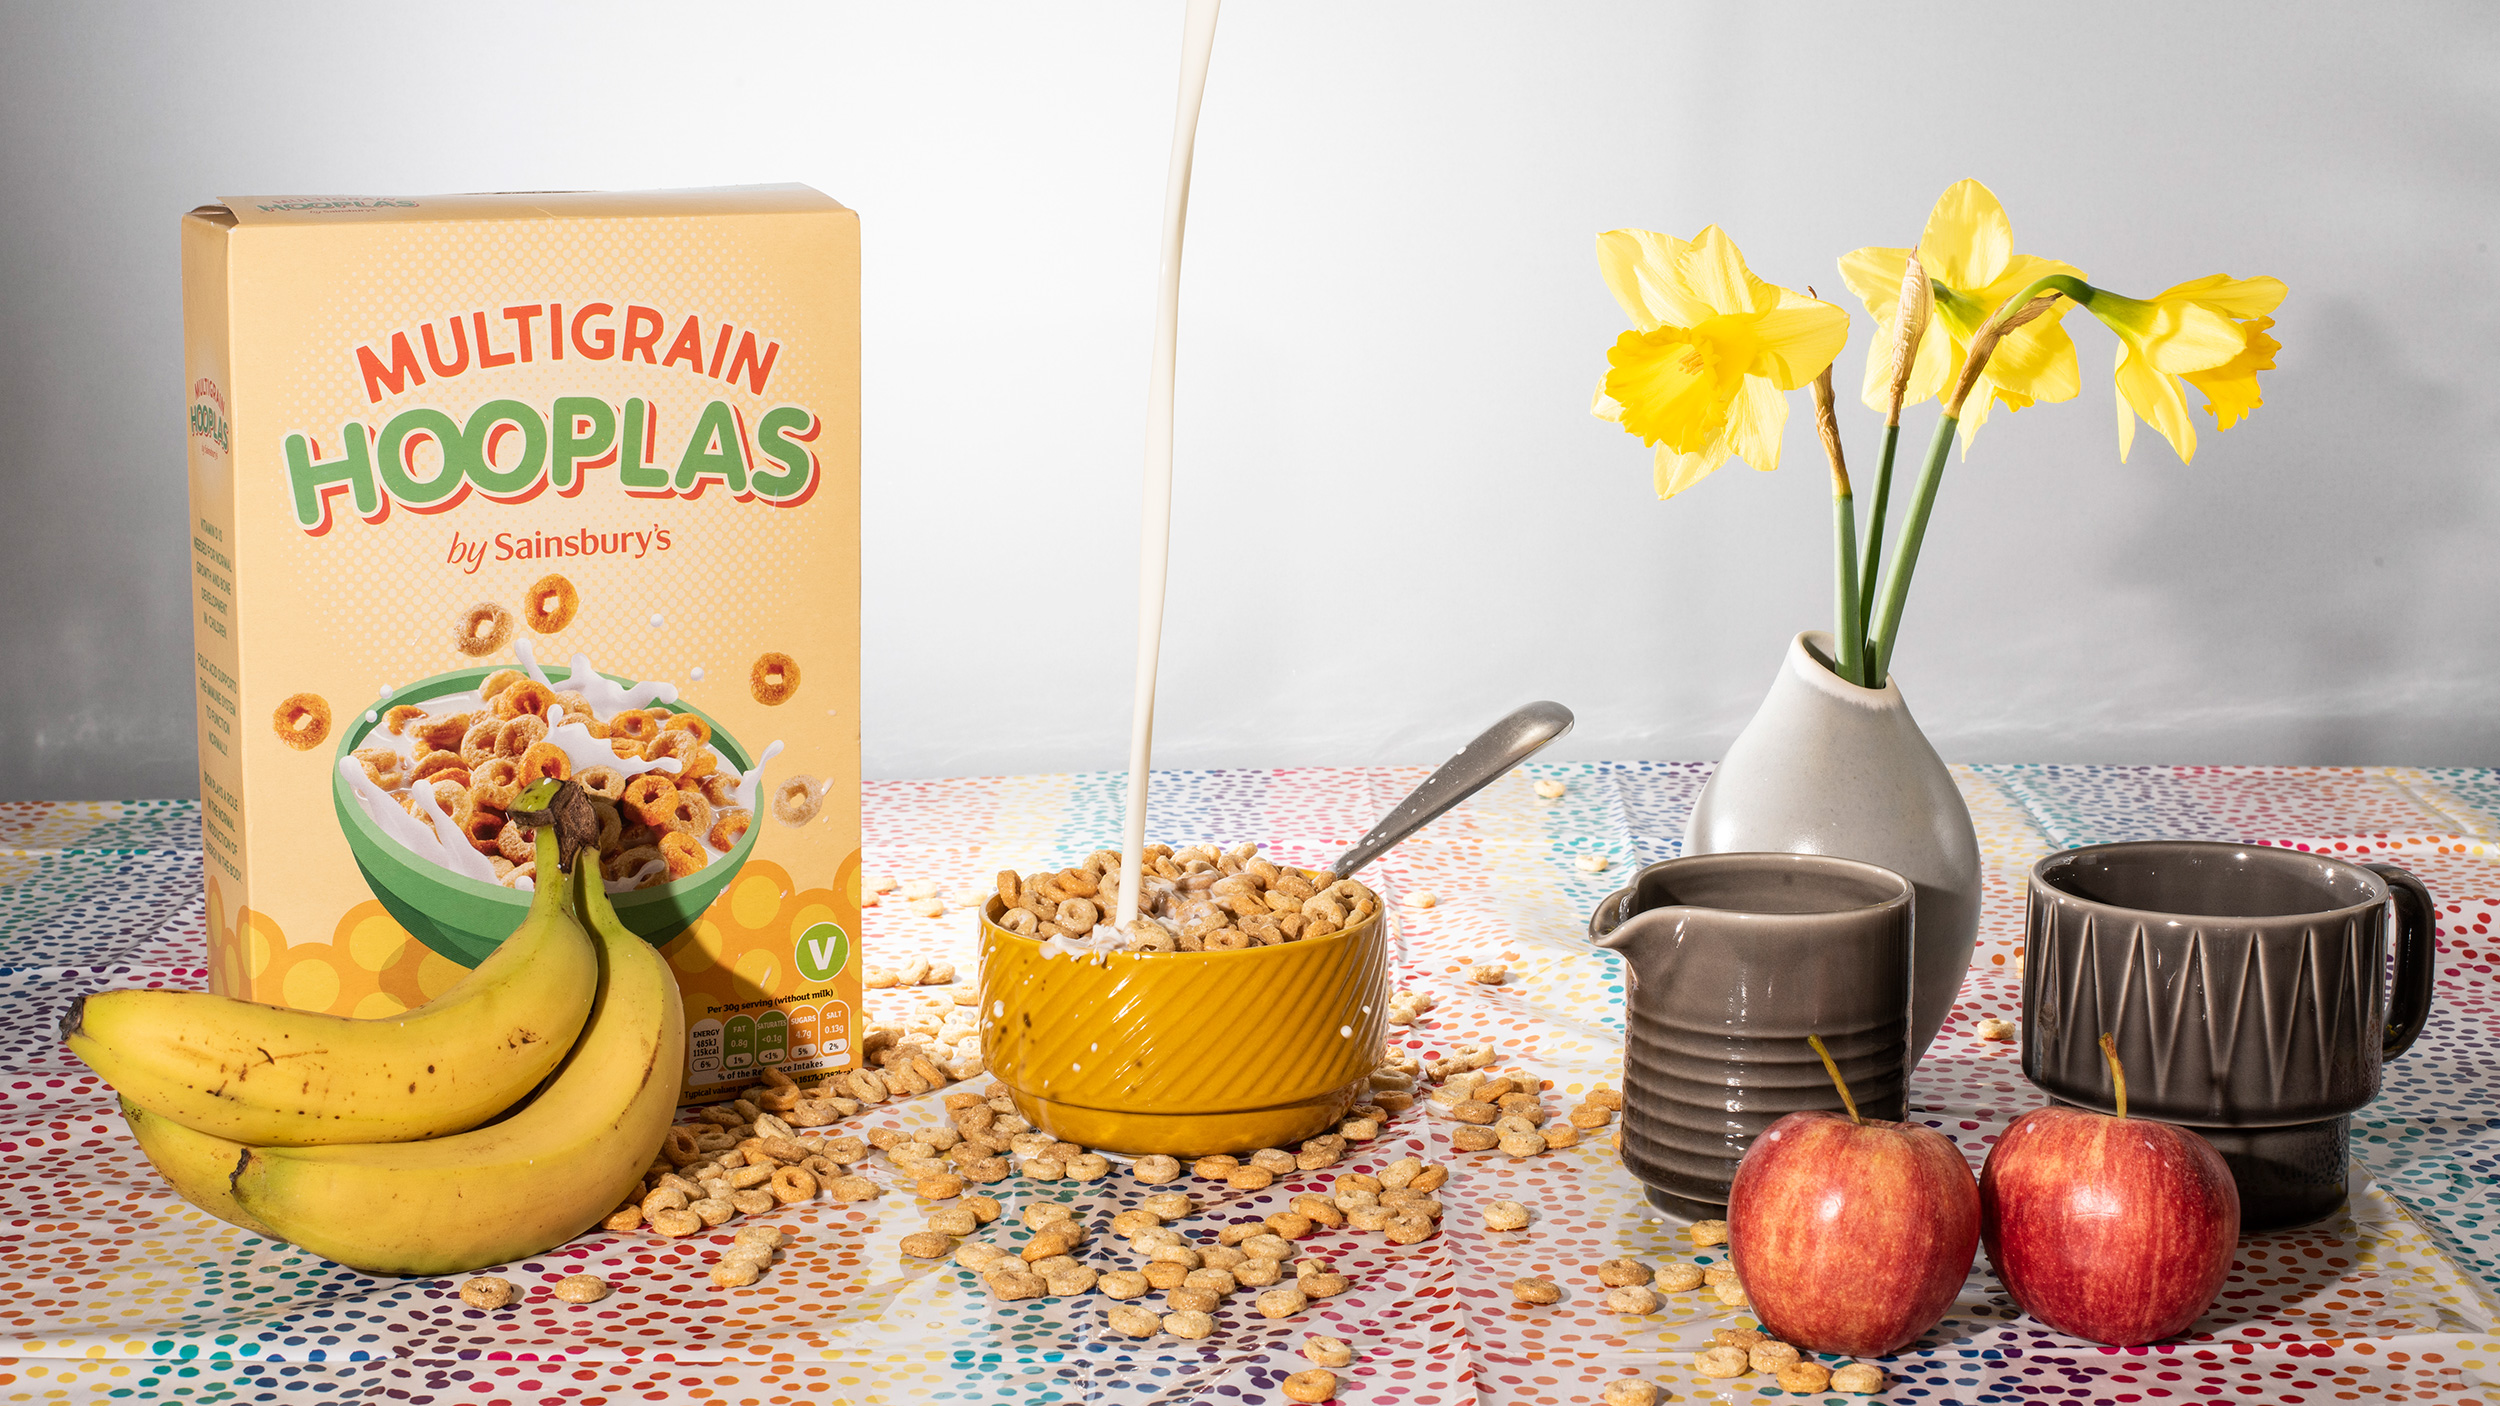
To create the fast food setup, I hung up a gray backdrop and placed down a colorful table cloth. As a bonus, the circles in the cloth mirrored the cereal hoops! I then positioned a breakfast bowl in the middle of the frame and filled it with cereal. A couple of daffodils were dropped in on one side to bring in color and fruit was scattered around, again to add color and variety. Mount your camera onto a tripod and keep tweaking the composition and the positioning of objects in the frame until you’re happy.
02. Light setup
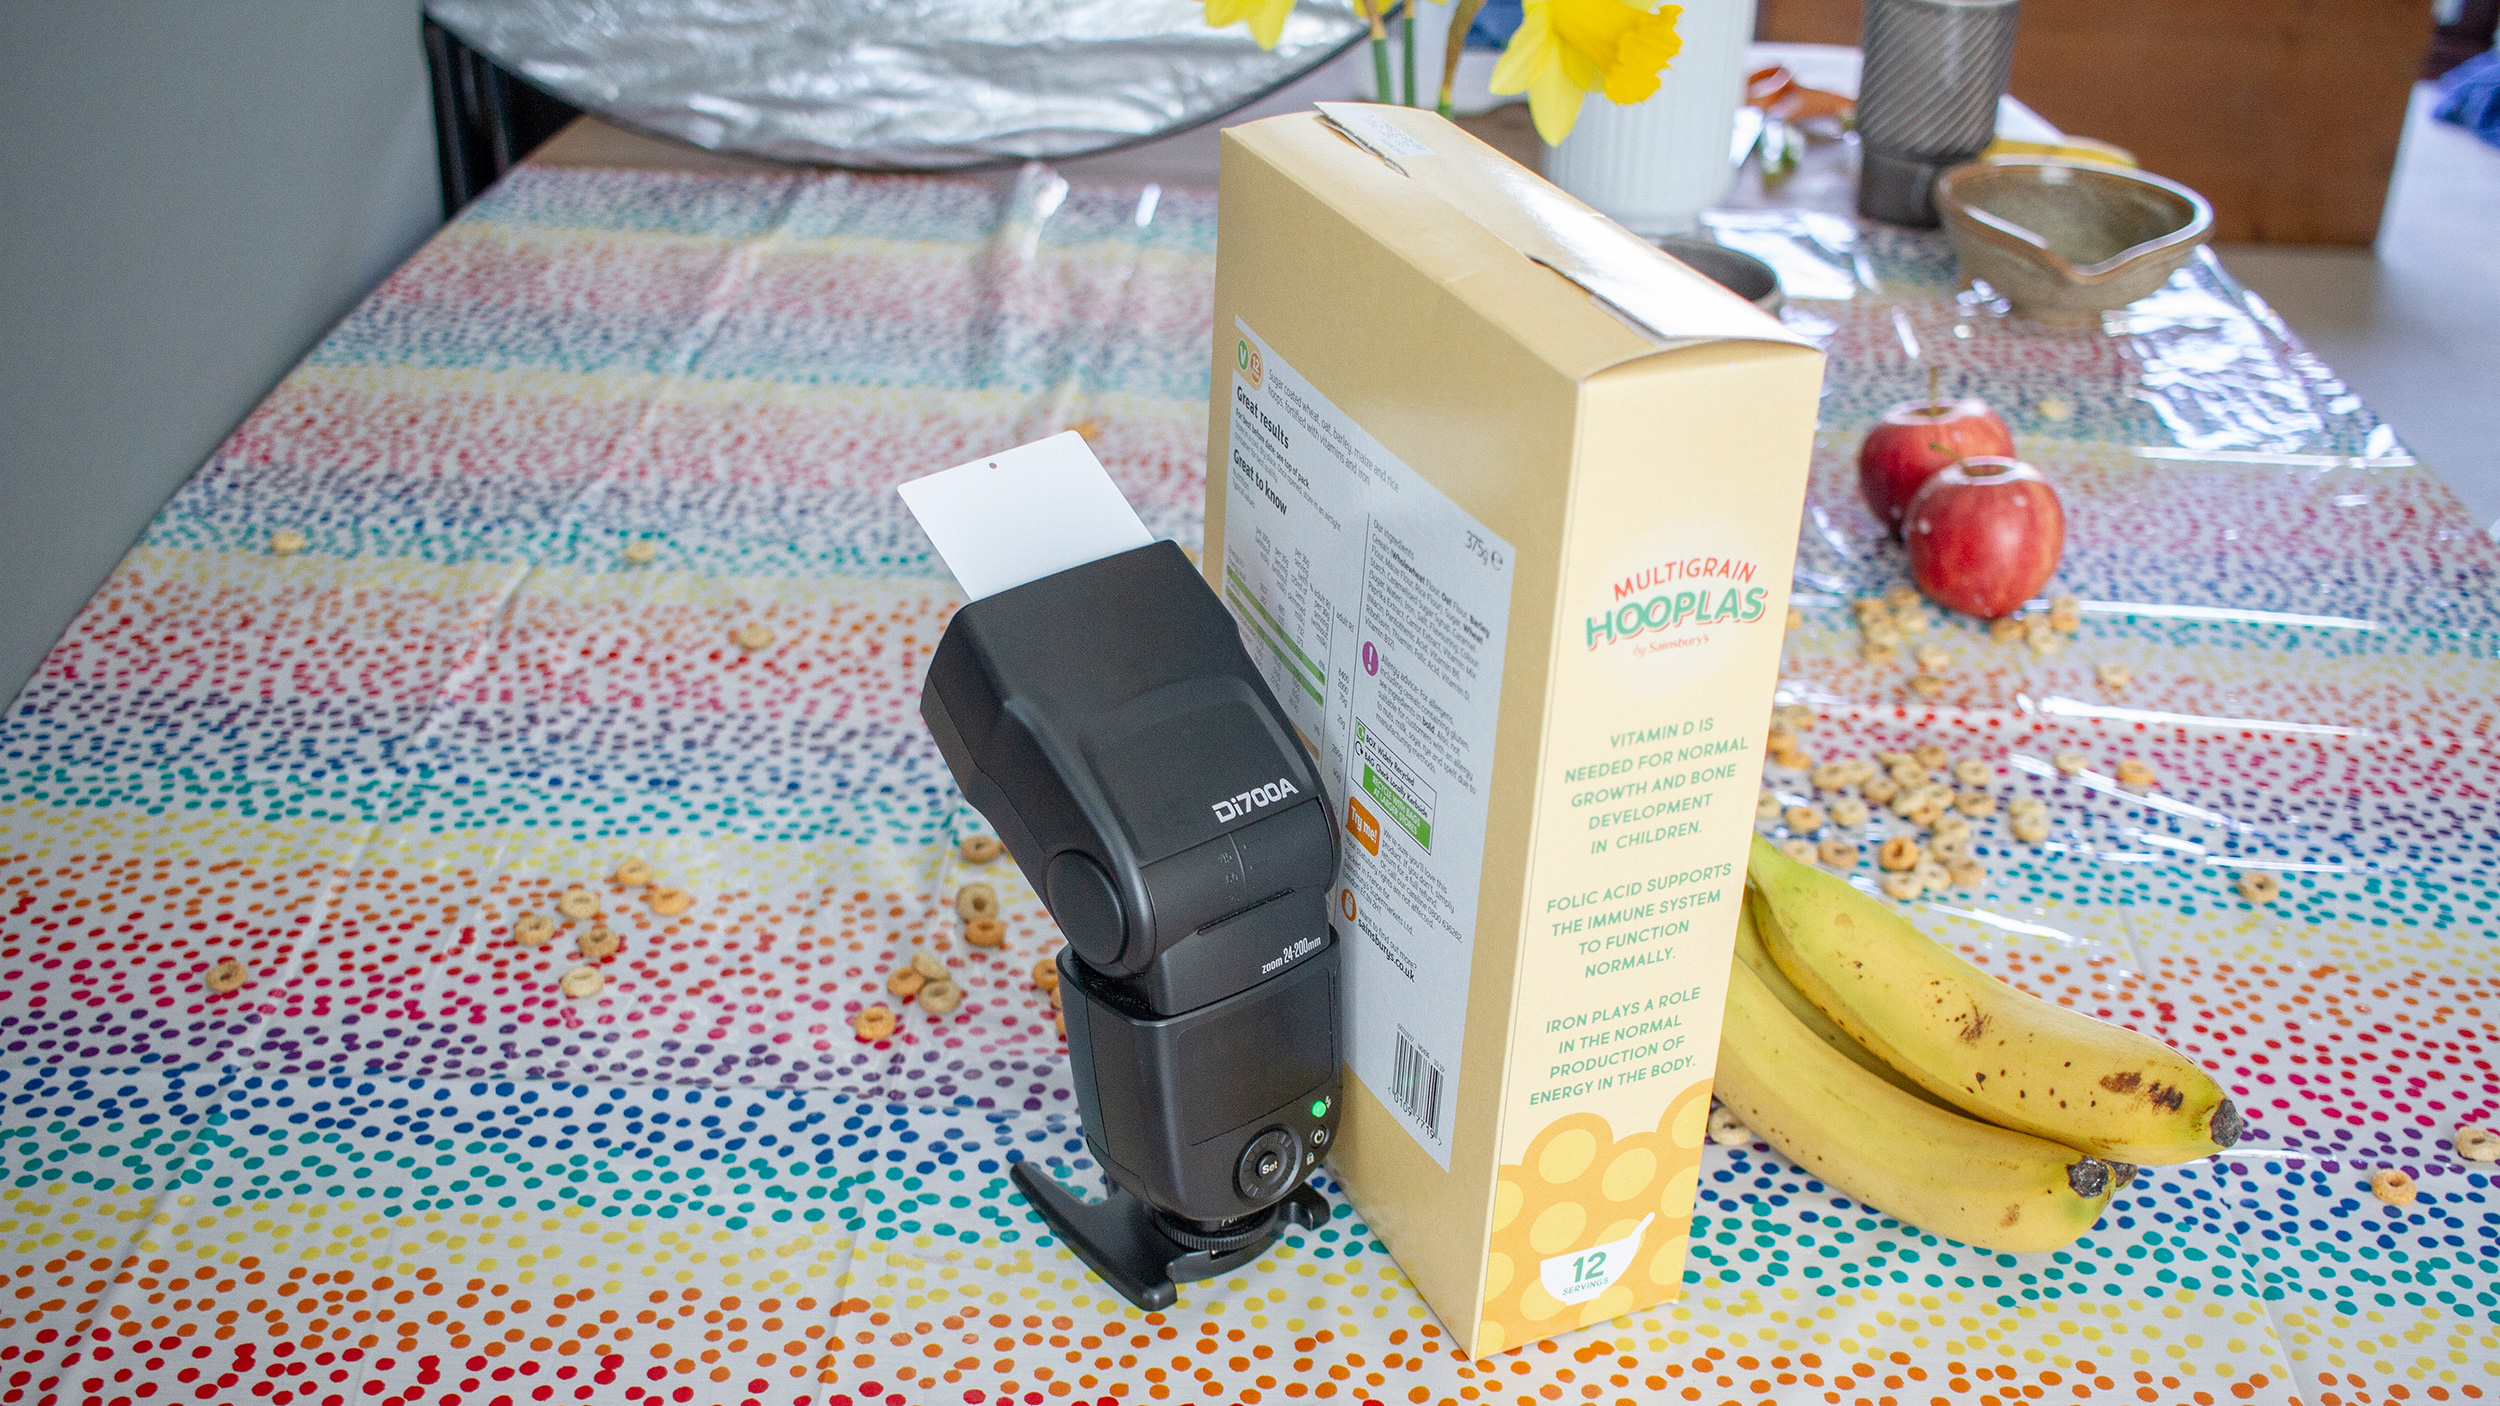
Next I set up the lights. For this shoot, I used two external flash units and a reflector. It’s easier to build your lighting setup one light at a time. That way you can see where the light is falling from each unit, and tweak the positioning for perfect results. The key light was placed at the front of the setup, and I used a diffuser panel to spread the light more evenly. To light the background behind and remove most of the shadows there, I placed one of the flashguns behind the cereal box. The reflector was placed to the side of this flashgun, to bounce light back in on the backdrop.
03. Camera and flash settings
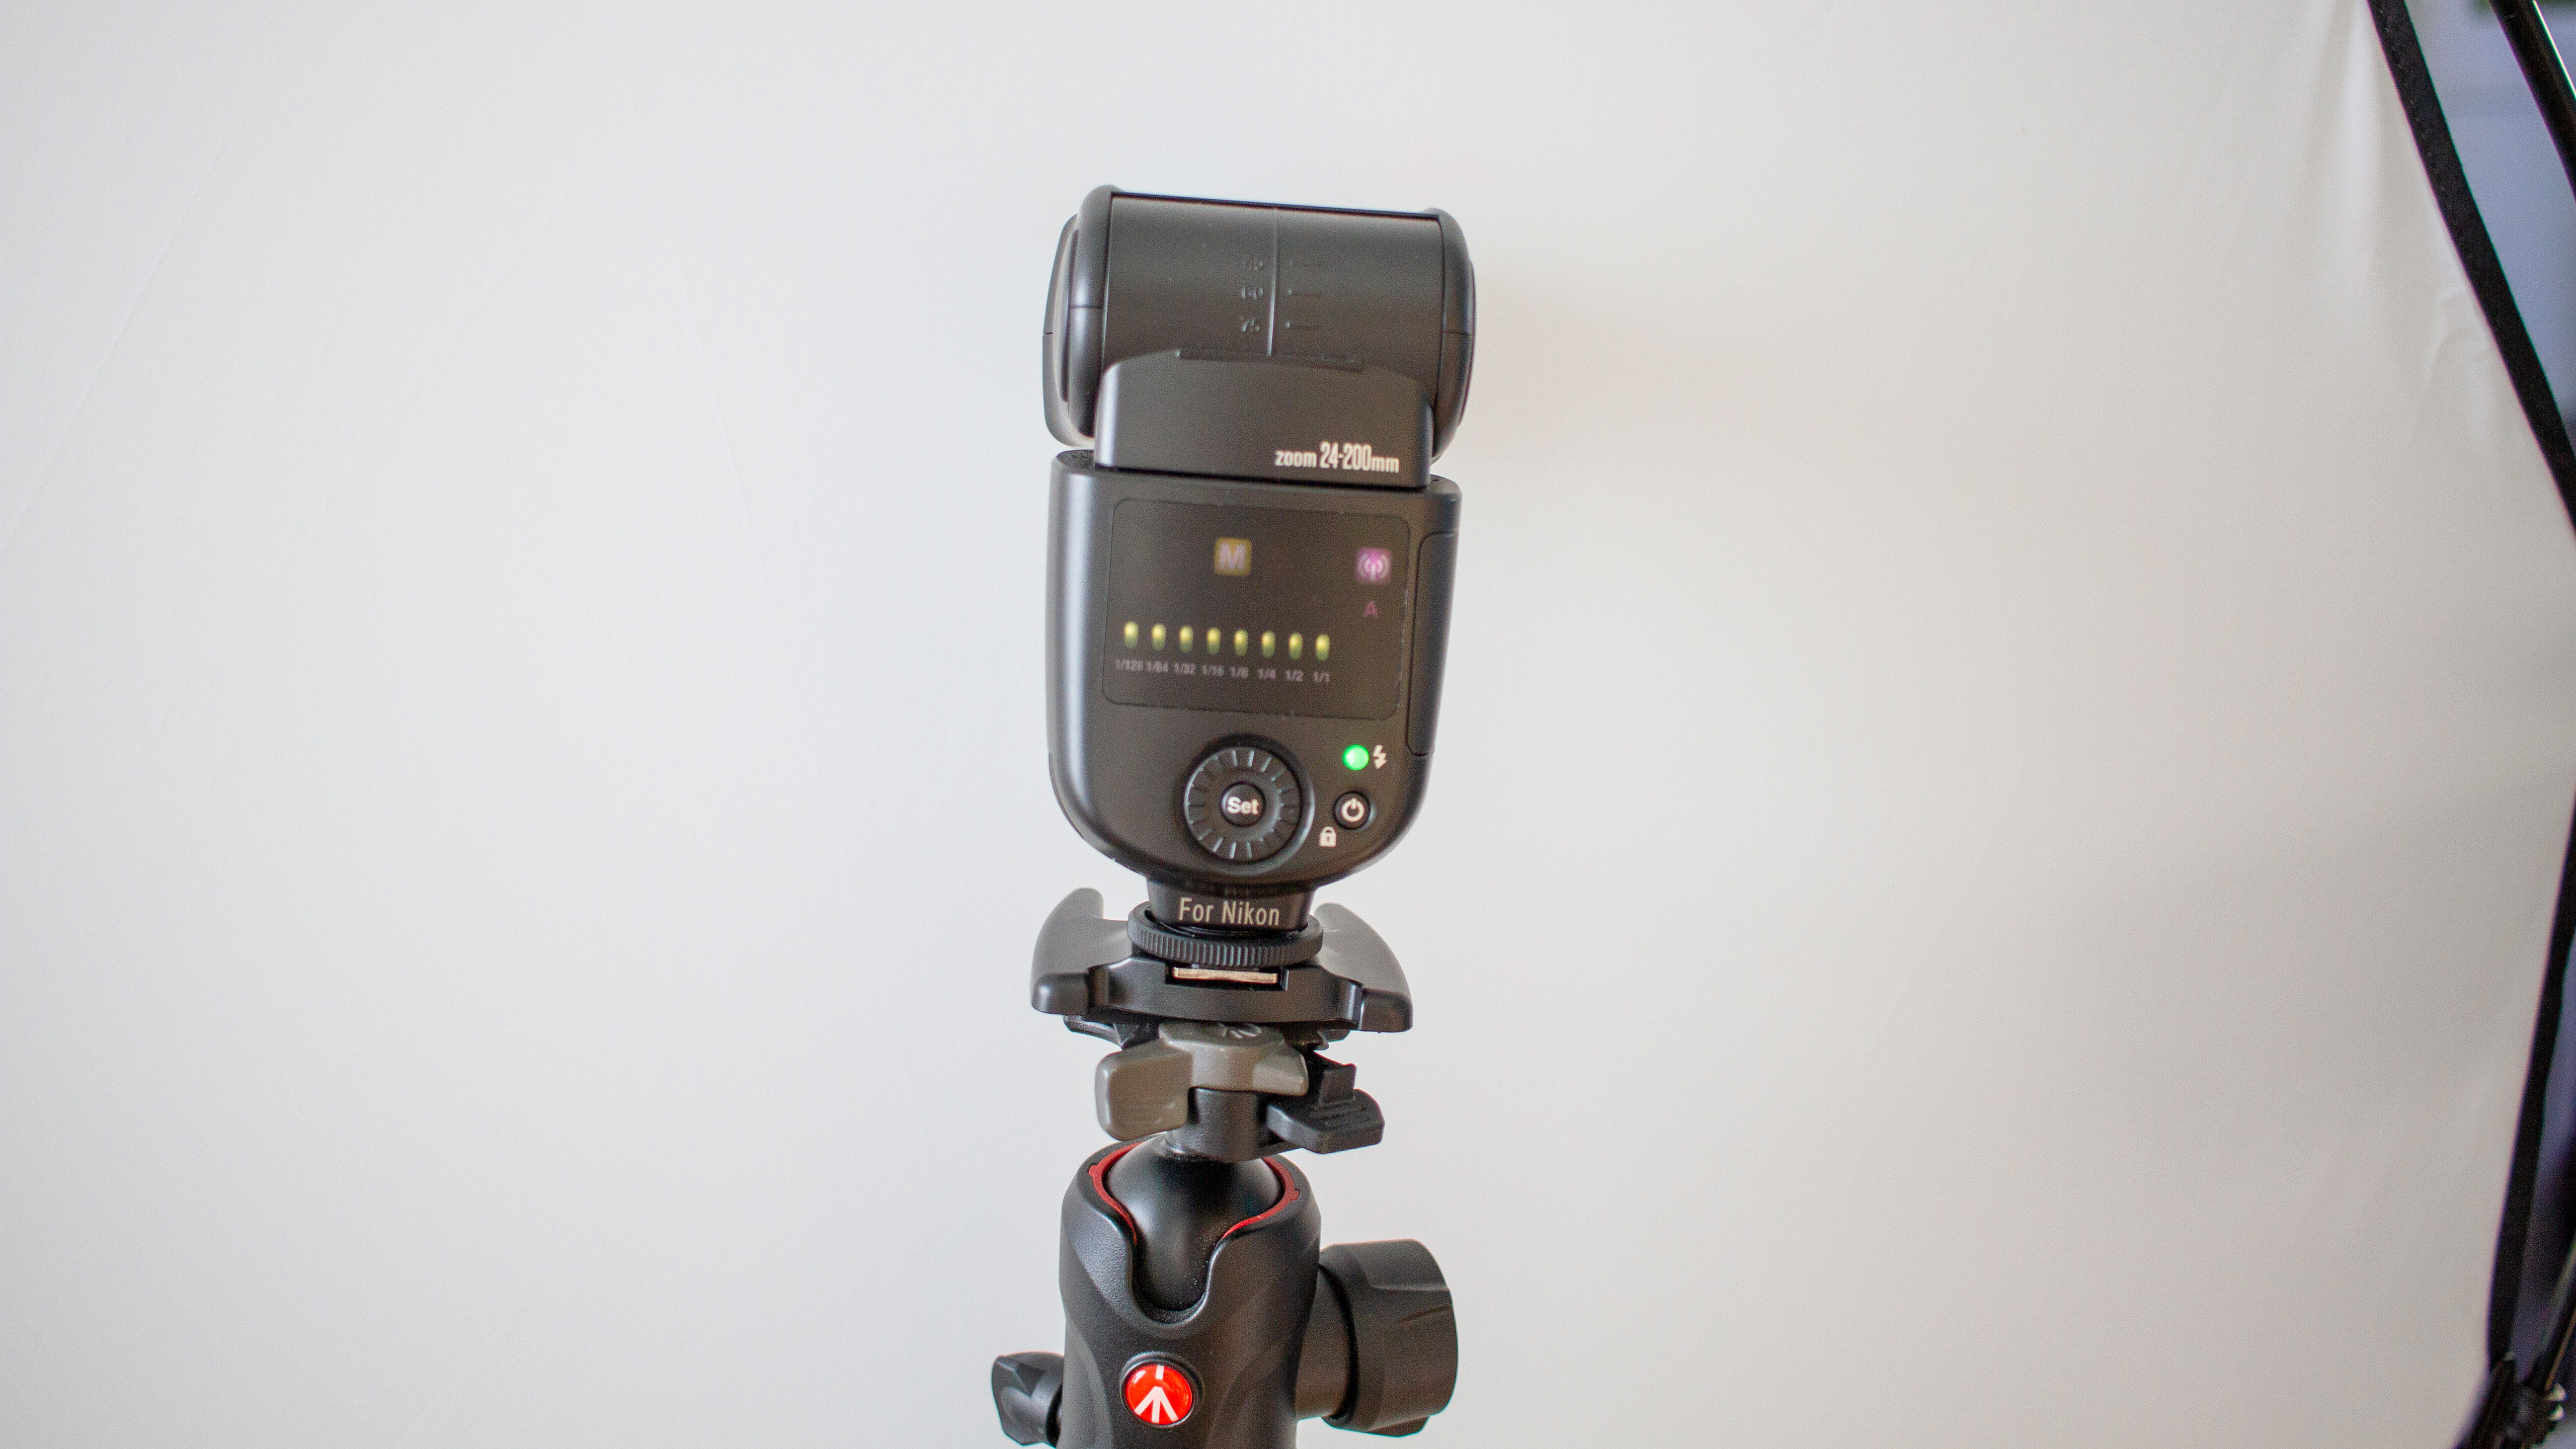
I put the camera into manual mode and synced the shutter speed to the flash, firing at 1/200 sec. The ISO was set low at 100 and the aperture was f/16. To balance the flash light to the camera settings, I had the front flash on channel A firing at full power, and the flashgun at the back on channel B, at its lowest setting of 1/128 power.
• See also Best camera for food photography
04. Getting the timing right
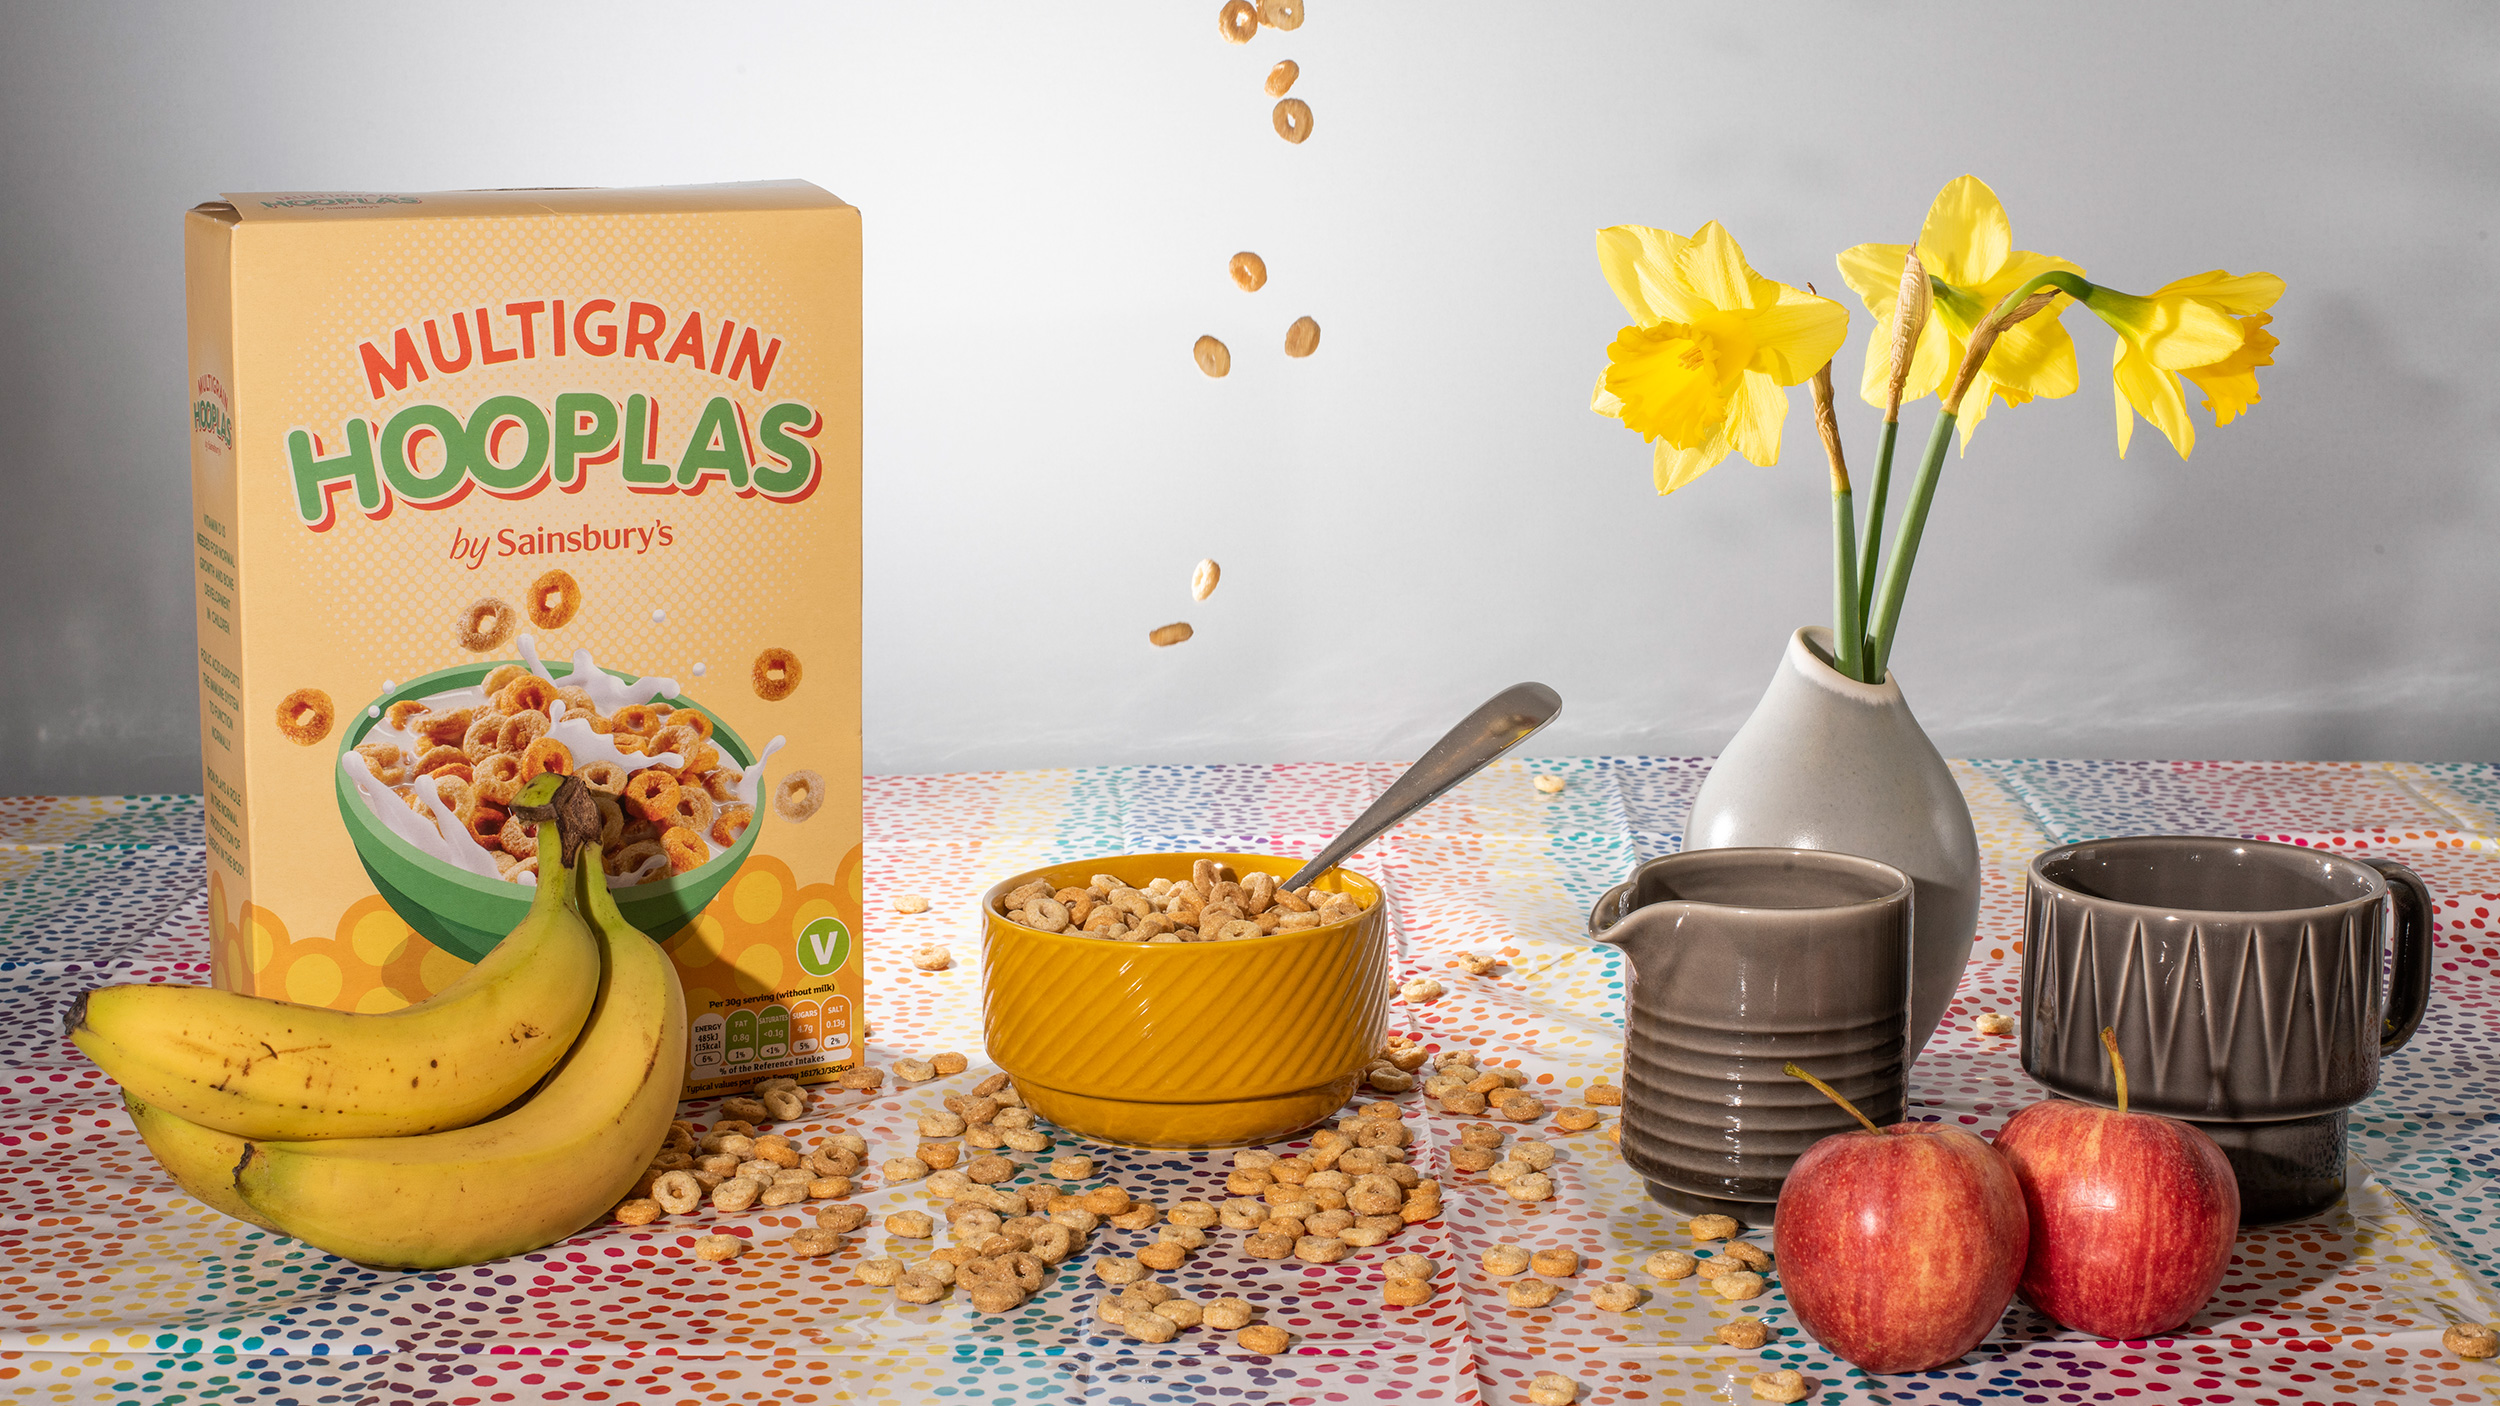
Achieving the falling cereal was simply a case of me dropping it into the frame, and experimenting with the timing and quantity. I found the best method was to drop a full bowl at once, and to fire the shutter straight after the release. You will have some mistakes and some keepers, so keep trying! To make it easier, shoot two separate exposures of the milk and the cereal. If you have an extra pair of hands, you could try and do them together, but it might turn out to be much trickier!
05. The final edit
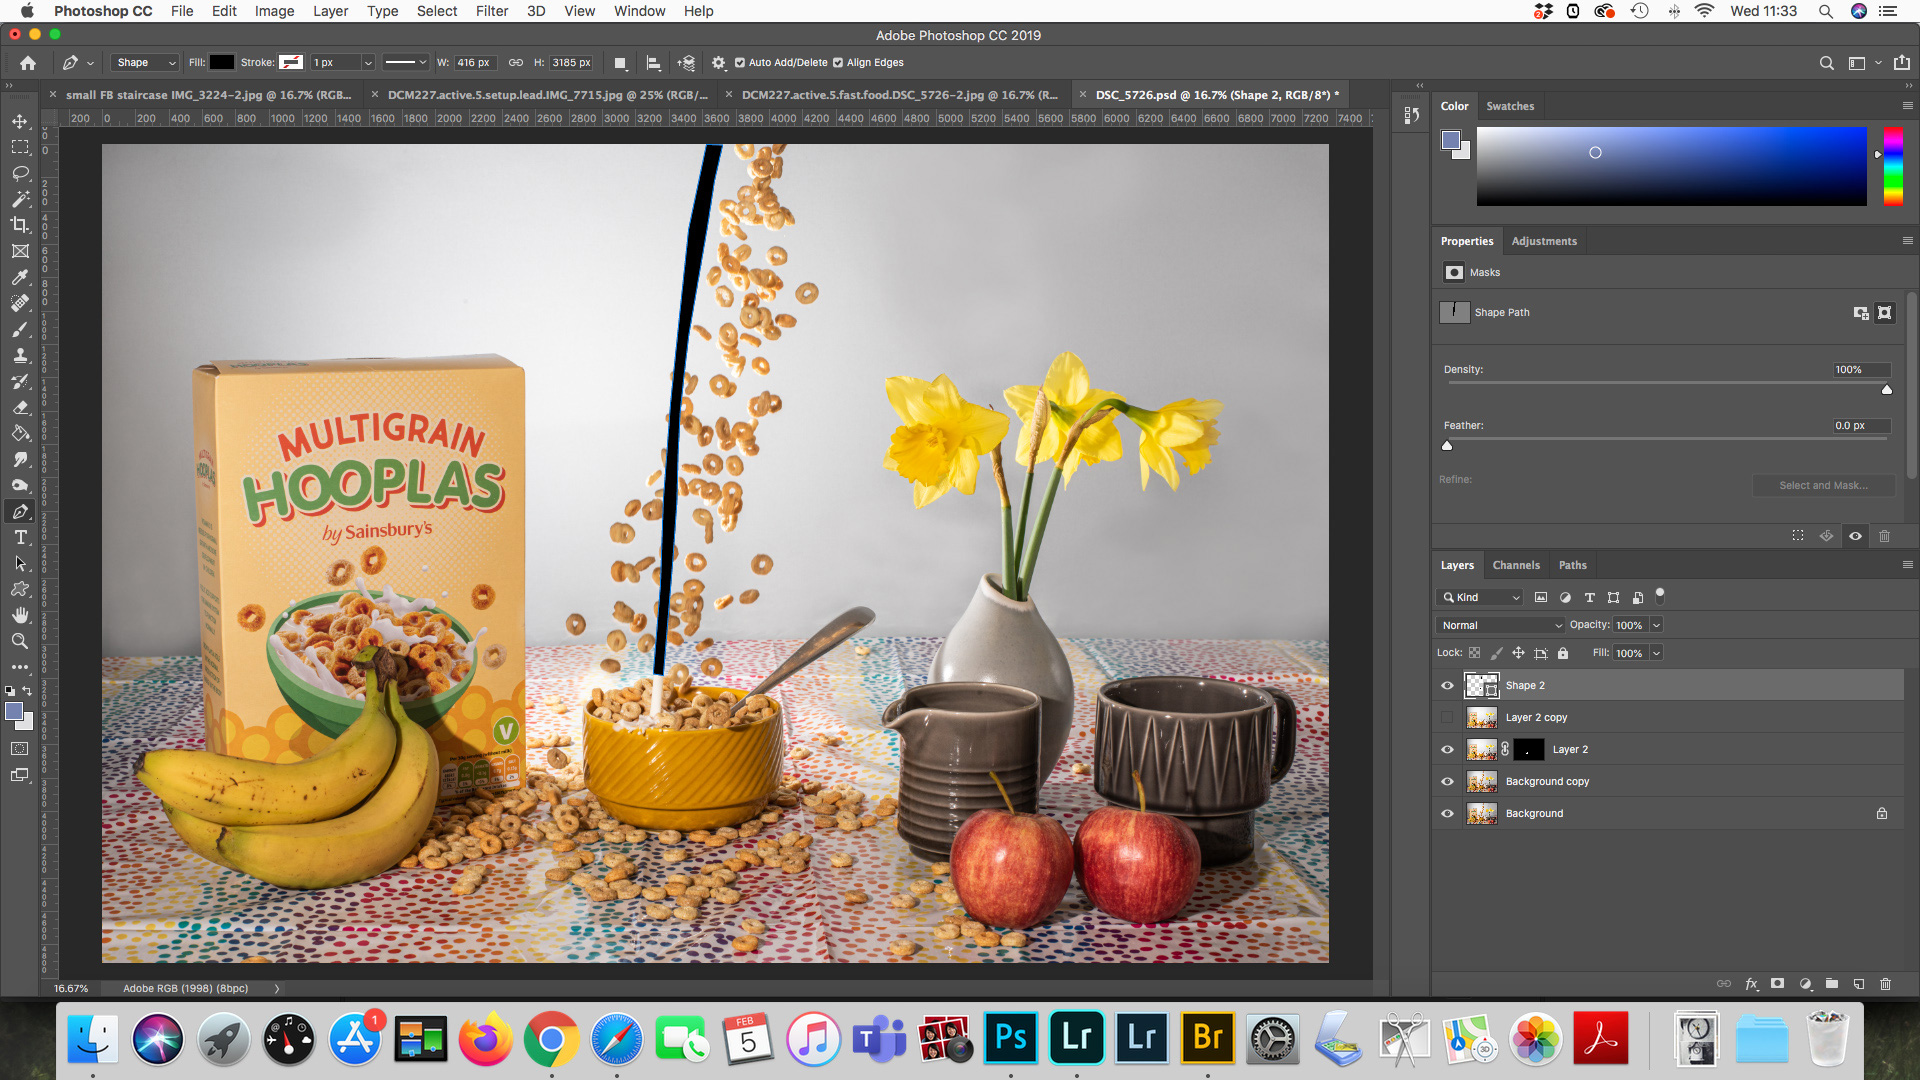
I edited the two images (of the cereal and the milk) together in Photoshop. You need to bring both images over into one document, with the milk layer on top. To cut out the milk, I used the Pen Tool to get accurate results. Simply zoom into the picture and place markers around the falling milk. The Pen Tool will create a new Shape Layer. Once you’re happy with your selection, you can move the milk layer above the Shape Layer in the Layers Panel, right-click on the top layer, and select Create Clipping Mask to paste the milk into the shape.
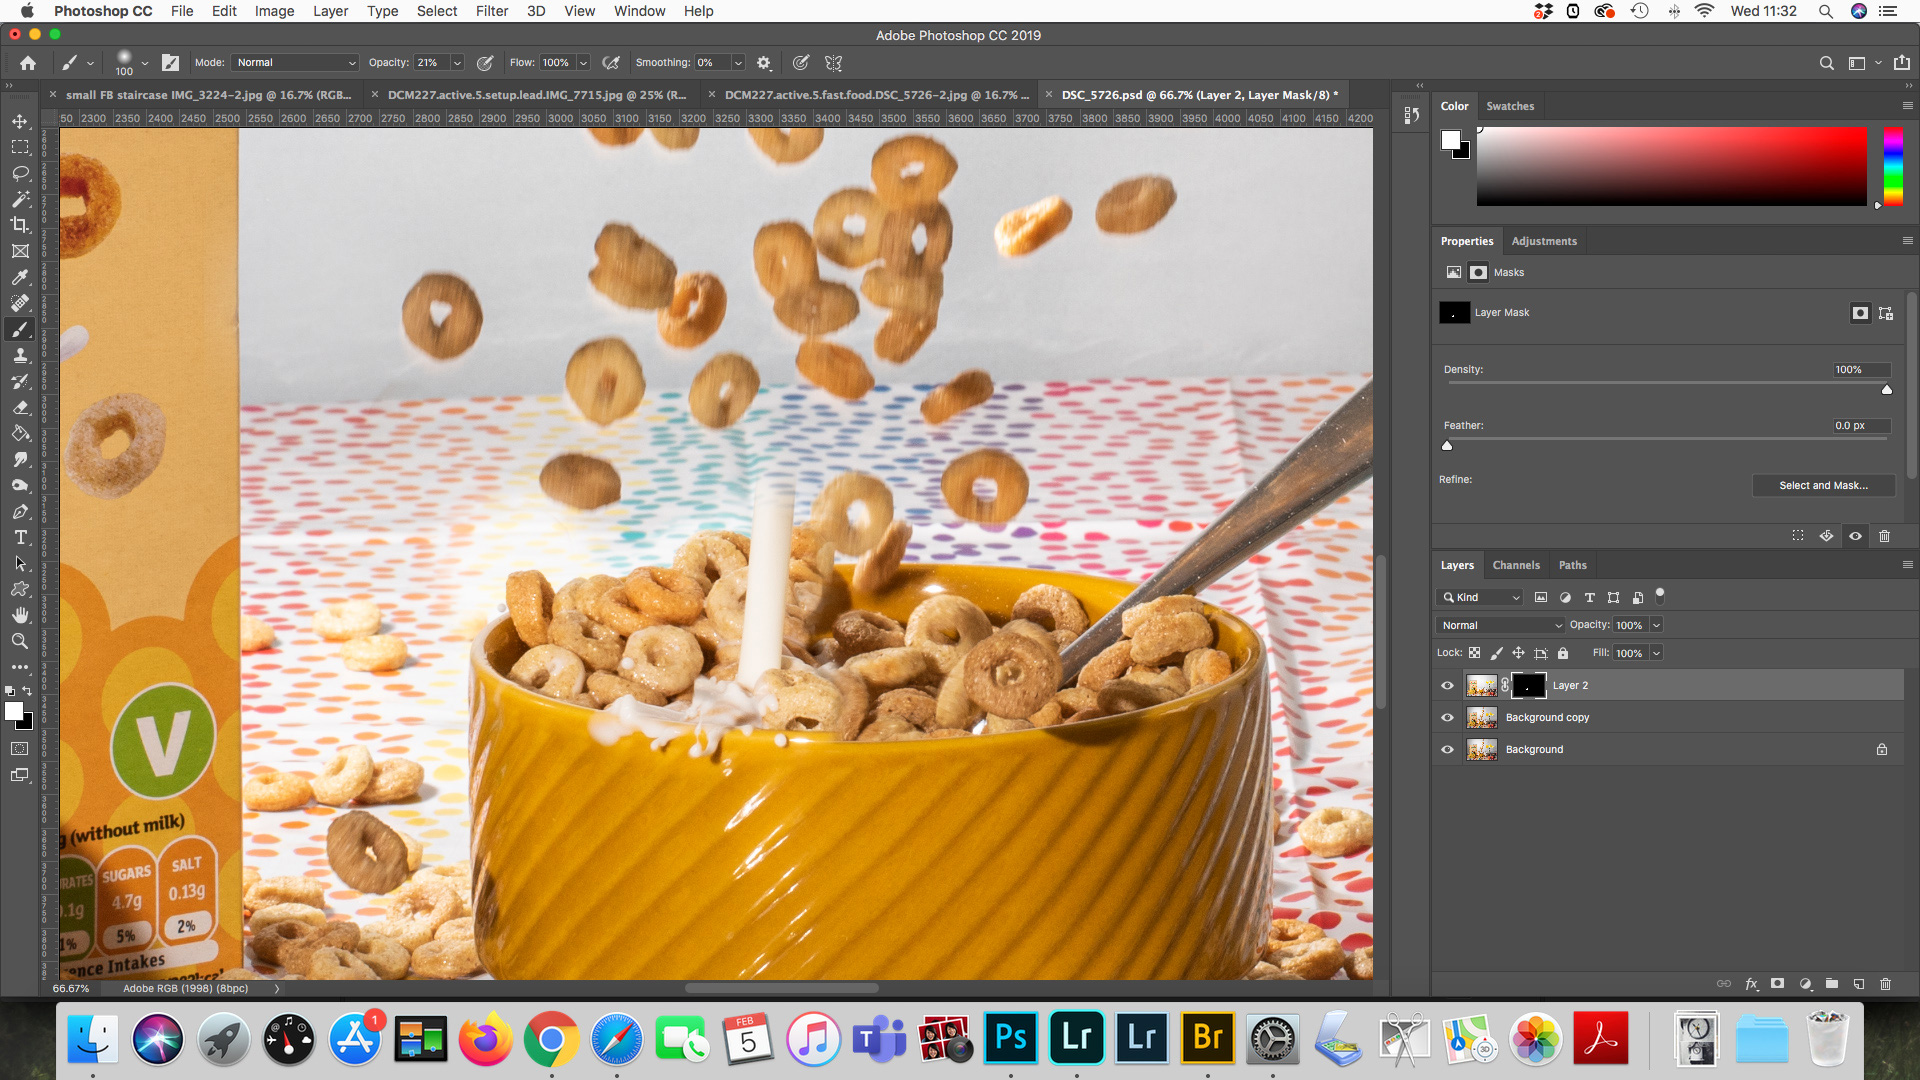
Where the milk had made a splash at the bottom of the bowl, I opted to duplicate the milk layer, add a black Layer Mask and use a white brush to paint back the parts I wanted to reveal. Finally, on a merged top layer, I used a gray paint brush at a reduced Opacity (around 20%) to smooth out the background for a flawless result.
This article was first published in Digital Camera magazine.
Subscribe now
Every issue of Digital Camera magazine is packed with tips, techniques, pro advice, reviews, news and inspiration. To make sure of your copy every month, subscribe at our online shop.
Alternatively, you could choose from our range of digital options, including:
• Apple app (for iPad or iPhone)
• Zinio app (multi-platform app for desktop or smartphone)
• Google Play (for Android devices)
• Readly (digital magazine subscription service )
Read more:
Get the Digital Camera World Newsletter
The best camera deals, reviews, product advice, and unmissable photography news, direct to your inbox!
Claire is a professional photographer and writer, and lives by the the sea with her two young children, husband and cat in the southwest of the UK.
After graduating from The Bournemouth Arts Institute with a first-class degree in photography, Claire worked for a number of years in the publishing industry, including as Technique Editor for Digital Camera magazine.
She loves anything and everything to do with photography, from creating magazine articles to photographing ballerinas on the beach and newborn babies (but not at the same time). She mainly shoots with digital DSLRs, but does dust off her beloved Hasselblad medium-format film camera once in a while…
