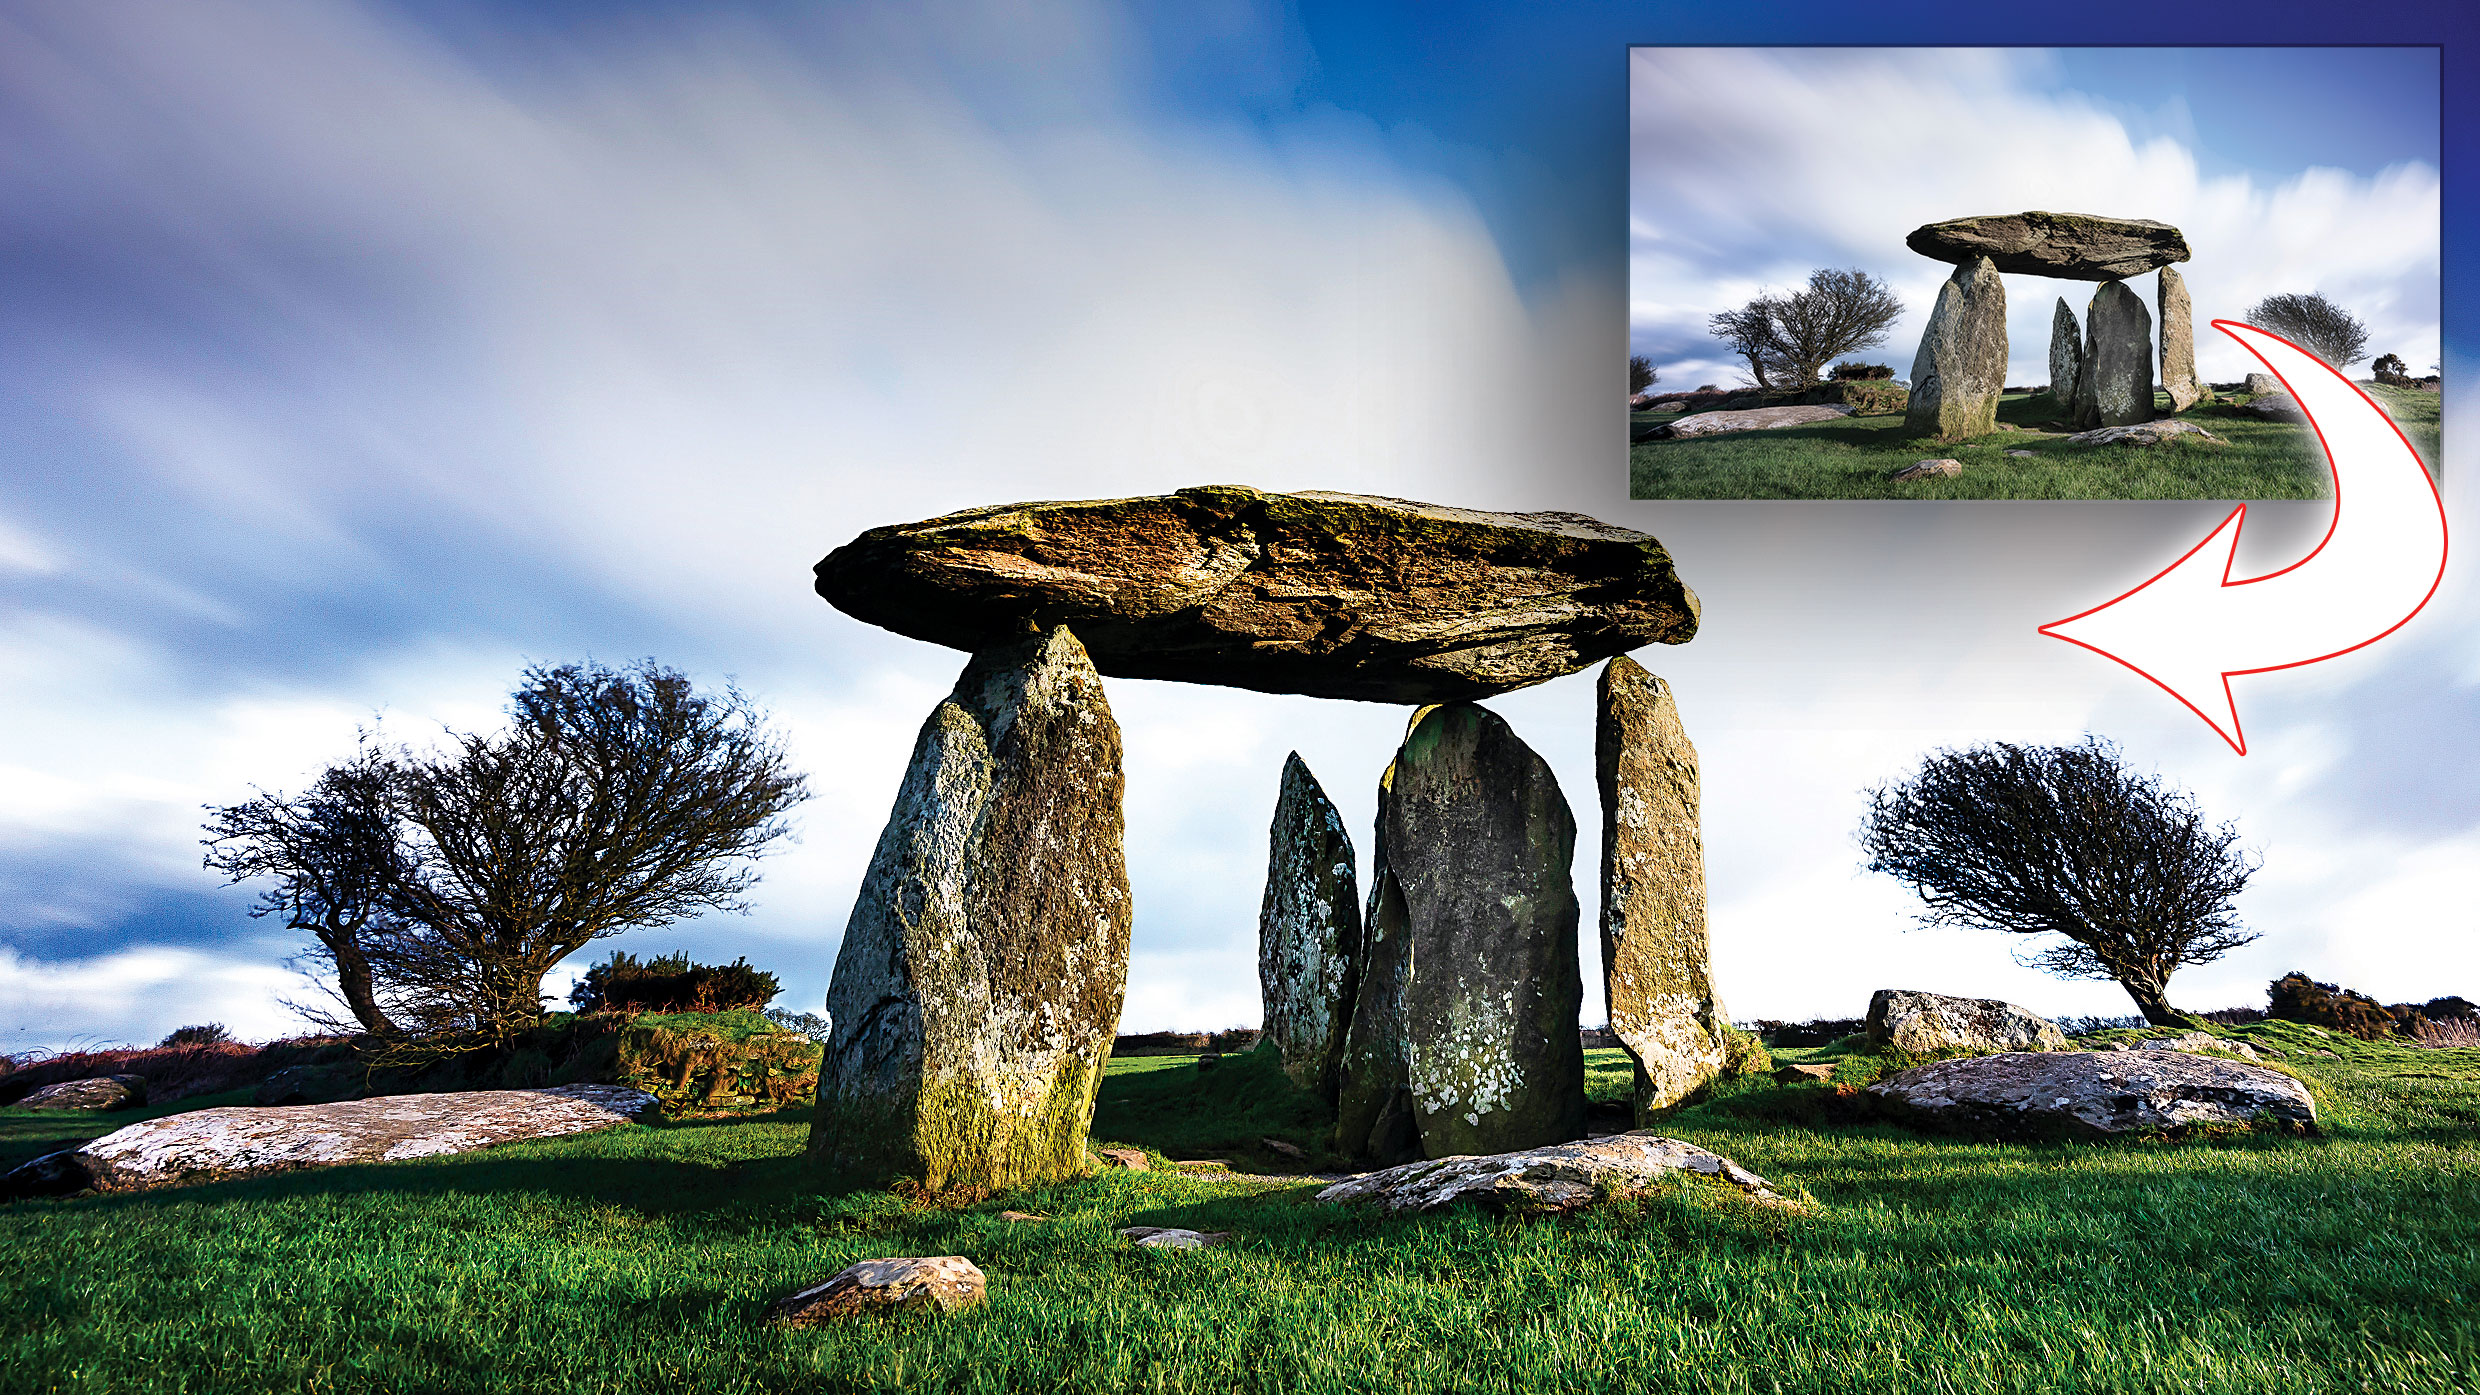
Six tips to enhance a landscape in Affinity Photo: contrast, clarity, drama and details
Quickly boost your outdoor photographs with half-a-dozen essential editing tips in Affinity Photo
Start here
• Affinity Photo tutorials
The tutorials
1. Affinity Photo vs Photoshop
2. RAW editing with Affinity Photo
3. Focus merge with Affinity Photo
4. Replace a sky in Affinity Photo
5. Moody mono in Affinity Photo
6. Six Affinity Photo landscape tips
7. Color correction in Affinity Photo
8. Live Filters in Affinity Photo
9. Create a classic wet plate look
10. Remove objects in Affinity Photo
11. Paint an abstract portrait
12. Enhance skintones in Affinity Photo
13. Create HDR in Affinity Photo
14. Replace a sky in Affinity Photo
15. Affinity Photo double exposures
16. Affinity Photo Denoise tool
When it comes to editing landscapes, judgement is the most important tool in your image-editing arsenal. We should ask ourselves whether anything in particular needs addressing – is the exposure right? Does the scene need more or less contrast? Would a colour boost benefit the image, or perhaps a black-and-white treatment These judgement calls have more to do with answering these questions than expertise in any one specific editing tool.
But it still pays to know the best tools for the job, and there are plenty to choose from in Affinity. In this tutorial we’ll look at six essential landscape editing tips. The right edits will depend on the requirements of each image, but these are all tips that can be applied to the majority of landscapes. Affinity is split into different editing workspaces called Personas. We’ll begin in Develop. This is the dedicated Raw-editing workspace that opens when you bring a Raw file in. But it’s not just for Raws, we can edit any image! It’s the ideal place to begin enhancing colours. Once done, we can head into the Photo Persona for retouching and precise dodging and burning, before finishing off in the Tone-Mapping persona with a trick for detail enhancements...
Read more:
Step 1: Boost the tones
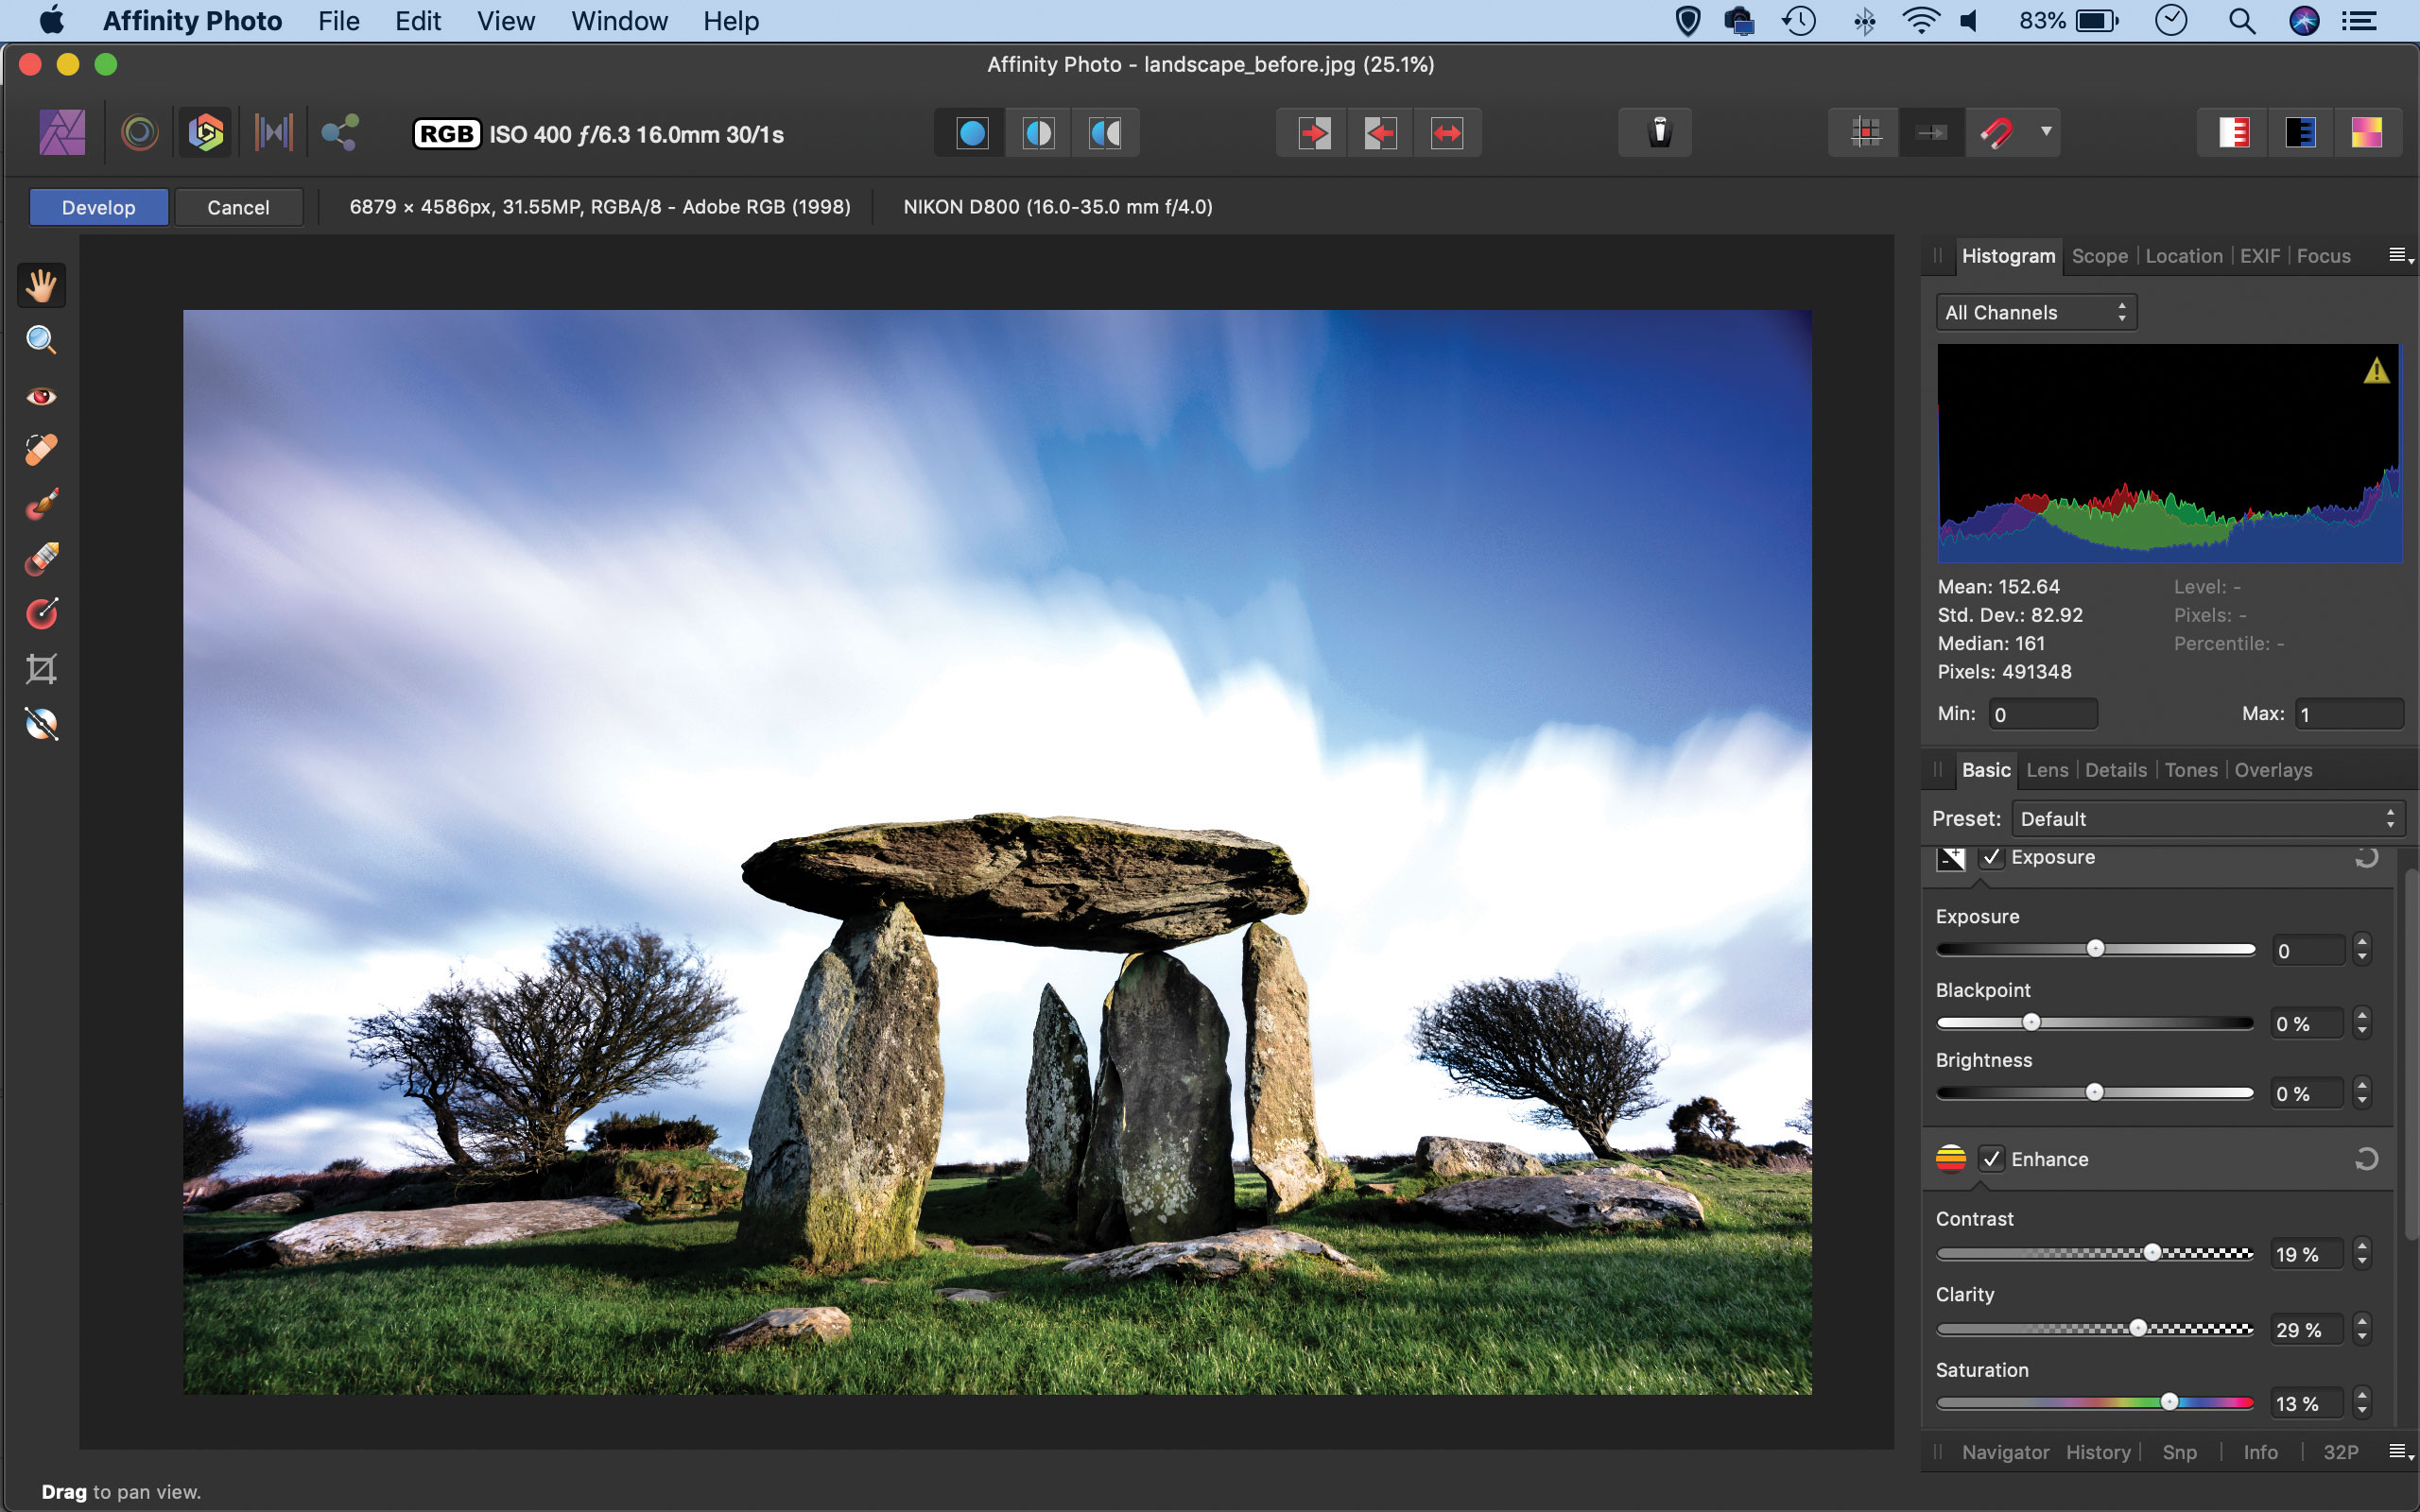
Whether editing a Raw or a JPEG, the best place to begin enhancing tone and colour is the Develop Persona. We've used the panel on the right to boost Contrast, Clarity and Saturation. Next we clicked the Tones tab to go to Curves and plotted an S-shaped curve to add some punch to the scene.
Step 2: Add drama to skies
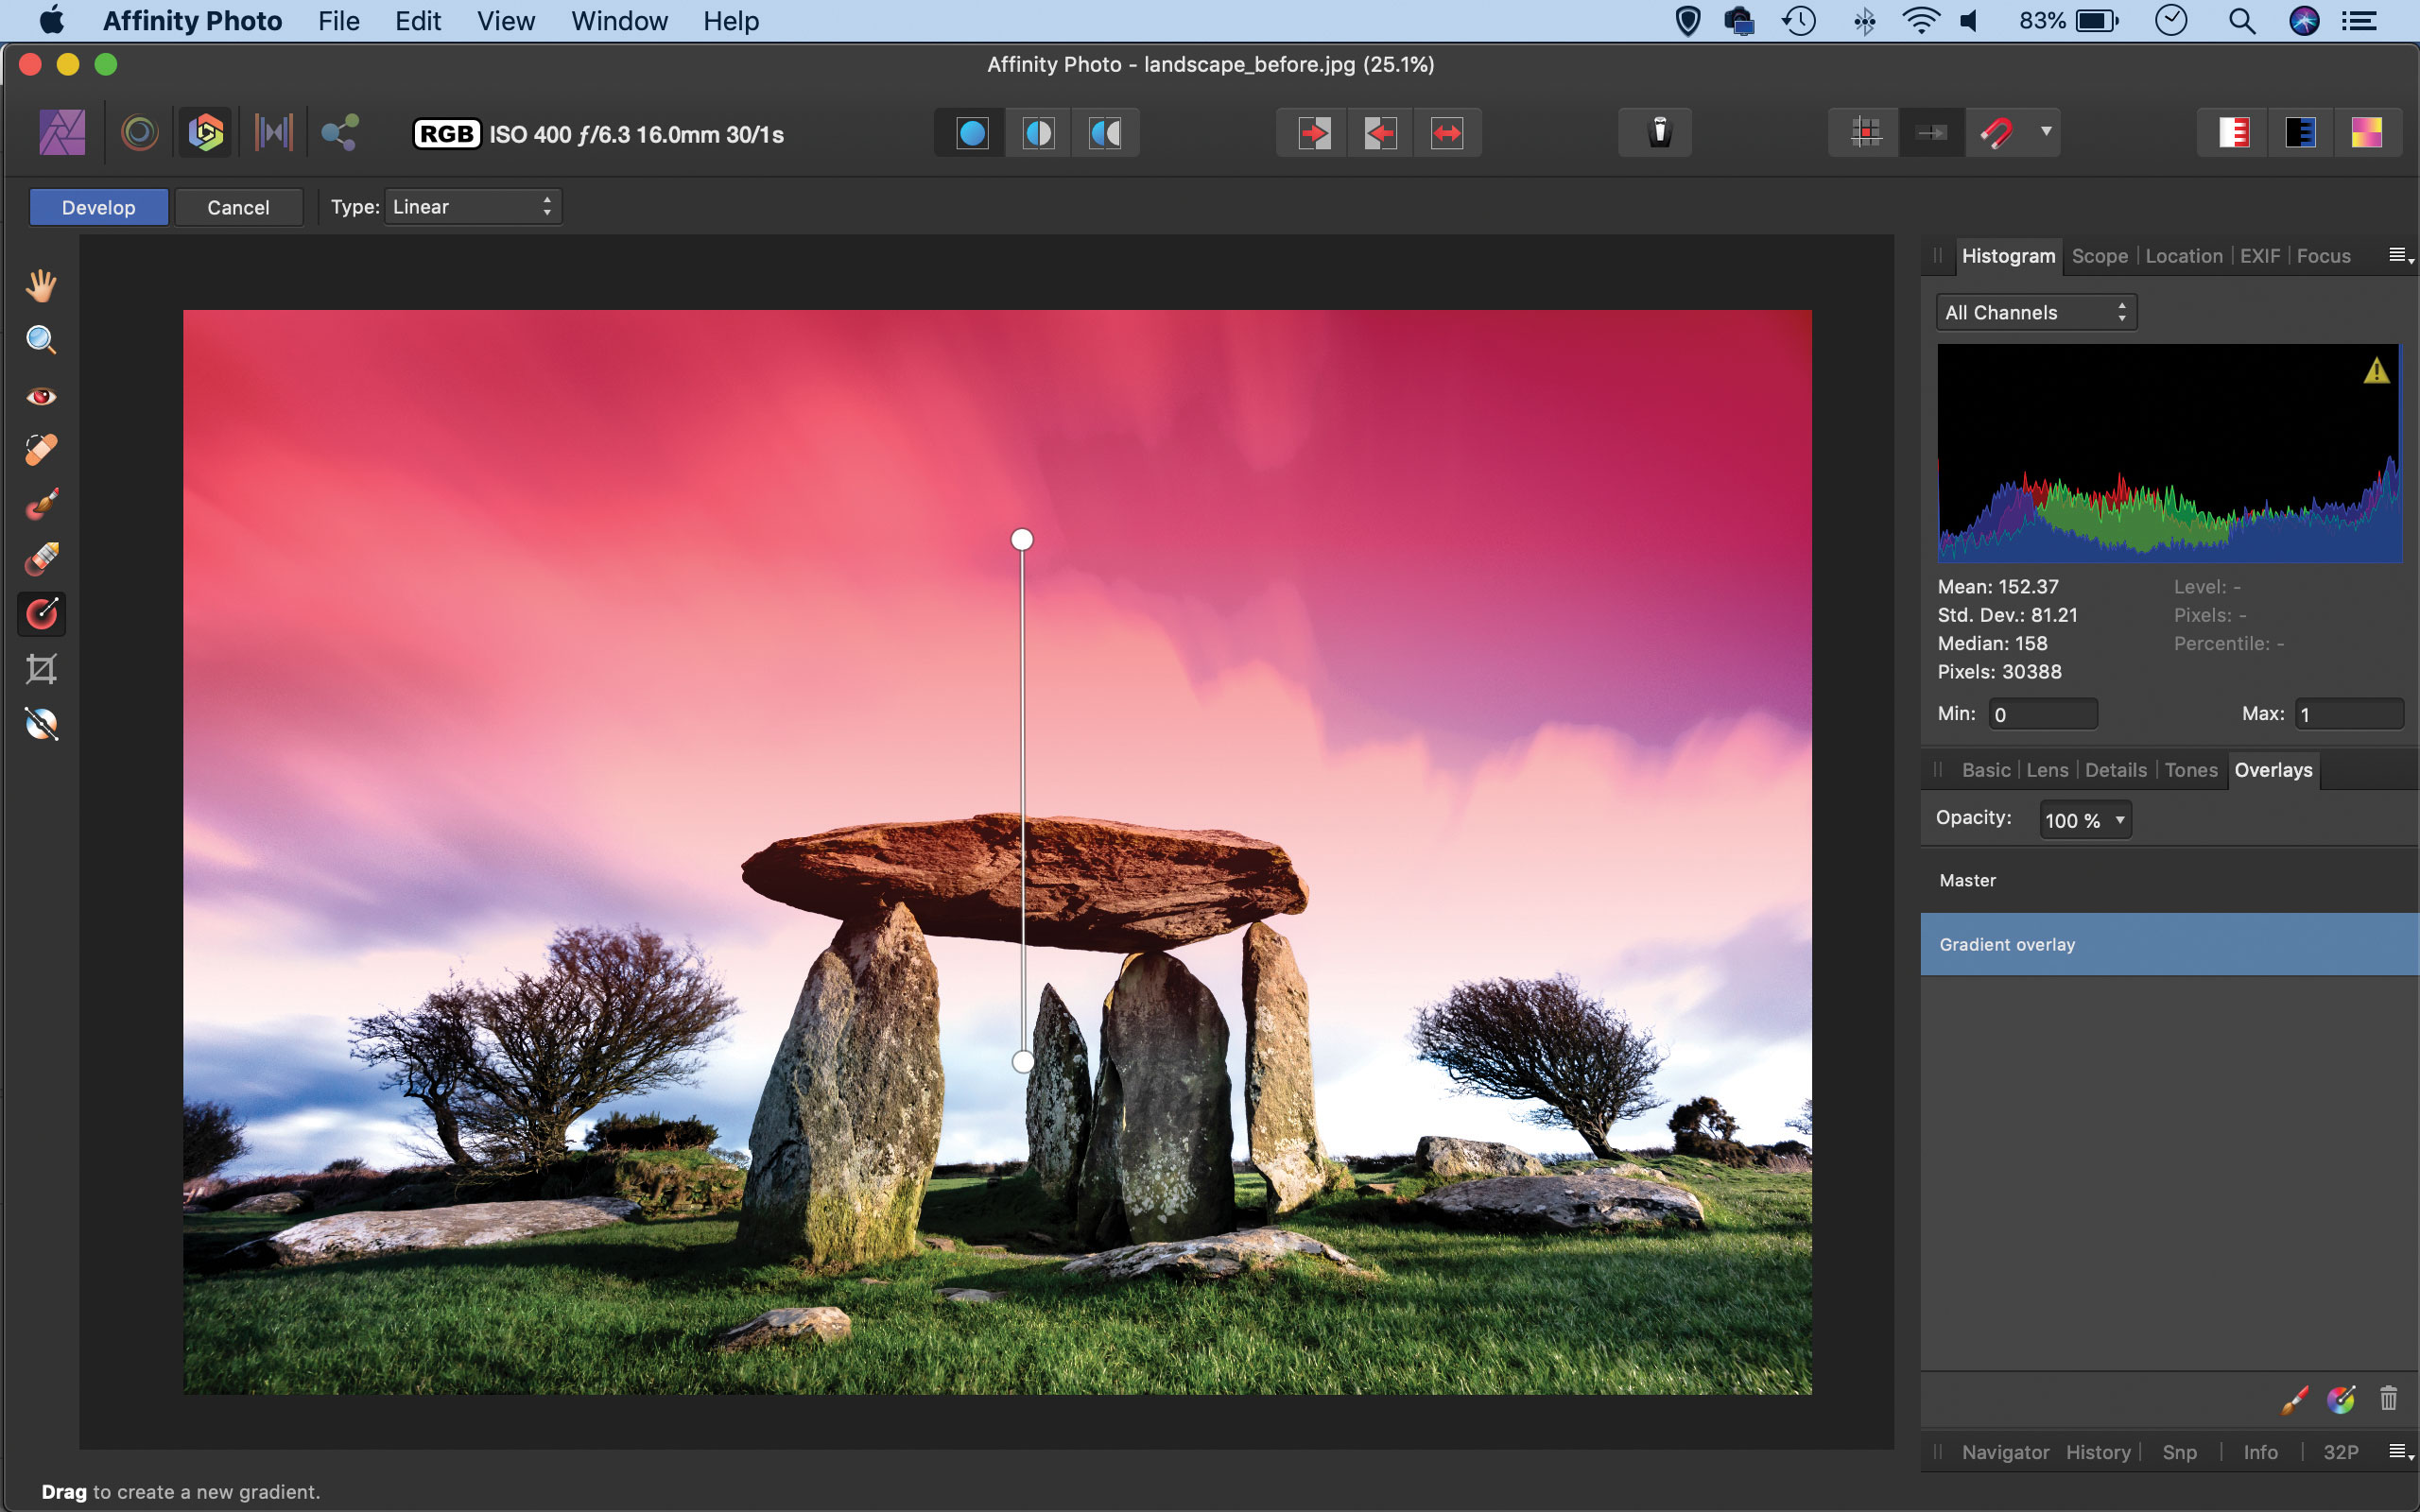
Skies often benefit from a darkening and an increase in contrast. While still in the Develop Persona, we clicked on the Overlays tab, then the gradient icon at the bottom. Dragging down from sky to land added a pink overlay. Next, we clicked Basic, decreased Exposure and Highlights, and increased Contrast.
Step 3: Dodge and Burn
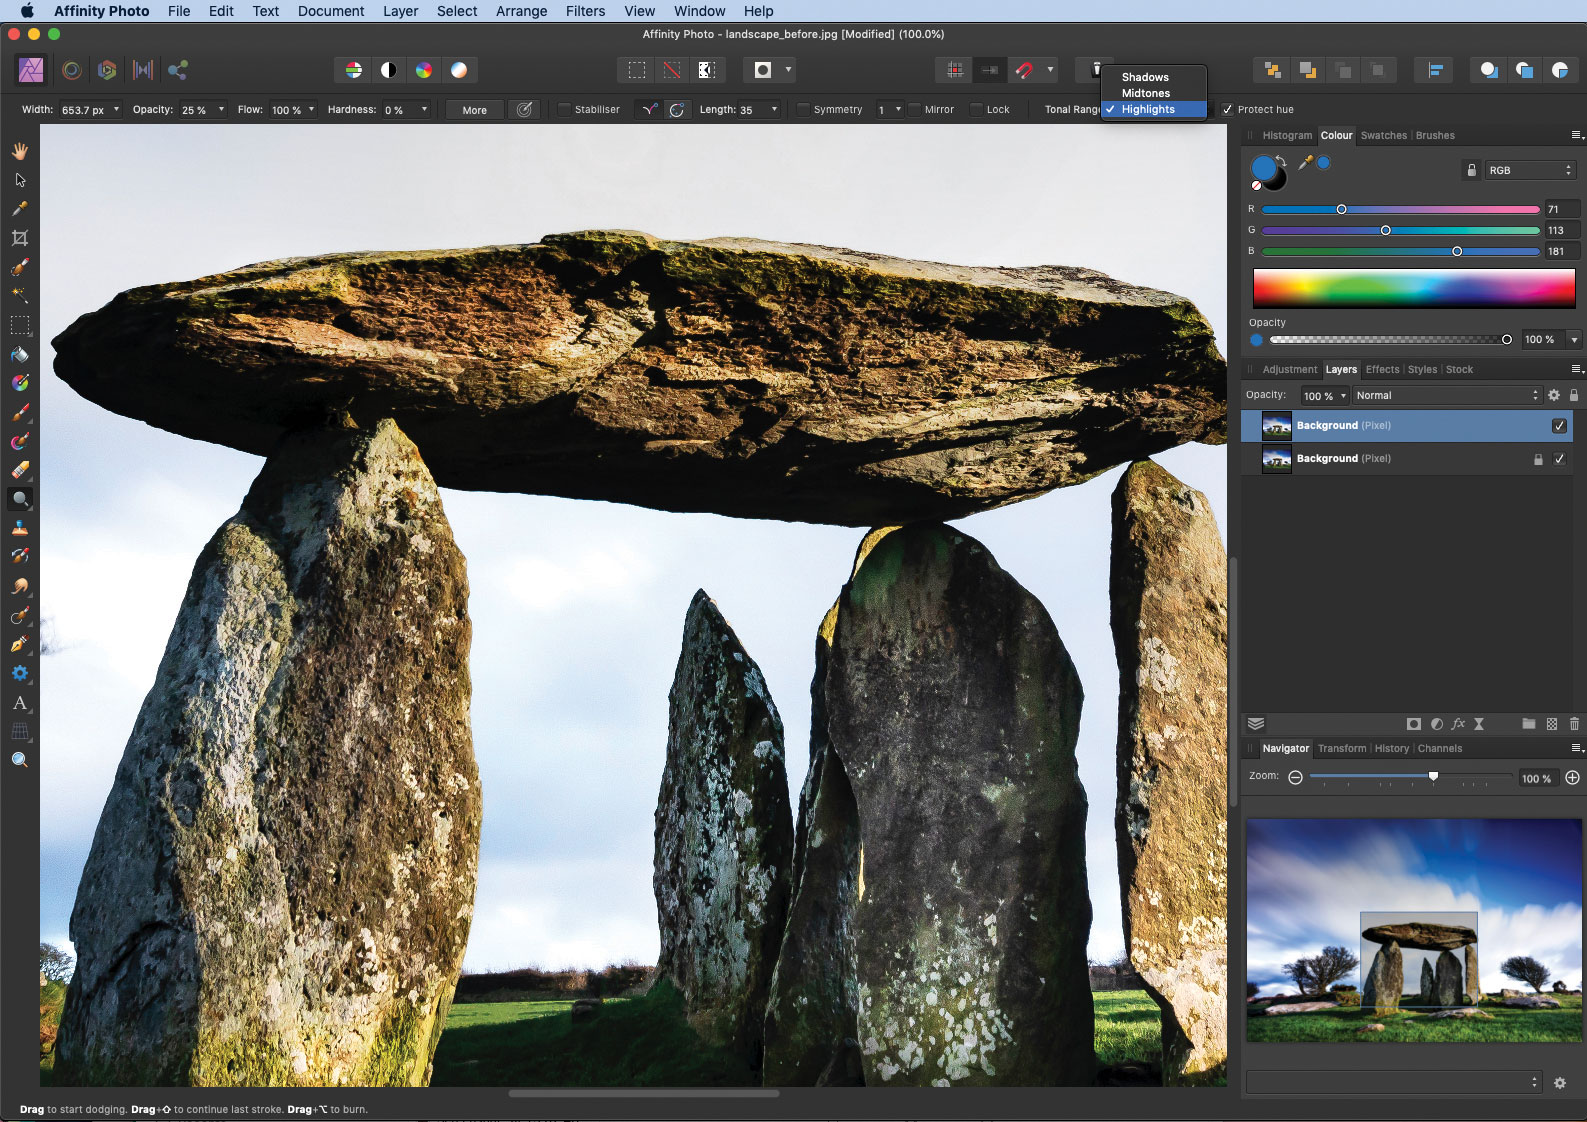
The next step was to hit the Develop button to complete the changes and enter the Photo Persona. We used the Cmd/Ctrl+J to duplicate the layer, then grabbed the Dodge tool. We set Range: Highlights at top, then painted to lighten the highlights on rocks. Switching to the Burn tool we set Range: Shadows then darkened the furrows in the rocks.
Step 4: Retouch distractions
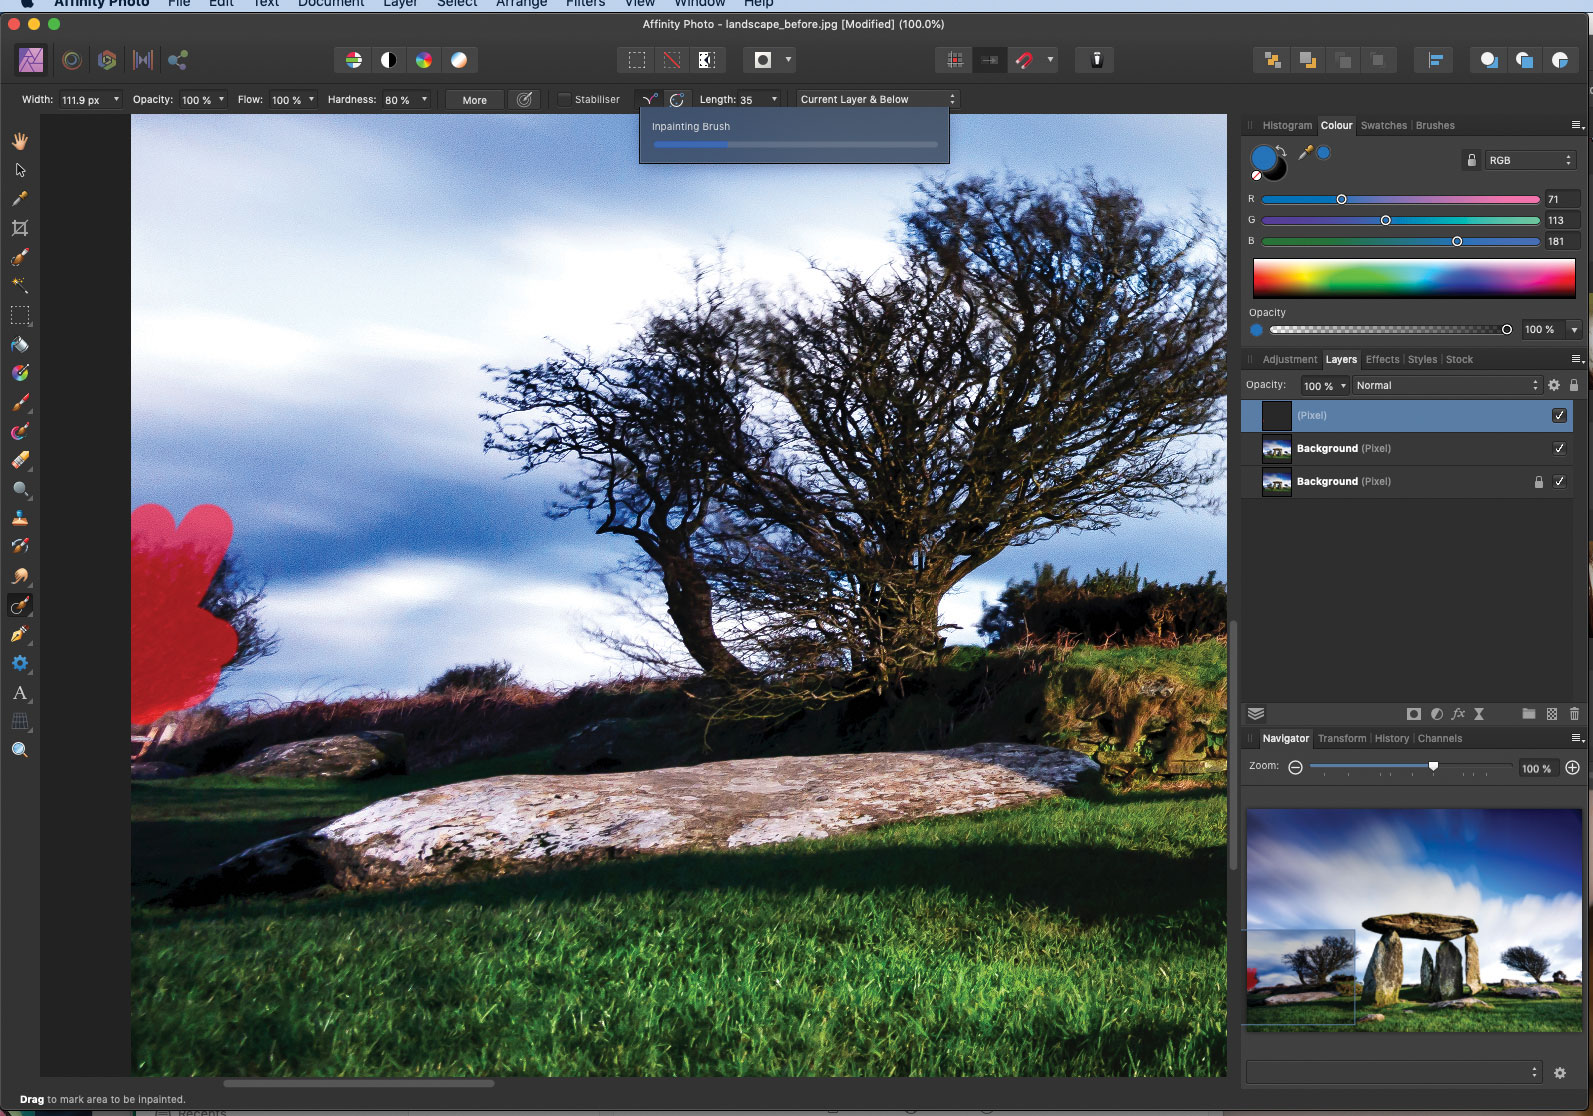
Annoying details that distract from your scene can be easily removed using the Inpainting tool in Affinity’s Photo Persona. Grab the tool from the toolbar then click the Add Pixel Layer icon in the Layers panel. Set ‘Current and Below’ in the options. We were able to paint over distractions like the trees on the edge of the scene here.
Step 5: Crop in tighter
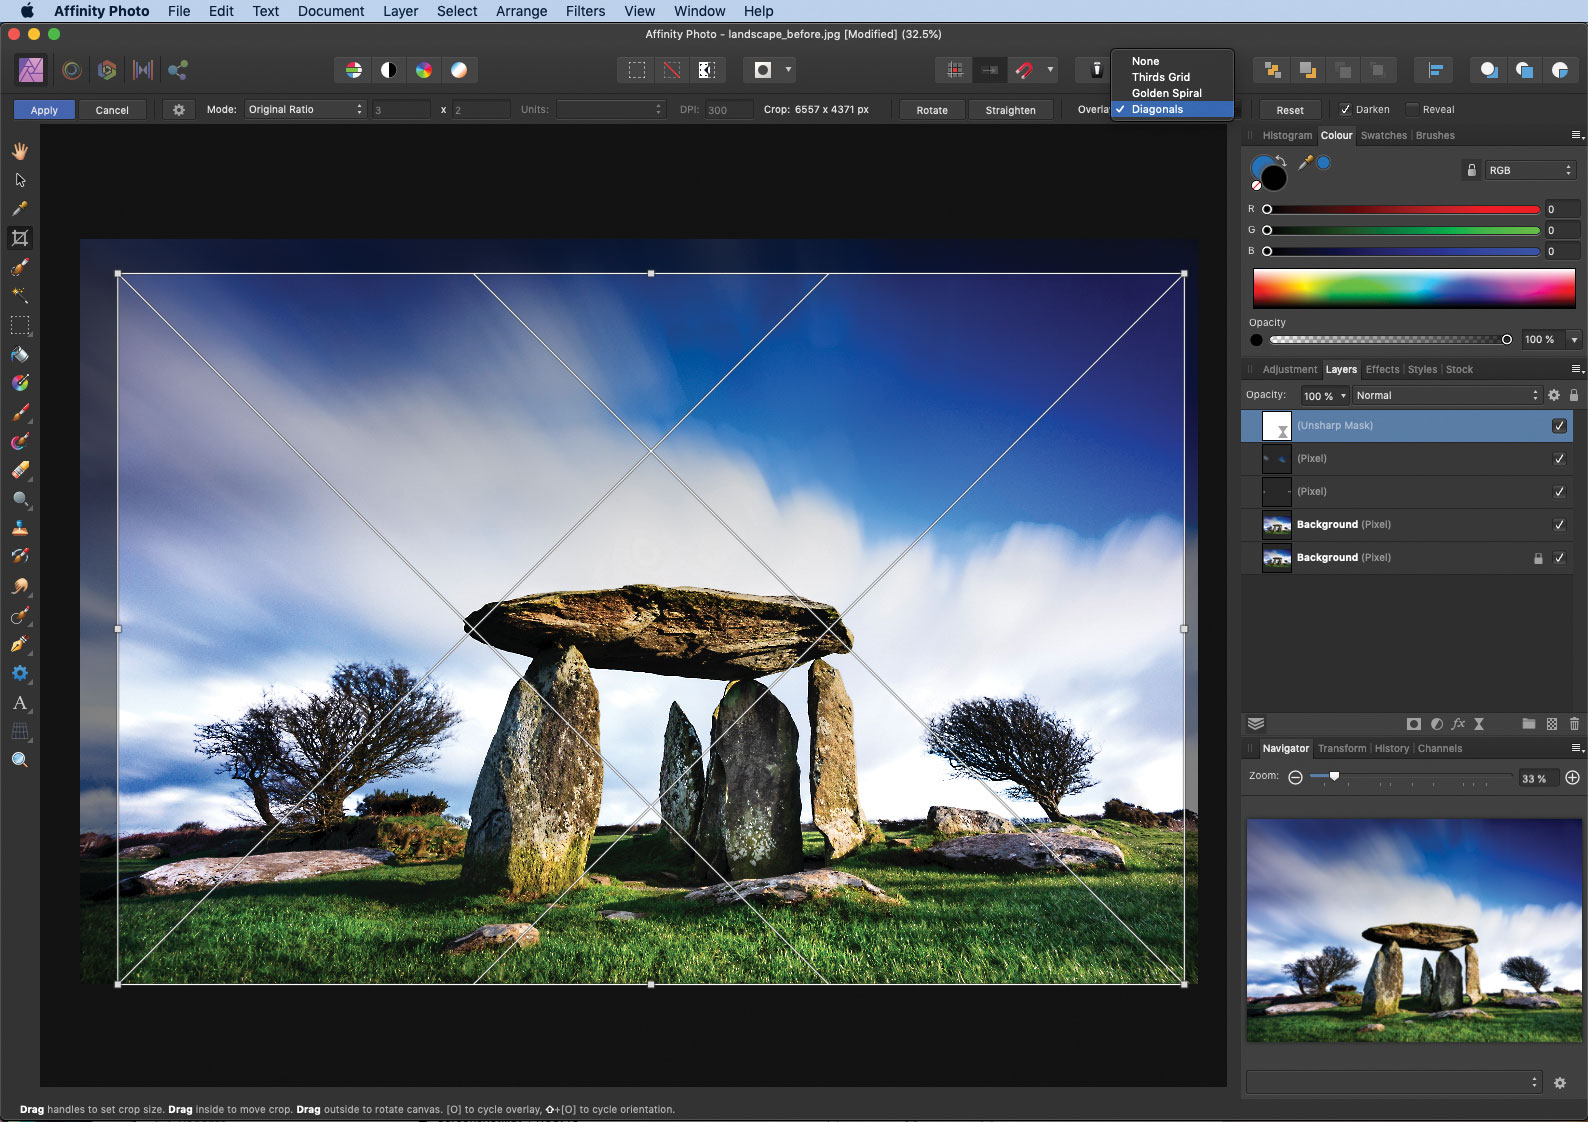
A tighter crop will help our composition, so we grab the Crop tool from the toolbar then go to the Overlay dropdown at top right. We can choose from helpful overlays like the Rule of Thirds, or Diagonals, to aid our cropping by positioning points of interest at the intersections of the overlay lines.
Step 6: Enhance detail
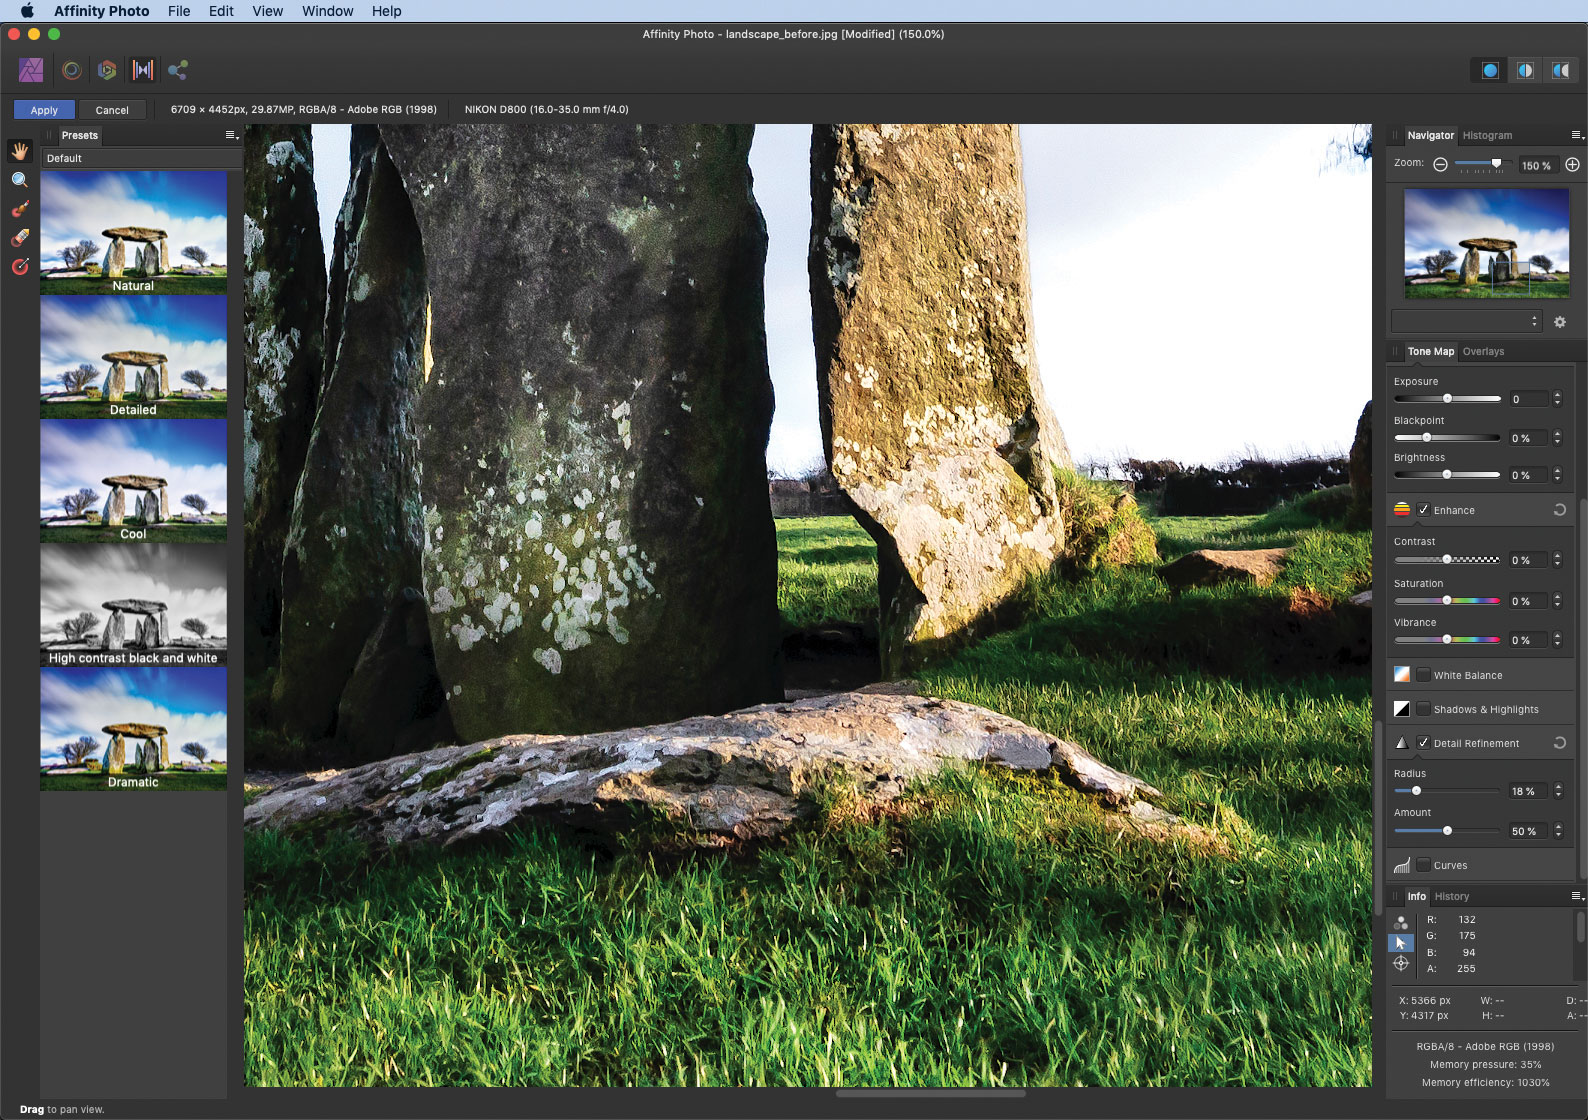
To finish off we press Cmd/Ctrl+Shift+Alt+E to merge all the layers into a new layer, then click on the Tone Mapping Persona at the top left. In the panel on the right we set Tone Compression to 0 then check Detail Enhancement. We set Amount to 50% then increase Radius until the details look sharper.
Quick Tip
The Overlays feature in Affinity Photo’s Develop Persona is a powerful tool for making local adjustments to your Raw files. First we make a new overlay by choosing to either paint one with the Brush tool, or apply a gradient overlay as we’ve done here. Then, with the overlay highlighted, we can go into the other tonal panels to change the affected area. Once done, we need to go back to the Overlays panel and highlight the ‘Master’ overlay to continue working on the overall image.
About N-Photo magazine
This tutorial originally appeared in N-Photo, the monthly newsstand magazine for Nikon photographers. Why not subscribe to a print edition, and have the magazine delivered direct to your door every month?
Alternatively, we have a number of different digital options available, including:
• Apple app (for iPad or iPhone)
• Zinio app (multi-platform app for desktop or smartphone)
• PocketMags (multi-platform app ideal for Android devices)
• Readly (all-you-can-eat digital magazine subscription service)
If you wanted a printed version of any of our most recent issues we have a selection of back issues to choose from in our online store.
Read more:
• Photography tips and tutorial videos
• The best photo editing tools and accessories
• The best desktop computers for photo editing
• The best photo-editing laptops right now
• The best photo editing software today
Get the Digital Camera World Newsletter
The best camera deals, reviews, product advice, and unmissable photography news, direct to your inbox!
N-Photo: The Nikon Magazine is a monthly publication that's entirely dedicated to Nikon users. As a 100% independent magazine, you can be assured of unbiased opinion from a trustworthy team of devoted photography experts including editor Adam Waring and Deputy Editor Mike Harris.
Aimed at all users, from camera newcomers to working pros, every issue is packed with practical, Nikon-specific advice for taking better photos, in-depth reviews of Nikon-compatible gear, and inspiring projects and exciting video lessons for mastering camera, lens and Photoshop techniques.
Written by Nikon users for Nikon users, N-Photo is your one-stop shop for everything to do with cameras, lenses, tripods, bags, tips, tricks and techniques to get the most out of your photography.

