Tackle tricky outdoor light with exposure compensation
The summer sunshine is great, but it can make it challenging to take good photos. Exposure compensation to the rescue!
Watch video: Tackle tricky outdoor light with exposure compensation
Photography projects at home
• More home photography ideas
Useful home photography kit
• Best tripods
• Best lighting kits
• Best reflectors
• Best macro lenses
Your camera’s metering system plays a vital role in picture-taking. It works out how much light should enter the camera to make a correct exposure, but be warned: while it’s very clever, it’s not completely foolproof.
The problem with metering is that it takes an average reading (either of the entire frame or part of it, depending on which metering mode you’re in), and this reading is assumed to be a midtone – halfway between white and black.
More often than not this assumption comes out right, but the metering system can struggle when a frame is dominated by areas of extreme brightness or darkness. (Find out about how your camera meter lies to you and why you should use a handheld light meter.)
• Read more: Best light meters
For example, imagine a person standing in the snow wearing a white coat. The frame will be dominated by whites, but your metering system doesn’t know that it’s snow, all it detects is overly bright tones. So it does what it’s designed to do, which is allow less light than into the camera in order to average out the scene. The result could be an underexposed face.
On the other hand, imagine a person standing under a spotlight in a dark room. This time the metering may be tricked by the large expanse of black into assuming the subject is darker than it really is, and overexpose the face.
The best camera deals, reviews, product advice, and unmissable photography news, direct to your inbox!
It’s all about portions of the frame. Your camera can’t always work out what the most important portion is – but you can. The question is, if the camera gets it wrong, what can you do about it? The solution is exposure compensation. Found on most cameras, this enables you to dial in more or less light as needed. Here’s how…
How to use exposure compensation
01 On the dark side
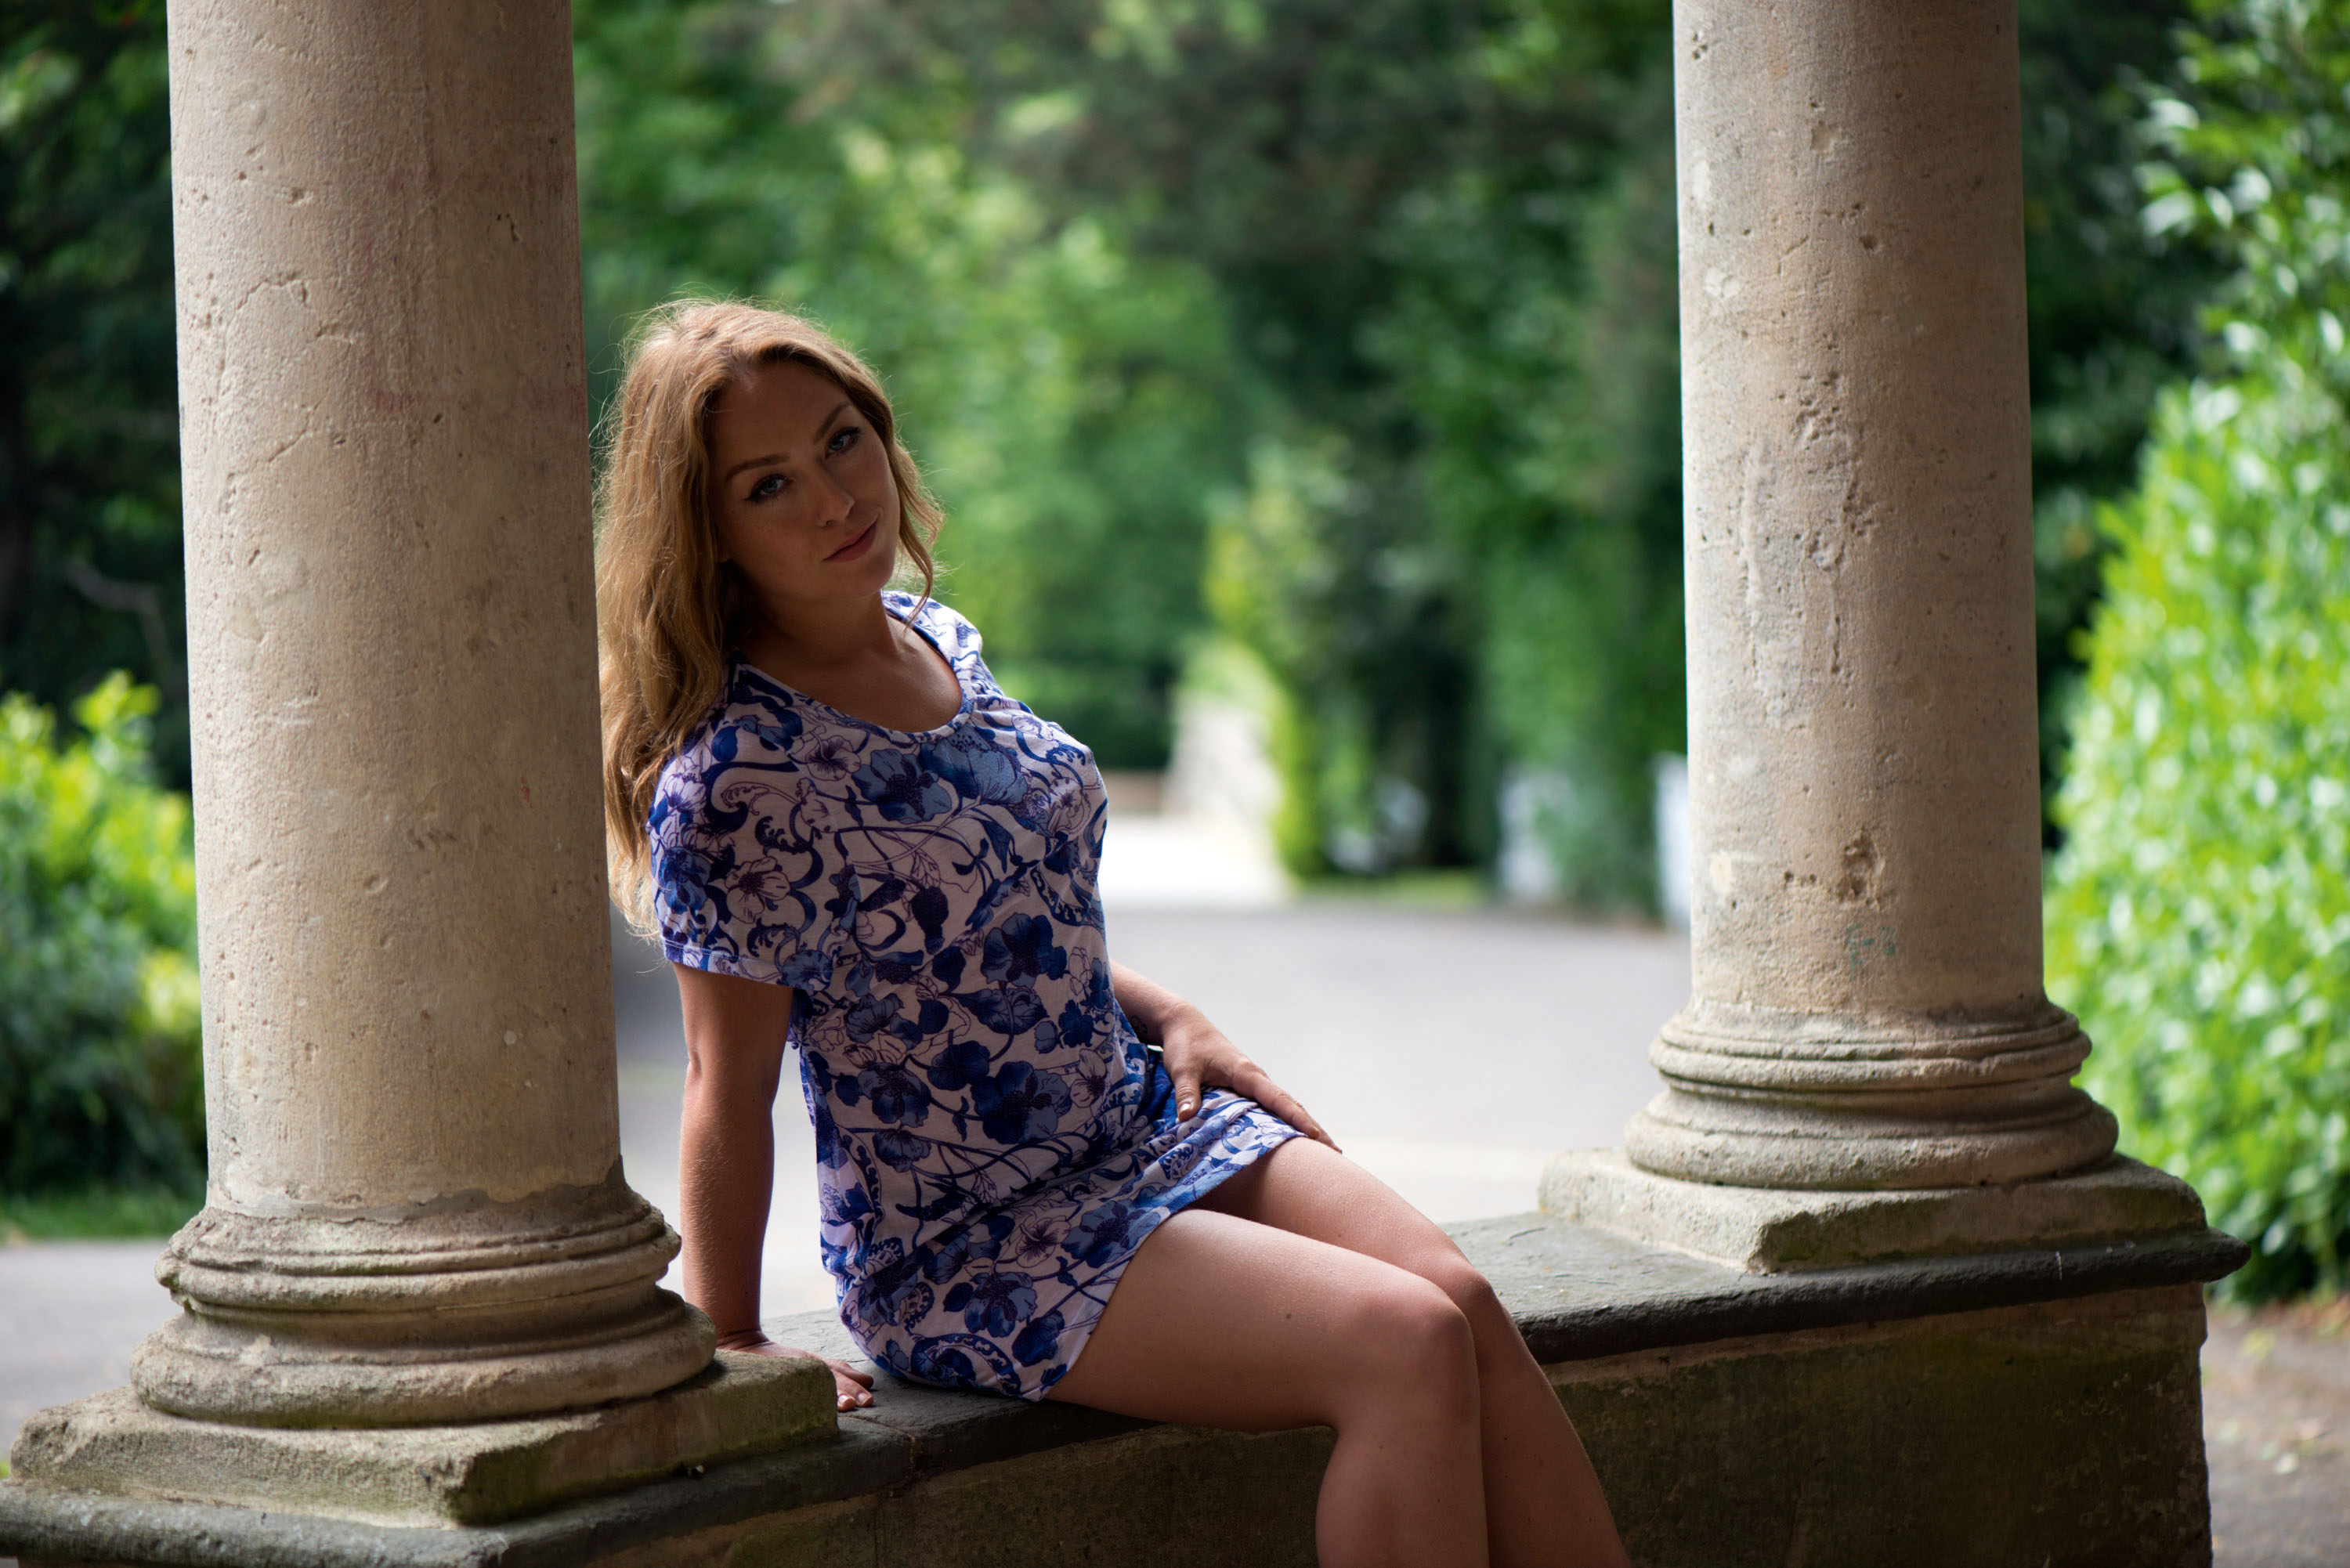
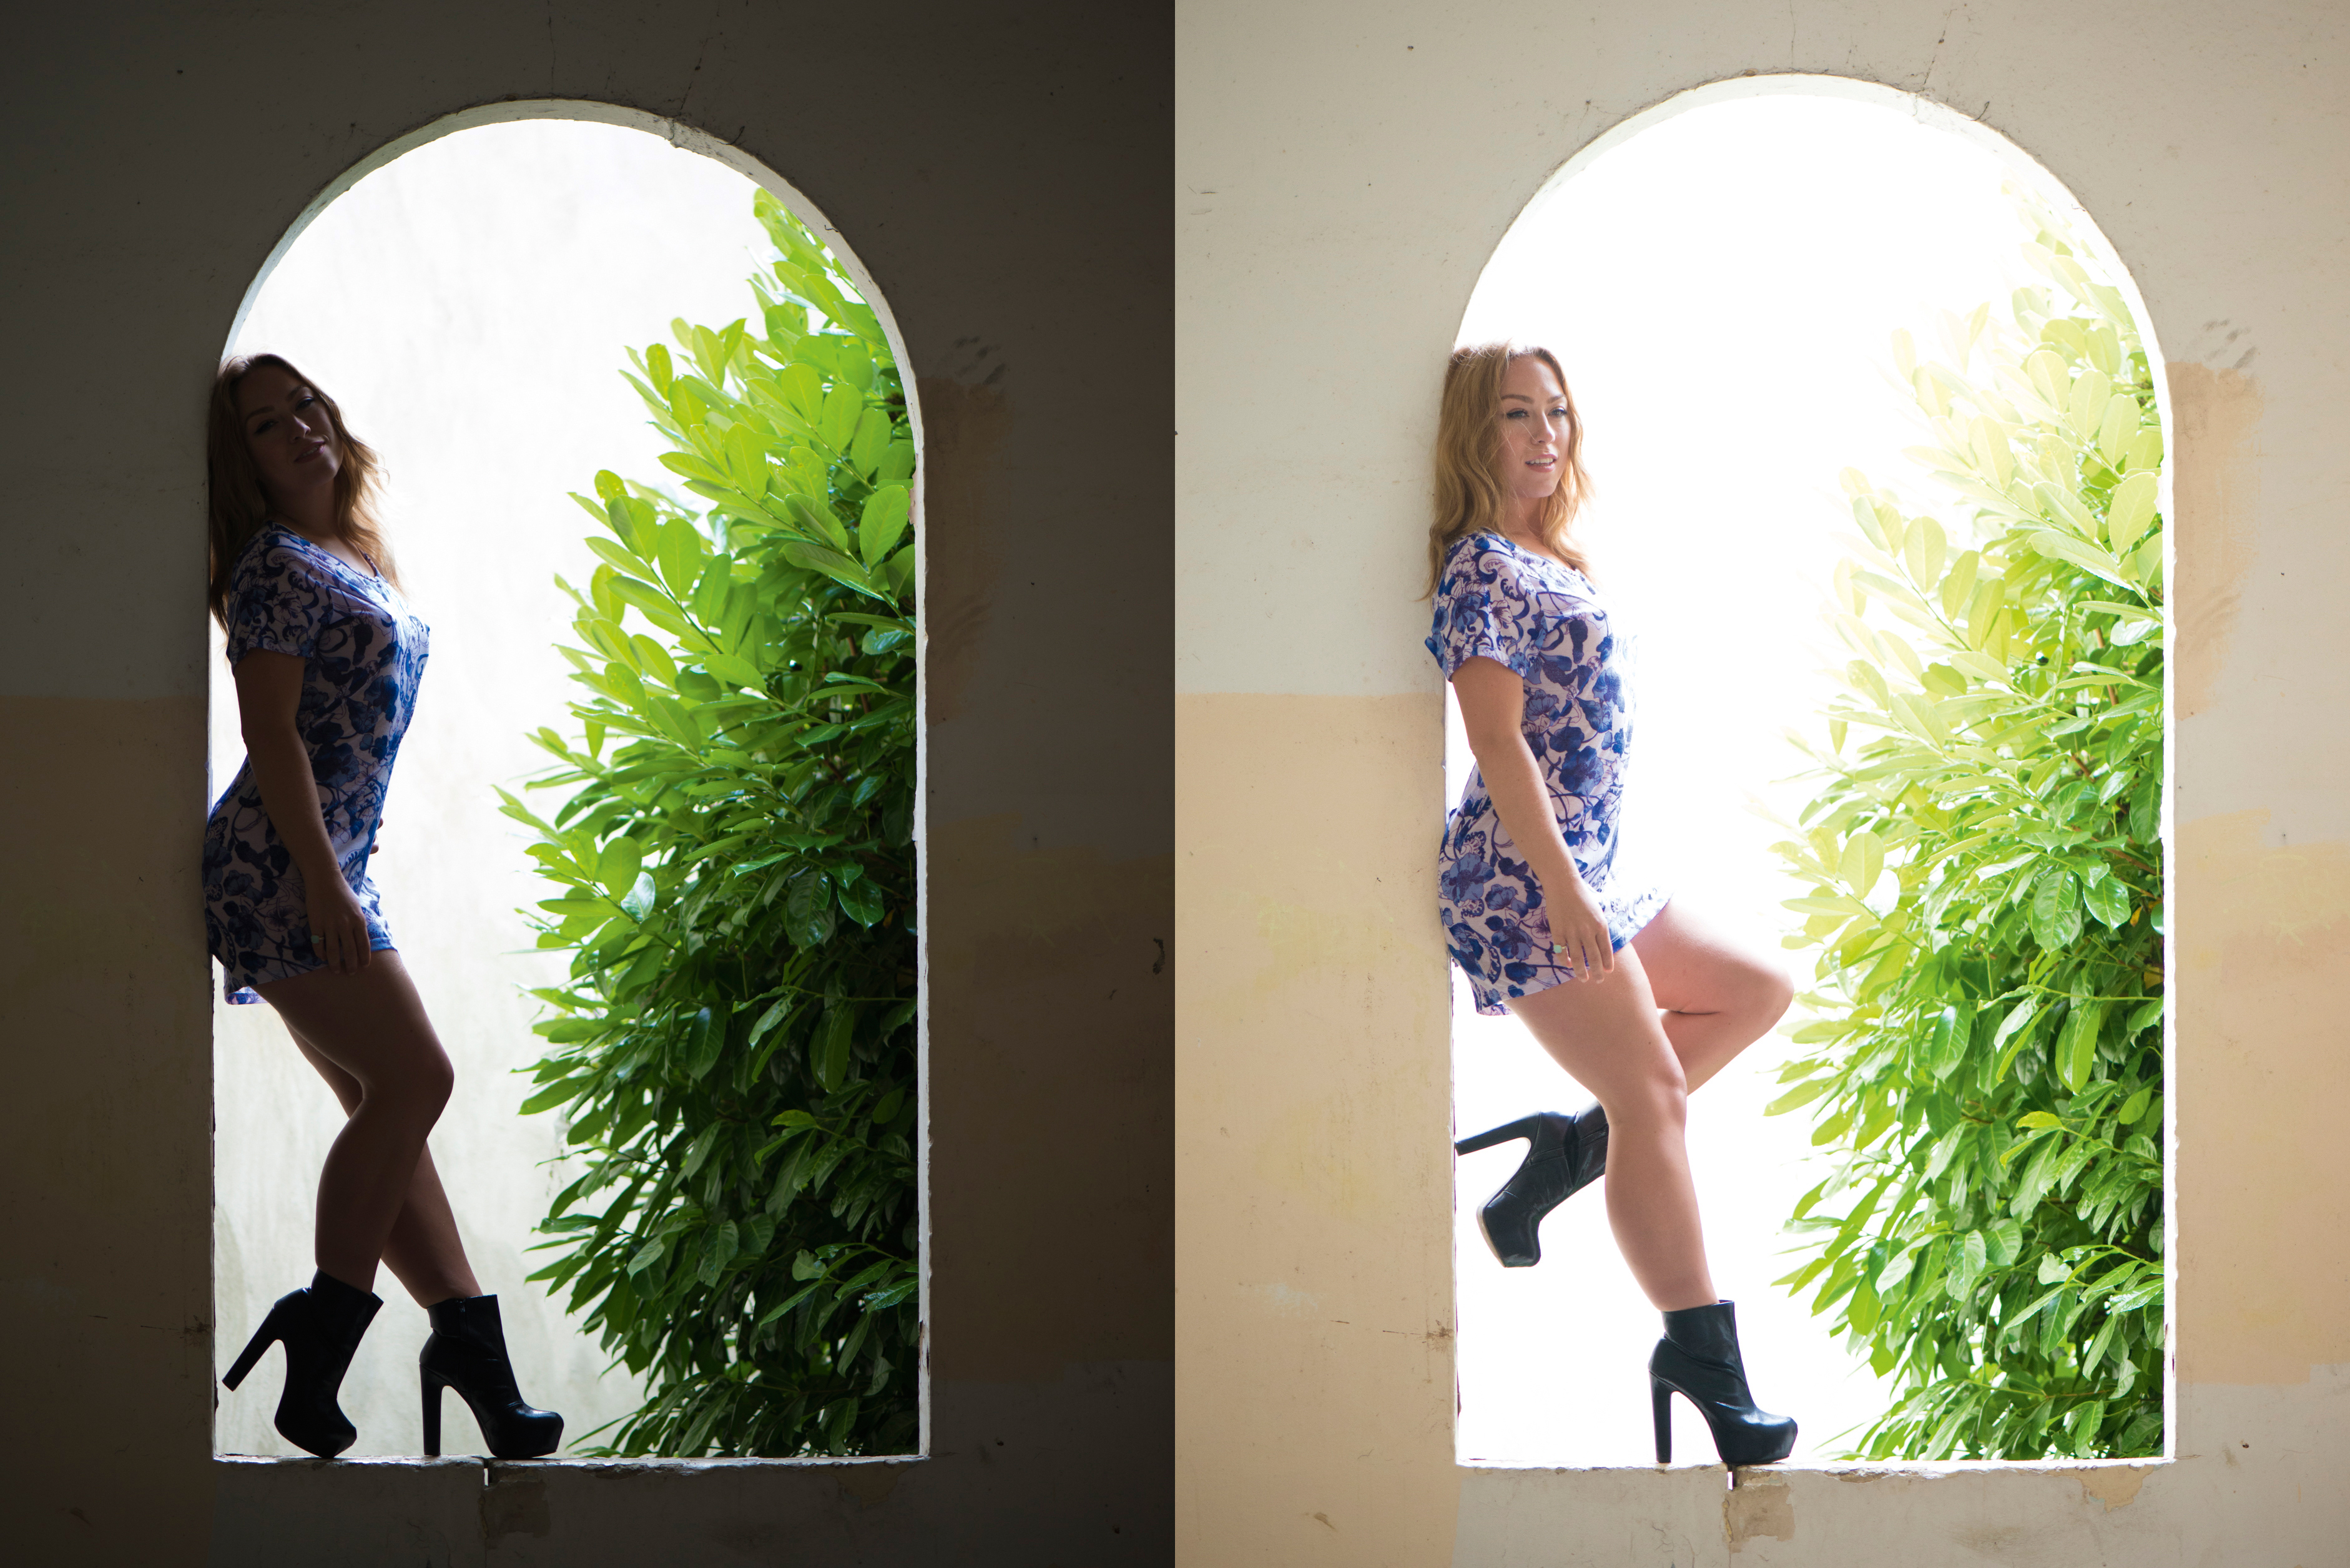
When shooting your subject in shade against a brighter backdrop, your camera's metering system may struggle. Scroll to the second image and you can see that the result of shooting from dark to light, when relying purely on matrix metering, is an underexposed subject.
02 Give it a stop
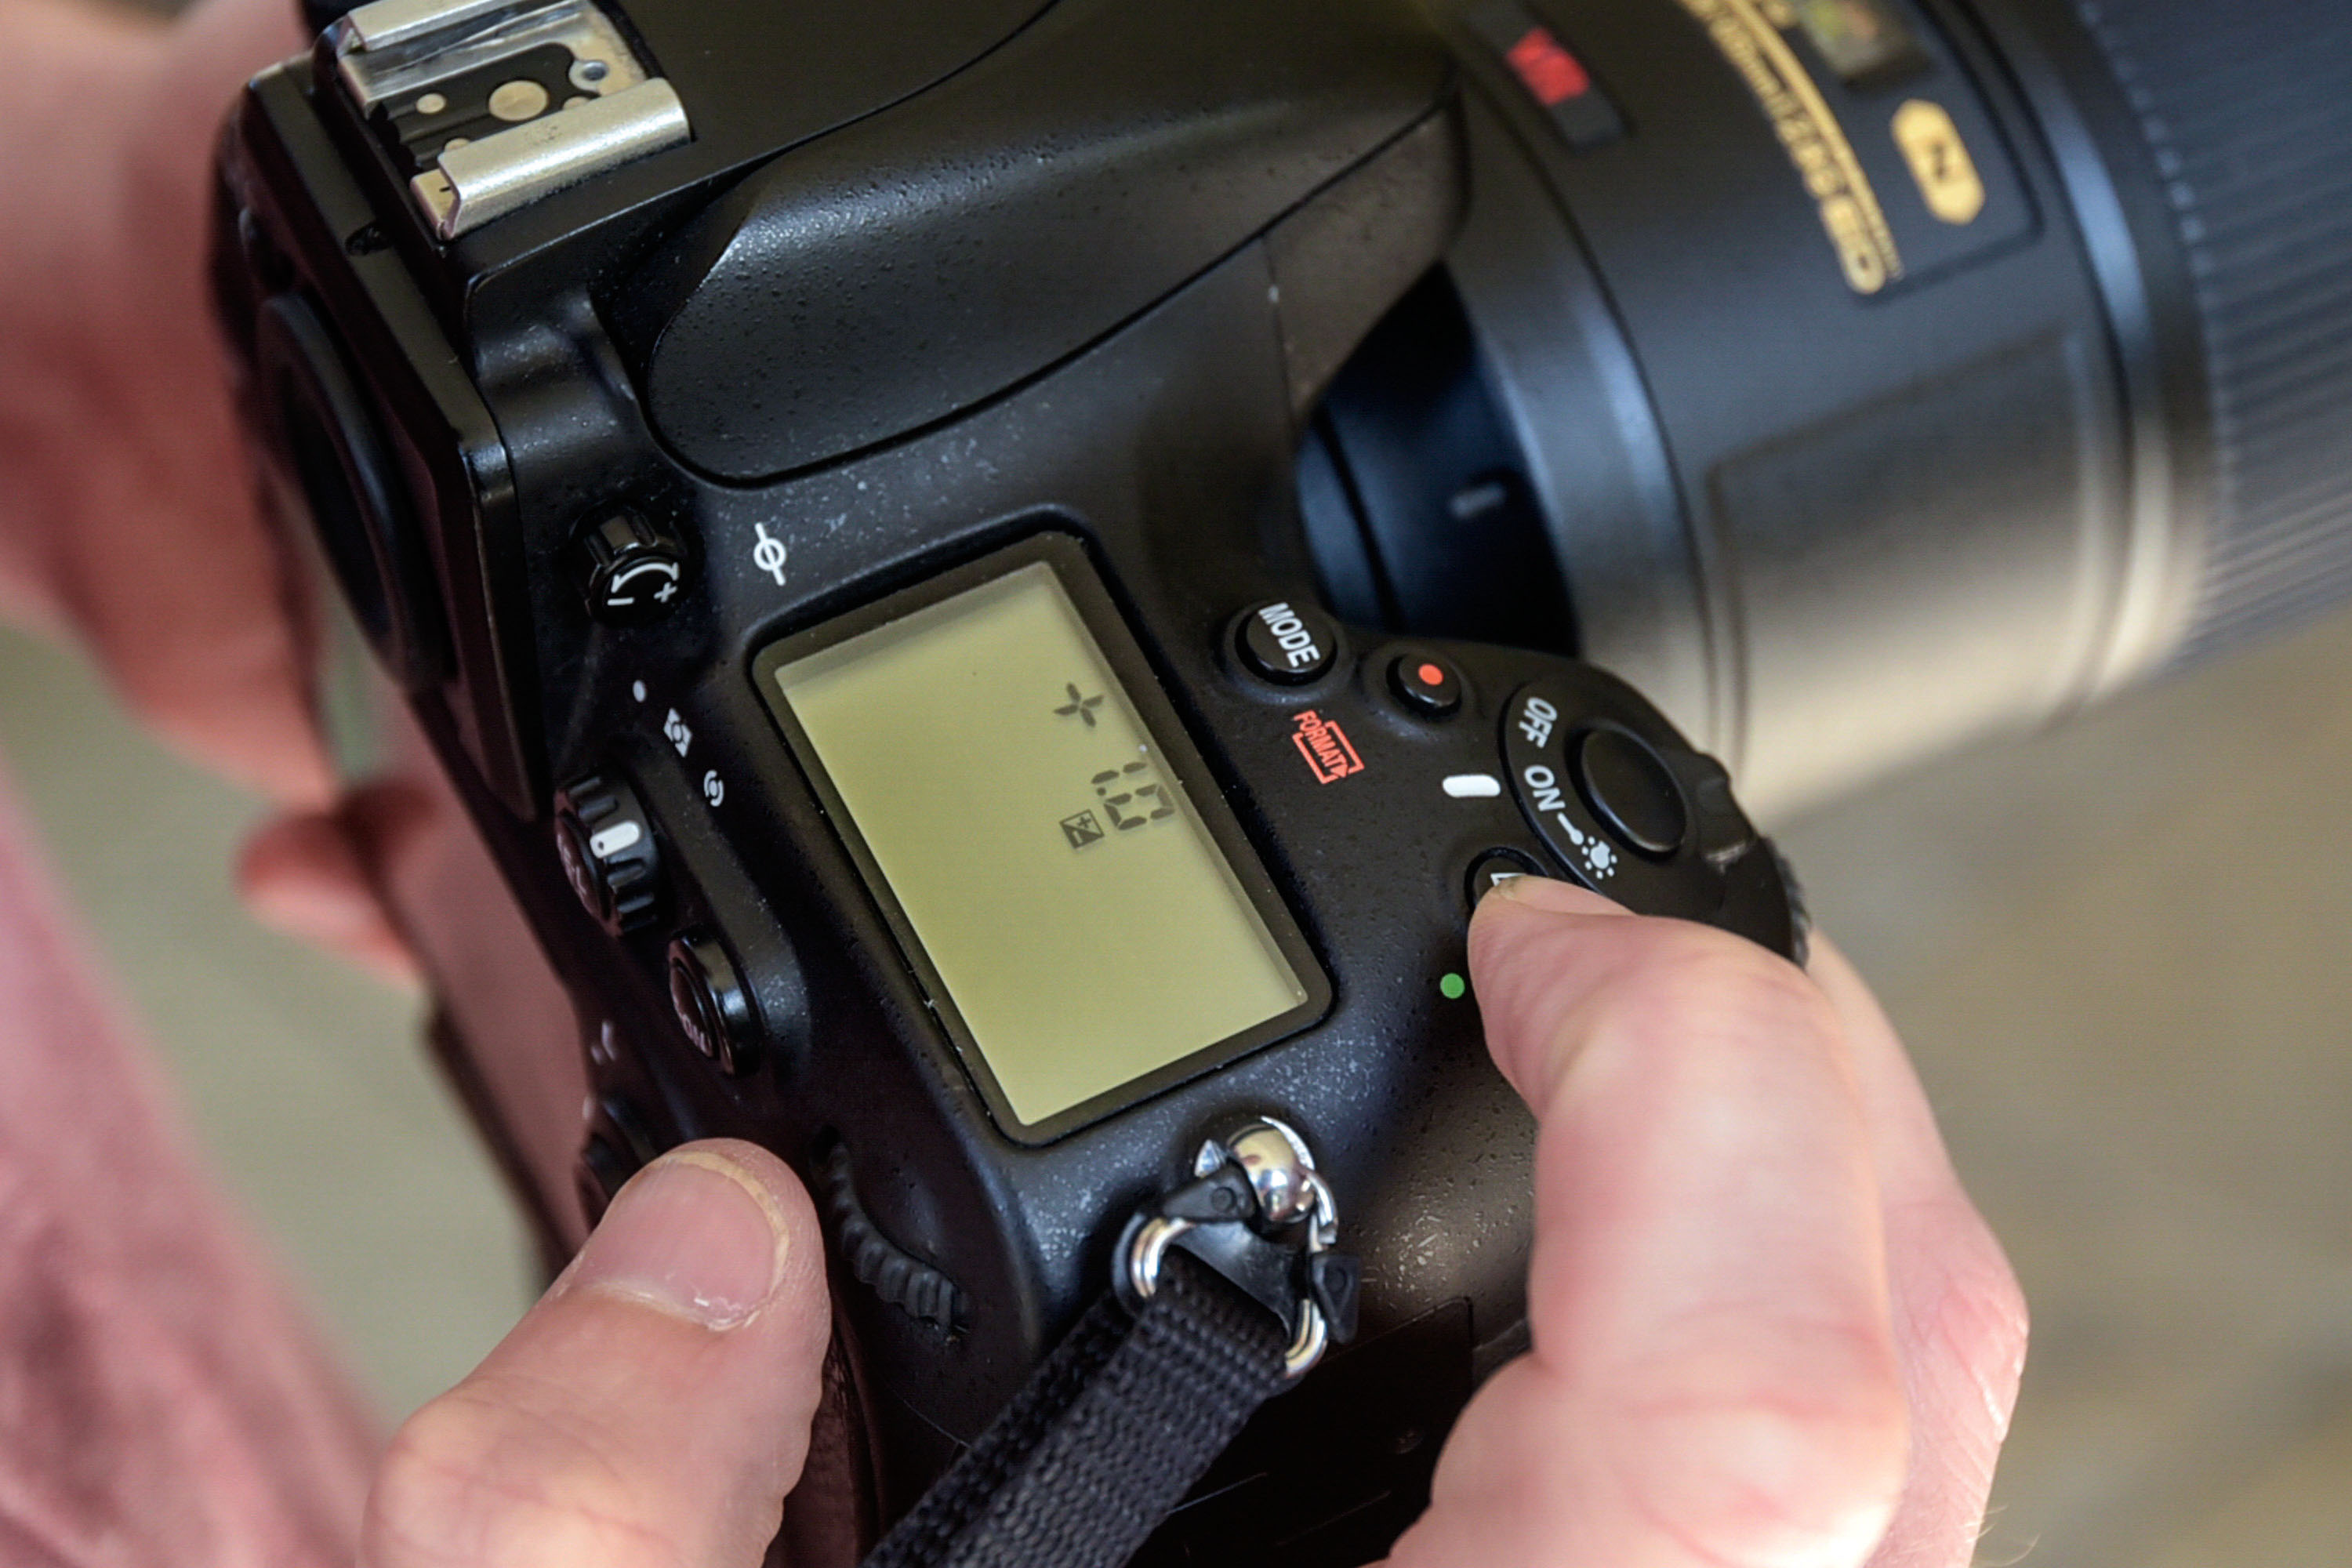
If you don’t want to leave your subject in the dark, now’s the time to try exposure compensation. Some cameras have a dedicated exposure compensation button on the top plate, while on some bodies it might be operated with a function button. Either way, use it to add in more light – here we’ll try +1 stop.
03 Don't stop at a stop
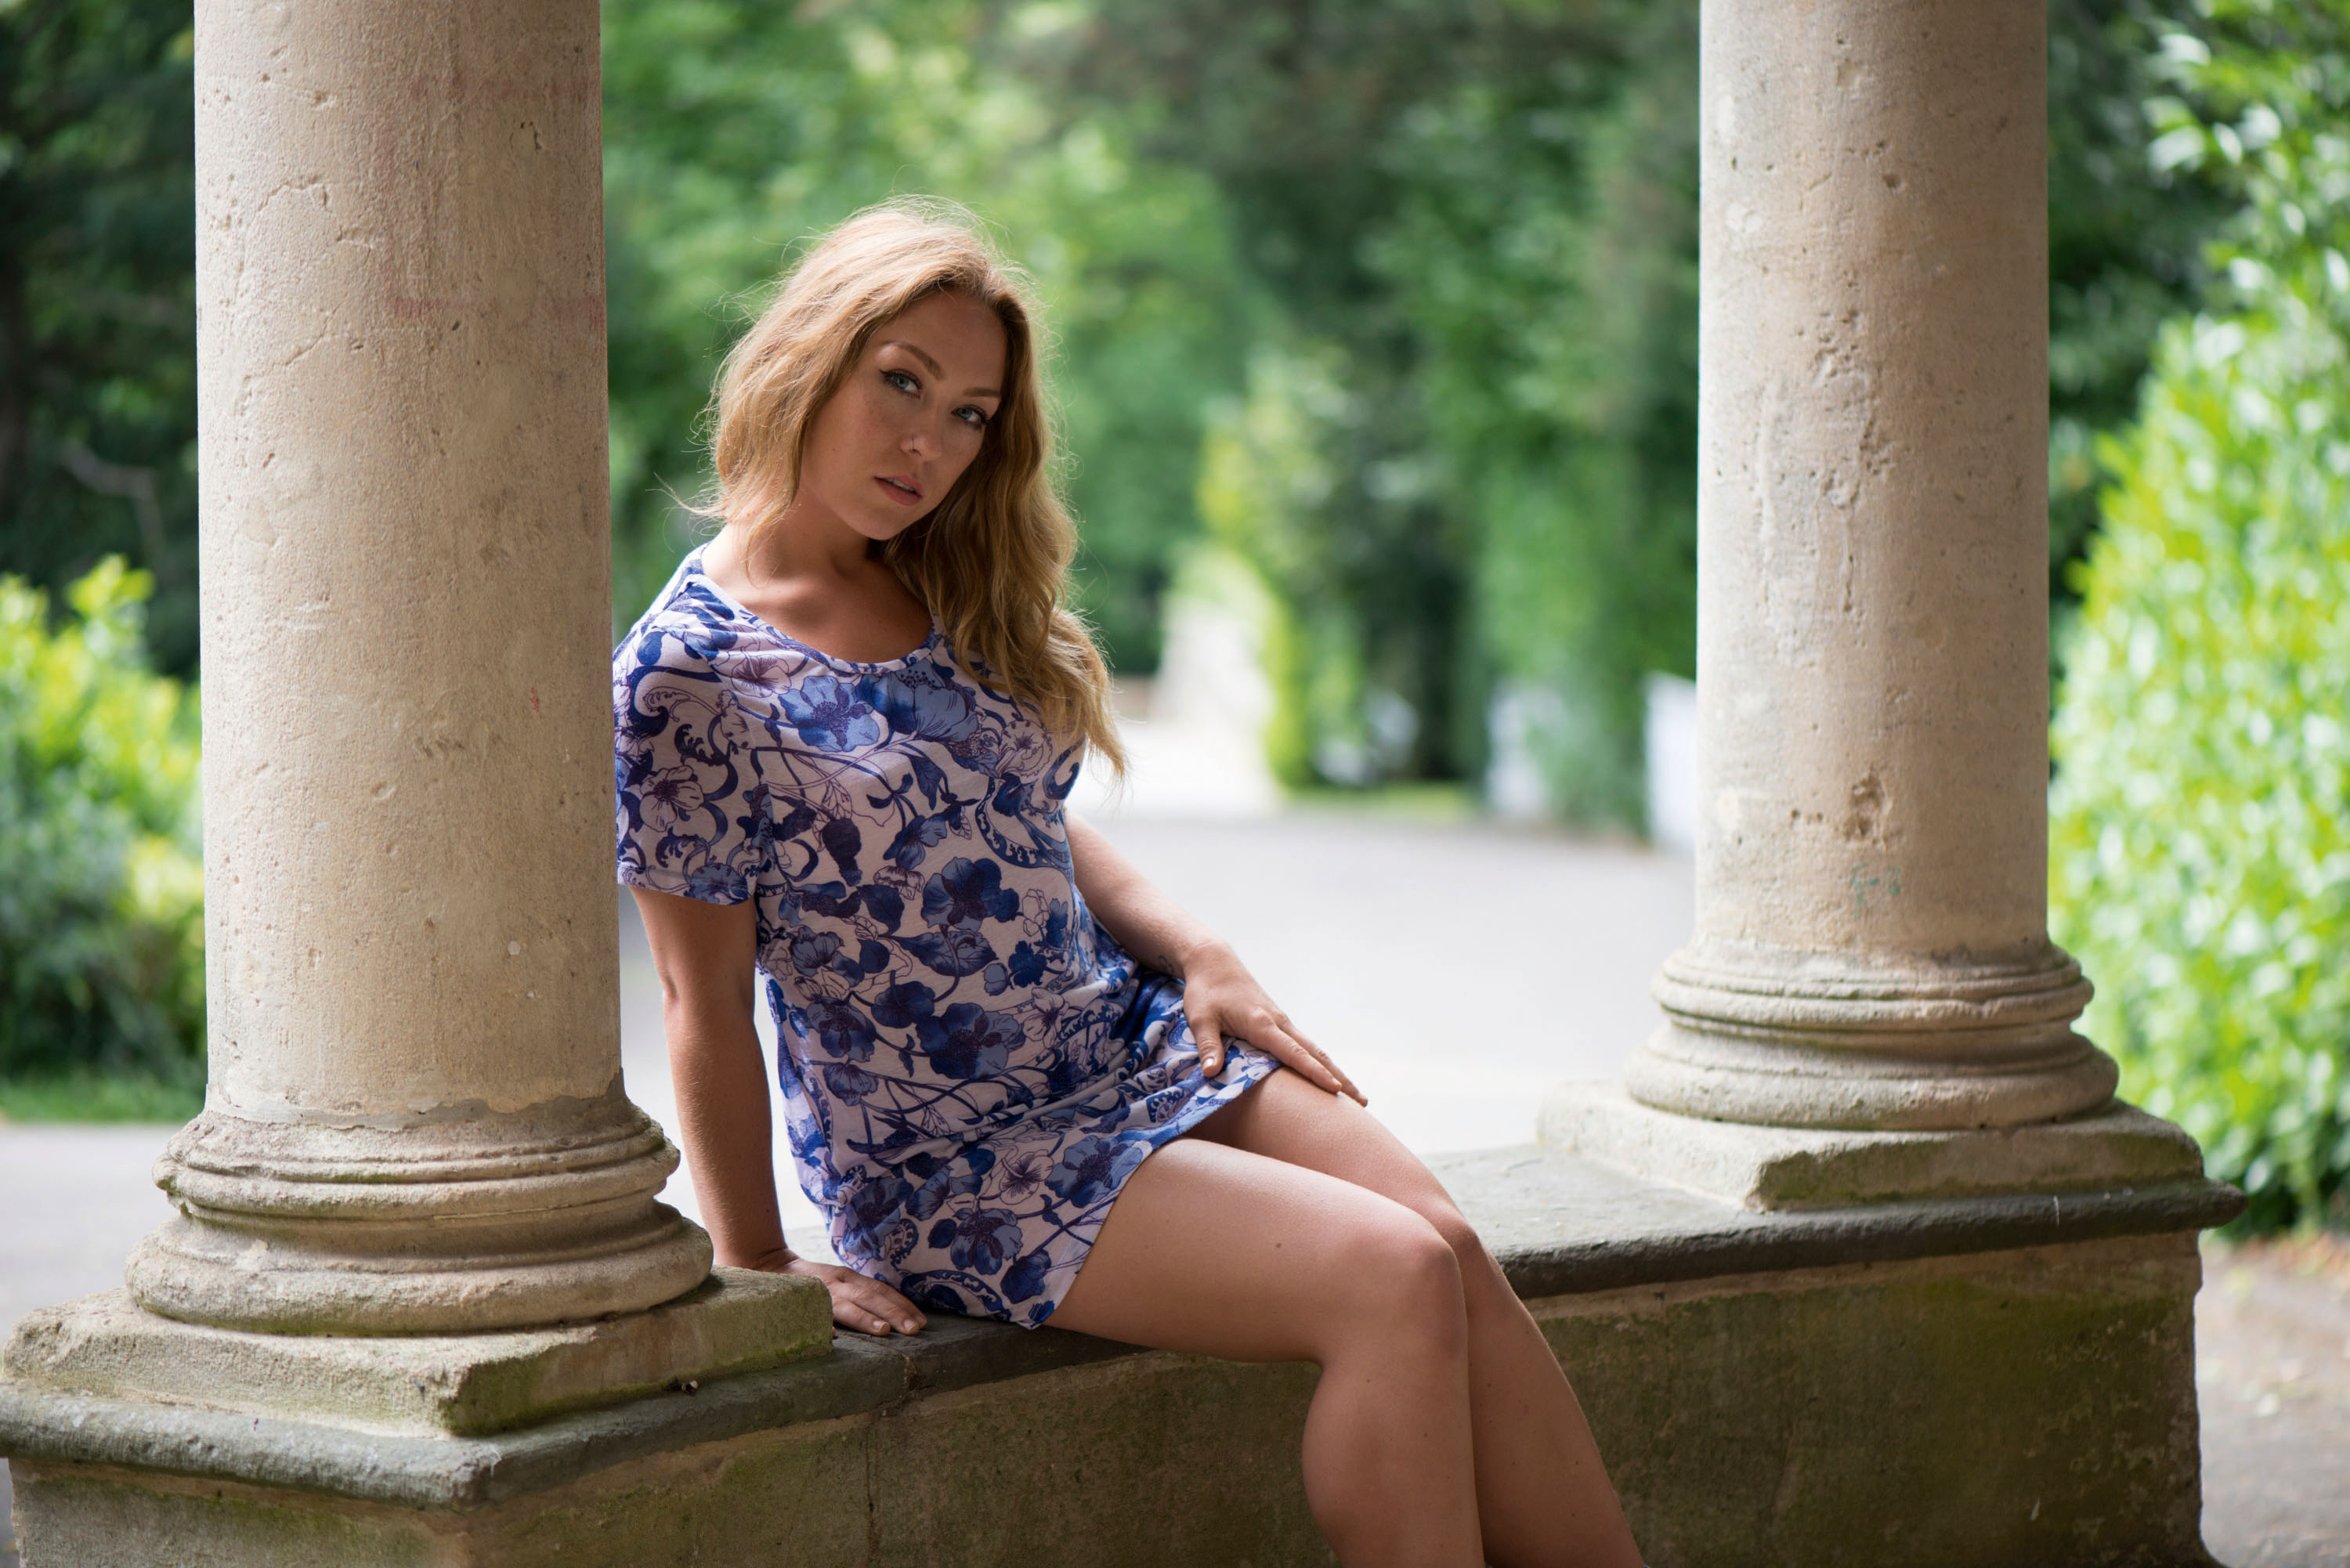
At +1 stop we’ve lifted the subject, but perhaps not enough. So we can try adding in a little more light; we took it to +2.3 for our second image here. This correctly exposes the face; it blows out some of the background detail, but that’s fine – we can’t have it both ways.
04 Change the mood
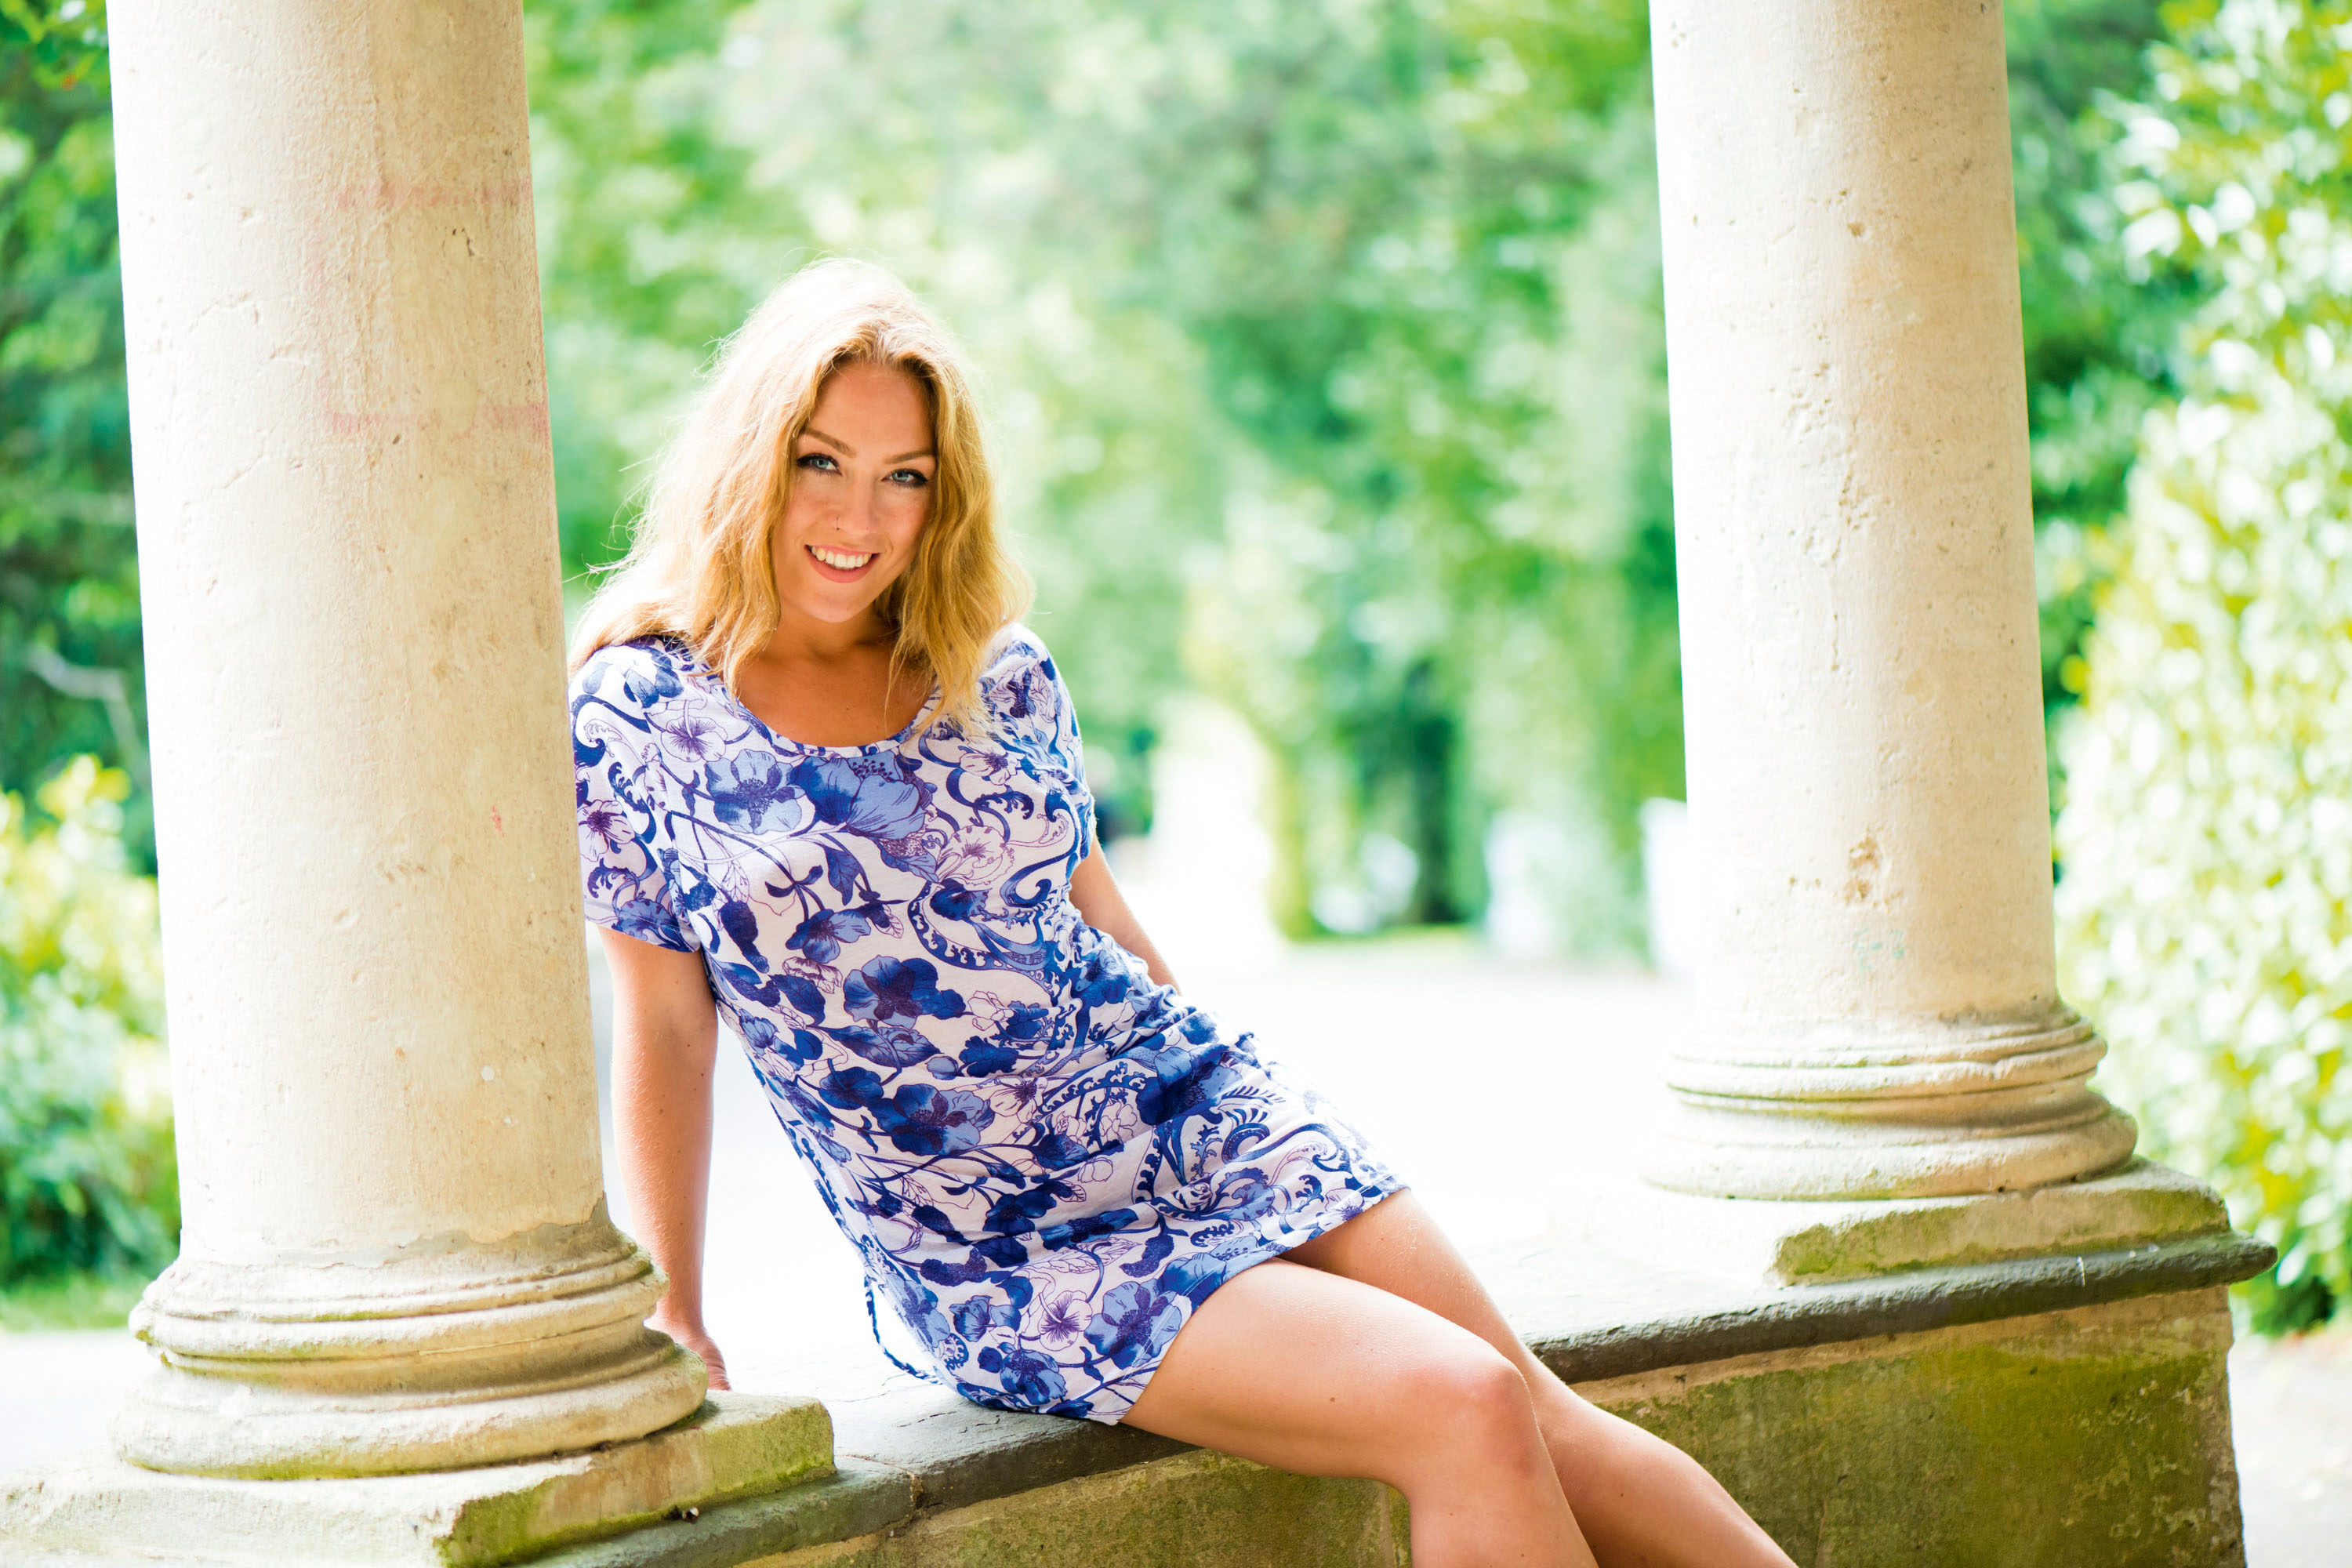
Exposure compensation gives you a huge degree of control over the mood of your shots. Here, with the flick of a dial, we go from a moody silhouette to a bright, airy portrait. Just remember to reset it when you’re done, or it might trip you up the next time you pick up your camera!
05 Light to dark
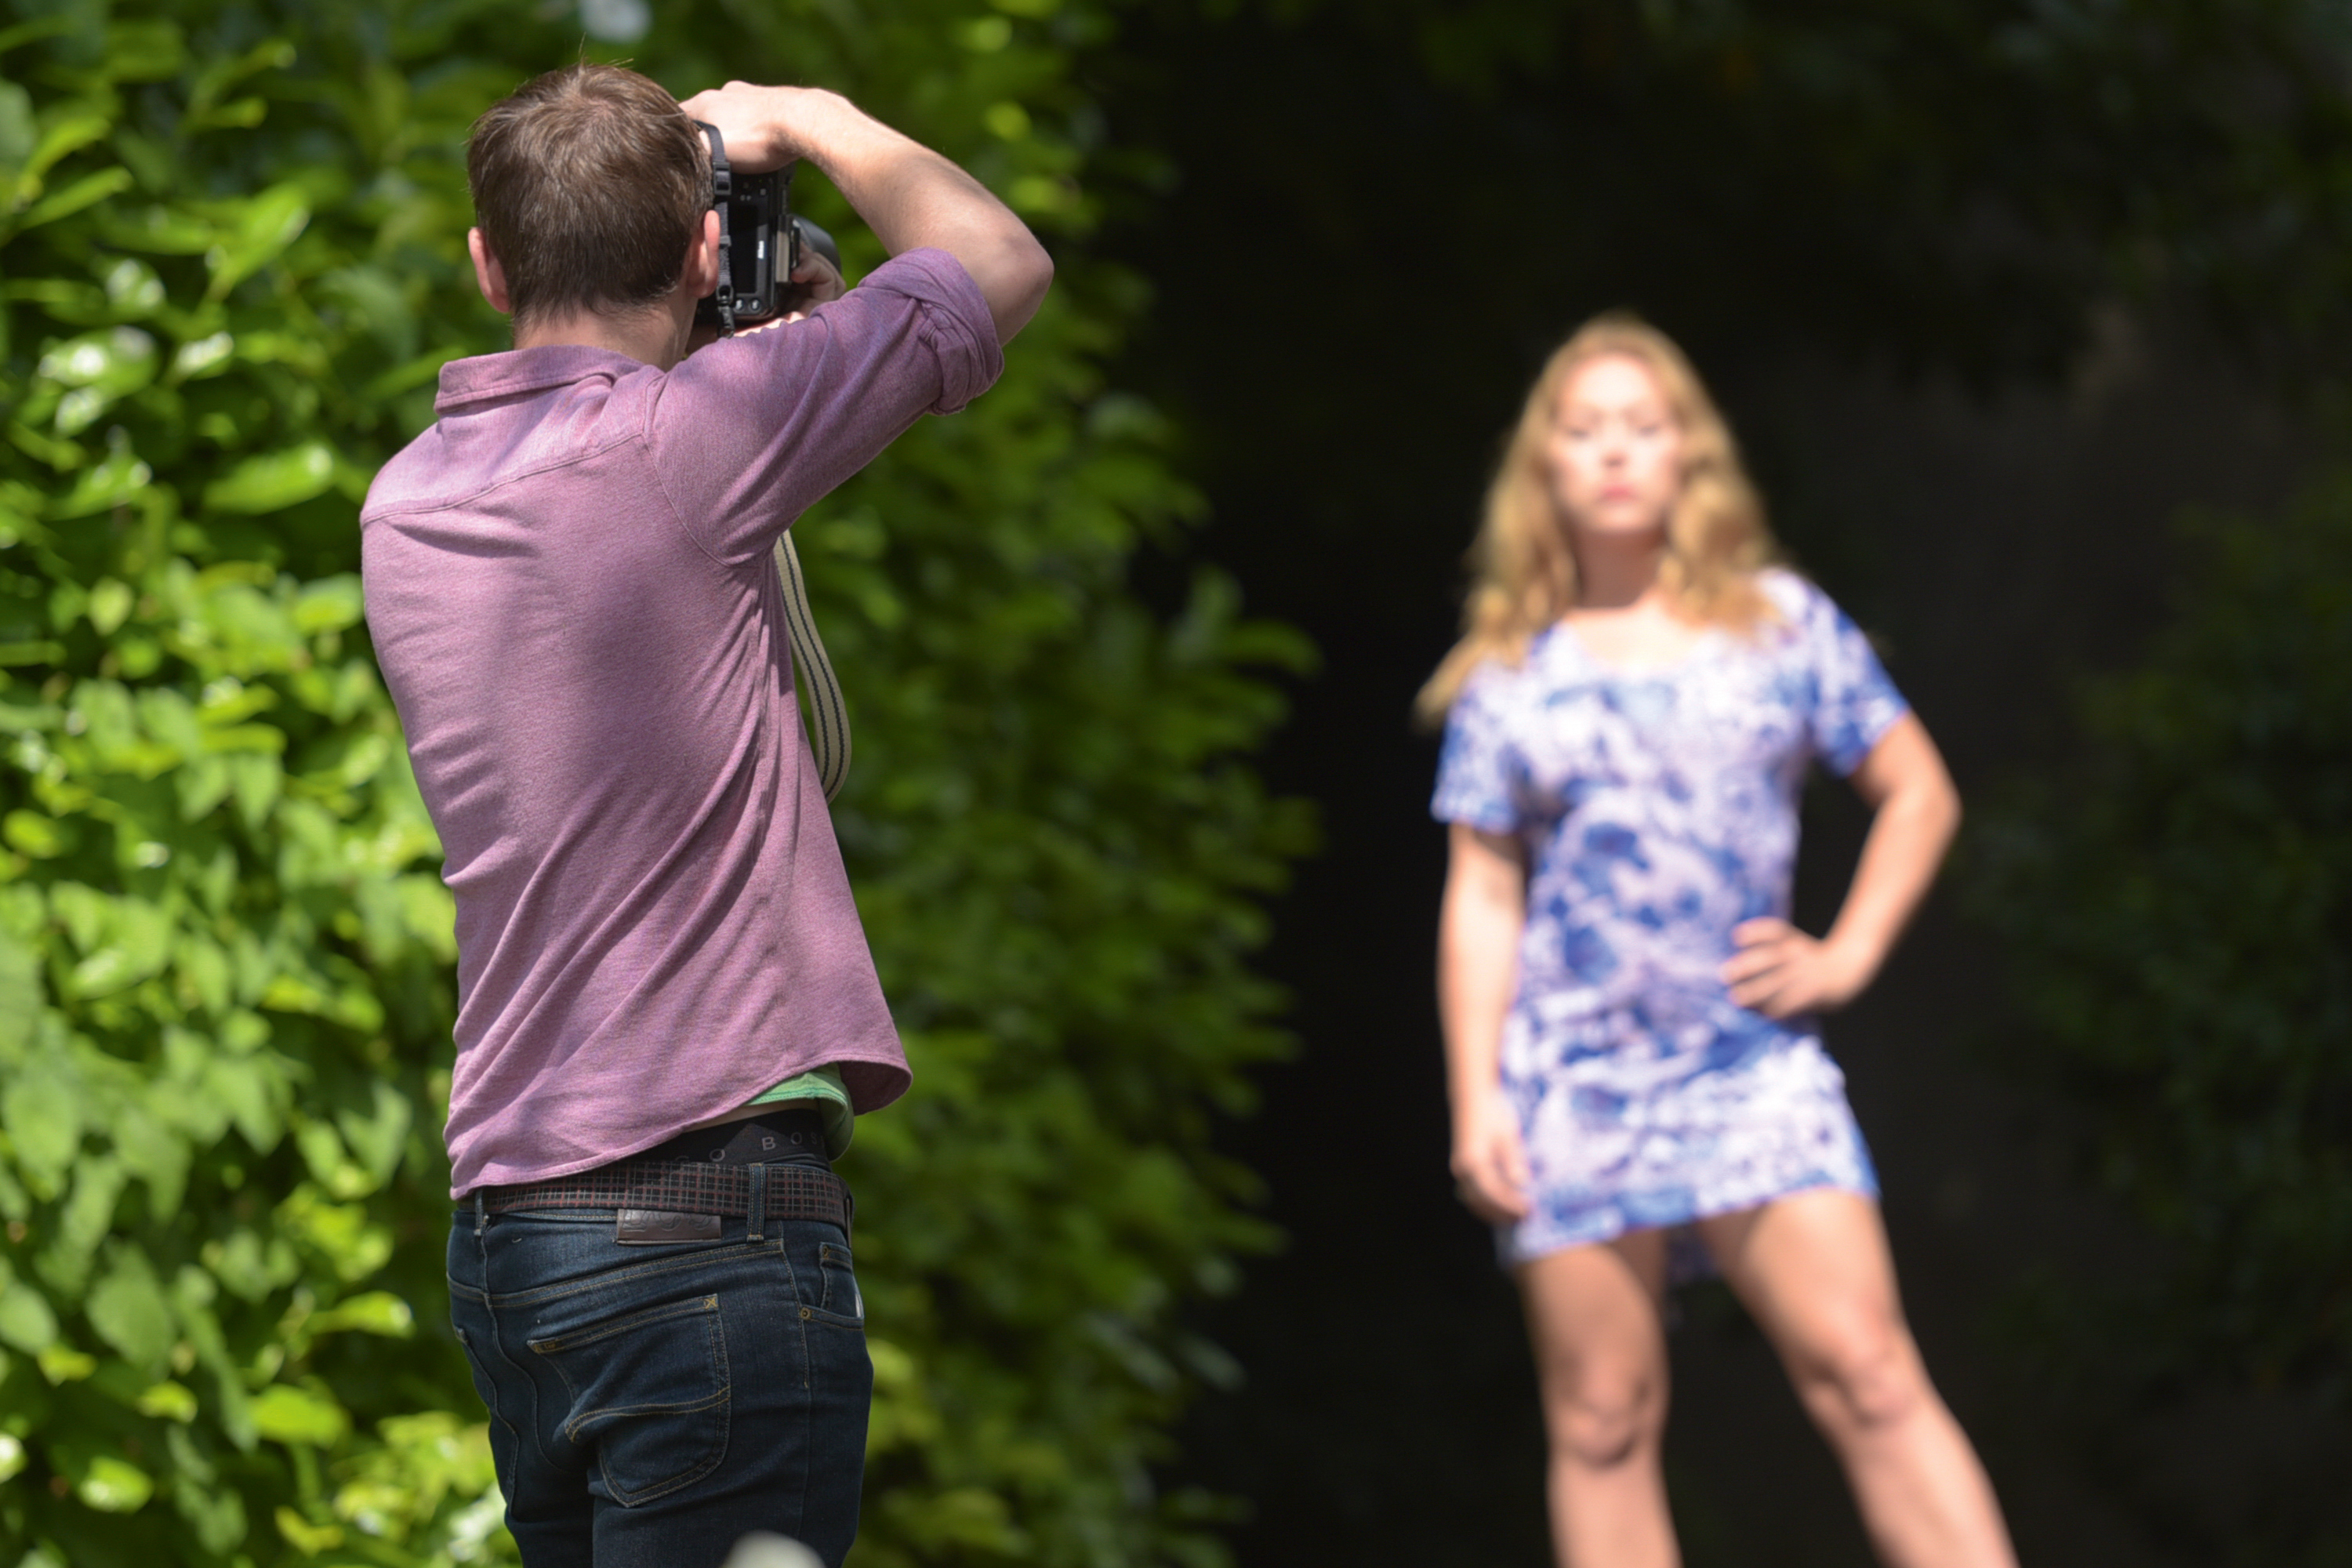
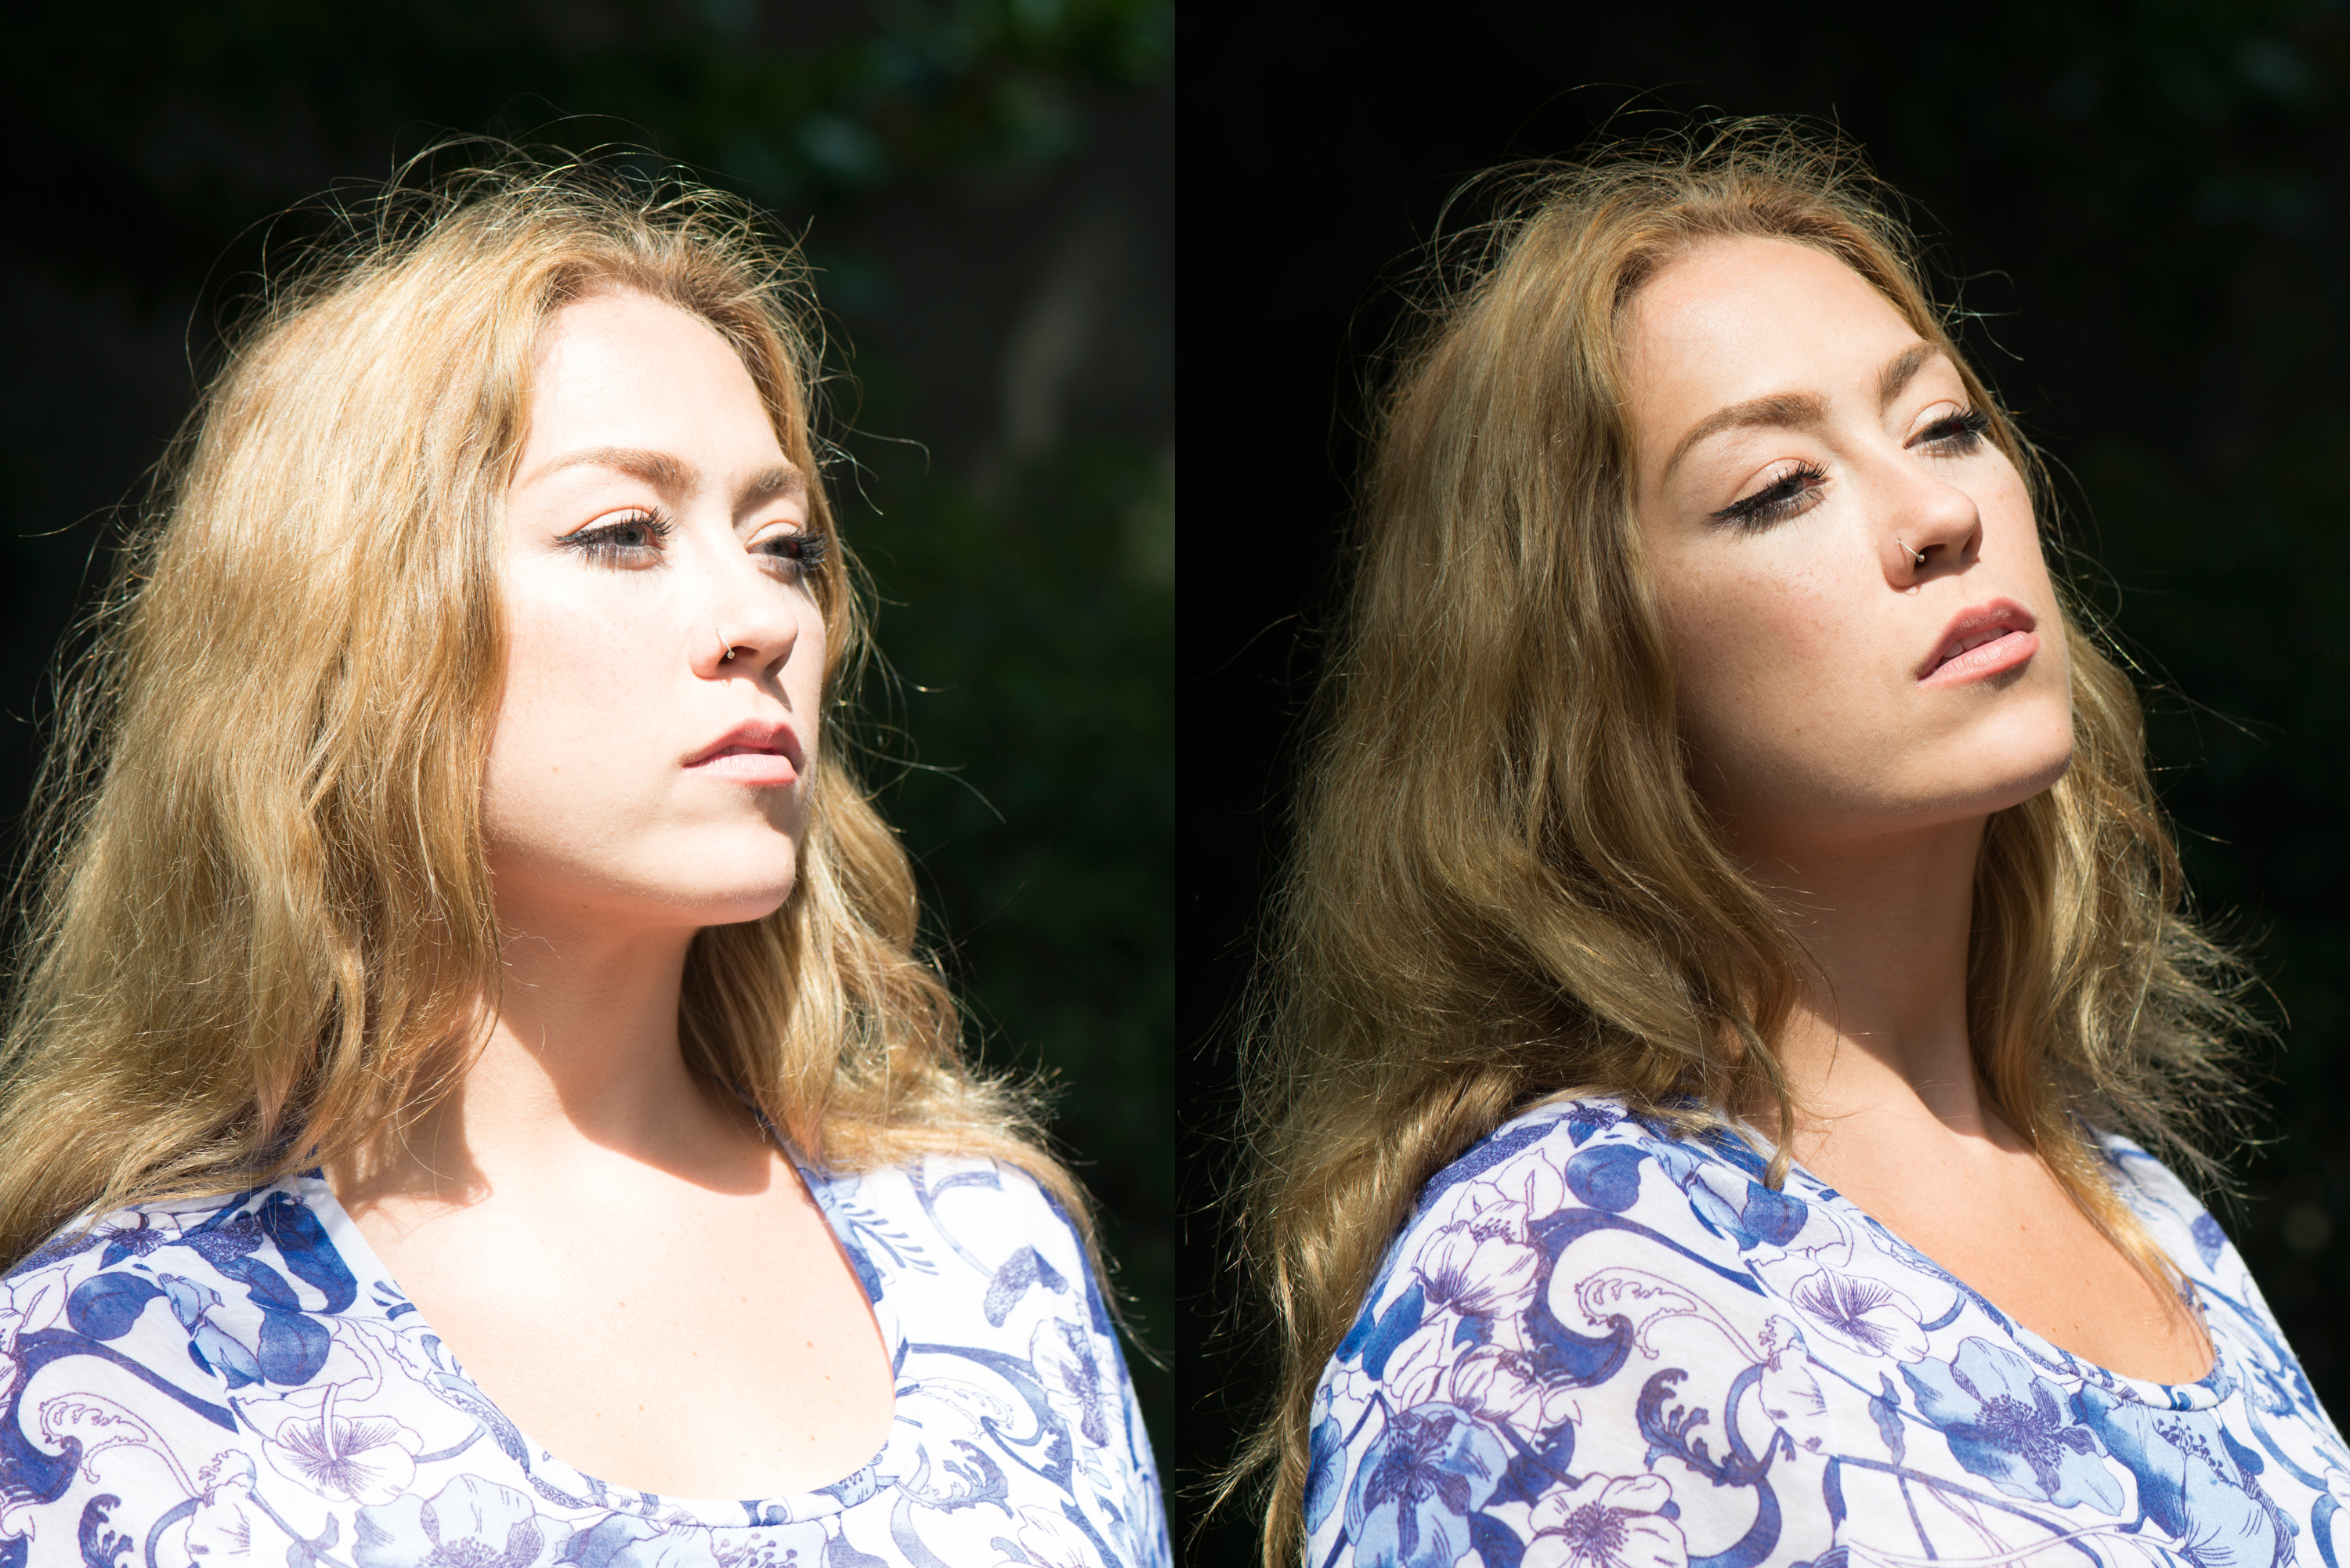
When the background is darker than the subject, we have the opposite problem: our metering system may overexpose the face. We moved our model into the light and shot into a background of shade. When shooting in sunshine like this, tilt the face upwards towards the light.
06 Take it down
As you can see from the shot on the left, the large dark patches in the frame have fooled the meter into thinking we need more light than we really do, resulting in an overexposed face. So we dial in -1 stop of underexposure and the skin tones look much nicer.
N-Photo: The Nikon Magazine is a monthly publication that's entirely dedicated to Nikon users. For the best news, reviews, projects and more, subscribe to N-Photo today!
Read more:
Best light meter for photography
How to use a light meter (and why not to trust the camera meter!)
Cheat sheet: At-a-glance guide to metering modes
The lead technique writer on Digital Camera Magazine, PhotoPlus: The Canon Magazine and N-Photo: The Nikon Magazine, James is a fantastic general practice photographer with an enviable array of skills across every genre of photography.
Whether it's flash photography techniques like stroboscopic portraits, astrophotography projects like photographing the Northern Lights, or turning sound into art by making paint dance on a set of speakers, James' tutorials and projects are as creative as they are enjoyable.
He's also a wizard at the dark arts of Photoshop, Lightroom and Affinity Photo, and is capable of some genuine black magic in the digital darkroom, making him one of the leading authorities on photo editing software and techniques.
