The art of photographing artwork: taking photos of paintings like a pro
Use your camera gear to capture artwork and paintings the right way with simple camera skills and cross-polarization
Watch video: The art of copying art
Whether you want to capture a painting like the above, digitize old prints, or reproduce any kind of canvas, there’s a real skill in capturing artwork with your camera. Not only do you need the colours to be accurate, you also need to master the spread, angle and quality of the light to minimise glare and show the work at its best.
This painting by the artist Bryan Hanlon has a wonderfully subtle color palette. To reproduce the painting in print and digital form, it needs to be captured in the right way.
It starts with your choice of EOS camera, lens, and exposure settings. Then comes the lighting. This is where a sound set-up can make all the difference. You’ll need two lights, and if reflections and glare are an issue, then you can cut through them by setting them up for cross-polarization. The cross-polarization technique is known for the colorful effect you get when capturing transparent plastics. But the uses don’t end there. In a copy work set-up it can be invaluable.
We just need a polarized source of light and a circular polarizing filter on our camera. It takes moments to set up, but it has a magical effect on reflections, which are often the biggest headache when capturing artwork. We’re not just talking about big patchy reflections but also the tiny, weaker reflected light that can cloud over fine details and brushwork. The technique completely eradicates the reflections, which makes it especially useful for dark, glossy paintings that are more susceptible to glare.
1. Watch for glare
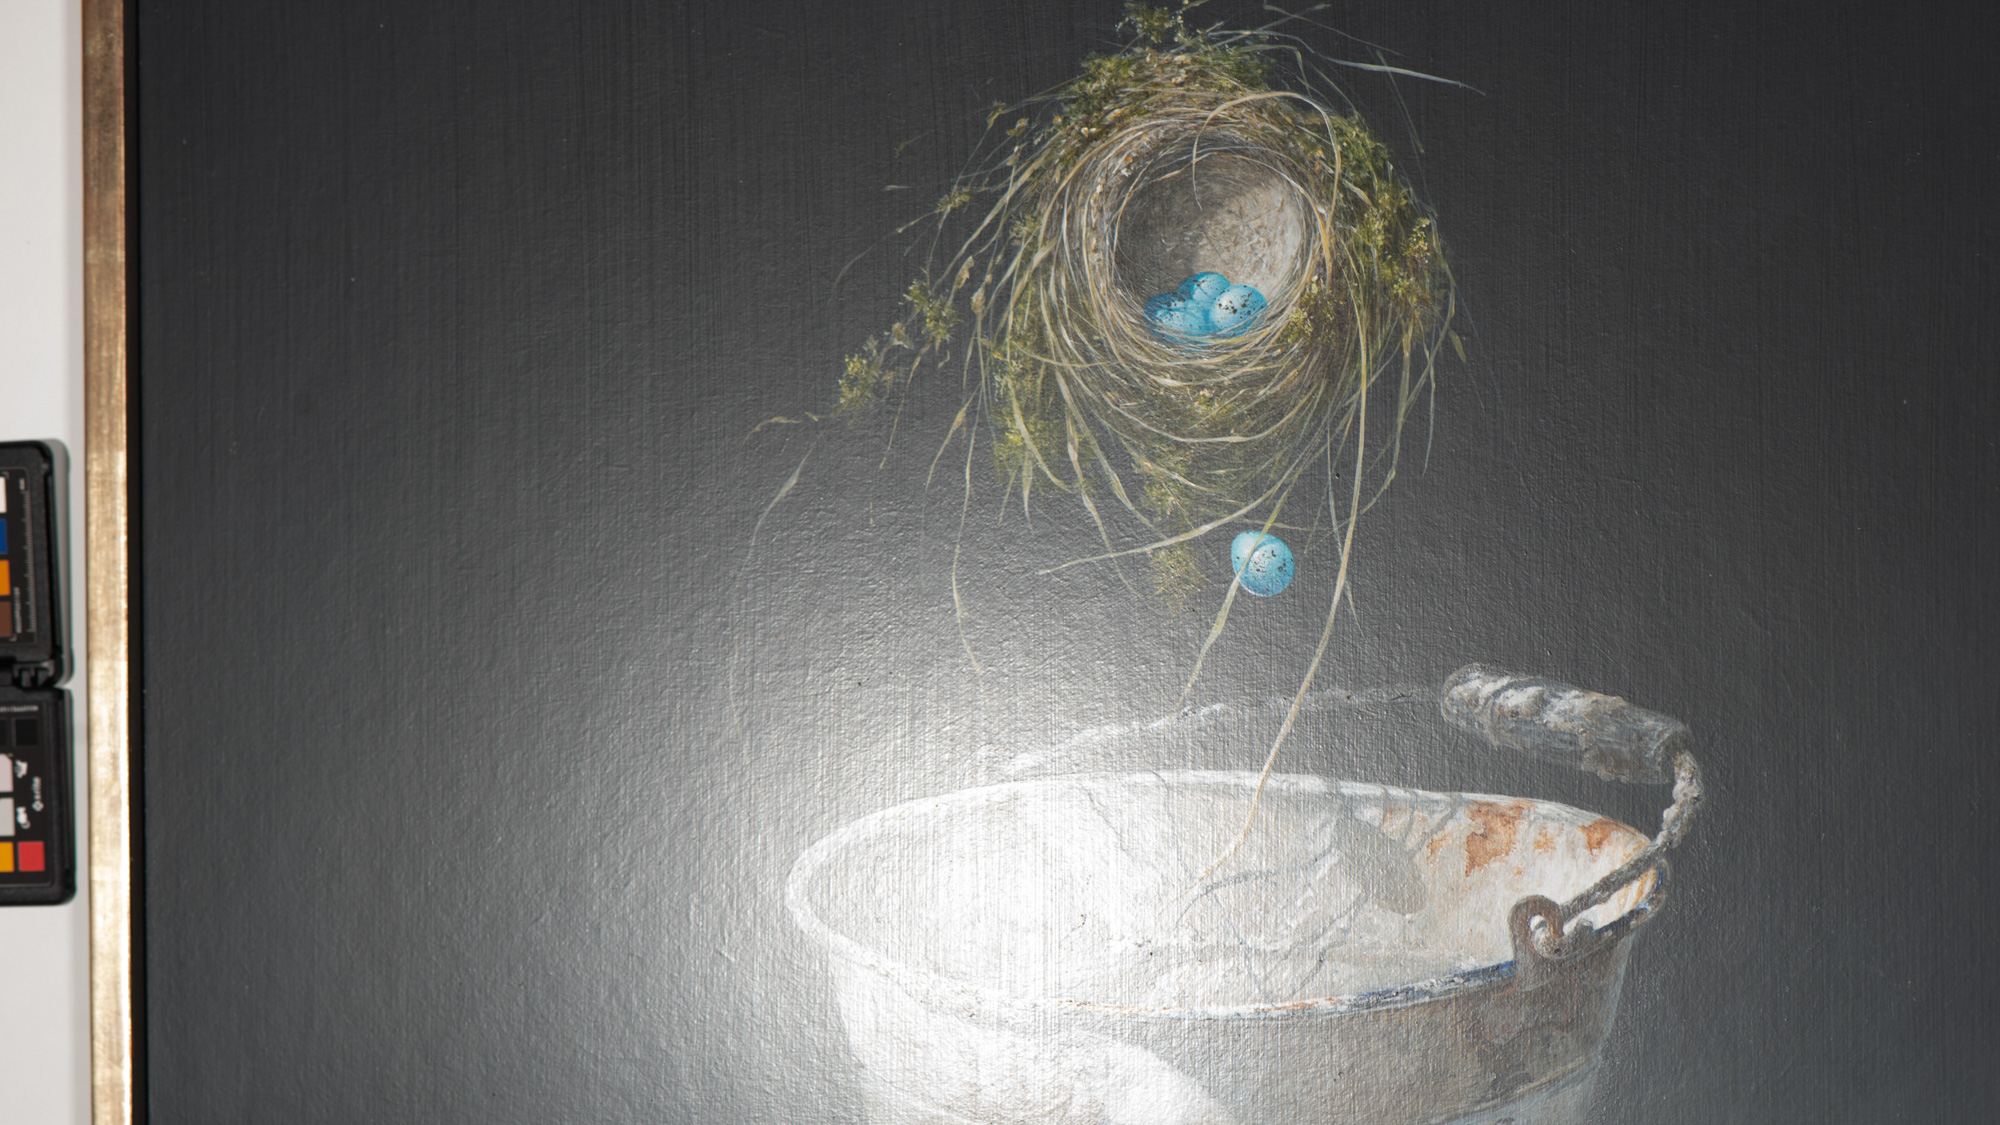
The magic of cross-polarization is the complete lack of reflections, which makes it an invaluable technique for shooting artwork, especially dark, glossy paintings. Here before turning the circular polarizer on the lens, the artwork picks up a nasty reflection from the light.
2. Remove all reflections
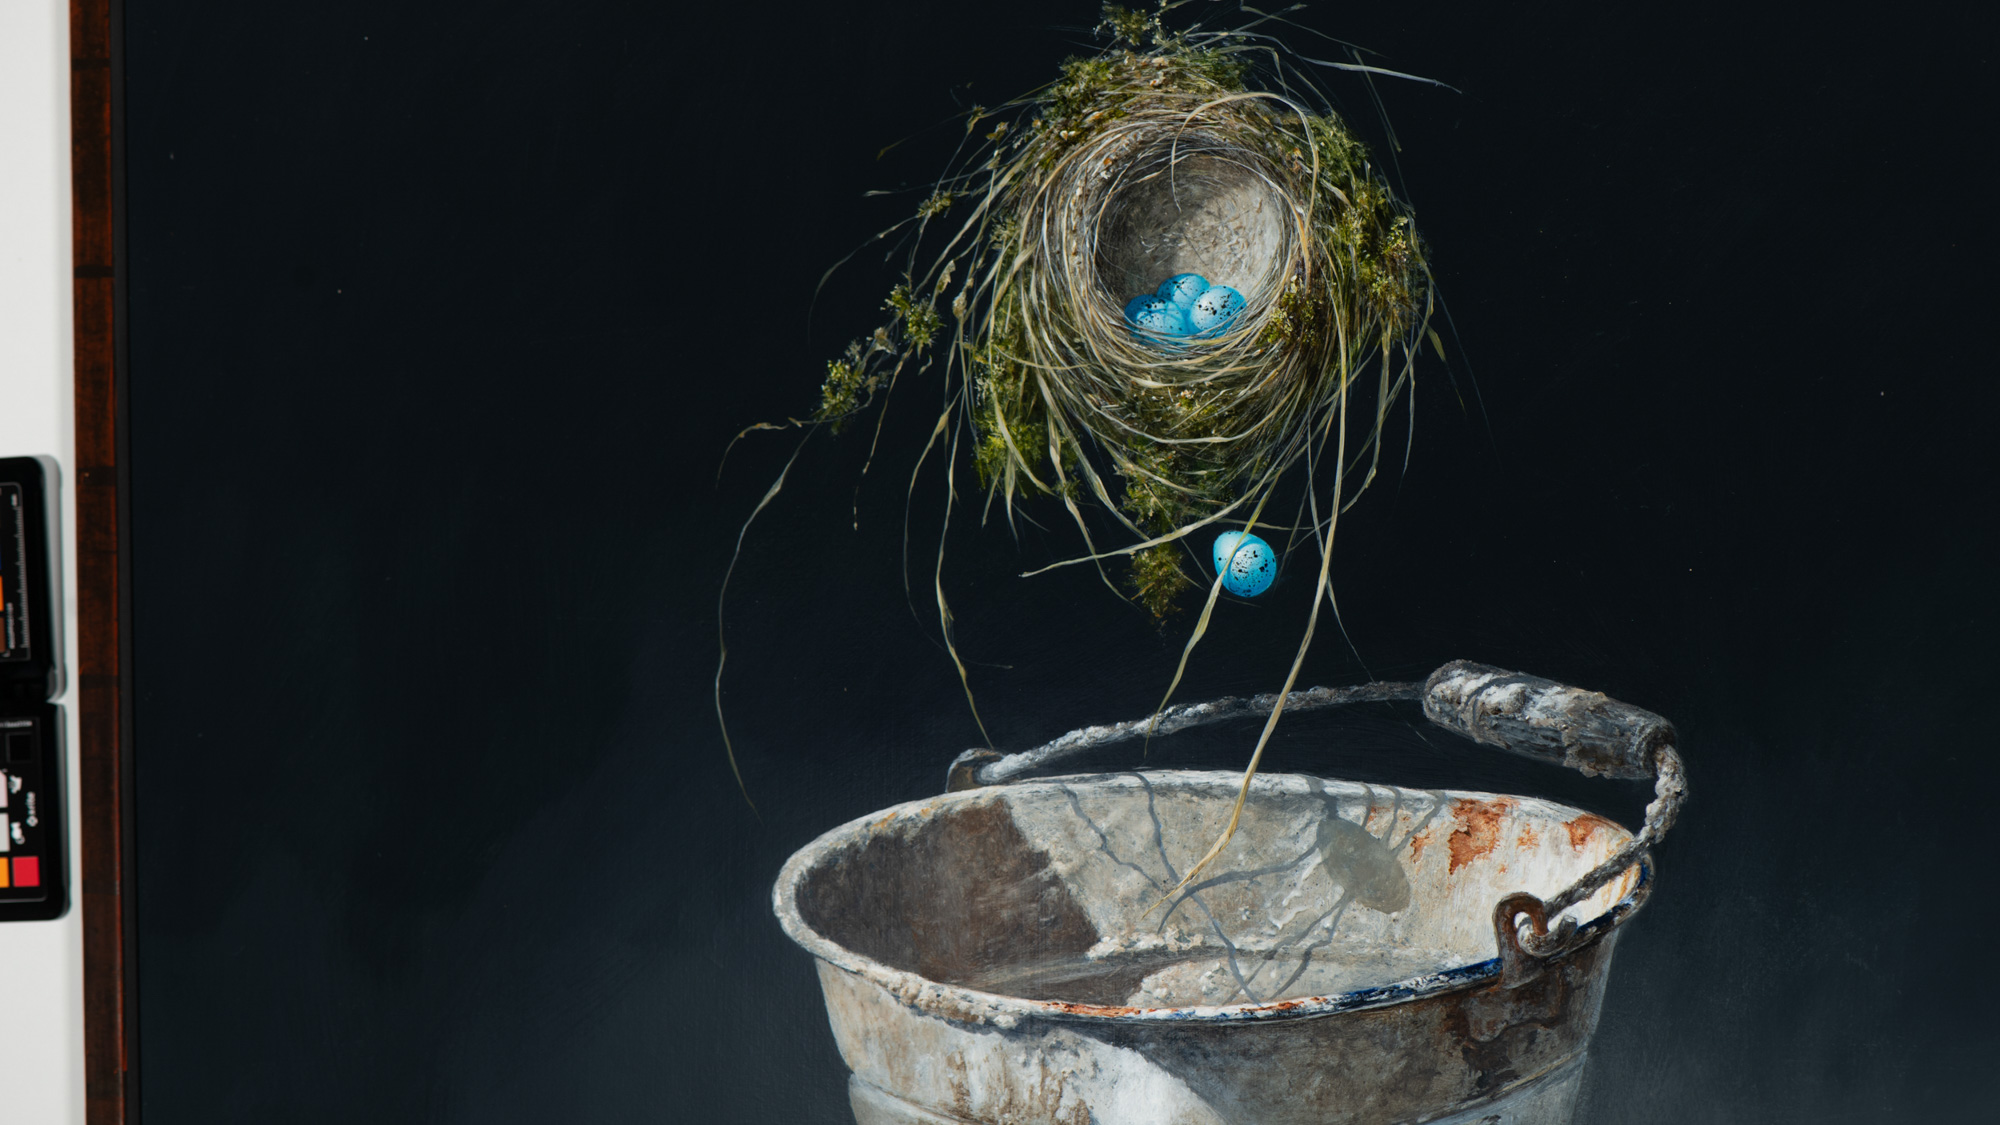
After turning the polarizer, the reflection is gone and the gold frame is almost black. Cross-polarization produces the near-complete lack of reflections. Small details can look crisper and white flecks you see in photographed paint strokes will disappear.
3. No polarizers? no problem
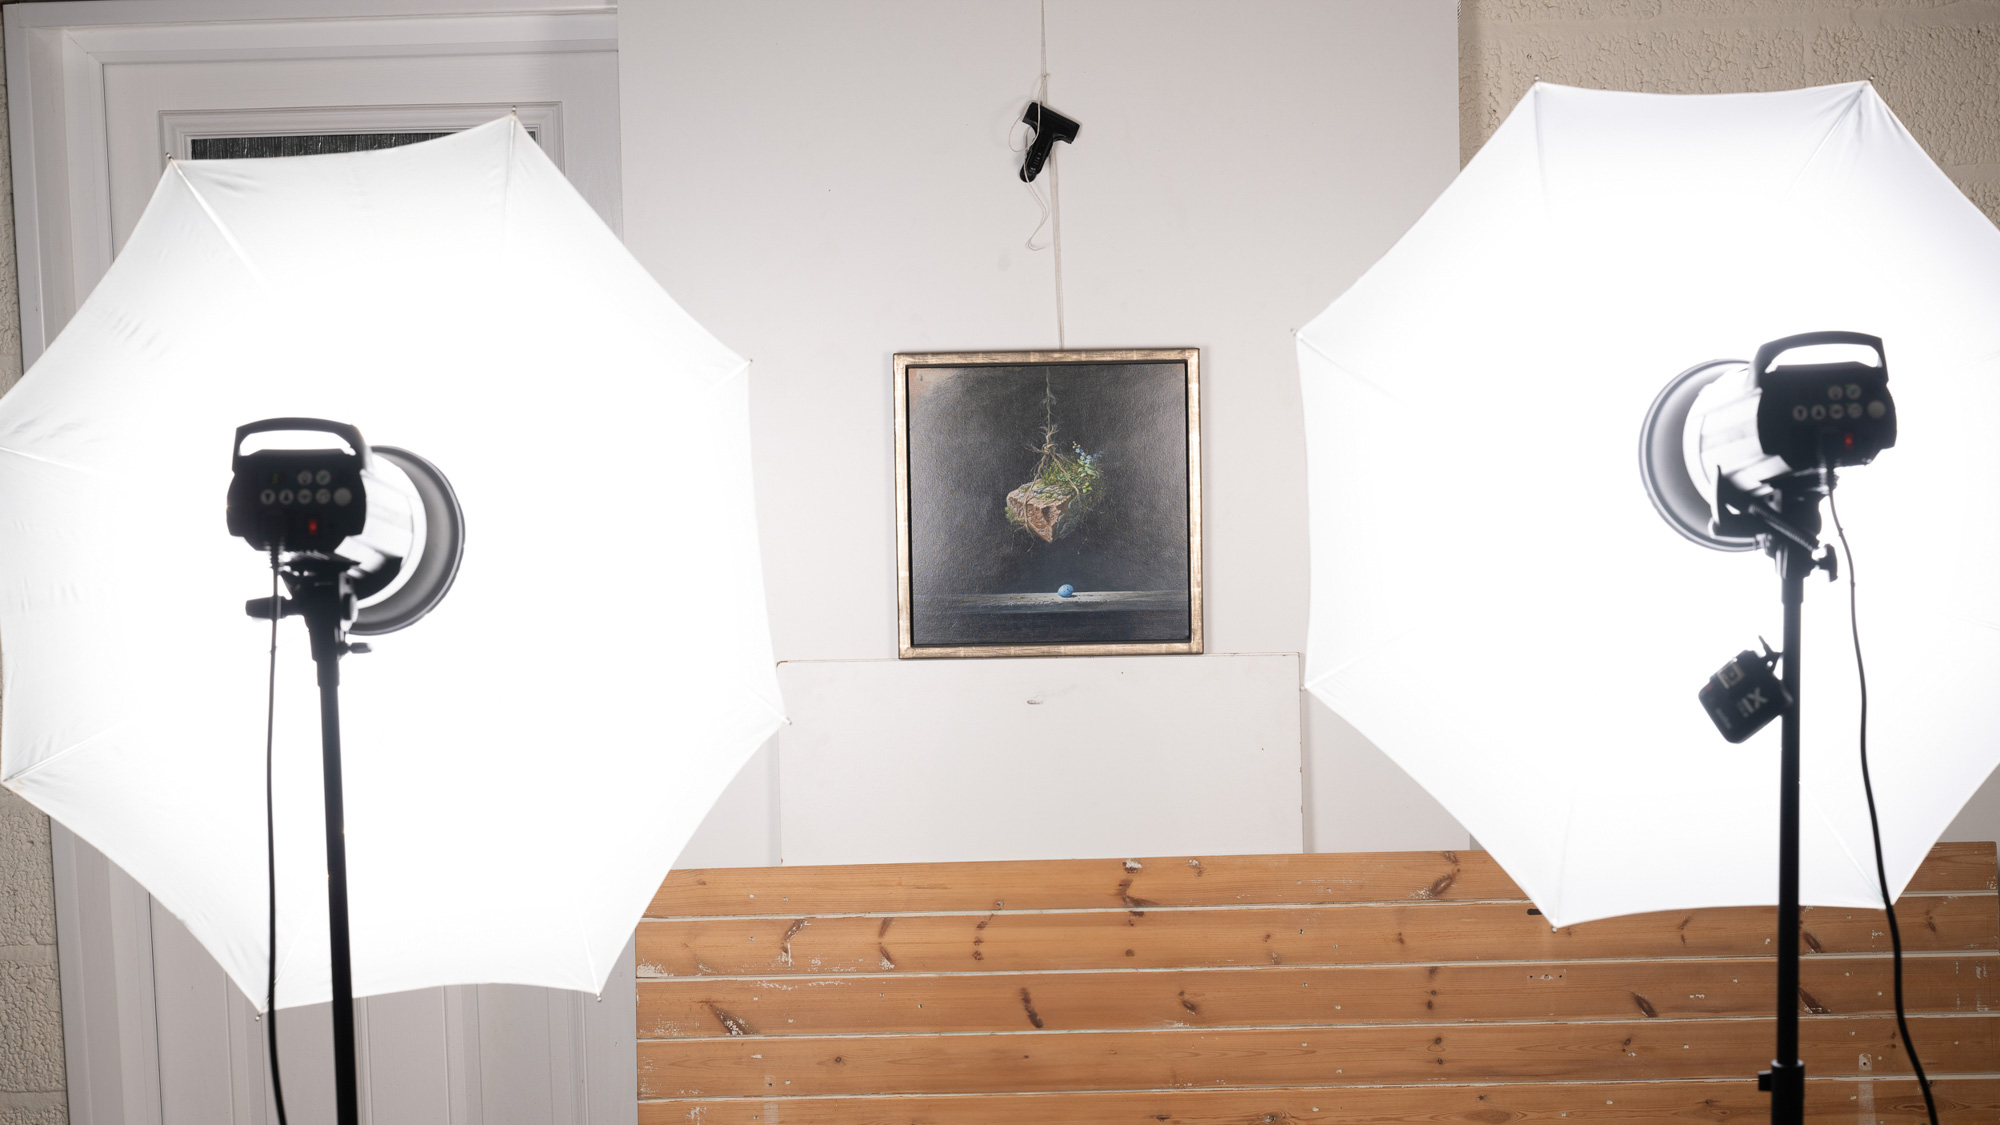
If you don’t use polarizing filters, all of the other tips mentioned here still apply. Place two lights either side of the artwork at 45 degrees, at the same distance and same power setting. You can use softboxes or umbrellas to diffuse the light for a larger spread.
4. Canon camera settings
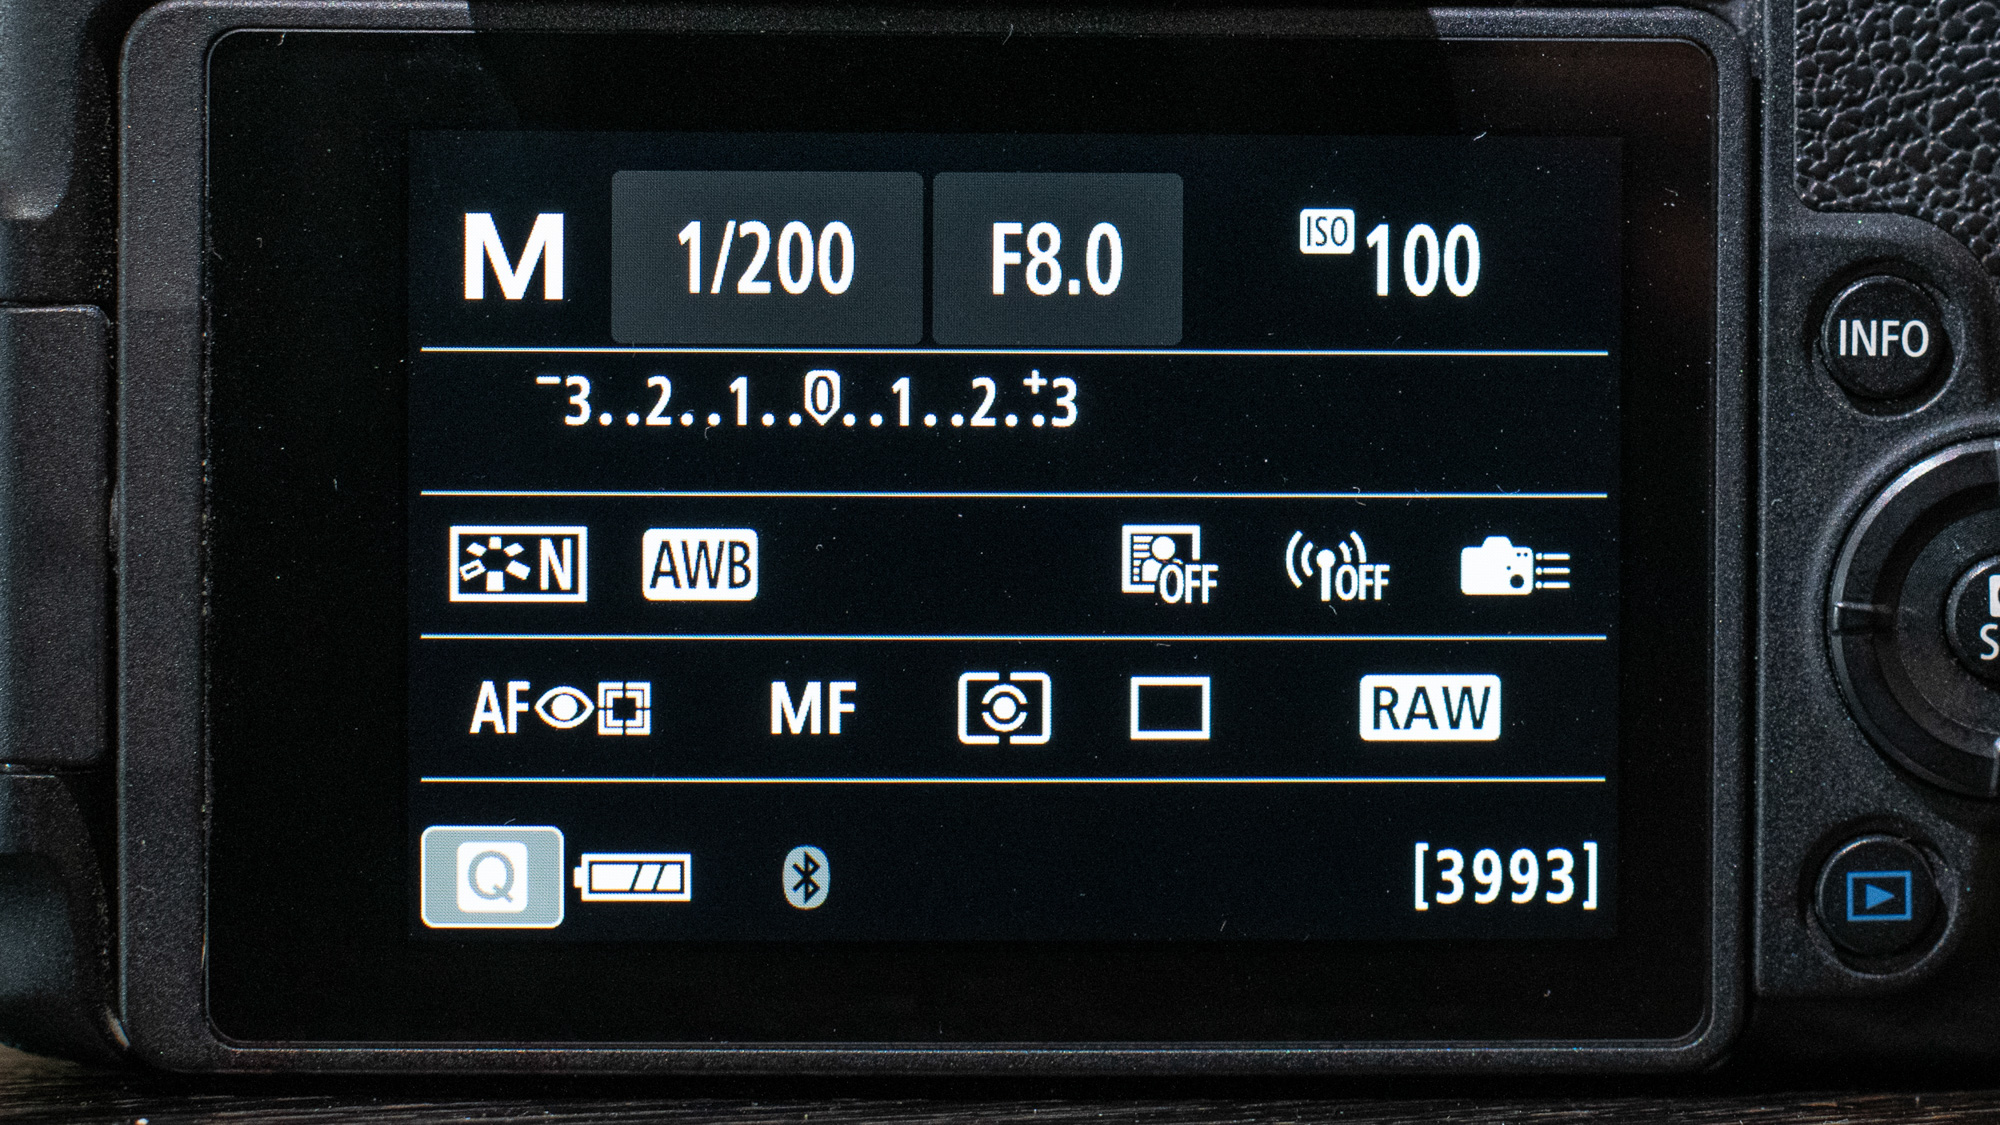
Set your camera to shoot in the RAW format. As for exposure, use Manual mode and set ISO100. Set the aperture to f/8 and shutter speed to 1/200 sec. Take test shots and adjust your flash’s power (keep them both the same power) until the exposure looks right.
5. Check the spread
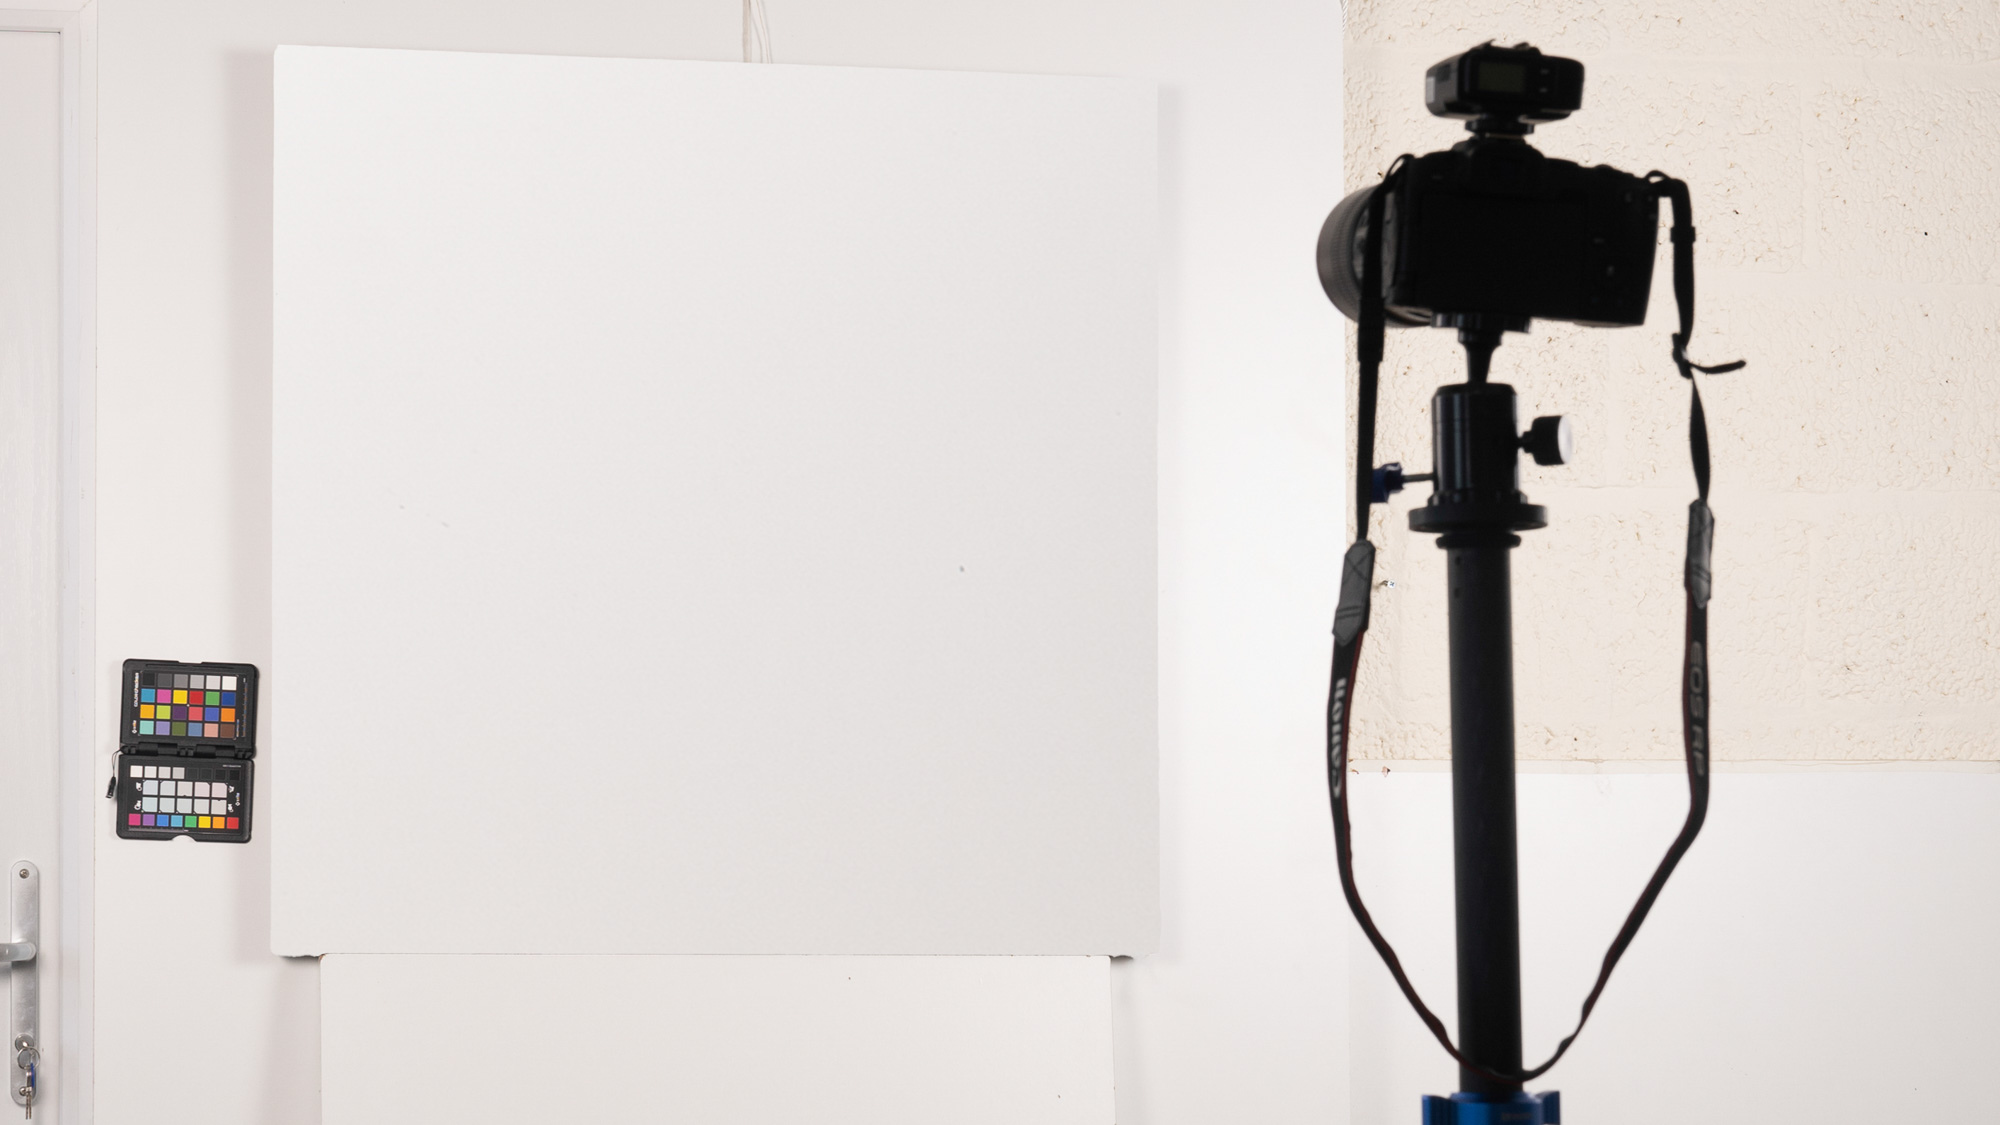
We want the spread of light across the painting to be even. To easily check this we can shoot a piece of white card and examine whether there are any hot spots. It can be easier to see if you underexpose slightly so temporarily close down the aperture.
6. Consistent lights
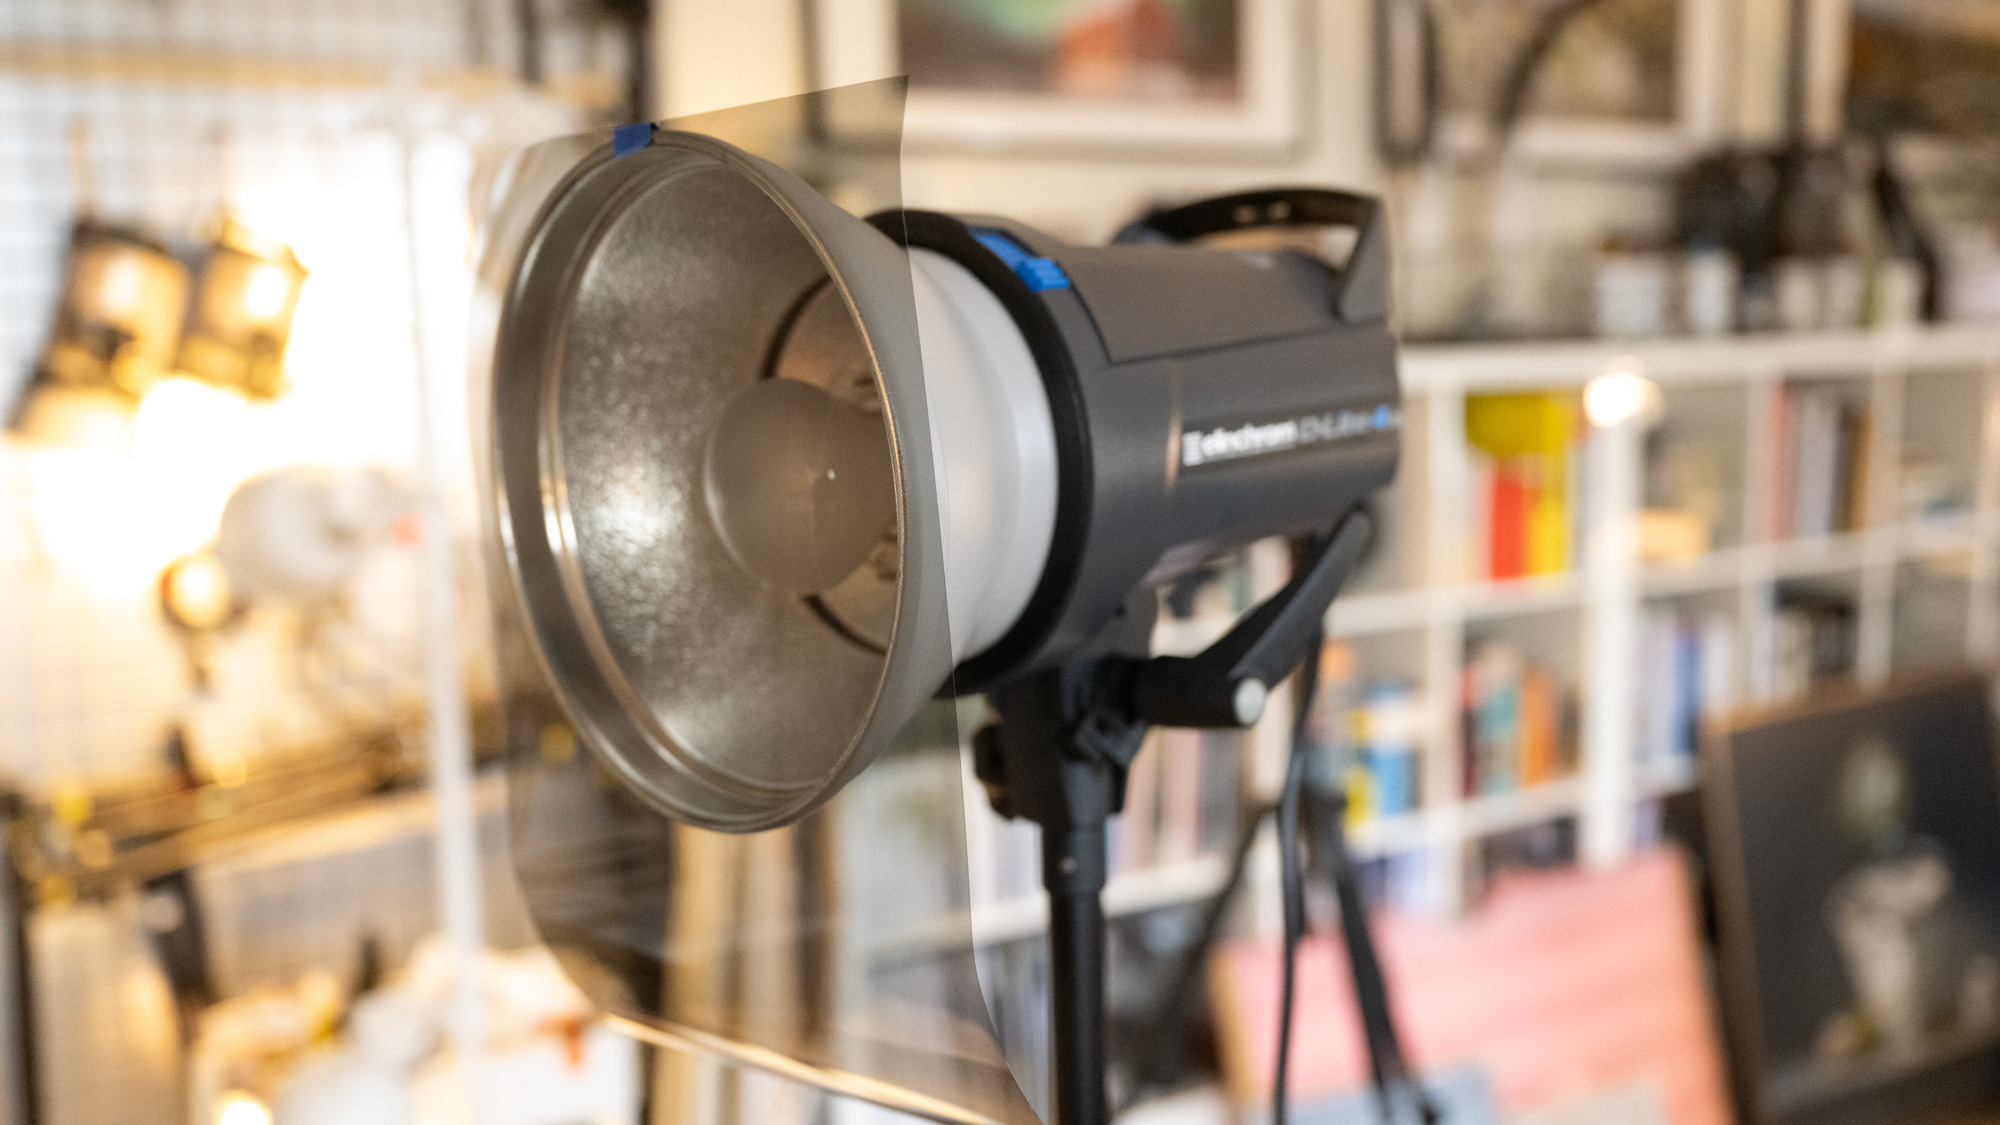
If you’re using more than one light, avoid mixing brands or types of lighting. Two of the same lights set to the same power are ideal. Look for lights with a high CRI rating (colour rendering index). If you’re using modifiers like softboxes make sure they’re the same.
7. Crop to the edges
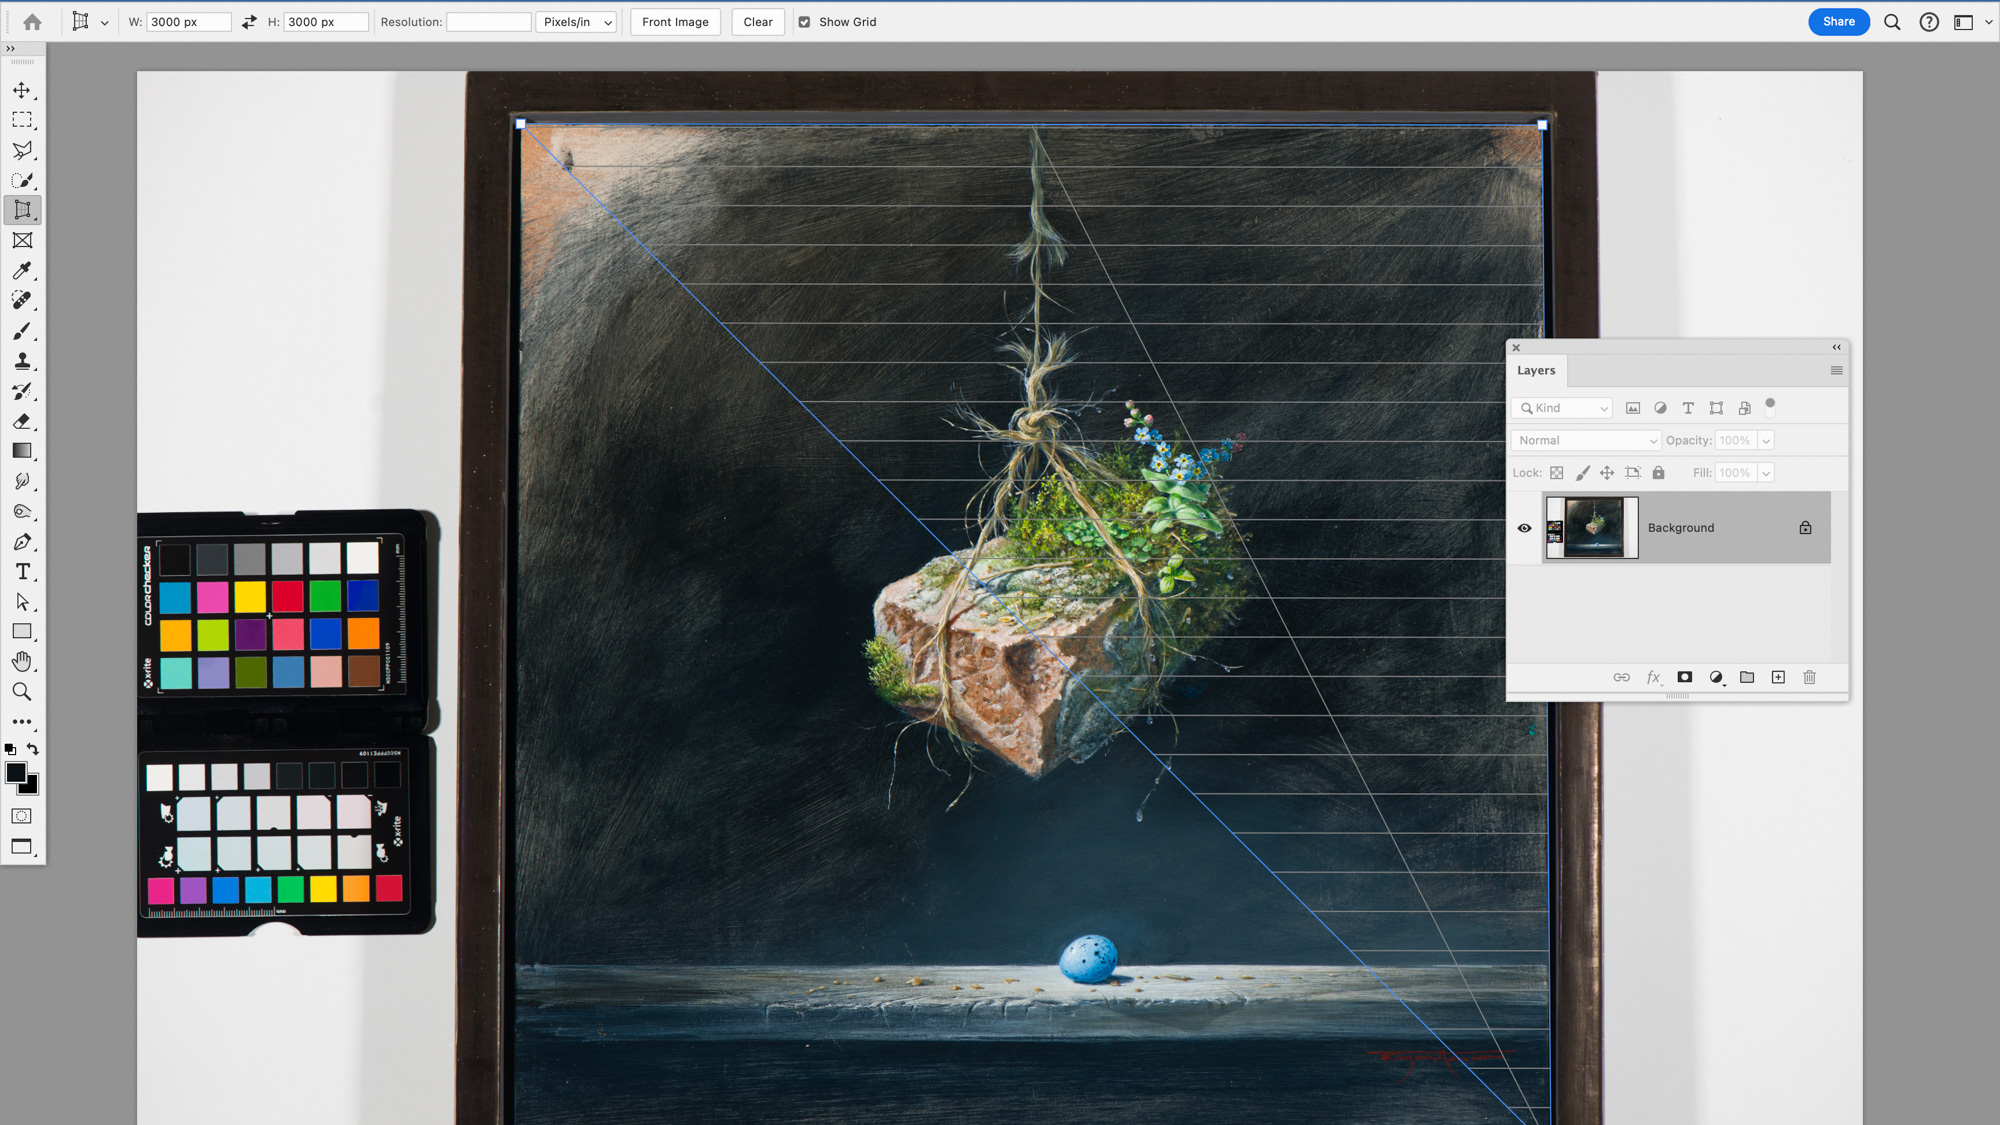
You’ll probably need to crop the image to the proportions of the artwork. At this point you may find that the camera was not 100% level or parallel to the artwork. If so try using the Perspective Crop tool in Photoshop. This allows you to plot points in the four corners of the painting, then crop to make it perfectly rectangular.
8. Make a drop shadow
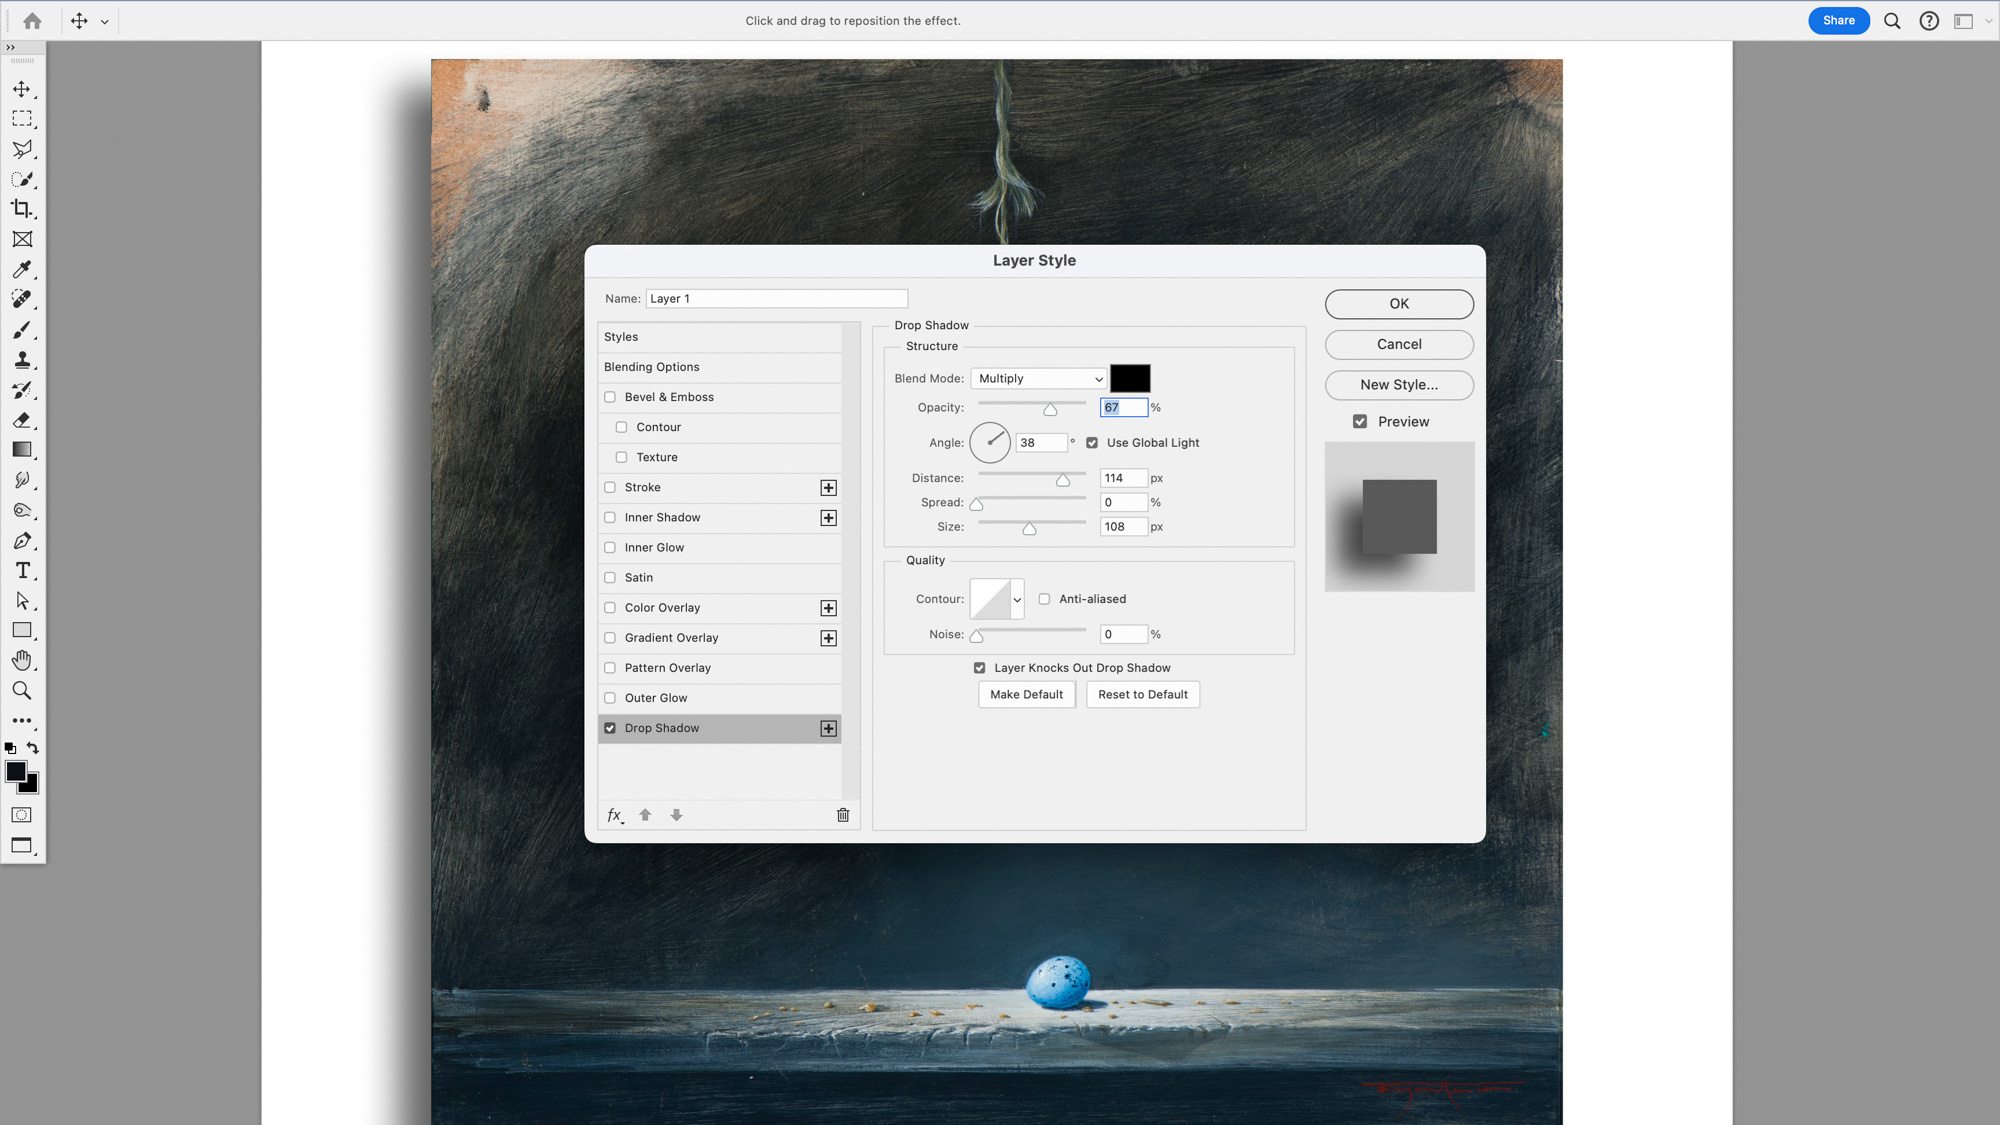
Consider adding a Drop Shadow. This can help the art stand out. In Photoshop, first crop to the edges then duplicate the layer (Cmd/Ctrl+J). Go to Image > Canvas size to extend the canvas. Click the FX icon in the Layers Panel and choose Drop Shadow, then use the settings shown and drag to change the angle of the shadow.
9. Try upsizing
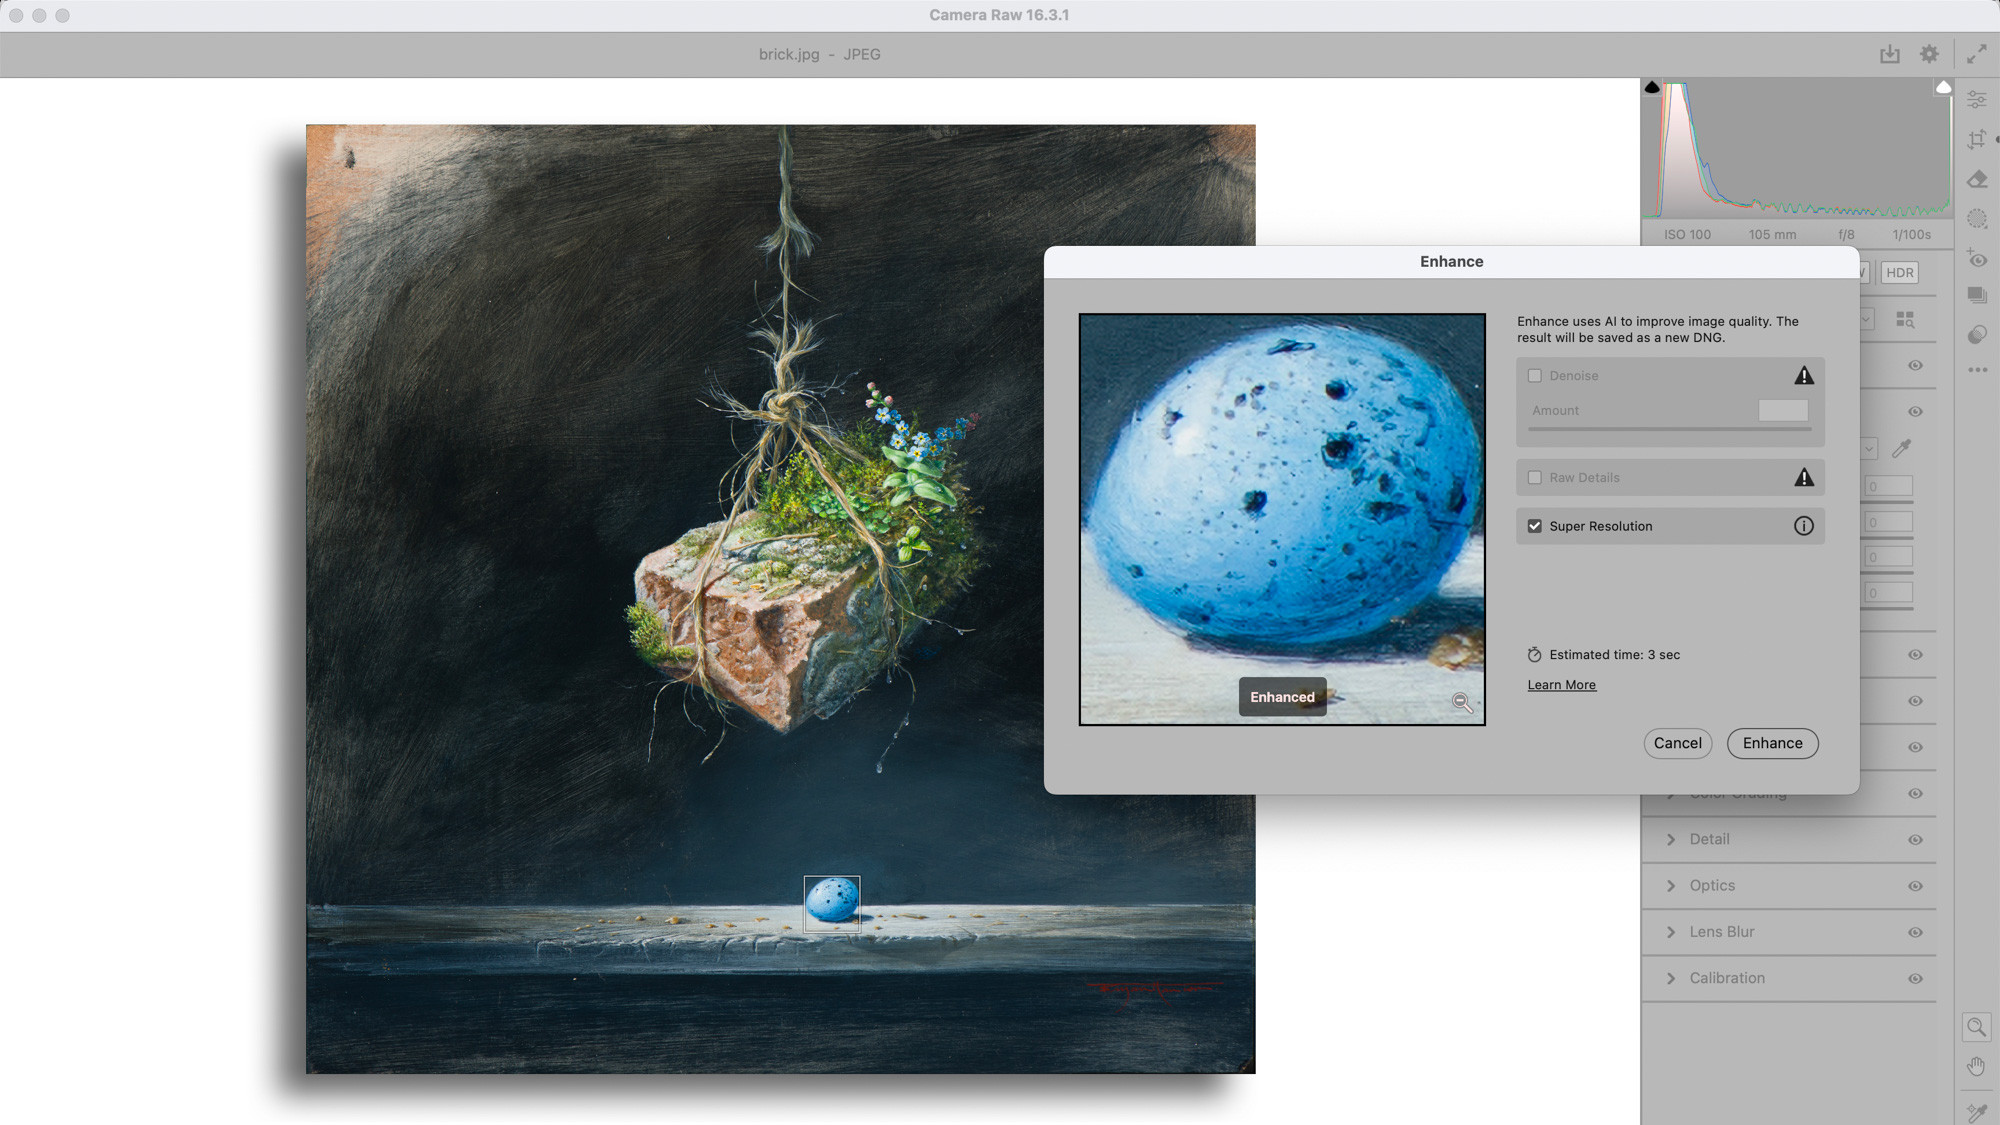
If you need to reproduce something on a larger scale than the original artwork, you can use upscaling in Photoshop as long as you don’t push it too far. Try the Super Resolution tool in Adobe Camera Raw. Right-click the image and choose Enhance then check Super Resolution. A new DNG file will be created that’s double the size.
10. Accurate colors every time
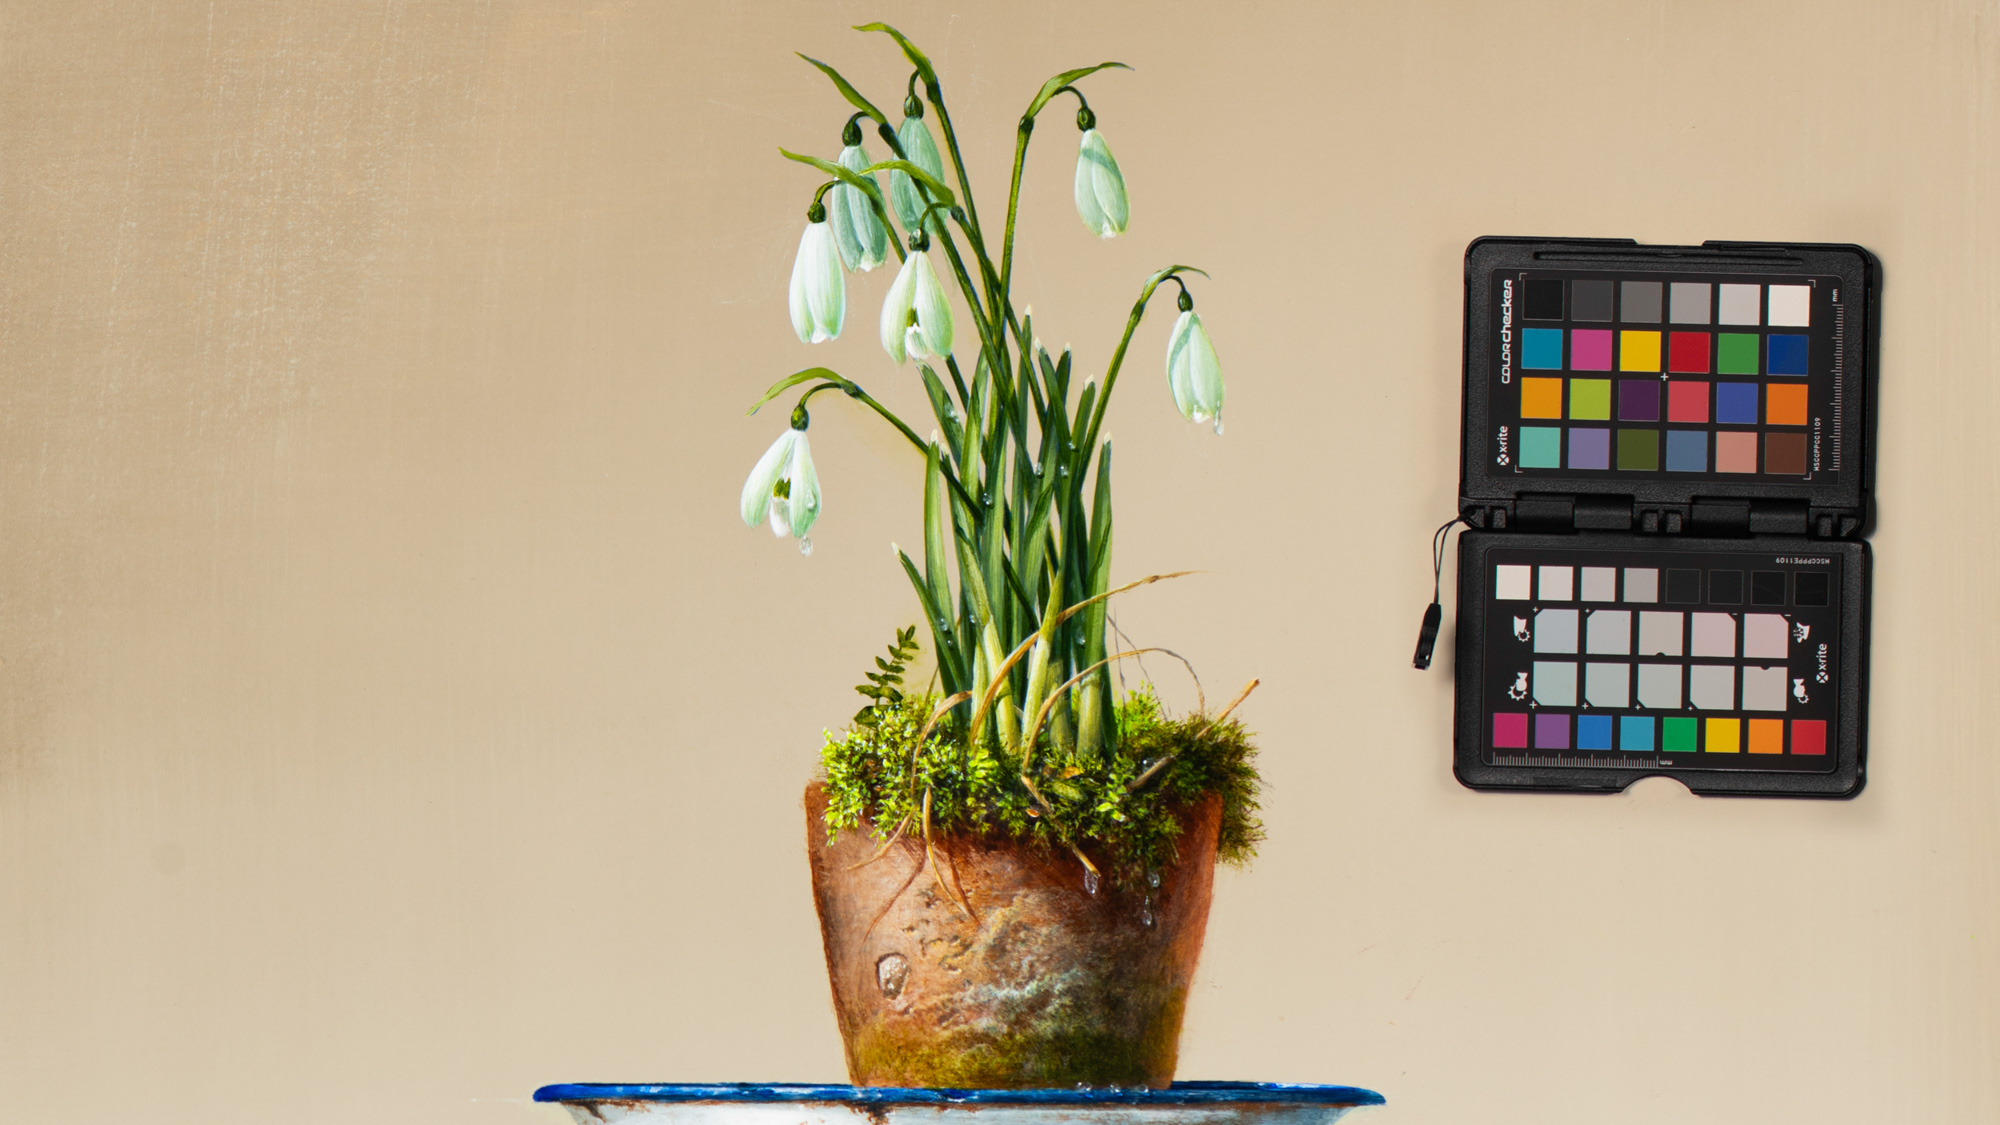
If you want accurate colors, you need to invest in a properly calibrated color chart. The Calibrite ColorChecker Passport 2 we used here isn’t cheap, but it is very accurate. After taking a raw photo with the chart in shot we can use the bundled software to create a profile. If you have an Adobe account and Photoshop/Lightroom, the Profile is automatically saved in the Adobe Profiles folder on your drive.
The next time you open Lightroom or Photoshop’s Camera Raw the profile will be listed in the Profile Browser, ready to be applied to other images. Here it has a subtle but vital impact. Alternatively, if you’re a user of DxO PhotoLab 8 or 7 then you have a dedicated calibration tool that streamlines the process.
PhotoPlus: The Canon Magazine is the world's only monthly newsstand title that's 100% devoted to Canon, so you can be sure the magazine is completely relevant to your system. Every issue comes with downloadable video tutorials too.
If you're serious about still life, take a look at the best high resolution cameras along with the best studio lighting kits.
Get the Digital Camera World Newsletter
The best camera deals, reviews, product advice, and unmissable photography news, direct to your inbox!
The lead technique writer on Digital Camera Magazine, PhotoPlus: The Canon Magazine and N-Photo: The Nikon Magazine, James is a fantastic general practice photographer with an enviable array of skills across every genre of photography.
Whether it's flash photography techniques like stroboscopic portraits, astrophotography projects like photographing the Northern Lights, or turning sound into art by making paint dance on a set of speakers, James' tutorials and projects are as creative as they are enjoyable.
He's also a wizard at the dark arts of Photoshop, Lightroom and Affinity Photo, and is capable of some genuine black magic in the digital darkroom, making him one of the leading authorities on photo editing software and techniques.
