Transform photos into bold, blocky shapes in Affinity Photo
Learn how to transform a photo into bold, blocky shapes as James Paterson explains key tools and filters in Affinity Photo
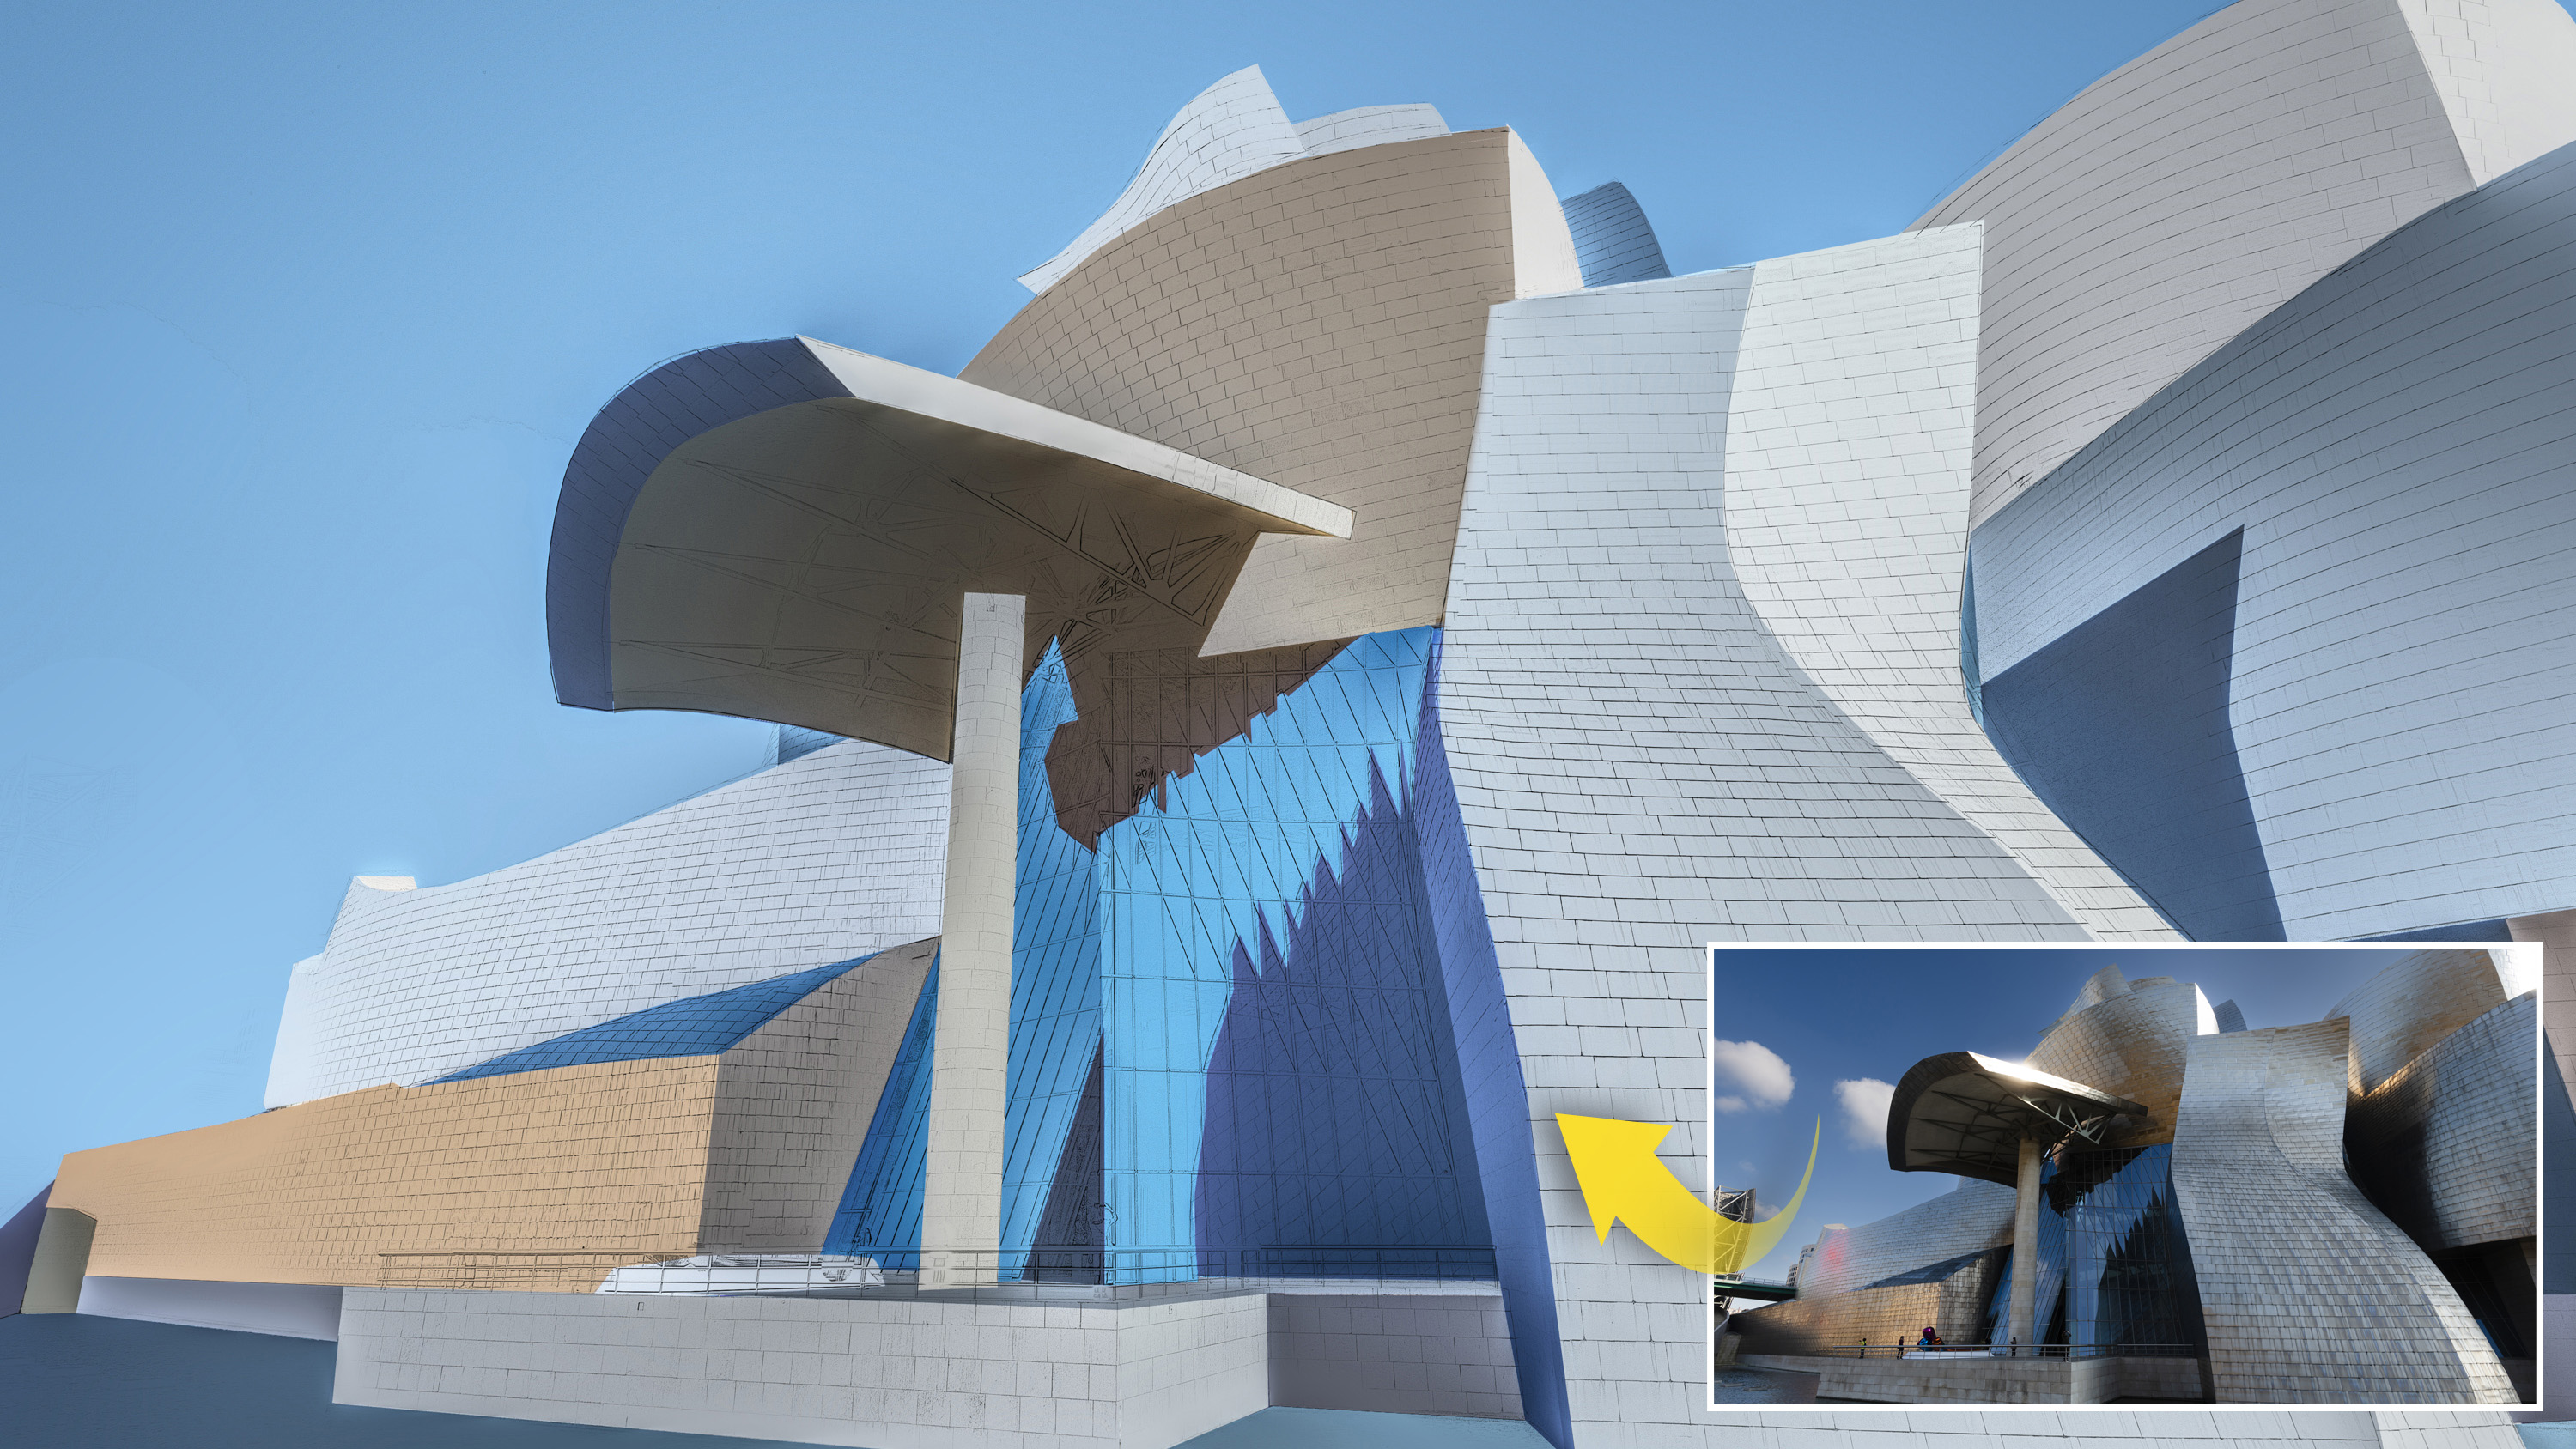
Some scenes are so iconic that they can be reduced to simple blocks of color and still remain instantly recognizable. The Guggenheim Museum in Bilbao, Spain, is a case in point. In this project, we look at how to transform the flowing lines of the building into graphic shapes like a minimalist painting.
For this tutorial, we’re showing you the steps using Affinity Photo software, but there's no reason why you couldn't use any of the best photo editing software to try it yourself. You can use the start image to follow along, and remember that the same technique can be used for all kinds of images, not just buildings, so if you have a photo of your own in mind, give it try!
There are two stages to this effect. First, we transform our photo into a pencil sketch using a clever combination of layer blend modes and blur filters. This gives us a fine degree of control over the look of the sketch effect, as we can make the lines thicker or thinner by adjusting the blur strength.
The second stage here takes slightly longer, but results in a graphic look that would be impossible to achieve with filter effects alone. We use the Pen tool to isolate sections of the building, then copy and blur them into single blocks of color. This means spending time with the Pen tool to trace around surfaces and objects. If you’ve not used it before – or if you’re a little rusty – this is a great way to brush up on your Pen tool skills.
Download the start image here to follow along with the image-editing tutorial…
1. Photo to sketch
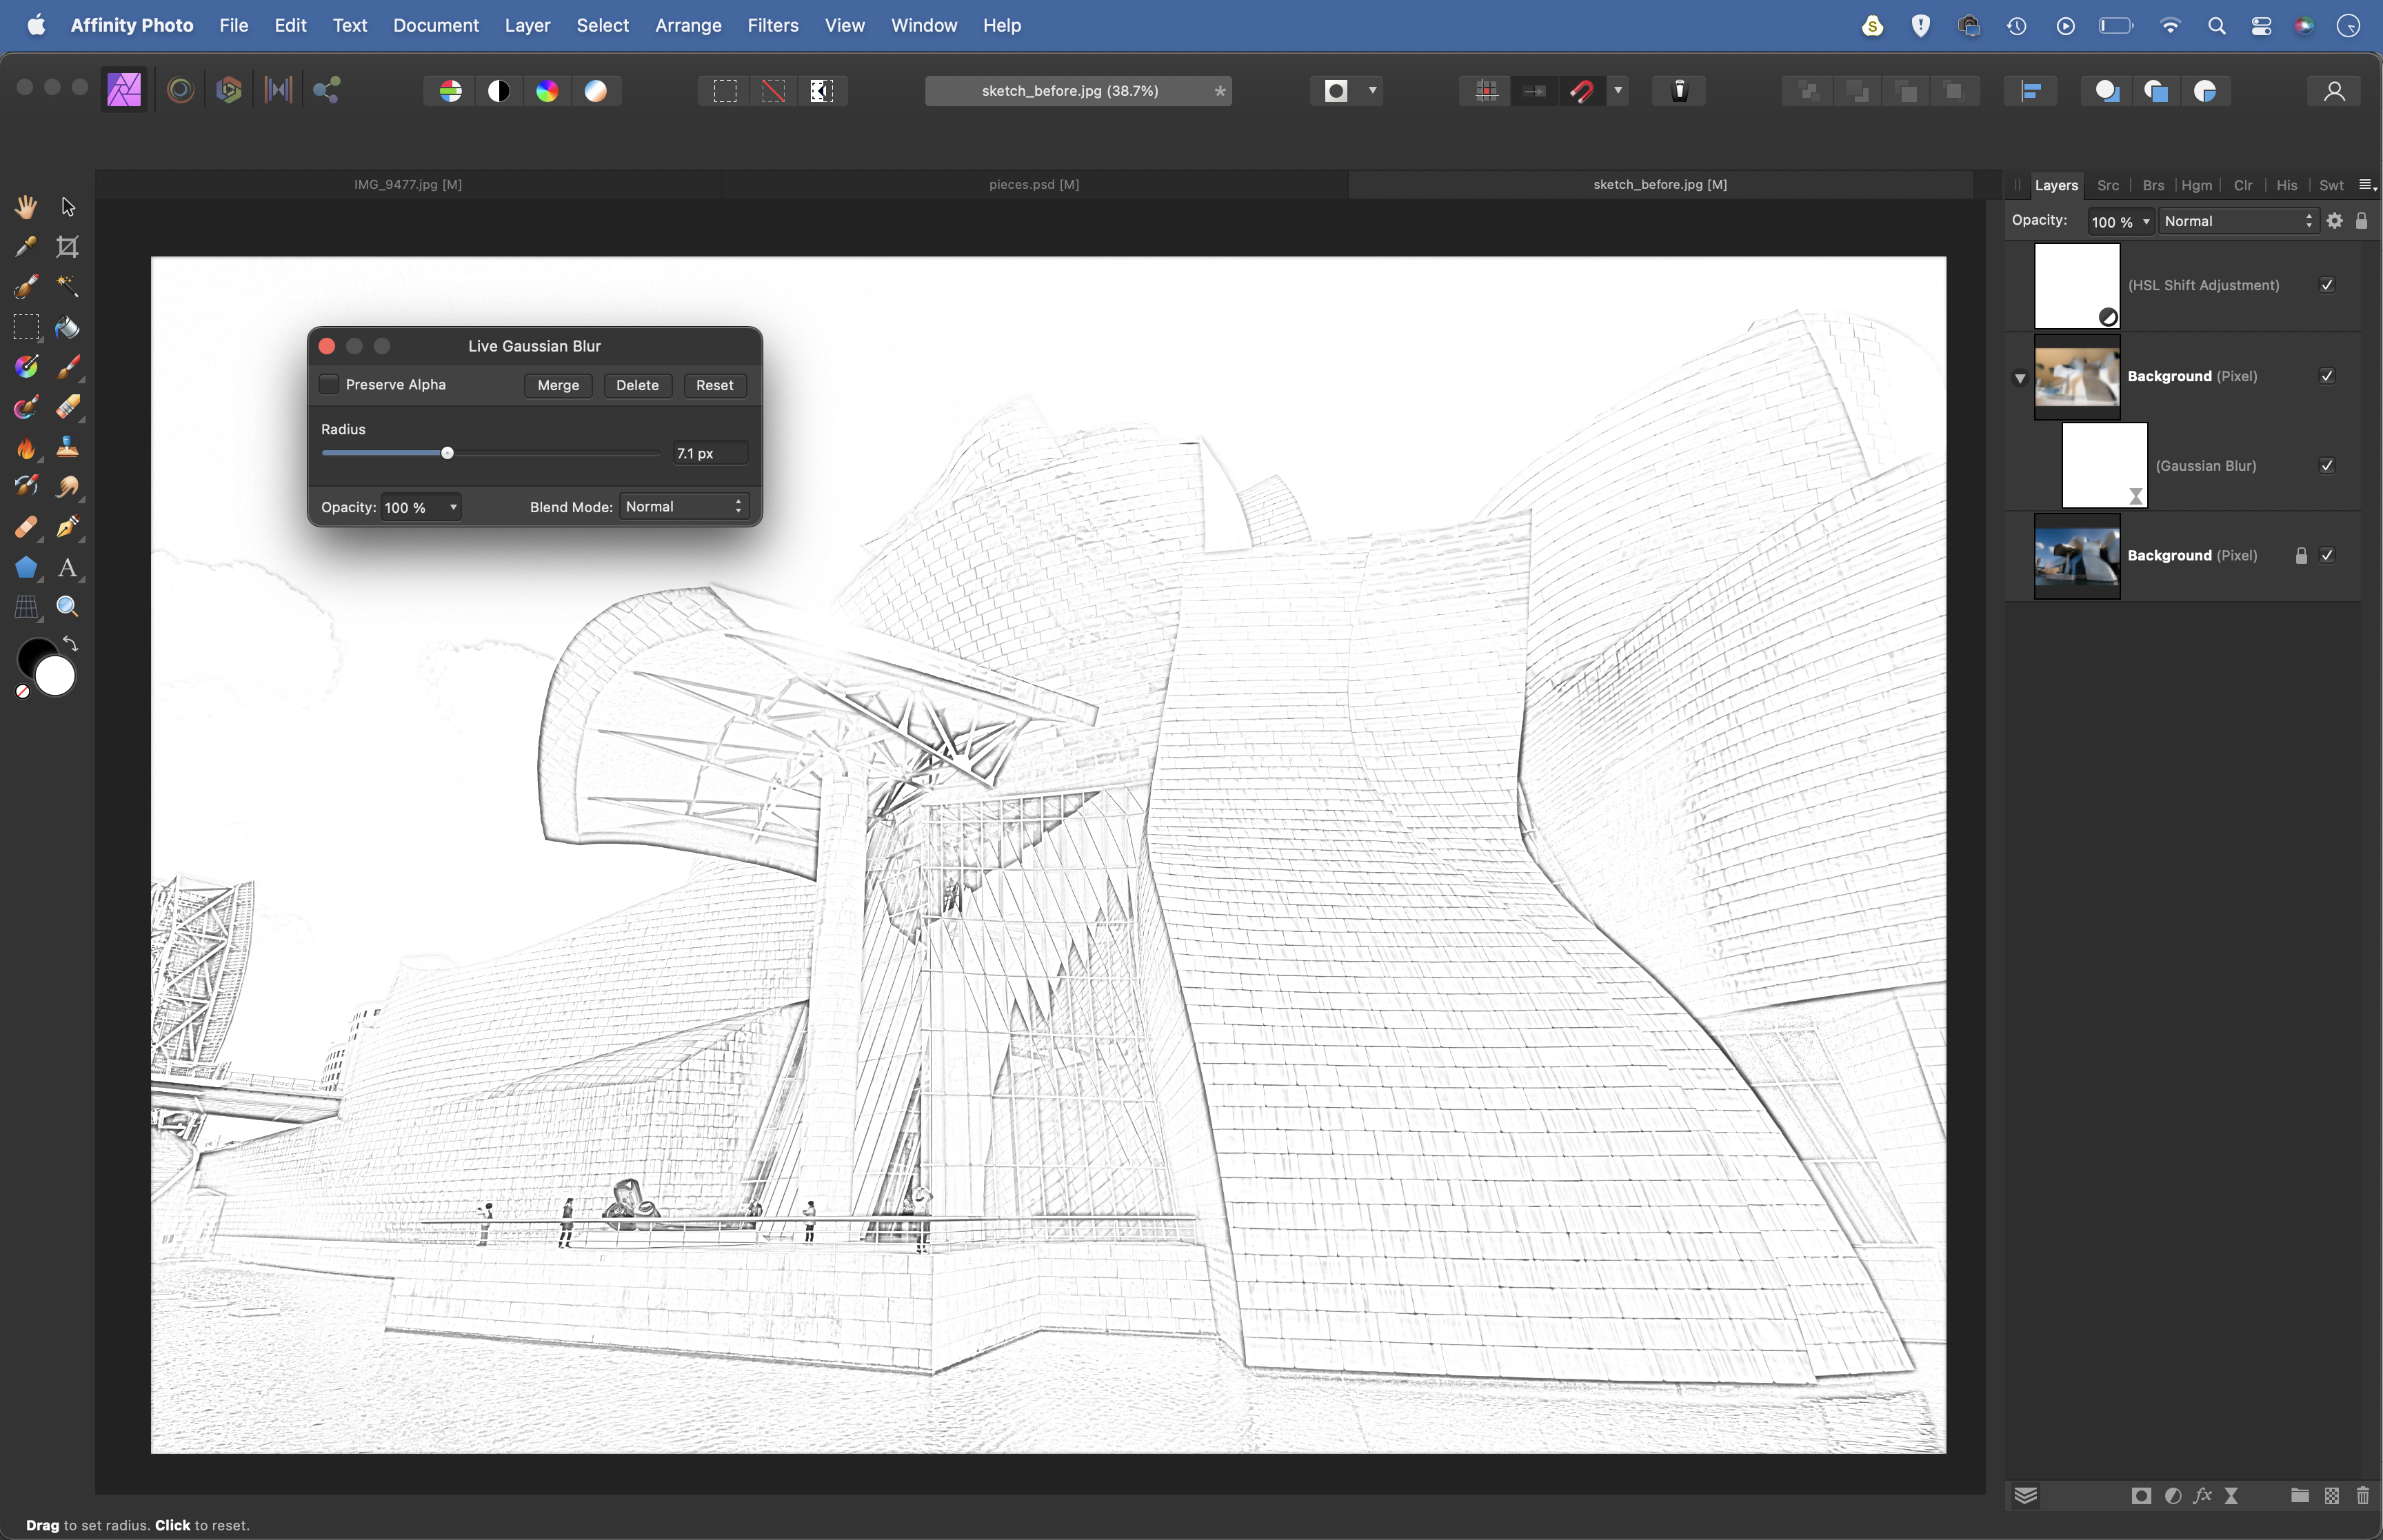
Hit Cmd/Ctrl+J to copy the bottom layer, then Cmd/Ctrl+U to bring up HSL. Drag Saturation to -100. Highlight the middle layer, hit Cmd/Ctrl+I to invert, set Blend Mode to Colour Dodge in the Layers panel. Go to Filter>New Live Filter Layer>Blur>Gaussian Blur.
2. Boost the contrast
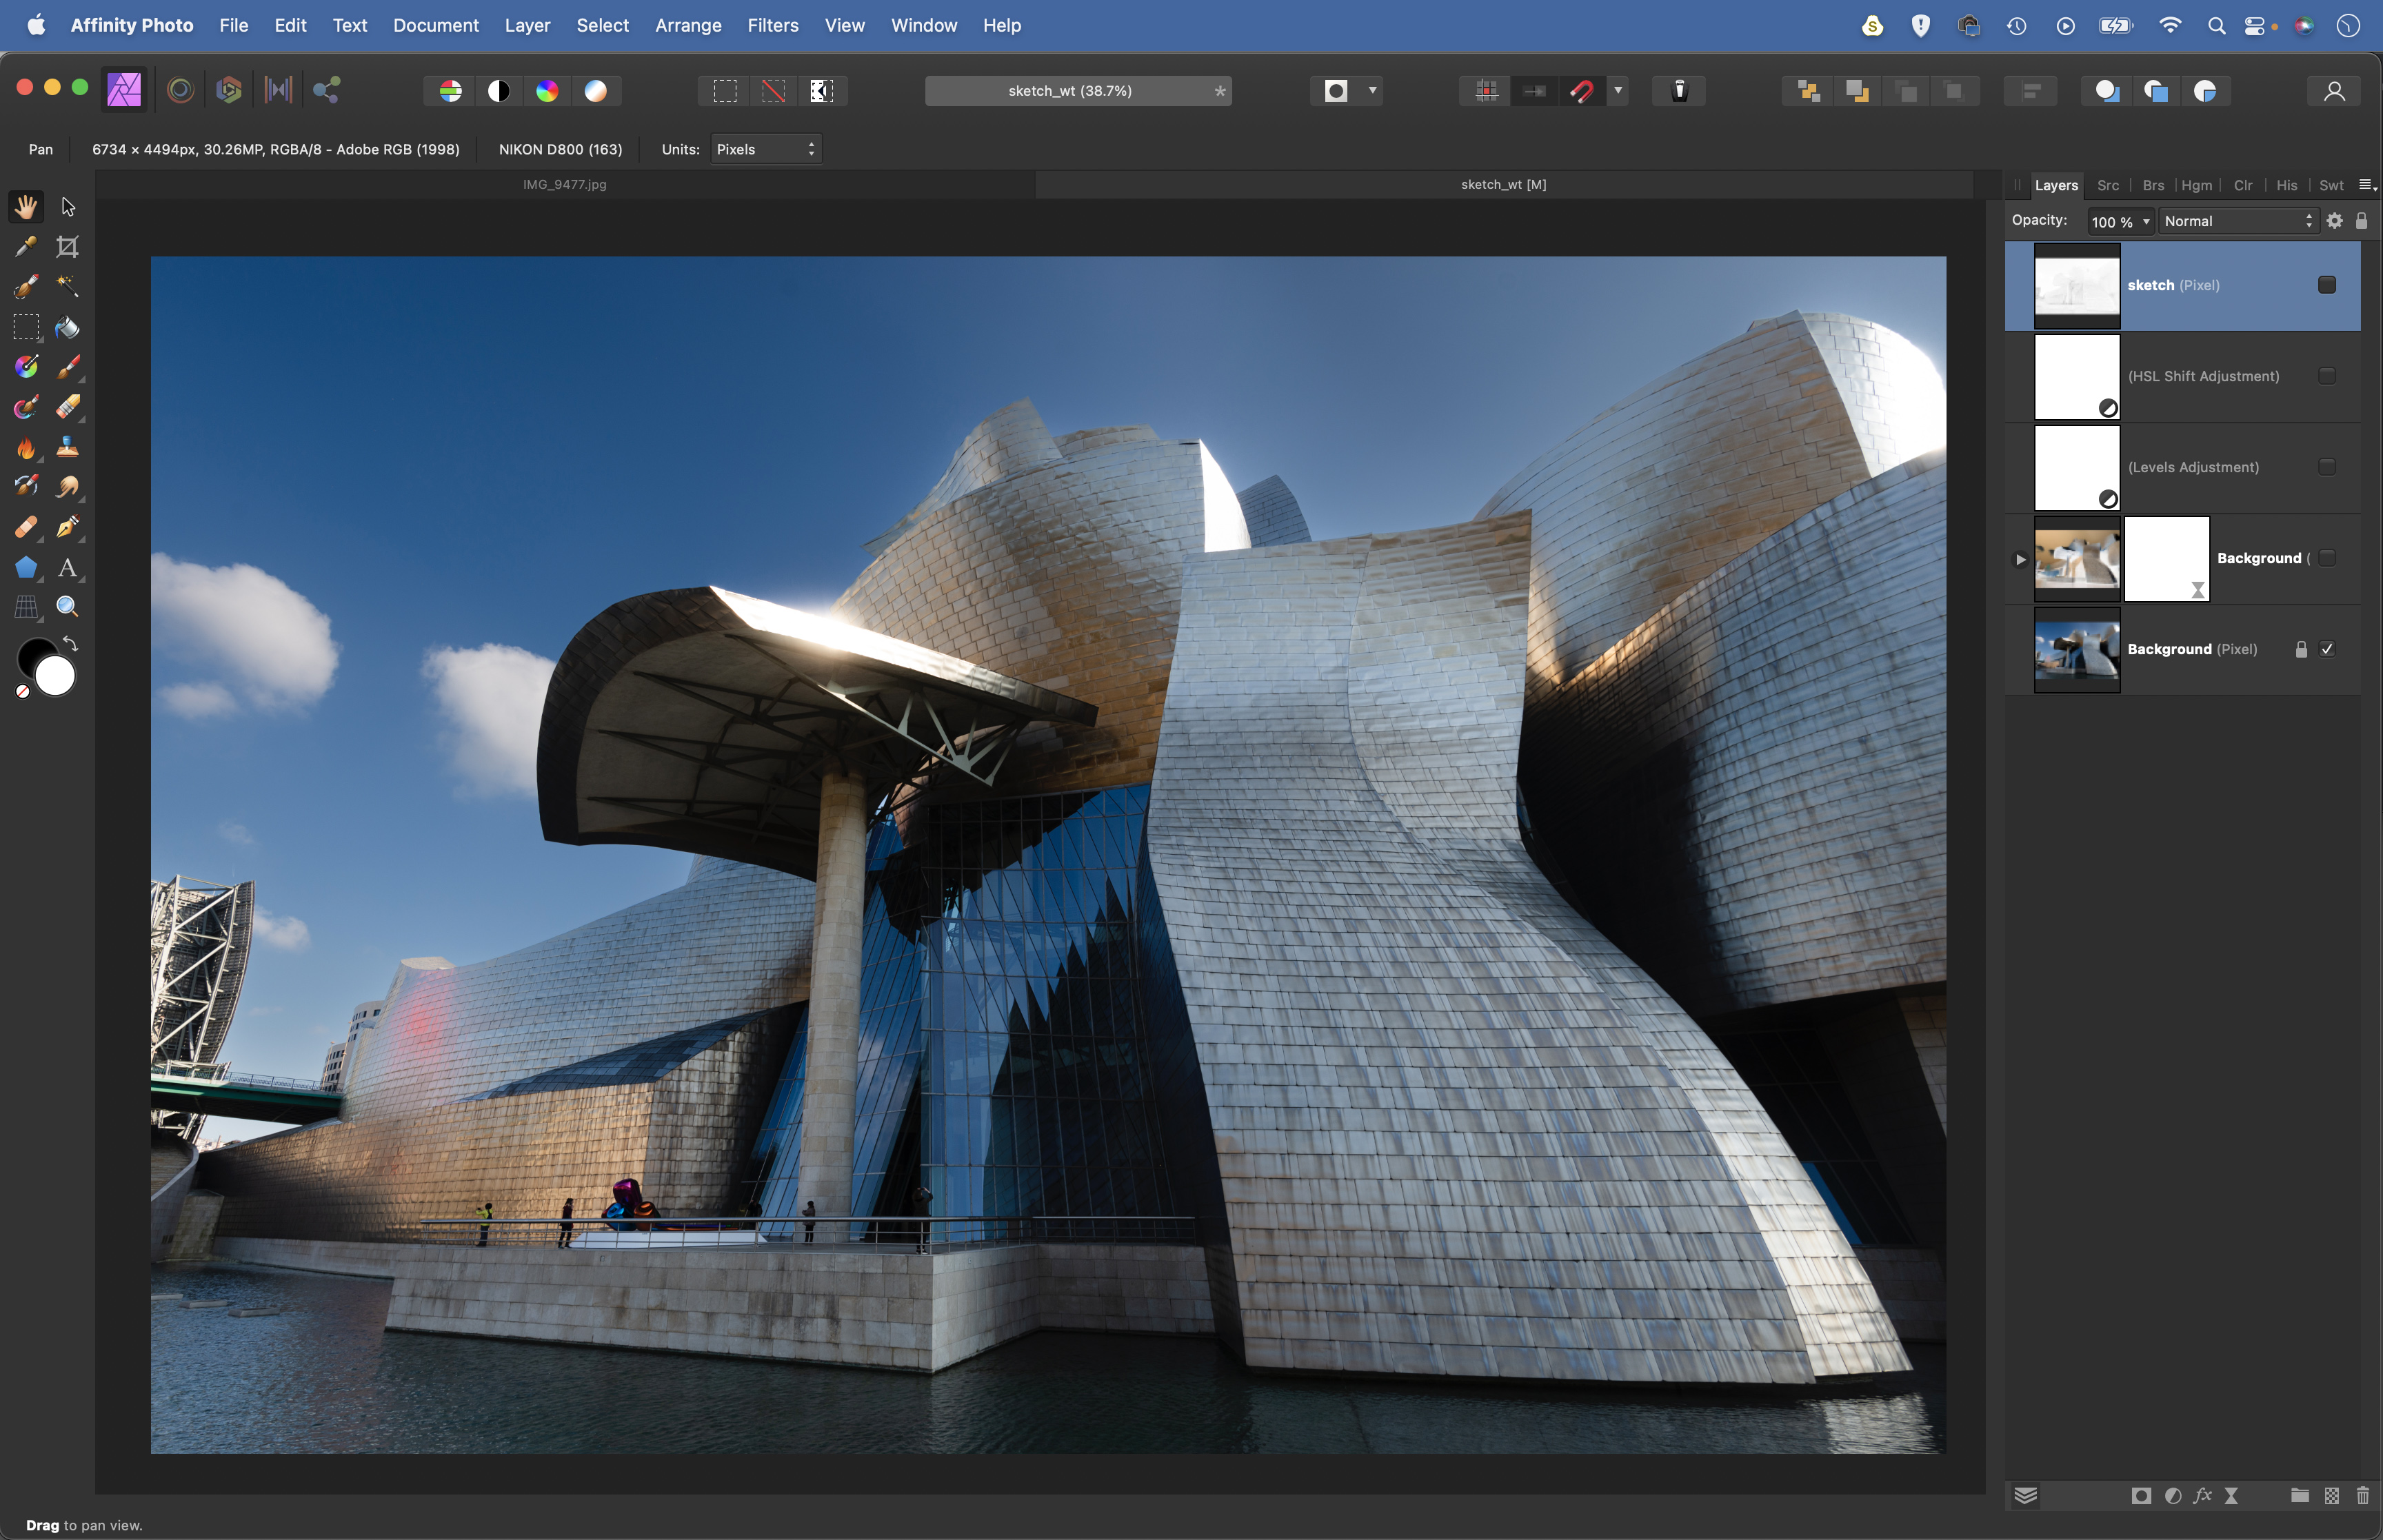
Increase the blur to make a sketch effect. Next hit Cmd/Ctrl+L for Levels and drag in black and white points to increase contrast. Next hit Cmd/Ctrl+Shift+Alt+E to merge a copy of all the layers. Rename the new layer Sketch, then hide all but the bottom layer.
3. Trace around the building
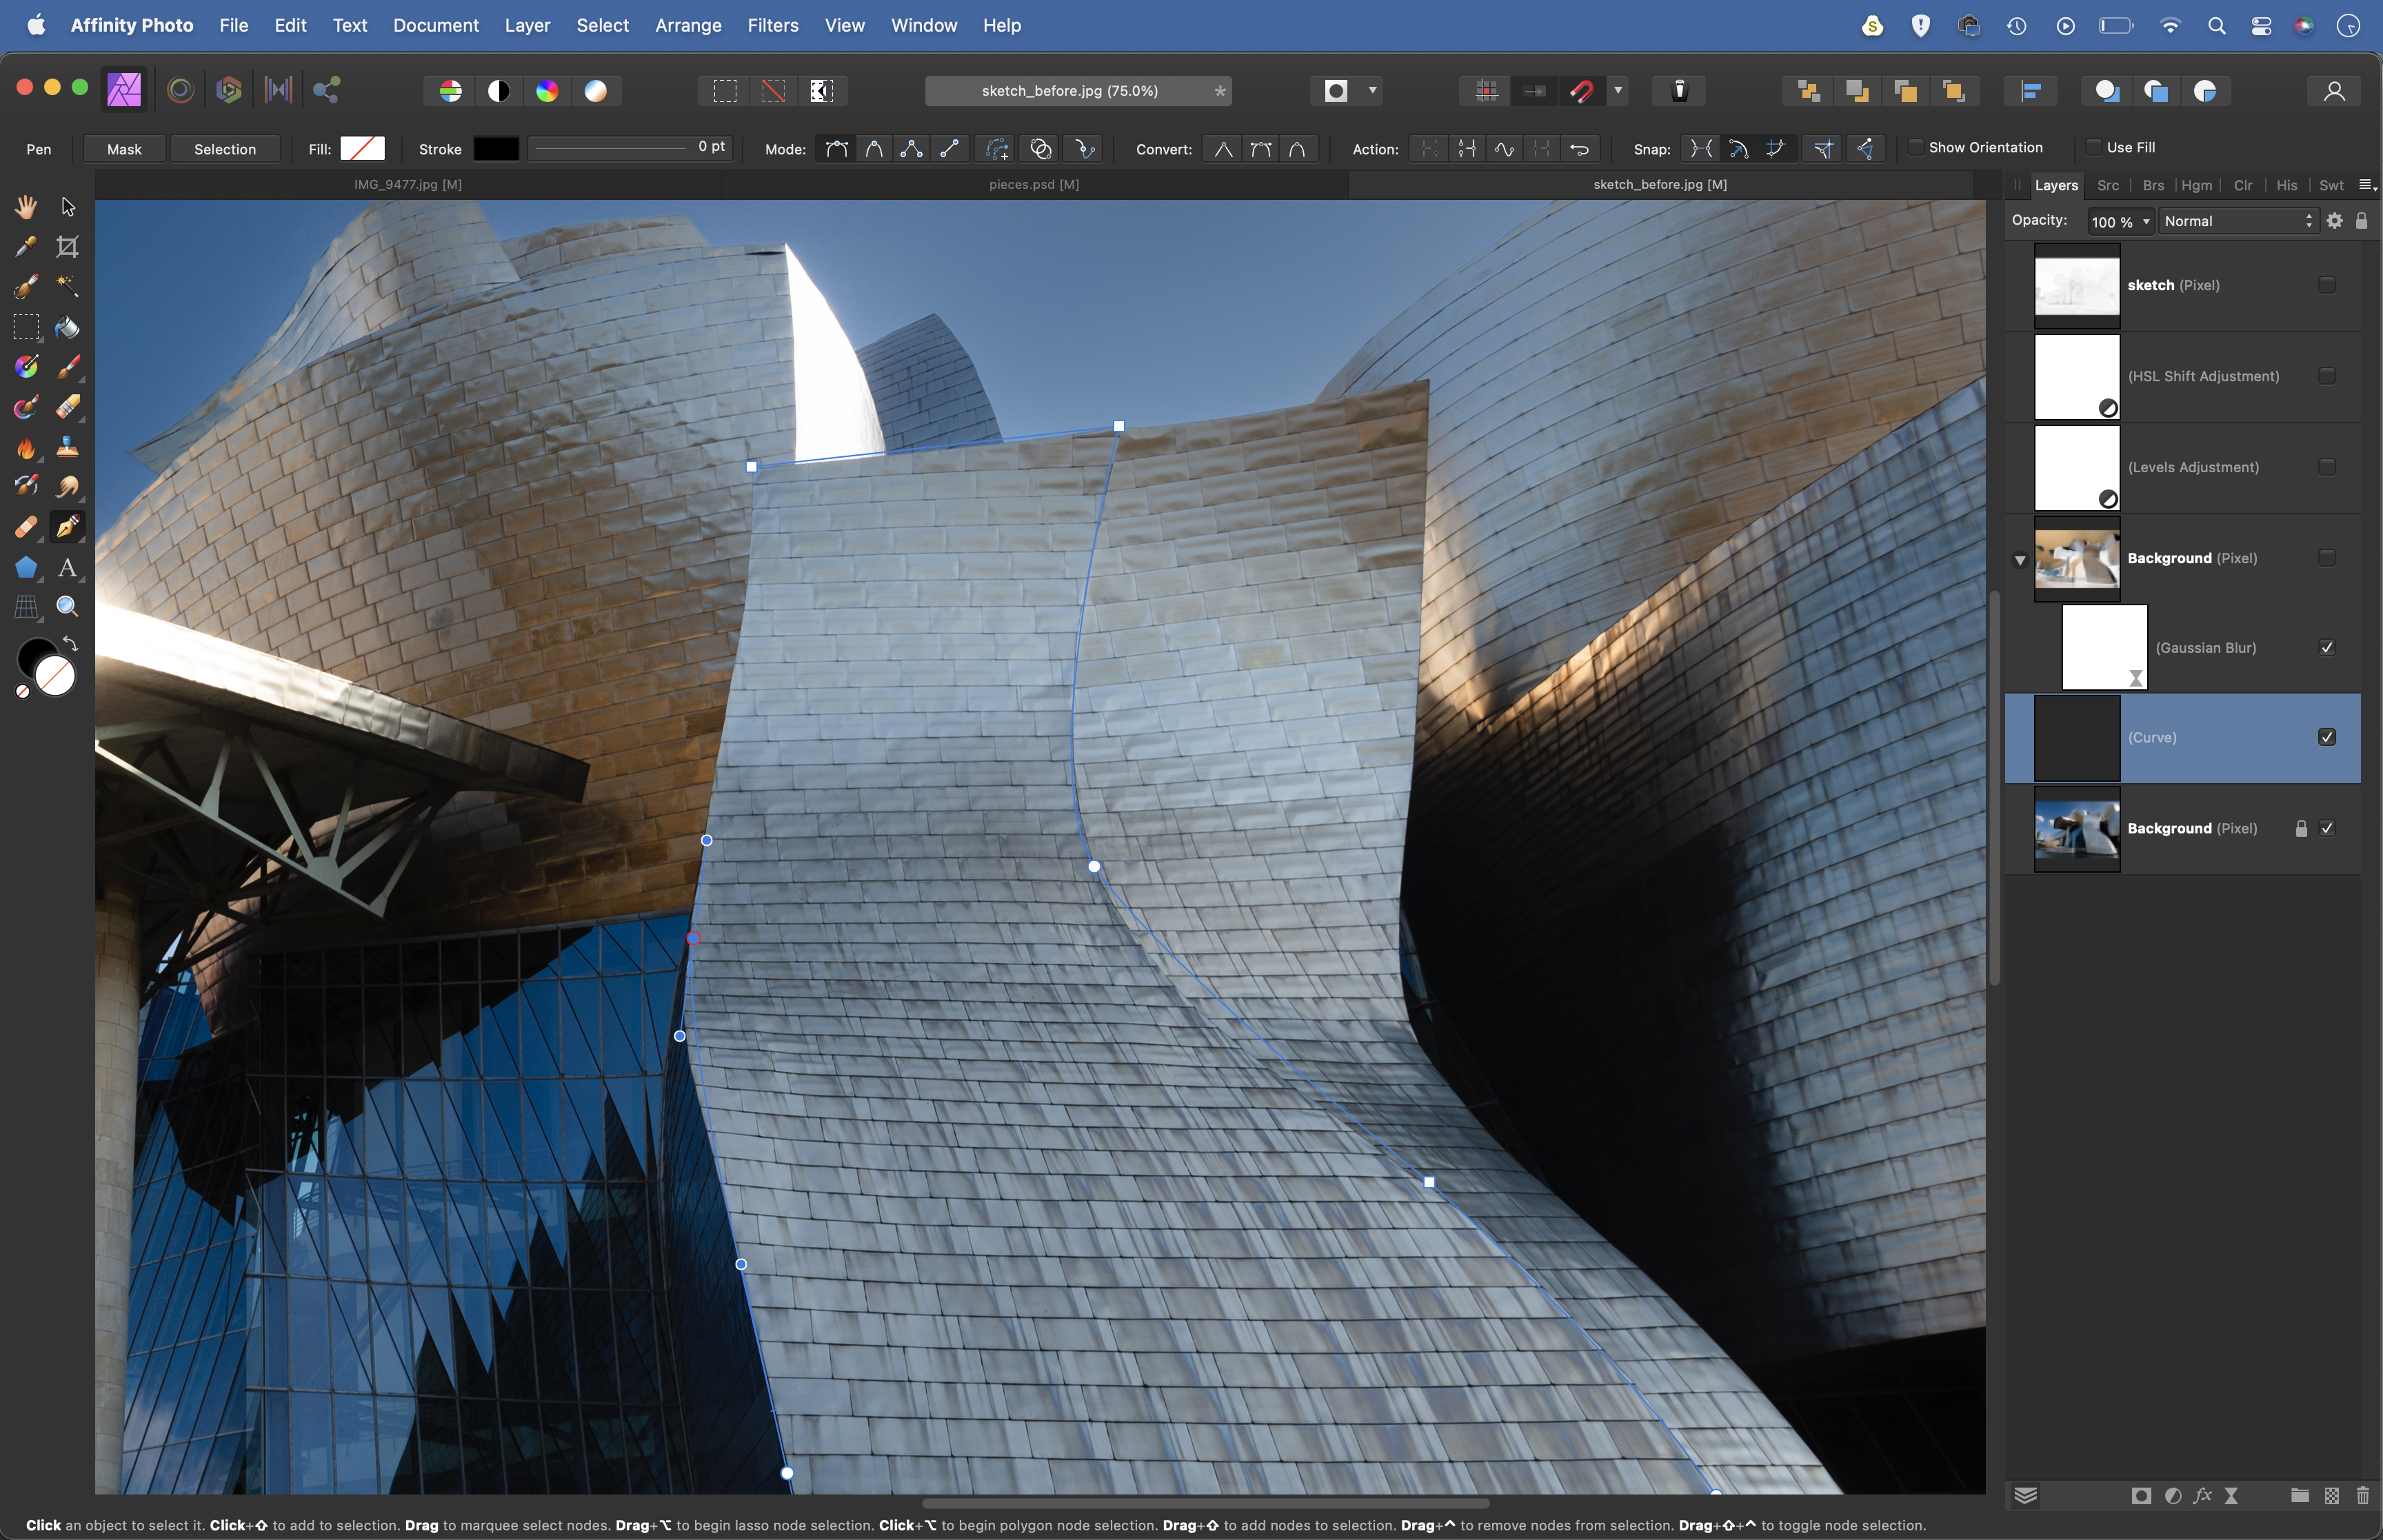
Grab the Pen tool. Choose a surface and click on the corner to add a point. Click+drag to make another – the wider you drag, the more curved the line. Plot anchor points to trace around a section of the building, then click on the first point to close the path.
4. Blur the surface
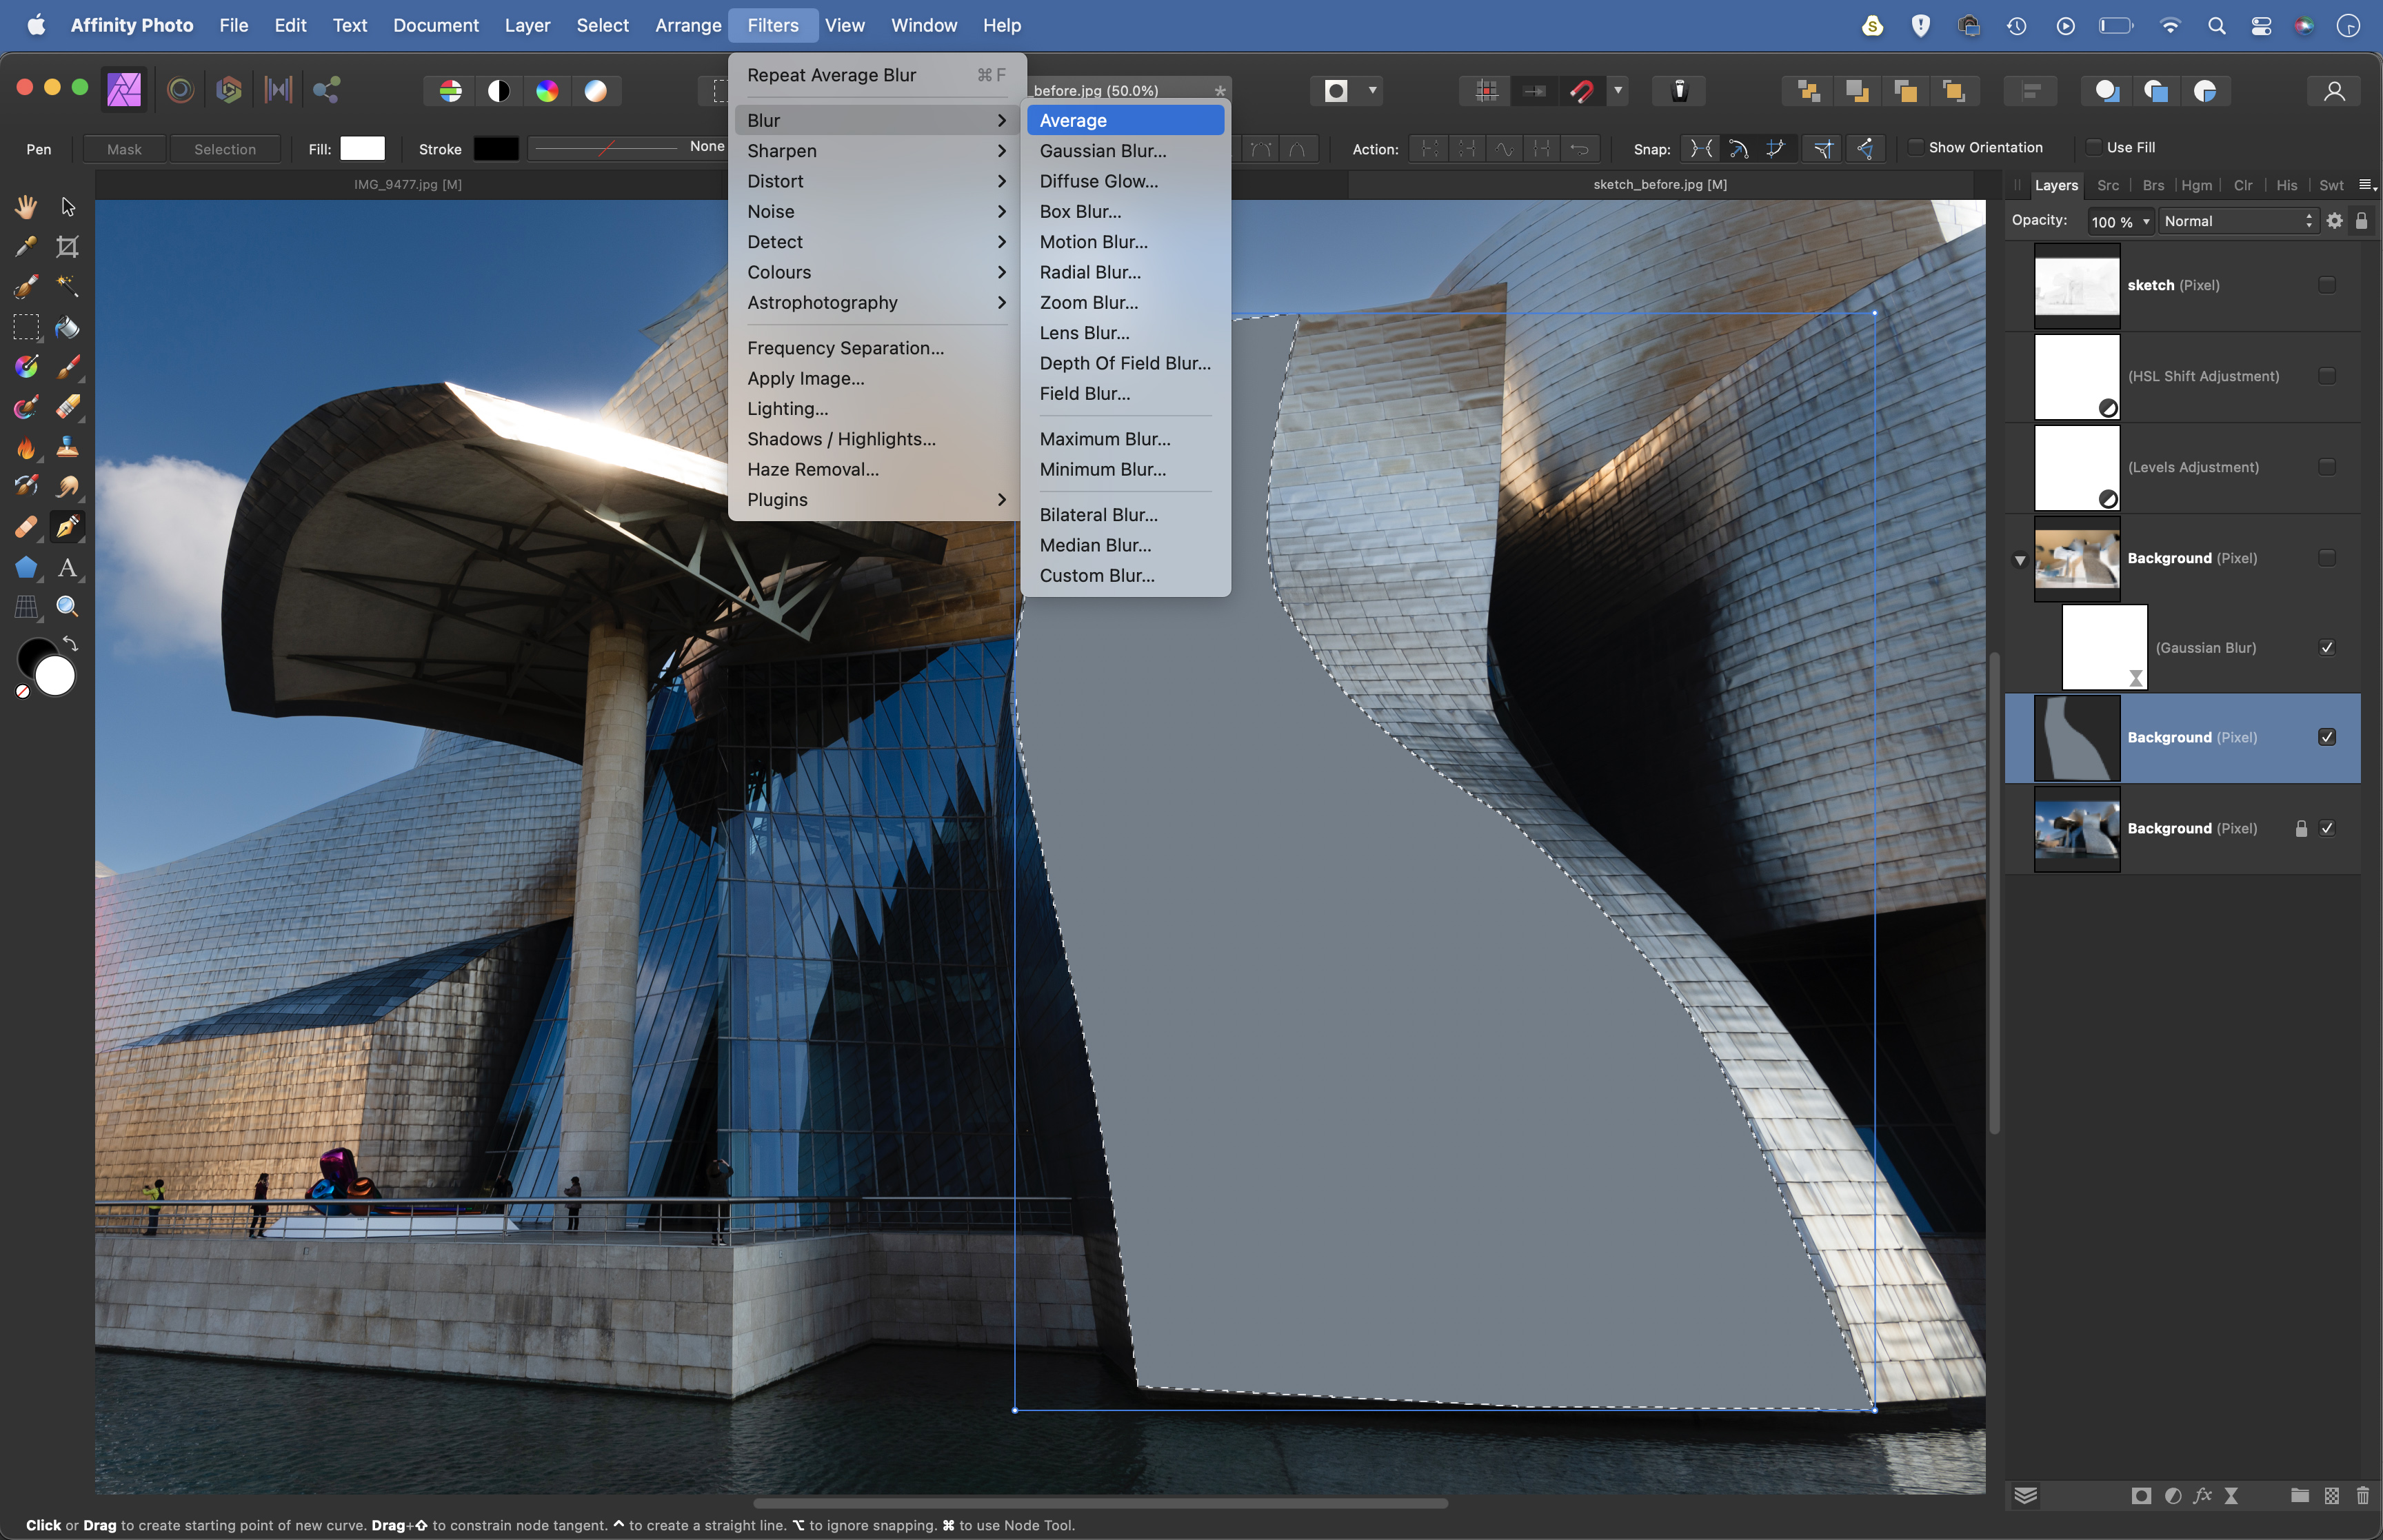
Click the Selection button in the Pen tool options at the top to convert the Pen tool path to a selection. Press Cmd/Ctrl+J to copy the selected area to a new layer, then go to Filter>Blur>Average. Press Cmd/Ctrl+D to deselect, then highlight the bottom layer.
5. Build it up
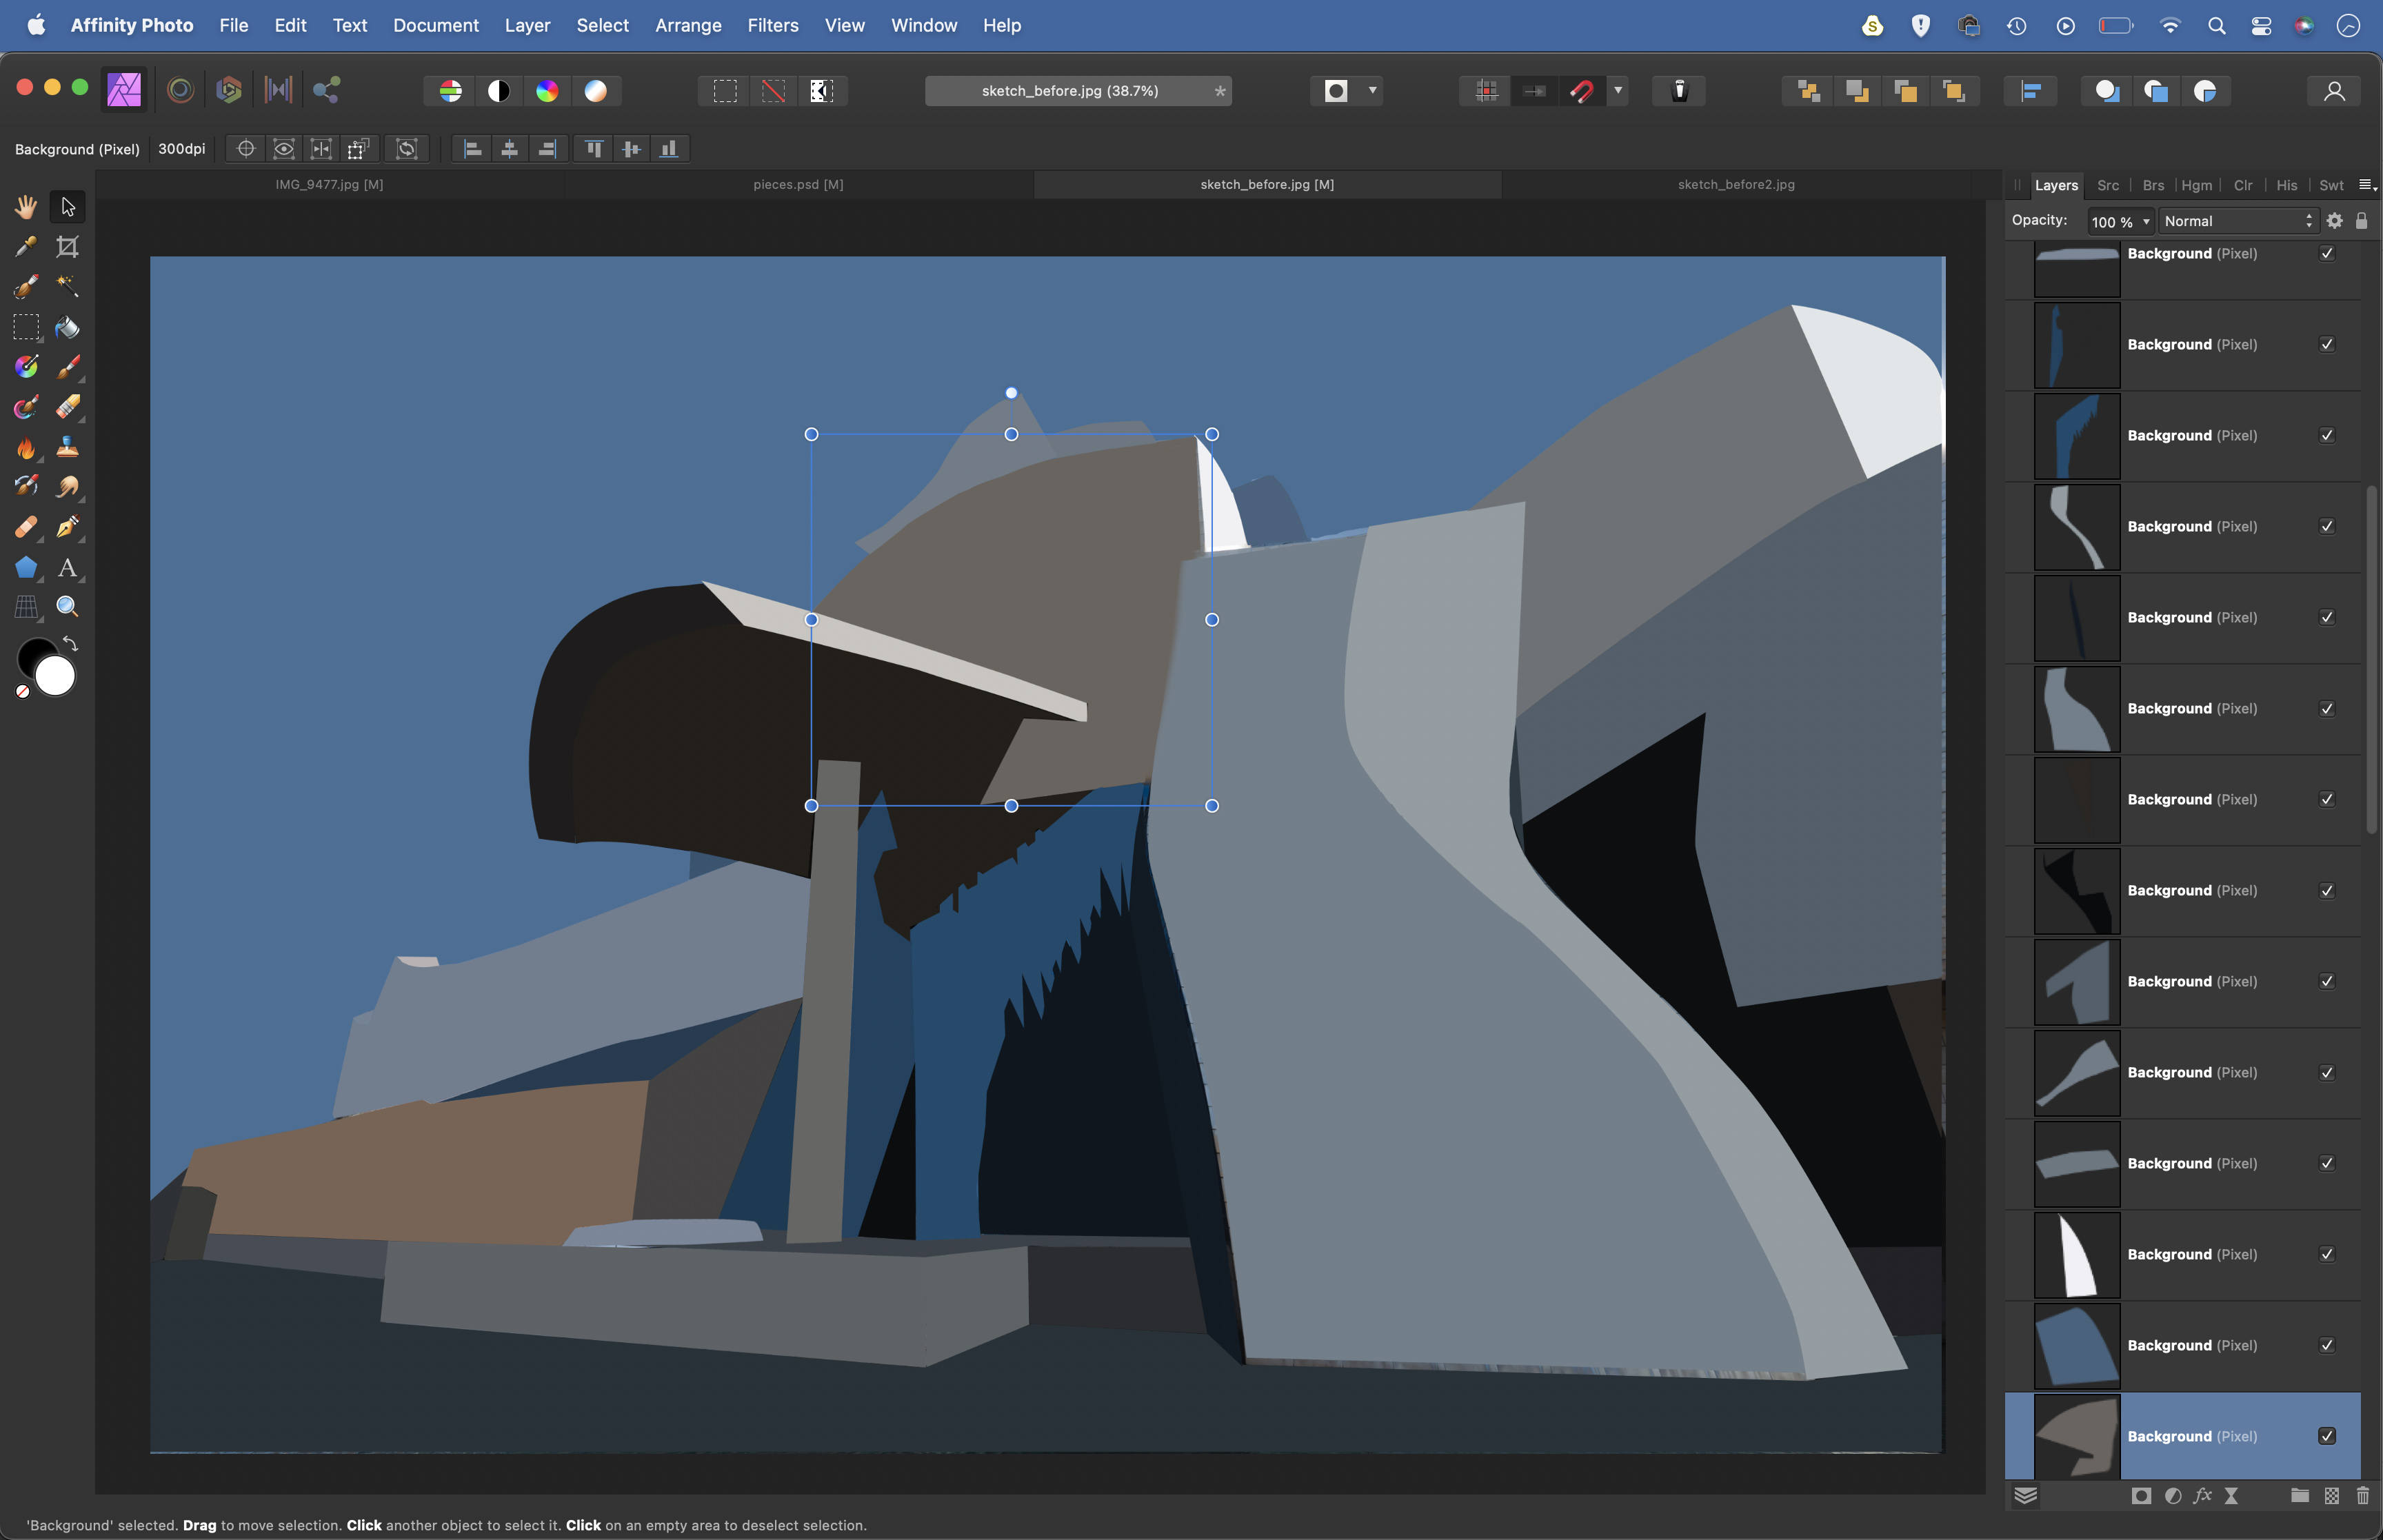
Grab the Pen tool, trace around another section, then repeat the process to copy and blur it. Continue, isolating areas with the Pen tool, then blurring them until the whole image is covered. Once done, press Cmd/Ctrl+Shift+Alt+E to merge a copy of all layers.
6. Tone and blend
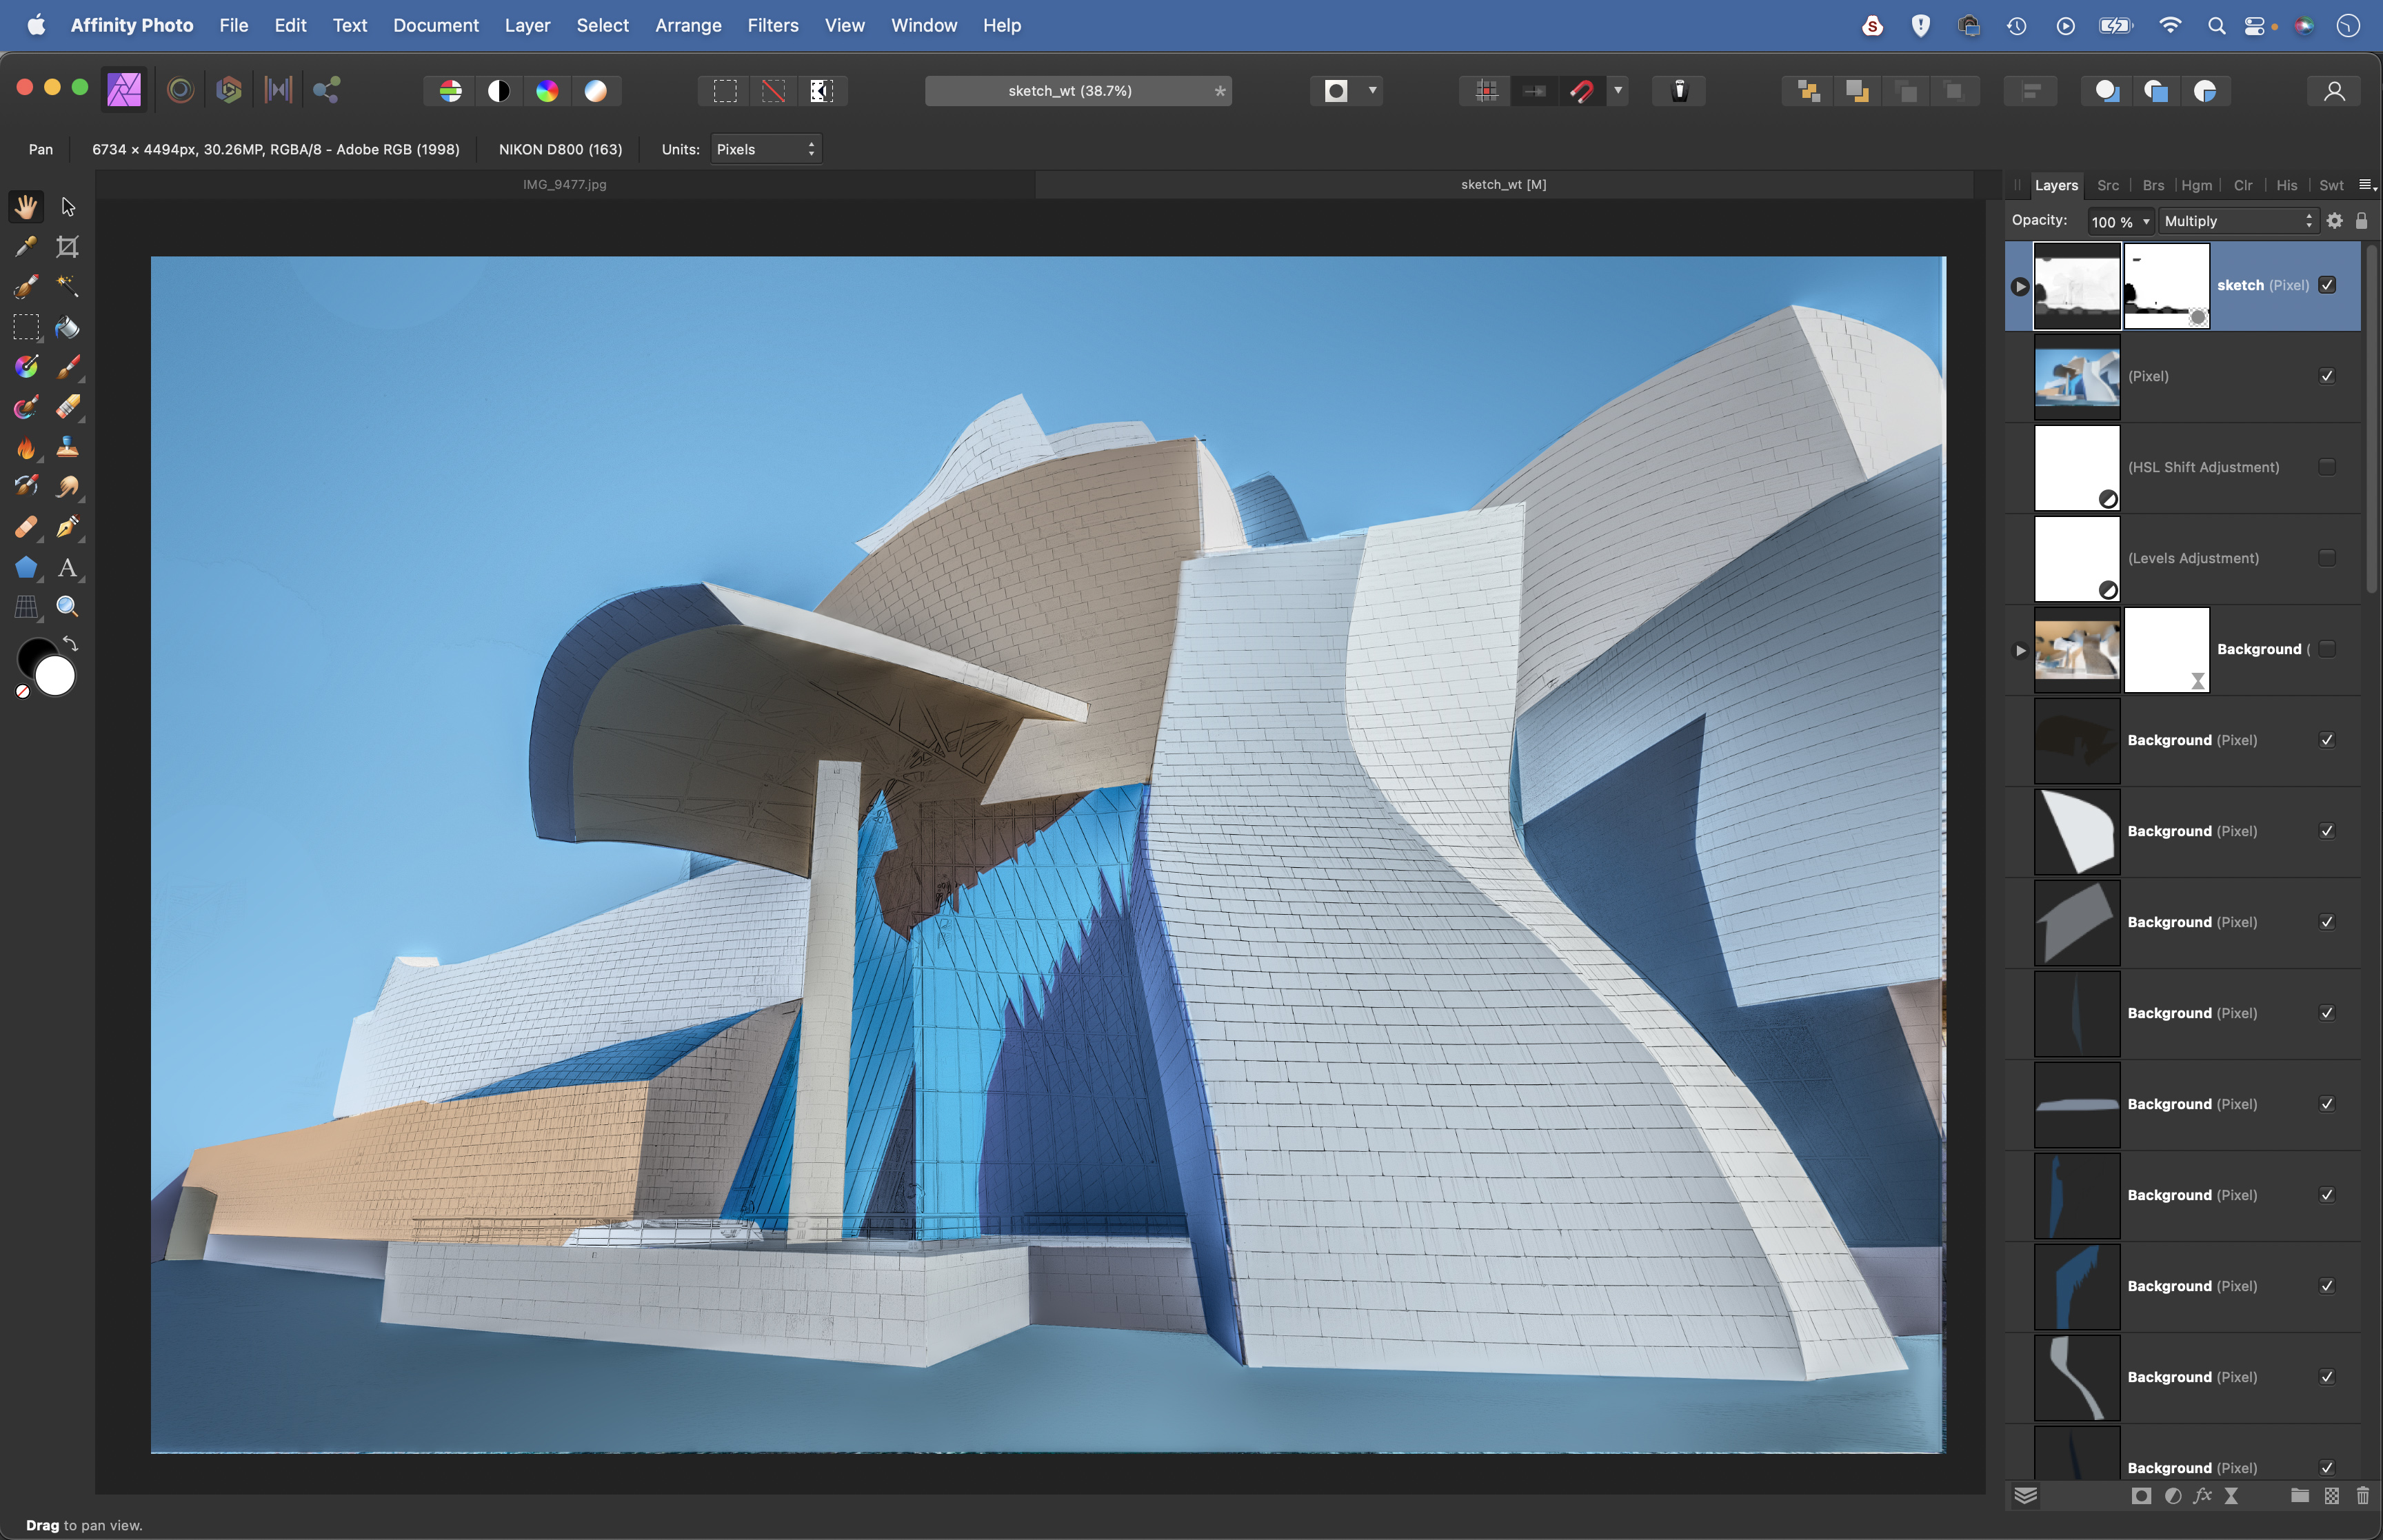
Click the Tone Mapping Persona at the top-left. Choose a preset – we used My Eyes See In HDR. Finally, reveal the Sketch layer at the top and change the Blend Mode to Multiply. Add a layer mask and paint black to hide any unwanted parts of the sketch.
• See more of our Affinity Photo tutorials
PhotoPlus: The Canon Magazine is the world's only monthly newsstand title that's 100% devoted to Canon, so you can be sure the magazine is completely relevant to your system.
If you enjoyed this tutorial but want a bit more power from your laptop, why not look at the best photo-editing laptops? If you're really keen to improve your skills further than online photography courses could be the way to go.
Get the Digital Camera World Newsletter
The best camera deals, reviews, product advice, and unmissable photography news, direct to your inbox!
The lead technique writer on Digital Camera Magazine, PhotoPlus: The Canon Magazine and N-Photo: The Nikon Magazine, James is a fantastic general practice photographer with an enviable array of skills across every genre of photography.
Whether it's flash photography techniques like stroboscopic portraits, astrophotography projects like photographing the Northern Lights, or turning sound into art by making paint dance on a set of speakers, James' tutorials and projects are as creative as they are enjoyable.
He's also a wizard at the dark arts of Photoshop, Lightroom and Affinity Photo, and is capable of some genuine black magic in the digital darkroom, making him one of the leading authorities on photo editing software and techniques.


