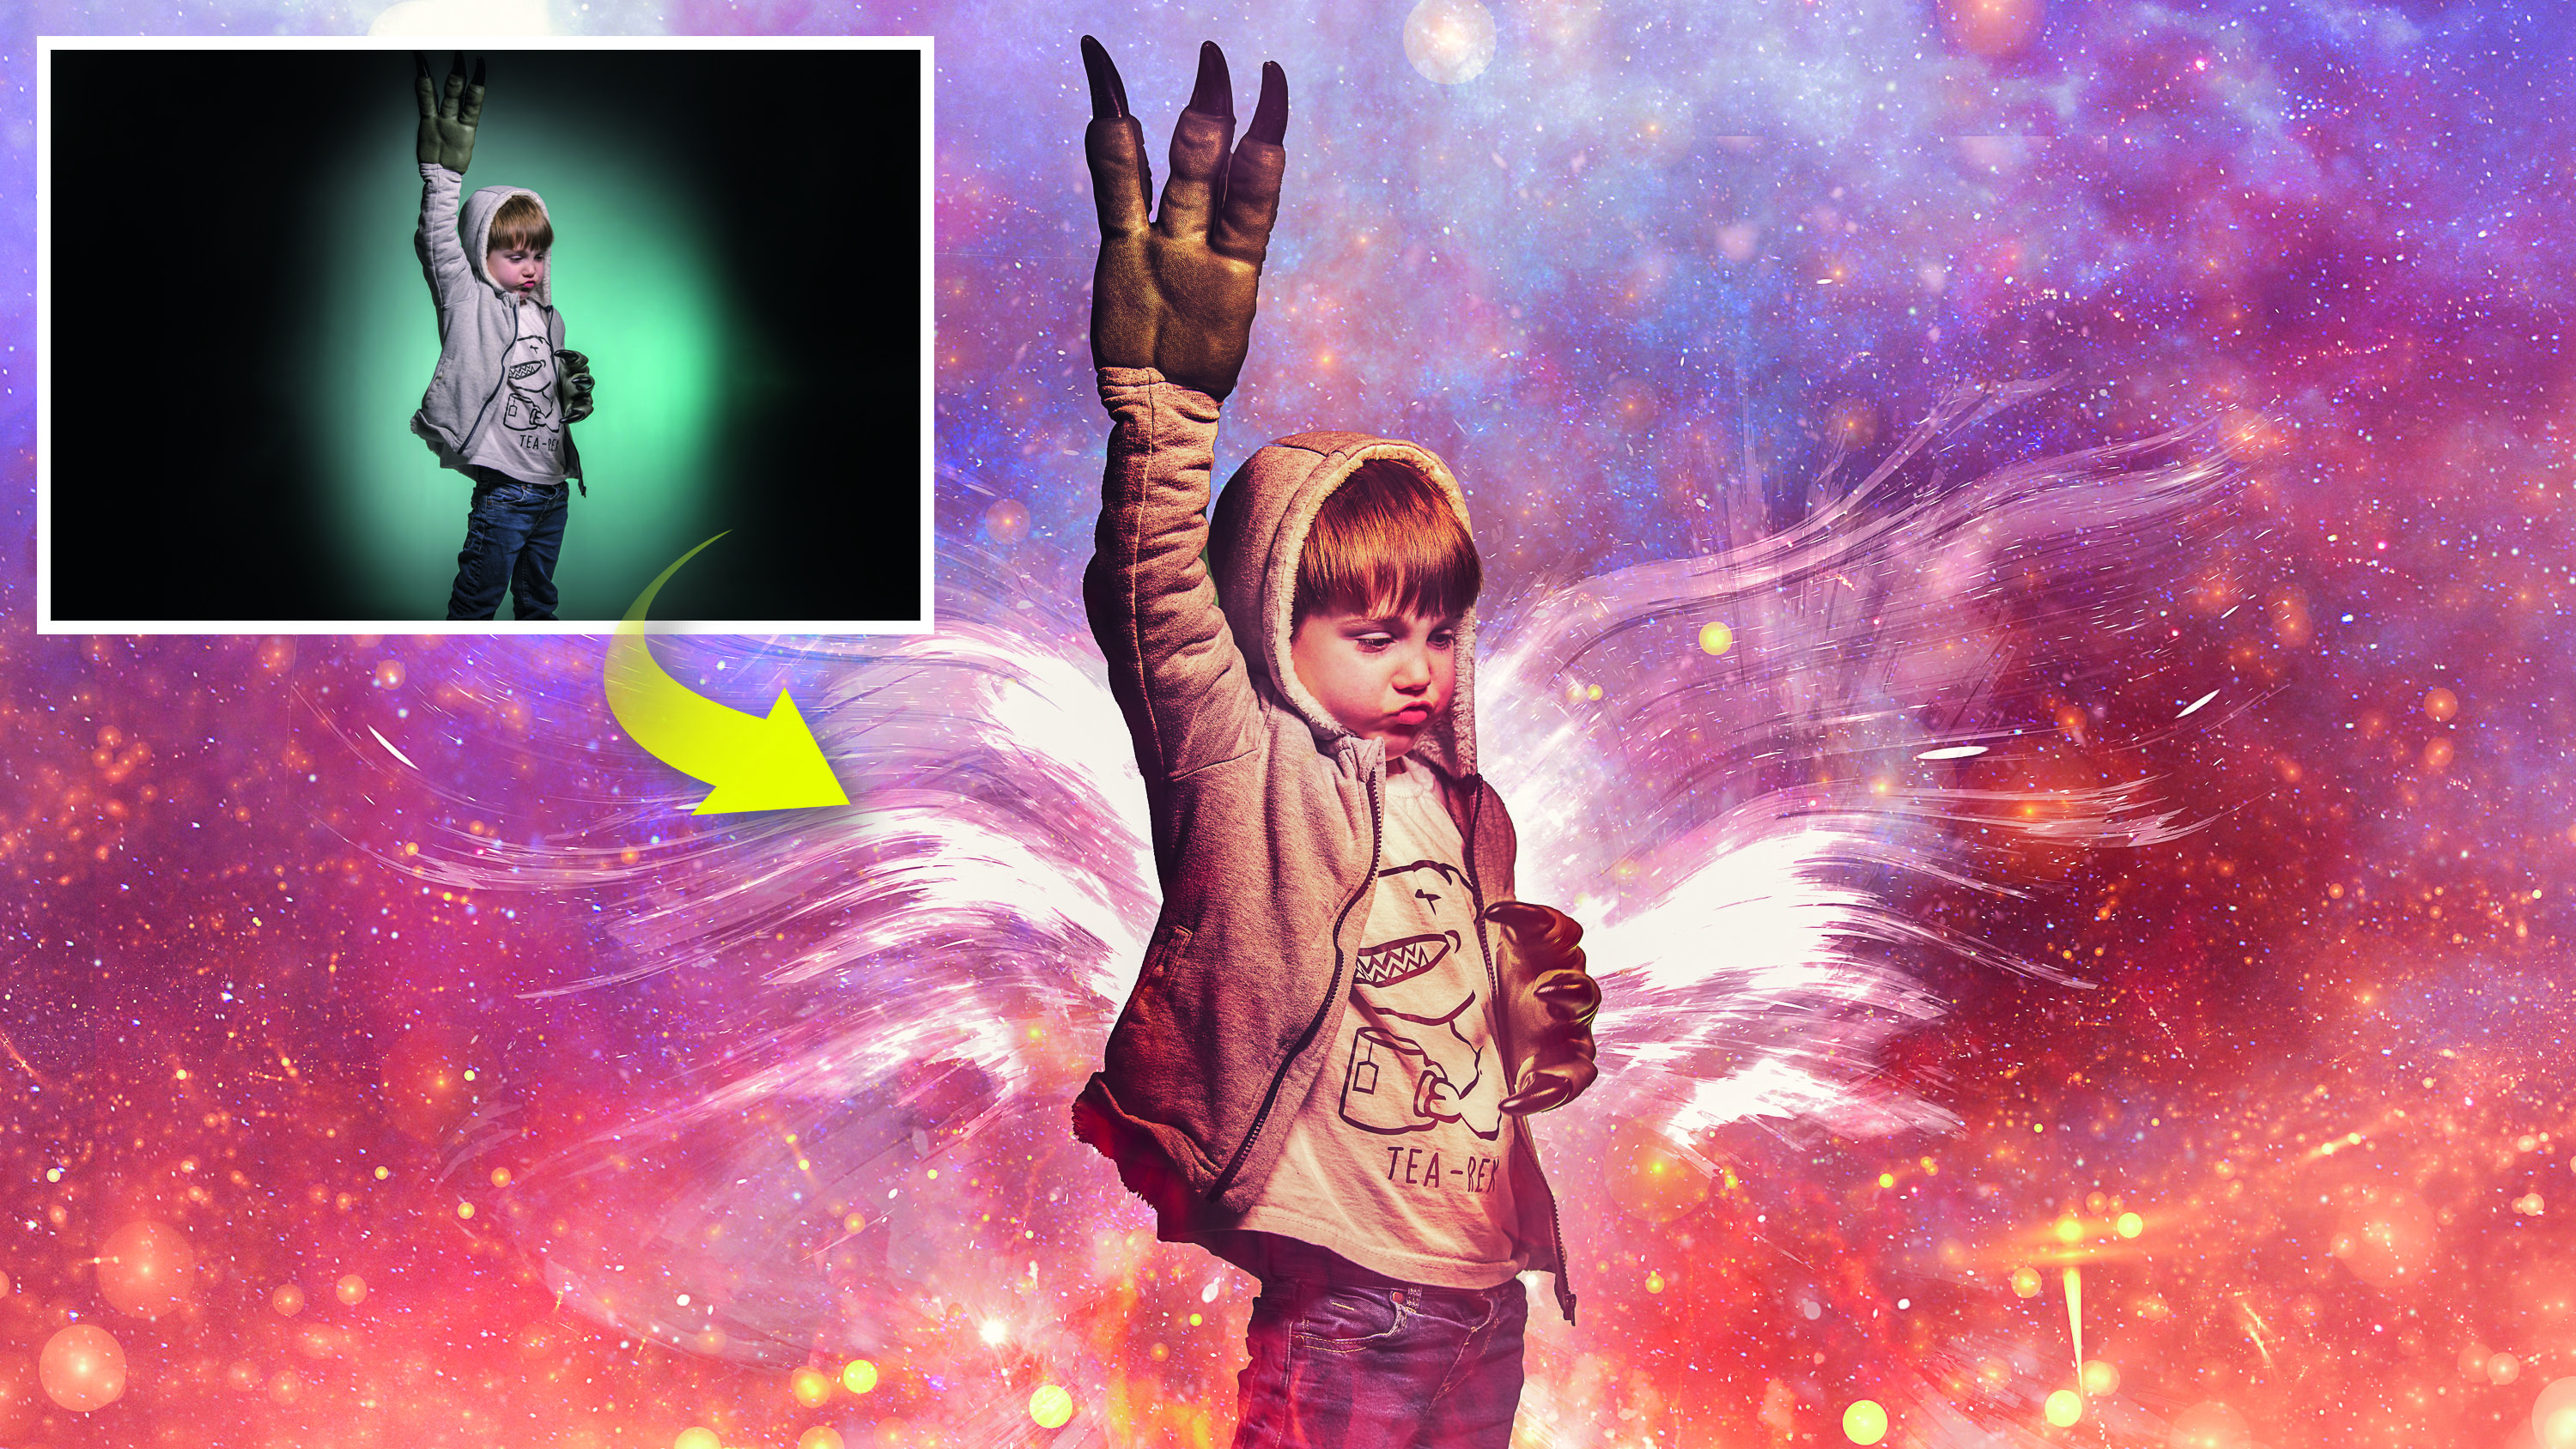
Turn kids into superheroes with quick composite tricks in Photoshop CC
Create a movie poster superhero-look by mastering Photoshop CC's blending modes and utilizing special effects
Watch video: Use Blending Modes in Photoshop CC
Why not give the kids a superhero makeover? By utilizing the power of layer Blending Modes and a range of free downloadable images, it’s easier than it might look to create a portrait that could pass for a movie poster.
The key skill here is in mastering layer Blending Modes in Photoshop CC. These let us combine our portrait with our set of other images. The most useful blend mode for this is Screen, which adds together the brighter parts from each image while cancelling out black areas. It means we can start with a black background, then build up layers on top of one another – either in front or behind our subject. By using Screen we can blend images of fireworks, flames and stars to build our special effect with ease. The images were downloaded for free from Pixabay – search for images 2585843, 3860177, 5456206, 1285364 and 3129573 so you can use the same images that we did and follow along.
• Read more: Best photo editing software
We’ll also make use of Select Subject command, which lets us cut out our subject in an instant. We’ve provided a portrait for you to practice with, but why not shoot your own for this effect? All you need to do is capture a person in a suitably heroic pose. Try and place them against a plain backdrop, so they’re easier to cut out. You could even take it a step further than we have here by adding a movie title or other graphic elements to the scene to finish it all off.
01 Cut out the subject
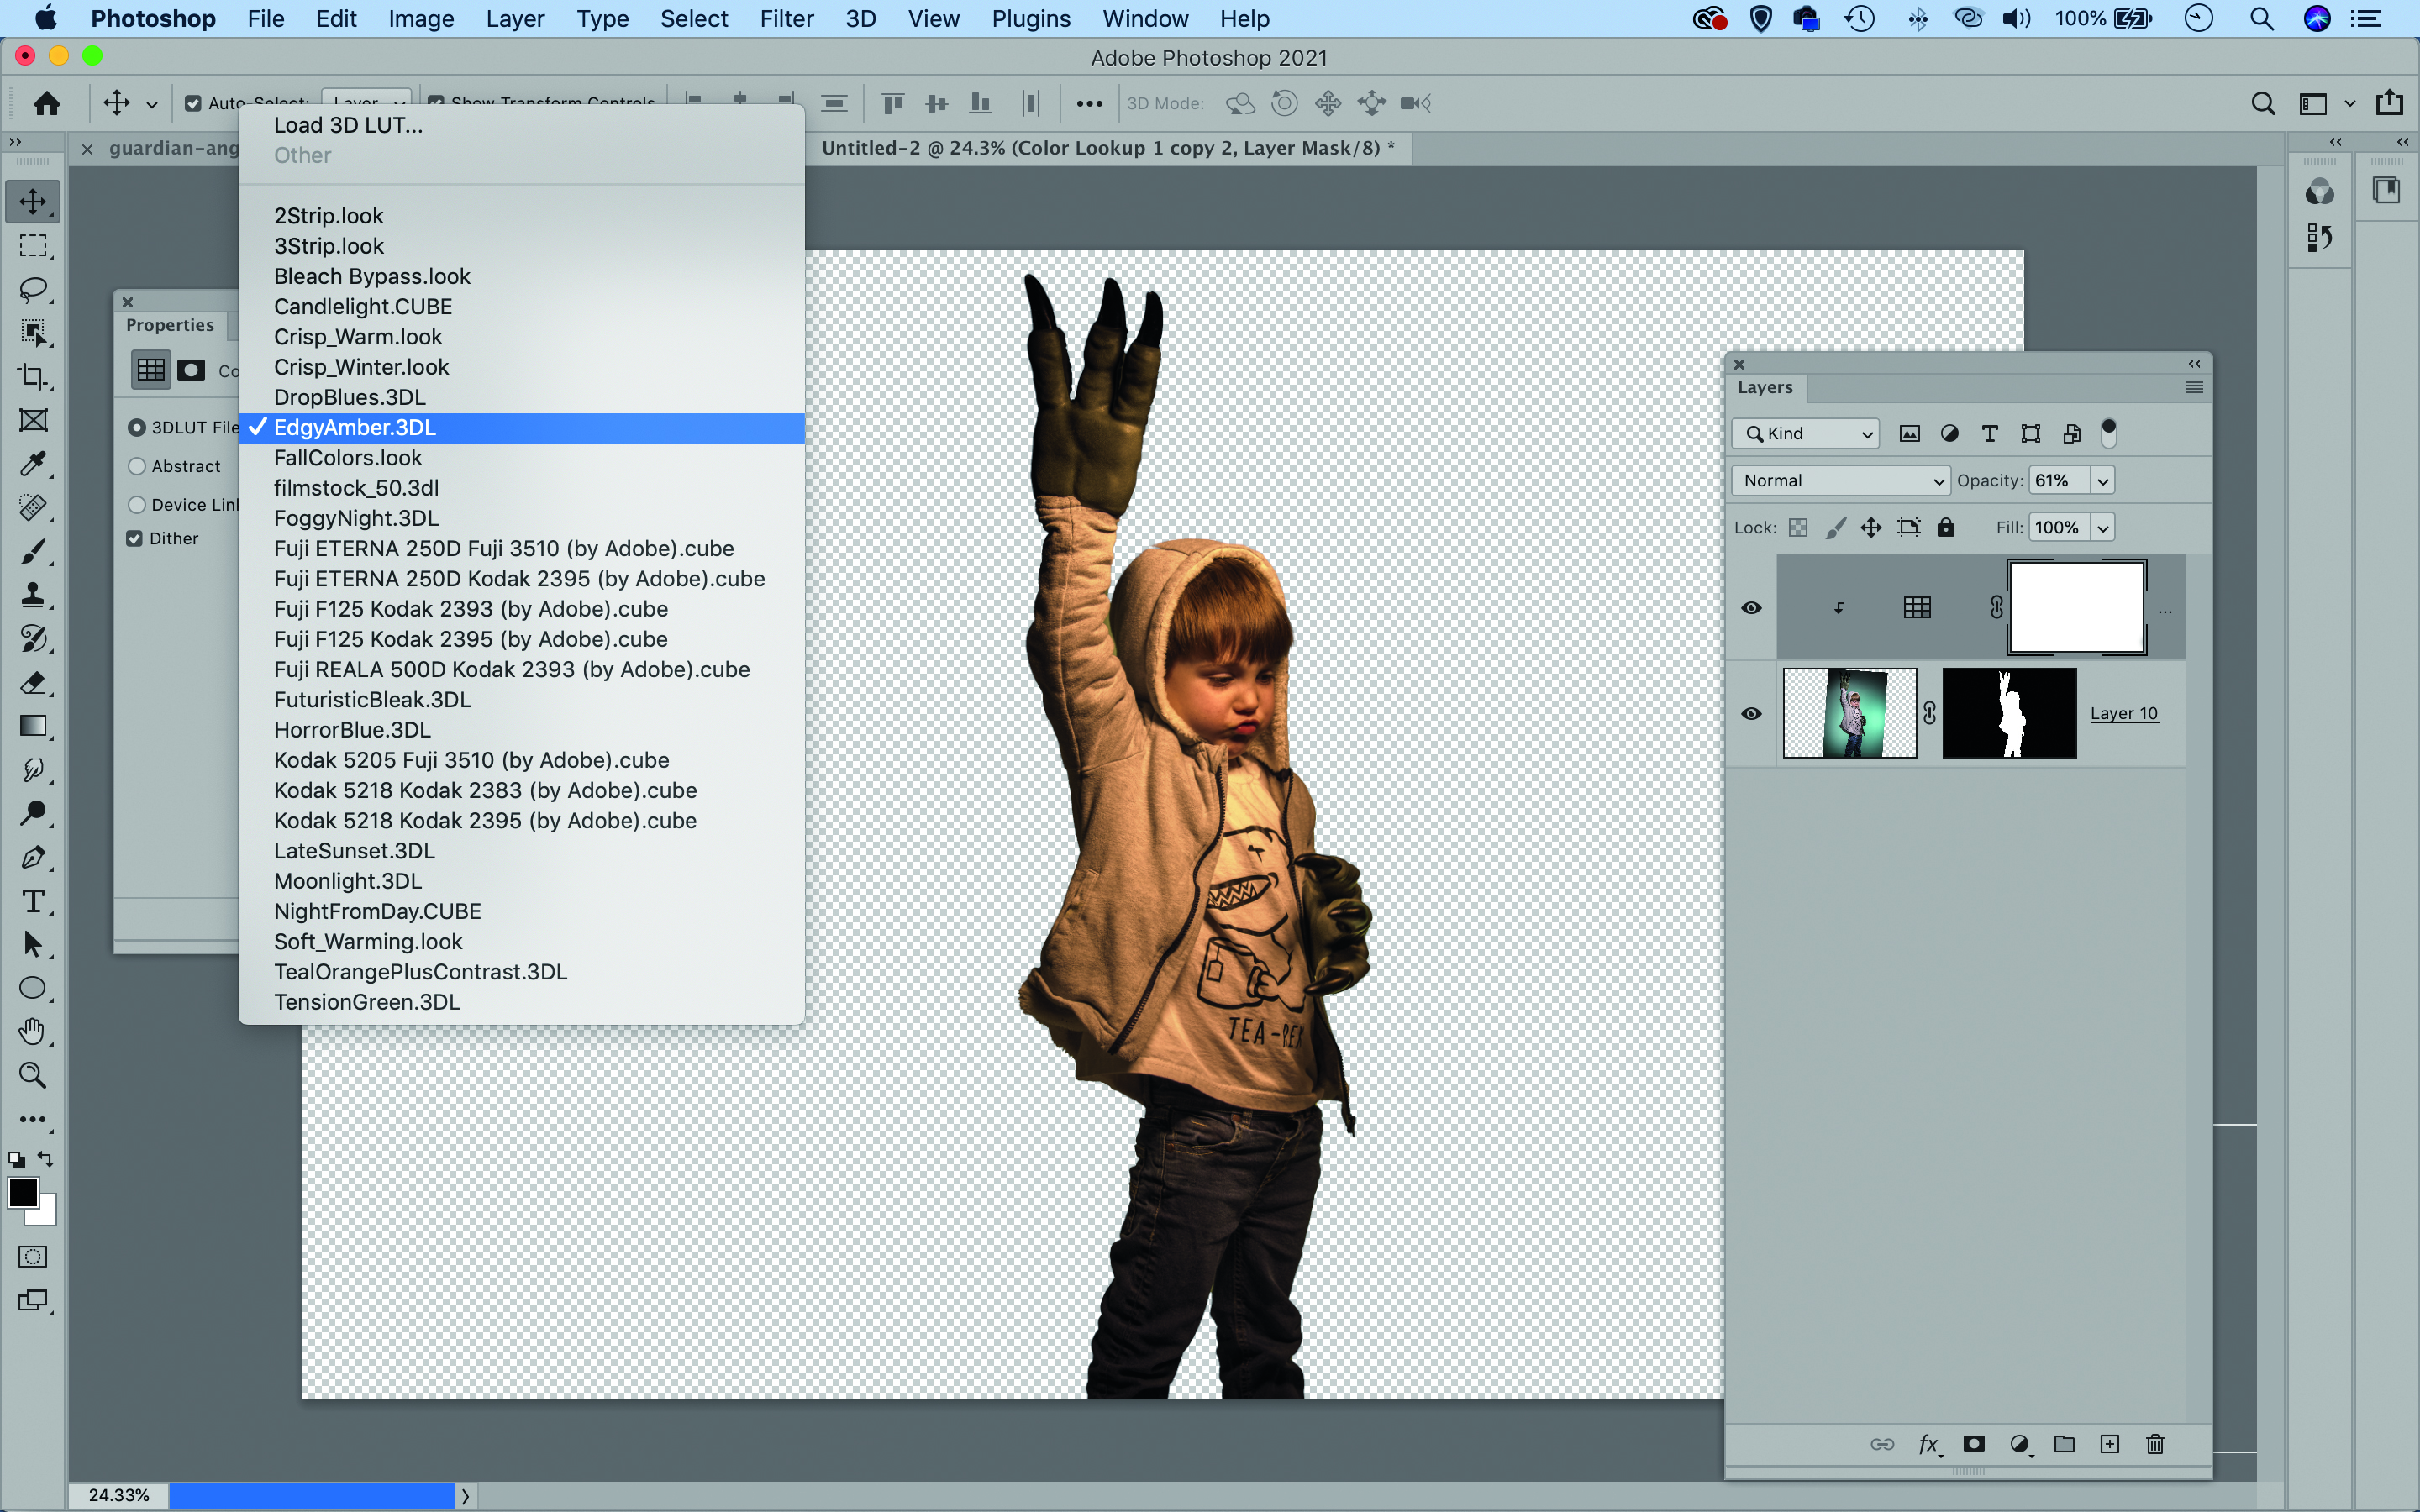
Download the superhero_before.jpg image and open it into Photoshop CC. Then go to Select>Subject. Once selected, click the Add Mask icon in the Layers panel. Next, click the Create Adjustment Layer icon. Choose Color Lookup. Click the square ‘clip to layer’ icon in the properties, then choose the ‘Edgy Amber’ LUT.
02 Blend in some fireworks
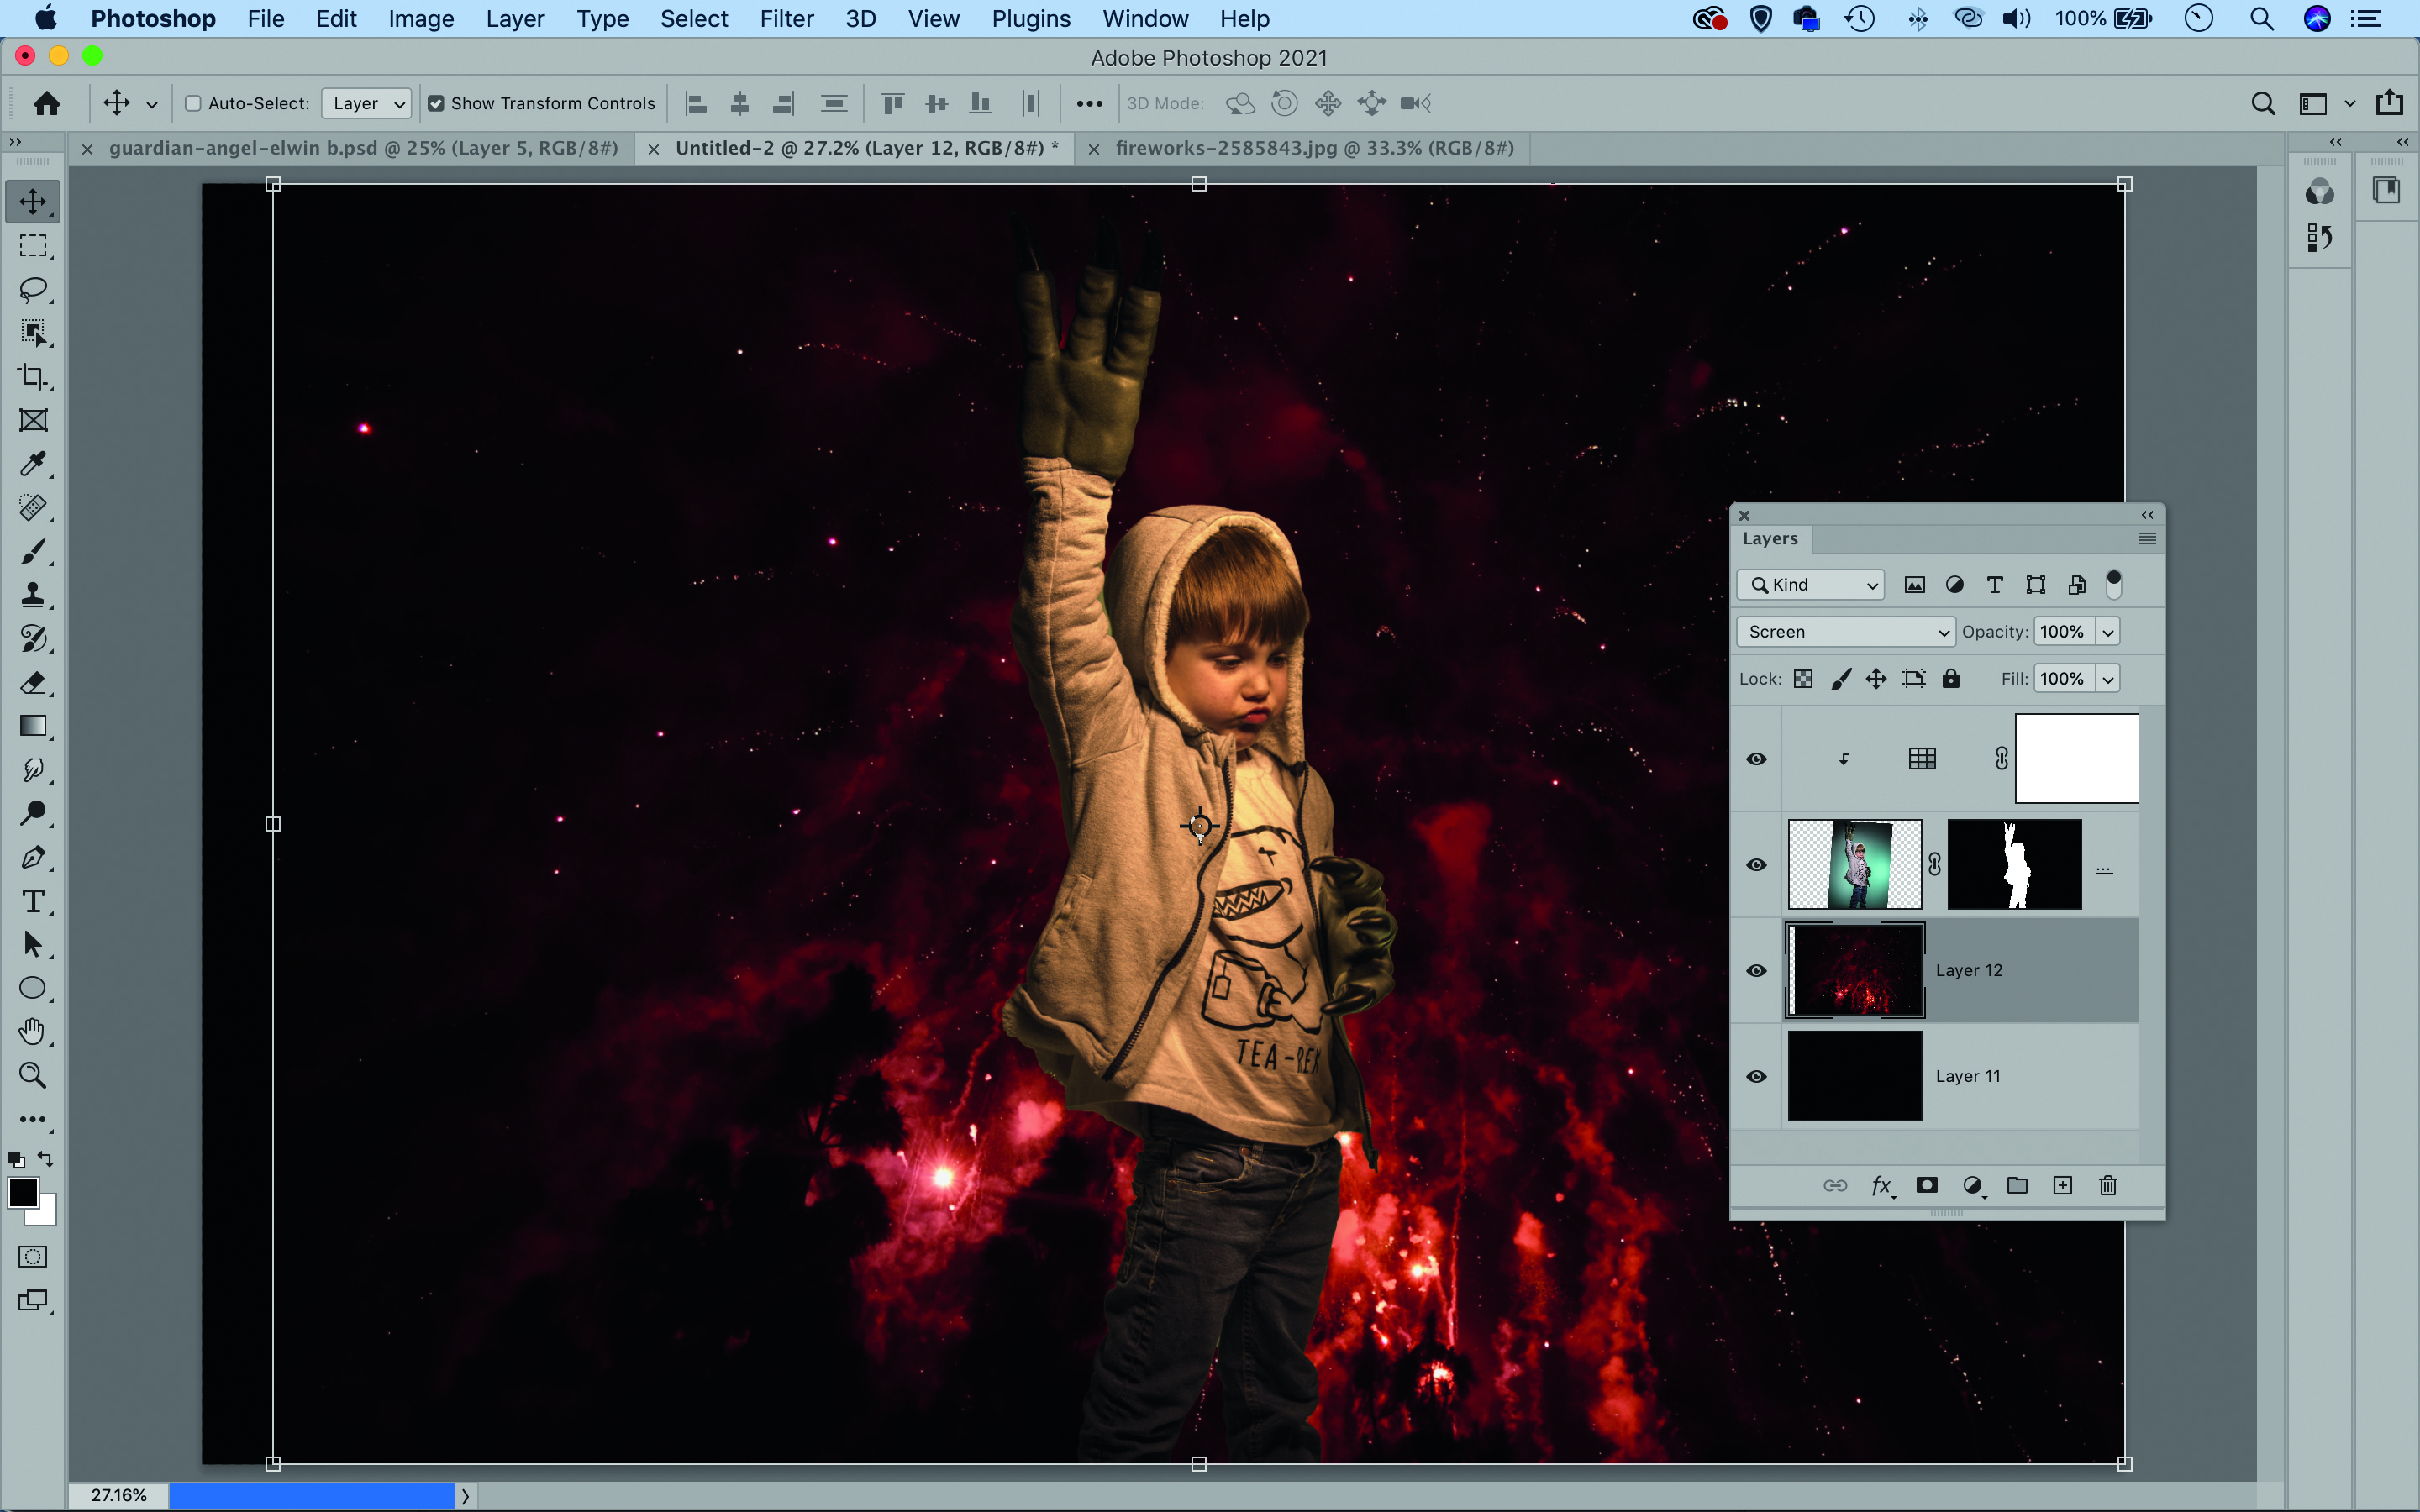
Make a new layer, drag to the bottom of the stack and fill with black. Open image fireworks-2585843 from Pixabay. Drag and drop it in to your image, then drag it just above the black layer at the bottom. Hit Cmd/Ctrl+T if you need to resize the layer to fit.
03 Add more images to build up the effect
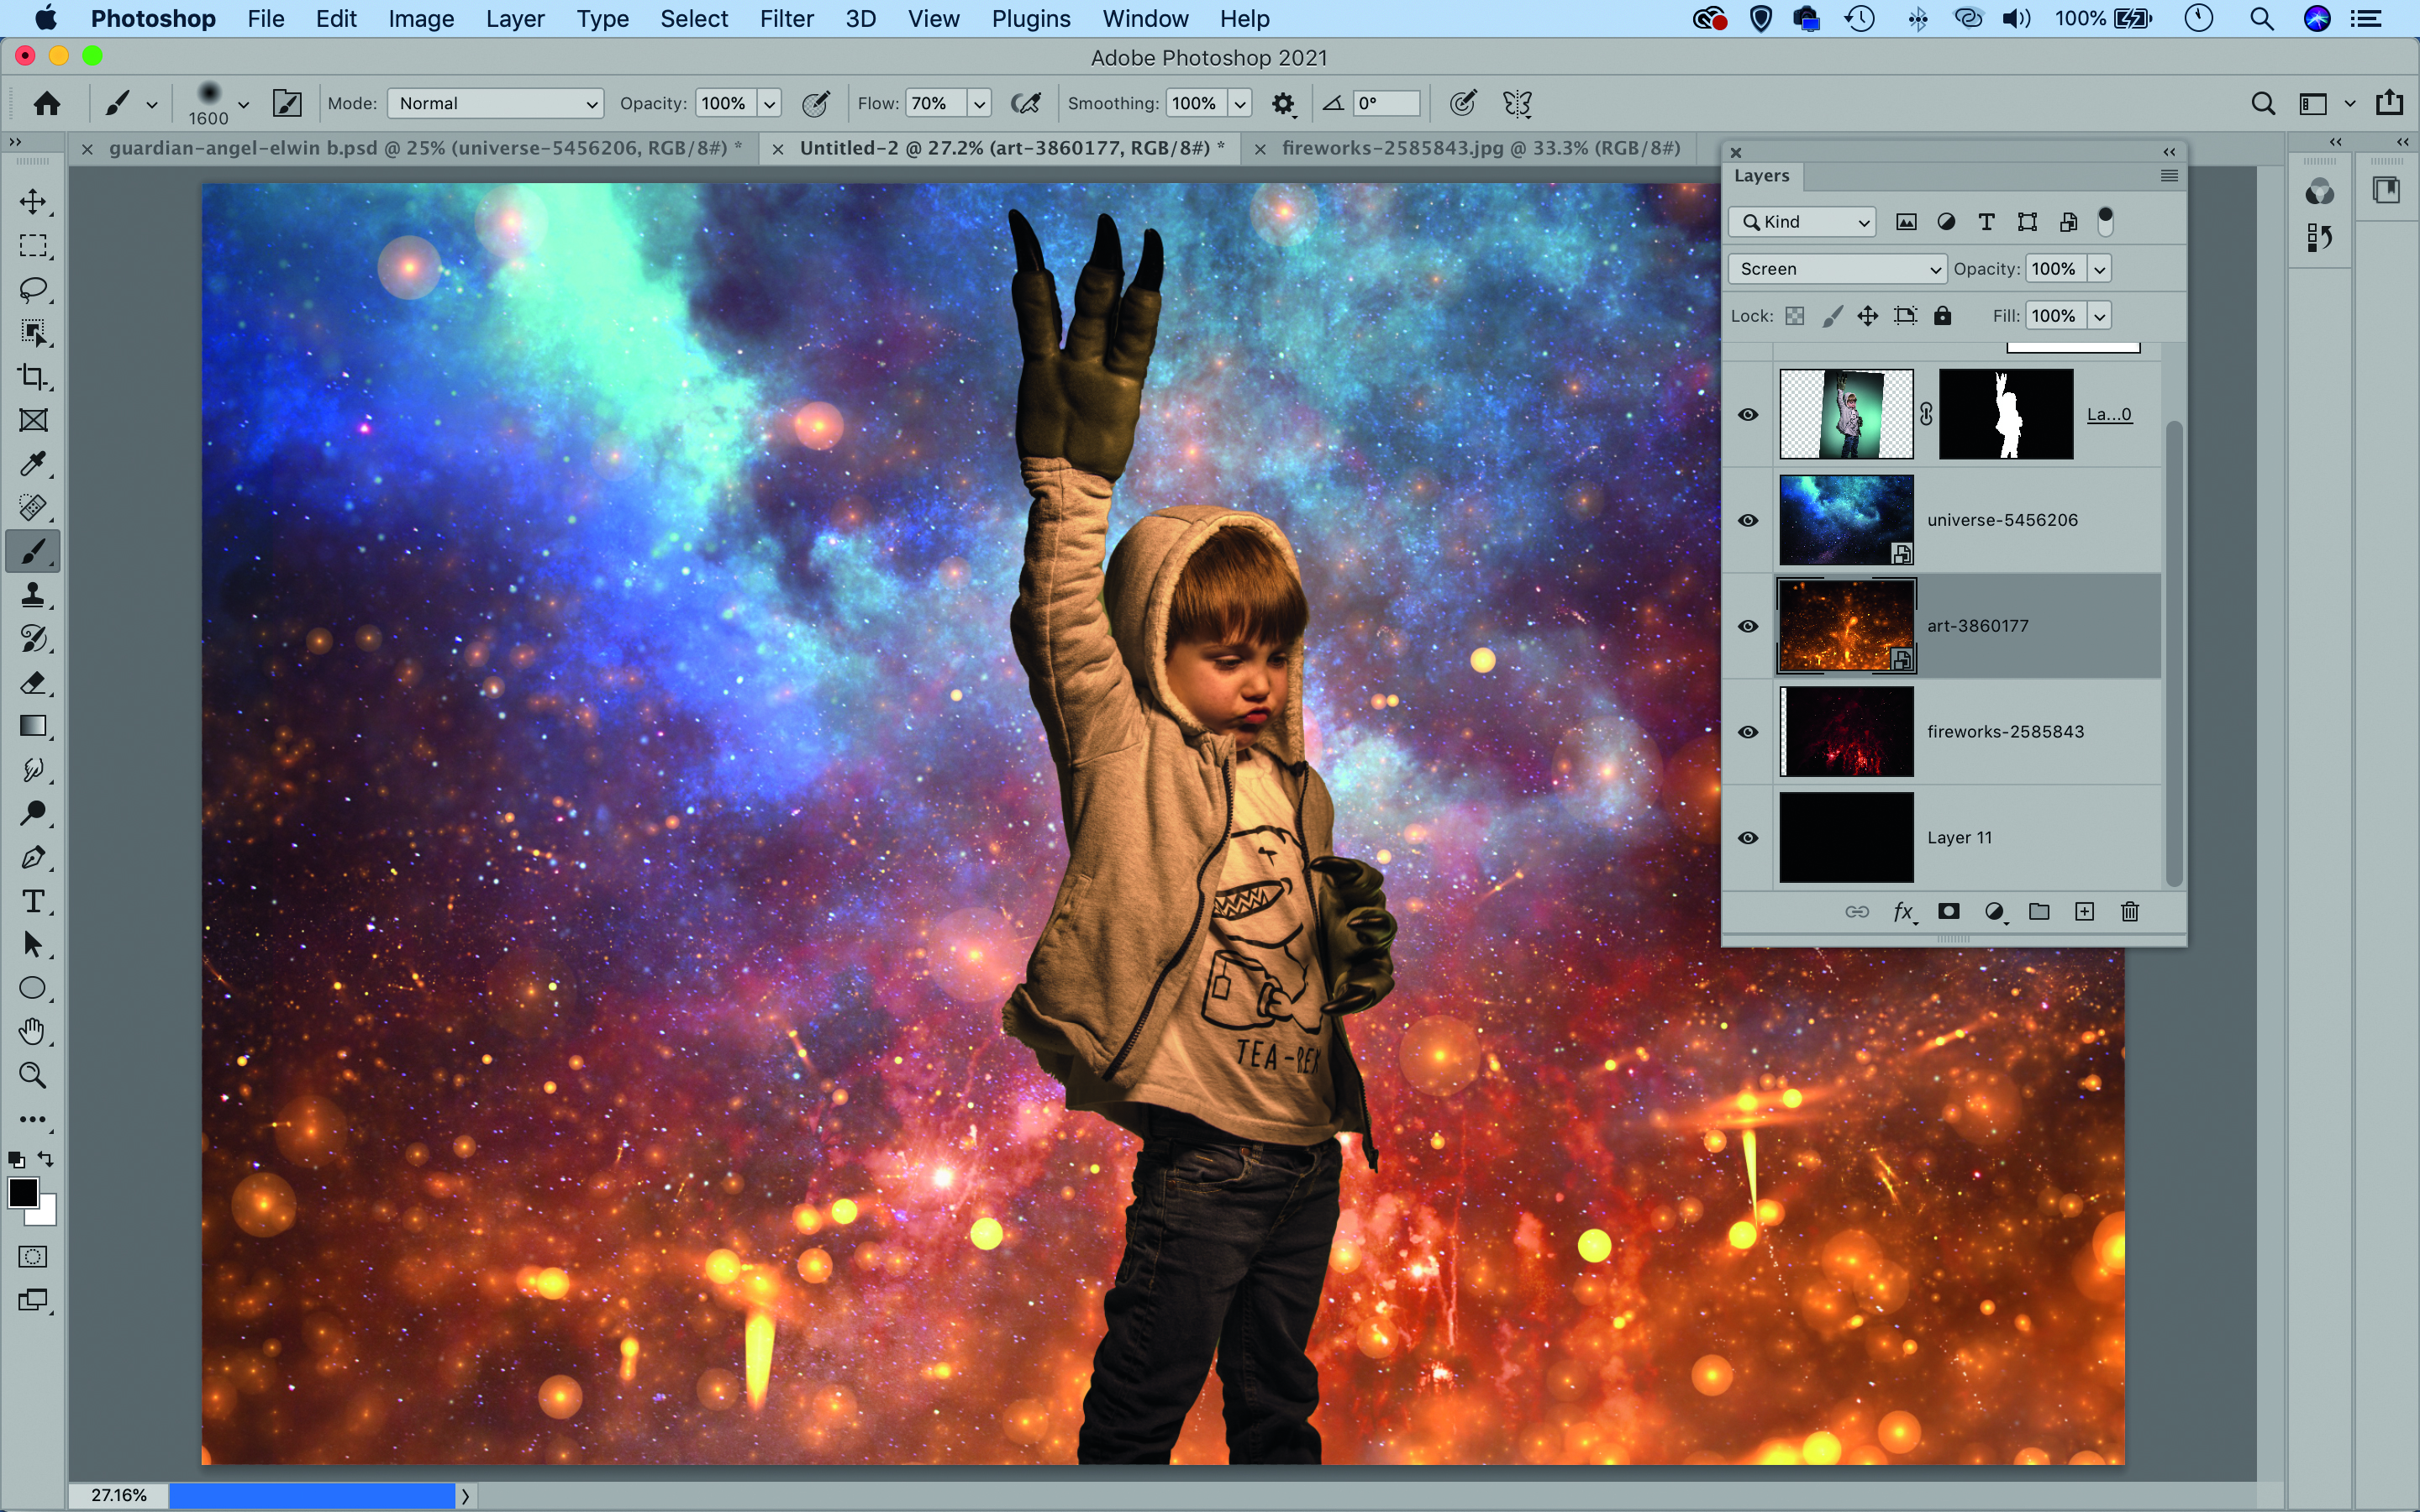
Download image art-3860177 from Pixabay. Drag and drop it in to the portrait image and resize, then go to the Layers panel and change the blend mode to Screen. Position the layer below the cut out portrait in the layer stack. Repeat for the image universe-5456206.
04 Liquify the layer
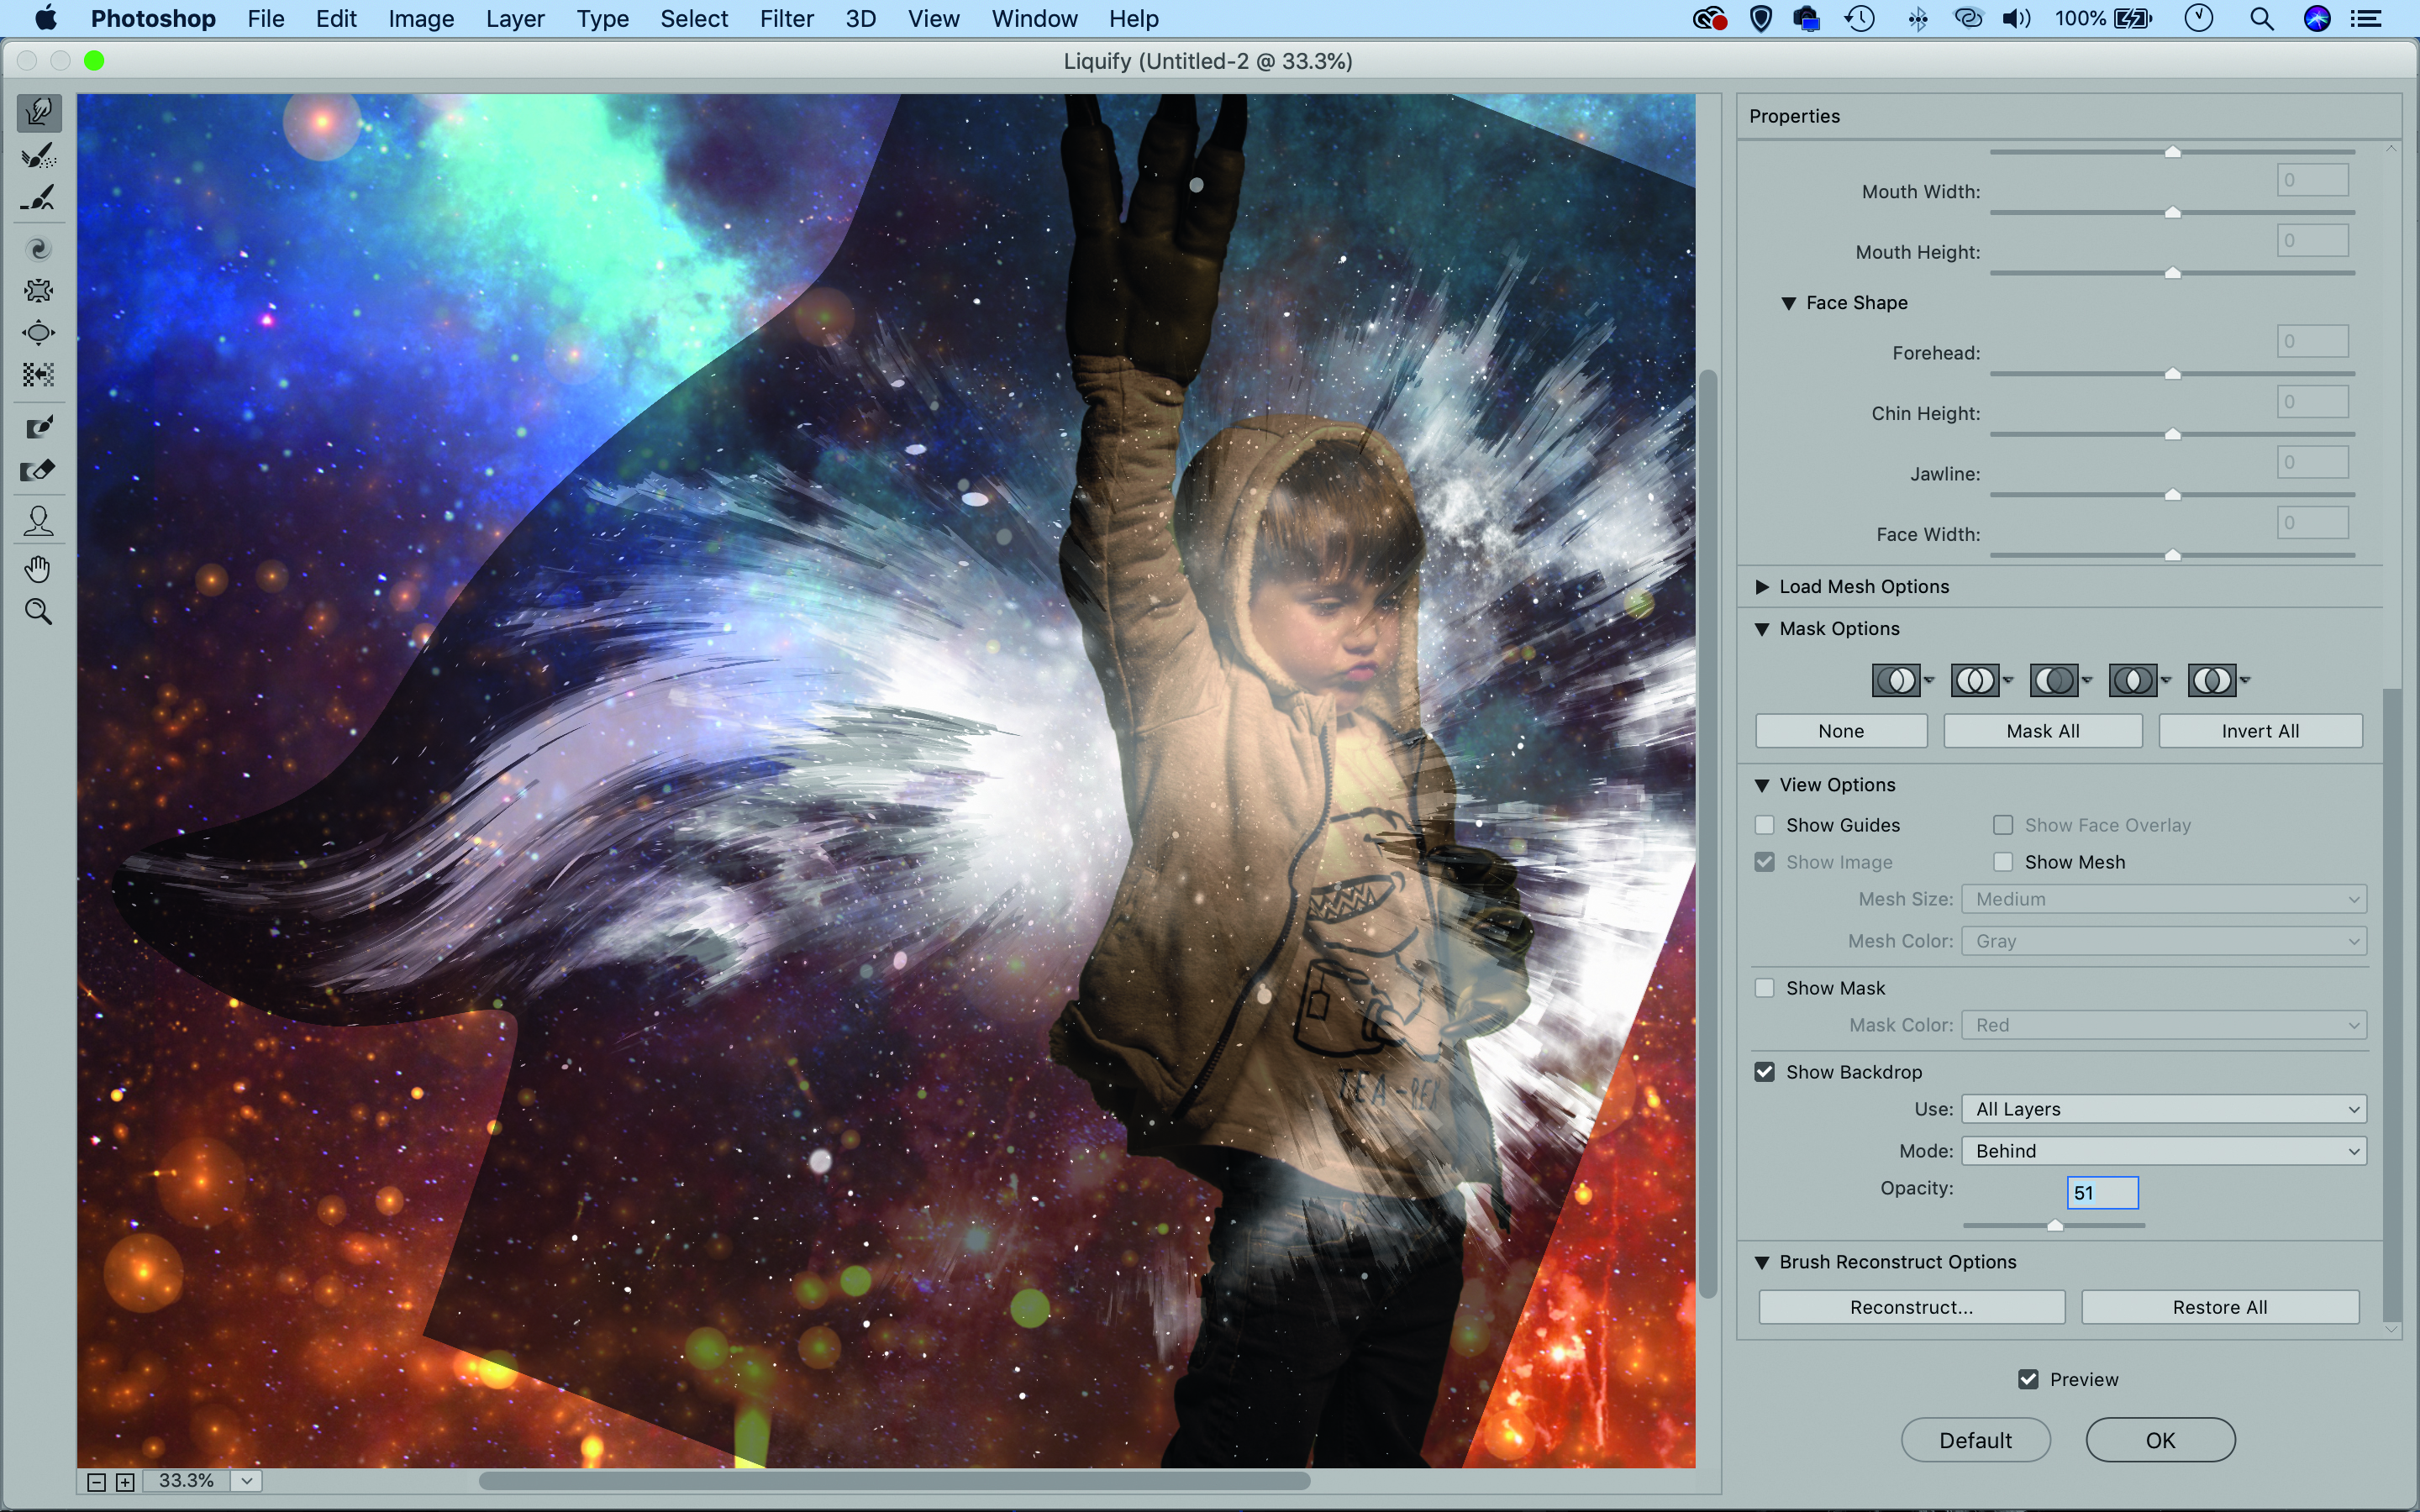
Drop in image explosion-1285364 and set it to Screen blend mode, so the darker areas get cancelled out. Position it to one side of the figure, go to Filter>Liquify. Use the Forward Warp tool to stretch out the lines to create a wing-like shape on one half of the figure.
05 Boost the tones

Add a Layer Mask and paint black to hide unwanted parts of the wing-shape layer, then copy the layer (Cmd/Ctrl+J) and repeat for the other side. Drag in meteor-3129573 and set it to Screen. Drag to the top of the layer stack and position it over the figure.
06 Choose a profile to finish it off
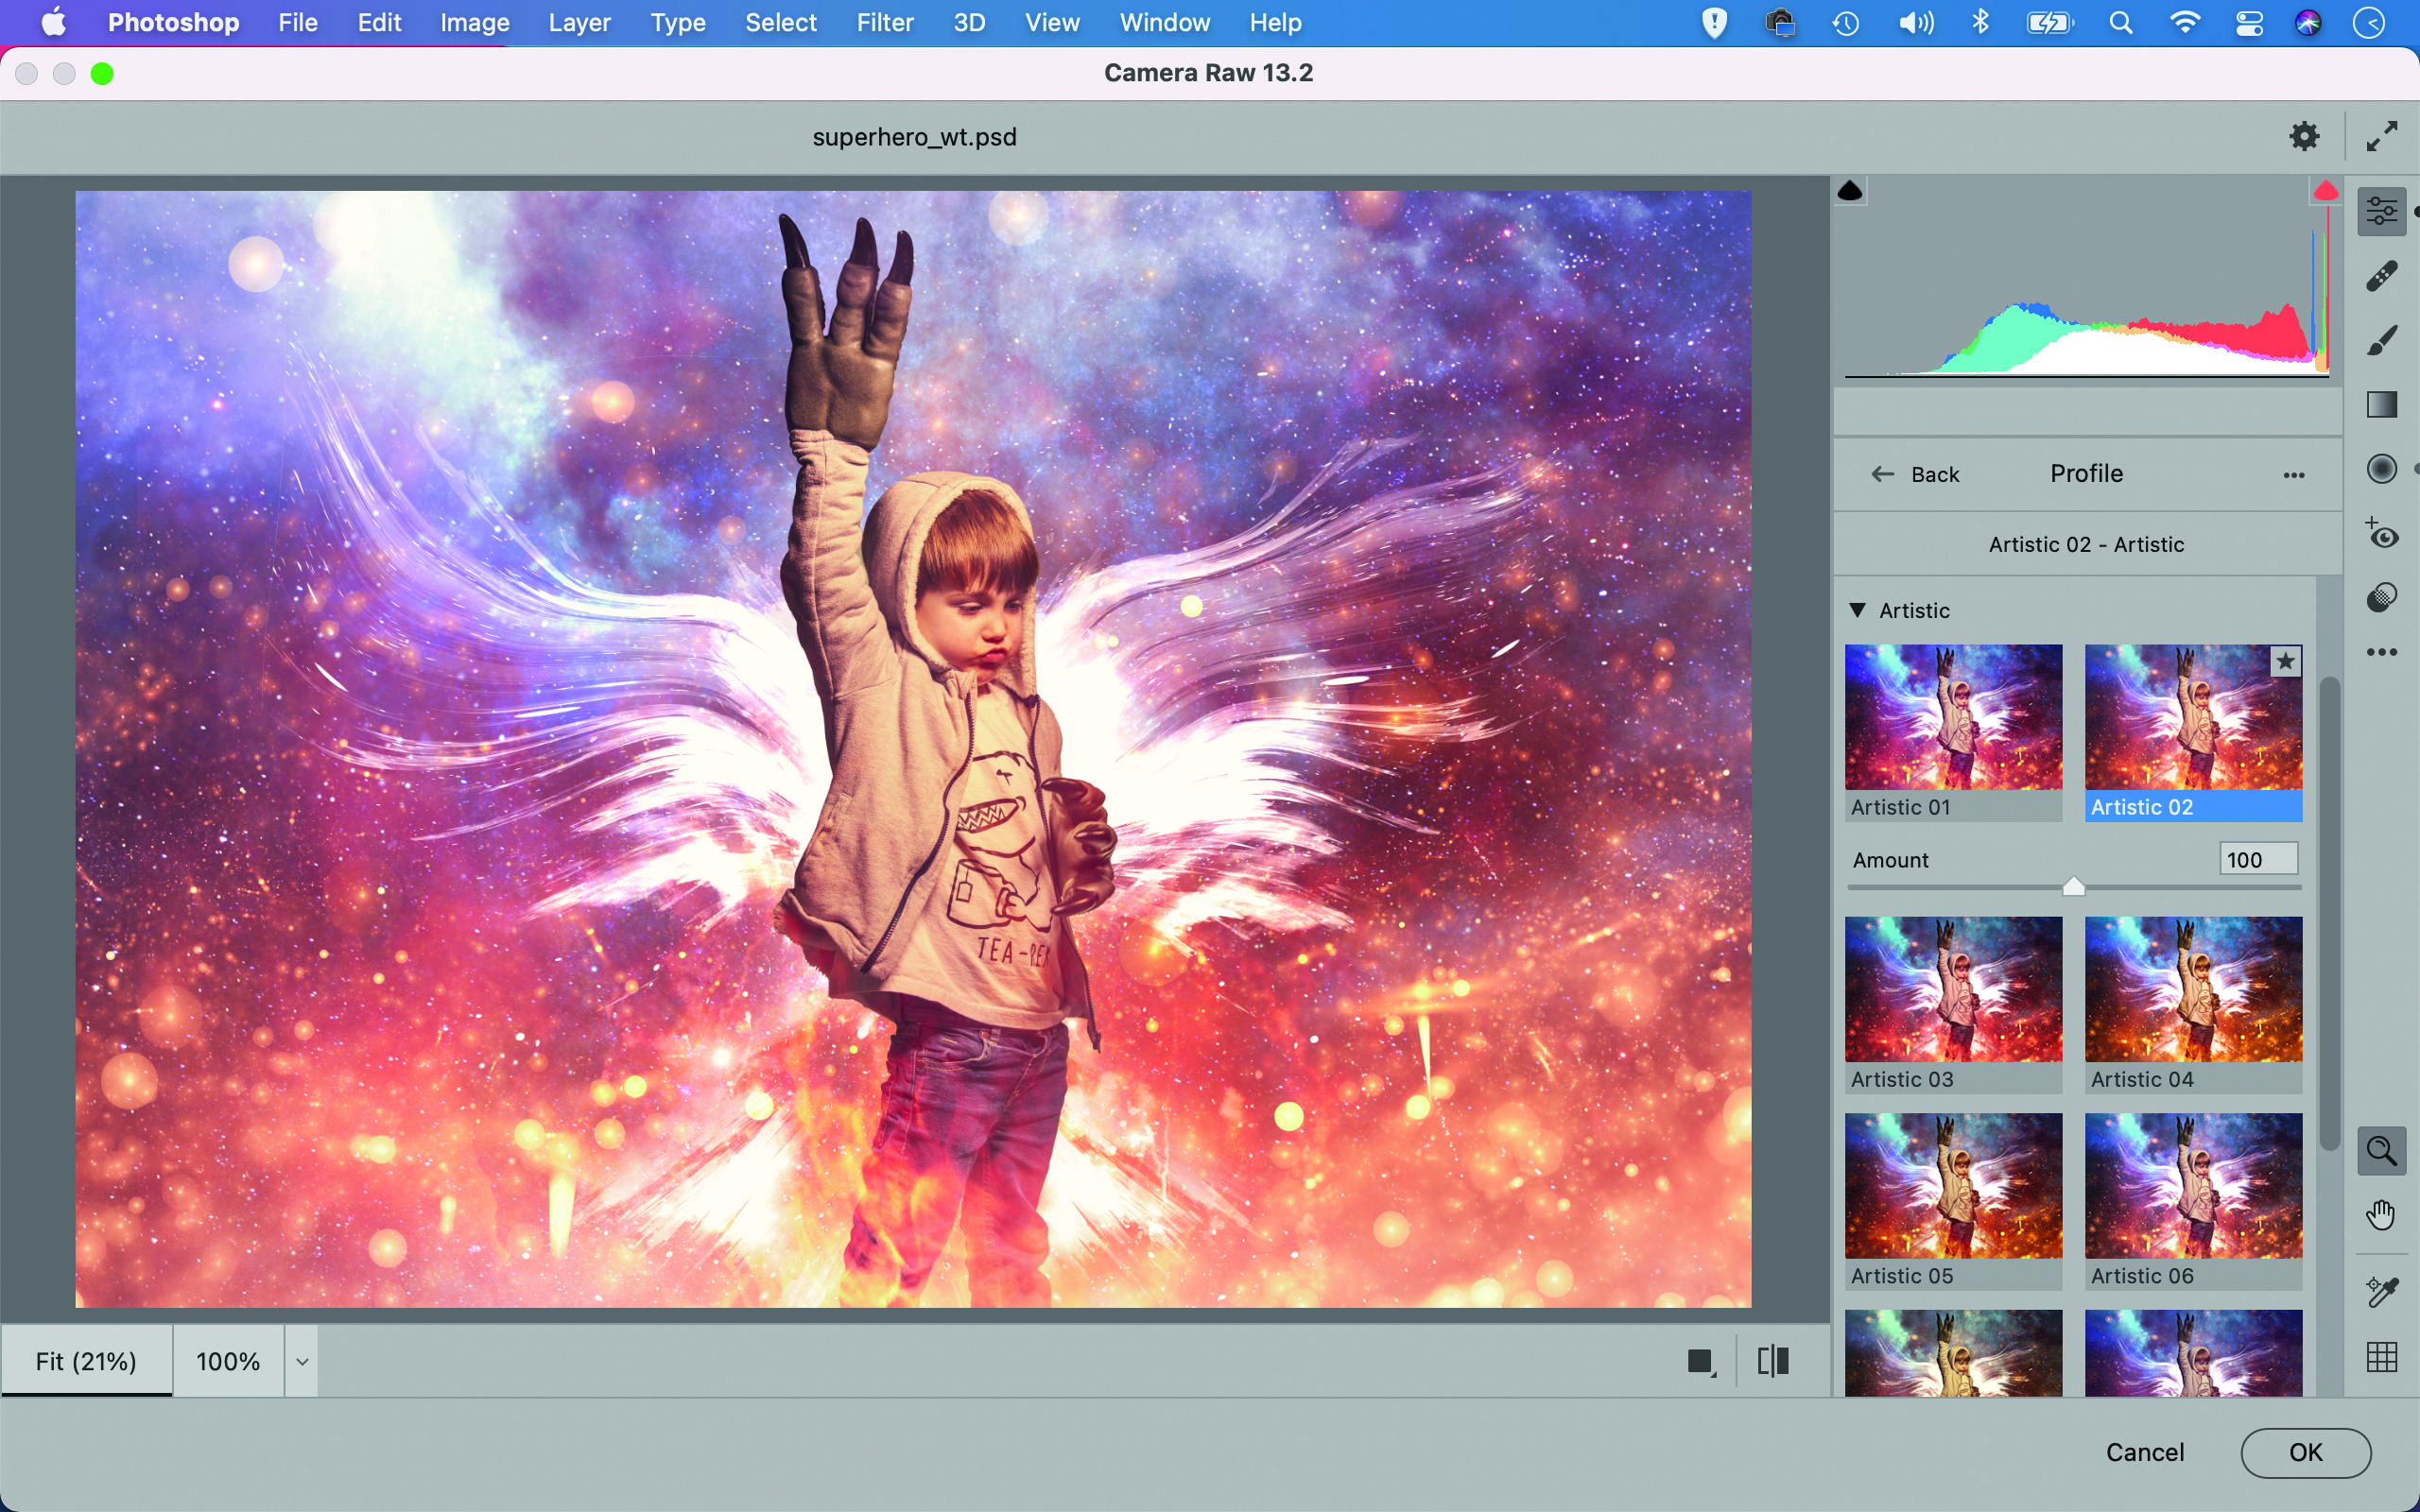
A tonal change at the end will help all the elements come together. Hit Cmd/Ctrl+Shift+Alt+E to merge a new layer. Go to Filter>Camera Raw Filter. Choose a profile to alter the colours. We used Artistic02, and added a vignette to lighten the corners to finish the image off nicely.
PhotoPlus: The Canon Magazine is the world's only monthly newsstand title that's 100% devoted to Canon, so you can be sure the magazine is completely relevant to your system.
Read more
The best photo editing software: image editors for novices through to pros
The best photo-editing laptops: top laptops for photographers
10 best online photography courses – from beginner guides to masterclasses
Get the Digital Camera World Newsletter
The best camera deals, reviews, product advice, and unmissable photography news, direct to your inbox!
The lead technique writer on Digital Camera Magazine, PhotoPlus: The Canon Magazine and N-Photo: The Nikon Magazine, James is a fantastic general practice photographer with an enviable array of skills across every genre of photography.
Whether it's flash photography techniques like stroboscopic portraits, astrophotography projects like photographing the Northern Lights, or turning sound into art by making paint dance on a set of speakers, James' tutorials and projects are as creative as they are enjoyable.
He's also a wizard at the dark arts of Photoshop, Lightroom and Affinity Photo, and is capable of some genuine black magic in the digital darkroom, making him one of the leading authorities on photo editing software and techniques.


