Use an L-bracket to capture stunning landscape photography
Perfect for landscape photography, an ‘L-bracket’ helps you switch quickly between horizontal and vertical orientations
If you're looking to make a living from your landscape photography, you should consider shooting in both landscape and portrait orientation for one reason: it doubles your chances of sales. This is because people buying shots for use in print are mostly looking for a photo that’ll fit onto a single page, which demands it’s longer on the vertical edge, or to go across two pages, which has to be longer on the horizontal.
Tripods are mainly designed for shooting horizontally. Once you’ve set up the legs so it’s level, you screw the base plate into the camera and it sits on top, the centre of gravity of the camera above the tripod. To shoot vertically, ball heads have an indent which the attachment to the baseplate slots into. But this means the weight is now off-centre. Worse, the camera has moved to a new position and so we have to recompose. However, we can quickly and easily solve this frustrating problem with the simple addition of an L-bracket.
• Read more: Best travel tripods
• Landscape photography tips and techniques
An L-bracket means that it takes just seconds to switch from horizontal to vertical, and the camera will still be in the same place, weight above the tripod – the centre of the frame will also be the same.
When we went to shoot Aston Windmill in Somerset, overcast conditions meant the sun would only break through the clouds occasionally. We wanted the windmill to be sunlit, but by the time we had switched orientation and recomposed, it was in plunged into shade once again. This is where an L-bracket can really help save your landscape photography. However, it can be even more helpful at sunset or sunrise, where the light changes quickly and once it’s gone, it’s gone.
01. Composing horizontally with a ball head
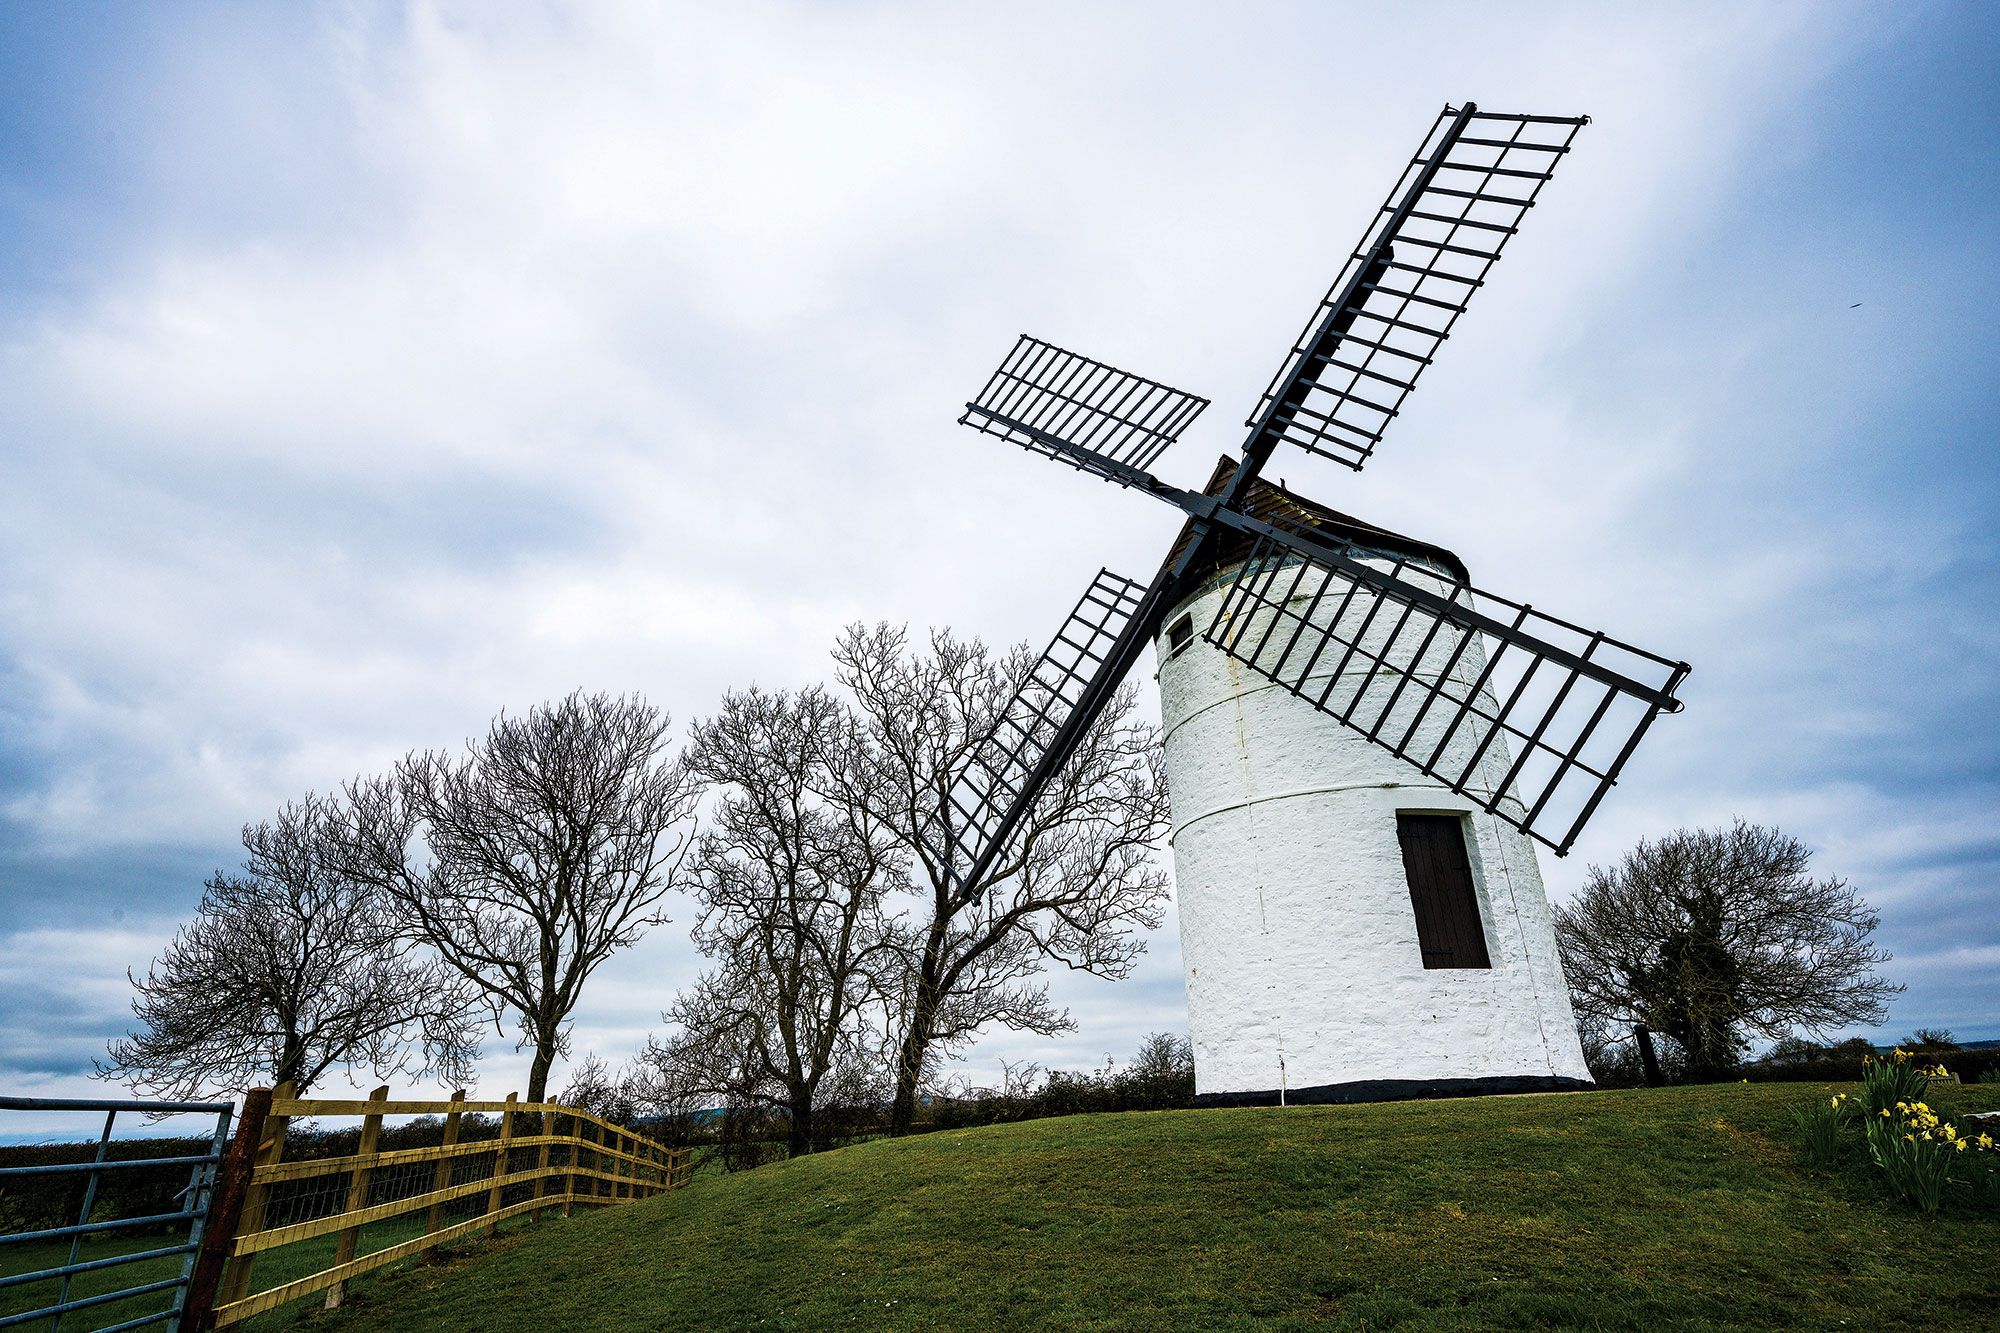
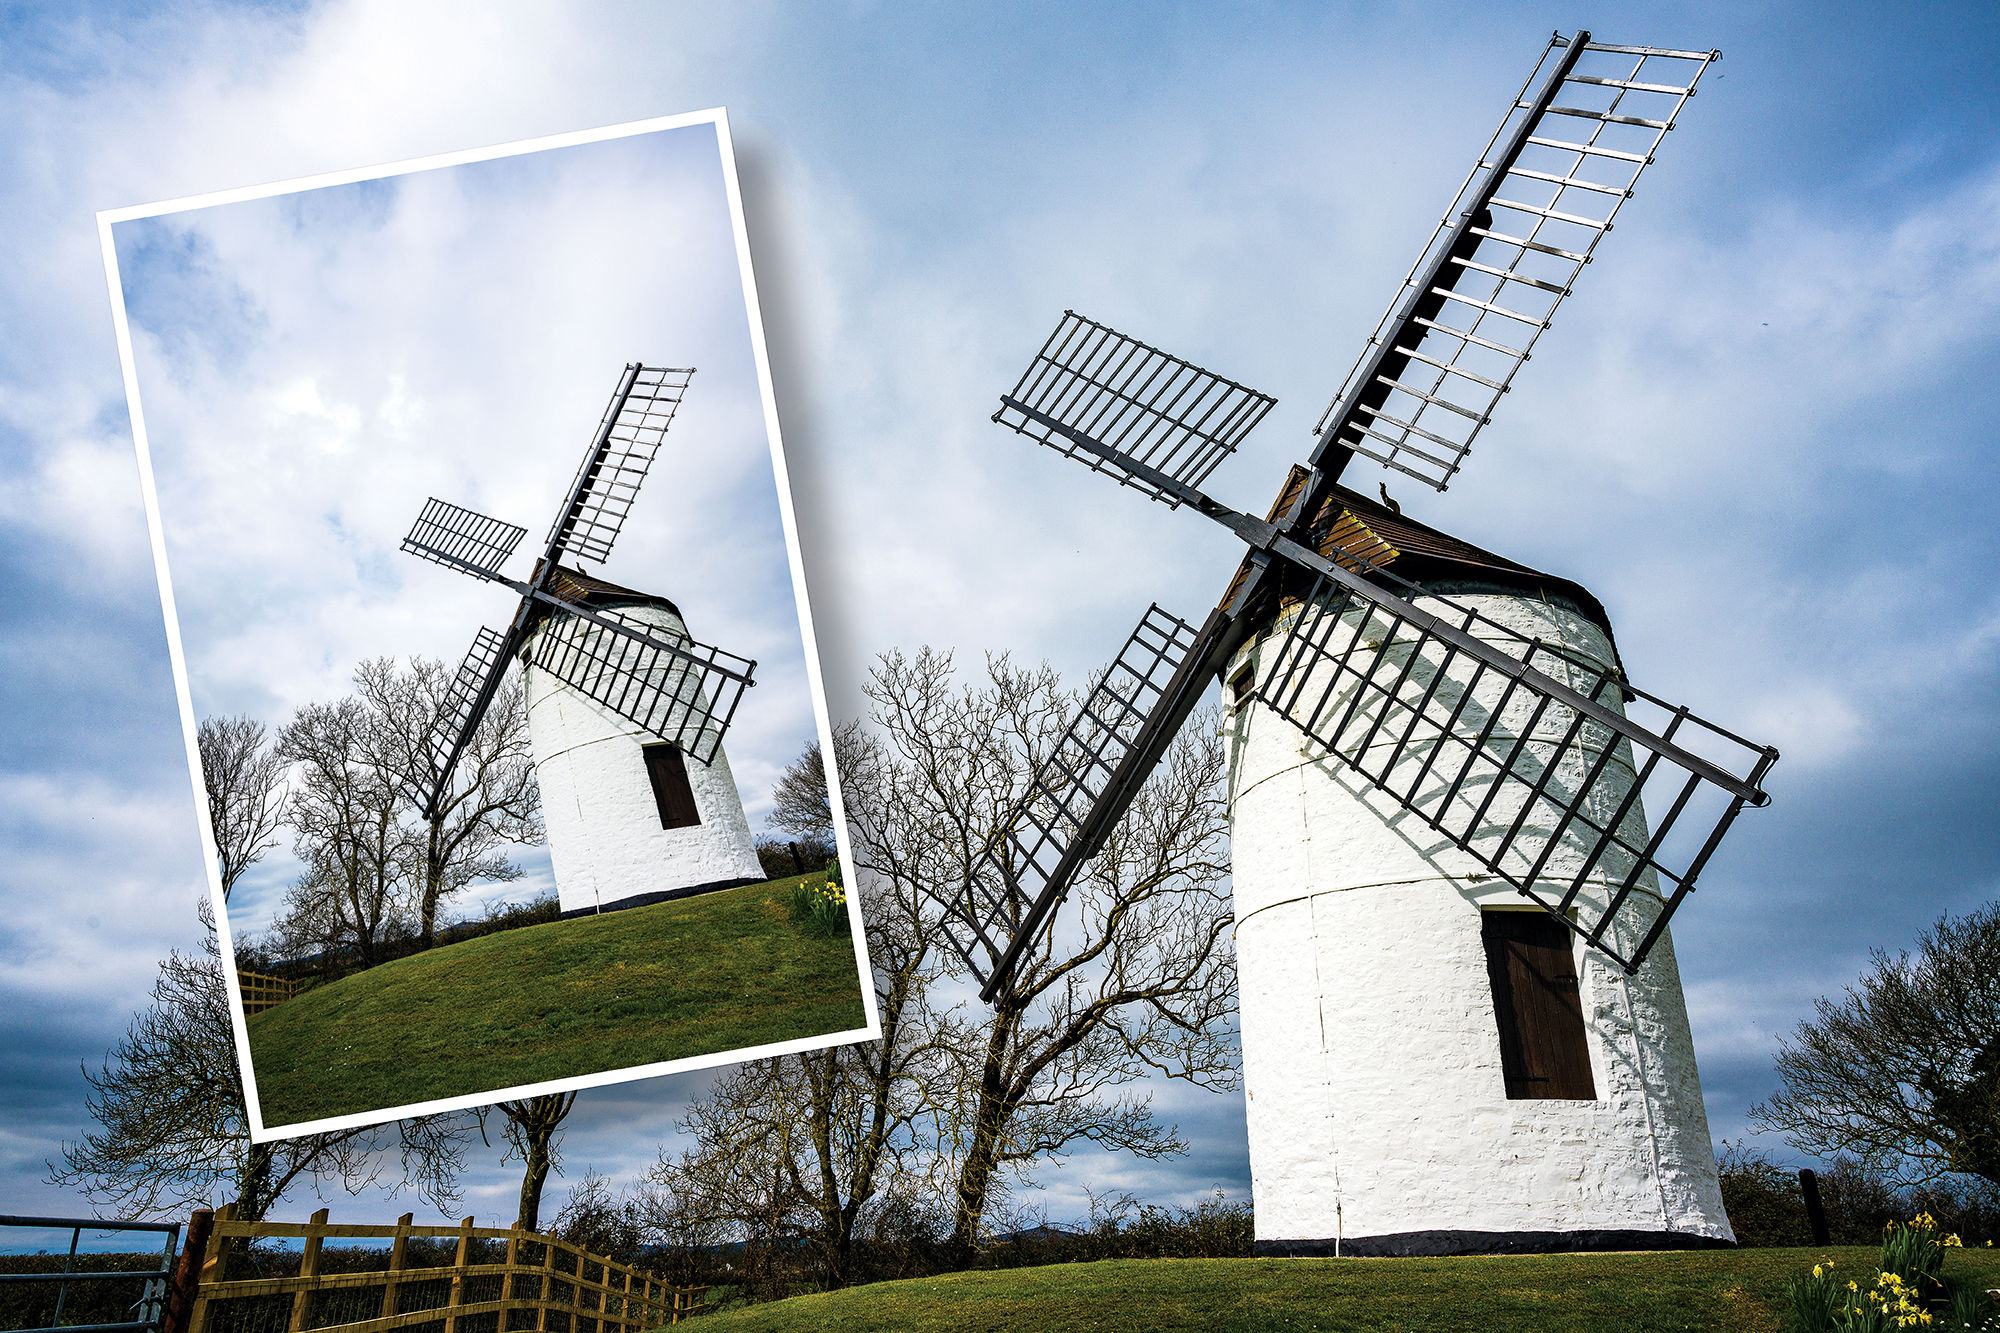
We’ve lined up our horizontal composition, ensuring our landscapes is level, and taken our shot with the windmill towards one side of the frame, following the ‘rule of thirds’. This gives the image room to breathe, but is also attractive to stock library customers as there’s plenty of space to place text.
02. Composing vertically with a ball head
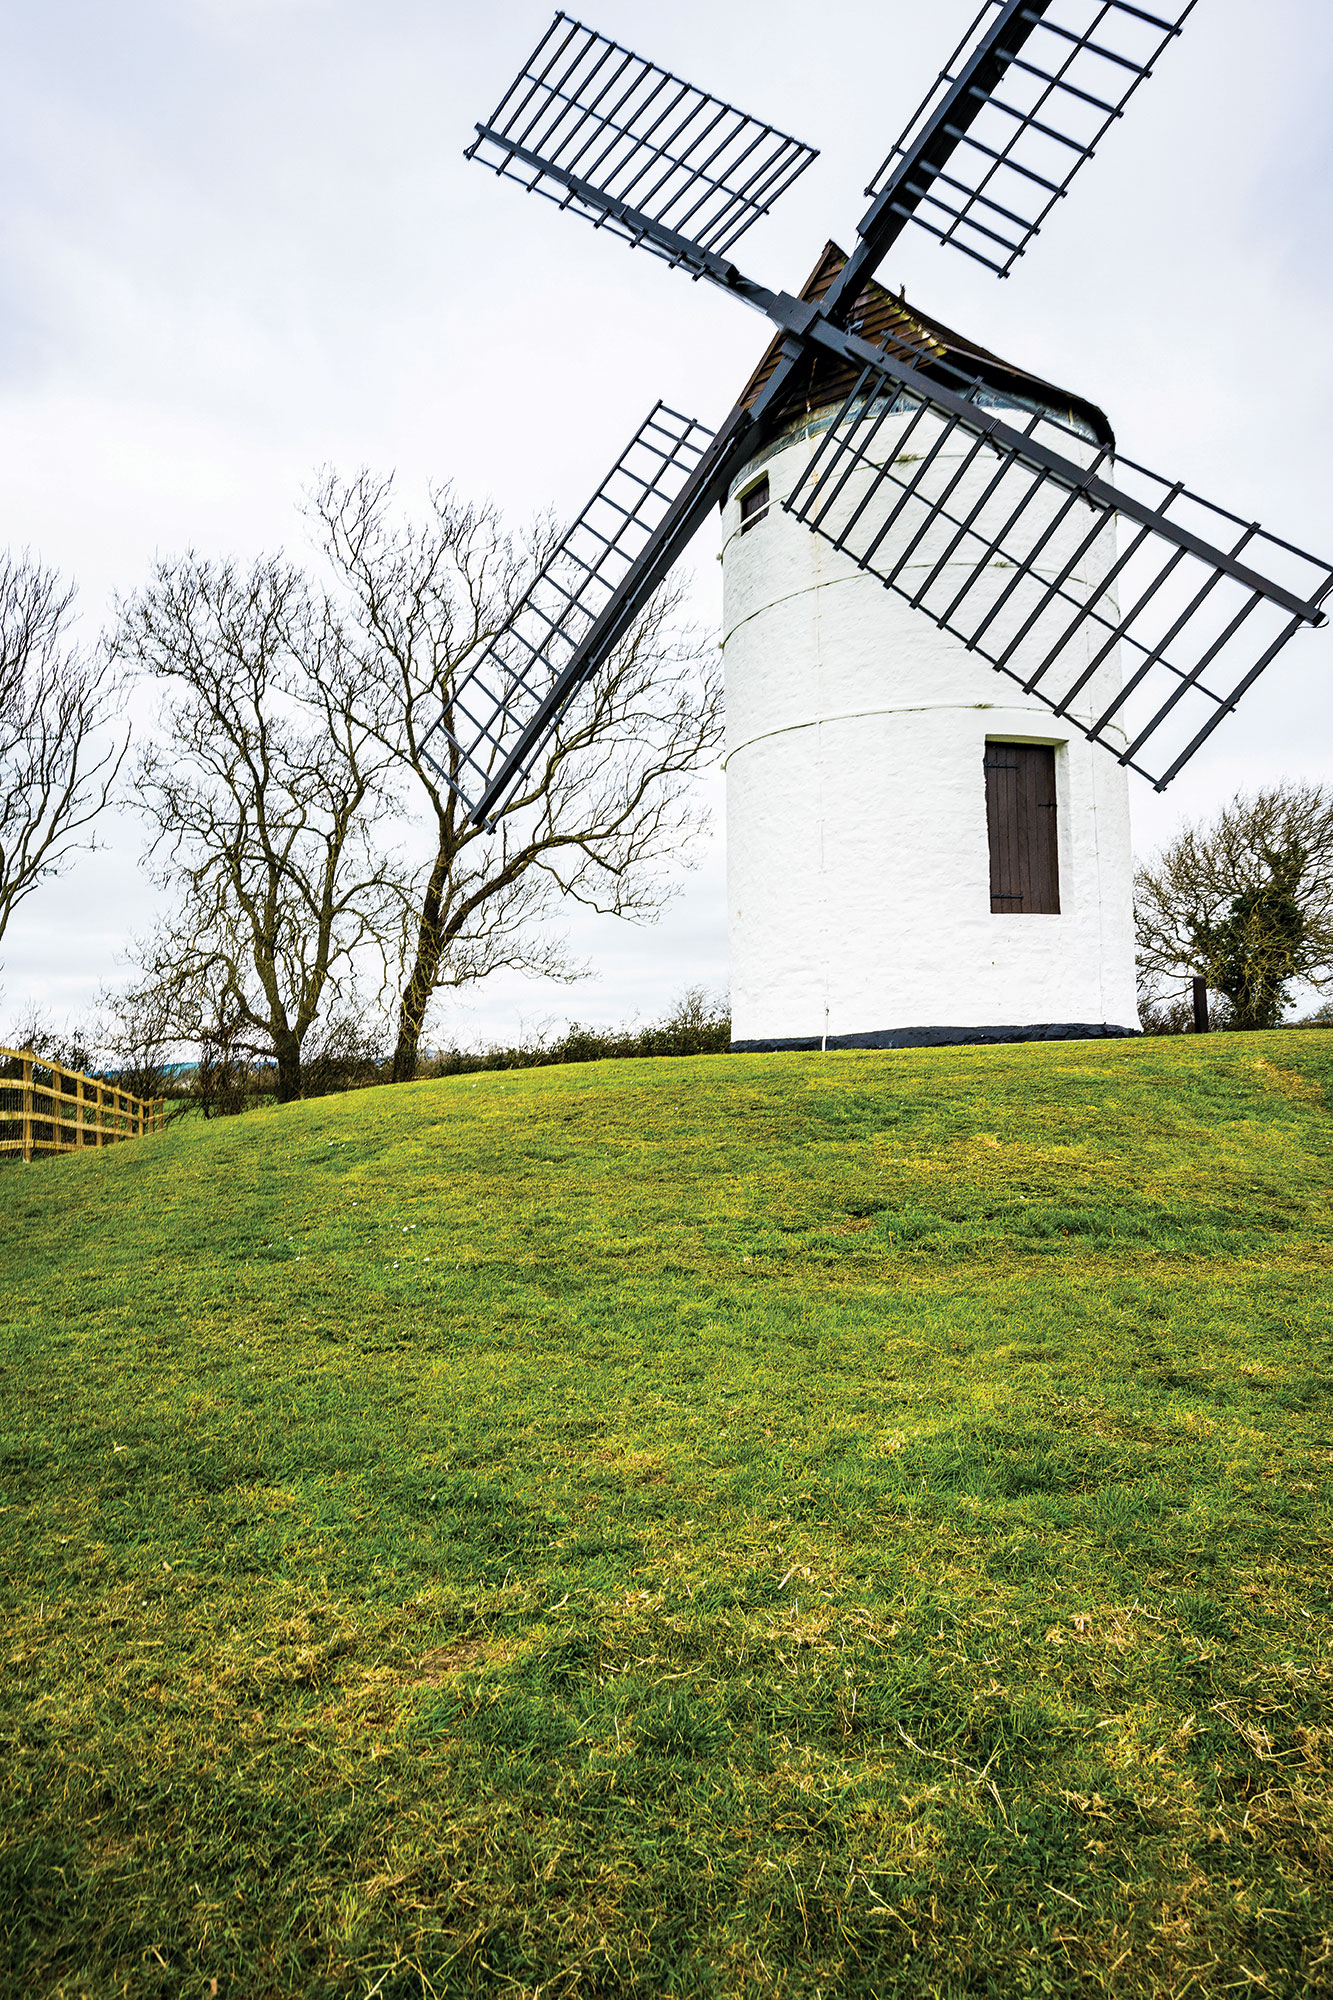
To shoot vertically our ball head has a notch for the camera to drop into. But rotating the camera body 90 degrees means it no longer sits atop the tripod, but at the side. It’s lower too, so our shot now crops the windmill towards the edges of the frame and adds too much foreground.
03. Switch to an L-bracket
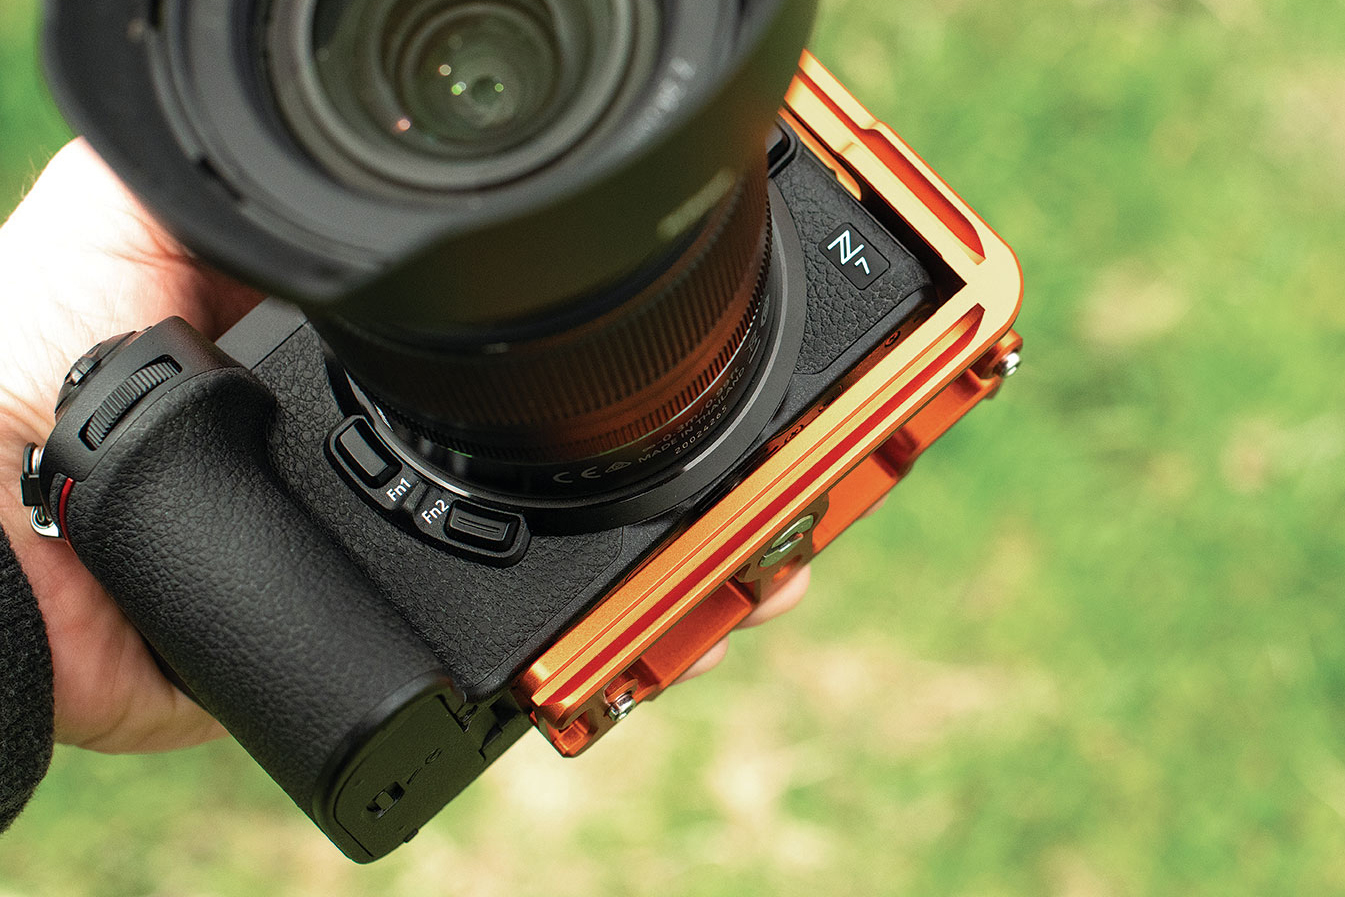
The L-bracket screws into the tripod-mounting socket, but the Arca Swiss mounting plate extends along the bottom of the camera and up one side. Our 3 Legged Thing Zelda is custom-made to fit the Nikon Z range, leaving the ports accessible. With ‘universal’ L-brackets, check compatibility with your particular camera.
• The best L-bracket for your camera
04. Level up your shot
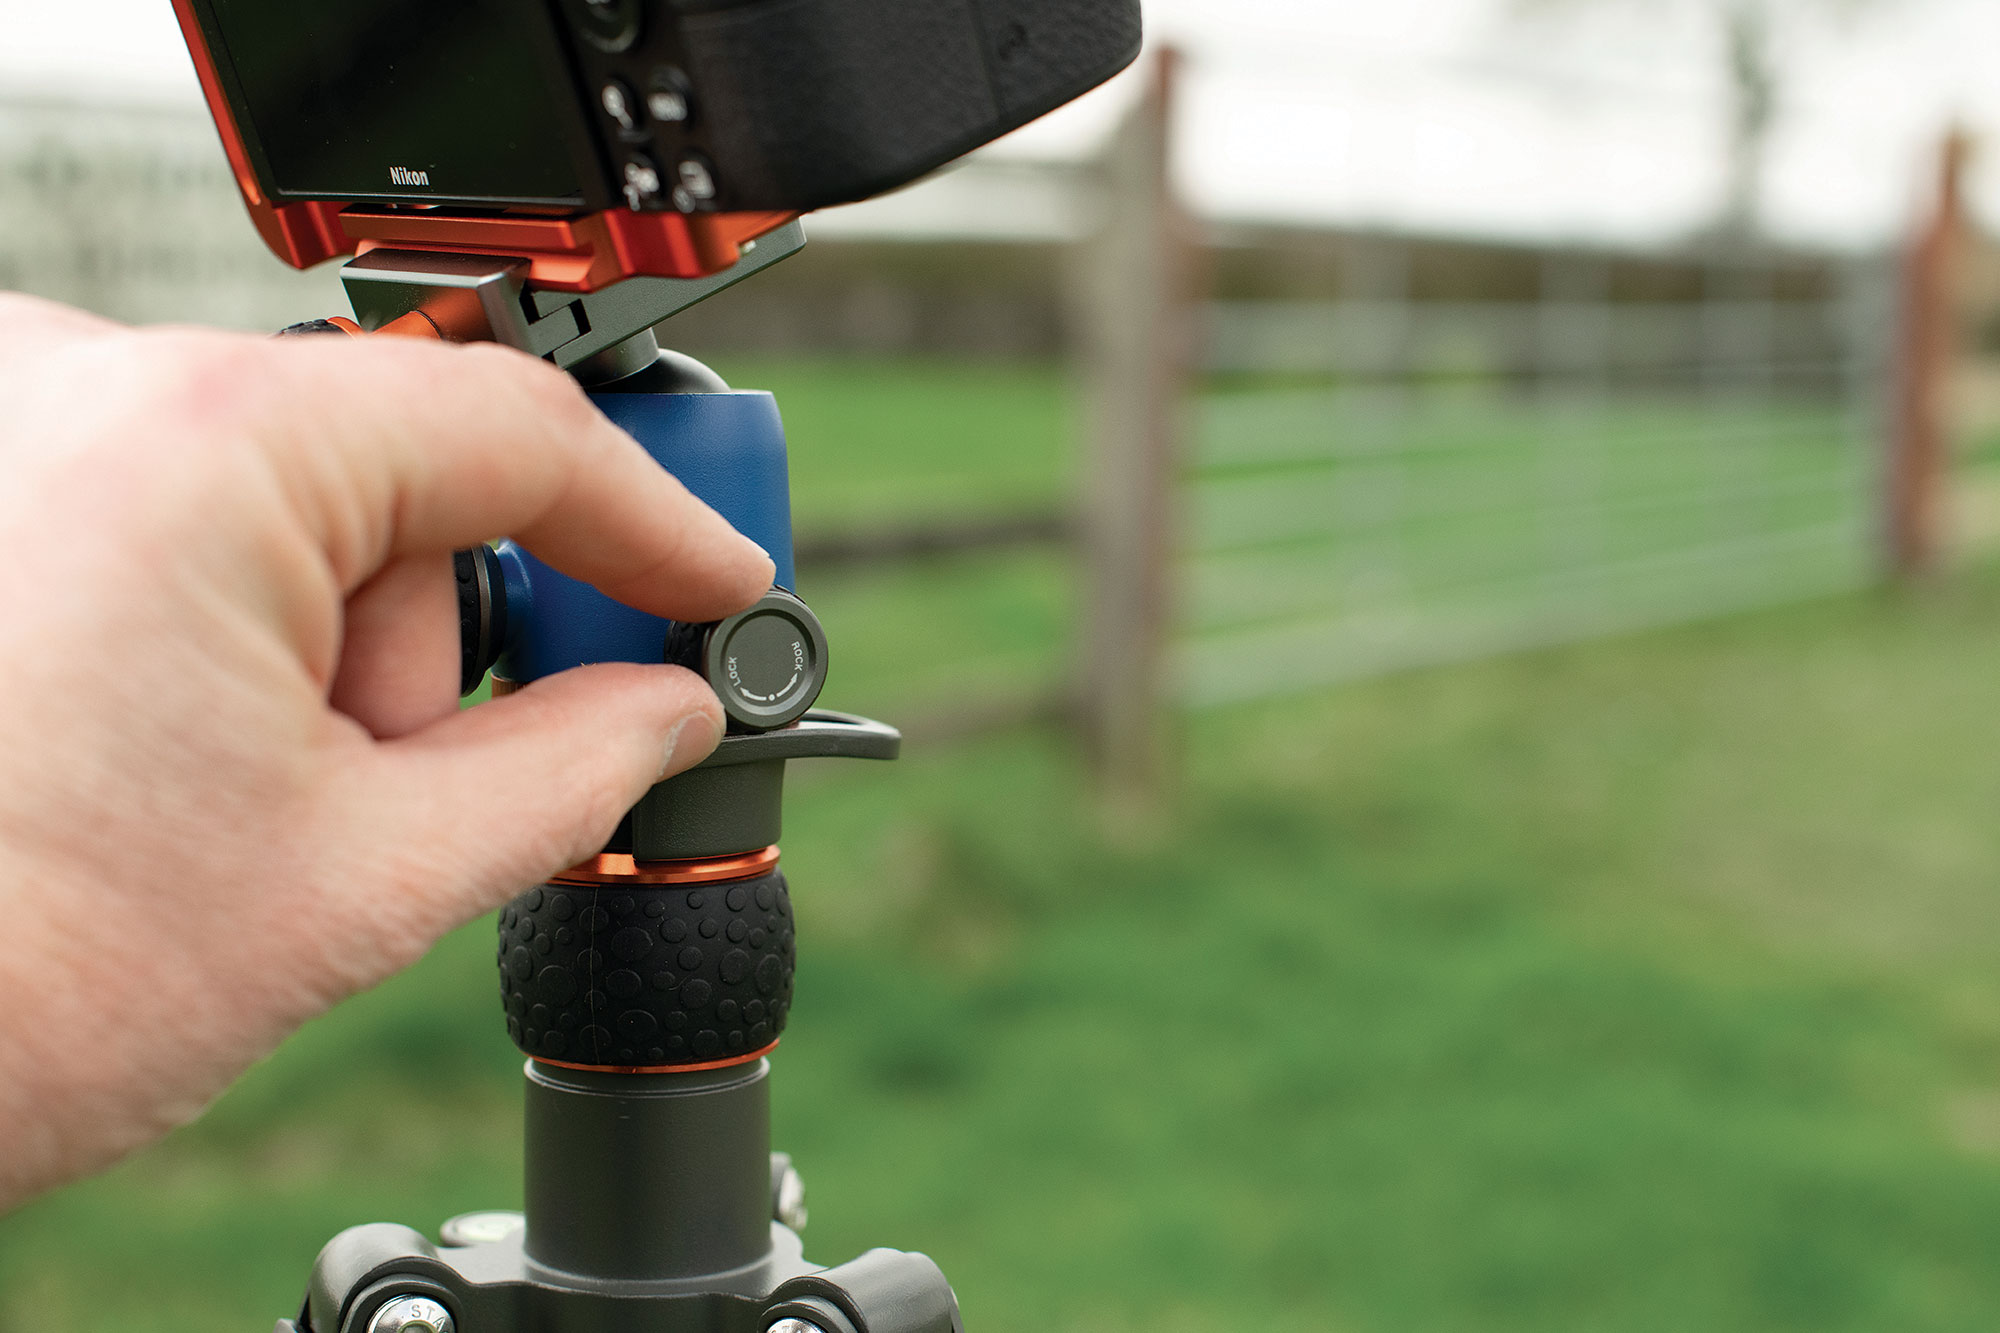
With the camera attached to the L-bracket, pop it onto the tripod in landscape orientation. Then ensure the camera is perfectly horizontal using the digital level in the Live View display, but also tilt the camera up so that the top and bottom of the windmill are evenly spaced, and not too close to the edge of the frame.
05. Wait for the right moment
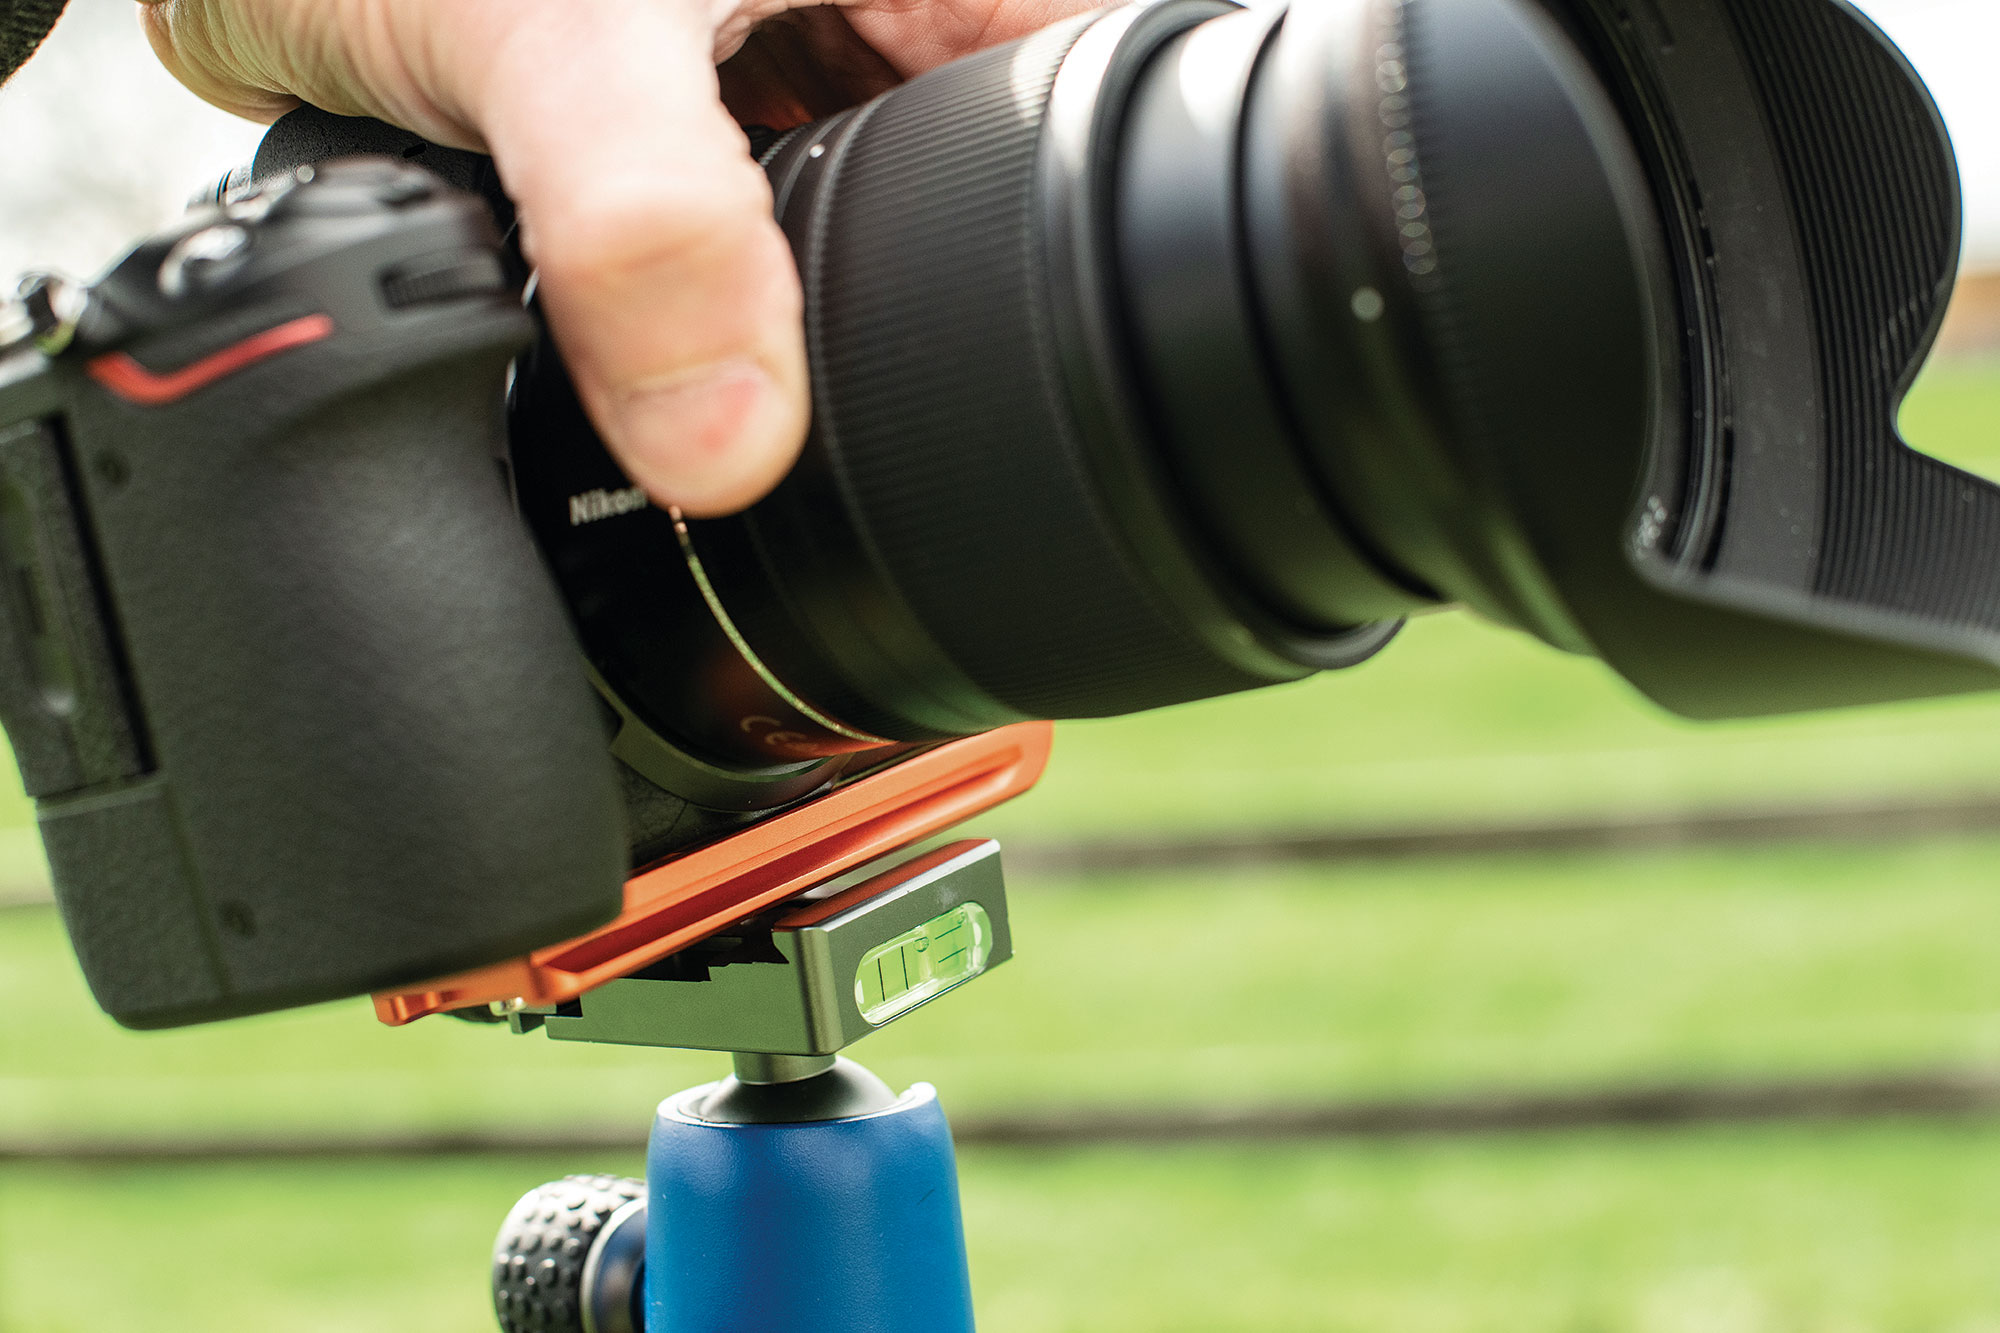
We waited until the sun broke through the clouds to light up the face of the windmill, casting a dramatic shadow from its sail, and took our landscape-orientation image. Then unlocked the tripod head release clamp, and popped the camera back on the tripod in portrait, and locked the clamp securely again.
06. Make the switch to vertical
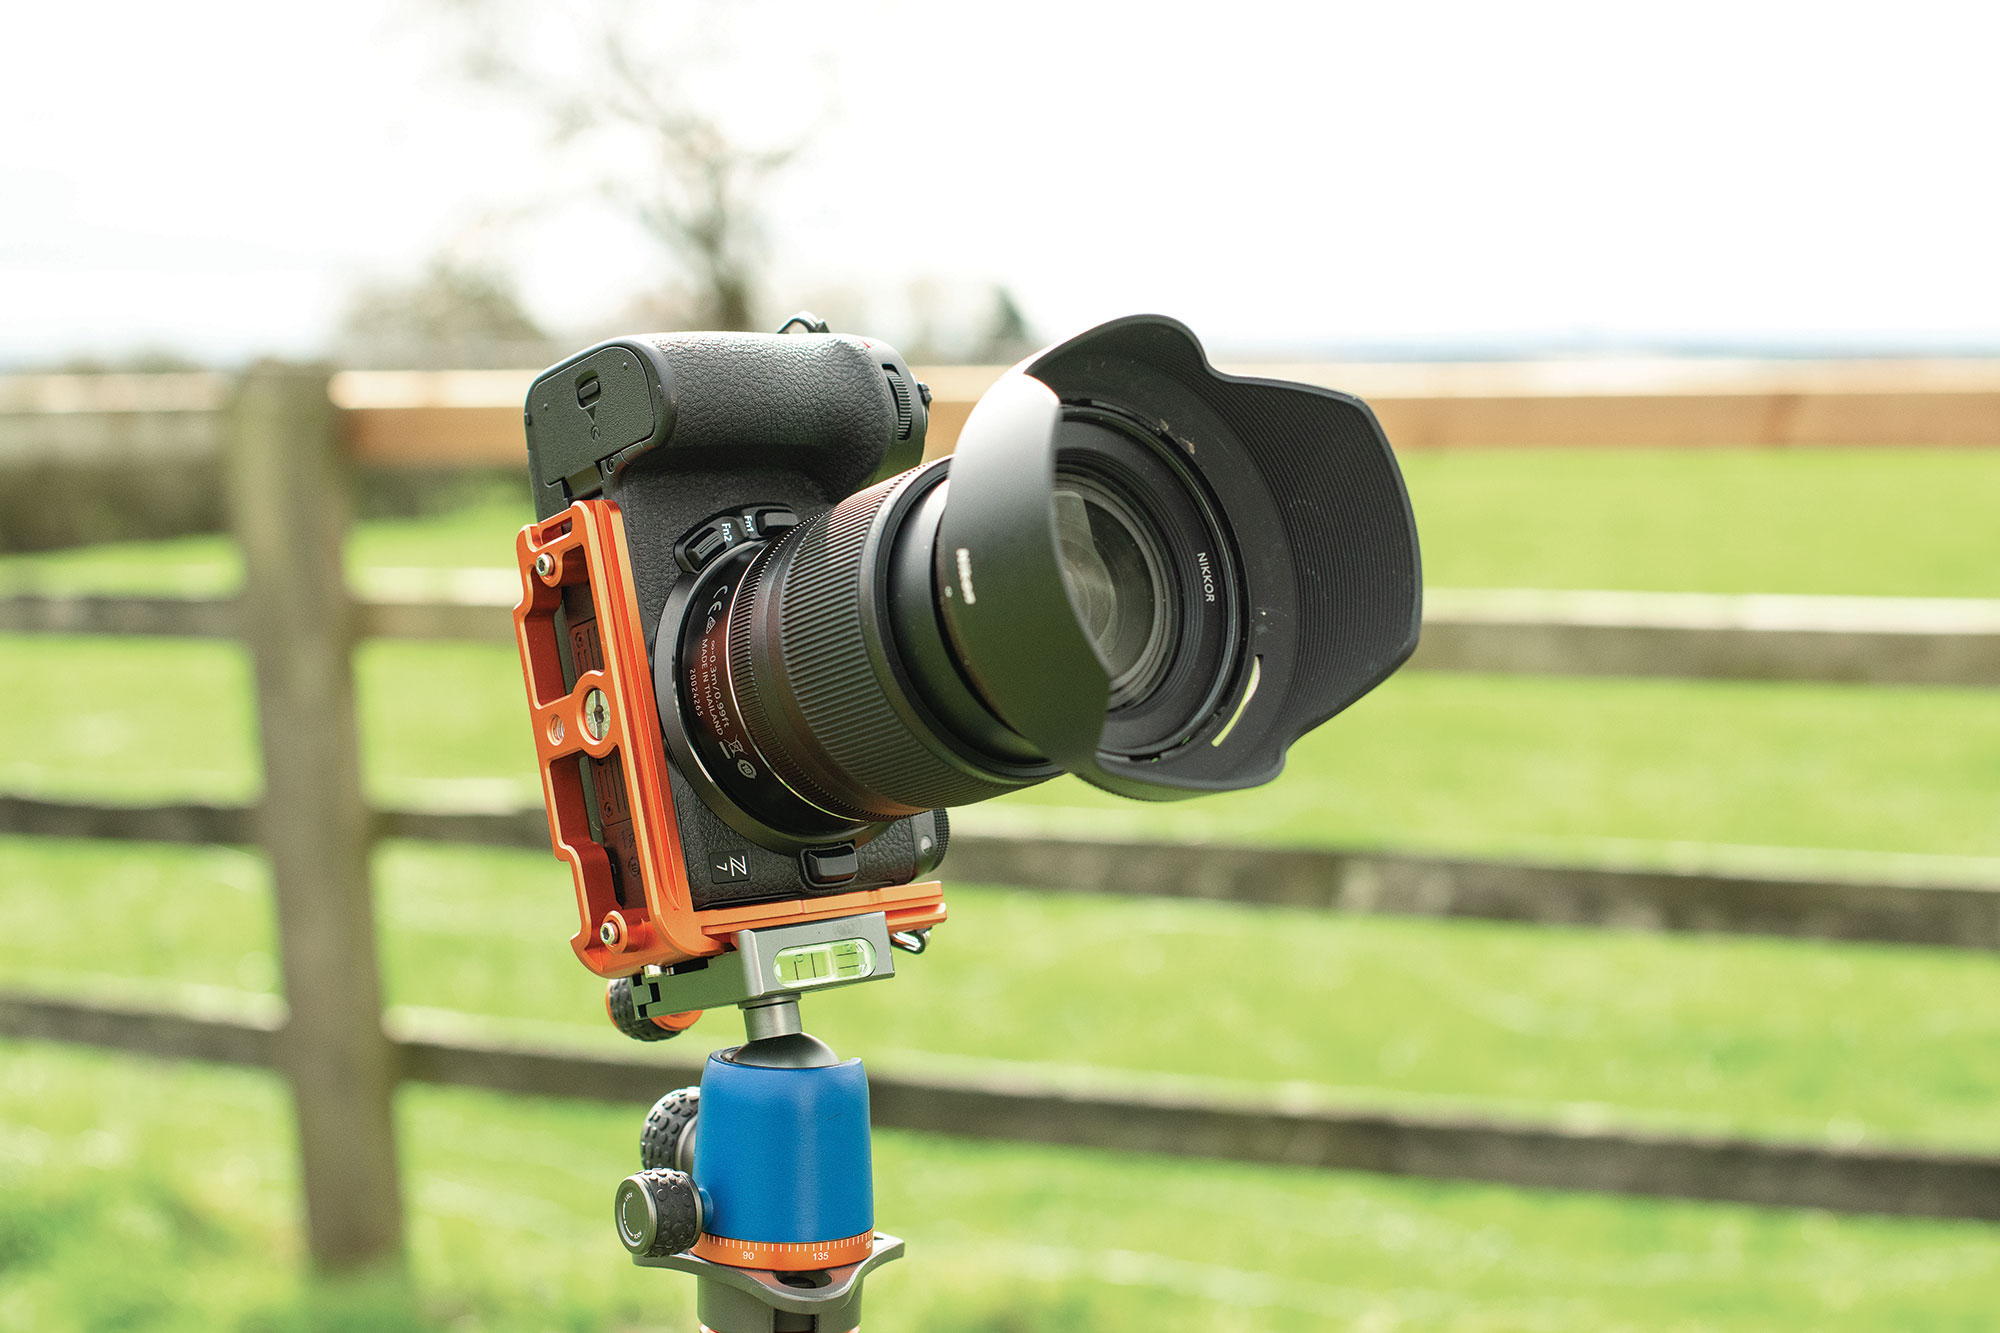
The Live View display confirms that the image is still perfectly level and the composition still has the windmill to the right of our frame, but with a little more foreground and sky, and naturally less space on the left, while still adhering to the rule of thirds. We were able to take our horizontal and vertical photographs within just a few seconds of each other, meaning that the light was consistent in both of our images.

About N-Photo magazine
This tutorial originally appeared in N-Photo, the monthly newsstand magazine for Nikon photographers. Why not subscribe to a print edition, and have the magazine delivered direct to your door every month?
Alternatively, we have a number of different digital options available, including:
Advertisement
• Apple app (for iPad or iPhone)
• Zinio app (multi-platform app for desktop or smartphone)
• Google Play (for Android devices)
• Readly (all-you-can-eat digital magazine subscription service)
If you wanted a printed version of any of our most recent issues we have a selection of back issues to choose from in our online store.
Read more
What is depth of field in photography
Best ball heads for tripods: take seamless shots
Best pan and tilt tripod heads
Get the Digital Camera World Newsletter
The best camera deals, reviews, product advice, and unmissable photography news, direct to your inbox!

Prior to joining digitalcameraworld.com as Guides Editor, Adam was the editor of N-Photo: The Nikon Magazine for seven years, and as such is one of Digital Camera World's leading experts when it comes to all things Nikon-related.
Whether it’s reviews and hands-on tests of the latest Nikon cameras and lenses, sharing his skills using filters, tripods, lighting, L brackets and other photography equipment, or trading tips and techniques on shooting landscapes, wildlife and almost any genre of photography, Adam is always on hand to provide his insights.
Prior to his tenure on N-Photo, Adam was also a veteran of publications such as PhotoPlus: The Canon Magazine, so his wealth of photographic knowledge isn’t solely limited to the Big N.
