Watch video: Enhance landscapes with Levels in Photoshop Elements
To get a true feeling of spring into your landscapes, you need a sense of warm sunshine and a good dose of blue in the sky. But straight out of your camera, rural scenes can be a bit flat, with a lack of warmth in the color balance and overly bright skies.
To address this, Photoshop CC is equipped with the awesome Levels adjustment, which can be used to control the contrast and color balance within your shots. Handily, Photoshop Elements, the budget version we’re using here which doesn’t require a monthly subscription to Adobe CC, also shares the very same Levels palette.
What’s more, by using Levels via an Adjustment Layer, you can use a Layer Mask to choose which areas of your picture you want to apply the changes to – simply by drawing around them and using Layer masks. This makes it a breeze to lighten or darken a specific area, or change its color.
This is great for all scenic shots, but especially for those where you want to ramp up the atmosphere and convey that seasonal sense of rich contrast, and warm, well-saturated colors. In this tutorial, I’ll run through how you can enhance any flat landscape and give it a new lease of life.
You can download the same Chrome_Hill.jpg start file we’re using here, or open up one of your own landscape images into Elements, then follow along with the above video lesson to see how it’s done in real-time. Let’s get started…
01. Recompose for impact
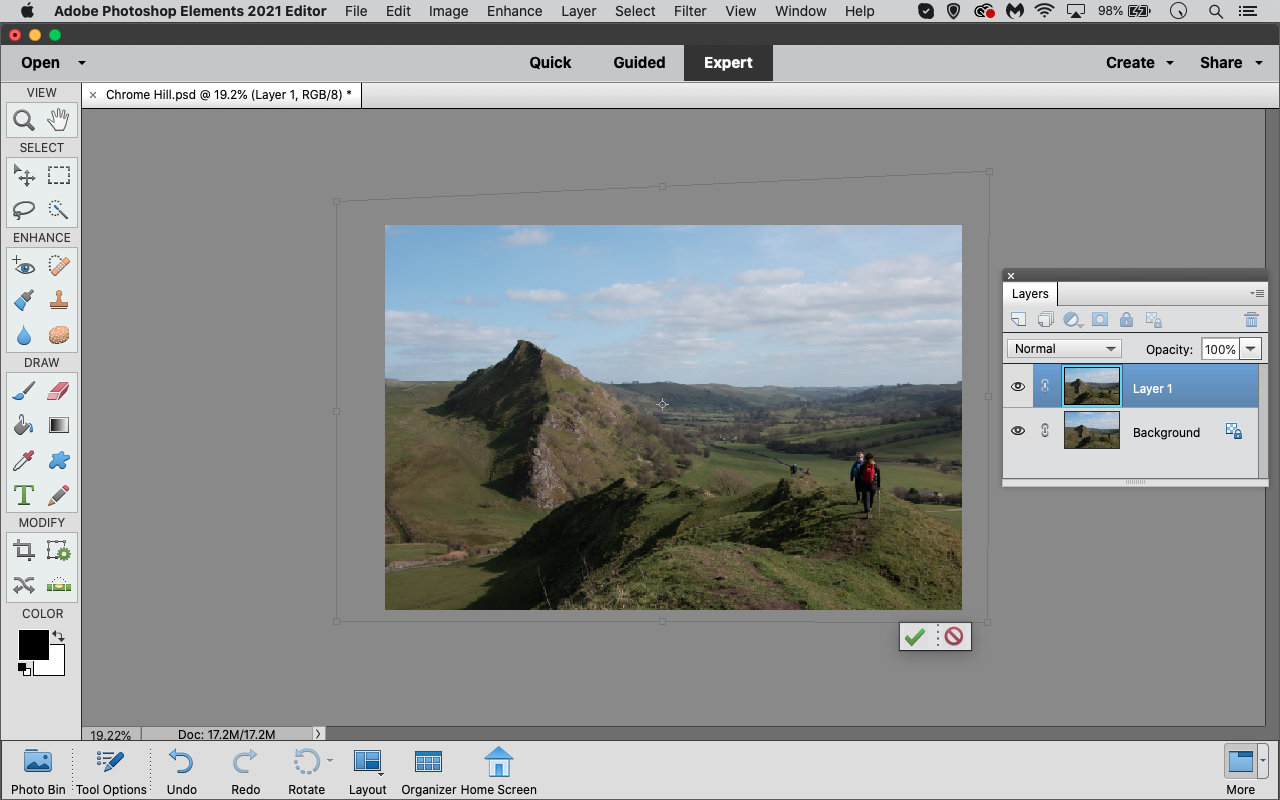
Copy the Background layer with Ctrl/Cmd + J and then hit Ctrl/Cmd + T to enter Free Transform mode. While holding the Ctrl/Cmd key, pull out the corner handles to level up the horizon and recompose the frame so the balance is better. Hit Enter when you’re happy.
02. Select the sky
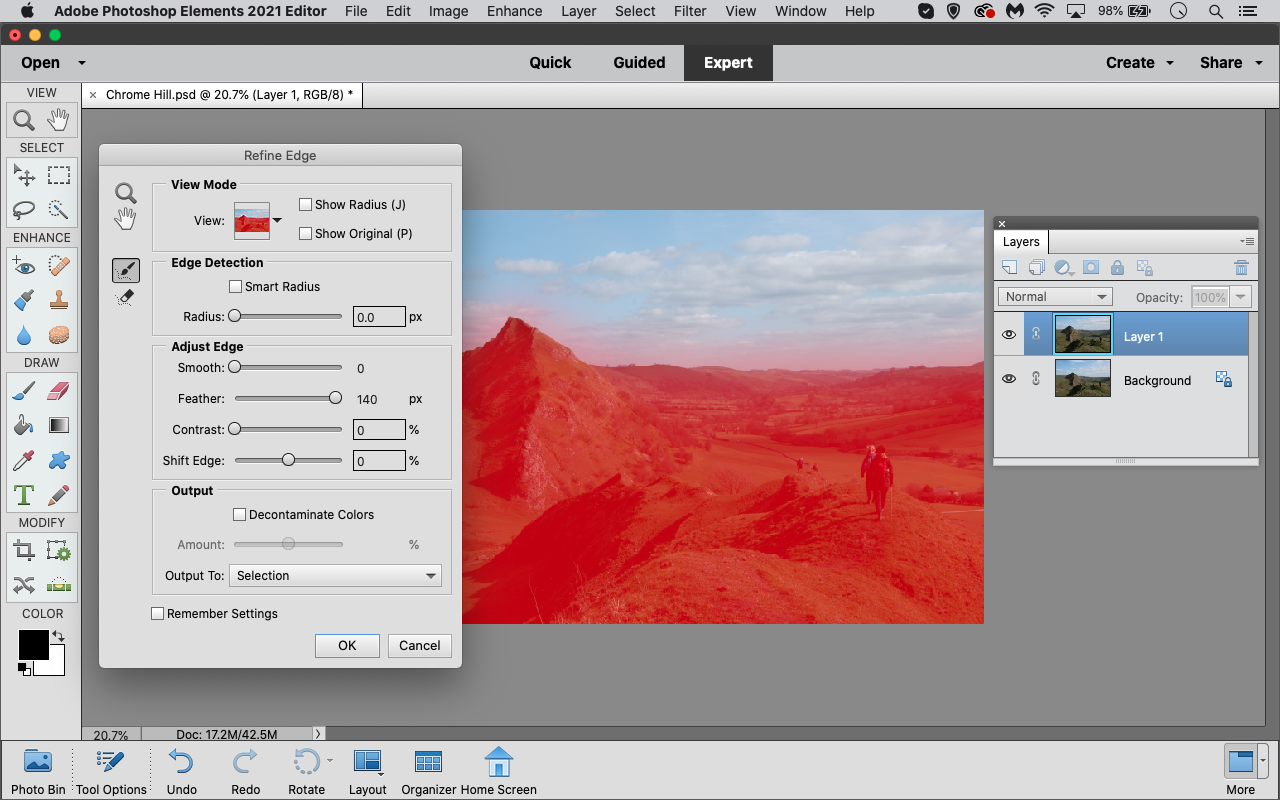
Select the Lasso tool and draw around the sky to make a Selection. In the Tool Options bar, click Refine Edge and then move Feather to 140px. This will soften the edge of the Selection, so any changes blend in with the rest of the image. Click OK to apply.
03. Darken the sky
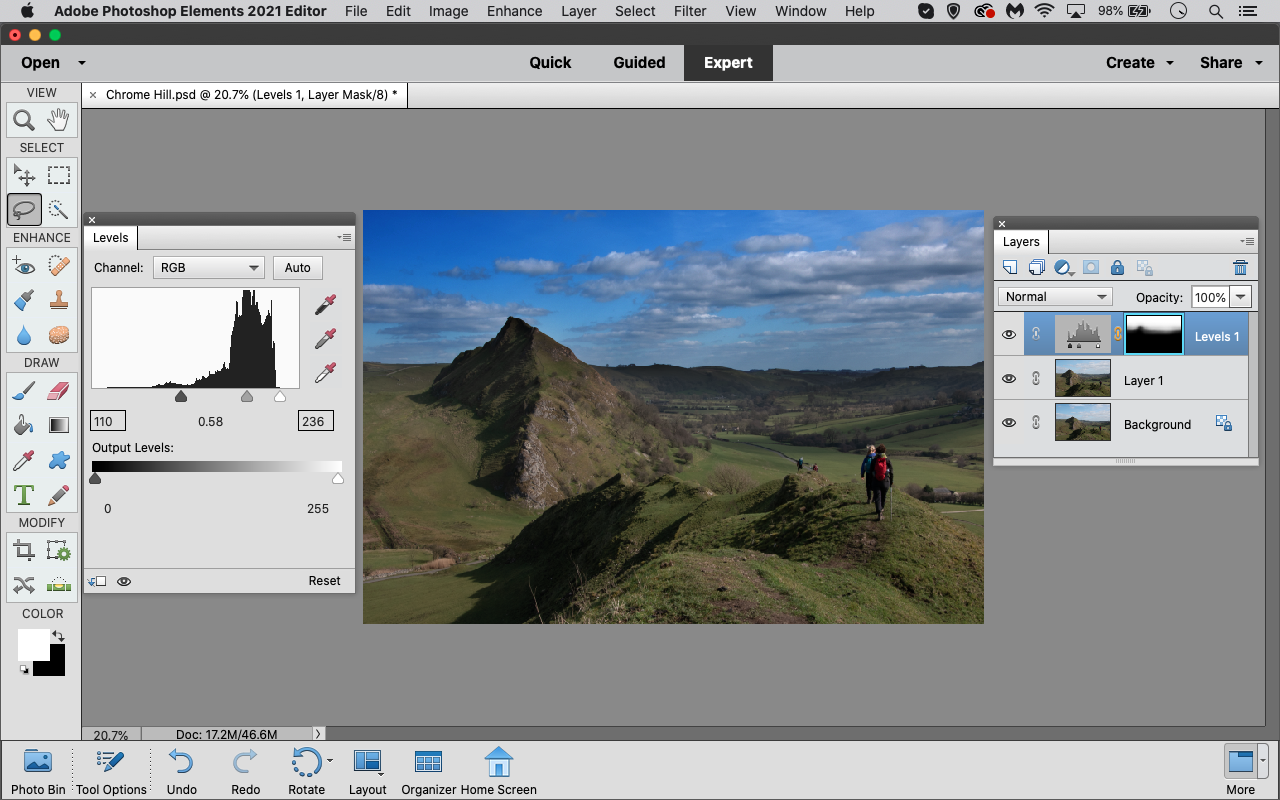
At the top of the Layers panel, click the Adjustment Layer icon and choose Levels. Move the Highlights slider to meet the edge of the Histogram to brighten the clouds, then move the Shadows and Midtones sliders to the right to darken the sky.
04. Brighten the foreground
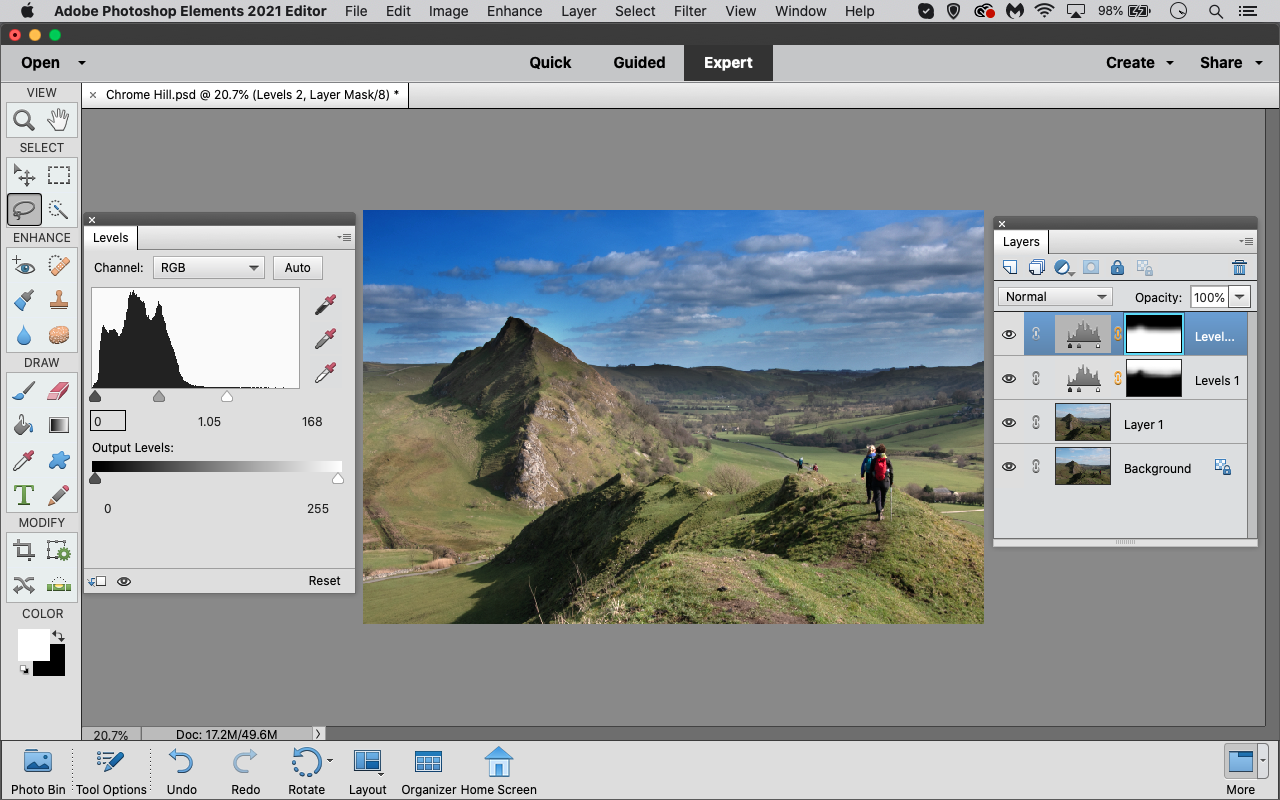
Hold Ctrl/Cmd and click on the layer mask on the Layer you’ve just adjusted to reselect the sky. Now hit Ctrl/Cmd + Shift + I to select the foreground. Make a new Levels Adjustment layer and move the Highlights and Midtones to the left to brighten the foreground.
05. Warm up the foreground
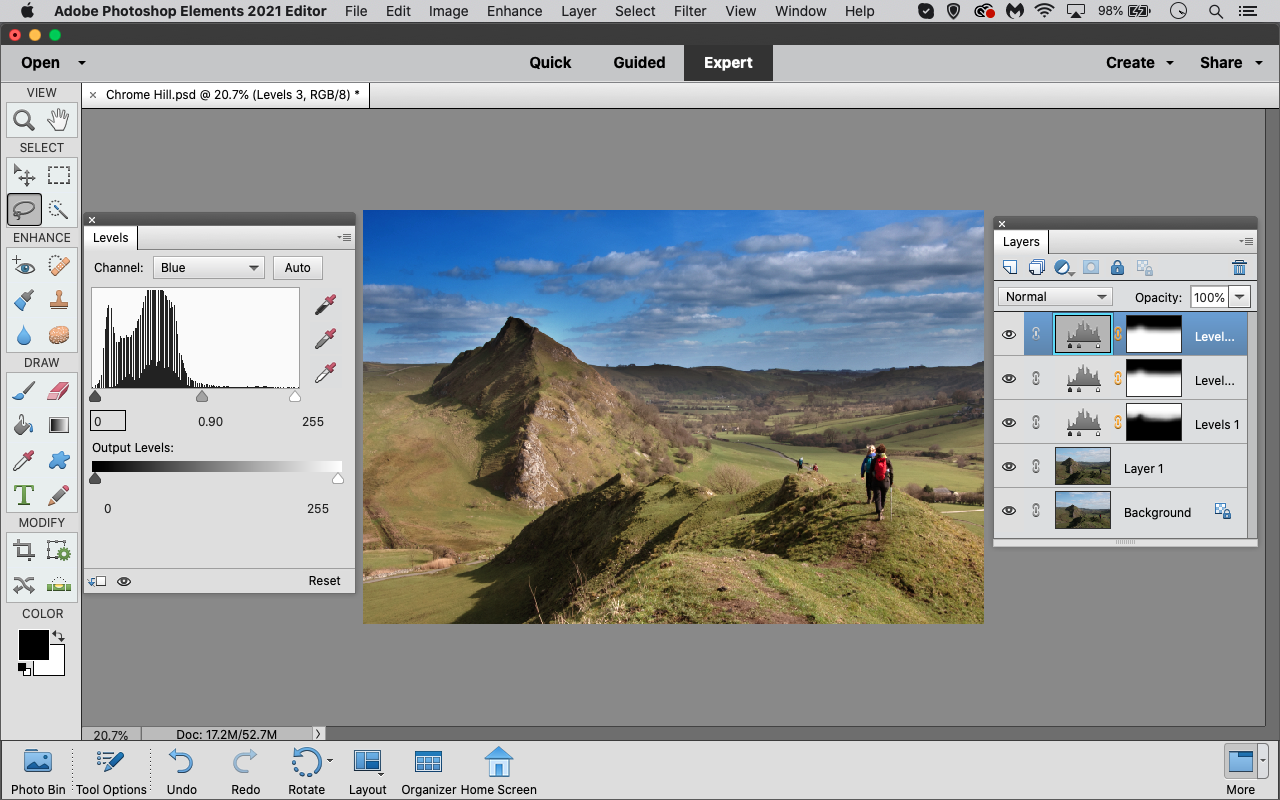
Reselect the foreground with Ctrl/Cmd and clicking on the mask, and create another Levels Adjustment layer. Click on RGB, select the Red channel, and move the midtone slider to the left (to about 1.15). Now pick the Blue channel and move it to the right (about 0.90).
06. Add a custom vignette
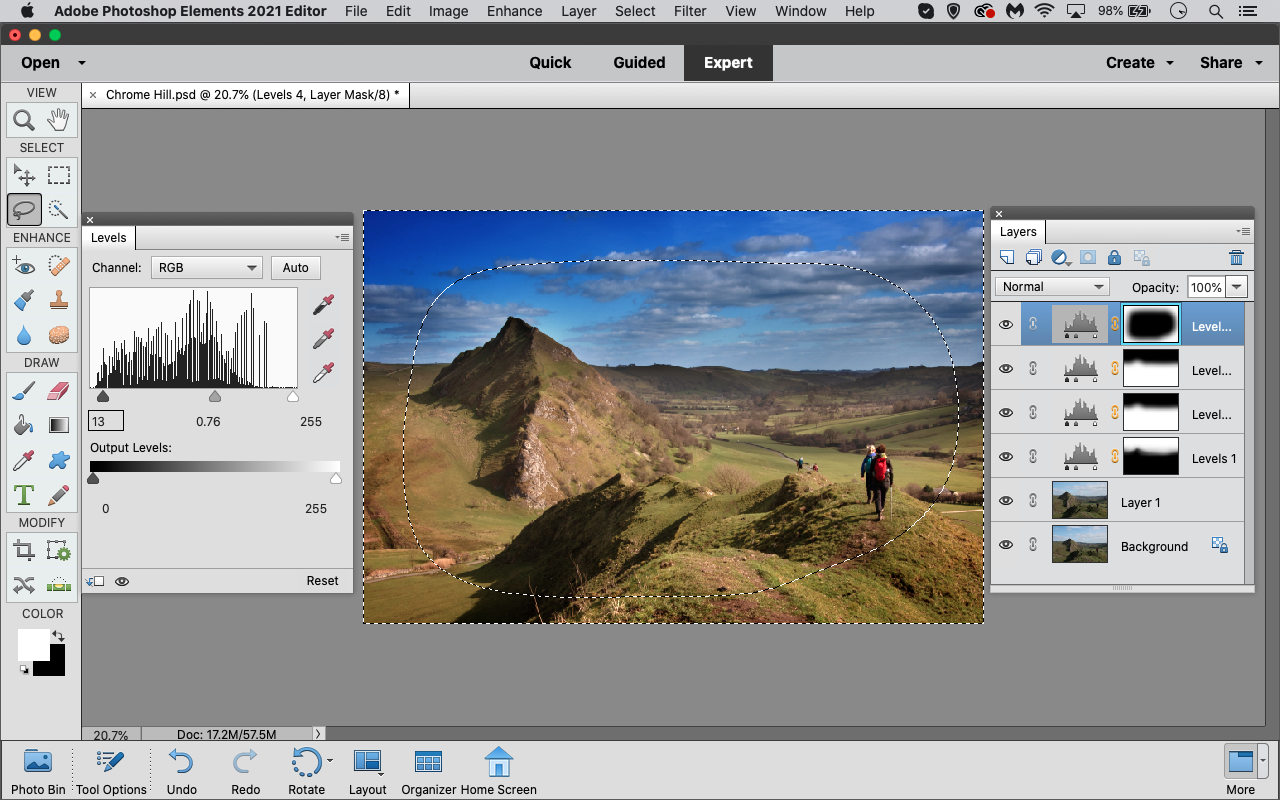
Grab the Lasso tool and set the Feather to 150px, then draw around the central area, leaving a margin around the edge. Hit Ctrl/Cmd + Shift + I to get the inverse, then create another Levels Adjustment Layer. Move the Shadows and Midtones right to darken.
PhotoPlus: The Canon Magazine is the world's only monthly newsstand title that's 100% devoted to Canon, so you can be sure the magazine is completely relevant to your system.
Read more:
The best photo editing software: image editors for novices through to pros
The best photo-editing laptops: top laptops for photographers
10 best online photography courses – from beginner guides to masterclasses
Get the Digital Camera World Newsletter
The best camera deals, reviews, product advice, and unmissable photography news, direct to your inbox!
Jon started out as a film-maker, working as a cameraman and video editor before becoming a writer/director. He made corporate & broadcast programmes in the UK and Middle East, and also composed music, writing for TV, radio and cinema. Jon worked as a photographer and journalist alongside this, and took his video skills into magazine publishing, where he edited the Digital Photo magazine for over 15 years. He is an expert in photo editing, video making and camera techniques.


