Use local adjustments to tweak parts of an image in Photoshop CC
Take architectural shots to the next level by building up local adjustments in Photoshop CC's Adobe Camera Raw
The best camera deals, reviews, product advice, and unmissable photography news, direct to your inbox!
You are now subscribed
Your newsletter sign-up was successful
Watch video: Use the Adjustment Brush Tool in Adobe Camera Raw
Whether you’re a seasoned retoucher or completely new to Photoshop CC, one of the biggest challenges with image editing is in settling on the right strength for a tonal change. This can be a bit of a juggling act, as after making another edit you may want to go back and fine-tune the one before, so that they work together in harmony.
This is why the editing tools in Adobe Camera Raw in Photoshop and Lightroom are so useful. Every edit is non-destructive, so you have the freedom to go back and alter a setting, or tweak a tonal change whenever. Not only does this give you a safety net to backtrack edits, it also allows for the creative freedom to try out different treatments and effects.
Article continues belowThis sort of control is especially useful when making a series of local edits, as you’ll often need to balance the strength of one edited area after seeing the effects on another. With the tools in Camera Raw, we can edit different areas simultaneously until they come together into a pleasing whole. In this project we’ll look at how this works in practice with an architectural scene. Images like this tend to have several distinct areas that all require their own tailored tweaks.
As such, we’ll make several local adjustments using the Adjustment Brush tool while employing the excellent Range Mask and Auto Mask controls, which enable us to break our image down into different editable areas with minimum fuss. This way, we can alter areas by boosting contrast and shifting colors – or changing them completely.
01 Paint over the sky
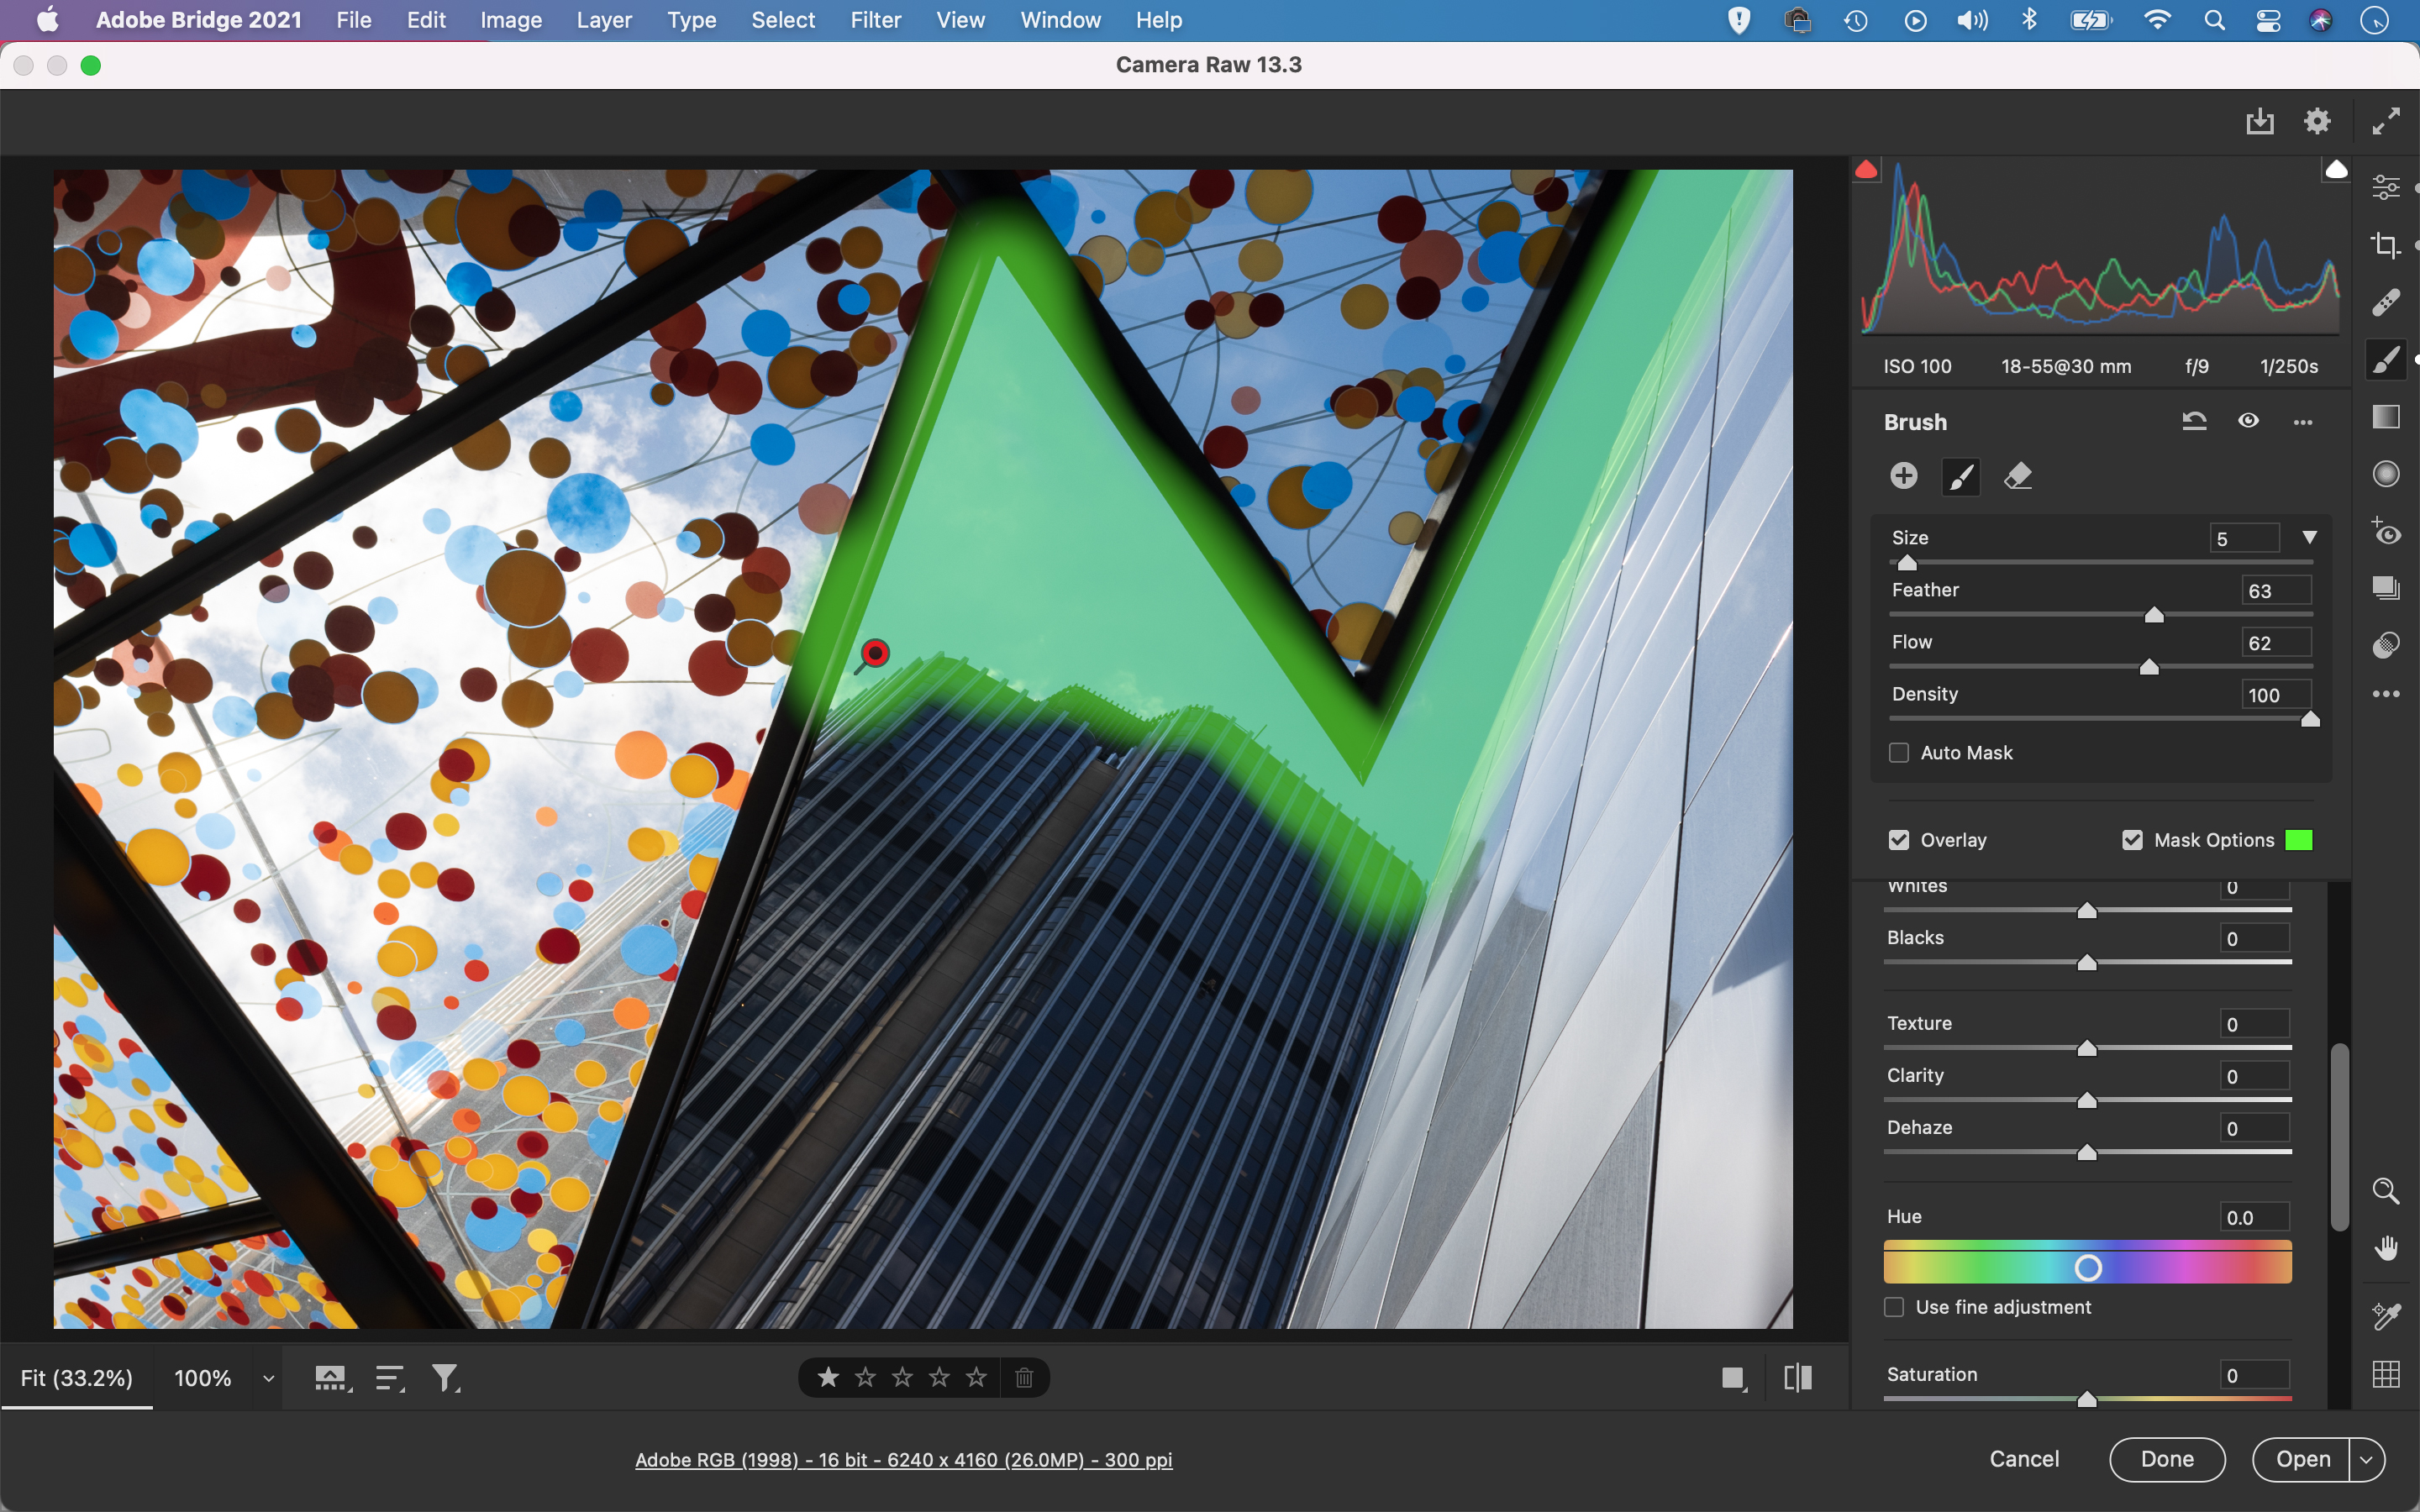
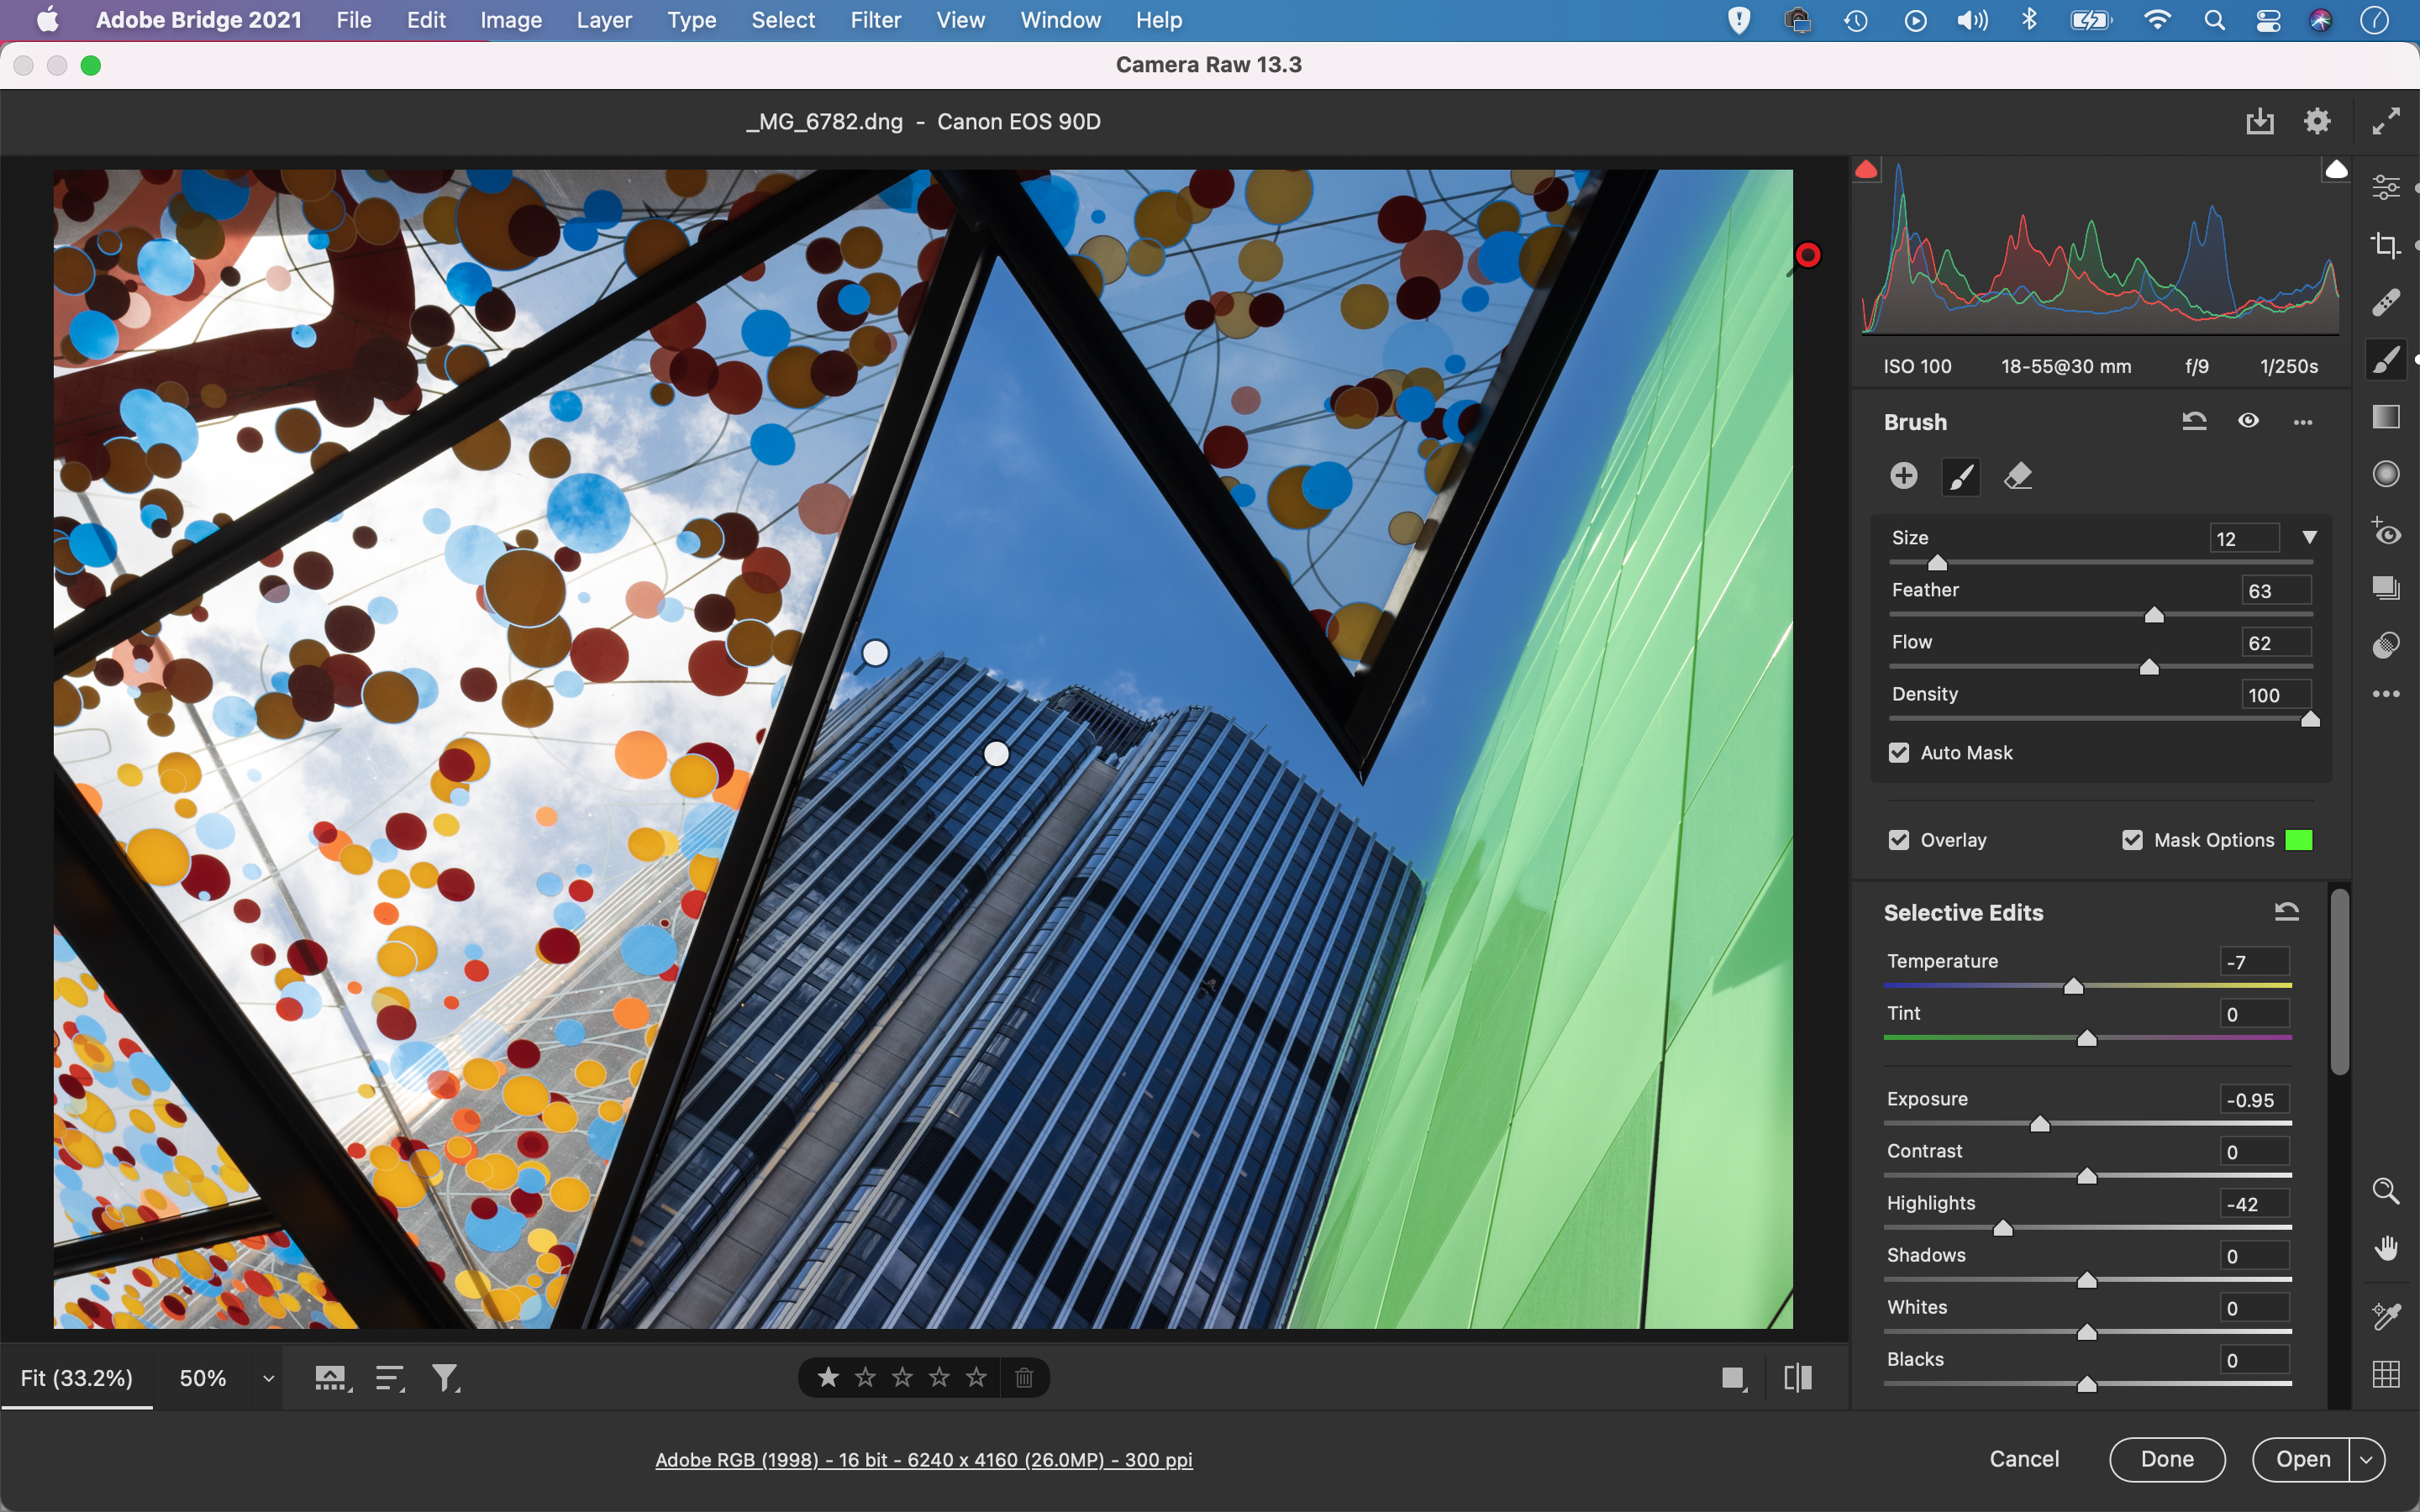
Navigate to the buildings_before.jpg start image (download here) in Adobe Bridge or open up one of your own images then right-click the file and choose ‘Open in Camera Raw’. Make initial changes to boost the tones in the Basic panel, then grab the Adjustment Brush from the toolbar on the right. Hit Y to toggle on the mask overlay, then paint over the sky.
02 Sample the blues
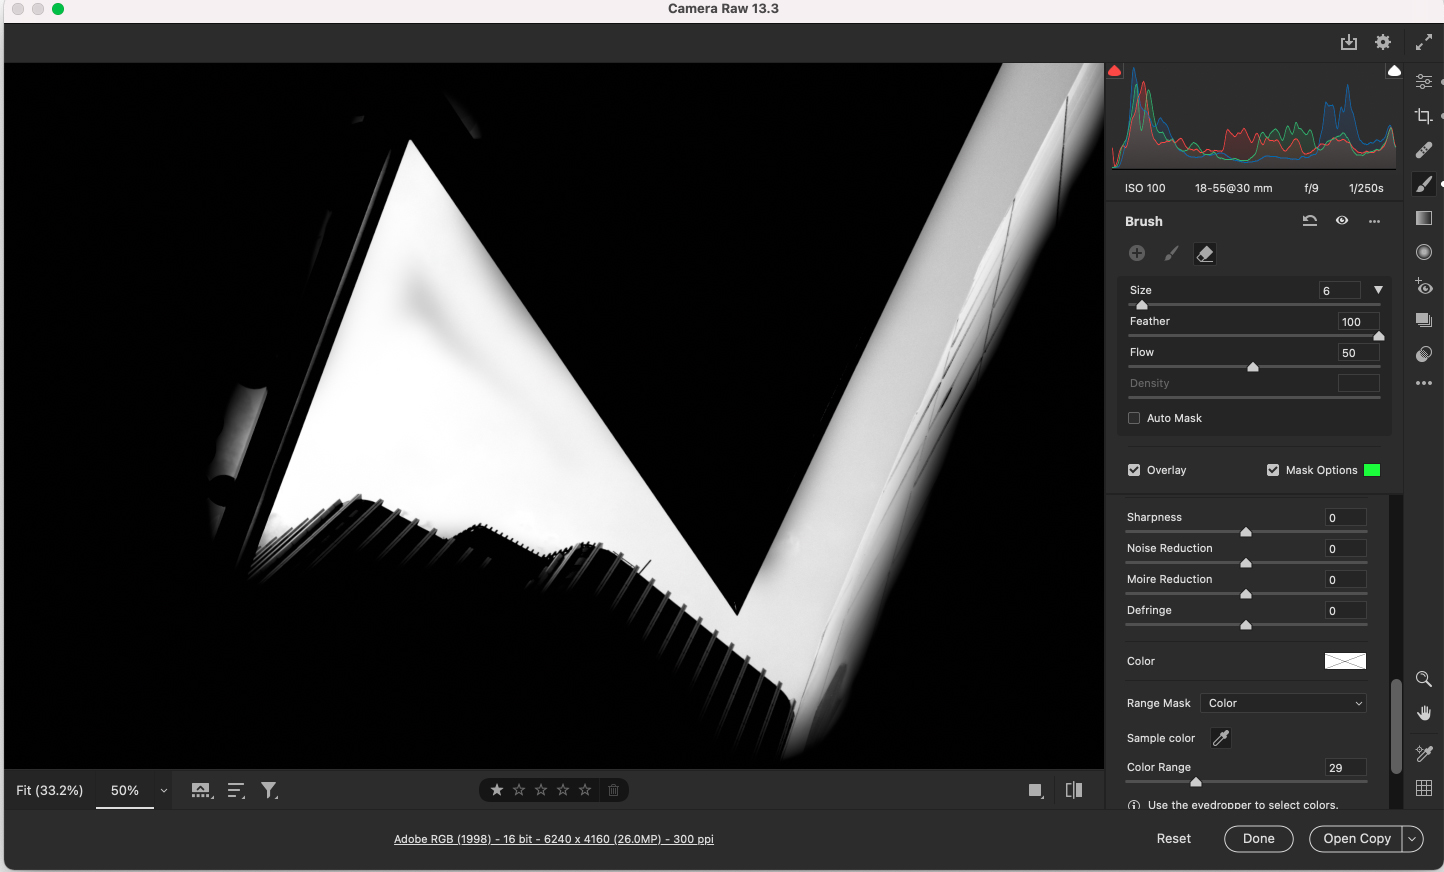
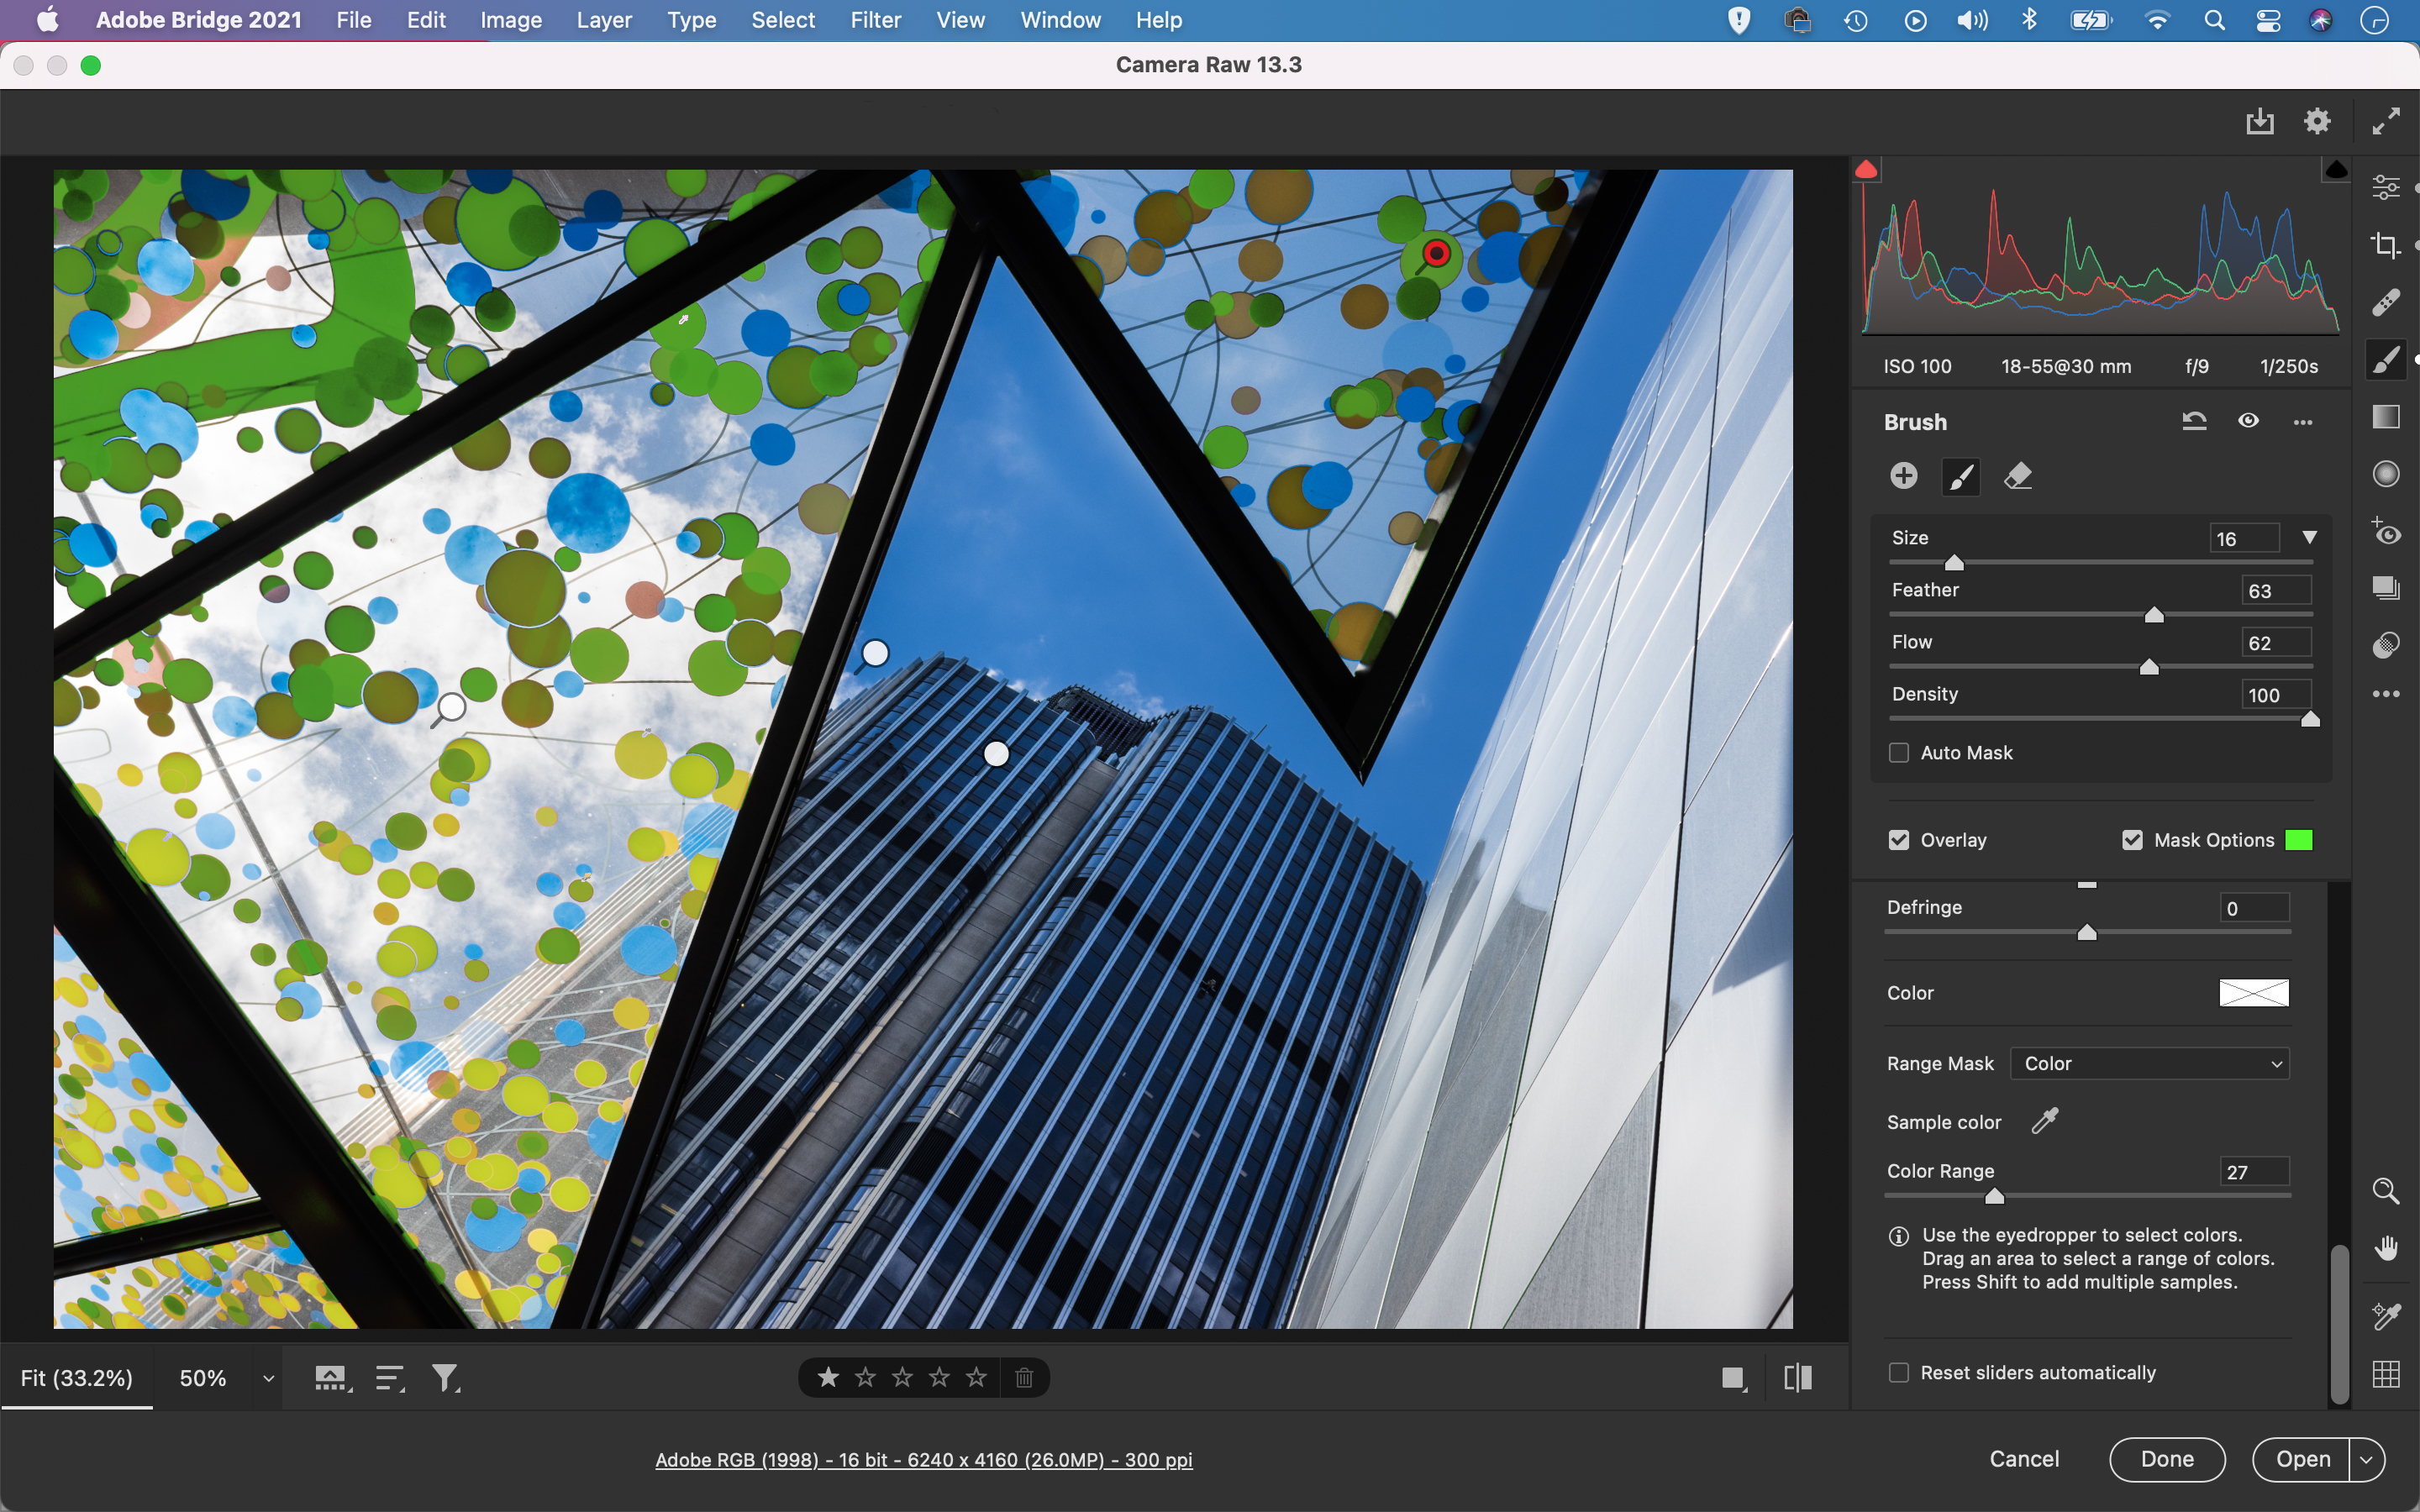
Go to the brush settings and pick Range: Color. Use the eyedropper tool in the range mask settings to click on the sky, hold Shift and click to sample colors until the sky is isolated. Hold Alt and drag the Color Range slider for a black and white view that shows what is included.
The best camera deals, reviews, product advice, and unmissable photography news, direct to your inbox!
03 Mask the building
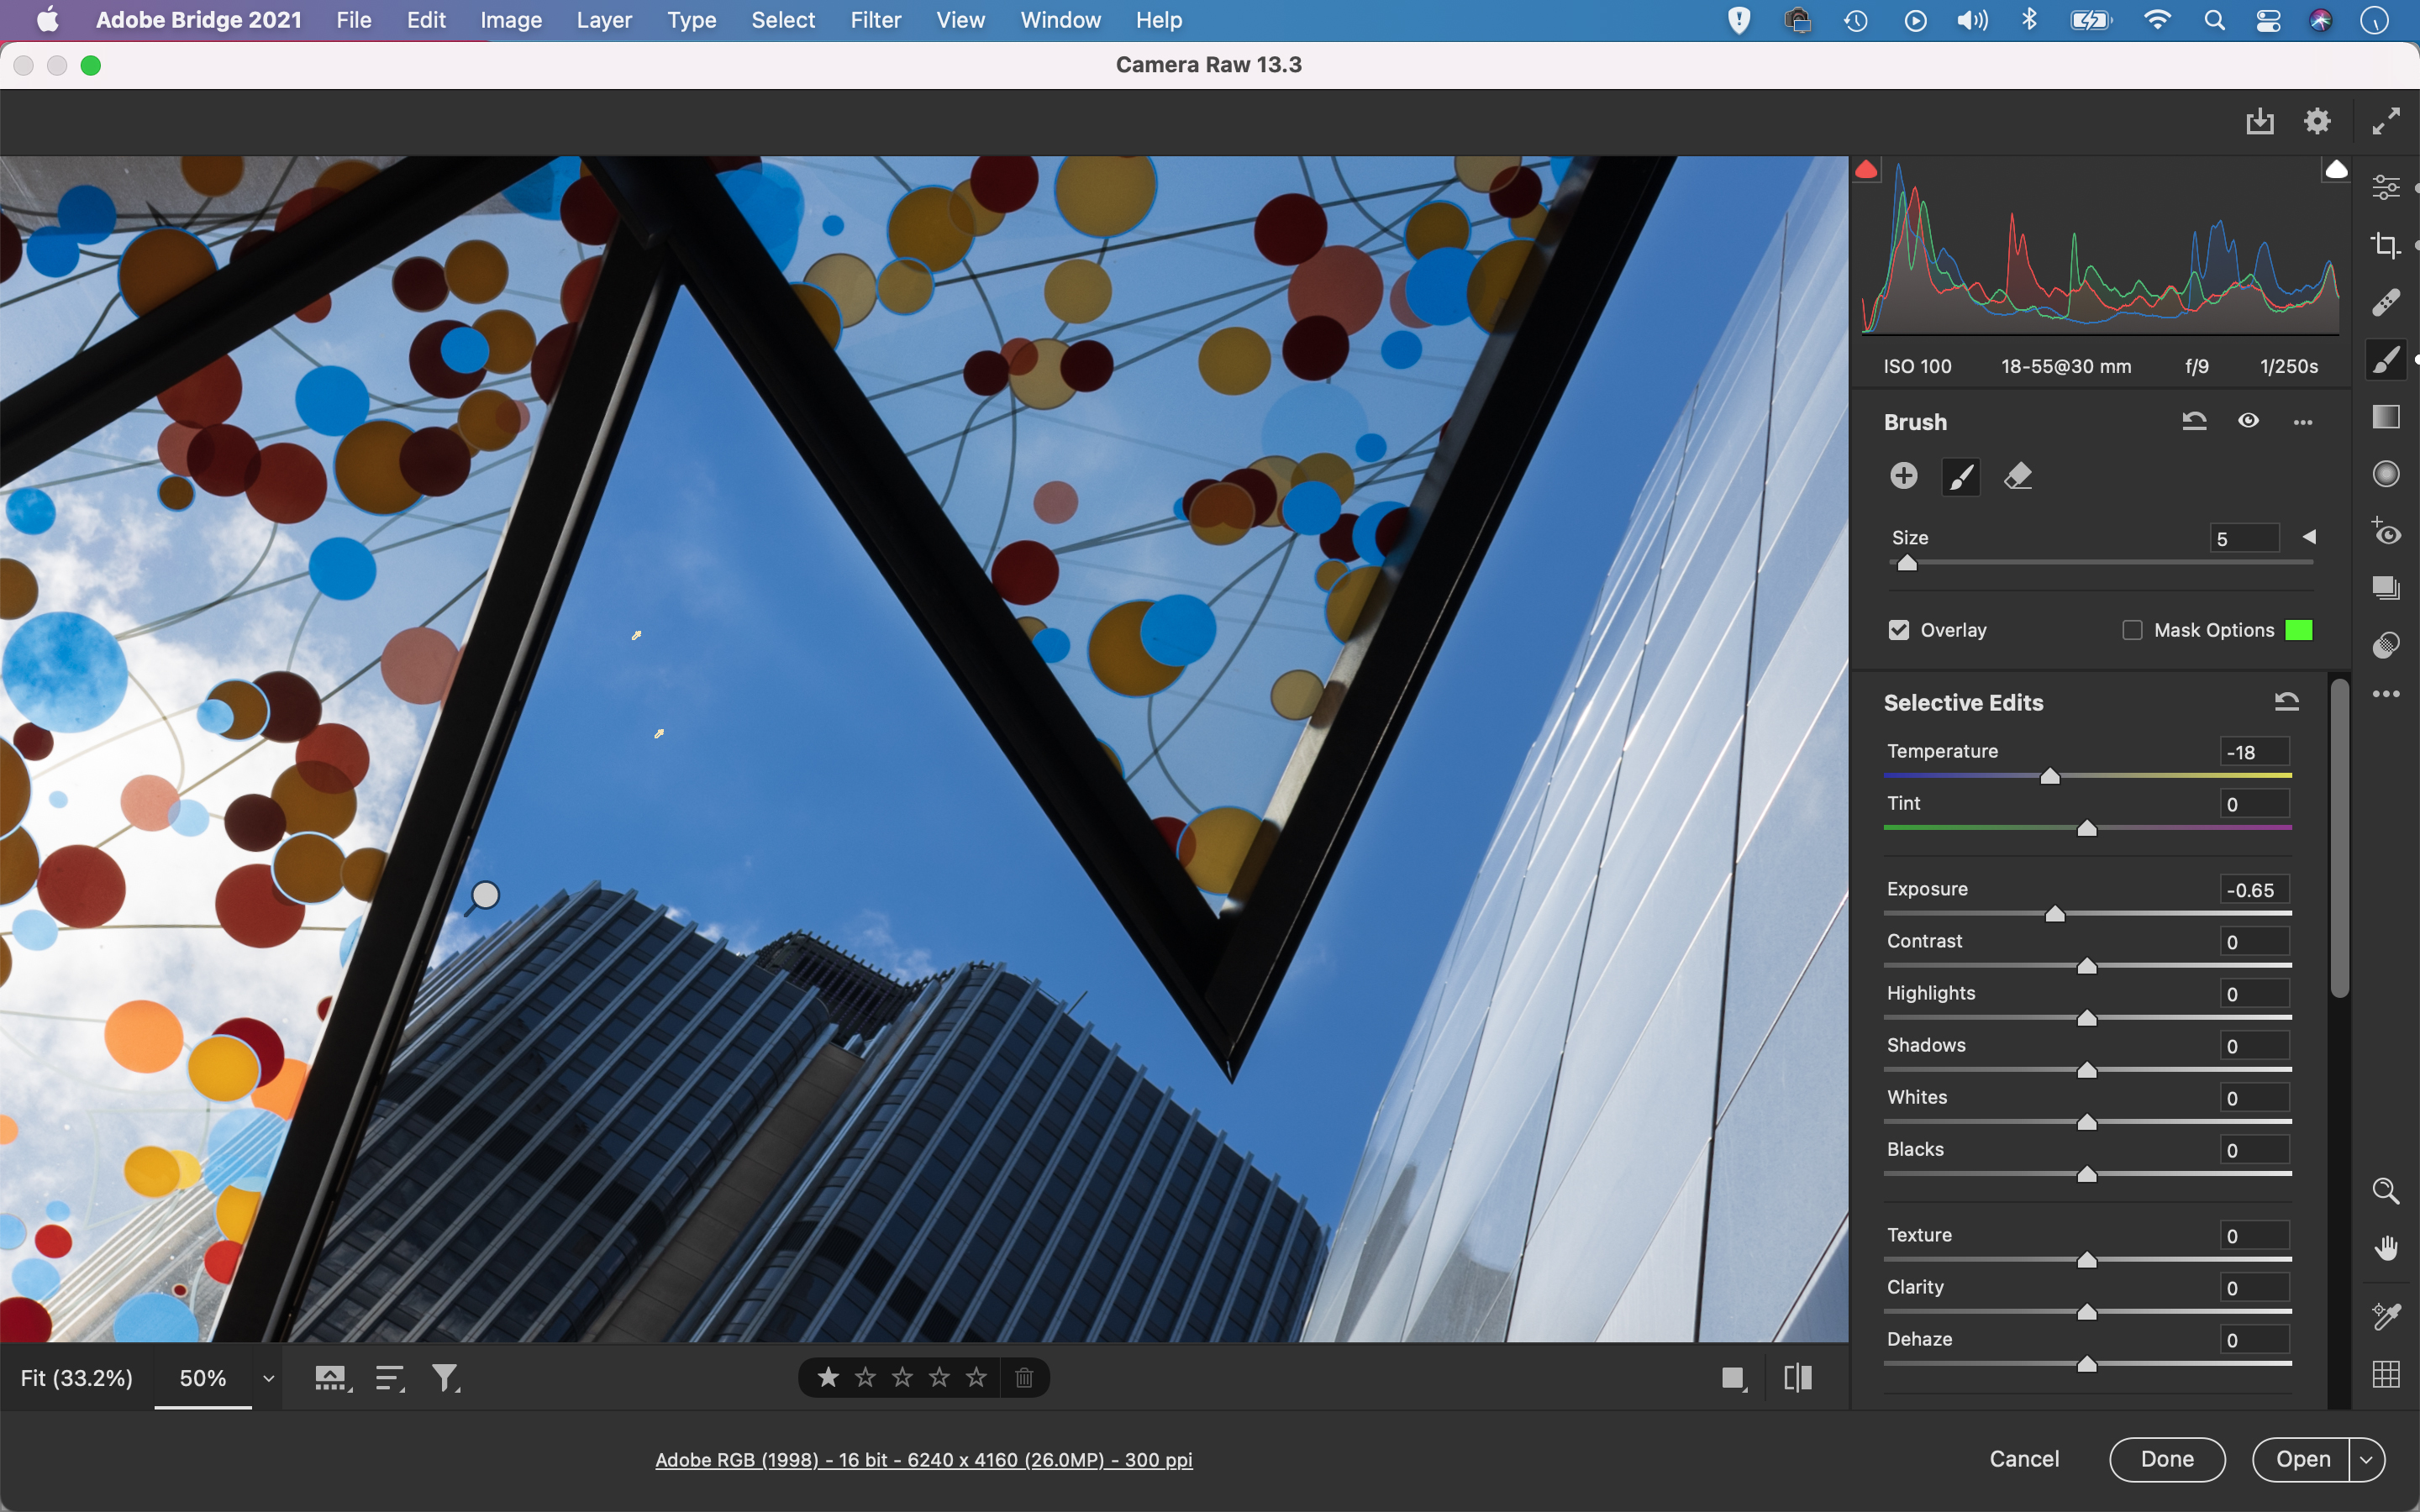
Hit Y to toggle off the mask overlay, then lower Exposure and Temperature, and increase Saturation to boost the sky. Next, click the plus icon in the brush settings to make a new local adjustment. Hit Y to toggle on the mask and paint over the darker building.
04 Increase the exposure
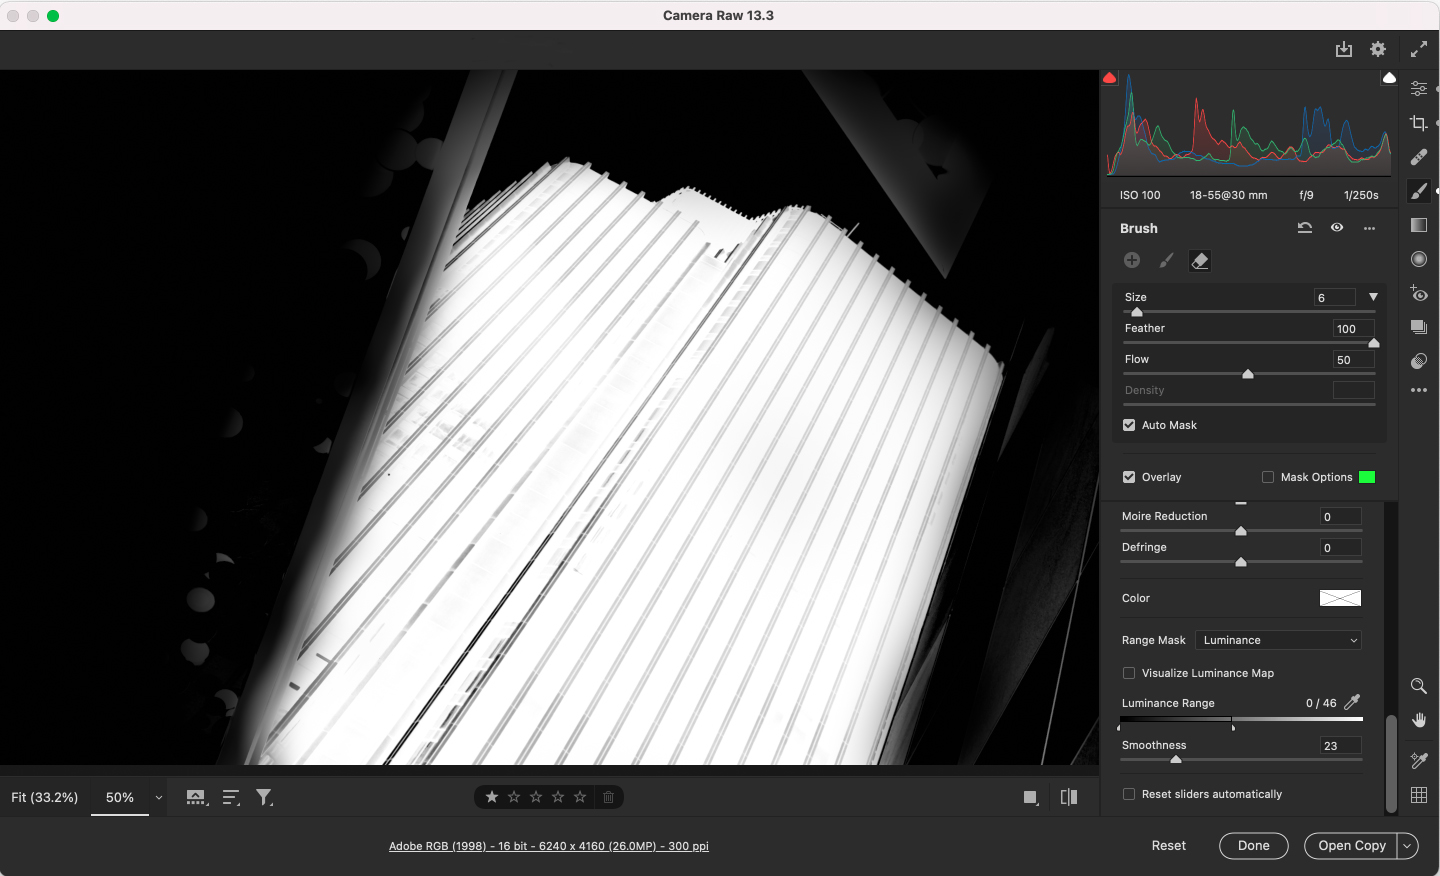
Use the Luminance Range Mask to target the building. Set Range: Luminance then drag the white point in to exclude lighter pixels from the change. Hold Alt as you drag for a B&W view, then fine-tune the Smoothness. Increase Exposure and Clarity to boost the building.
05 Use Auto-Mask
Hit N for a new adjustment, then check Auto-Mask in the brush settings. Paint over the building on the right. Auto-Mask makes the brush snap to the edges of the shape. Lower Exposure and Temperature, and boost Clarity to balance the building with the scene.
06 Change the colors
Make a new adjustment and paint over the spots, then set Range Mask: Color and sample the yellows and reds. Increase Exposure and use the Hue slider to change colors. Click on the adjustment pins to go back and tweak any of the local adjustments or masks.
PhotoPlus: The Canon Magazine is the world's only monthly newsstand title that's 100% devoted to Canon, so you can be sure the magazine is completely relevant to your system.
Read more:
The best photo editing software: image editors for novices through to pros
The best photo-editing laptops: top laptops for photographers
10 best online photography courses – from beginner guides to masterclasses
The lead technique writer on Digital Camera Magazine, PhotoPlus: The Canon Magazine and N-Photo: The Nikon Magazine, James is a fantastic general practice photographer with an enviable array of skills across every genre of photography.
Whether it's flash photography techniques like stroboscopic portraits, astrophotography projects like photographing the Northern Lights, or turning sound into art by making paint dance on a set of speakers, James' tutorials and projects are as creative as they are enjoyable.
He's also a wizard at the dark arts of Photoshop, Lightroom and Affinity Photo, and is capable of some genuine black magic in the digital darkroom, making him one of the leading authorities on photo editing software and techniques.
