Use off-camera flash to brighten up your landscape photographs
Make one flashgun do the work of ten, by light-painting scenes taken during the day over several frames
The best camera deals, reviews, product advice, and unmissable photography news, direct to your inbox!
You are now subscribed
Your newsletter sign-up was successful
Watch video: Use off-camera flash to illuminate landscapes
We often hear portrait photographers talk about underexposing the ambient light, then using a flash to pick out the subject. It’s a technique that can result in wonderfully atmospheric portraits with bold skies. So we thought, why not use the same method to create a bold landscape? This way we can underexpose the scene for a dramatic evening sky, then pick out parts of our scene with flash.
• Read more: Best flashguns
Article continues belowThe problem is – like the neolithic burial chamber here – that subjects in landscape photos tend to be larger than people, meaning that a single flash may not be big enough, or strong enough, to light the entire thing. Thankfully, there’s no need to bring along an arsenal of flashes.
One of the advantages to landscape photography is that, apart from the movement of clouds or foliage, the scenes in front of us tend to remain still (for the most part). So we can capture our scene in several exposures, then piece it together afterwards with Photoshop.
This way we can make one flash do the work of many, by lighting our landscape scene from various positions over a series of frames. Not only does this mean we can light our subject from any angle, it also enables us to pick and choose the frames where the light hits the subject in the most pleasing way. As such, it’s like painting your daytime scene with a flash, piece by piece.
01 Underexpose the ambient
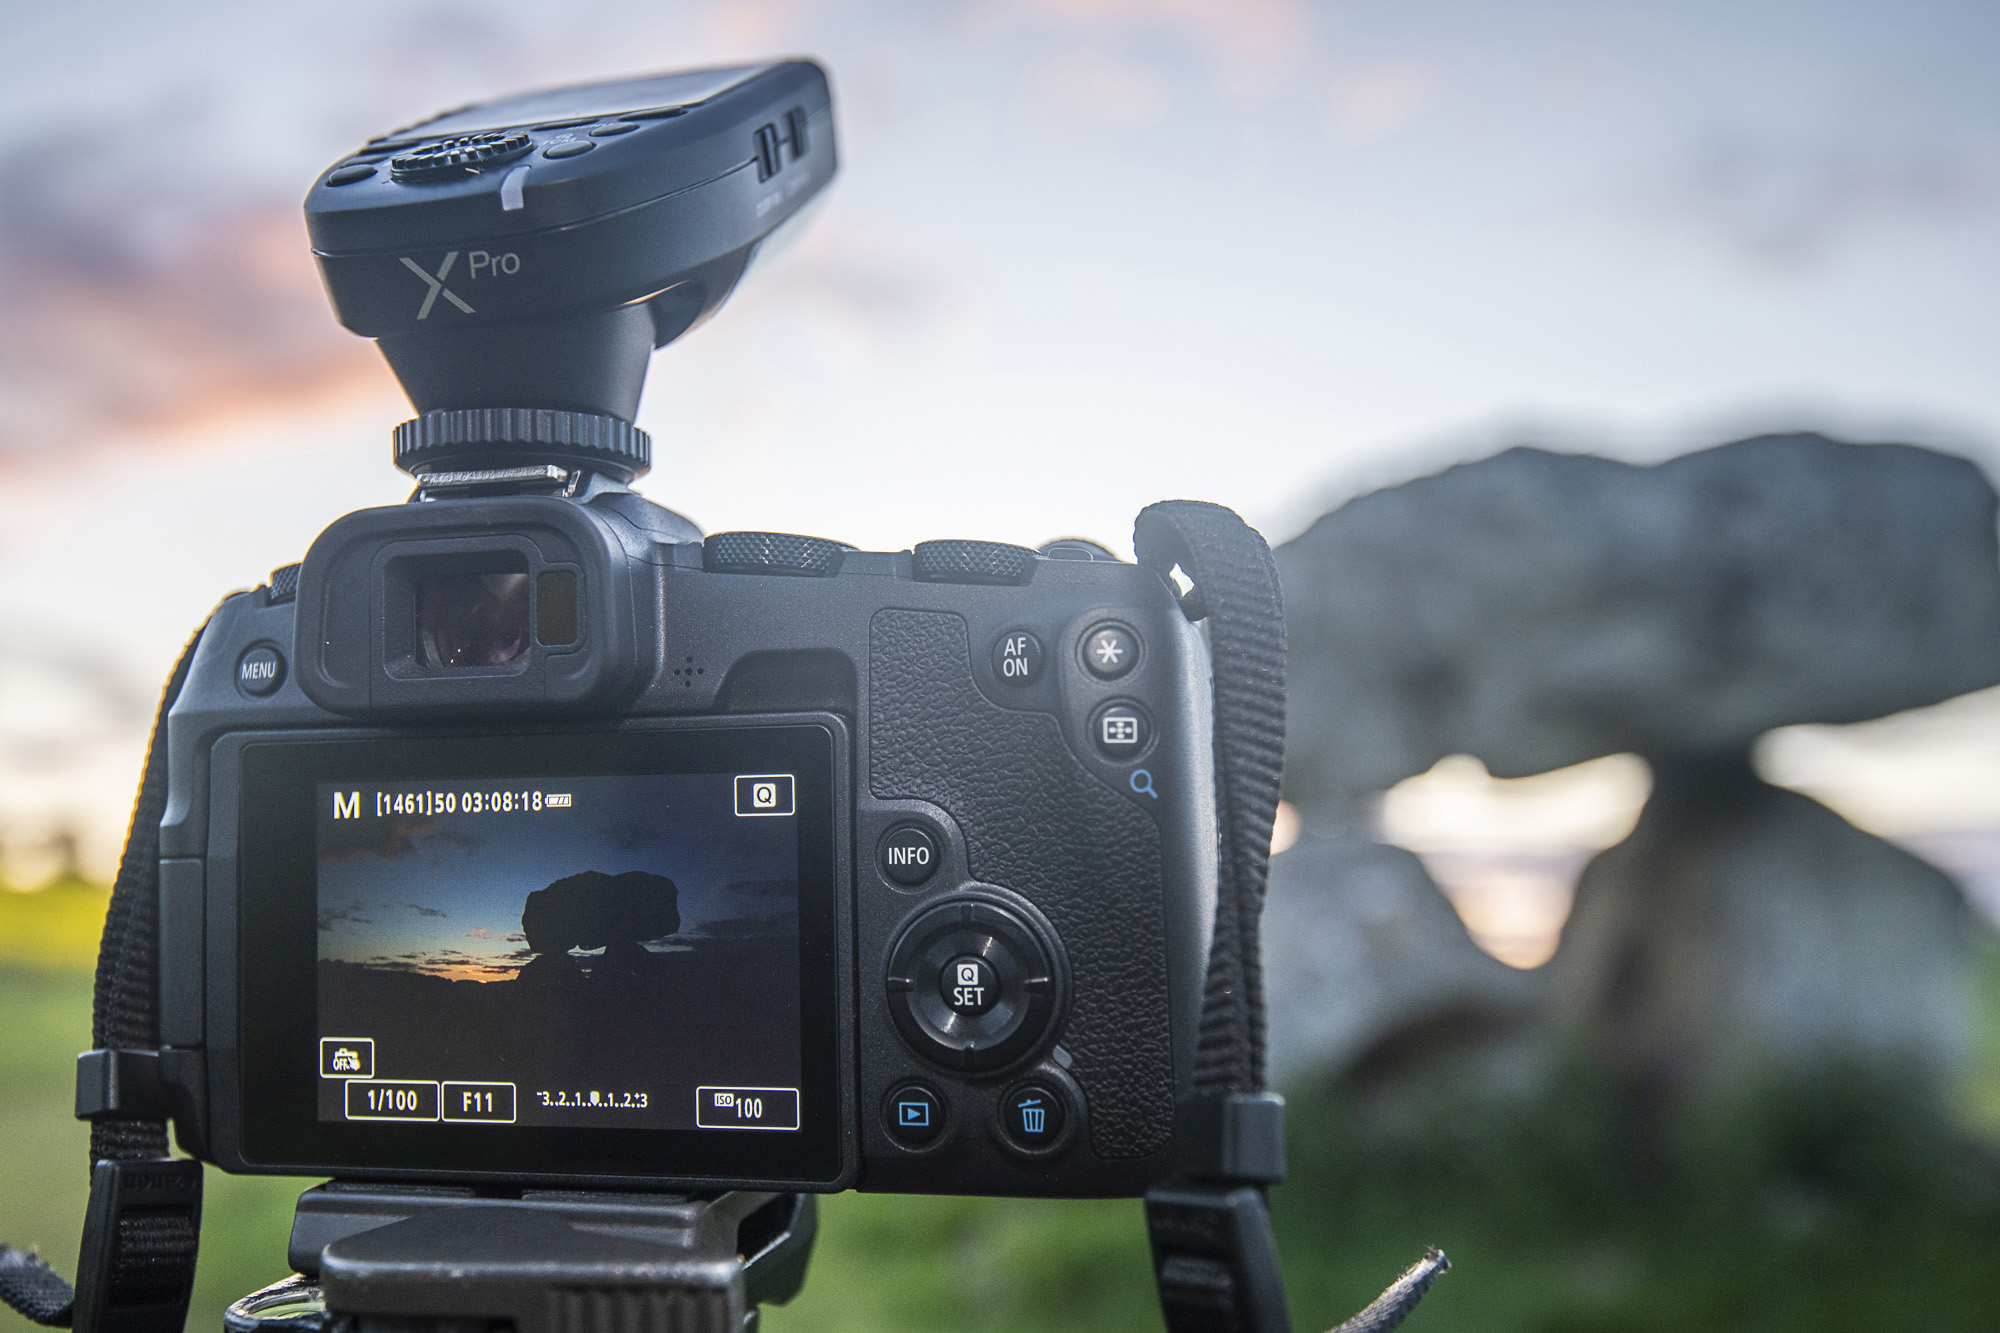
Set up your camera on a tripod as usual. Before turning on the flash, we first work out an ambient exposure that results in a dramatic sky. As we are shooting into the setting sun, this leaves most of our scene in deep shade. That’s fine, though; we can use our flash to lift the areas of our choosing.
The best camera deals, reviews, product advice, and unmissable photography news, direct to your inbox!
02 Set the flash power
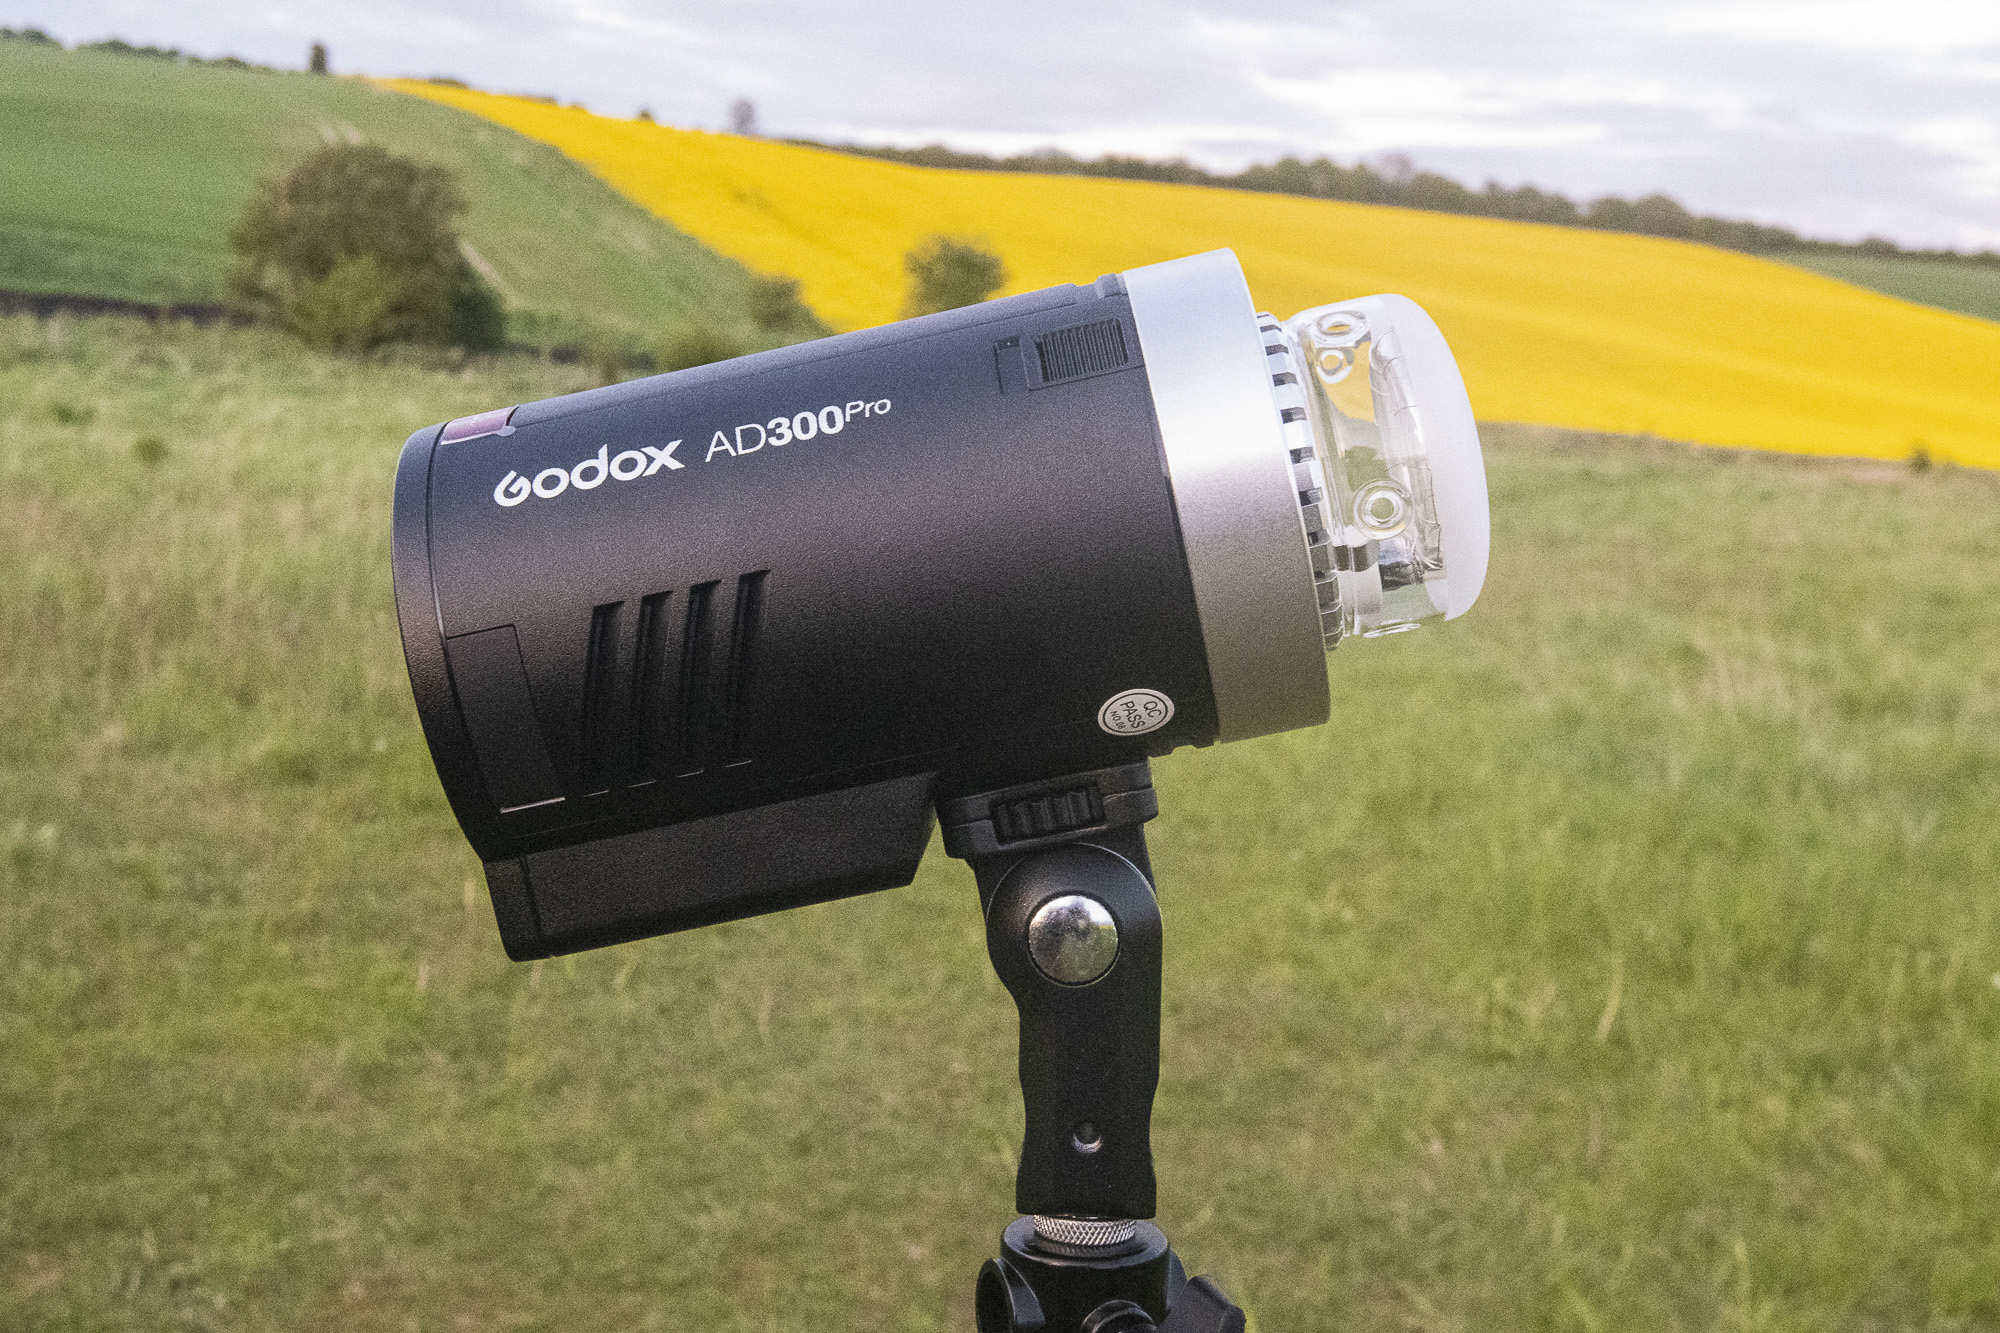
Turn on the flash and set it to manual, then take test shots to find the right output. To overpower the daylight we needed the flash at or near to full power, especially if using a modifier. The closer we bring the flash, the stronger the light will be.
03 Paint the scene
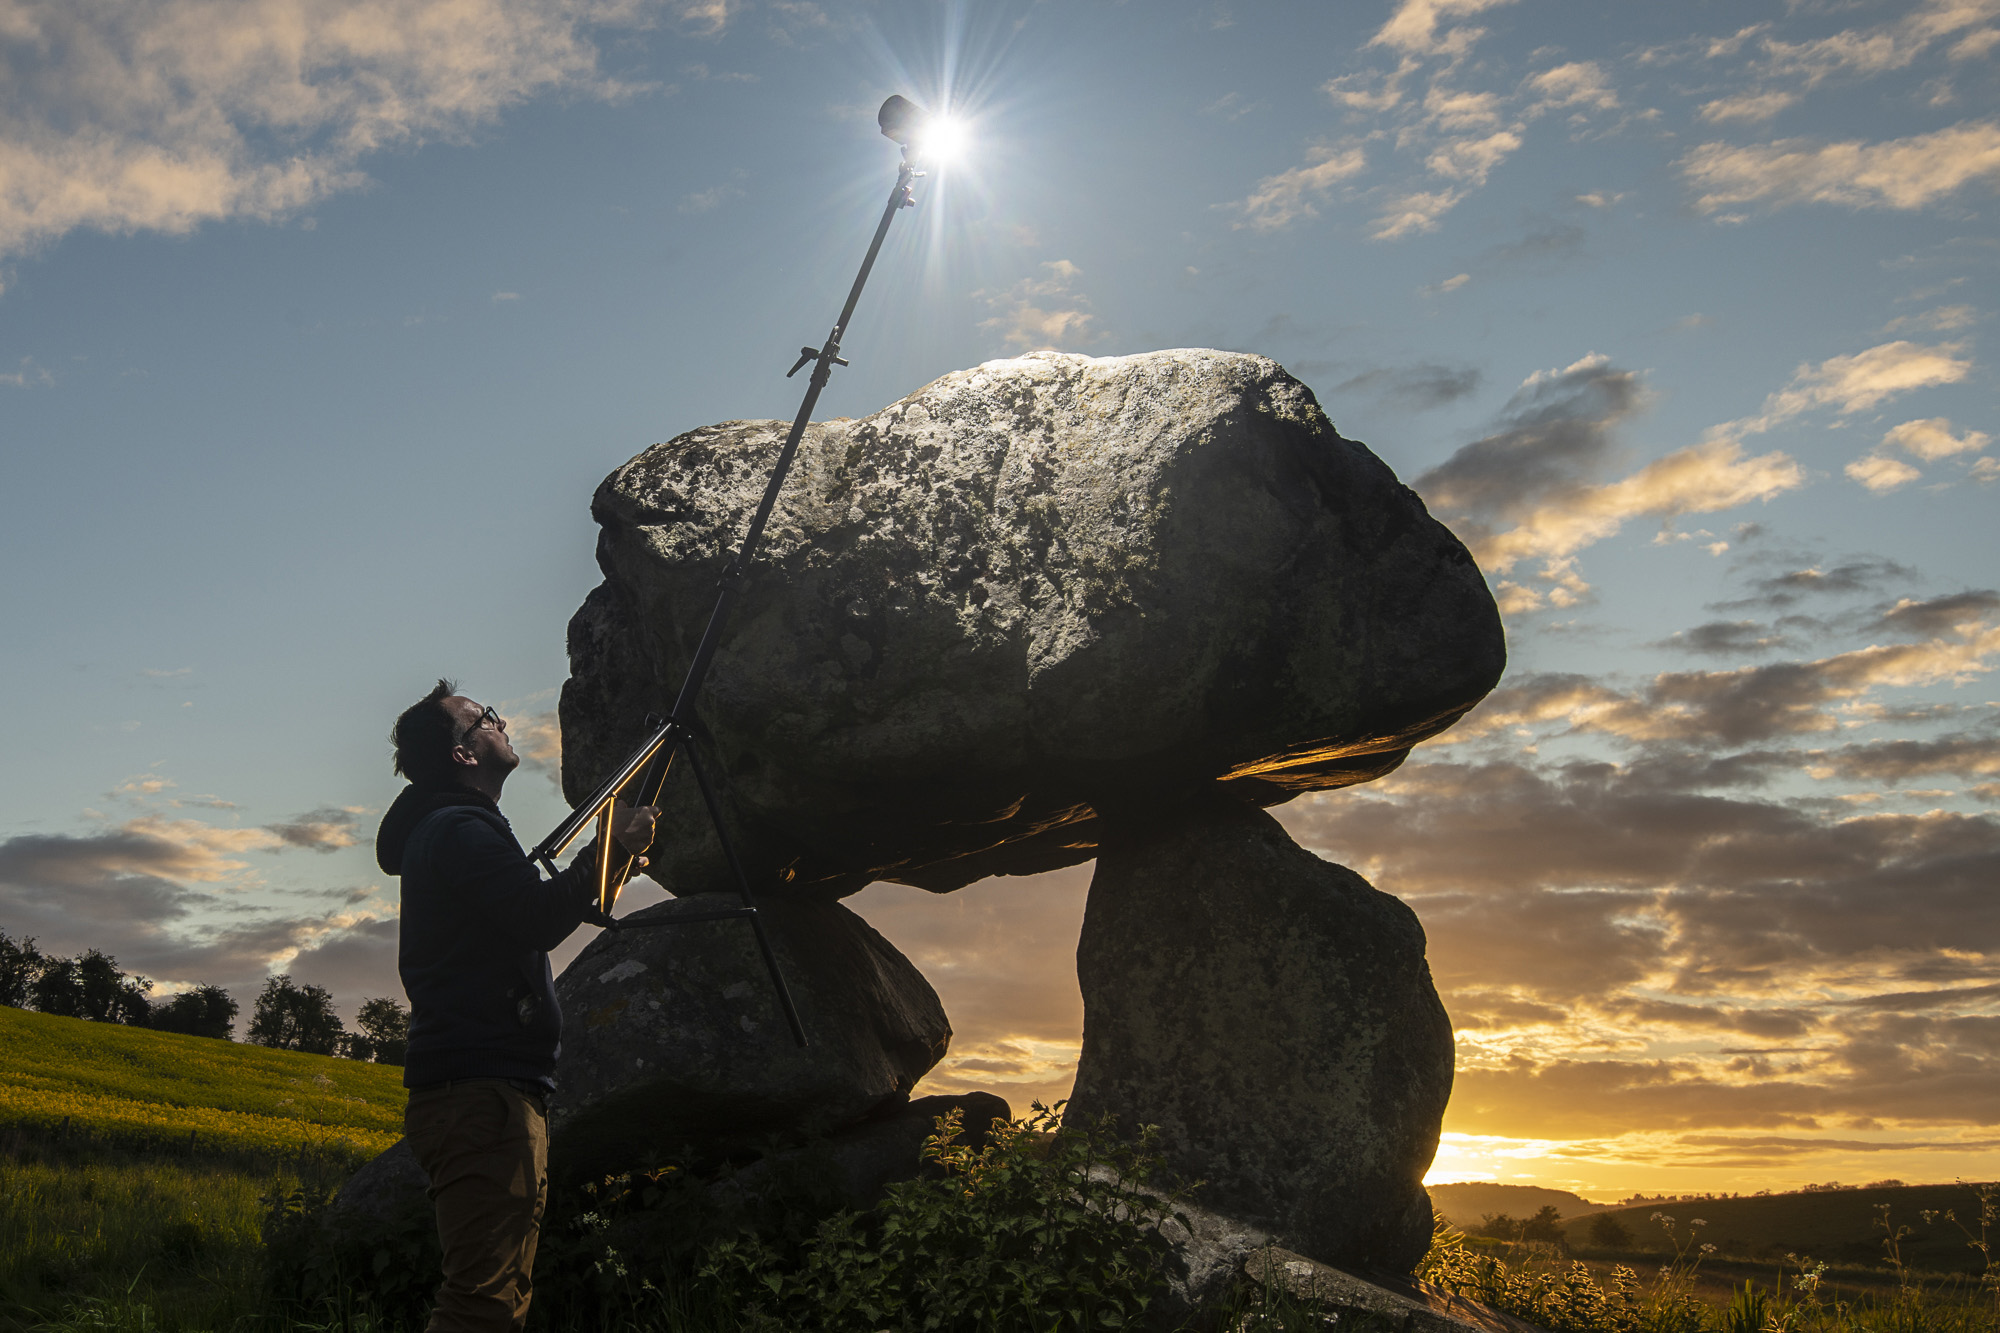
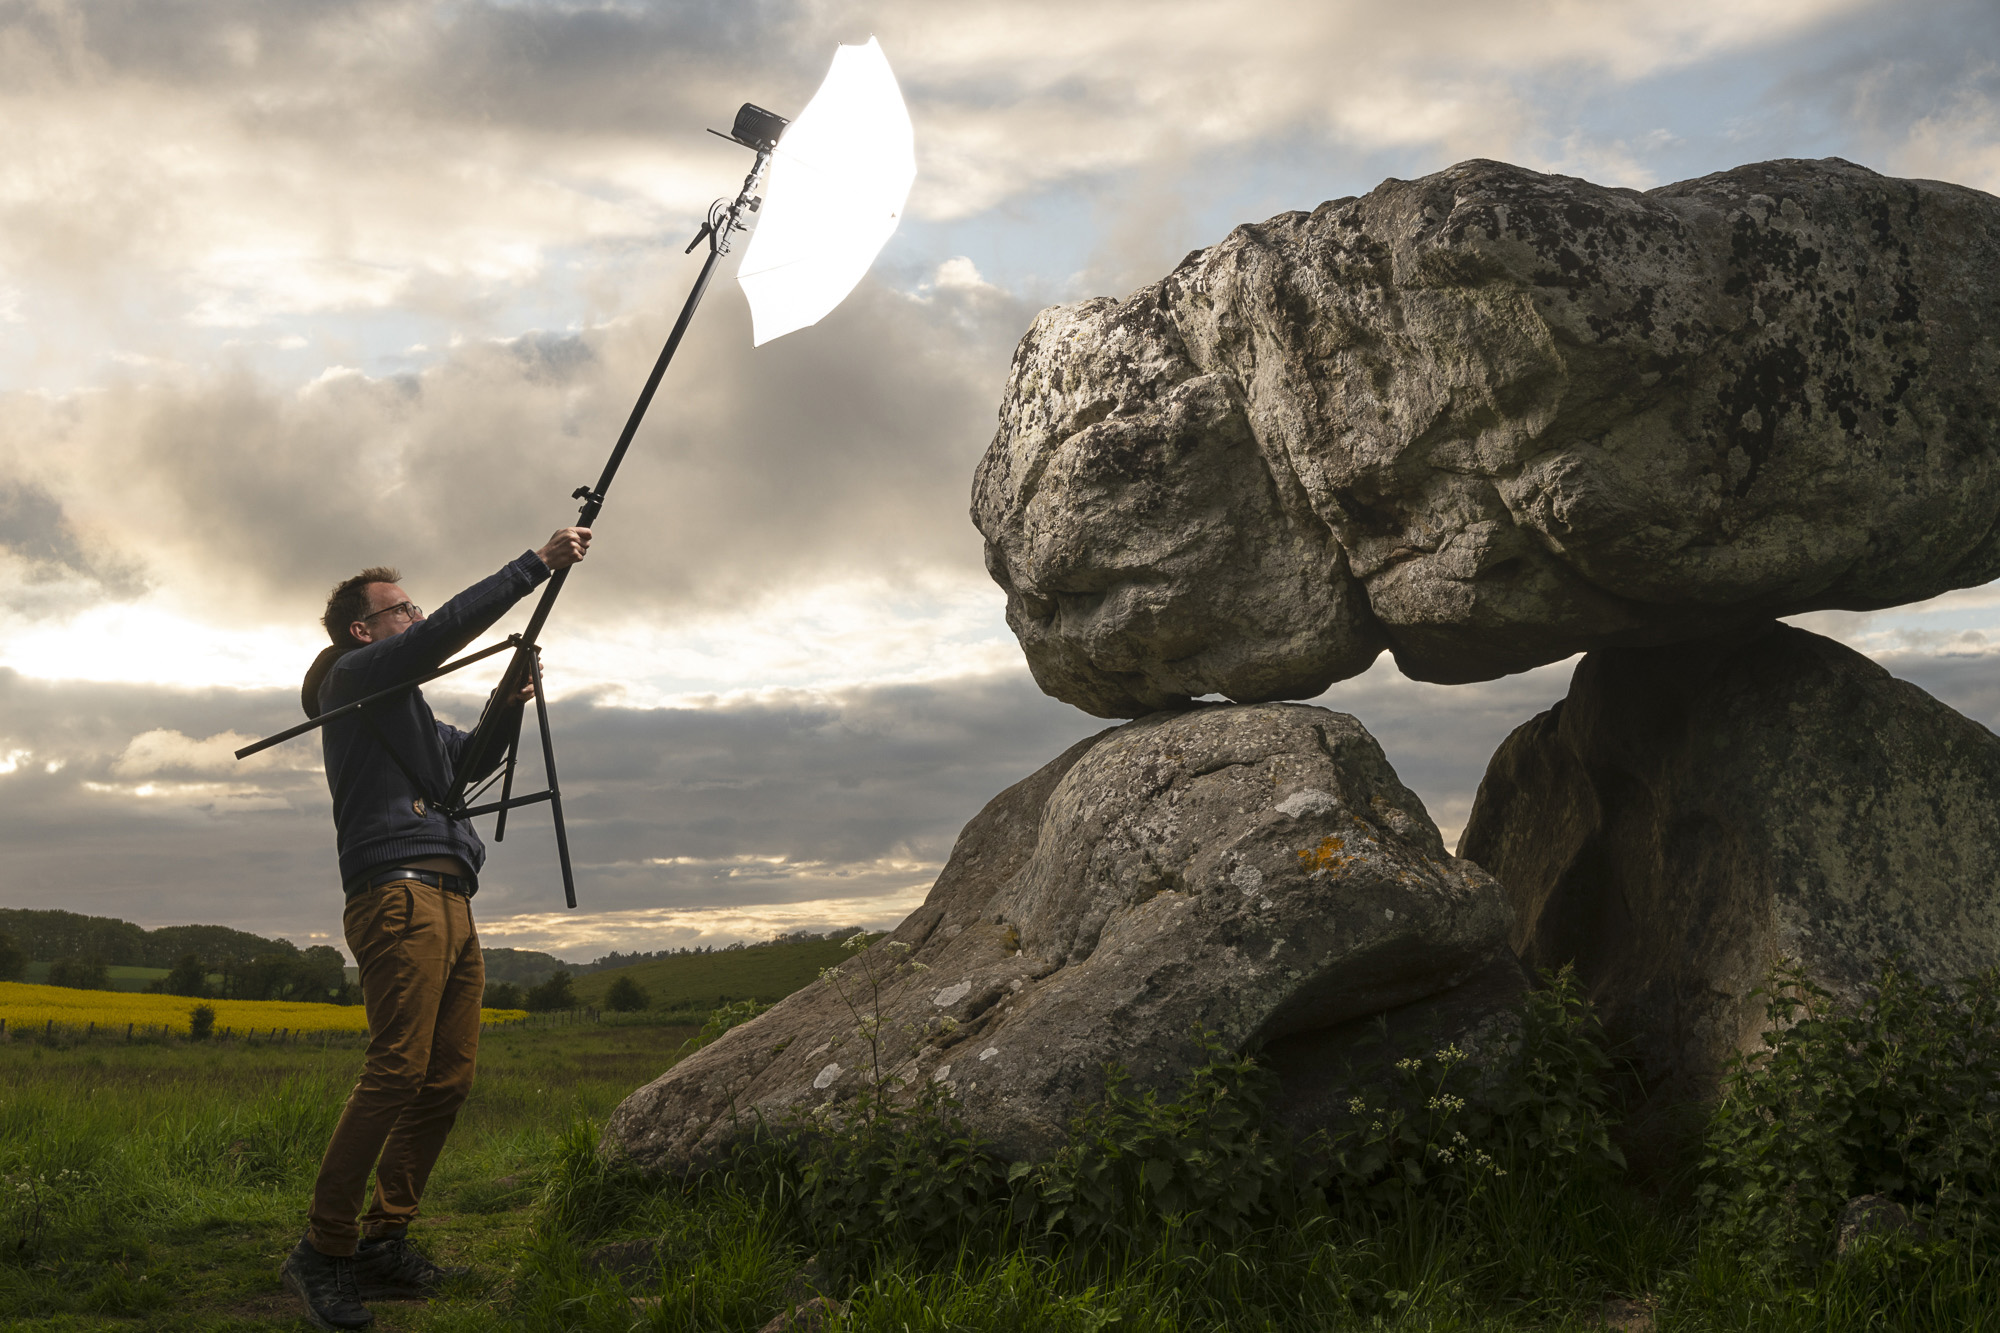
Move around your subject, holding the flash in various positions while pressing your remote release to trigger the camera and flash. It doesn’t matter if you’re in the shot, as you can remove things later. Paint the subject from all angles, and also light the surrounding ground.
04 Try a gel
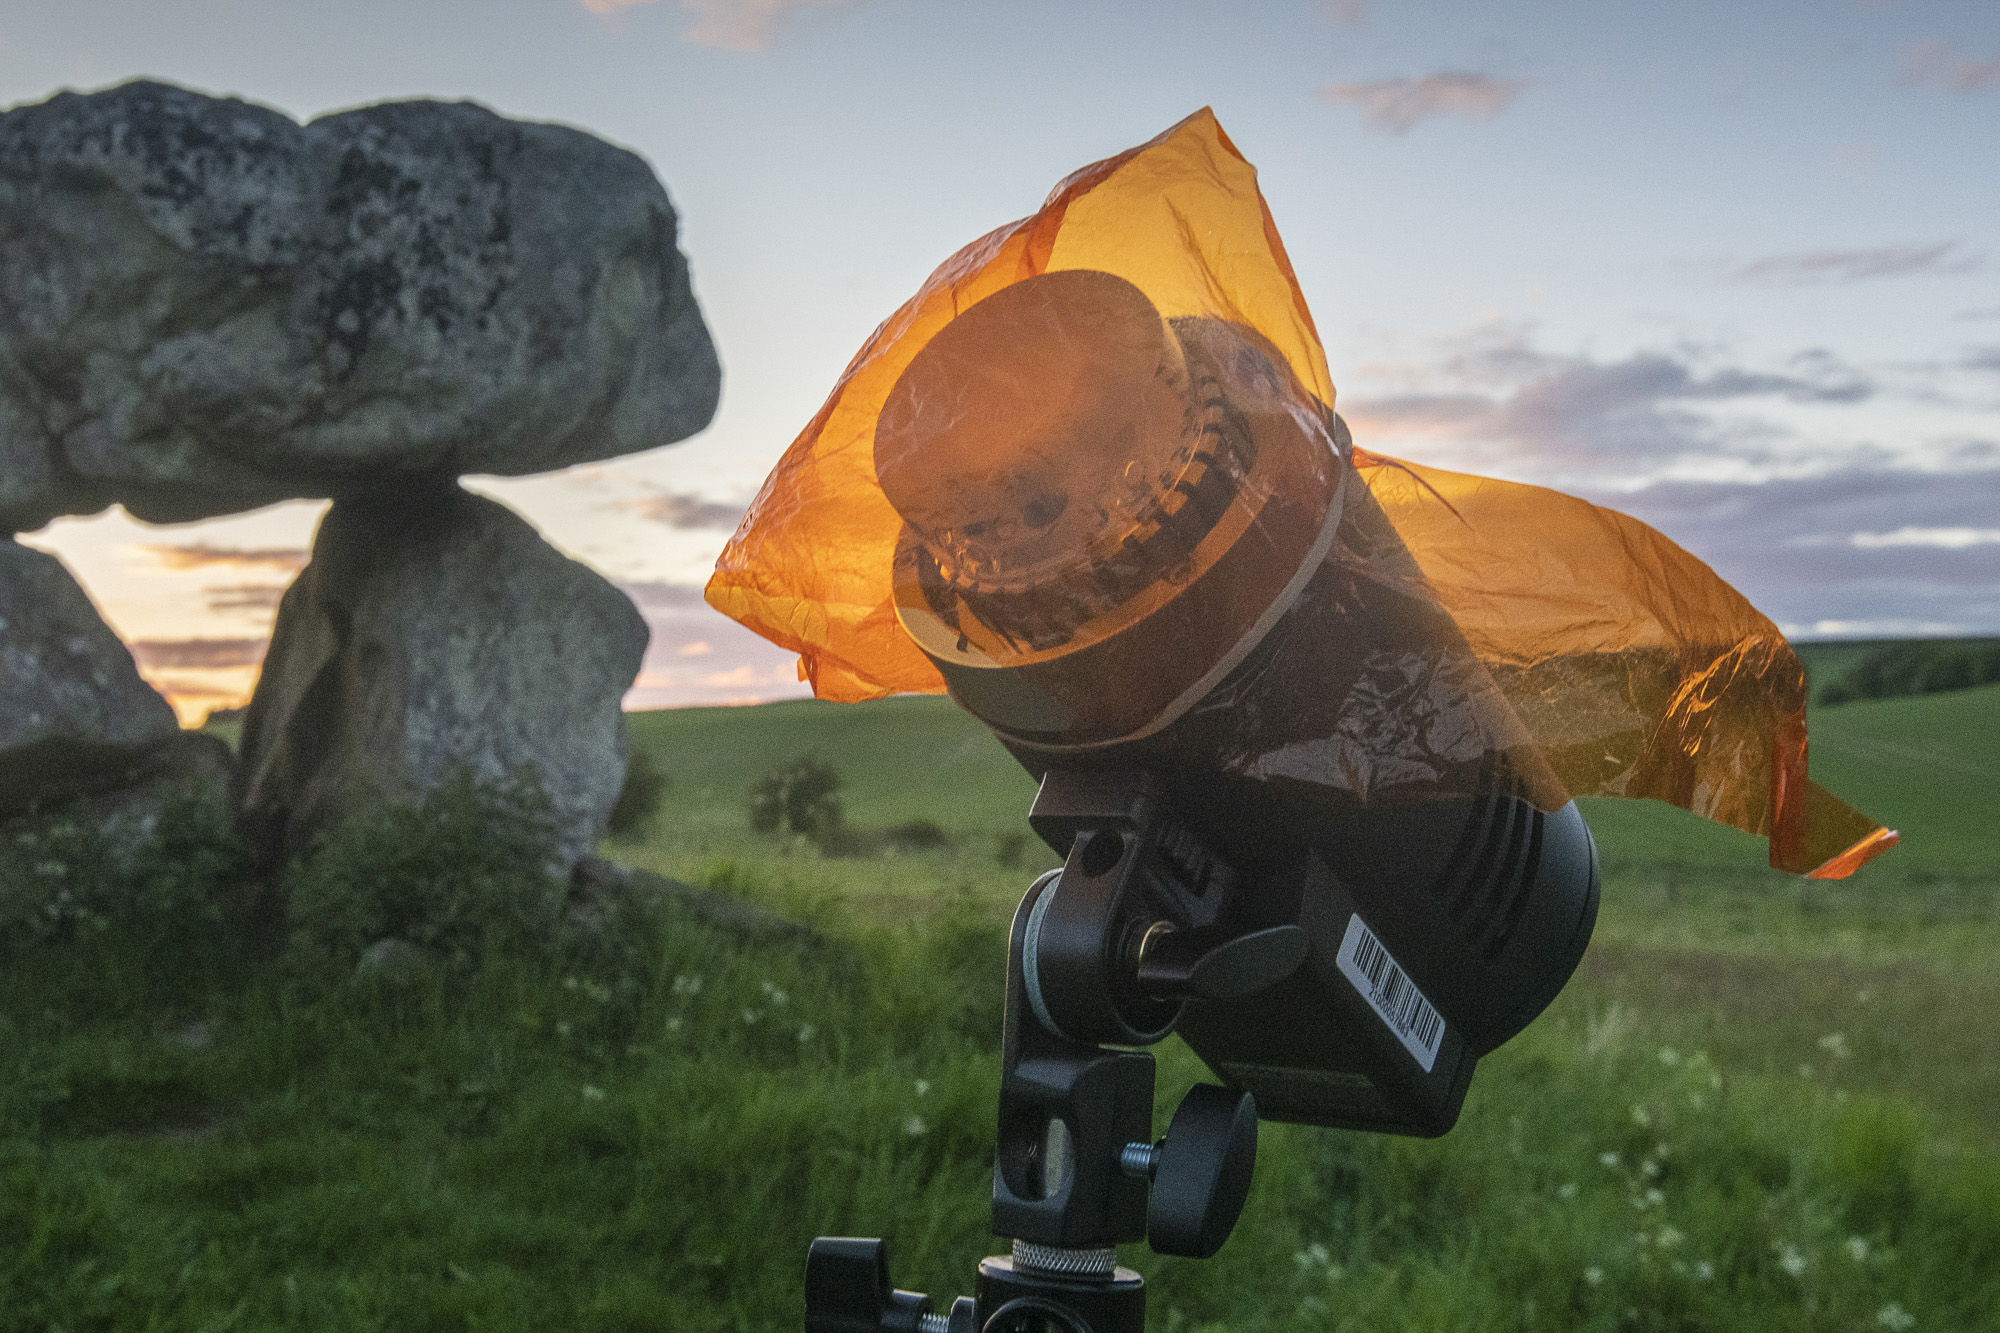
It can be helpful to think of your flash as a supplement to the natural light. We’ve fitted a CTO (color temperature orange) gel over the flash, to match the warmth of the low sunlight. By lighting the scene from the side and behind, we mimic the direction of the sunlight
05 Fake the sun
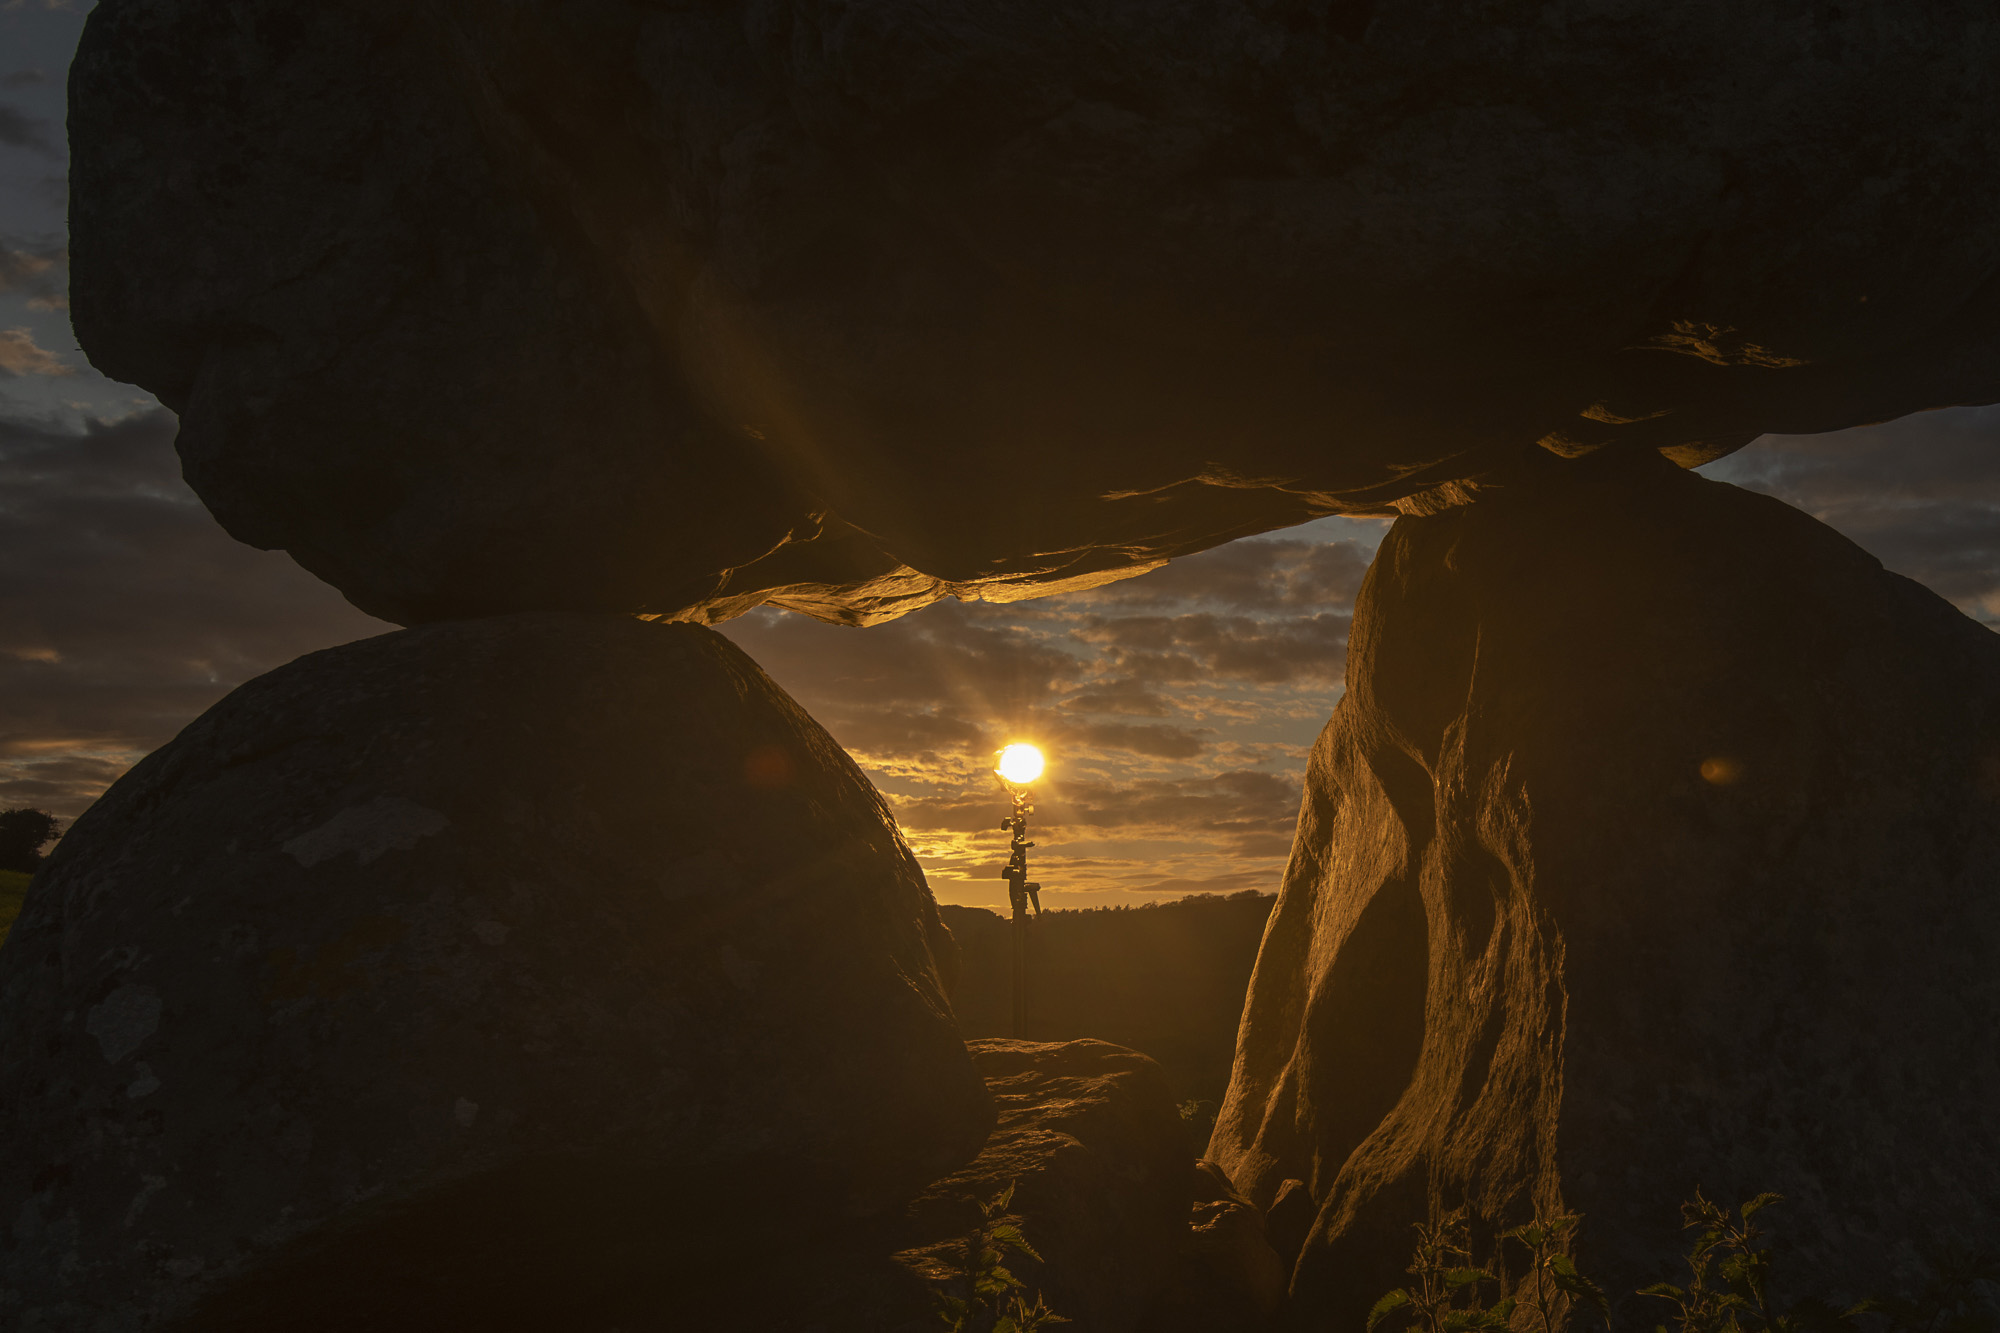
By including the flash bulb in frame we can get a bright highlight and atmospheric flare that looks like the sun. It’s best to gel the flash with a warm CTO gel, and it’s more realistic if the flash is against the brightest part of the sunset sky so it looks as if the sun has broken through.
06 Try flash modifiers
It’s worth playing with flash modifiers to see whether hard or soft light suits your composition. A flash modifier like an umbrella or softbox will diffuse and spread the light, giving you softer shadows. We used the white umbrella for some shots, then fired the flash bare for others.
07 Combine and align
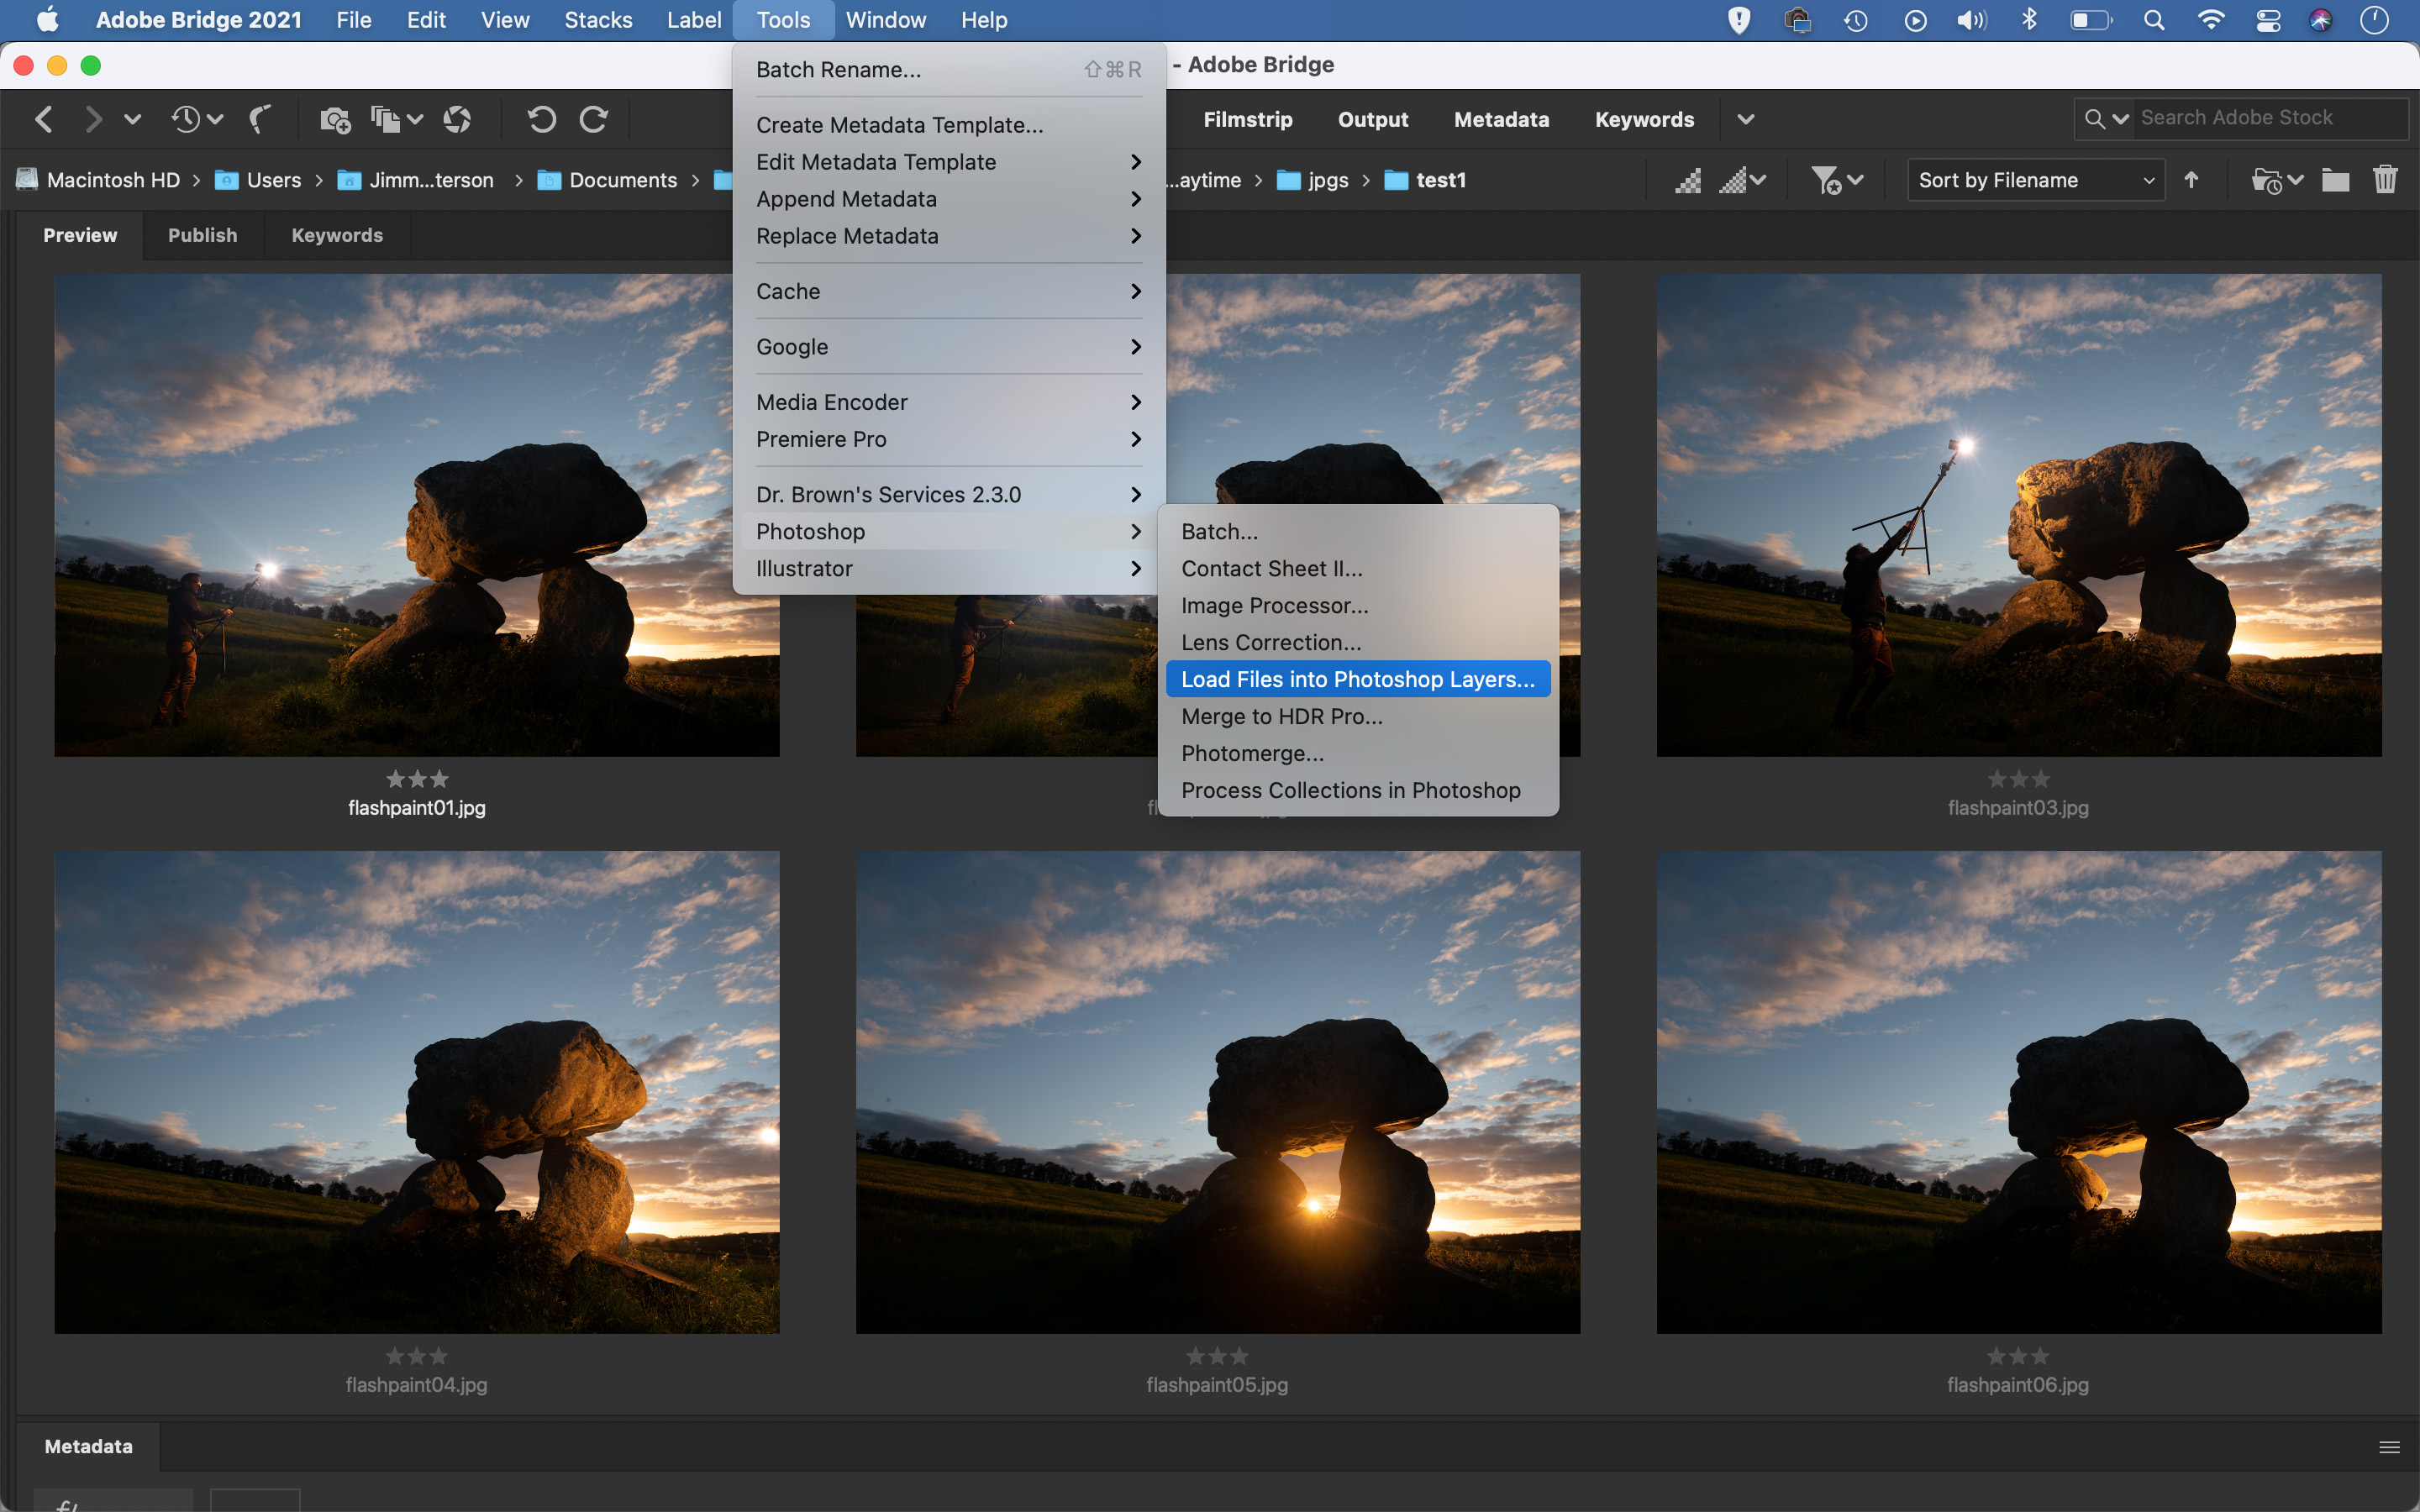
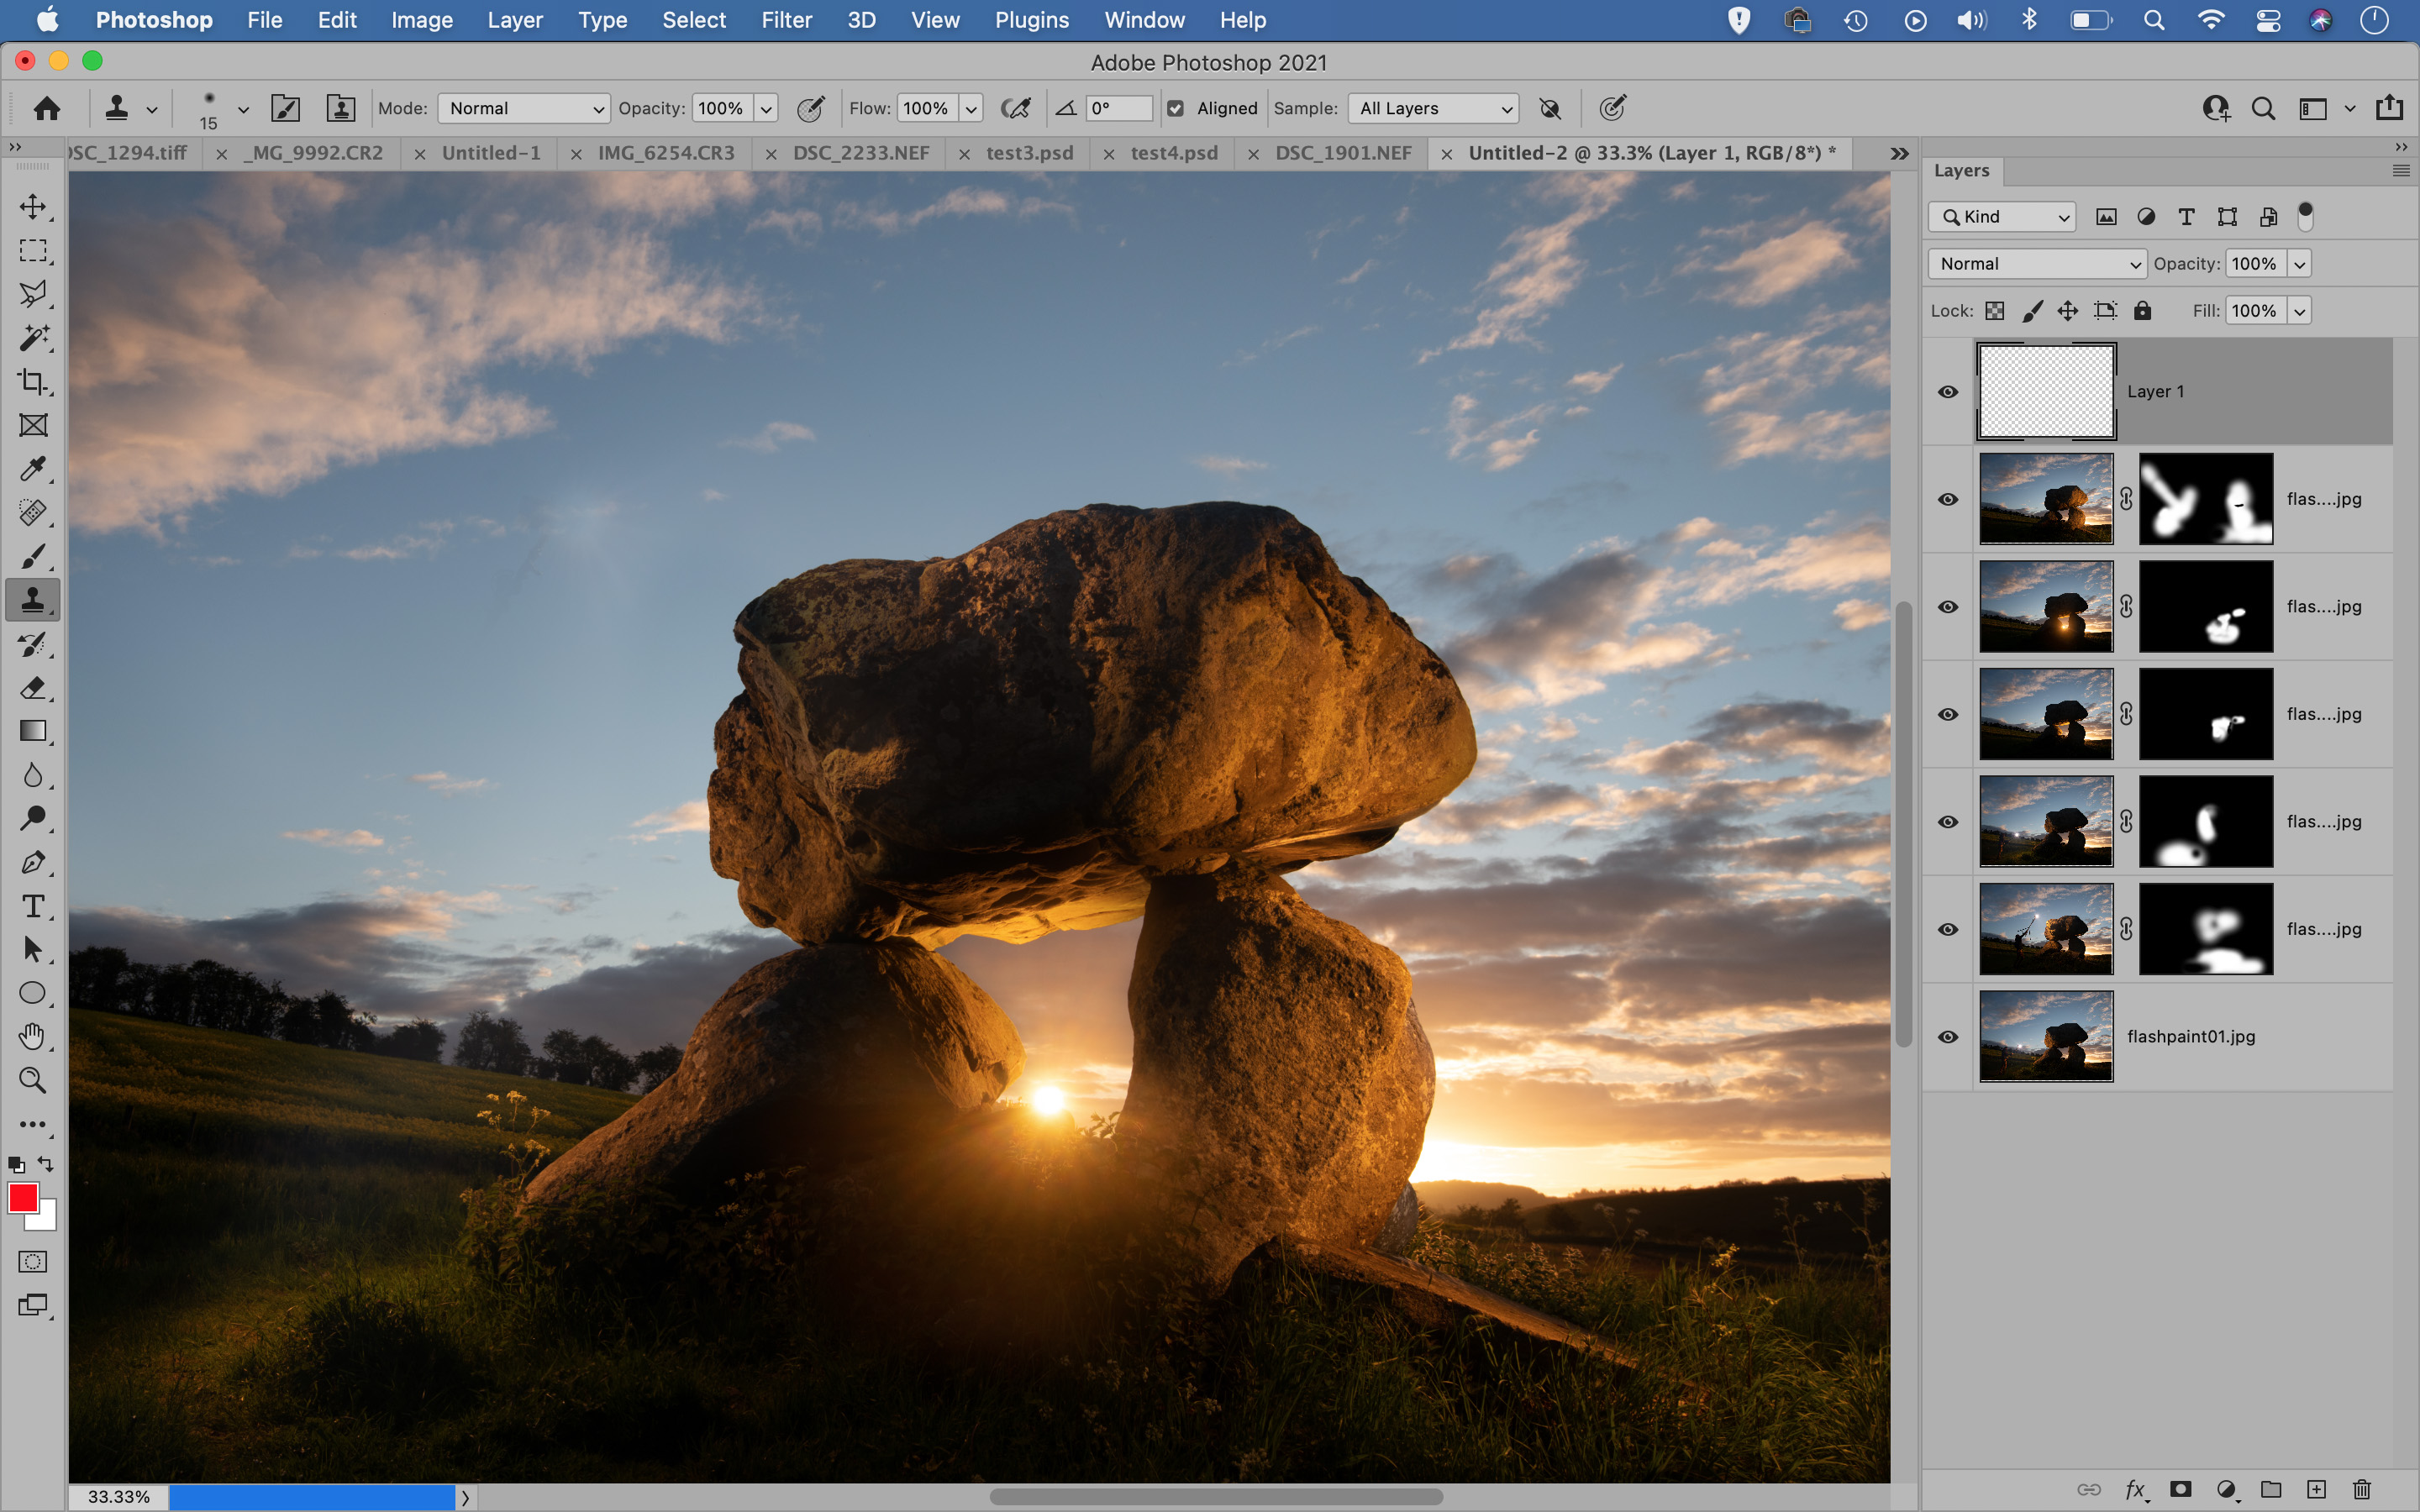
Highlight the images in Adobe Bridge that you want to blend together, then go to Tools > Photoshop > Load Files into Photoshop Layers. Go to the Layers panel and shift-click between top and bottom to highlight them. Go to Edit > Auto-Align Layers, choose Reposition and hit OK.
08 Mask and reveal
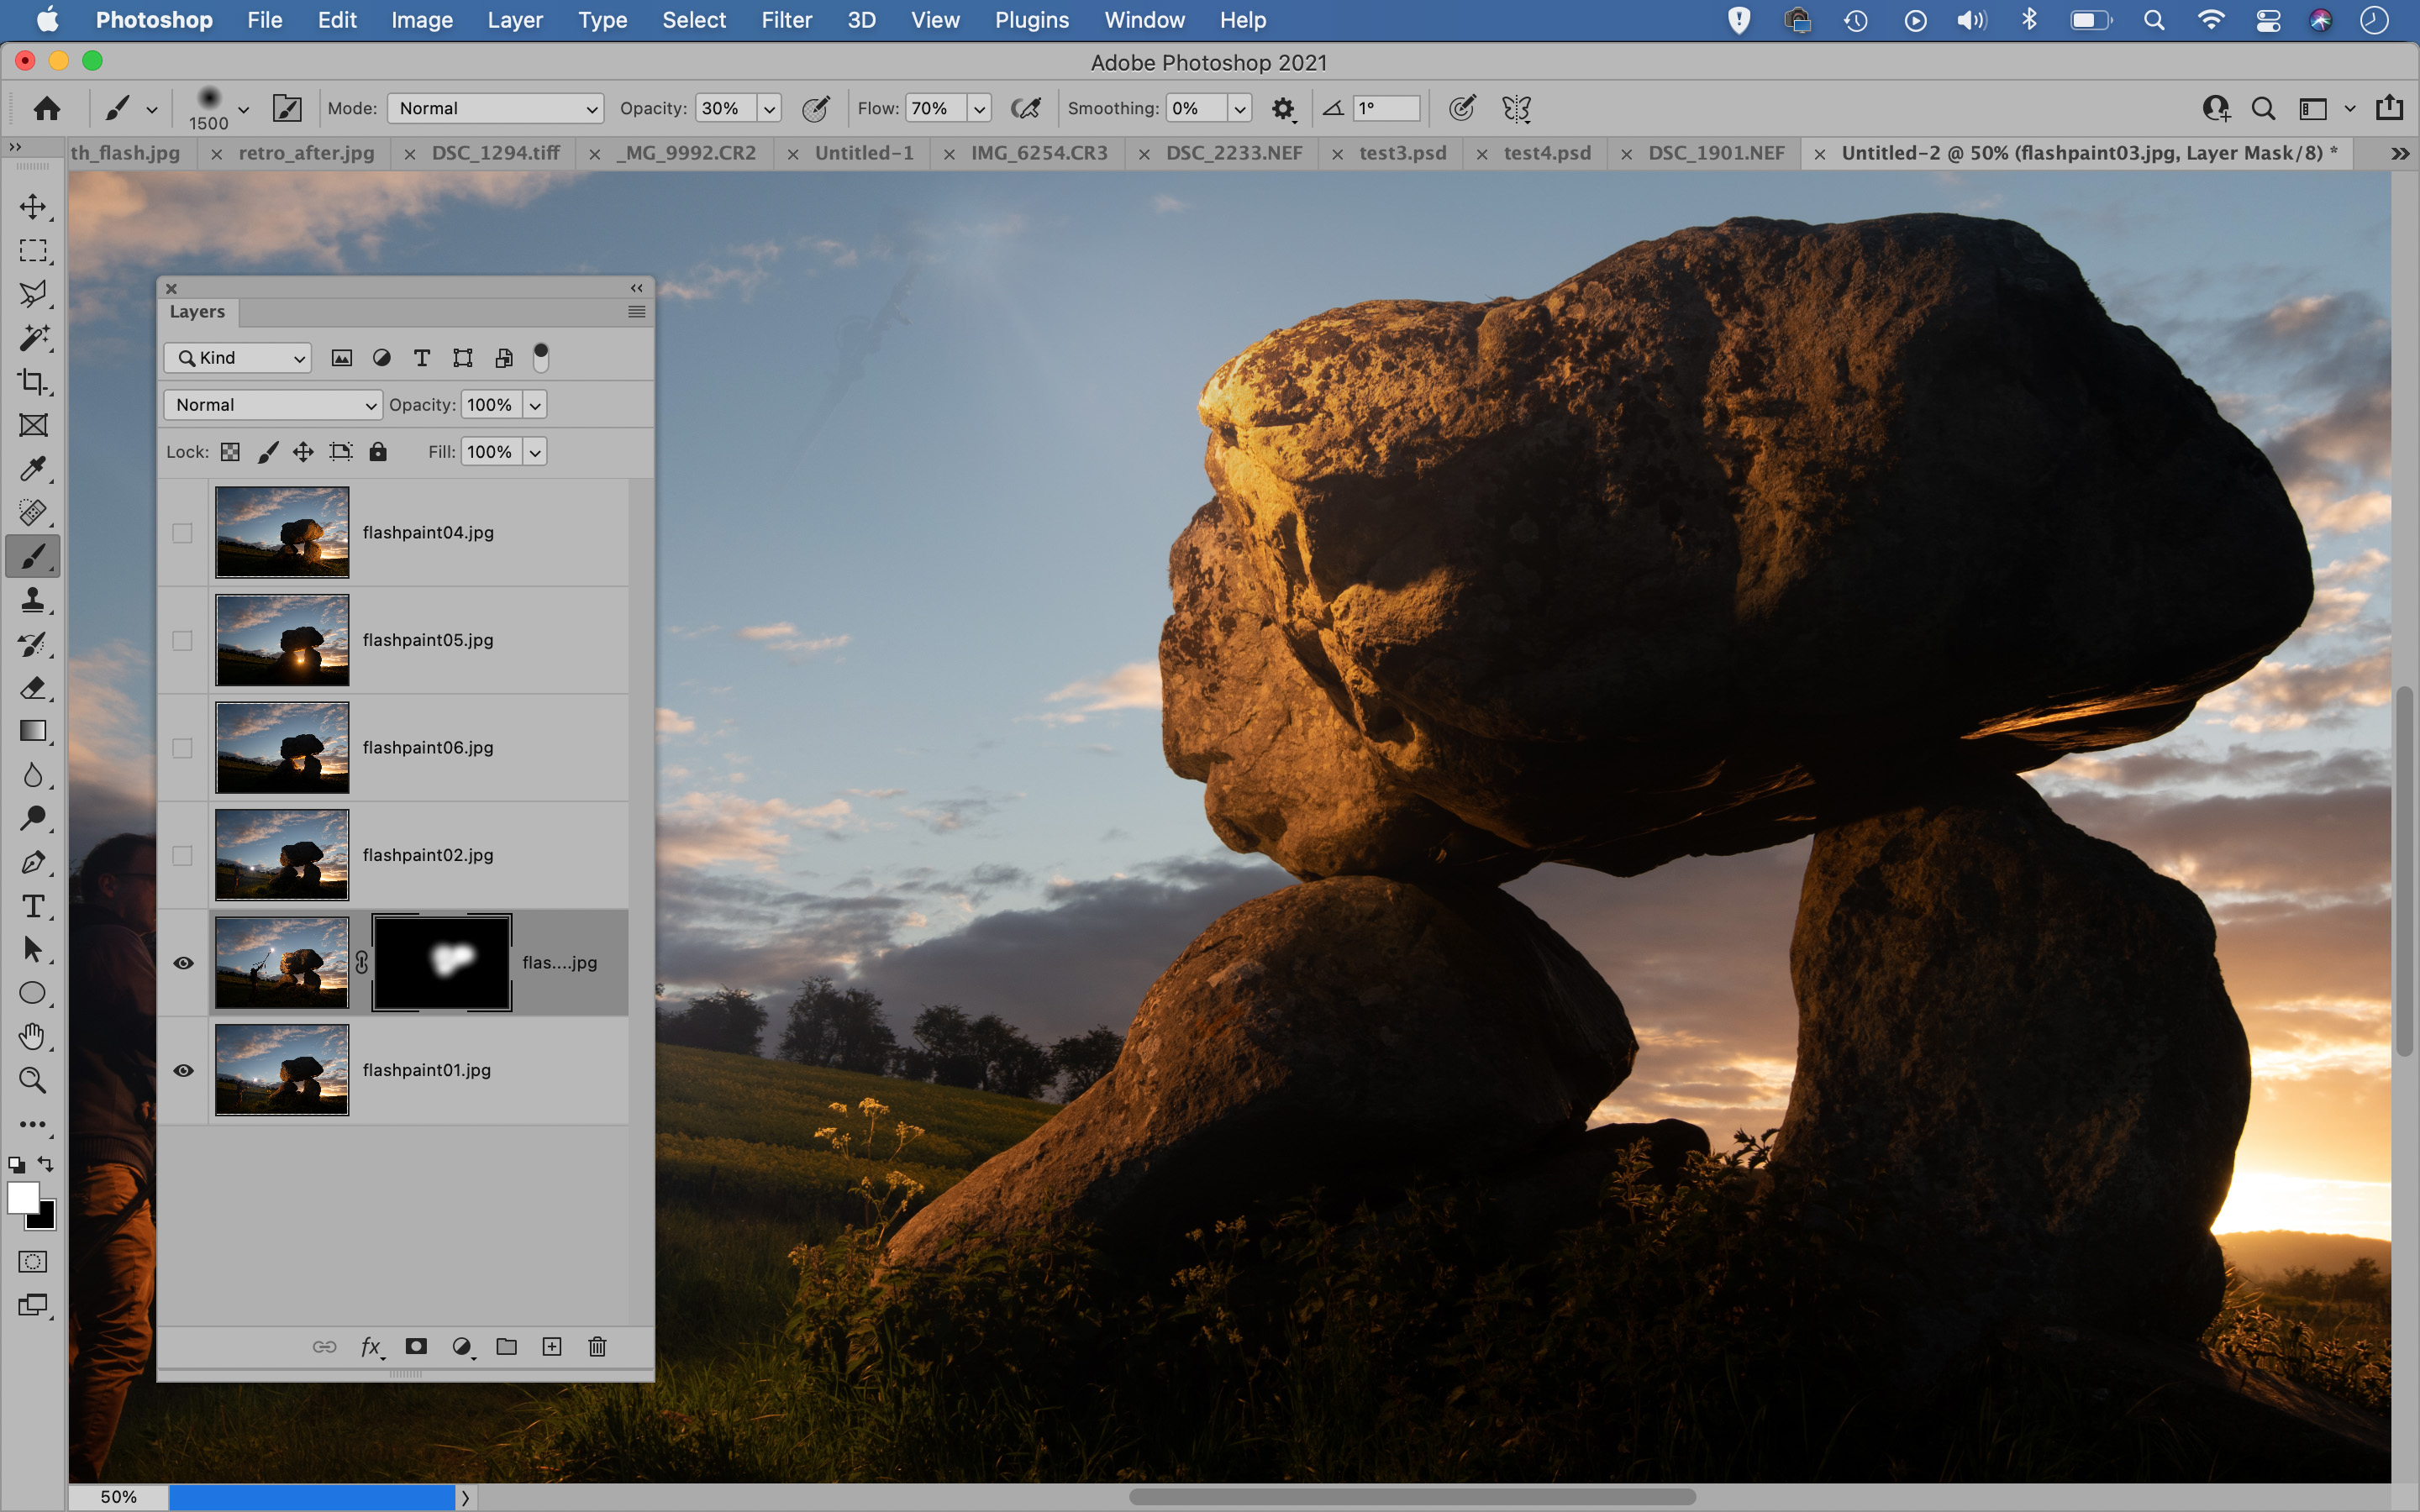
Hide all but the bottom layer, then reveal and highlight the layer above it. Hold Alt and click the Add Mask icon in the Layers Panel to add a full black mask, then grab the brush tool. Choose a soft-edged brush tip and paint with white to reveal the part of the hidden layer that you want to use.
09 Blend the light
Carry on working your way up the layers (change the layer order if necessary), adding masks and painting white to reveal. Once done, make a new layer on top of everything and grab the Clone tool. Set Sample: All Layers then use the tool to tidy up any messy areas to finish off.
PhotoPlus: The Canon Magazine is the world's only monthly newsstand title that's 100% devoted to Canon, so you can be sure the magazine is completely relevant to your system.
Read more:
The best photo editing software: image editors for novices through to pros
The best photo-editing laptops: top laptops for photographers
10 best online photography courses – from beginner guides to masterclasses
The lead technique writer on Digital Camera Magazine, PhotoPlus: The Canon Magazine and N-Photo: The Nikon Magazine, James is a fantastic general practice photographer with an enviable array of skills across every genre of photography.
Whether it's flash photography techniques like stroboscopic portraits, astrophotography projects like photographing the Northern Lights, or turning sound into art by making paint dance on a set of speakers, James' tutorials and projects are as creative as they are enjoyable.
He's also a wizard at the dark arts of Photoshop, Lightroom and Affinity Photo, and is capable of some genuine black magic in the digital darkroom, making him one of the leading authorities on photo editing software and techniques.
