Use overlays to transform your photography
Videographer and photographer Simone Ferretti shares how overlays can be used to improve your images
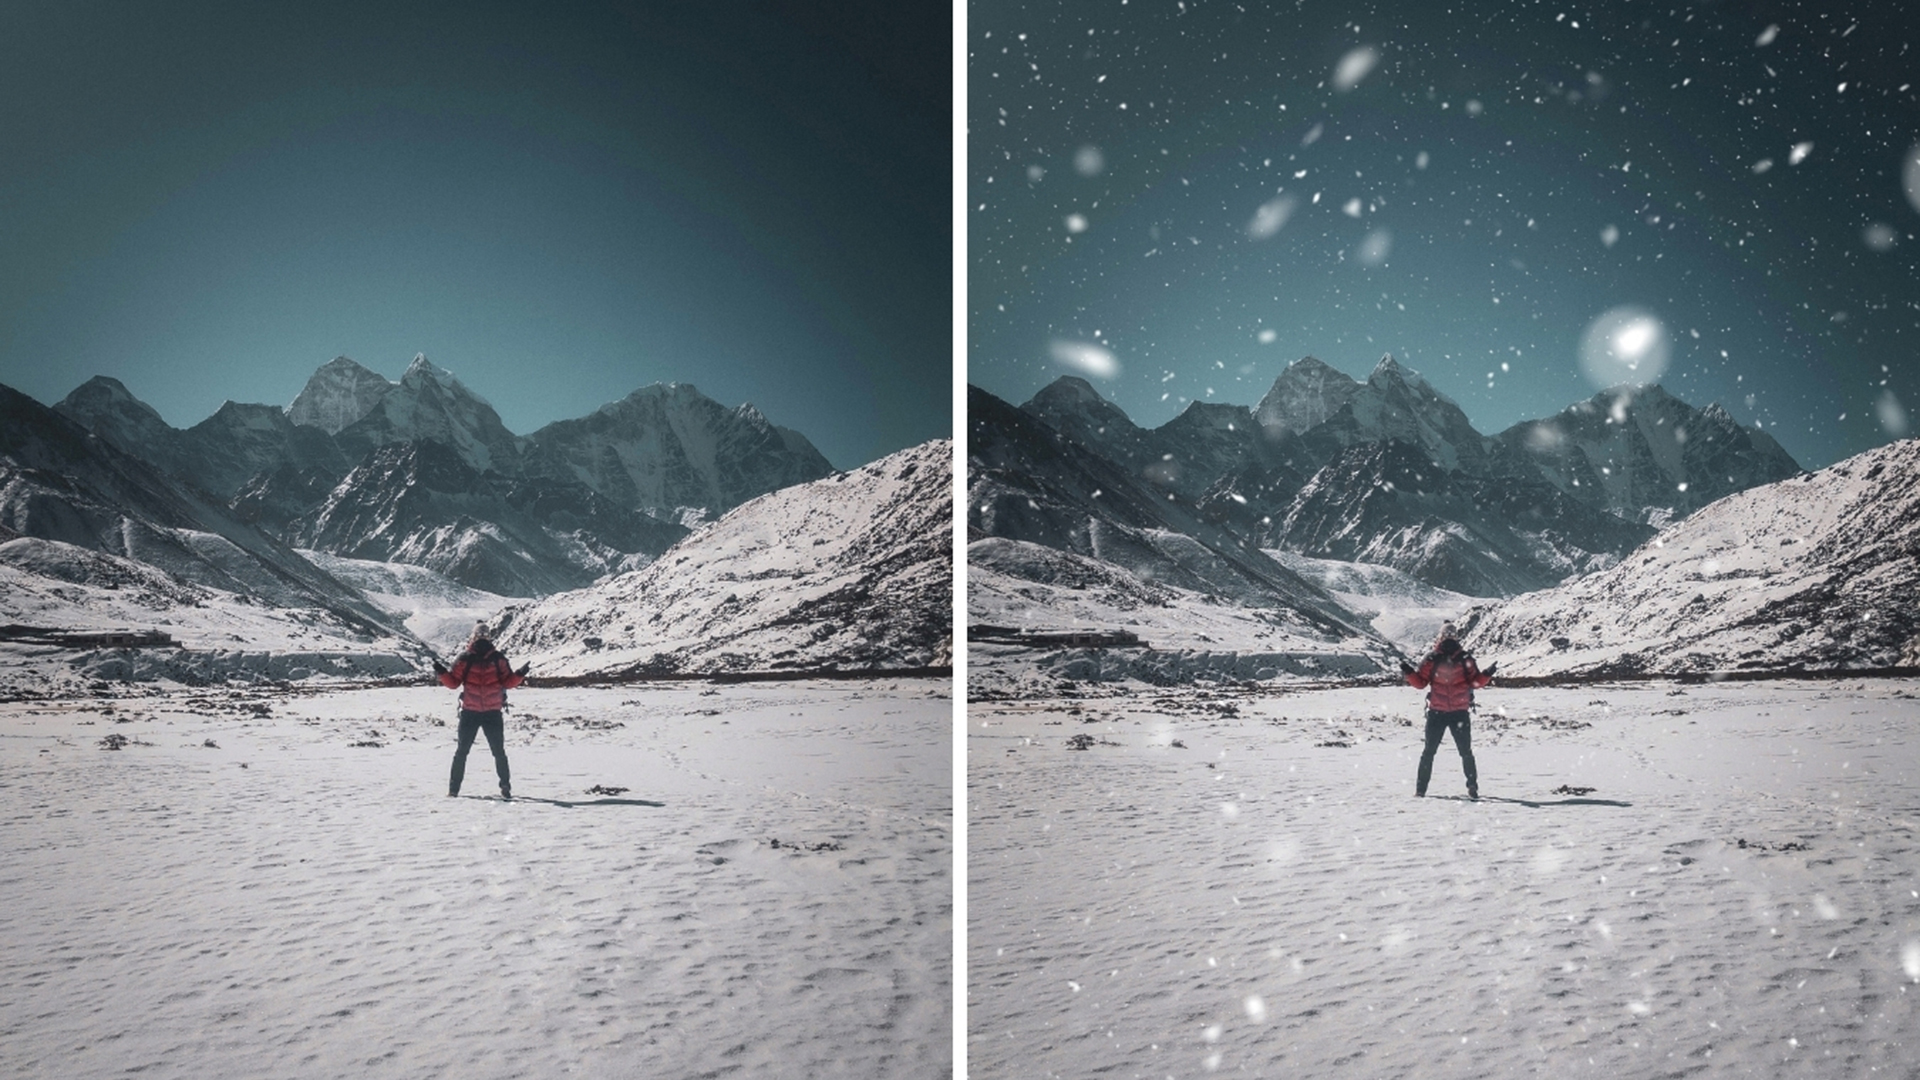
Have you ever wondered why some photos just look better than others? Why one photo can capture your attention and make you feel like you're right there in the moment, while another can leave you feeling underwhelmed?
I believe that, among other aspects, depth in photography is key to creating interesting and engaging clicks.
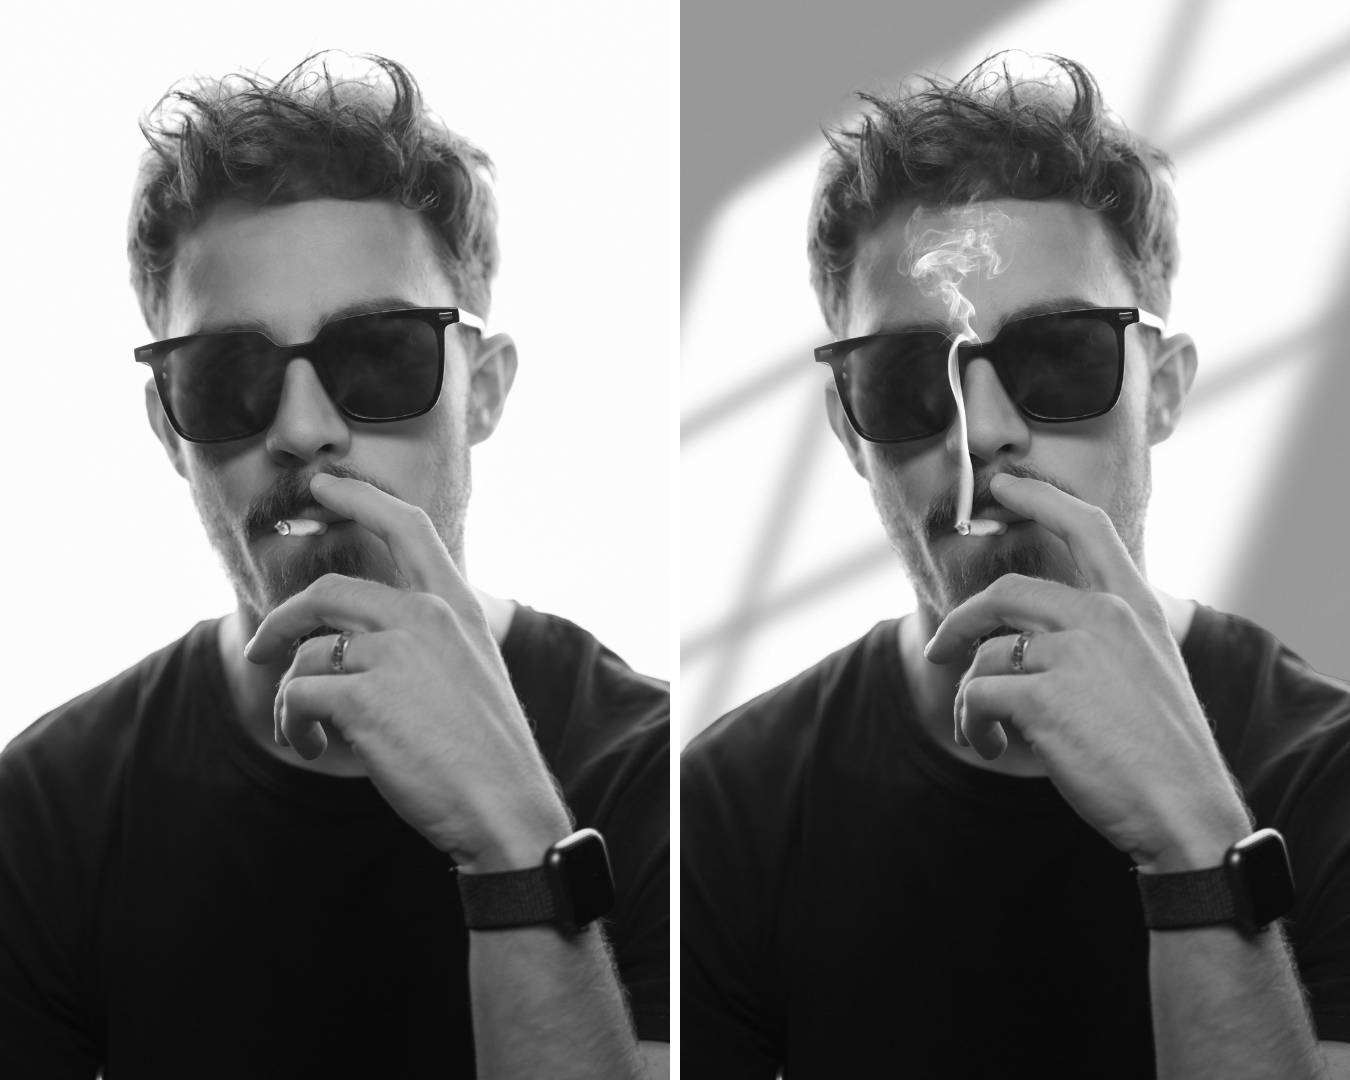
Not many people know that using Overlays can be a great way to add some extra depth to your photos. They can also be used to totally transform a photo from average to amazing.
But what are overlays? They are external elements (in the form of normal JPG/PNG images) that can be easily added to your photos to make them stand out by increasing contrast and adding depth in a matter of seconds. Overlays can be anything including clouds, flares, reflections, dust, scratches, rain, snow, shadows, leaks and more.
Simone Ferretti is an Italian living in London. He started as a commercial videographer in 2017, and during the first Lockdown started teaching what he knows about videography and photography through short videos on social media. Today Simone is a Joby ambassador and counts over 1M followers between Instagram, TikTok, and YouTube. He's "fully committed to helping as many people as possible start making money through their photos and videos."
Why should you use overlays?
Let’s be honest: It’s almost impossible to find the perfect conditions for a photo. Overlays solve that problem: if there’s a flat sky that makes the photo boring you can add some clouds, reflections and other elements to make it more interesting and eye-catching. It's the same approach that some photographers might take when using photo editing software to replace a sky in Photoshop.
Here’s how you can make sure to add more depth to your shots using overlays.
Think of your photo as a 3D space. How many layers can you identify?
OR
If you apply overlays to your photo, you’re basically creating extra layers; hence you’re adding depth to make the photo more interesting.
You can add one or more overlays to the same photo, but it’s important to keep it natural and don’t make it look fake.
This photo was shot in Wales on a very nice day. I like the overall shot but I felt I could add something extra to make it look even better. I tried adding a few clouds and the sun coming from the right.
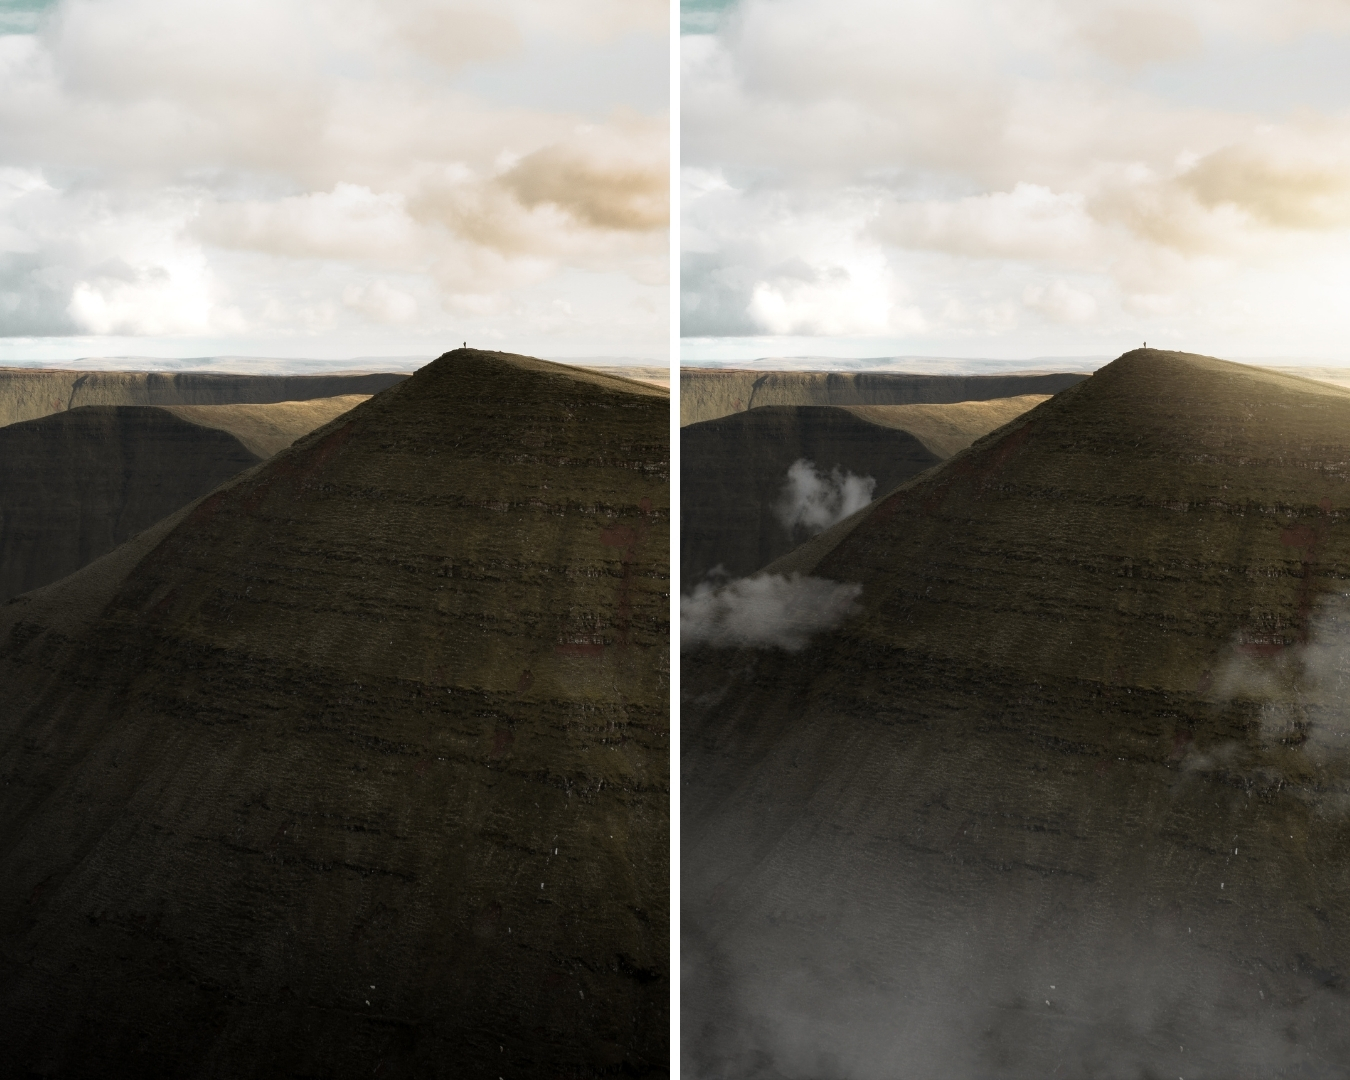
In this way I added a lot of depth with three or four extra layers: it’s just so much more interesting. The same thing can be done with products, portraits and any other type of photography. Here are a few more before/after images:
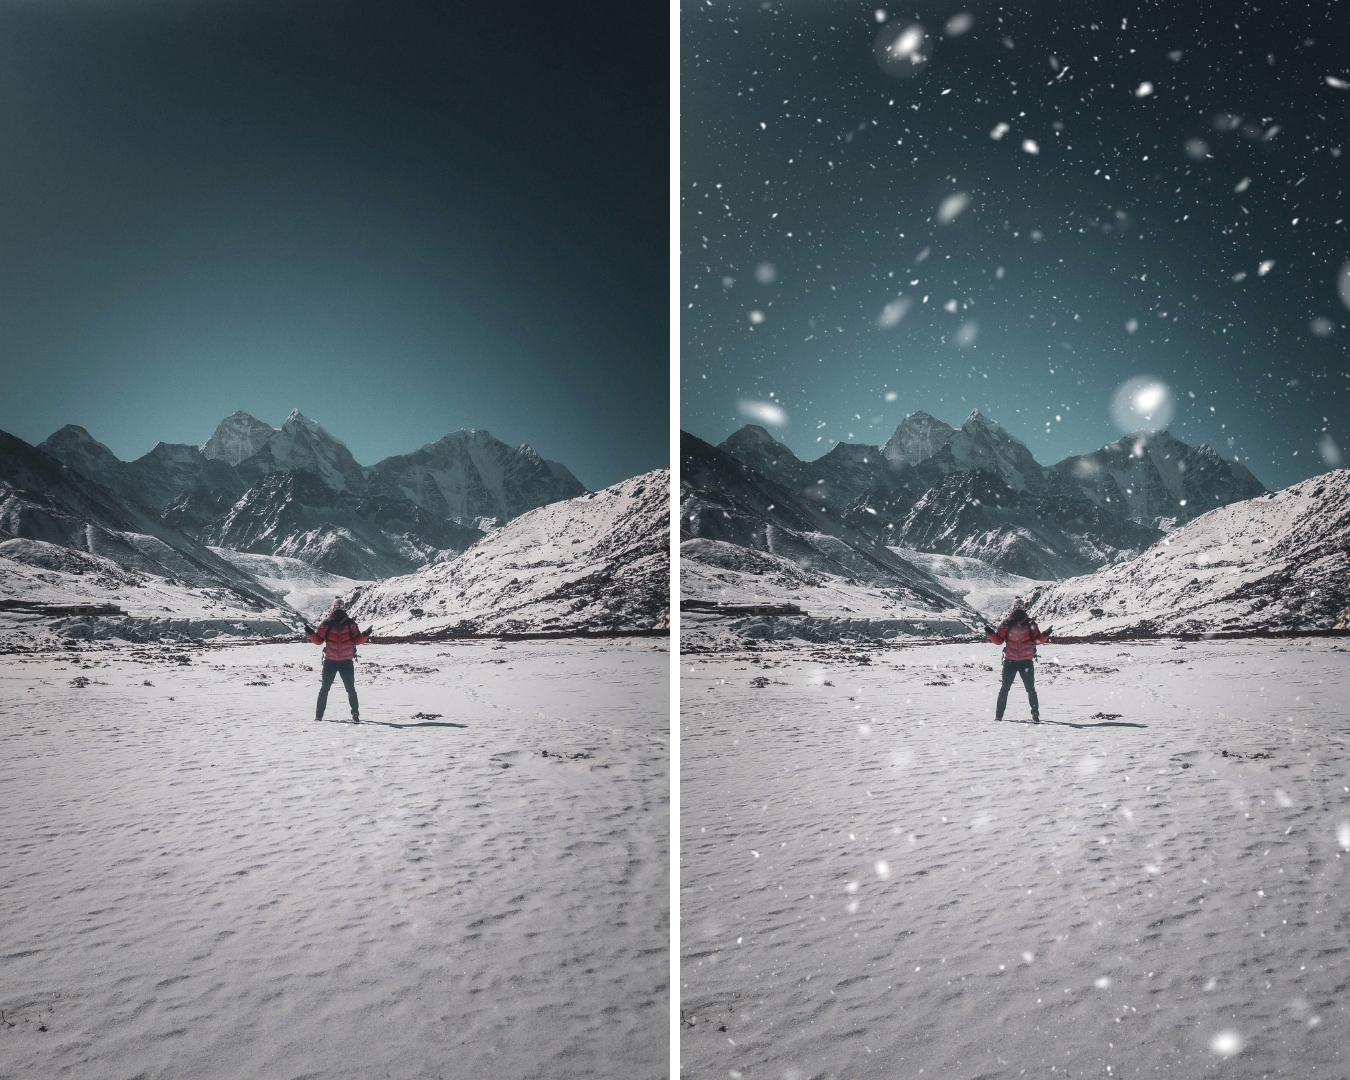

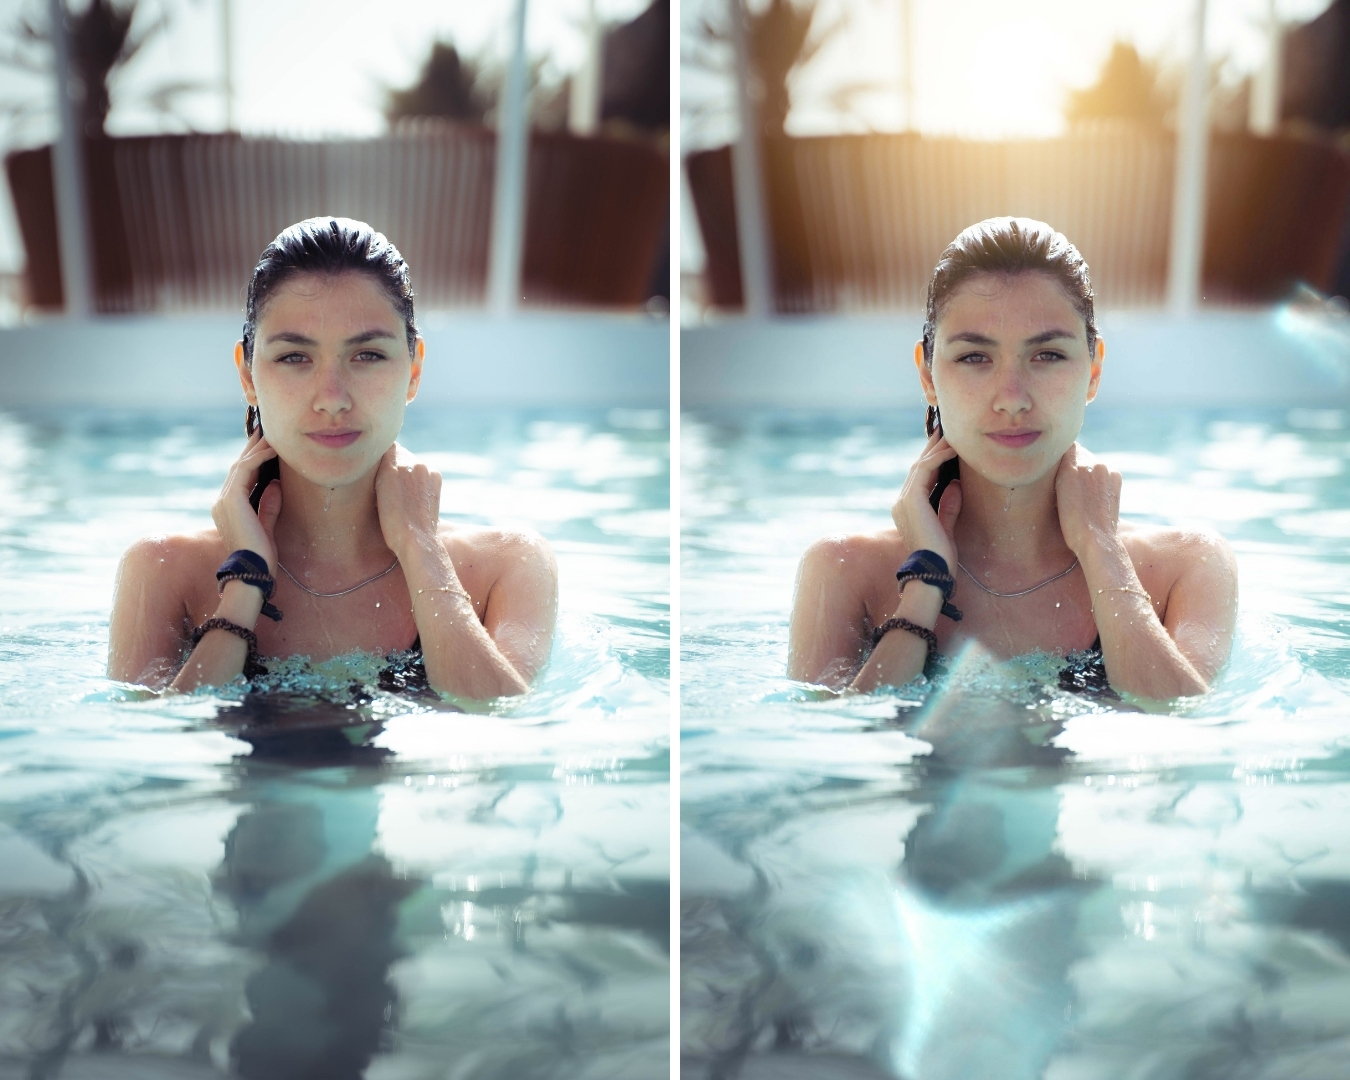
Through my Instagram and TikTok I saw a lot of interest in these overlays so I created a pack containing 480 overlays for desktop and mobile (they can be used on Mobile too with the free app PicsArt), and they're available on my website.
Top-quality overlays are an essential part of any beginner, amateur, or professional photographer's toolkit. They’re super easy to use, highly detailed, and make improving your photography effortless.
Using overlays is not difficult but it does require some practice at first. Do not give up and practice, practice, practice!
Get the Digital Camera World Newsletter
The best camera deals, reviews, product advice, and unmissable photography news, direct to your inbox!
Lauren is a writer, reviewer, and photographer with ten years of experience in the camera industry. She's the former Managing Editor of Digital Camera World, and previously served as Editor of Digital Photographer magazine, Technique editor for PhotoPlus: The Canon Magazine, and Deputy Editor of our sister publication, Digital Camera Magazine. An experienced journalist and freelance photographer, Lauren also has bylines at Tech Radar, Space.com, Canon Europe, PCGamesN, T3, Stuff, and British Airways' in-flight magazine. When she's not testing gear for DCW, she's probably in the kitchen testing yet another new curry recipe or walking in the Cotswolds with her Flat-coated Retriever.
