Use Photoshop's Depth Blur filter to automatically blur distracting backdrops
Understand the new Depth Blur filter in Photoshop and how to automatically blur out a distracting backdrop
Watch video: Use the Depth Blur filter in Photoshop CC
Photoshop CC offers a box of tricks for all sorts of effects. There are those that can transform your image into something completely unreal. Then there are those that let you make more realistic changes. The Depth Blur filter falls into the latter category. As the name suggests, it enables you to mimic the effects of in-camera blur by throwing a background out of focus. If your image has a foreground in front of your subject, this is blurred too. The result is realistic fall-off either side of your point of focus.
• Read more: Best photo editing software
Of course, we’ve been able to simulate depth-of-field effects in Photoshop for a long time by using filters like Lens Blur. But Depth Blur is one of the new range of Neural Filters, which means it works by employing machine learning to analyze the content of your photo. It automatically recognizes your subject and adds the blur to the areas in front of or behind them without any effort on your part. Not only does it blur the foreground and background, it also creates transitional blur, so the further away a point is from your subject, the more blurred it becomes.
A range of controls within the neural filter let us fine-tune the characteristics of the blur. We can expand or contract the plane of focus, strengthen the blur and add haziness. At the time of writing, the Depth Blur filter is in the beta stage, so it’s still in development. But even at this point, it’s an impressive tool for mimicking in-camera blur with the minimum amount of effort.
01 Enable the filter
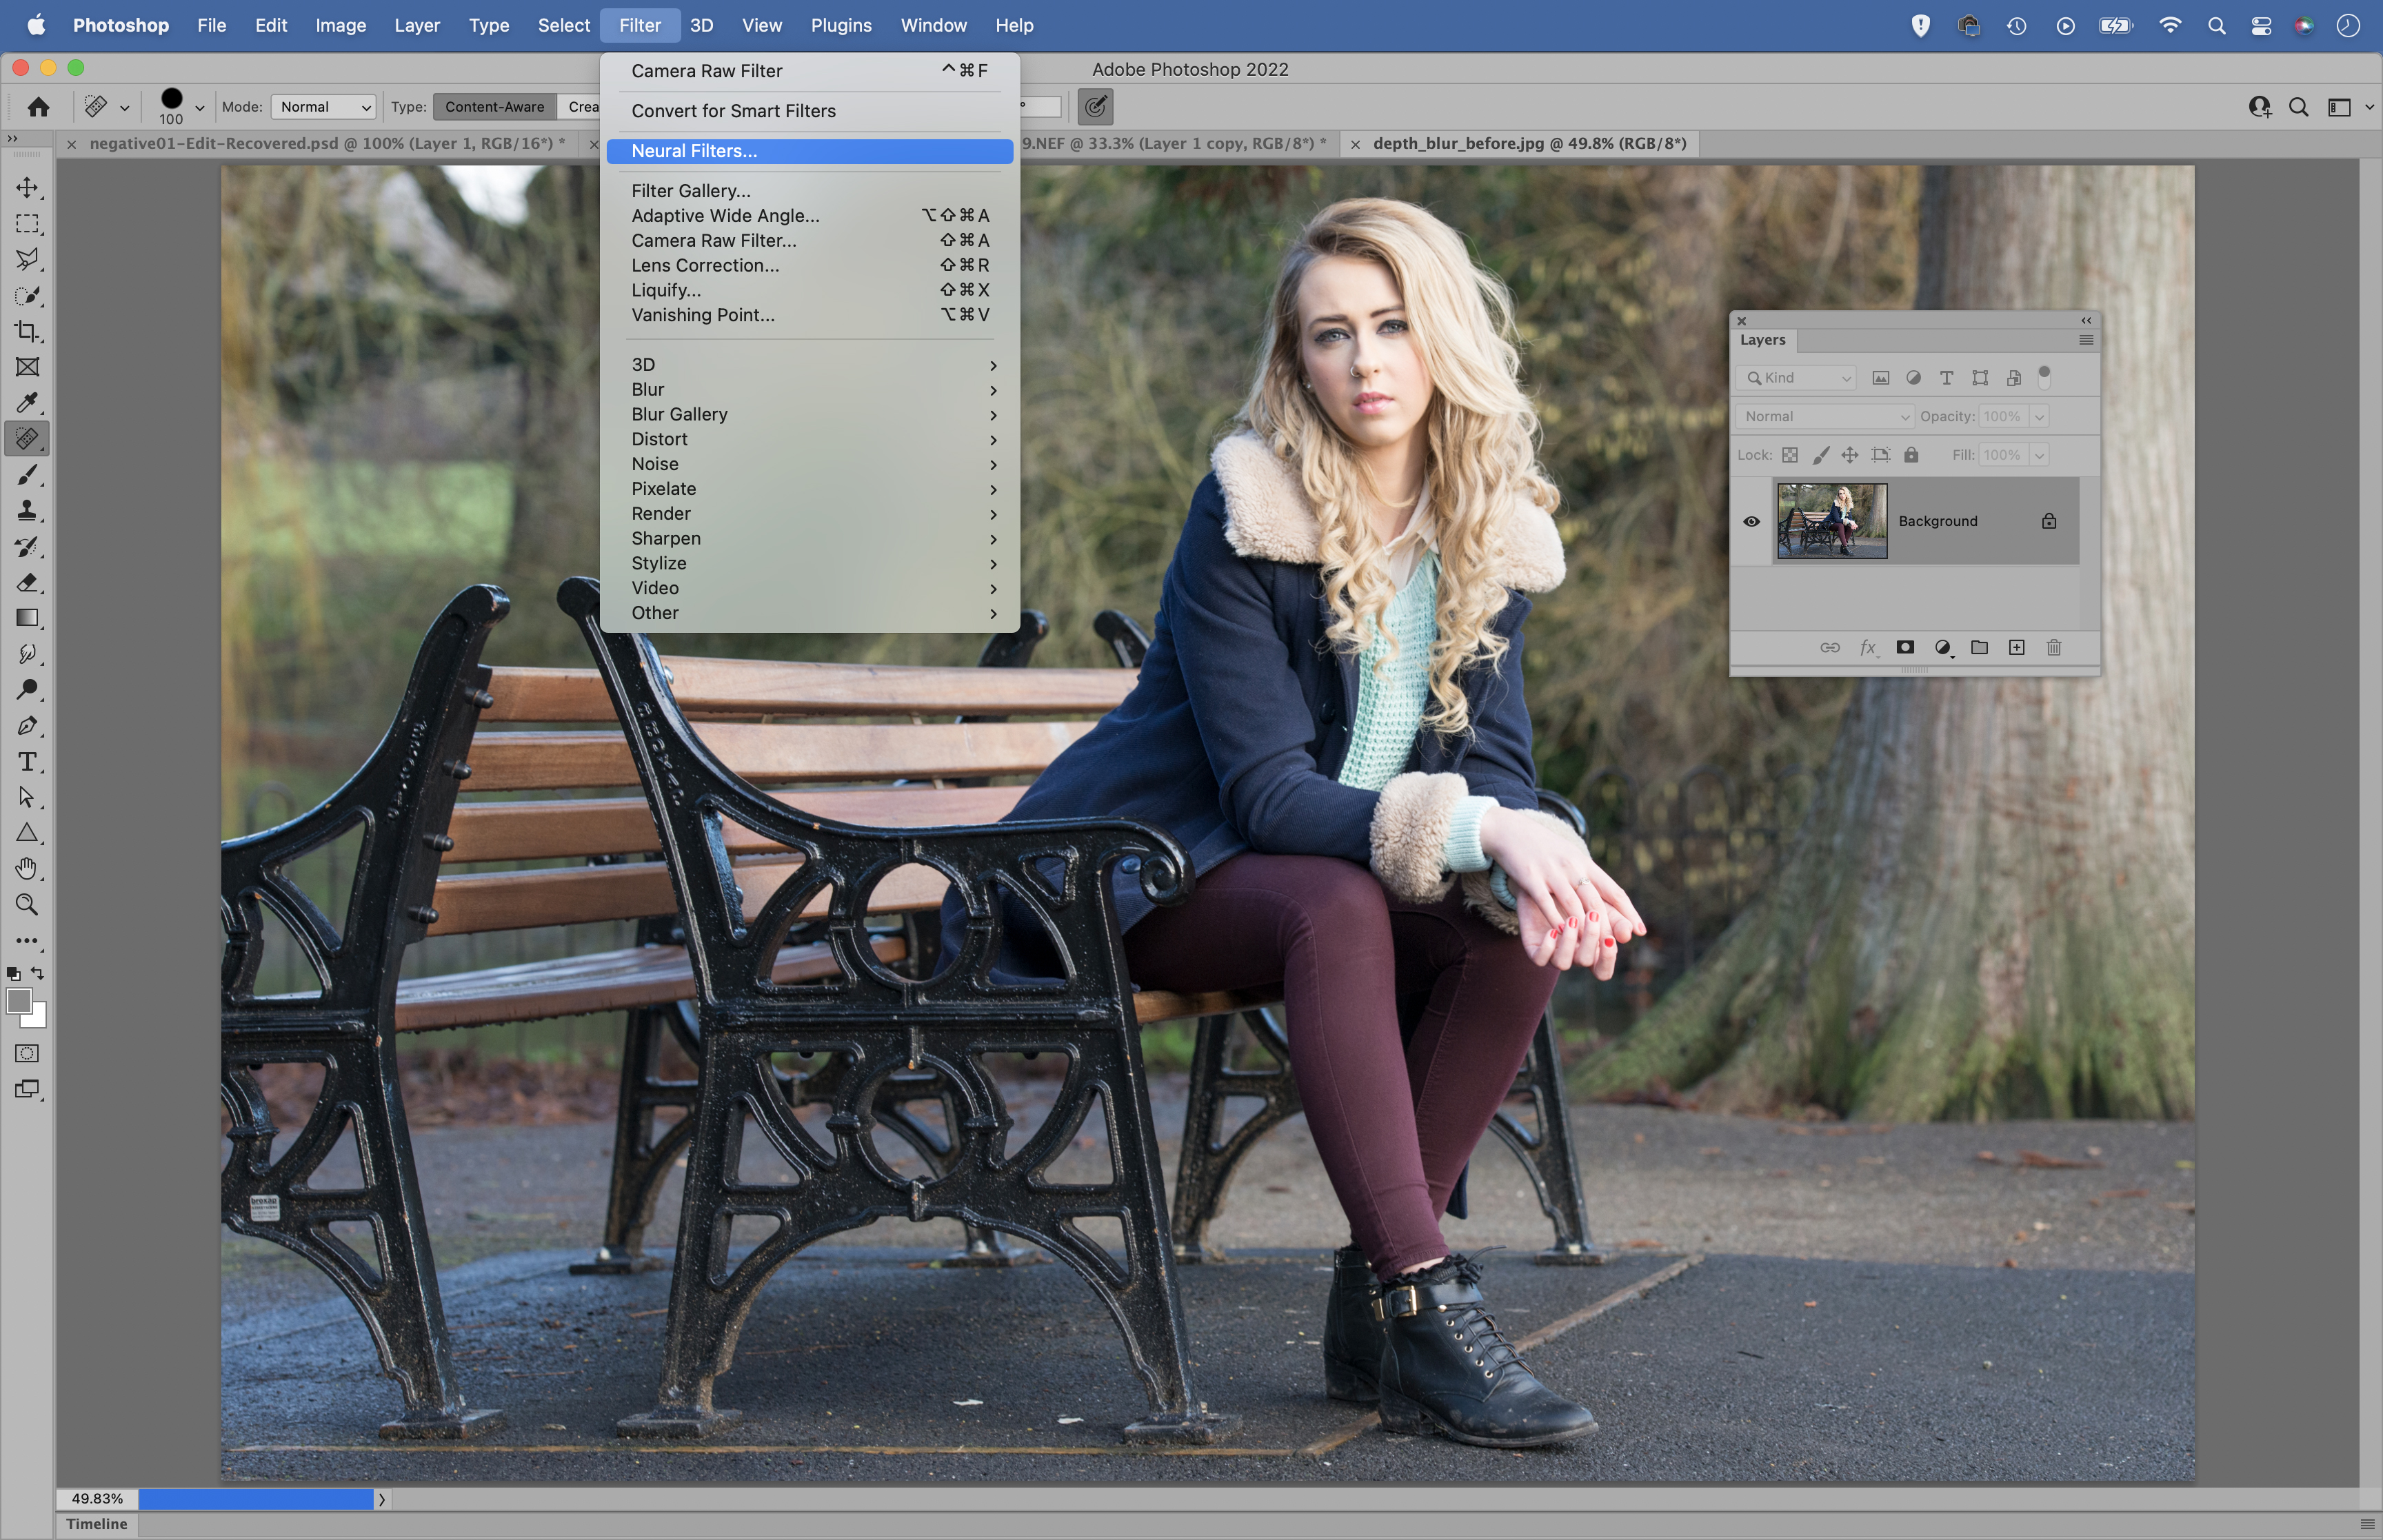
Open your image, go to Filter > Neural Filters. You’ll find Depth Blur in the Beta section. If it’s your first time using it you’ll need to download it. Once done, turn the filter on and it will analyze the shot, determine what your subject is and blur out the surroundings.
02 Choose a focus point
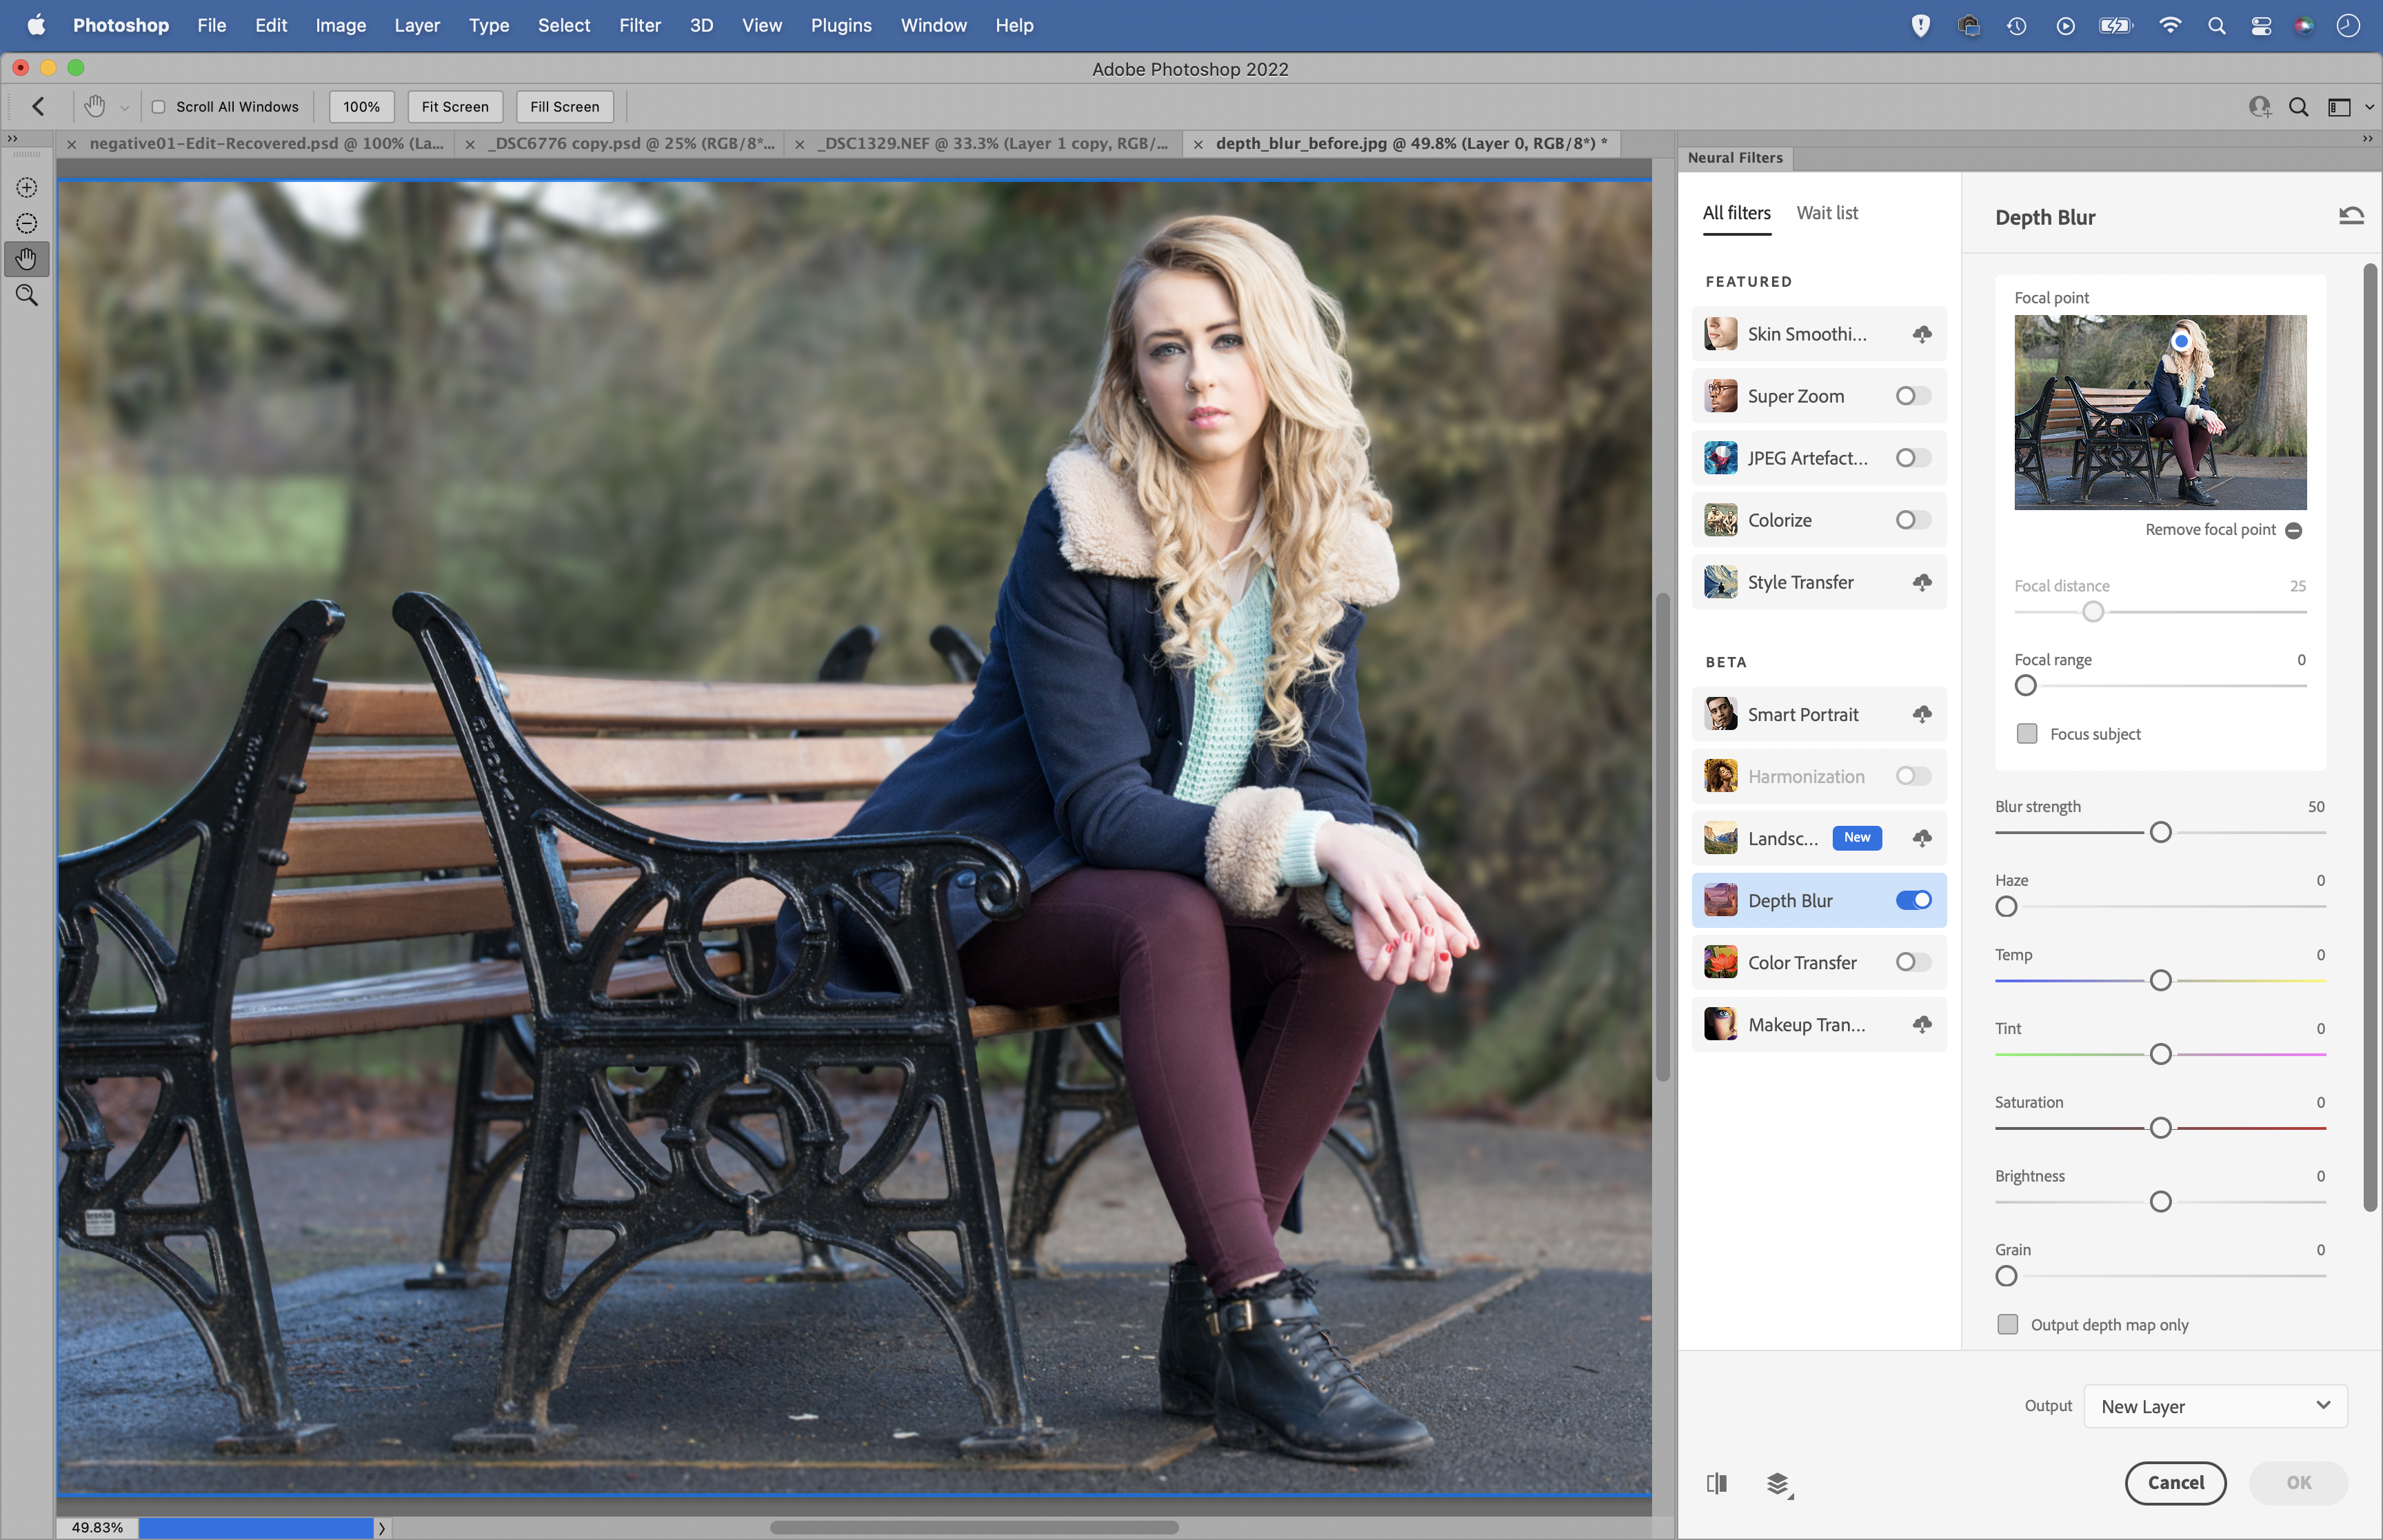
The filter will automatically choose a point of focus for you (with portraits, for example, it will recognize and snap on to the face), but you can choose a different focus point. Uncheck the ‘Focus Subject’ box then click on the preview image to choose a focus point.
03 Set a range
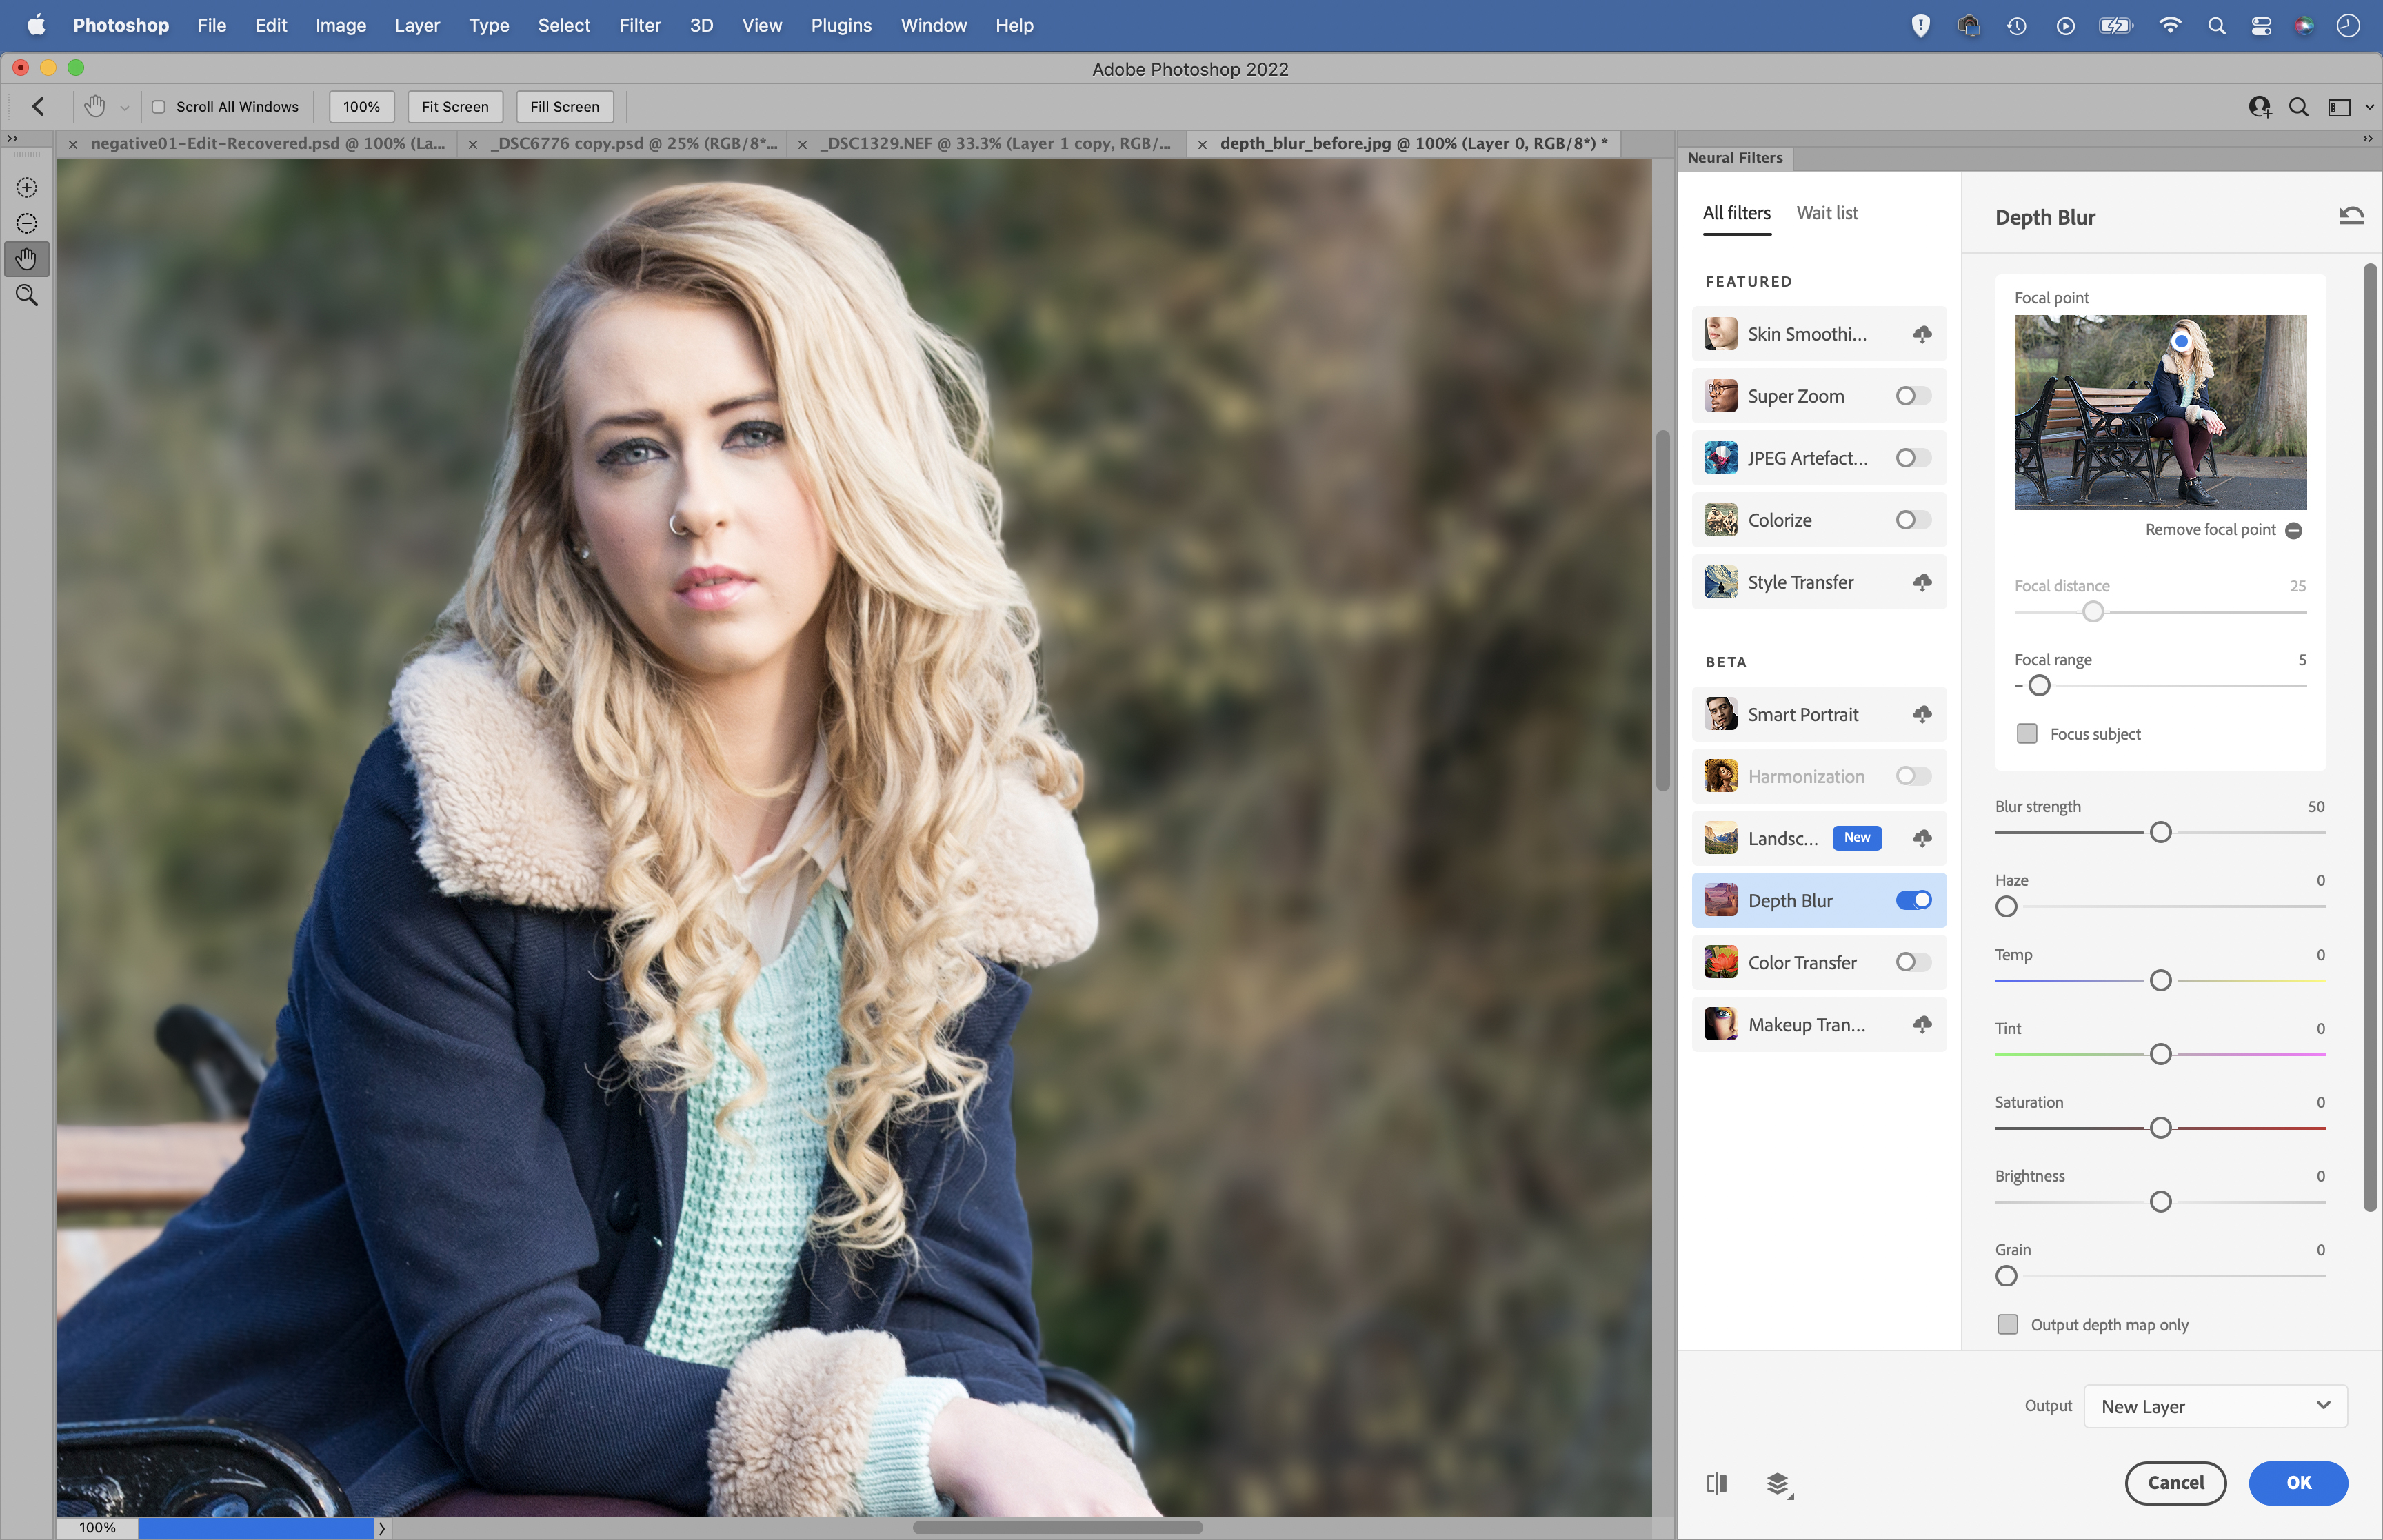
The Focal Range slider lets you expand or contract your depth of field. It’s similar to your aperture setting in that a narrower aperture will give you more depth of field. A low focal range setting works best for us here and keeps the depth-of-field effect very shallow.
04 Strengthen the blur
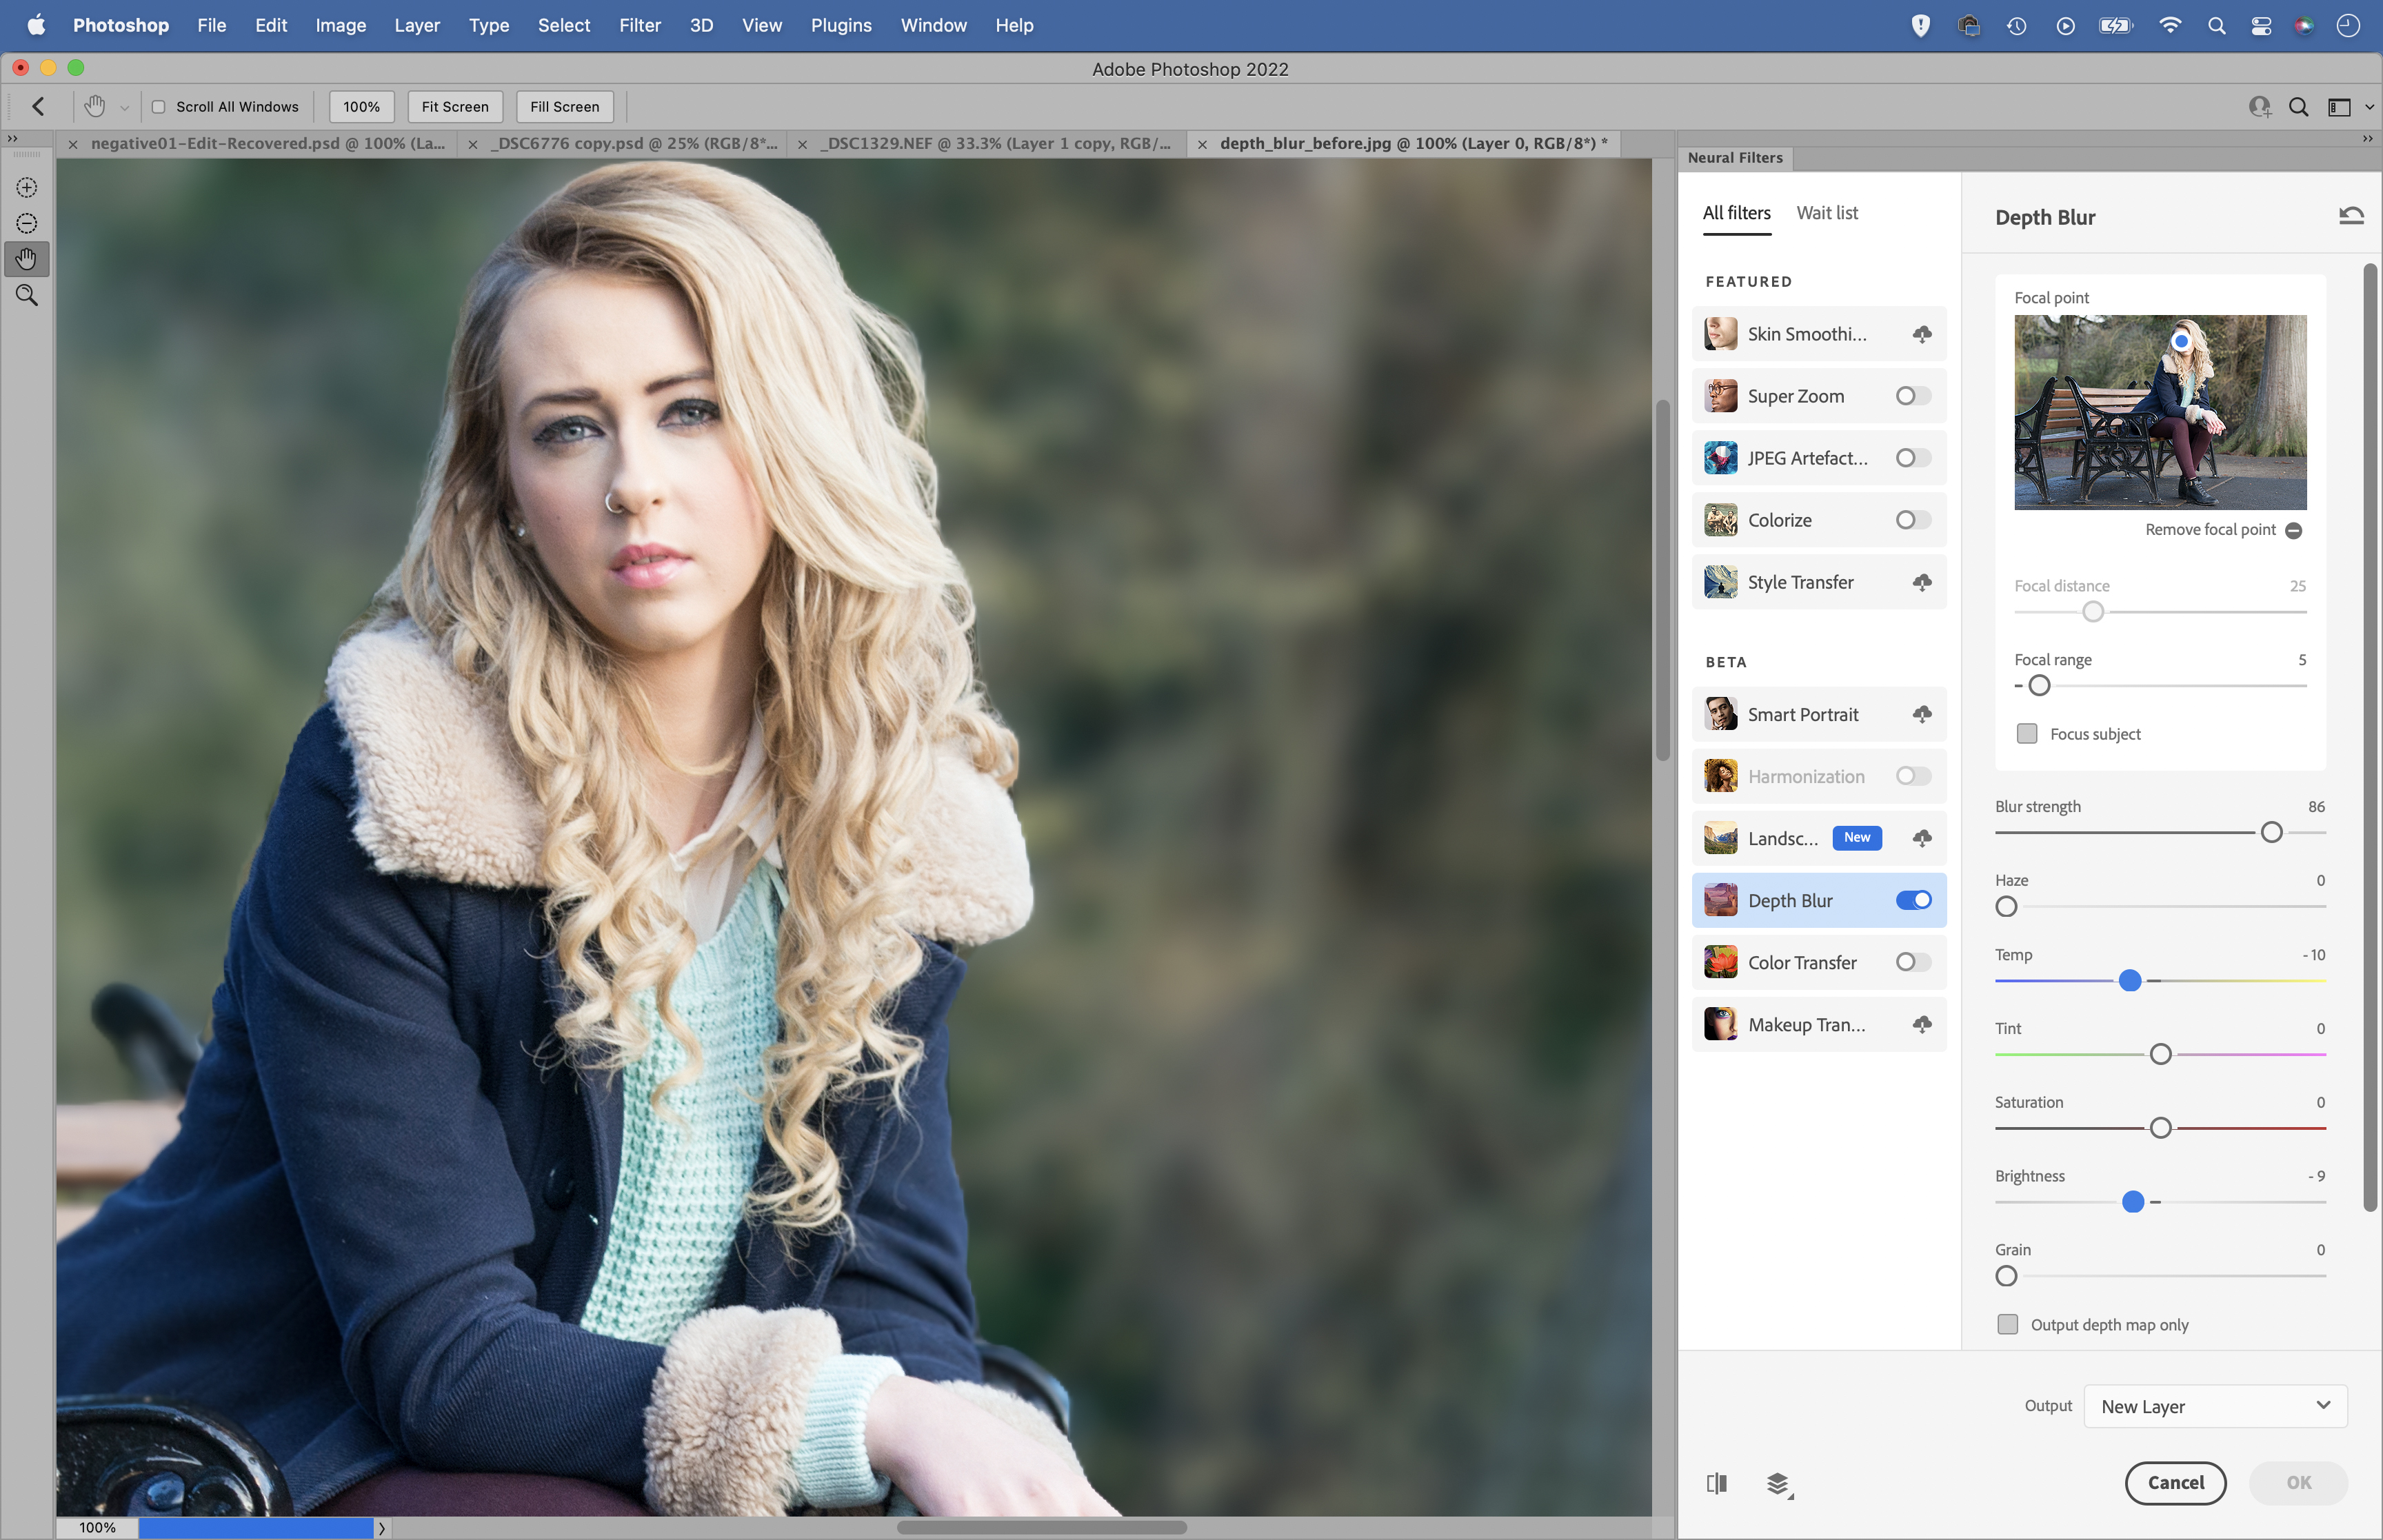
Use the Blur Strength slider to control how heavy the blur looks. The Haze slider and the four sliders below it let you change the characteristics of the blur. We’ve lowered the temperature here to give the background a cooler feel, and reduced the brightness slightly.
05 Increase the grain
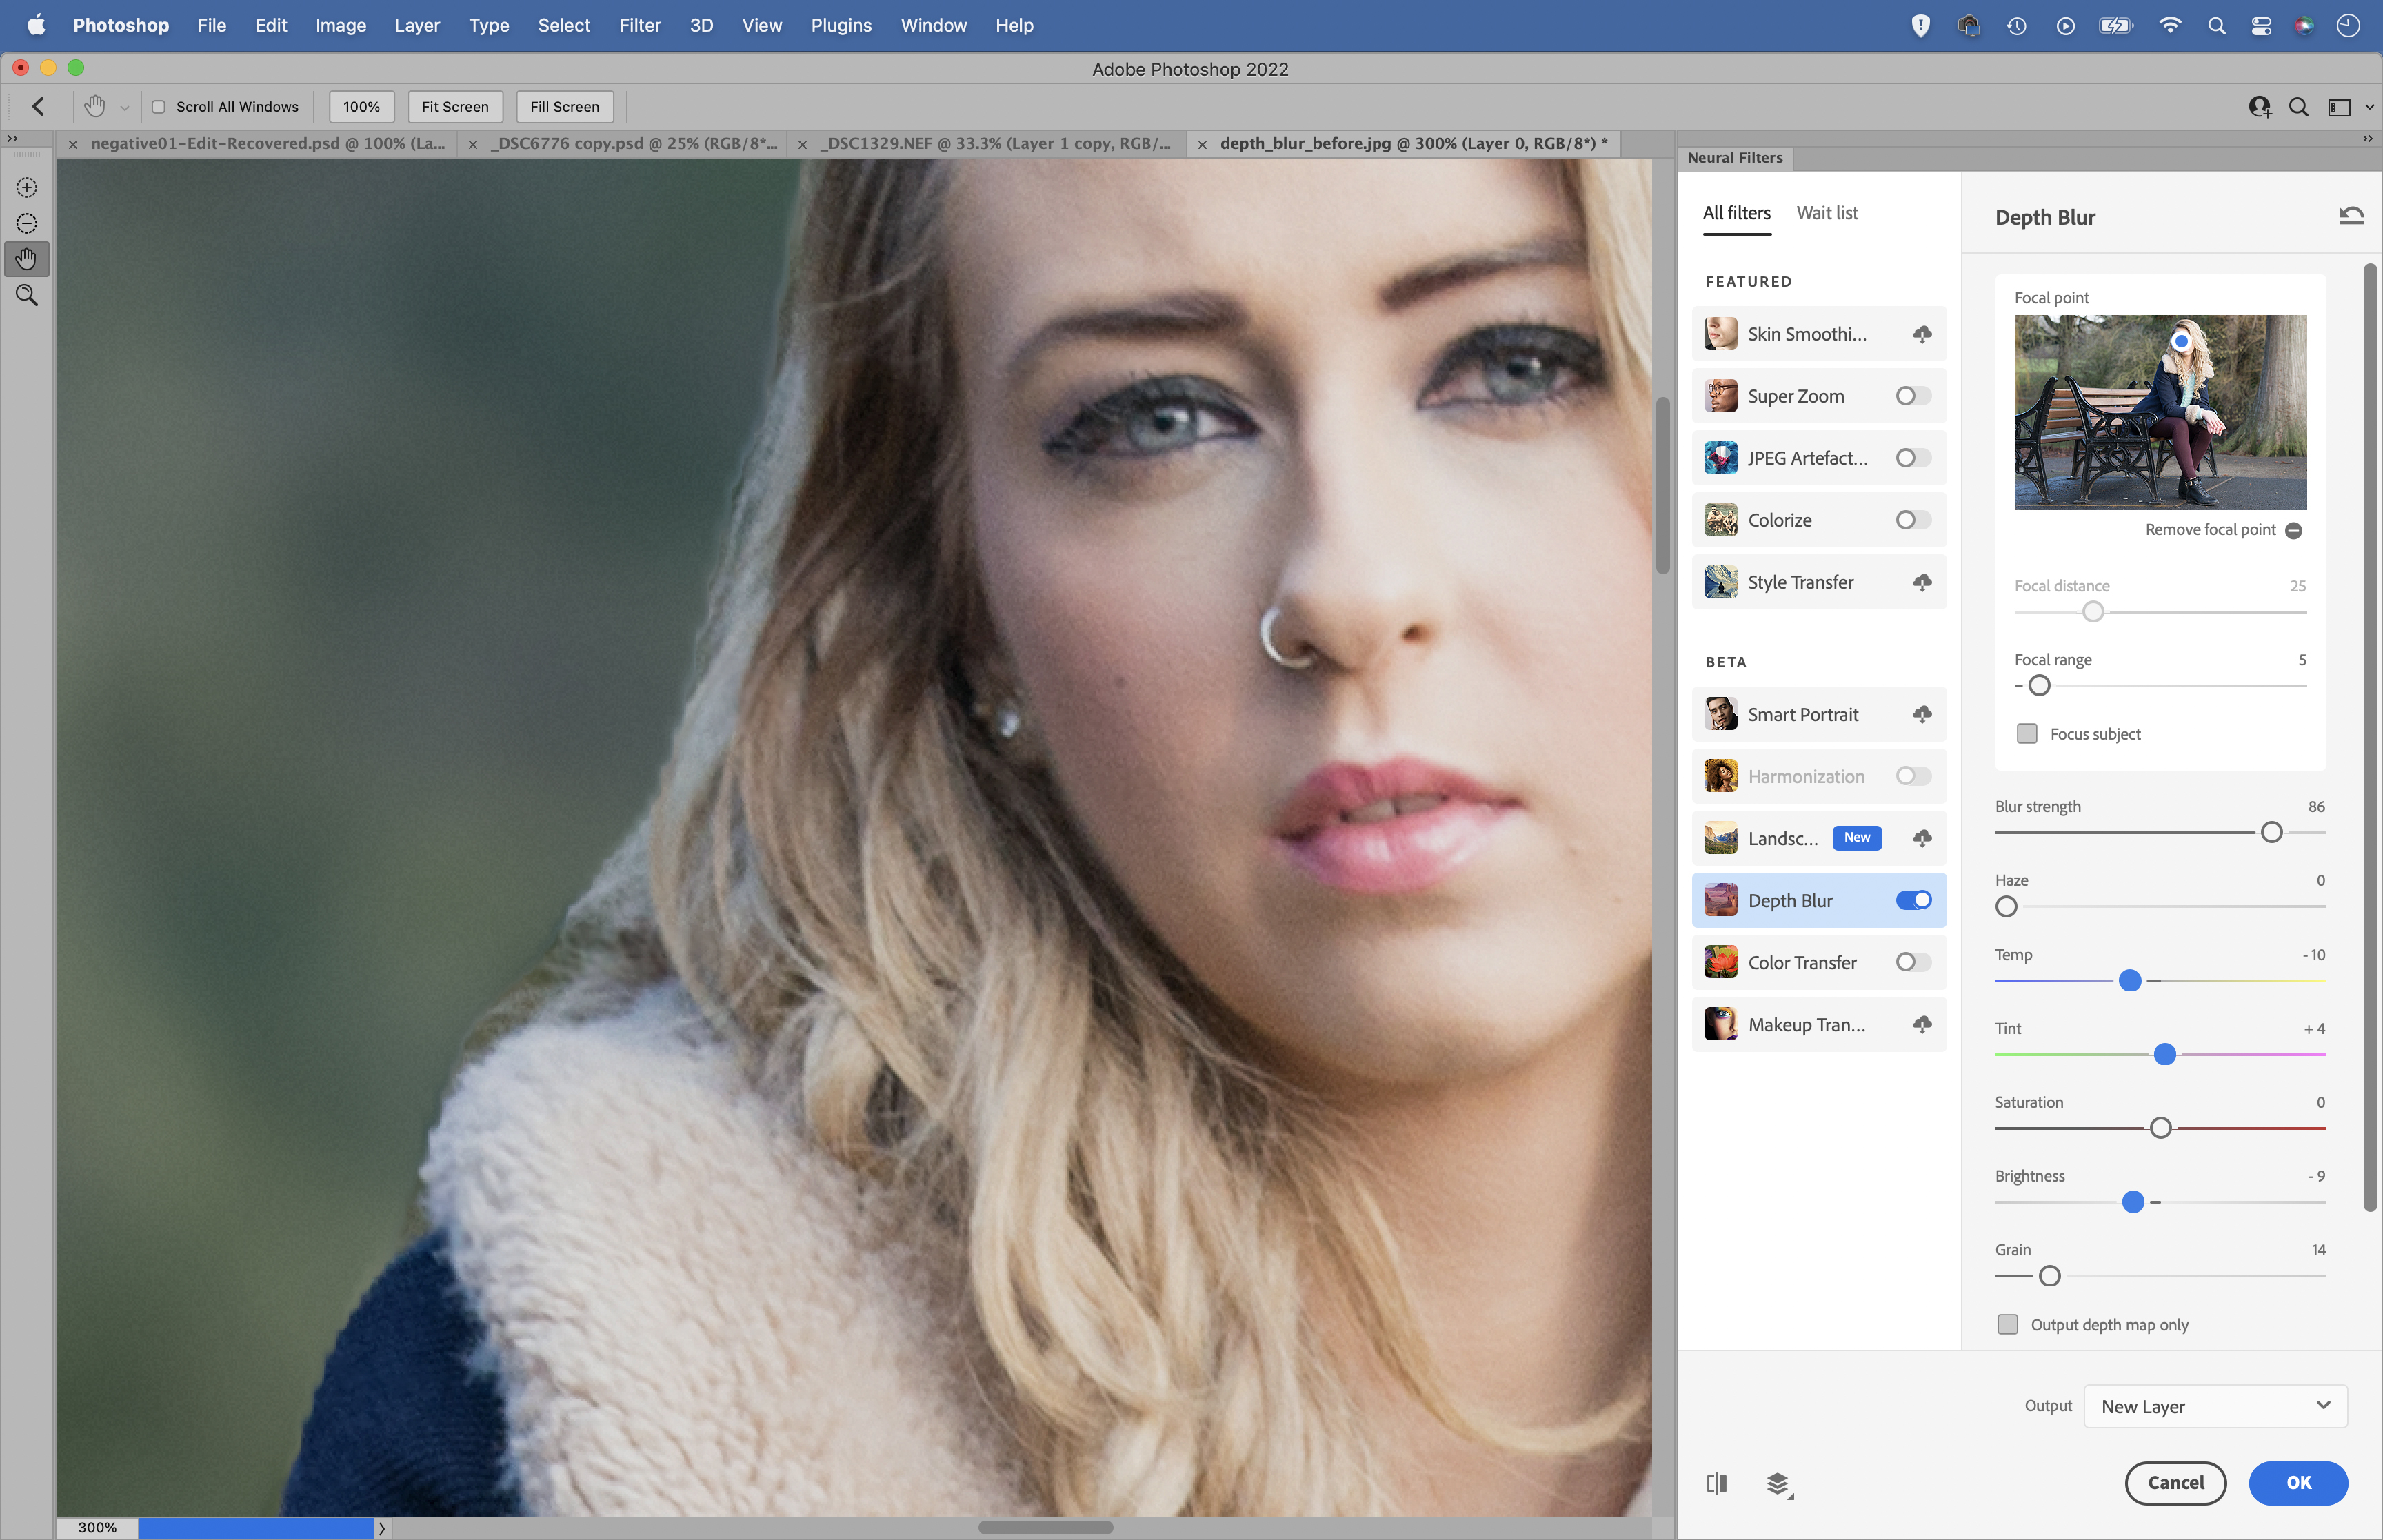
One of the problems with adding blur to backdrops is that it smooths out the grain in shots. This could look out of place. Zoom in close and use the Grain slider to assess the blurred areas, matching the noise to the sharp parts of the scene.
06 Check the edges
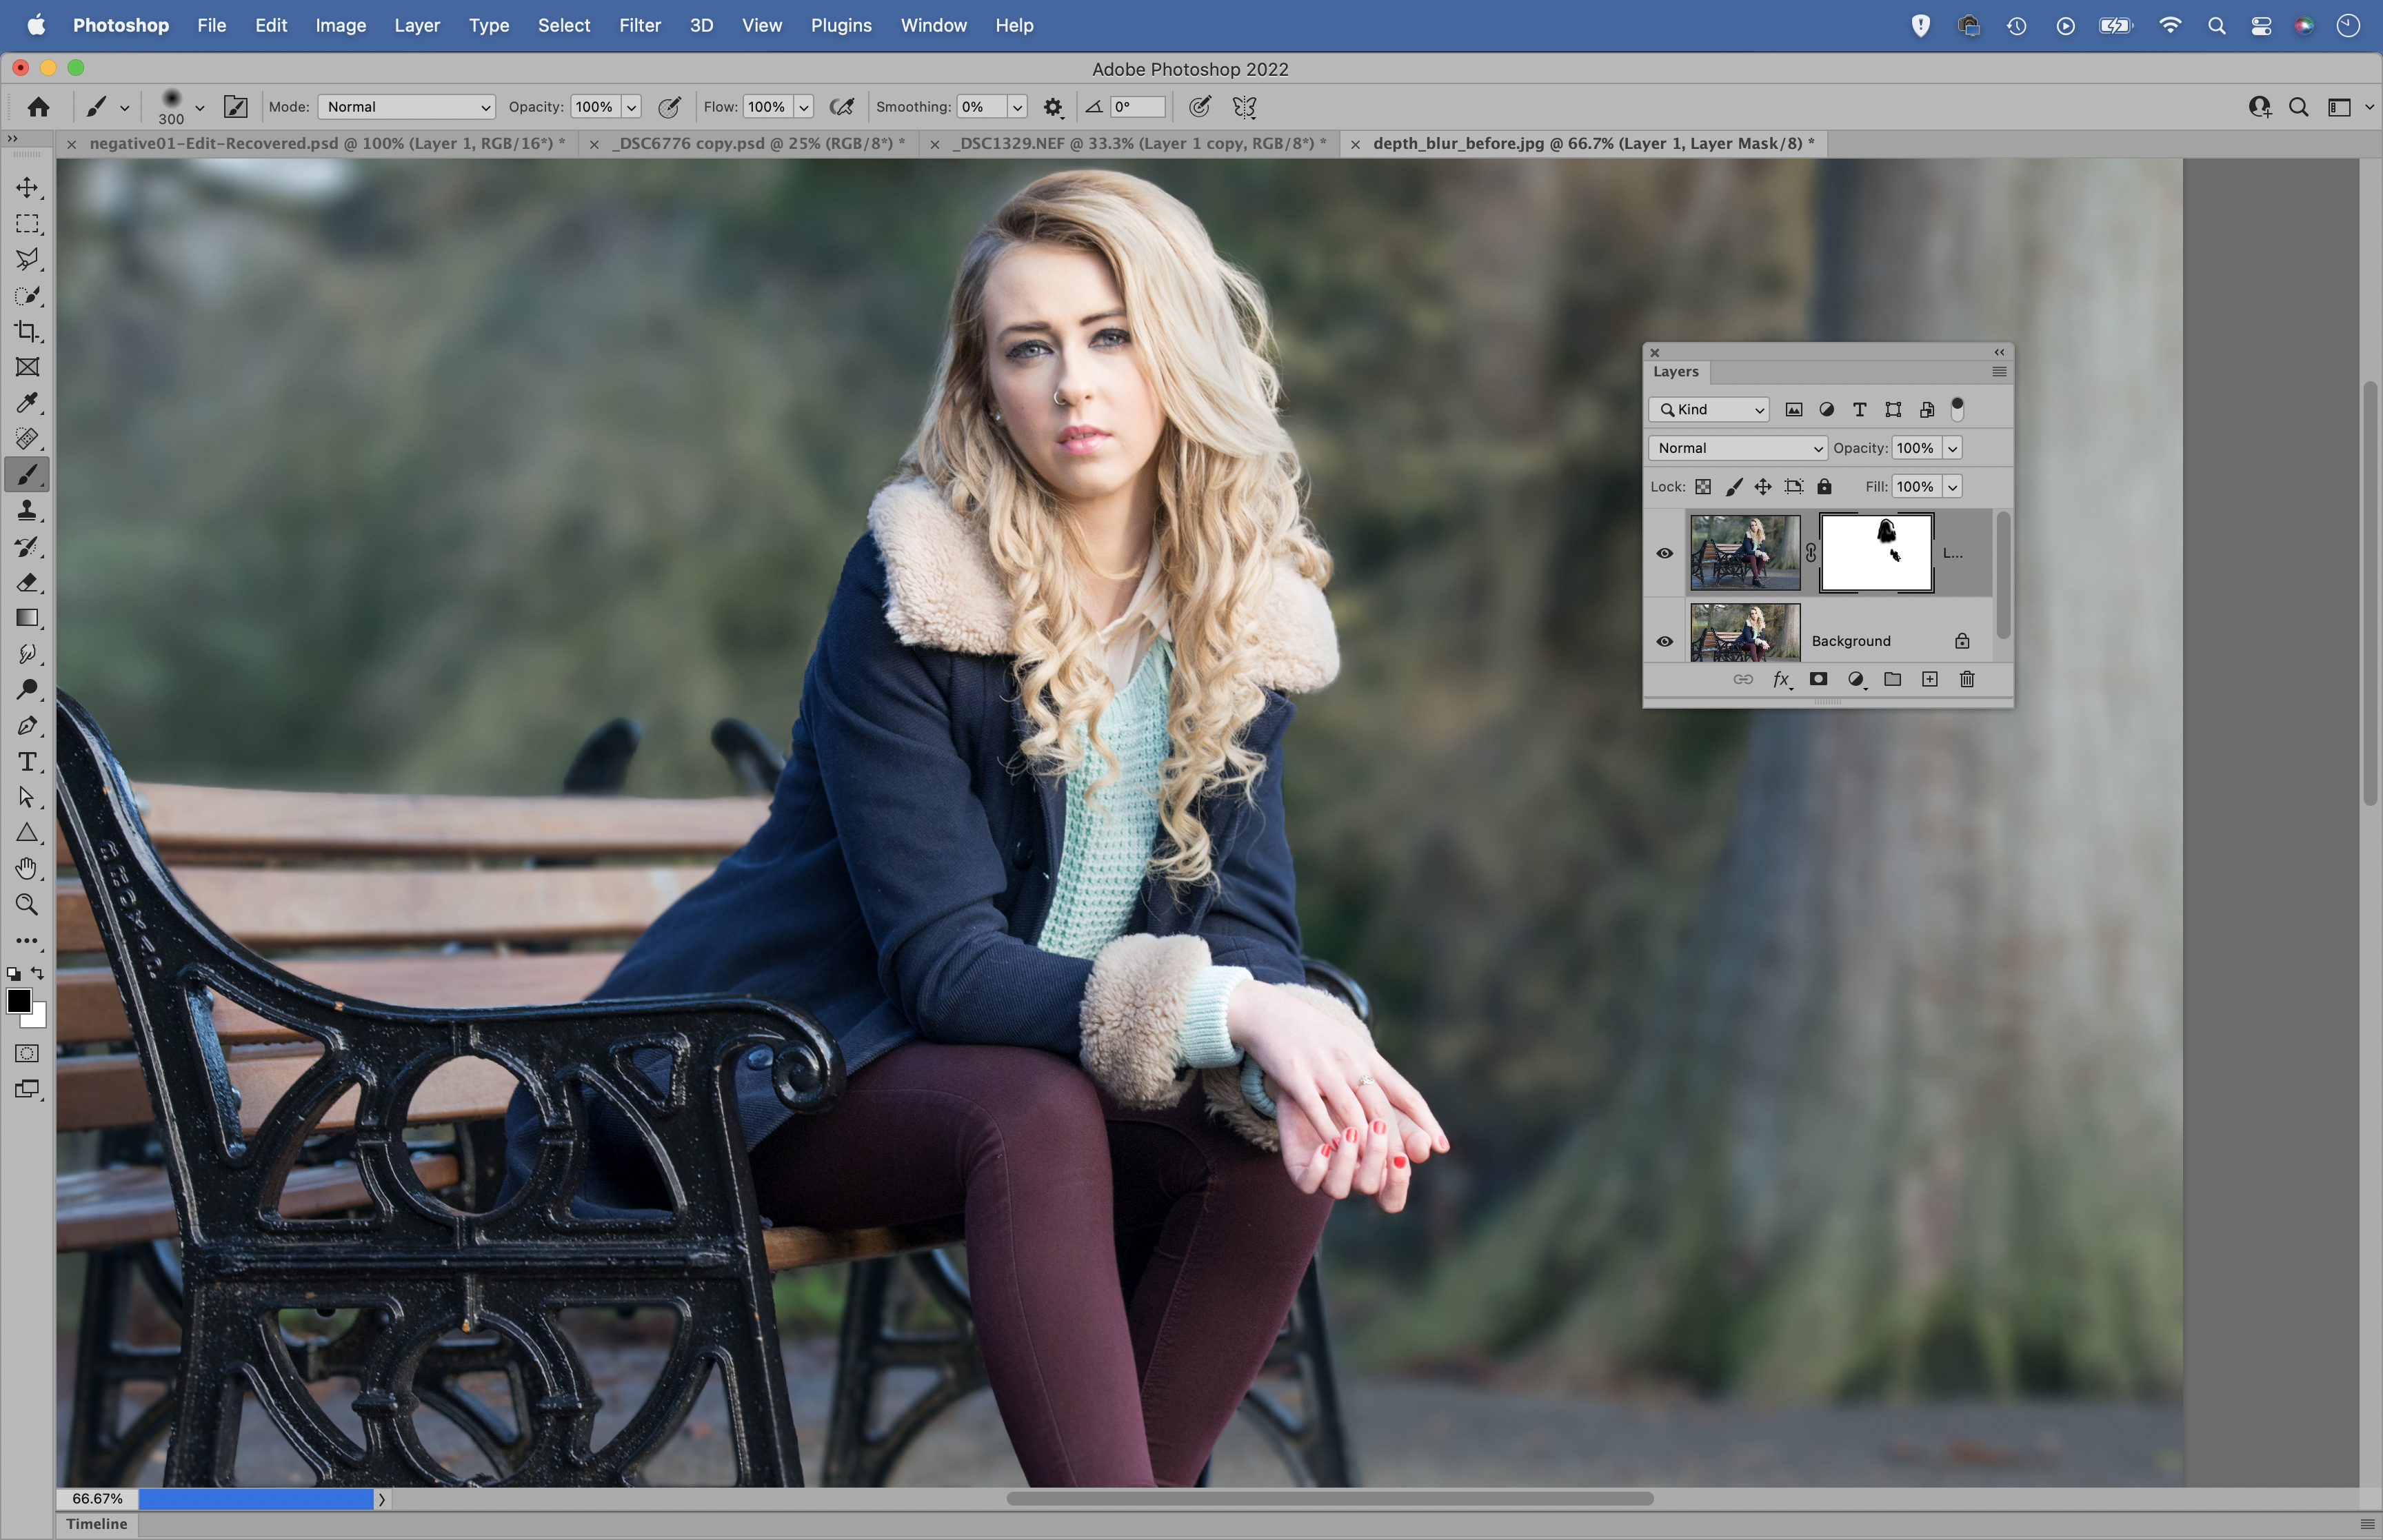
When you’re happy choose Output > New Layer and hit OK. Zoom in to check the edges of the subject. If you find any areas that look wrong, add a layer mask to the layer then paint black over the blur to hide the effect, revealing the sharper image on the layer below.
PhotoPlus: The Canon Magazine is the world's only monthly newsstand title that's 100% devoted to Canon, so you can be sure the magazine is completely relevant to your system.
Read more:
The best photo editing software: image editors for novices through to pros
The best photo-editing laptops: top laptops for photographers
10 best online photography courses – from beginner guides to masterclasses
Get the Digital Camera World Newsletter
The best camera deals, reviews, product advice, and unmissable photography news, direct to your inbox!
The lead technique writer on Digital Camera Magazine, PhotoPlus: The Canon Magazine and N-Photo: The Nikon Magazine, James is a fantastic general practice photographer with an enviable array of skills across every genre of photography.
Whether it's flash photography techniques like stroboscopic portraits, astrophotography projects like photographing the Northern Lights, or turning sound into art by making paint dance on a set of speakers, James' tutorials and projects are as creative as they are enjoyable.
He's also a wizard at the dark arts of Photoshop, Lightroom and Affinity Photo, and is capable of some genuine black magic in the digital darkroom, making him one of the leading authorities on photo editing software and techniques.


