Use Photoshop's High Pass Filter to selectively sharpen your photos like a pro
Selectively sharpen the focal point of your images in Adobe CC, using this effective expert high-pass hack
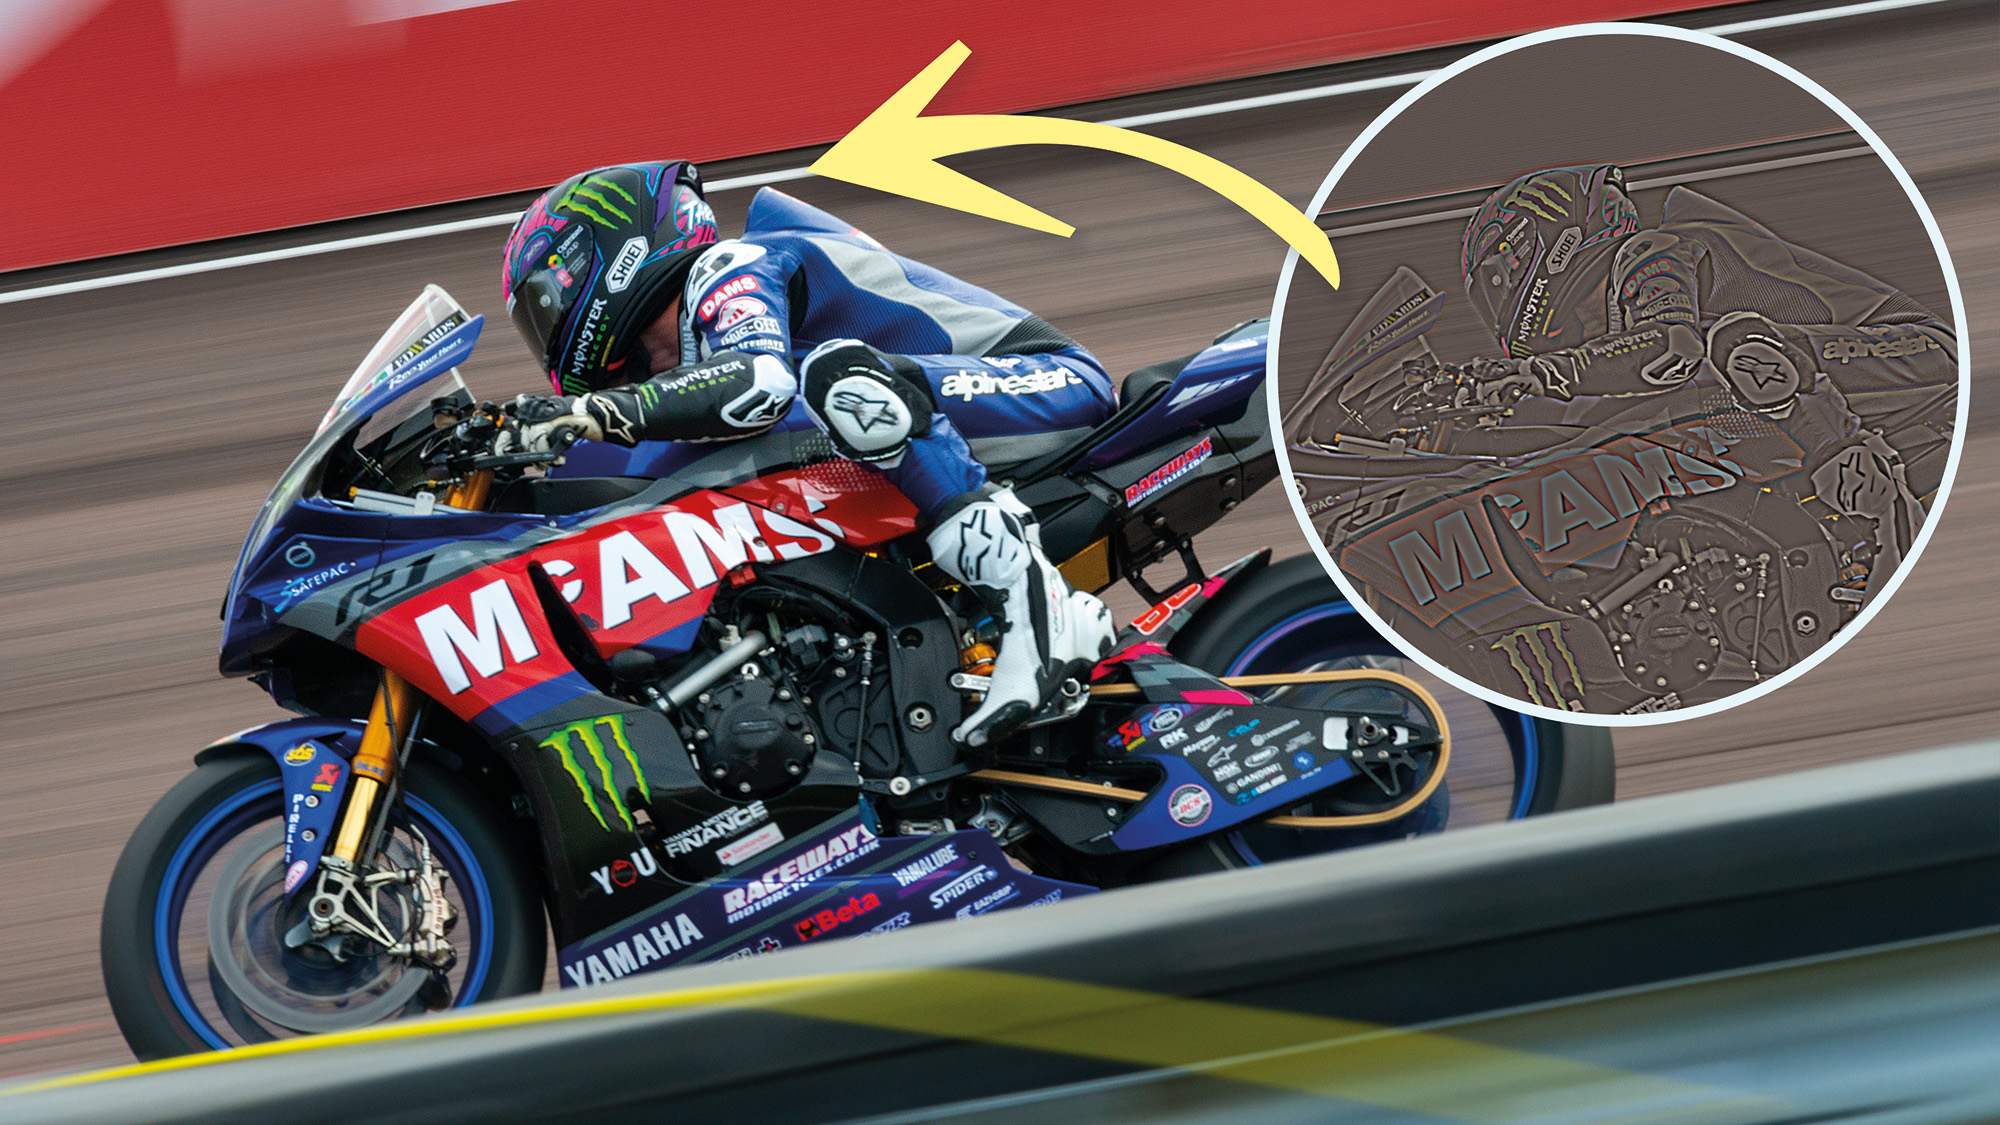
There are a multitude of ways to sharpen images in Adobe Photoshop – one of the best photo editing software suites on the market. But by applying the High Pass Filter in Photoshop CC, you can selectively paint a sharpening effect onto your images. This means you can choose where to sharpen your image, likely your focal point.
The advantages of this include the ability to direct your viewer's gaze, since they'll be naturally drawn to the sharpest area of the image, while also limiting the sharpening effect to where it's needed. This is particularly helpful if you're working with a shallow depth of field or motion blur, since you're unlikely to want to sharpen these ethereal areas of the frame. Sharpening can also accentuate noise, so the ability to apply it sparingly in low-light shots is invaluable.
Another plus of sharpening in an indestructive manner on layer-based editing software is that you can change the Blending Mode and opacity of your sharpening layer right up until you decide to export your image. So, if you want to selectively sharpen a set of images? Here's how to do it…
1. Add the High Pass Filter
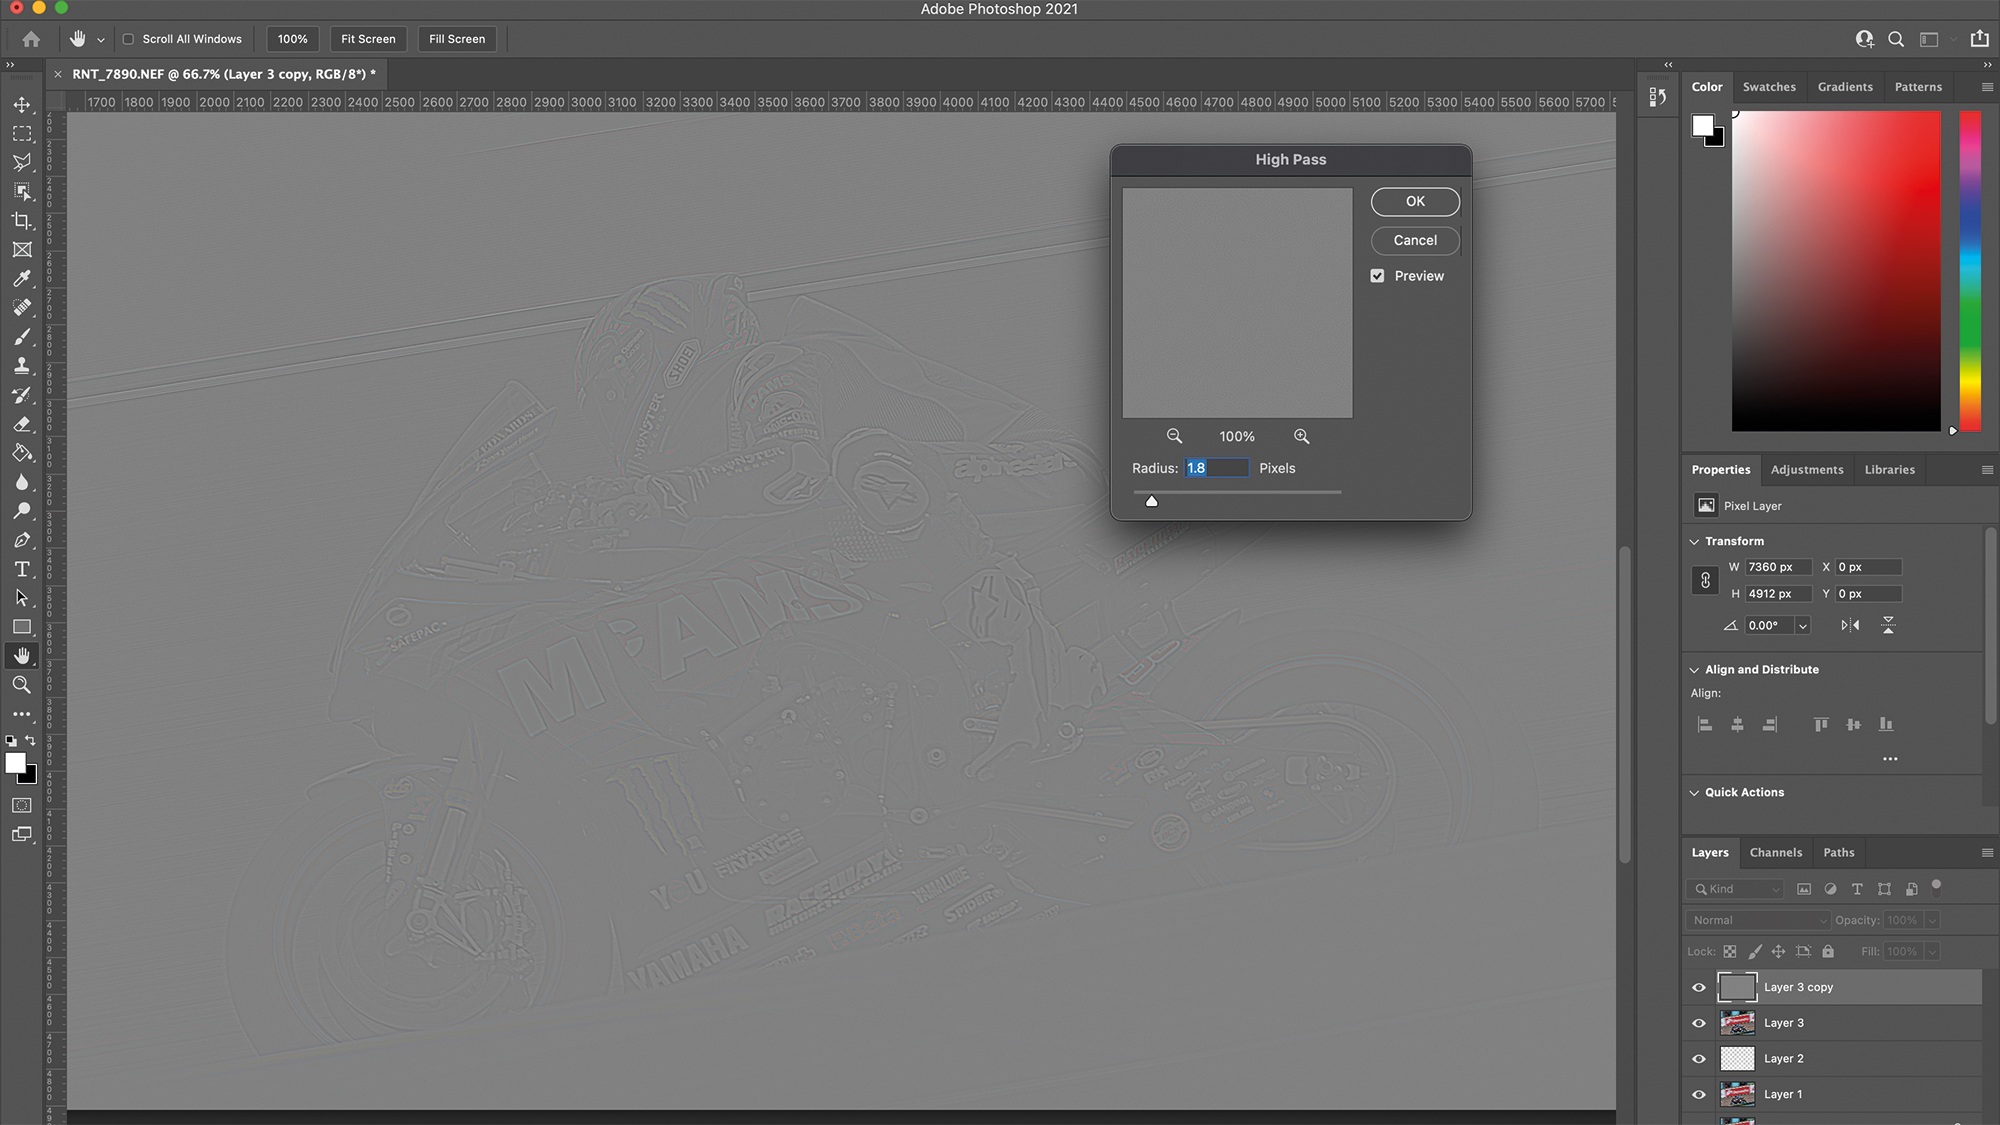
Open your chosen image in Adobe Photoshop CC. Duplicate the background layer (Cmd/Ctrl+J) and select Filter>Other>High Pass. Move the Radius Slider until your subject's outline is barely visible on the gray overlay – I usually find around 1.8-2.0px works well – and hit OK.
2. Change the Blending Mode
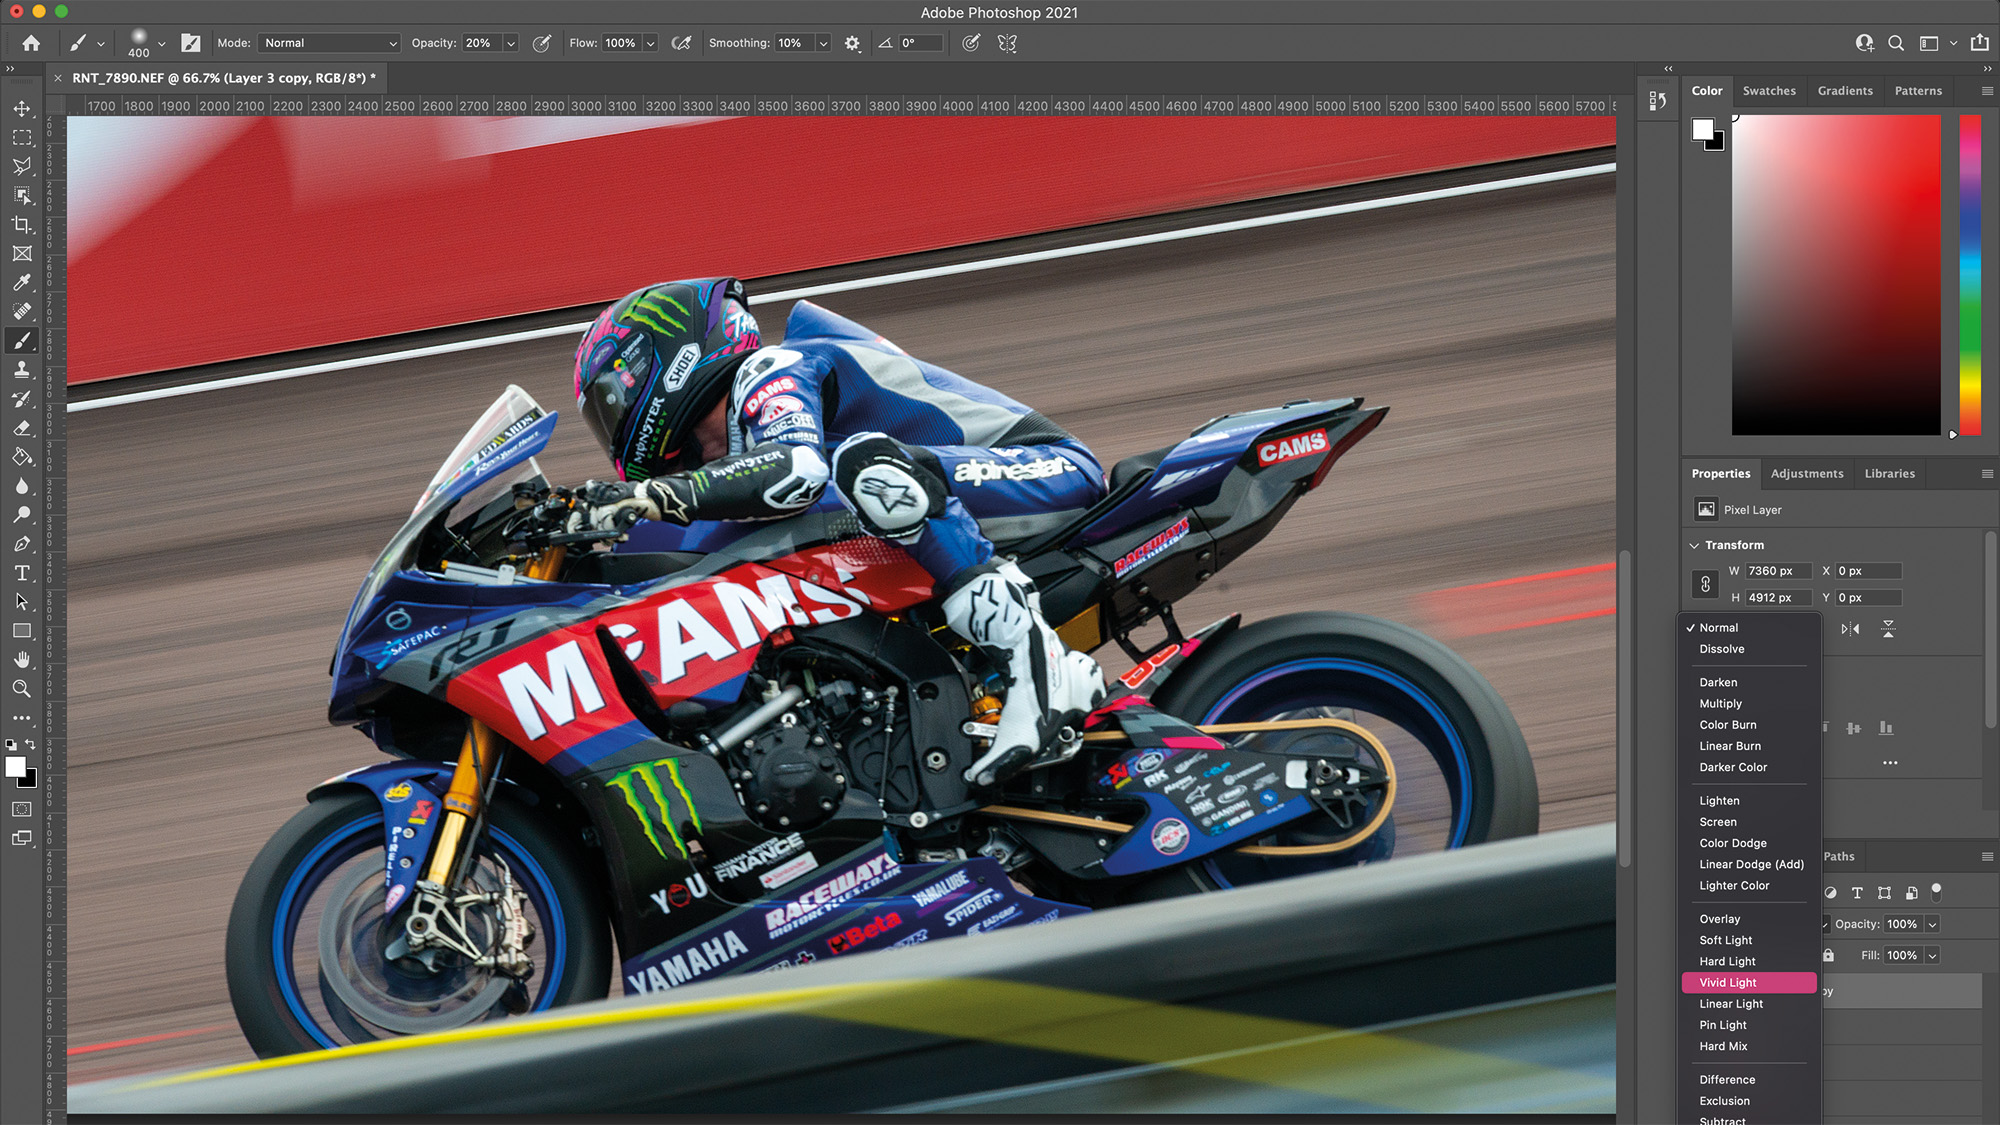
Change the Blending Mode to Vivid Light. This will remove the gray overlay, but increase the contrast of any edges to sharpen the image. You can lessen the intensity of the sharpening effect by reducing the layer opacity or changing the Blending Mode to Hard Light, Overlay or Soft Light. If you're unsure, Overlay represents a good middle ground.
3. Apply a layer mask
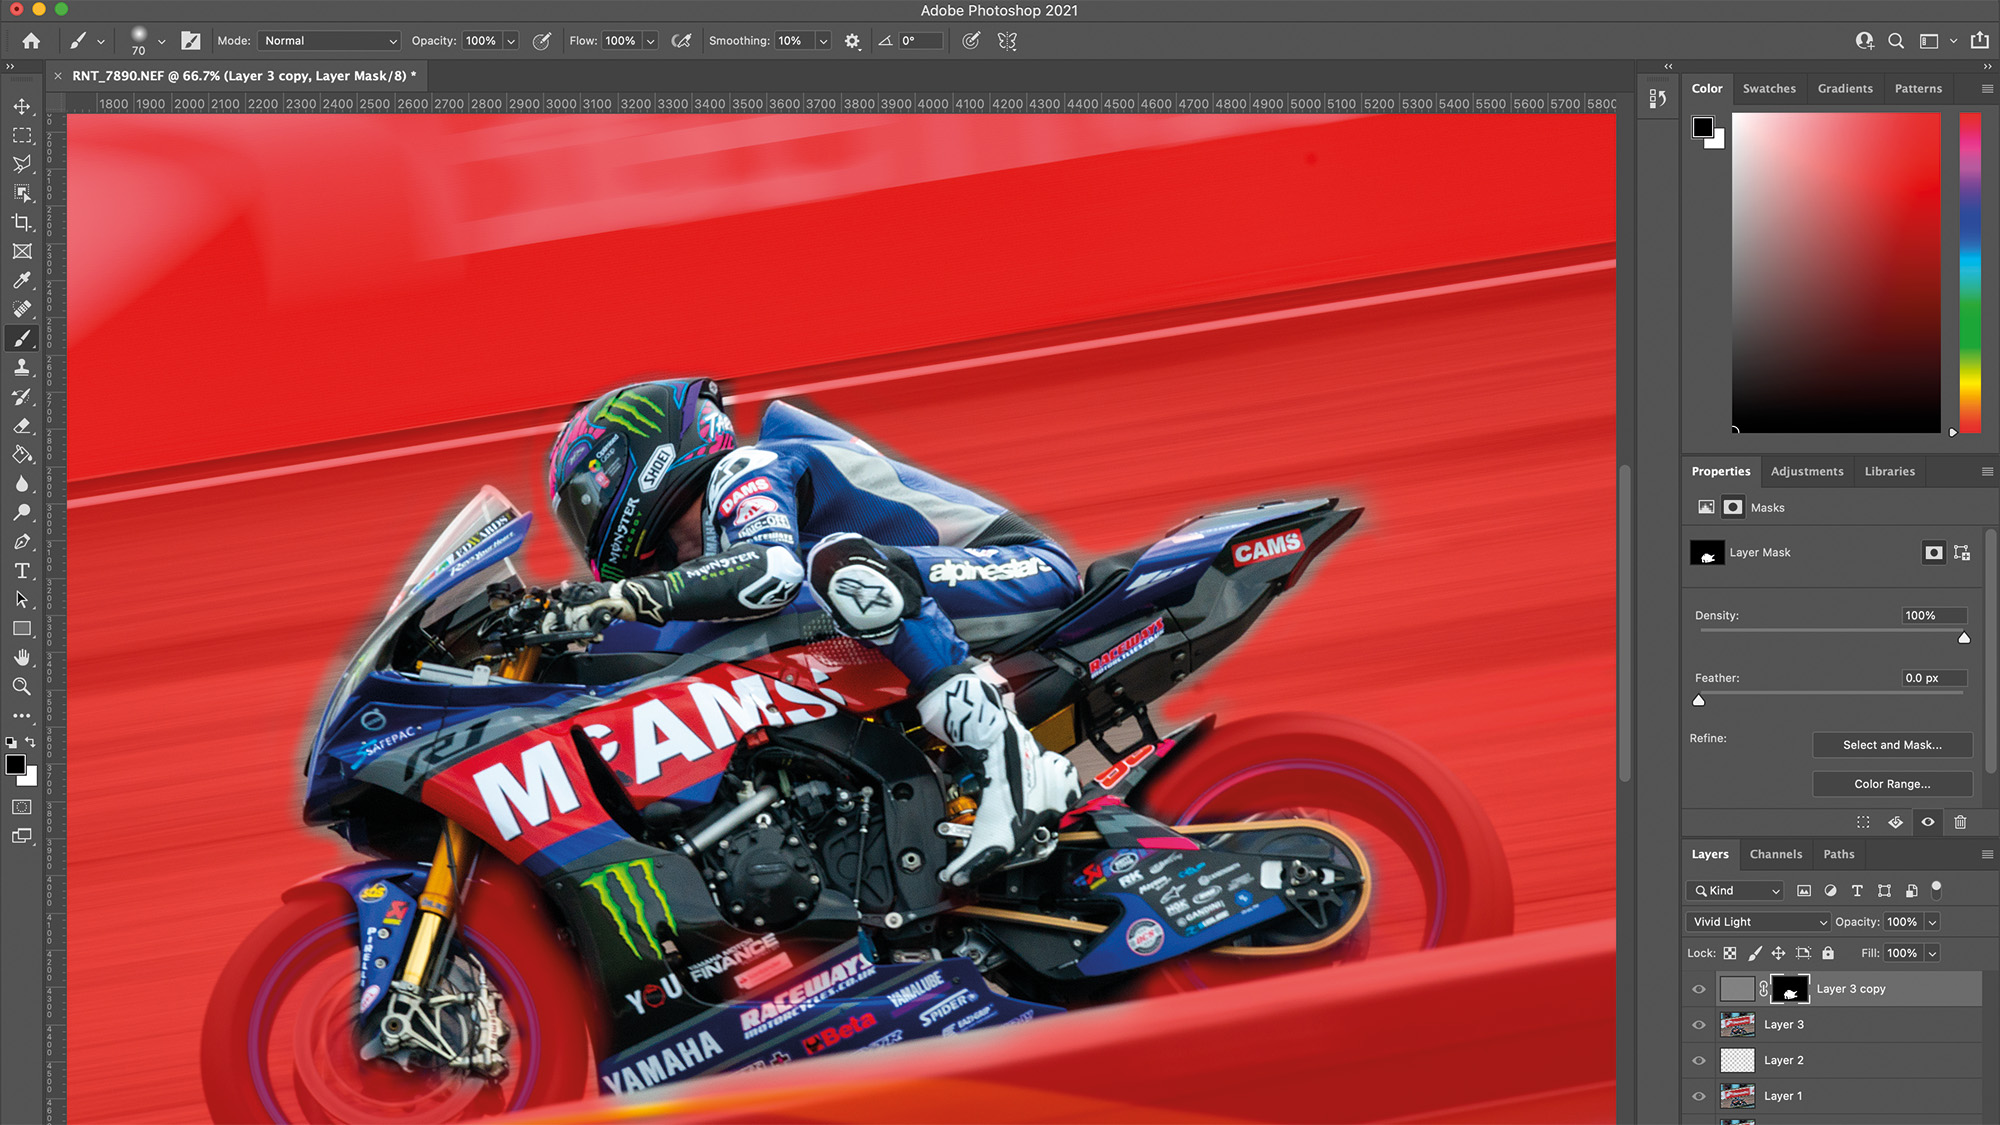
Select the 'Add layer mask' icon and invert the mask (Cmd/Ctrl+I). Paint over and 'sharpen' your subject with a soft, white brush. The red overlay (\) indicates what you have sharpened – switch to a black brush if you want to remove parts of the mask.
That's all there is to it. Add a High Pass Filter, change the Blending Mode and apply an inverted layer mask to selectively paint the sharpening effect, only onto the areas of the image you want sharpened.
You may also be interested in switching seamlessly between Lightroom and Photoshop, or the best free photo editing software that's available.
Get the Digital Camera World Newsletter
The best camera deals, reviews, product advice, and unmissable photography news, direct to your inbox!

Mike is Digital Camera World's How To Editor. He has over a decade of experience, writing for some of the biggest specialist publications including Digital Camera, Digital Photographer and PhotoPlus: The Canon Magazine. Prior to DCW, Mike was Deputy Editor of N-Photo: The Nikon Magazine and Production Editor at Wex Photo Video, where he sharpened his skills in both the stills and videography spheres. While he's an avid motorsport photographer, his skills extend to every genre of photography – making him one of Digital Camera World's top tutors for techniques on cameras, lenses, tripods, filters and other imaging equipment – as well as sharing his expertise on shooting everything from portraits and landscapes to abstracts and architecture to wildlife and, yes, fast things going around race tracks...
