Use the Harris Shutter Effect to shake up a psychedelic storm in Photoshop
Stack a sequence of three images in Photoshop, using RGB Channels to get a rainbow with the Harris shutter effect
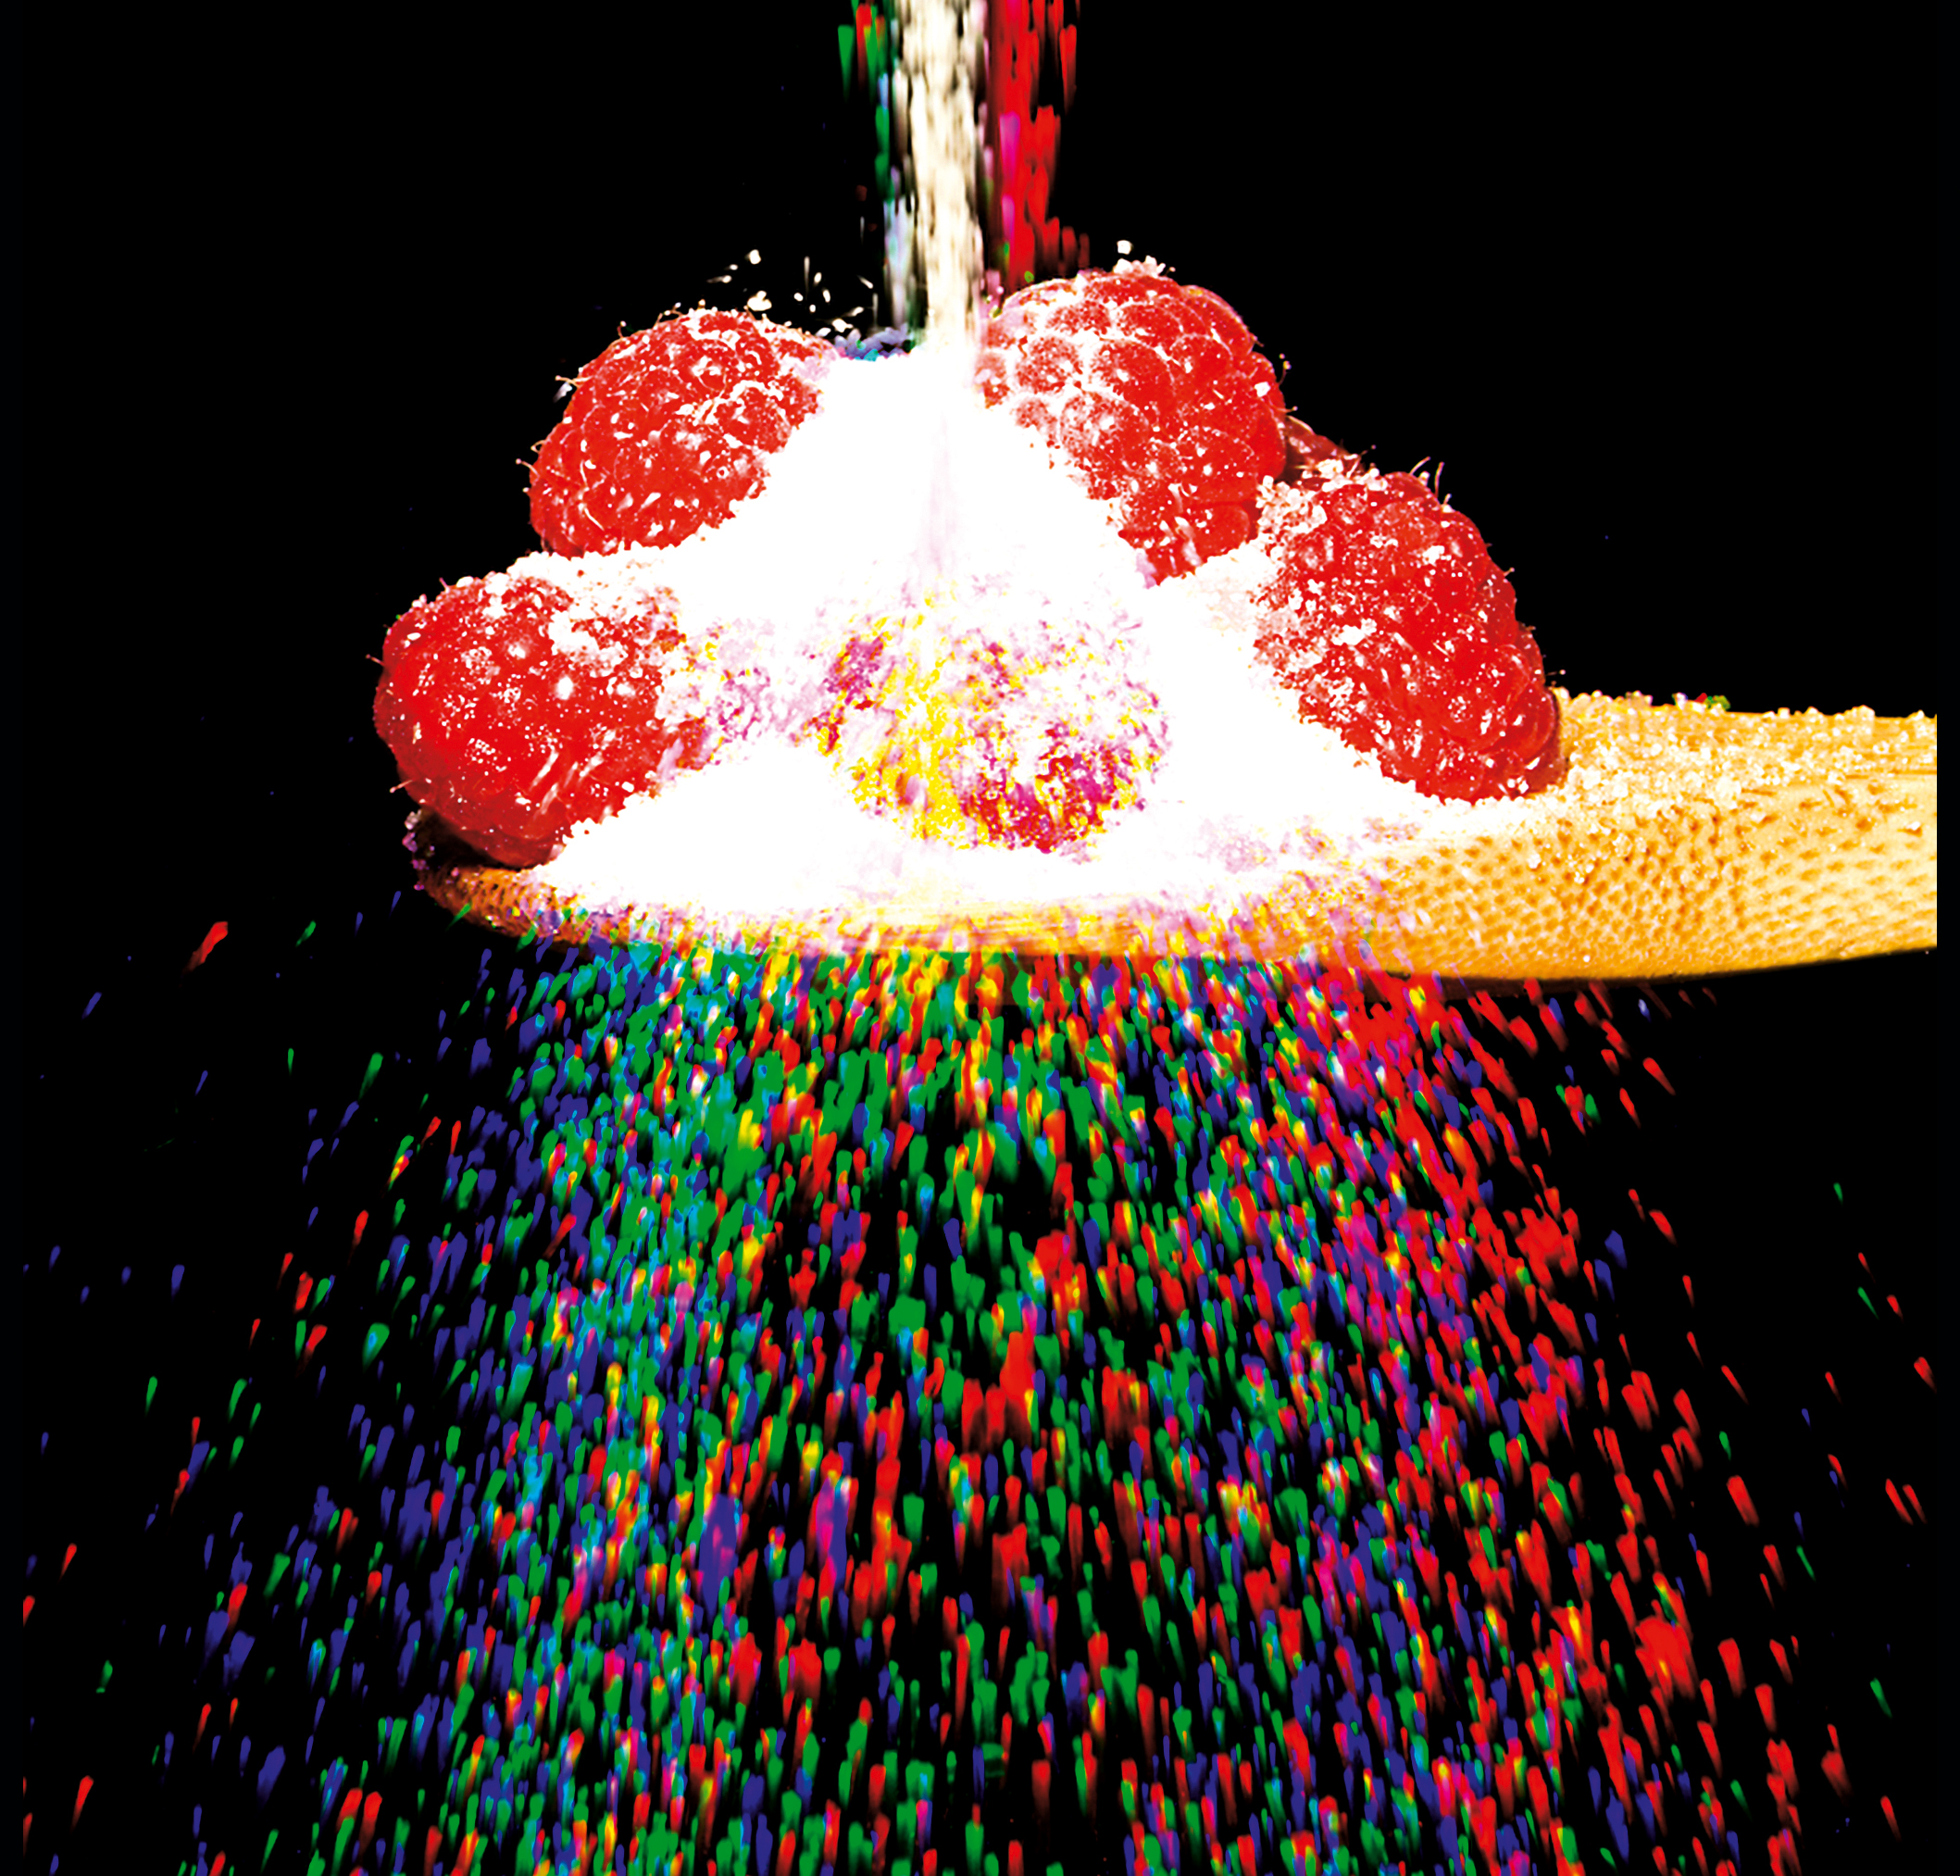
There are lots of differences between Photoshop CC and Photoshop Elements (and other Photoshop alternatives, for that matter), but many are minor or irrelevant to photographers. Some are more significant, however, particularly when it comes to advanced techniques. Photoshop’s Channels facility is one such feature, and in this tutorial we’ll show you how to use it to create a spectacular special effect.
All digital cameras capture color and tone using a combination of just three primary colors – red, green and blue (RGB). Every pixel in an image is made up of
a combination of these three hues. In full versions of Photoshop, you can access and manipulate images by looking at these colors in separate plates or layers, also known as Channels. This can be particularly useful when you’re creating a mask or cutout, as the outline may be more visible in a single channel than in the RGB image.
Here, we’ll combine three almost identical pictures using a different channel from each. The result is that stationary elements look normal, but those that changed slightly between exposures take on a rainbow of different tones. This ‘Harris Shutter’ effect will turn falling grains of sugar into red, green and blue streaks.
The Harris Shutter effect that we’ve used here is named after Kodak boffin Robert S Harris, who’s credited with first describing the technique in the 1970s. Back then, in the pre-digital era, the Harris Shutter effect was achieved by making a multiple exposure on film, using the three primary colored filters in turn.
Although the Harris Shutter effect works well with moving subjects, such as flowing water, it’s best not to choose the slow shutter speeds that are often used
to capture these subjects. The longer the shutter speed, the more similar each individual frame is likely to be. In our shot of sugar and raspberries, for instance, a shutter speed of 1/200 sec was used – with a burst of flash helping to define individual, streaking grains of sugar.
1. Three into one
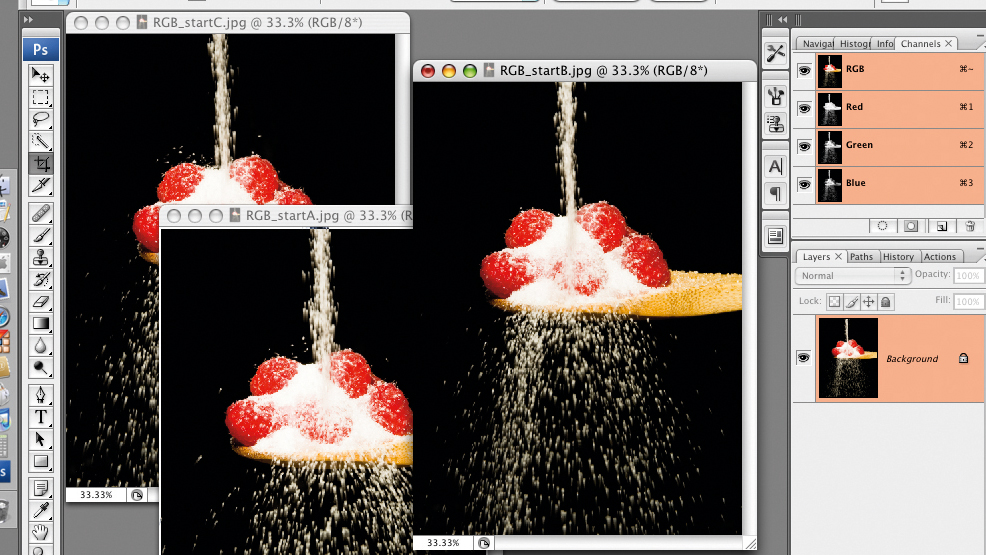
Choose three frames from a sequence taken with a tripod and the same camera settings. Open them in Photoshop. Click the Background layer icon on one shot, hold Shift and drag it into the main window of one of the other shots. Add the third image in the same way.
Check that the stationary elements are in perfect alignment in your combined image by changing the Blending Mode for Layers 1 and 2 to Difference. Turn off Layer 2 and click on Layer 1. Use the Move tool to nudge Layer 1, maximizing the amount of black and minimizing halos in the shot.
2. Spot the difference
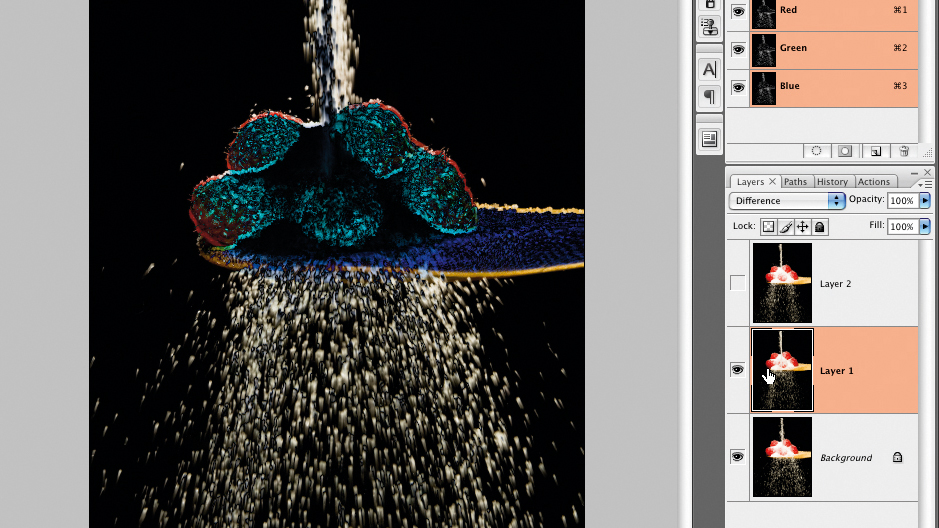
Click on the eye symbol next to Layer 1 to turn it off and Layer 2 to turn it on. Click on the icon for Layer 2 and select the Move tool. Use the arrow keys to nudge this into perfect alignment with the Background. Set the Blending Modes of Layers 1 and 2 back to Normal (from Difference), then make Layer 1 visible.
You can now combine the three layers so that each represents just one of the three primary colors. First, you’ll need to unlock the Background layer. To do this, double-click on its icon in the Layers palette. A window will appear, giving you the option to rename the layer, but you can leave this as the default ‘Layer 0’. Click OK to confirm the settings.
3. Advanced blending
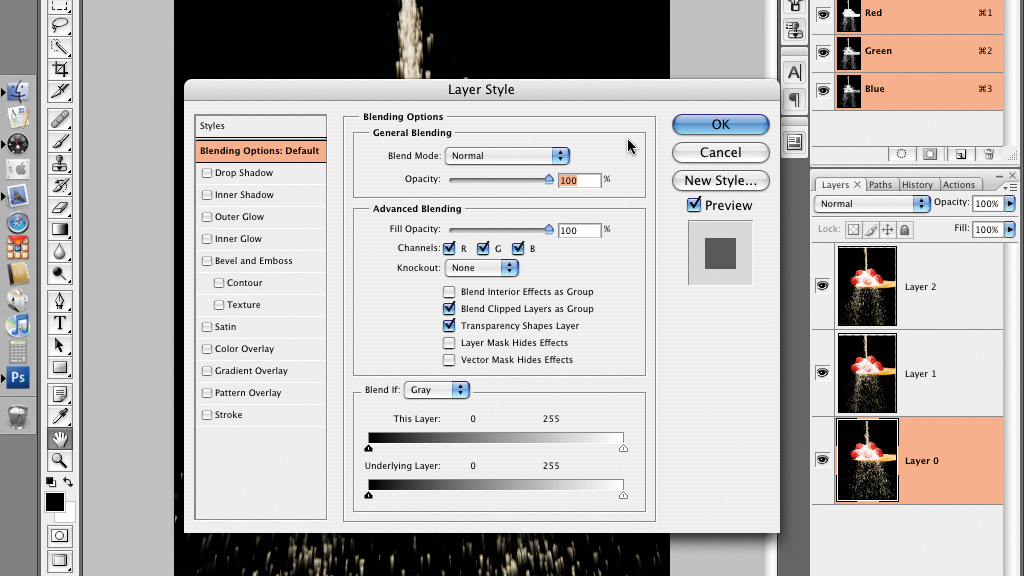
Double-click on the icon for Layer 0. This time, a Layer Style option box will appear. This provides advanced settings for blending different layers. You’ll see that in the Channels options, R, G and B are all checked. Uncheck the Green and Blue buttons so that the bottom layer shows just the Red channel.
Double-click on the icon for Layer 1. In the Advanced Blending options, uncheck the Red and Blue channel options and click OK. Next, double-click on the icon in the Layers Palette for Layer 2 and uncheck the Red and Green channel options. Click OK. This makes Layer 1 green and Layer 2 blue.
4. See the rainbow
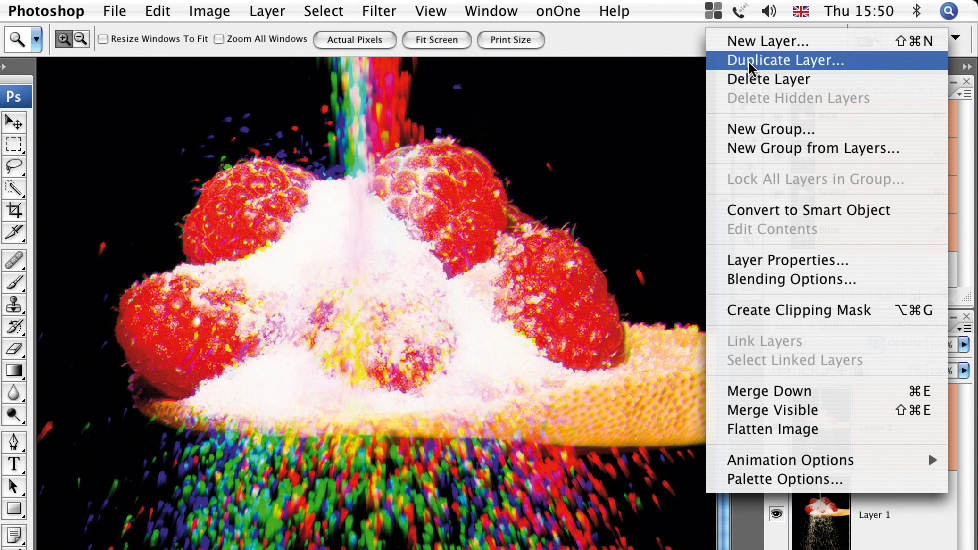
You can now see the final effect. The unchanged elements (the raspberries and spoon) look normal, but the falling sugar, which is in different places in each layer, is shown in a multitude of colors.
You can clean up the result by superimposing another layer onto the image. To do this, click on Layer 2 and choose Duplicate Layer from the drop-down menu. We want the new top layer (Layer 2 Copy) to appear in full color (not just in green), so double-click on the Layer icon and ensure that the R, G and B channel options are checked. However, we only want this full-colour version to appear selectively, otherwise we lose the Harris Shutter tricolour effect.
5. Masking and painting
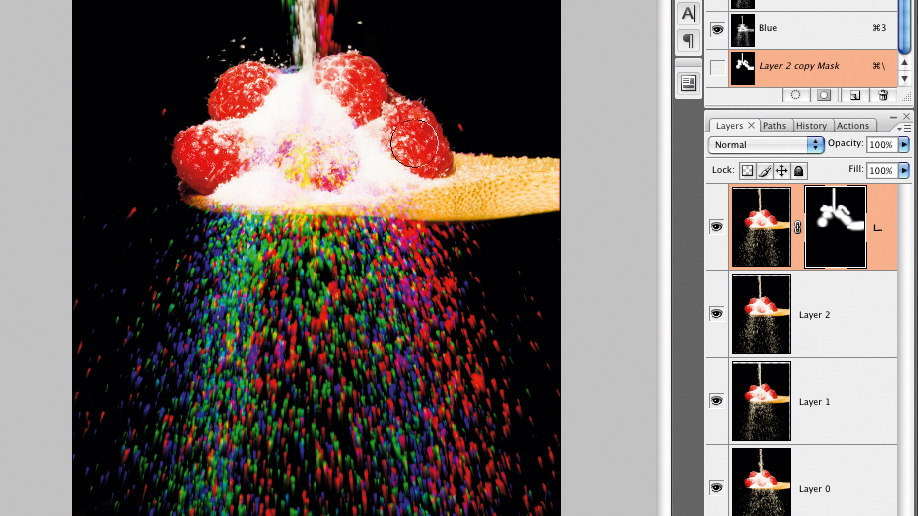
The next step is to create a mask for the top layer. You can do this by clicking on the Add Layer Mask icon at the bottom of the Layers palette. This will appear as a white square next to the active layer. The mask is initially completely transparent and has no effect on the layer. In order to start painting on the Layer Mask, you’ll need to make it opaque.
Make the Layer Mask opaque by clicking on the Mask icon and pressing Alt+Delete. The Mask icon in the Layers palette will turn black. You can now use a Paintbrush, set to white, to reveal areas of the combined image. This increases the detail in the raspberries and adds a white core to the sugar.
6. Flatten and finish
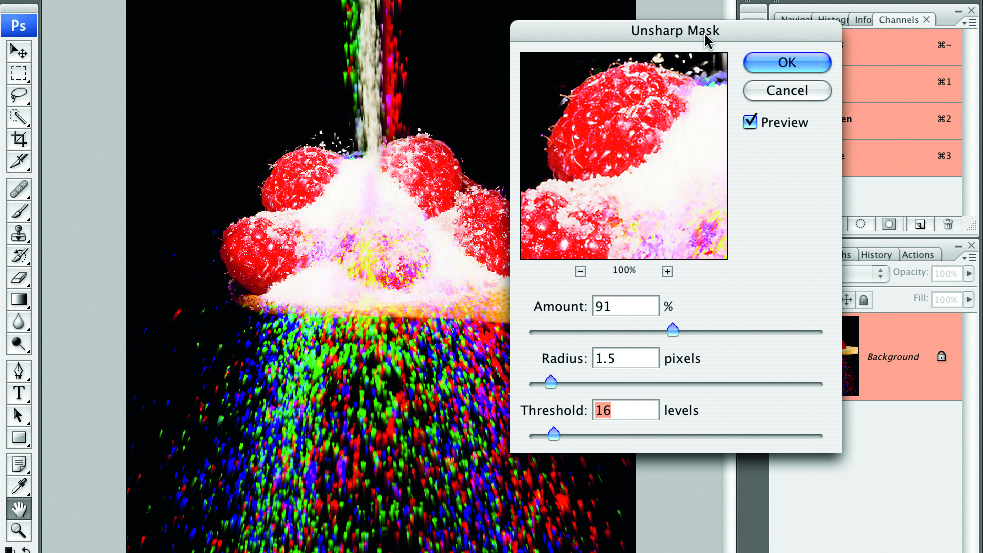
Do your mask painting gradually, until you’re happy with the result. If you make a mistake and overdo the effect, use the History palette to go back a few steps. Save the document in the Photoshop (PSD) file format so that you can re-edit the layers in the future. When you’re done, merge all the layers together by going to Layer>FlattenImage.
You can now retouch the image by using the Clone Stamp tool to remove any specks of color you feel are in the wrong place. The final step is to sharpen the combined image. Choose Unsharp Mask from the Filters menu and choose options that give enough detail without adding noise and artefacts.
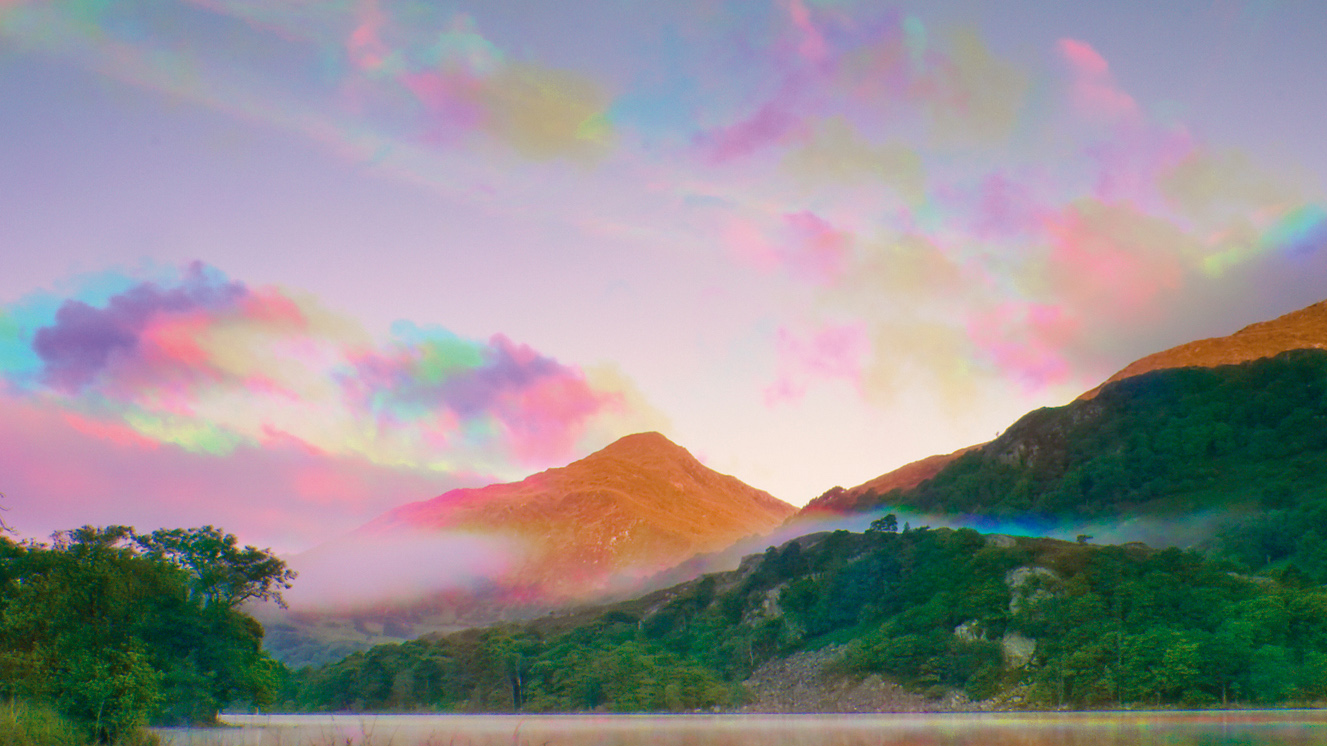
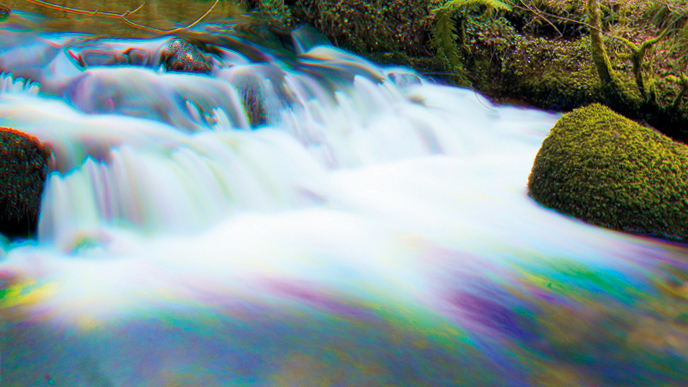
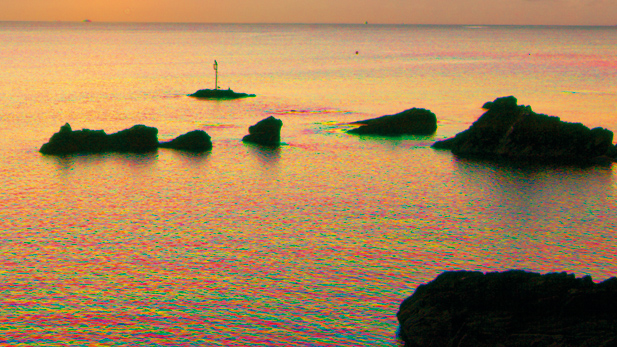
Using the Harris Shutter Effect outdoors
This effect works best on images in which the moving elements
are white, so flowing water often works well. Why not try this effect on your own tripod-shot sequence of a waterfall, seascape or fountain? Clouds and flames also make good Harris Shutter images, but don’t be afraid to try the technique with any set of near-identical pictures. See my examples below…
Get the Digital Camera World Newsletter
The best camera deals, reviews, product advice, and unmissable photography news, direct to your inbox!
Chris George has worked on Digital Camera World since its launch in 2017. He has been writing about photography, mobile phones, video making and technology for over 30 years – and has edited numerous magazines including PhotoPlus, N-Photo, Digital Camera, Video Camera, and Professional Photography.
His first serious camera was the iconic Olympus OM10, with which he won the title of Young Photographer of the Year - long before the advent of autofocus and memory cards. Today he uses a Nikon D800, a Fujifilm X-T1, a Sony A7, and his iPhone 15 Pro Max.
He has written about technology for countless publications and websites including The Sunday Times Magazine, The Daily Telegraph, Dorling Kindersley, What Cellphone, T3 and Techradar.
