Use your FREE Photoshop mist brushes to add loads of atmosphere to photos
These FREE Photoshop brushes enable you to enhance the atmosphere of your photos with mist
Watch video: Add mist and fog effortlessly in Photoshop CC
A misty morning is one of the most magical times to head out with your camera. But if the conditions aren’t right – or you want to enhance any existing mist – then it is possible to create your own. In our scene the mist is rolling in over the landscape, but the tree is clear. As such, this can be a good time to paint in a little more mist to enhance the atmosphere.
In visual terms, mist and fog are simply light, blurry patches of air. This is easily recreated with Photoshop CC brush skills, but it can be tricky to match the shape of the mist – so we’ve supplied ten mist brushes for you to use over your photos. Click here to download them free. Each creates a random mist effect; all you have to do is make a new layer, choose a mist brush and click around the image to add a random mist effect.
Real mist will become stronger as the scene recedes into the distance. So to make our effect more realistic we can mimic this by making the mist thicker in distant parts of the scene. It helps if we can paint the mist ‘behind’ objects like the tree in this instance. This is done by selecting and copying the tree to a new layer, then painting on a layer below so that the mist looks like it’s stronger behind the tree.
We’ve supplied a starting picture for you to try the mist brushes on, but why not use the brushes to give your own photographs an atmospheric misty makeover?
01 Load in your free brushes
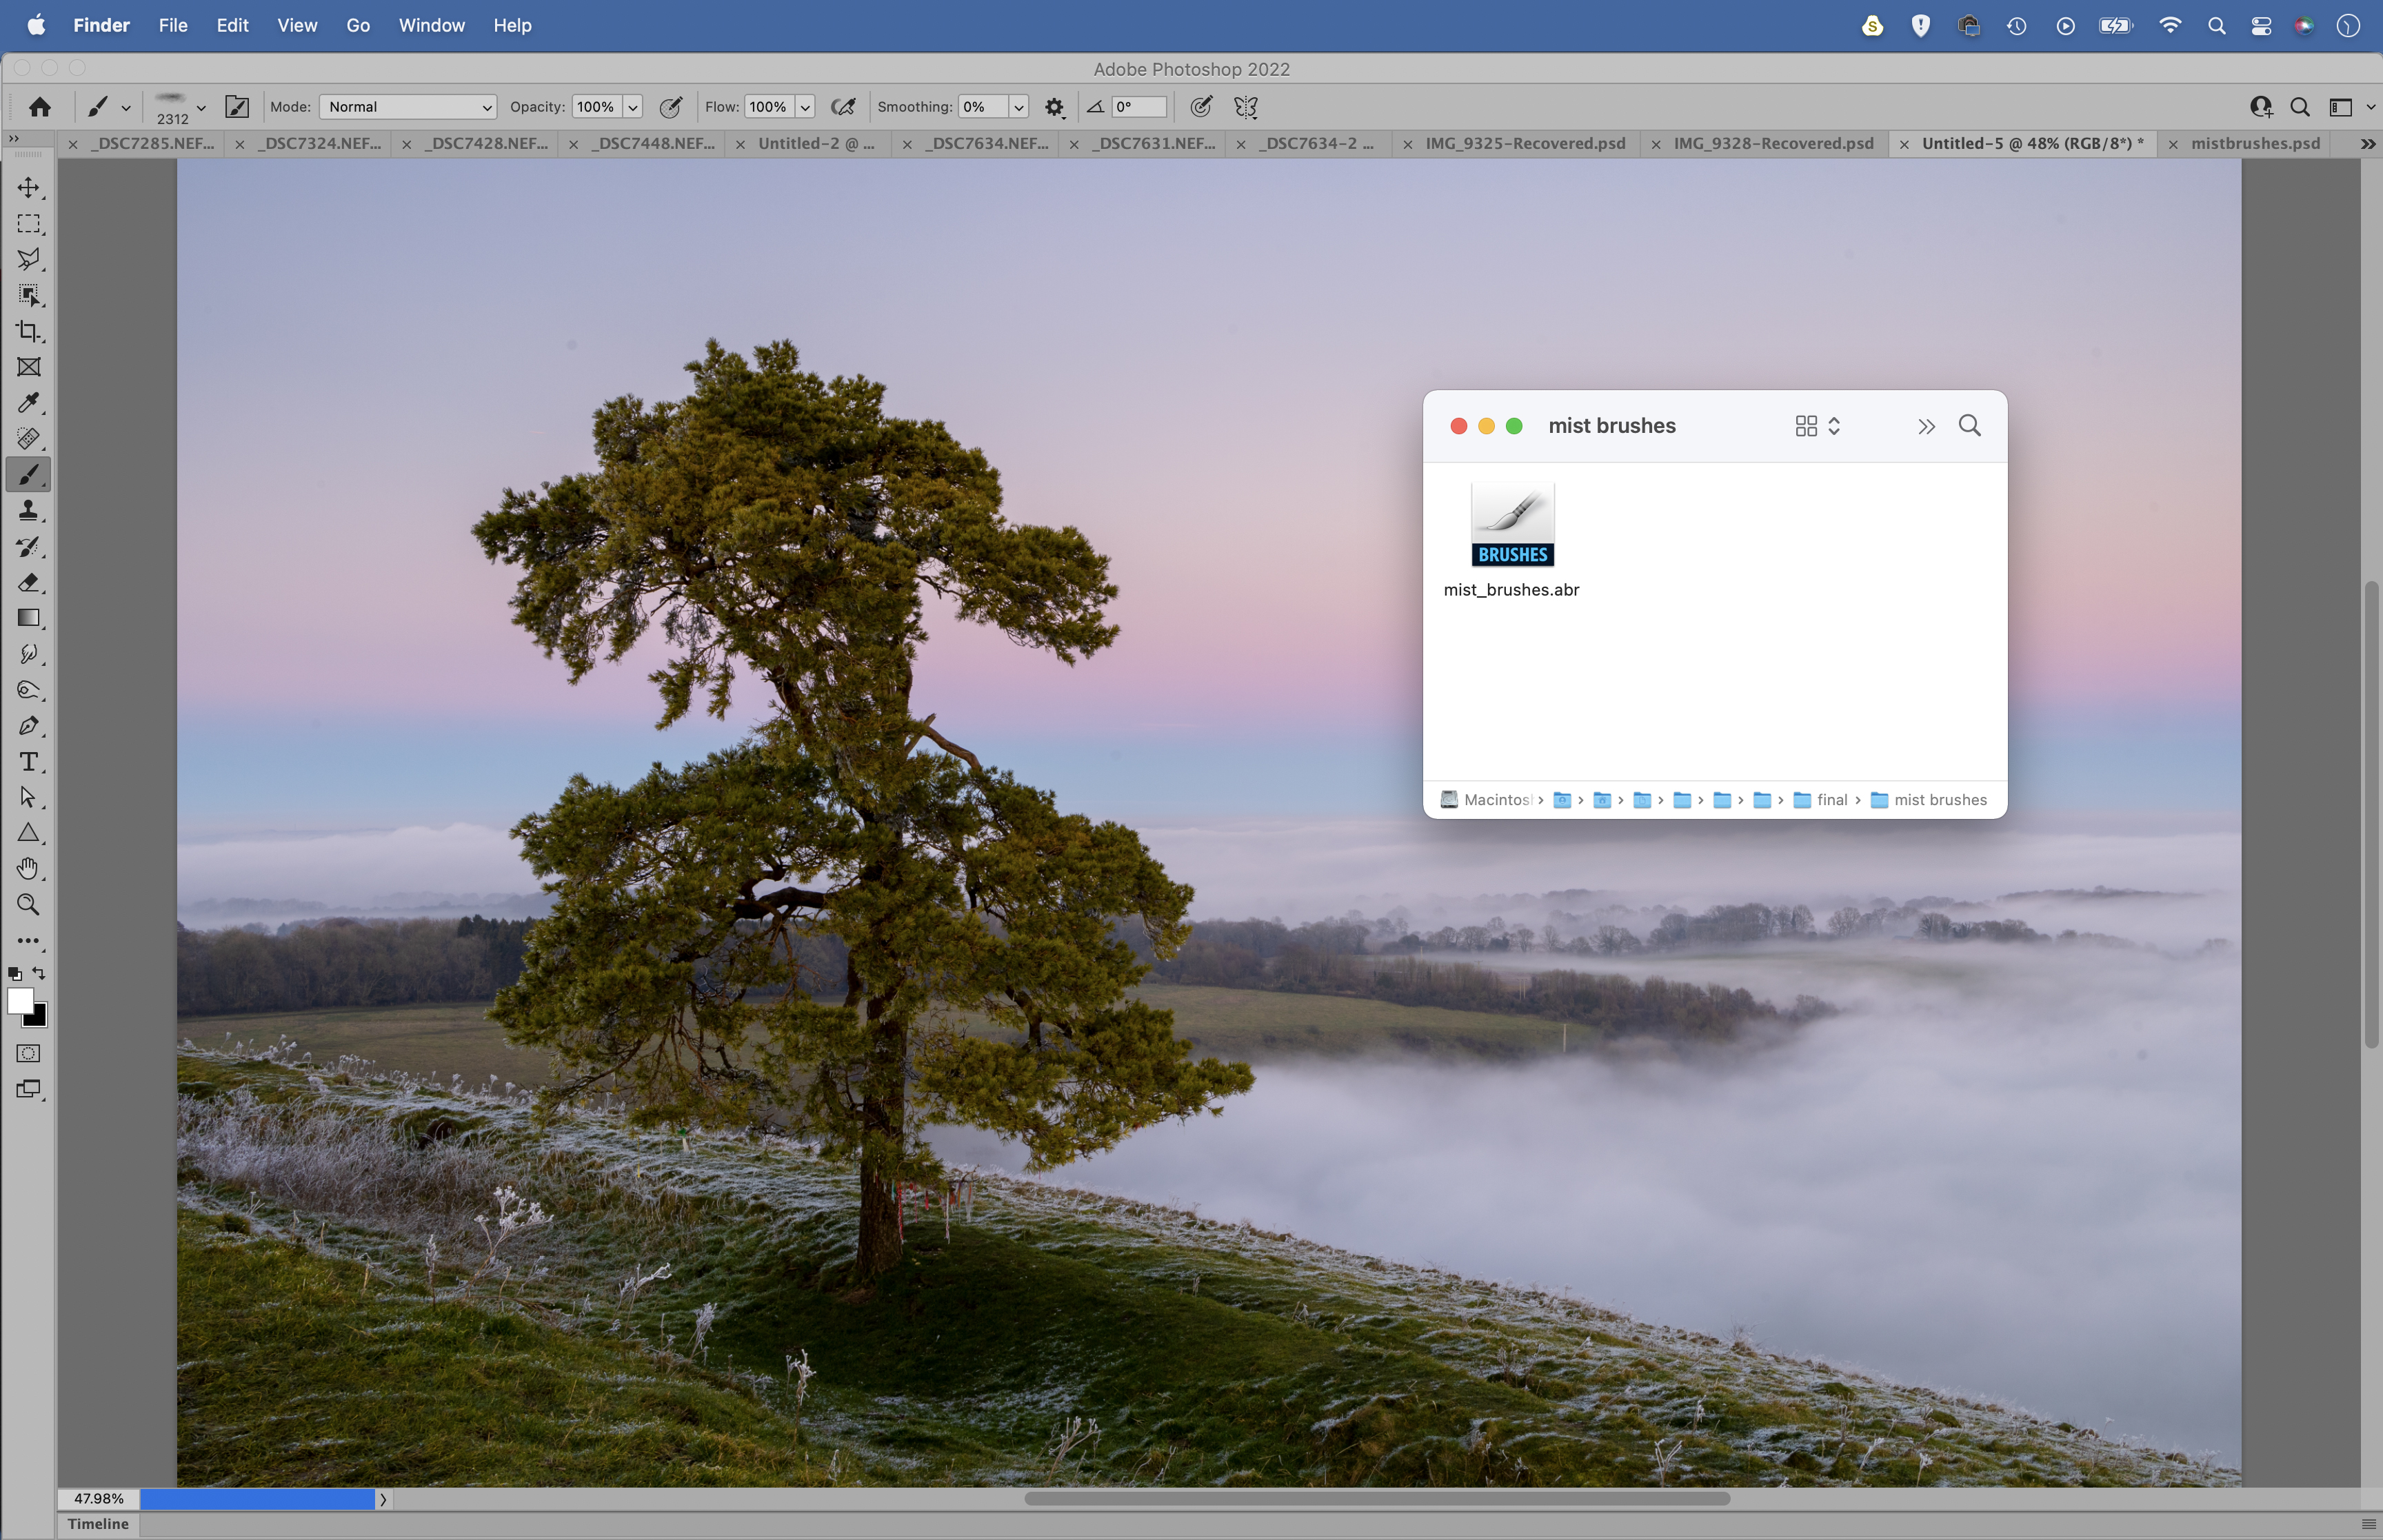
Download our start files here and with Photoshop running, double-click the supplied brush .abr file to load in the brushes. Grab the brush tool (B) then click the brush picker in the options. Scroll down the list to find the new ten mist brushes. Choose one of them then hit D and X to set color to white.
02 Paint in the fog
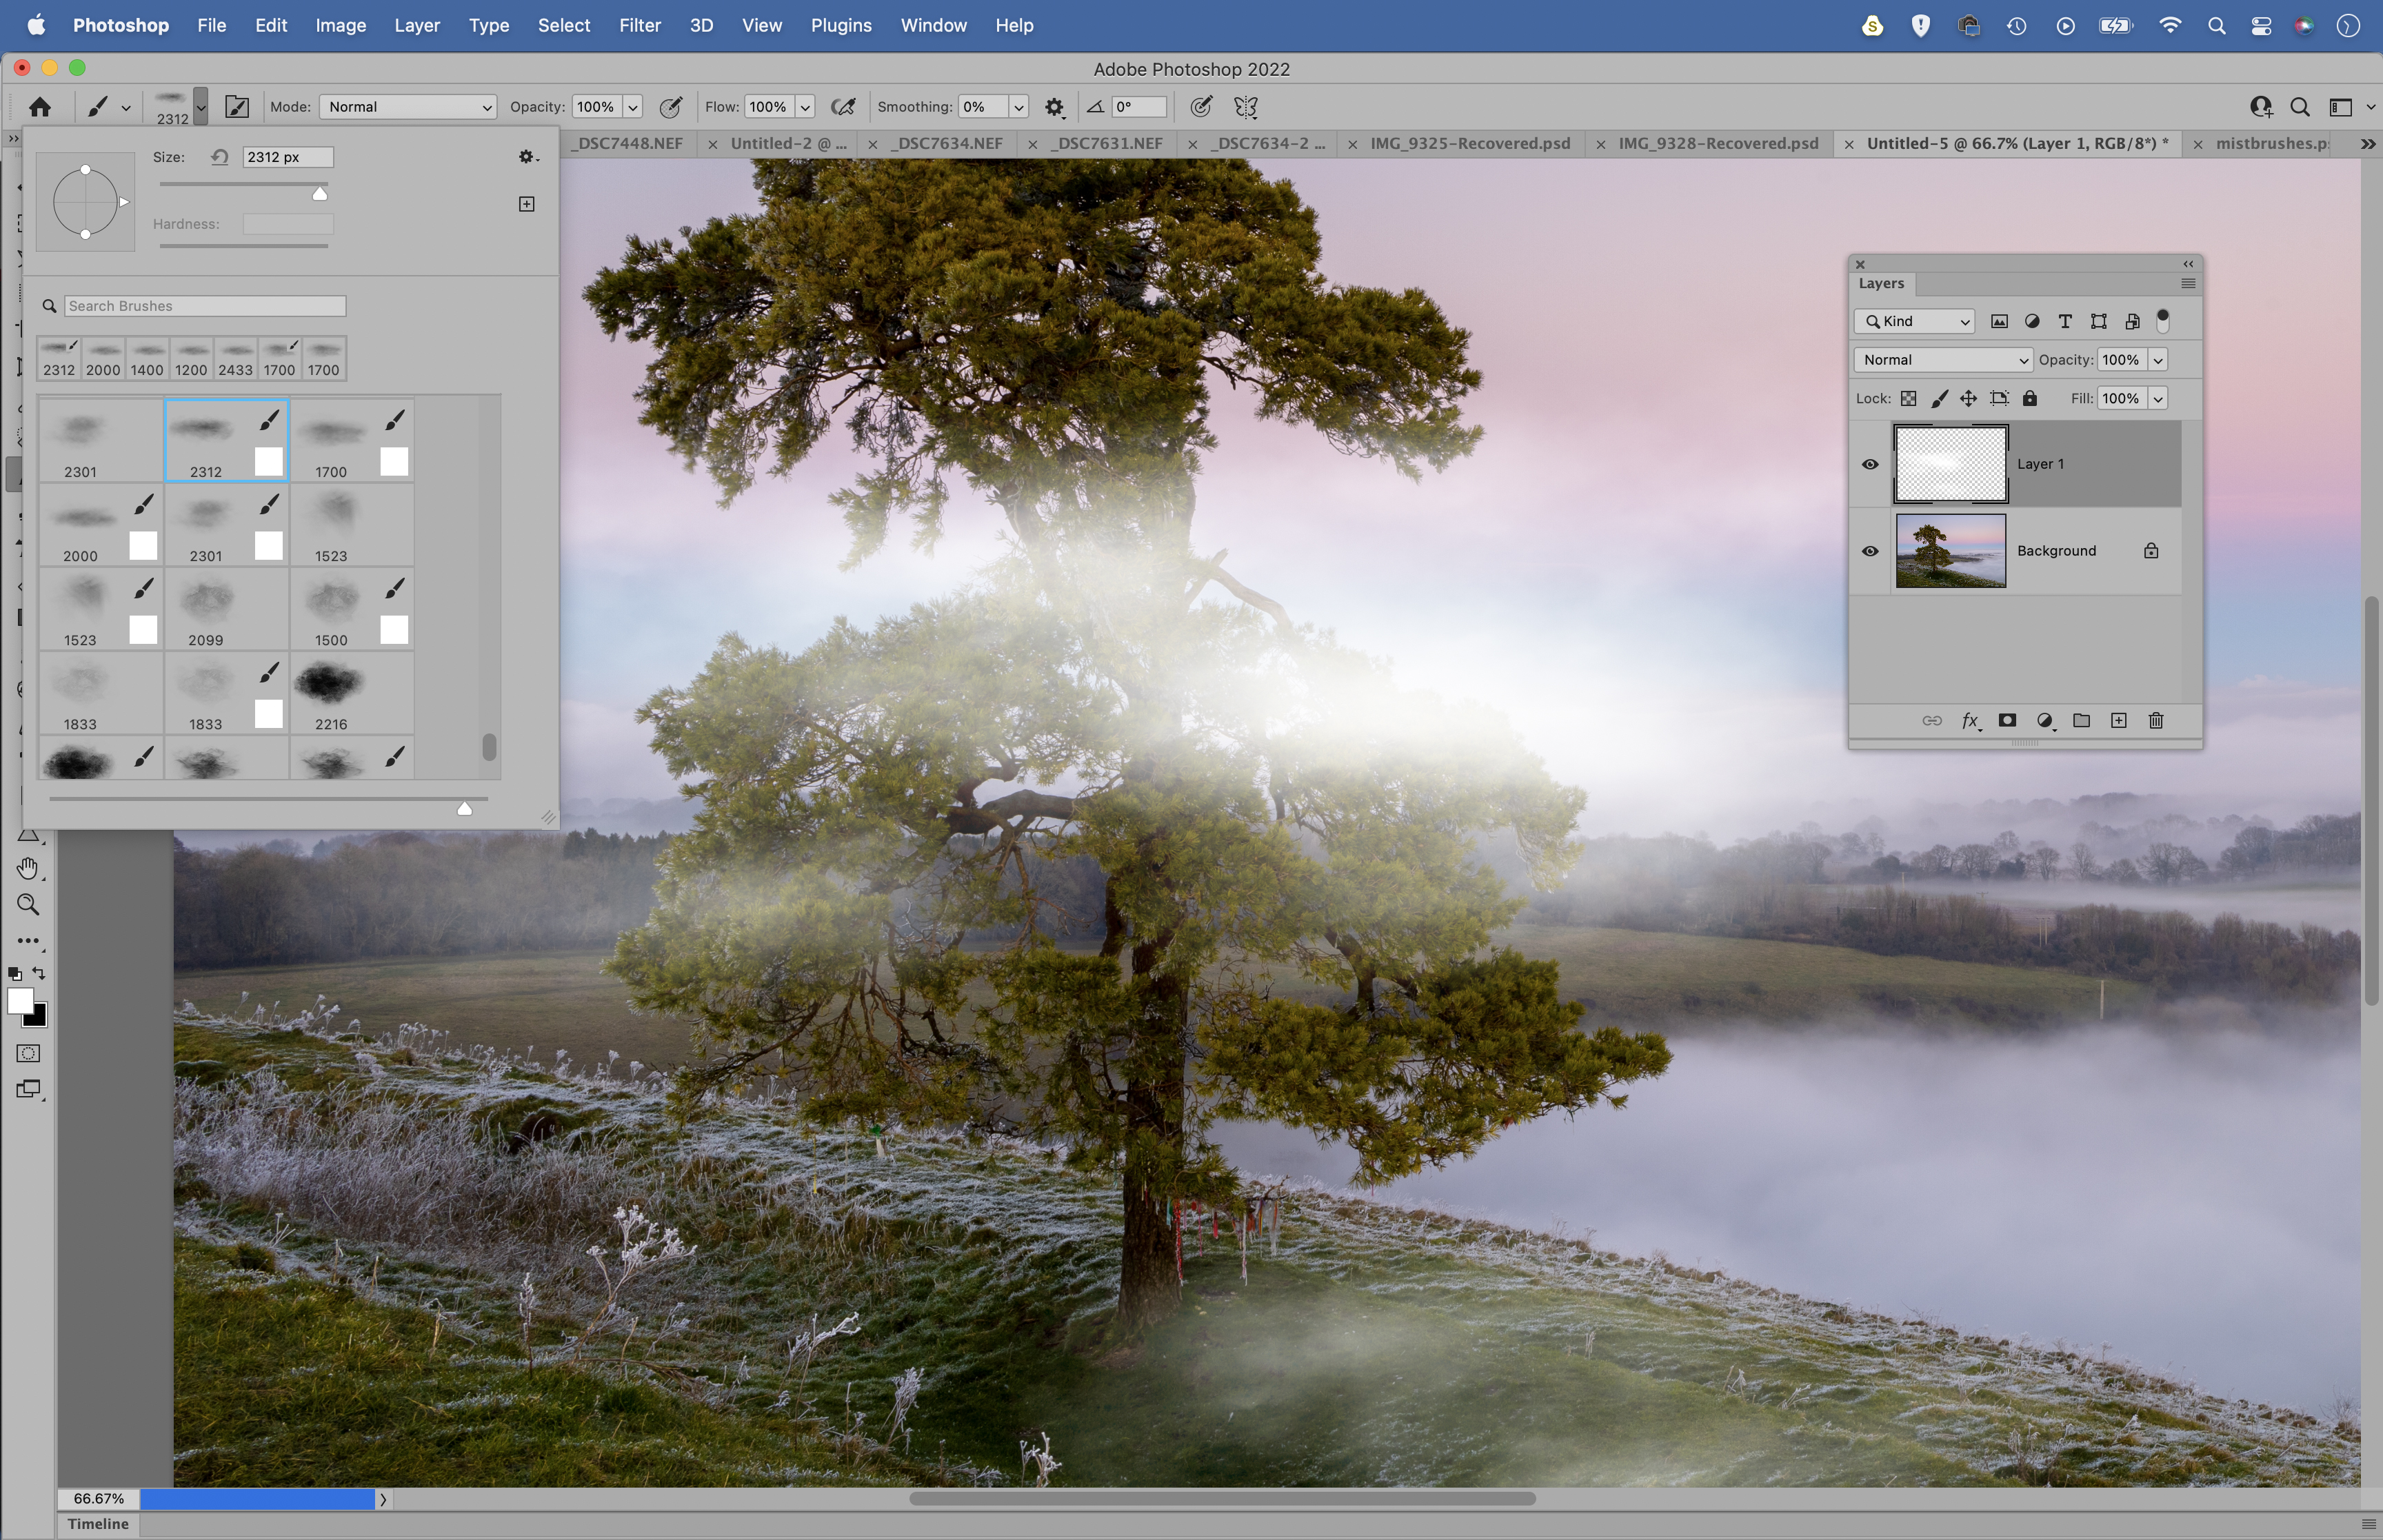
Click the New Layer icon in the Layers panel to make a new layer. Click around the shot with the brush tool to paint in mist. Use the ] and [ keys to vary your brush tip as you paint. Each time you click, the brush tip will change shape and orientation for a random result.
03 Select the tree
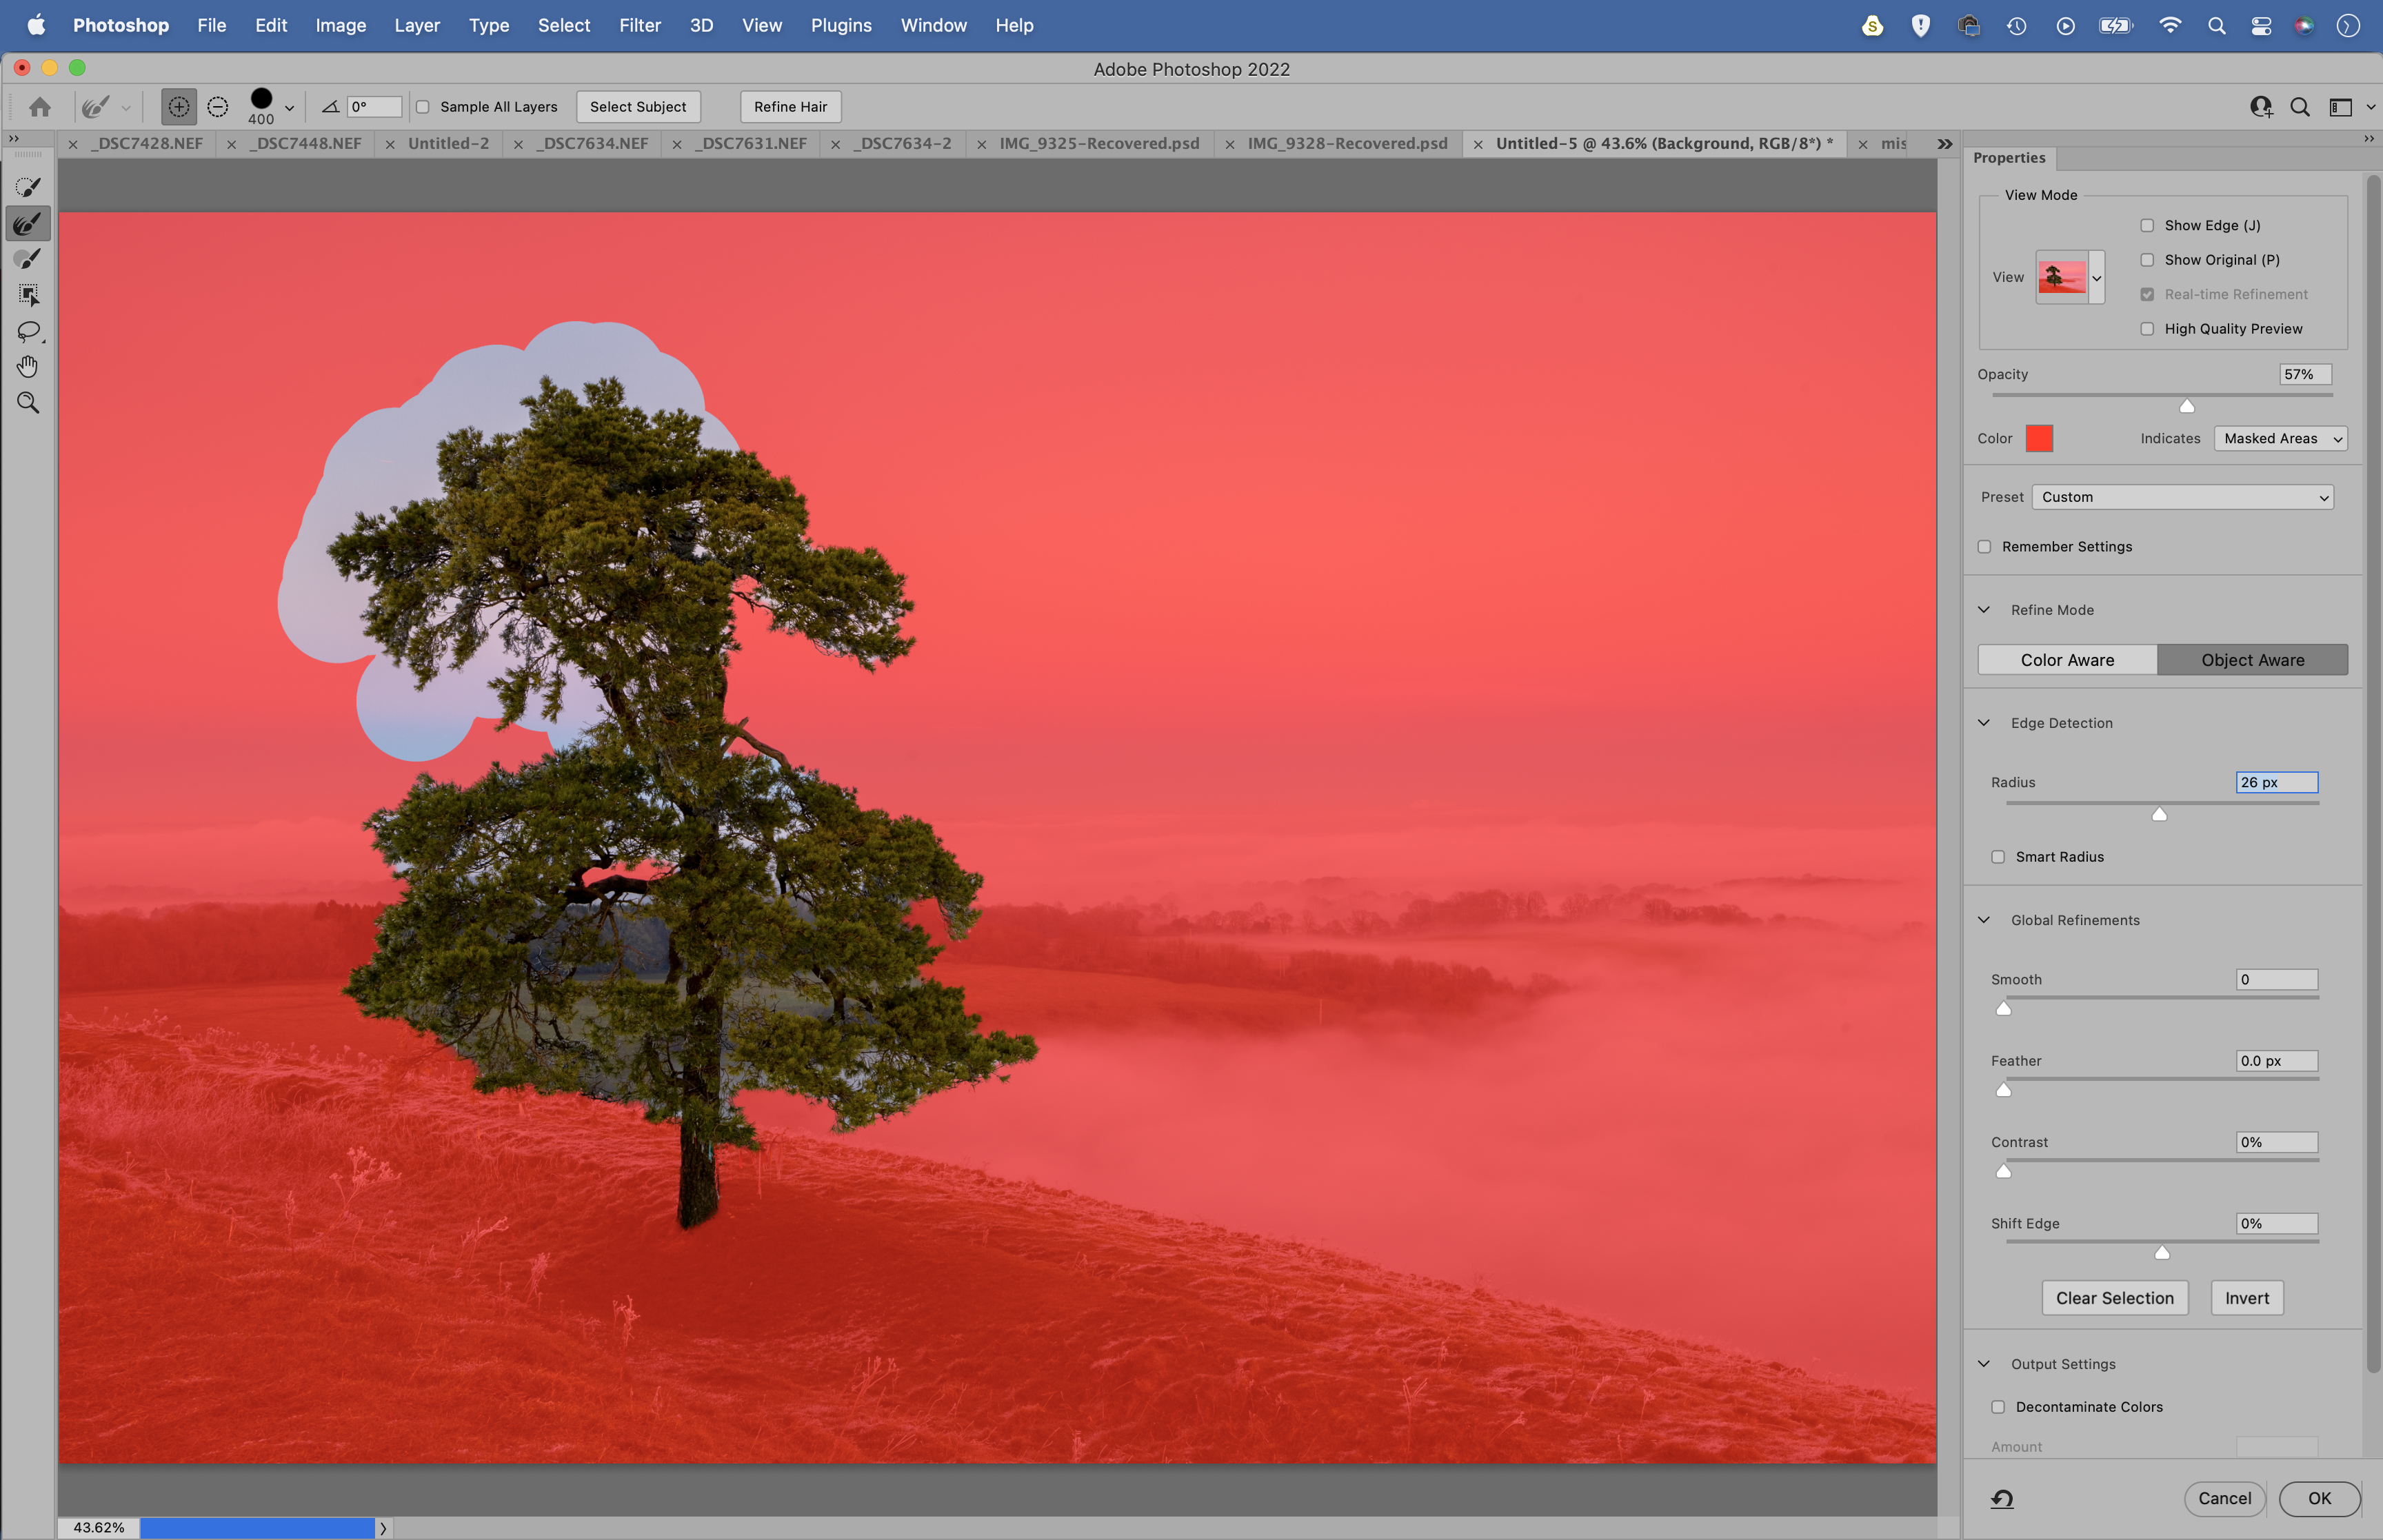
Highlight the bottom layer, grab the Object Selection tool and click the tree to select it. Click the Select and mask button, grab the Refine Edge brush and paint over the edges of the tree to improve the selection. Set Output: New Layer with Layer Mask and hit OK.
04 Paint distant mist
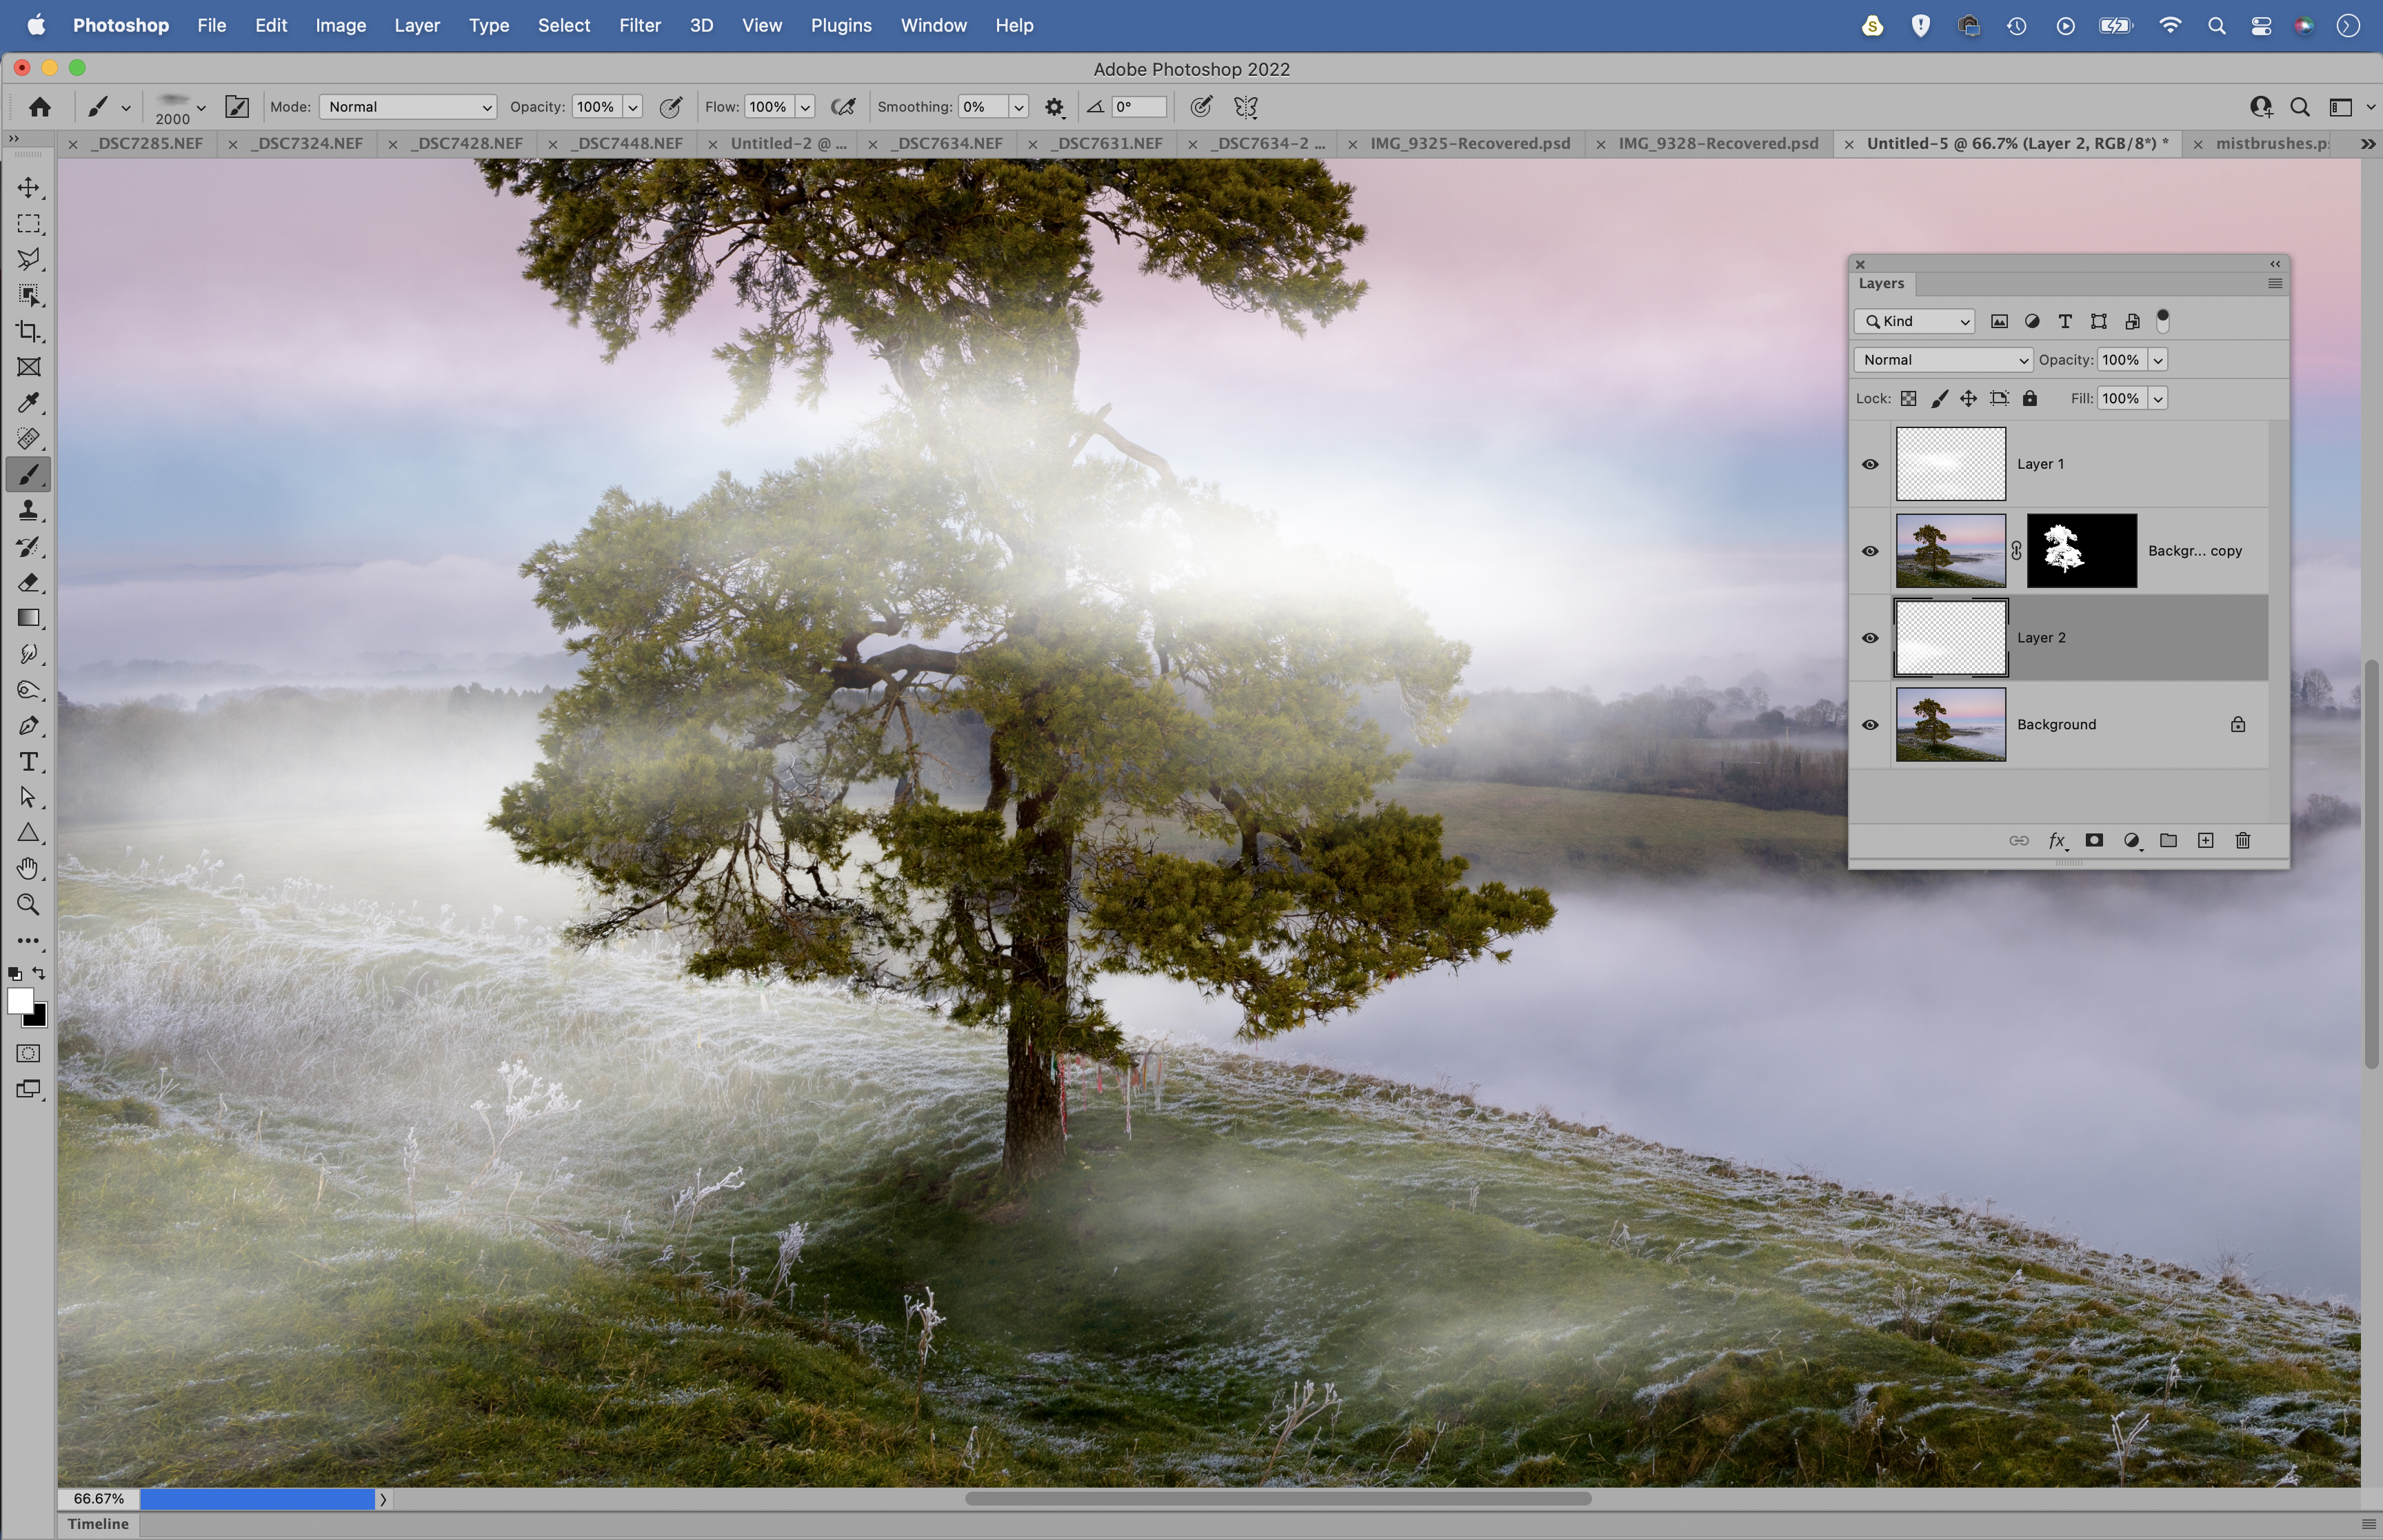
Highlight the bottom layer then make a new empty layer above. Get another mist brush then paint to add more mist. This adds depth to the effect by making it look like it’s forming behind and in front of the tree. Paint more mist as the scene recedes into the distance.
05 Build it up
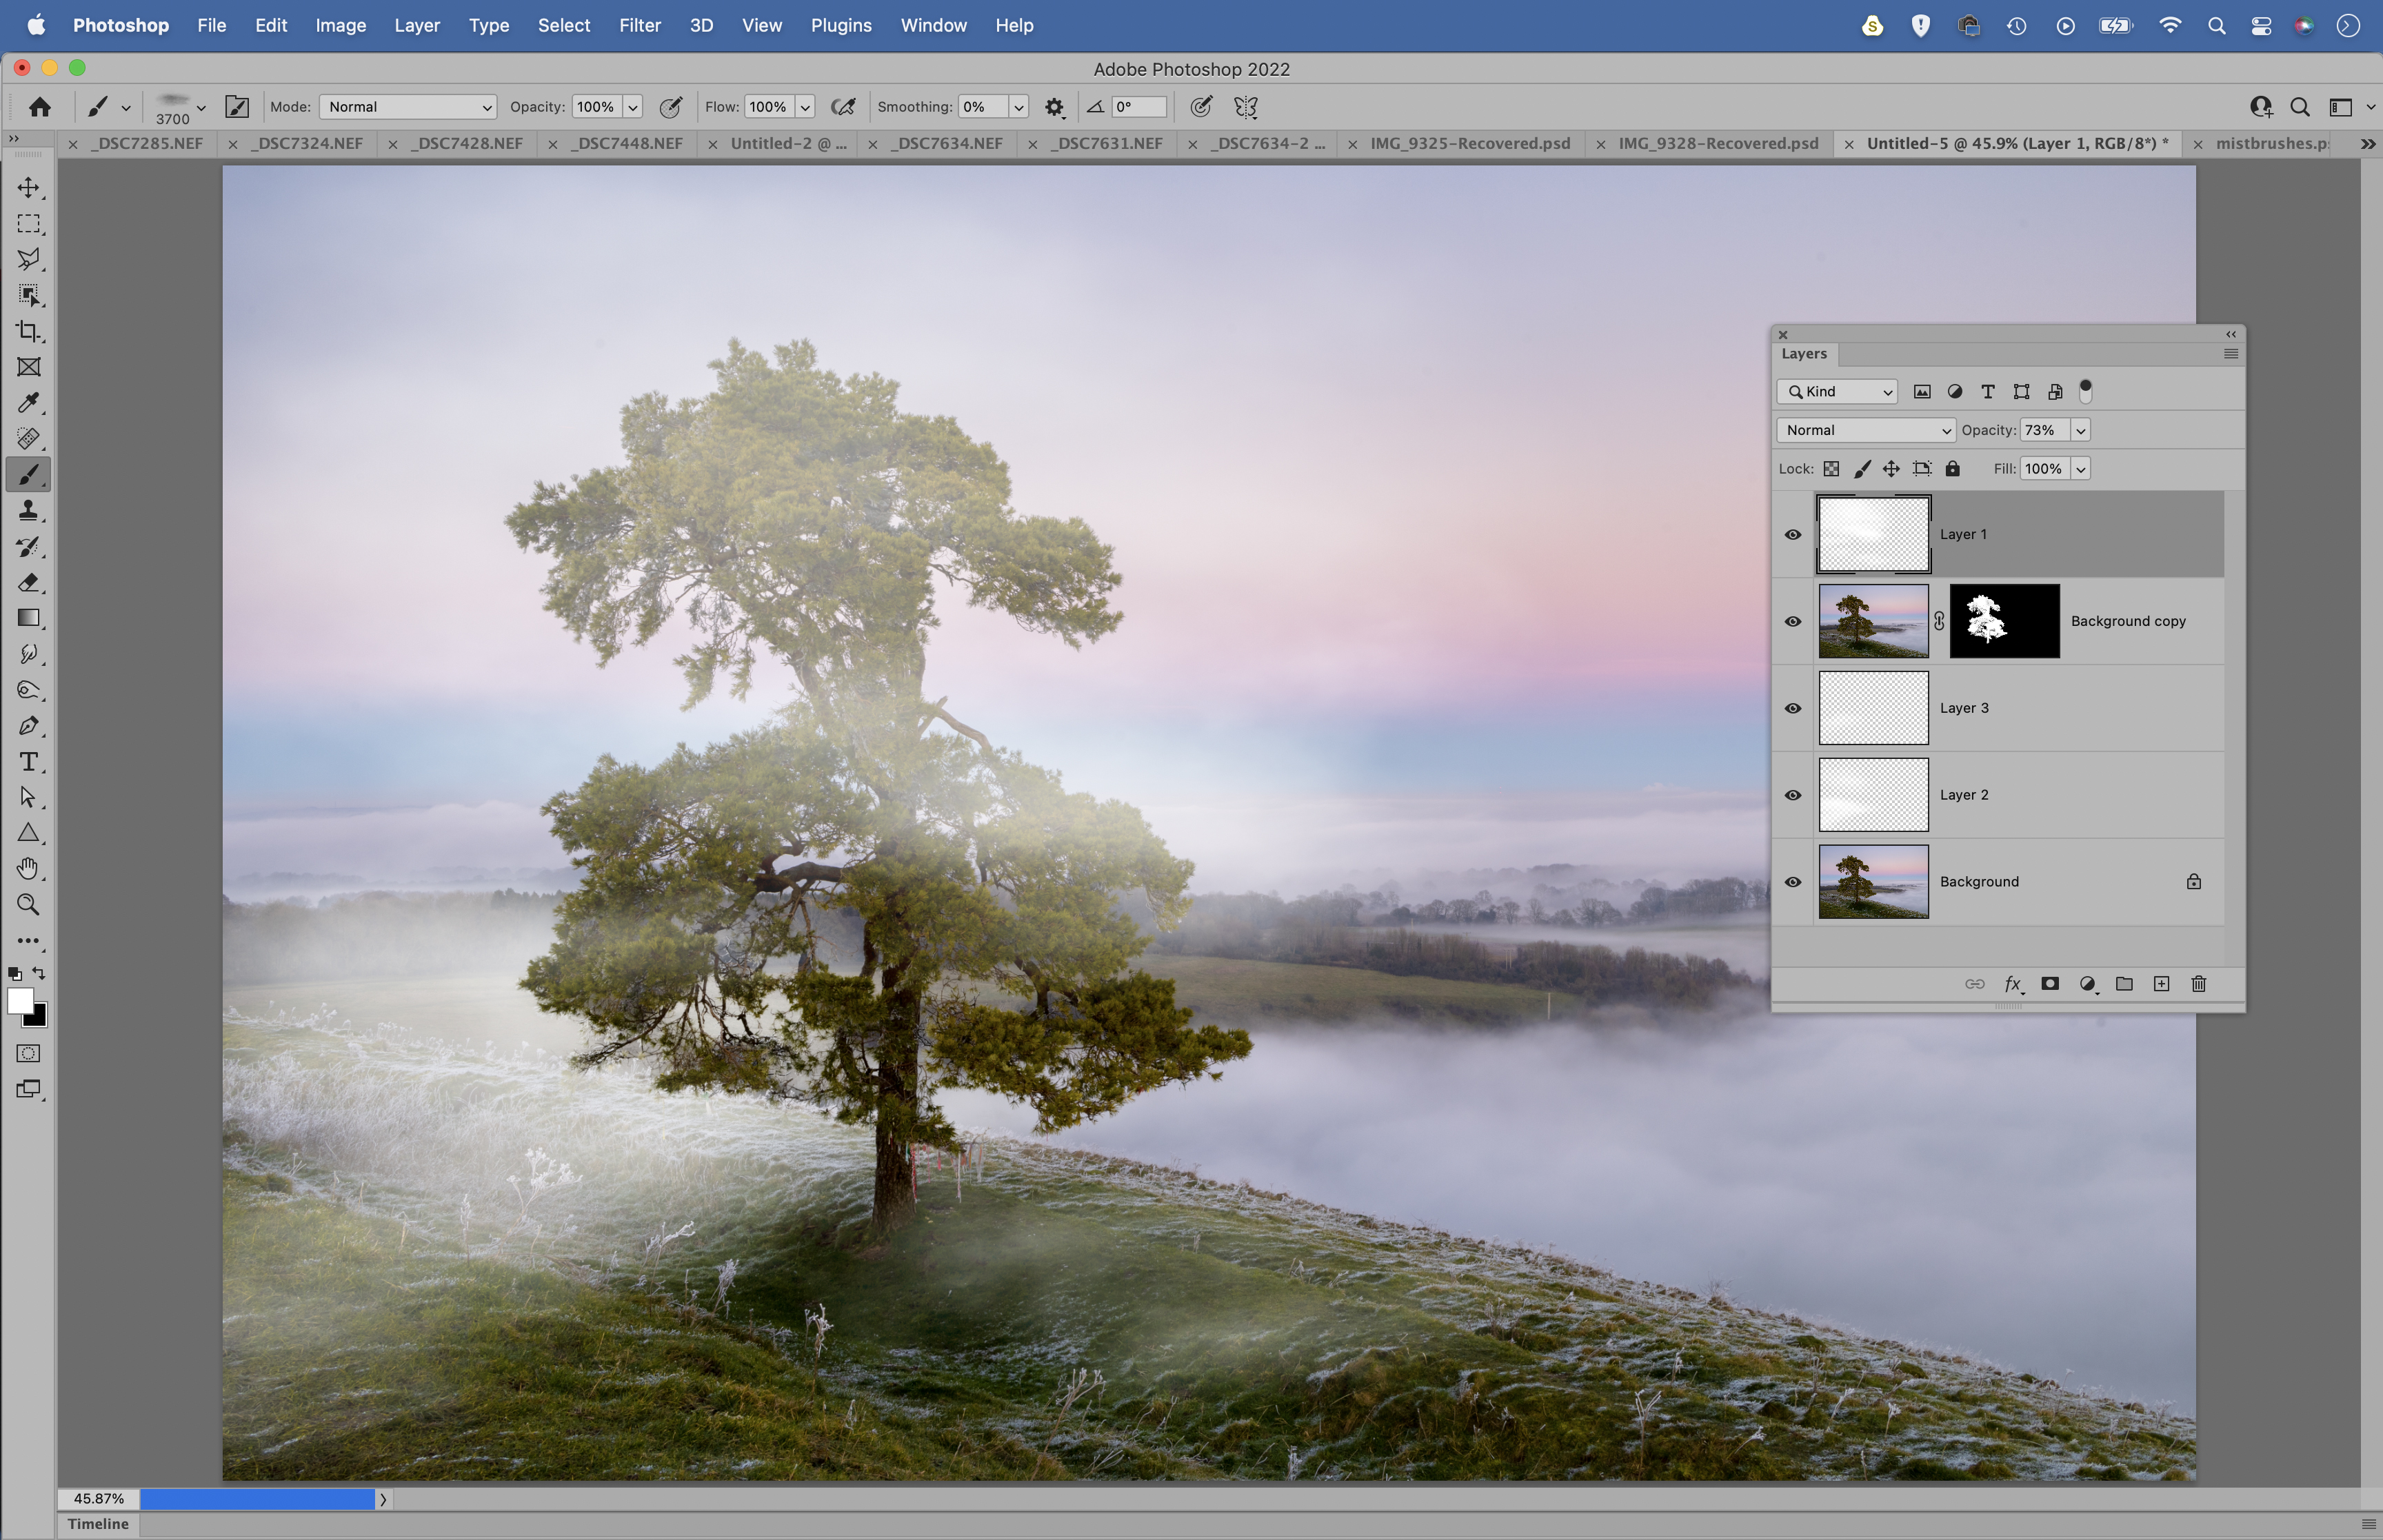
Build up the mist effect using a combination of brush tips, varying the size of each brush. You can hit the number keys to set a brush opacity as you paint (1 for 10%, 2 for 20% and so on). You can also vary the opacity of the layer to make the mist more subtle.
06 Tone to finish
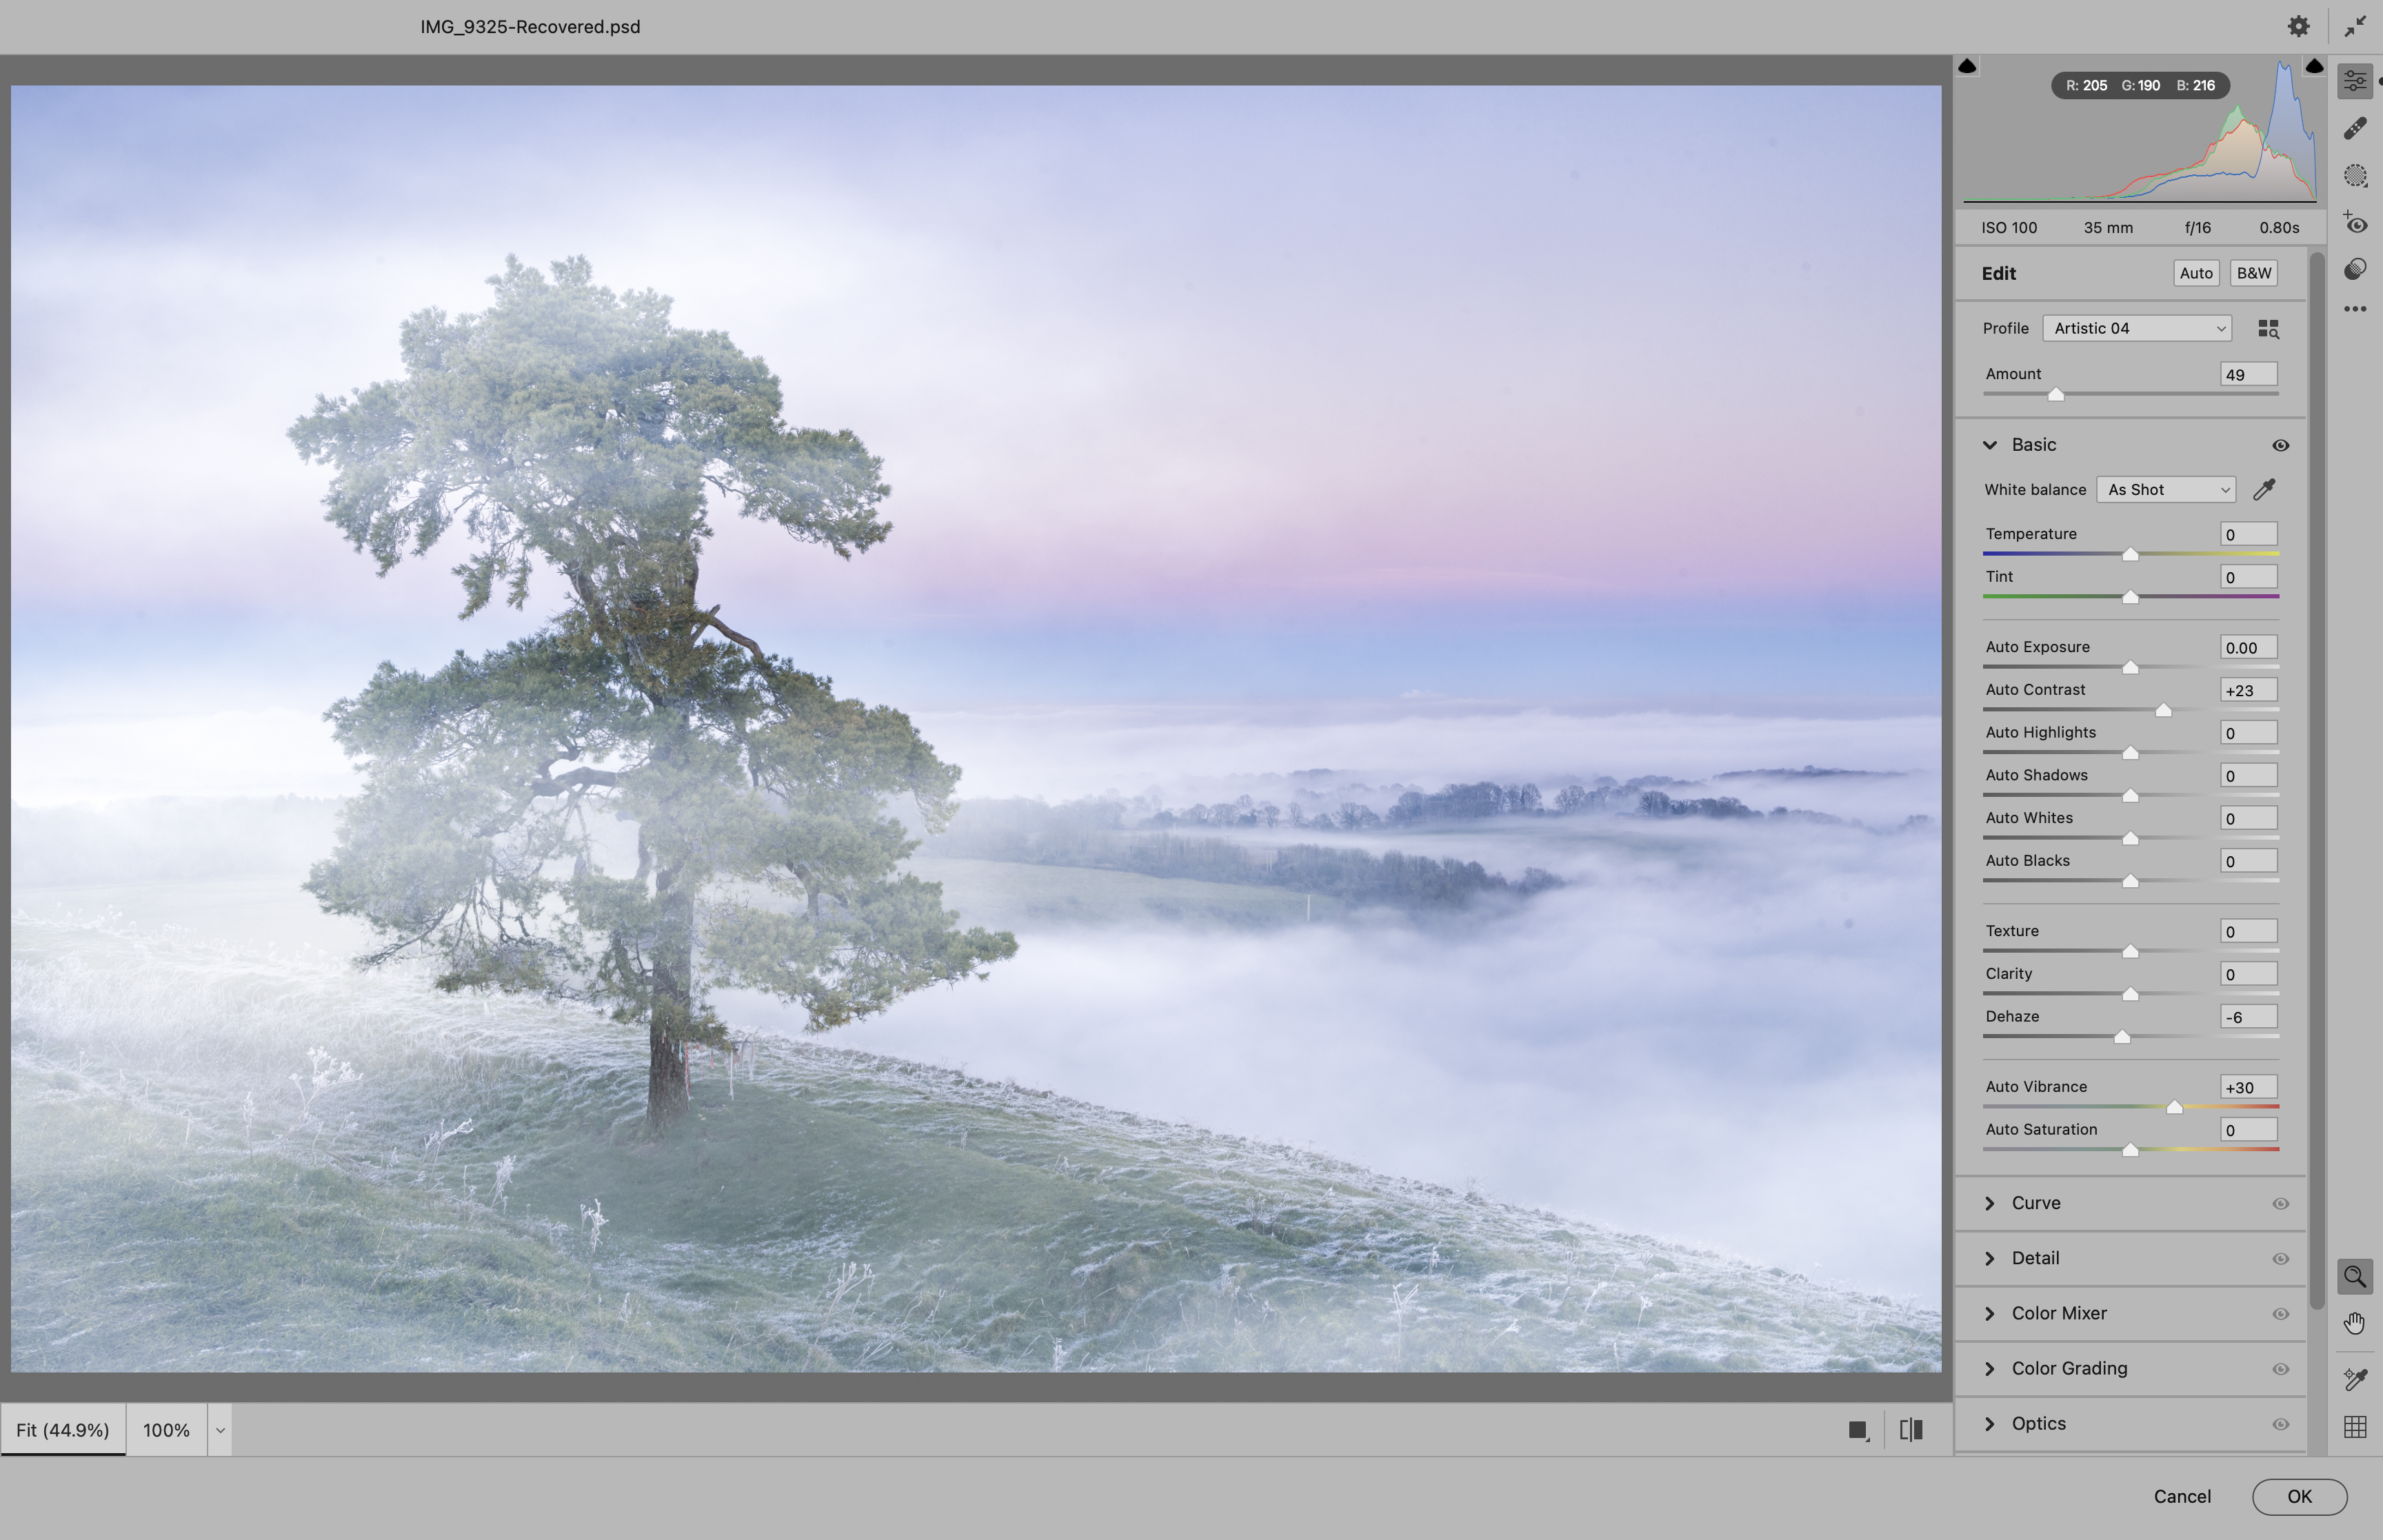
Highlight the top layer and press Cmd/Ctrl + Shift + Alt + E to merge a copy of all layers, then go to Filter > Camera Raw Filter. Choose a profile in the basic settings (we used Artistic 04) and reduce Temperature to cool the image, then make any other tonal changes you like.
PhotoPlus: The Canon Magazine is the world's only monthly newsstand title that's 100% devoted to Canon, so you can be sure the magazine is completely relevant to your system.
Read more:
The best photo editing software: image editors for novices through to pros
The best photo-editing laptops: top laptops for photographers
10 best online photography courses – from beginner guides to masterclasses
Get the Digital Camera World Newsletter
The best camera deals, reviews, product advice, and unmissable photography news, direct to your inbox!
The lead technique writer on Digital Camera Magazine, PhotoPlus: The Canon Magazine and N-Photo: The Nikon Magazine, James is a fantastic general practice photographer with an enviable array of skills across every genre of photography.
Whether it's flash photography techniques like stroboscopic portraits, astrophotography projects like photographing the Northern Lights, or turning sound into art by making paint dance on a set of speakers, James' tutorials and projects are as creative as they are enjoyable.
He's also a wizard at the dark arts of Photoshop, Lightroom and Affinity Photo, and is capable of some genuine black magic in the digital darkroom, making him one of the leading authorities on photo editing software and techniques.


