Watch the video: water drop photography
High-speed photography is an easy way to impress friends and other photographers. A quick look for inspiration will often turn up lots of clever tricks, but most involve complex rig setups and specialist equipment. They get good results but are generally expensive or require a high level of electrical knowledge.
To get started, though, all you really need is your camera, a sturdy tripod, a remote shutter release and a flash that can be adjusted manually. Oh, and a drop of patience is also essential!
In this project, we’re going to look at how to capture a droplet as it splashes through the surface of some water – no mean feat, as this action happens faster than we can see. In order to freeze it, you’ll need to deviate from normal focusing and exposure techniques and get to grips with your camera’s manual features.
The setup that creates the droplet is essential to a good image, as are the positioning of the camera and flash. Luckily, it’s easy to get these right. The most important thing is to shoot in a dark environment – we want to use the flash, rather than the camera’s shutter, to expose the image.
This is because the pulse of light from the flash will be much faster than your camera’s top shutter speed, especially at lower power ratings. Winter evenings are great for this, and shooting in the dark means that you should be able to decrease the aperture to f/16, increasing the depth of field and capturing the water droplet in focus.
In this tutorial, you’ll learn a number of skills that are key to perfecting manual exposure and capturing subjects in a split second.
01 Organize the scene
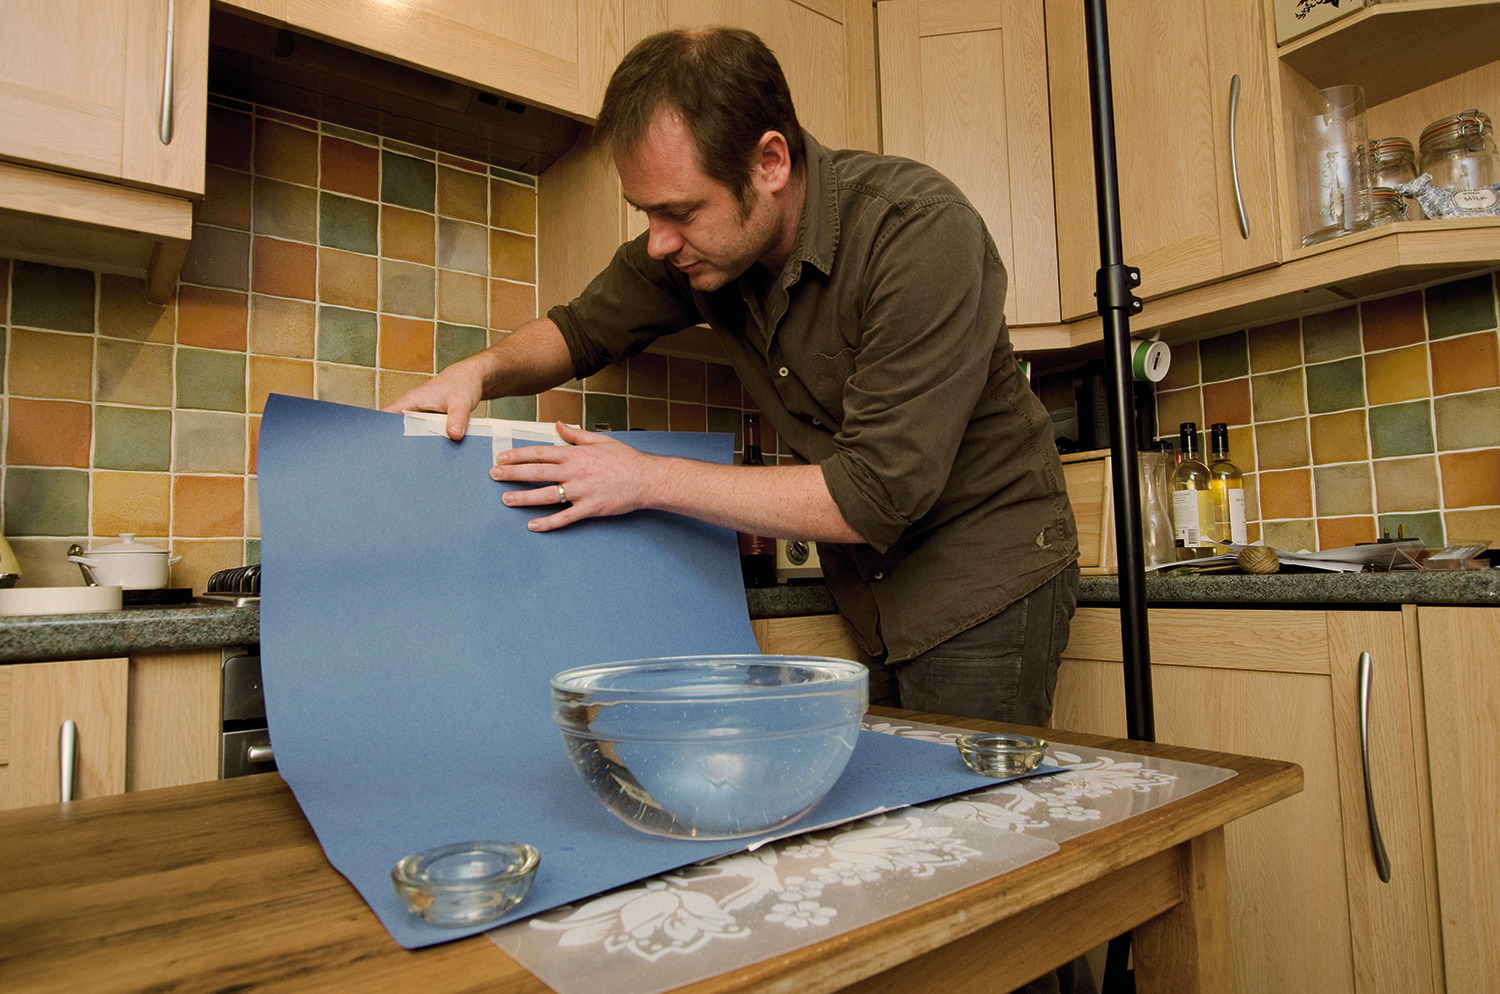
Setup is crucial to getting the shot you want. Start by filling a glass bowl with water, and place this on a colored sheet of A3 paper that’s propped up at the back to create an infinity curve. Next, make a hole in the screw cap of a plastic bottle and use a pin to make a small hole in the side of the bottle. Cover this second hole with tape.
02 Create the water droplet
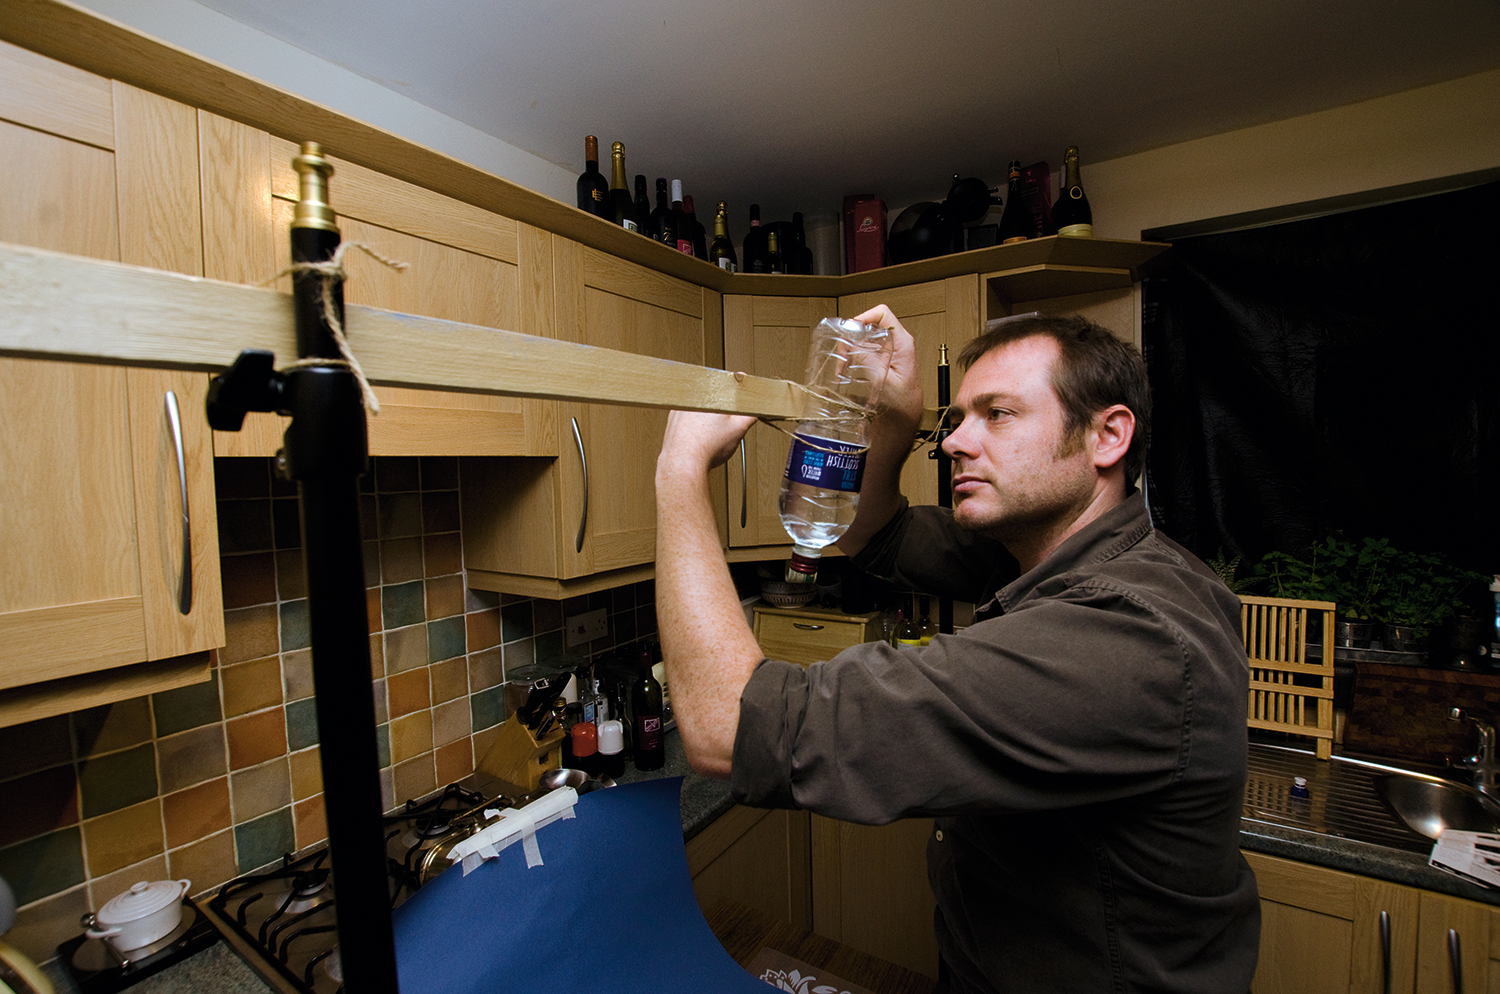
Half-fill the bottle with water. Place boxes or lighting stands on either side of the bowl, and tape a pole between the two. Attach the bottle to the pole, with the cap pointing down. Peel back the tape and check that the water drops from the cap into the bowl. The higher up the bottle is, the bigger the water droplet will be.
03 Use manual focus
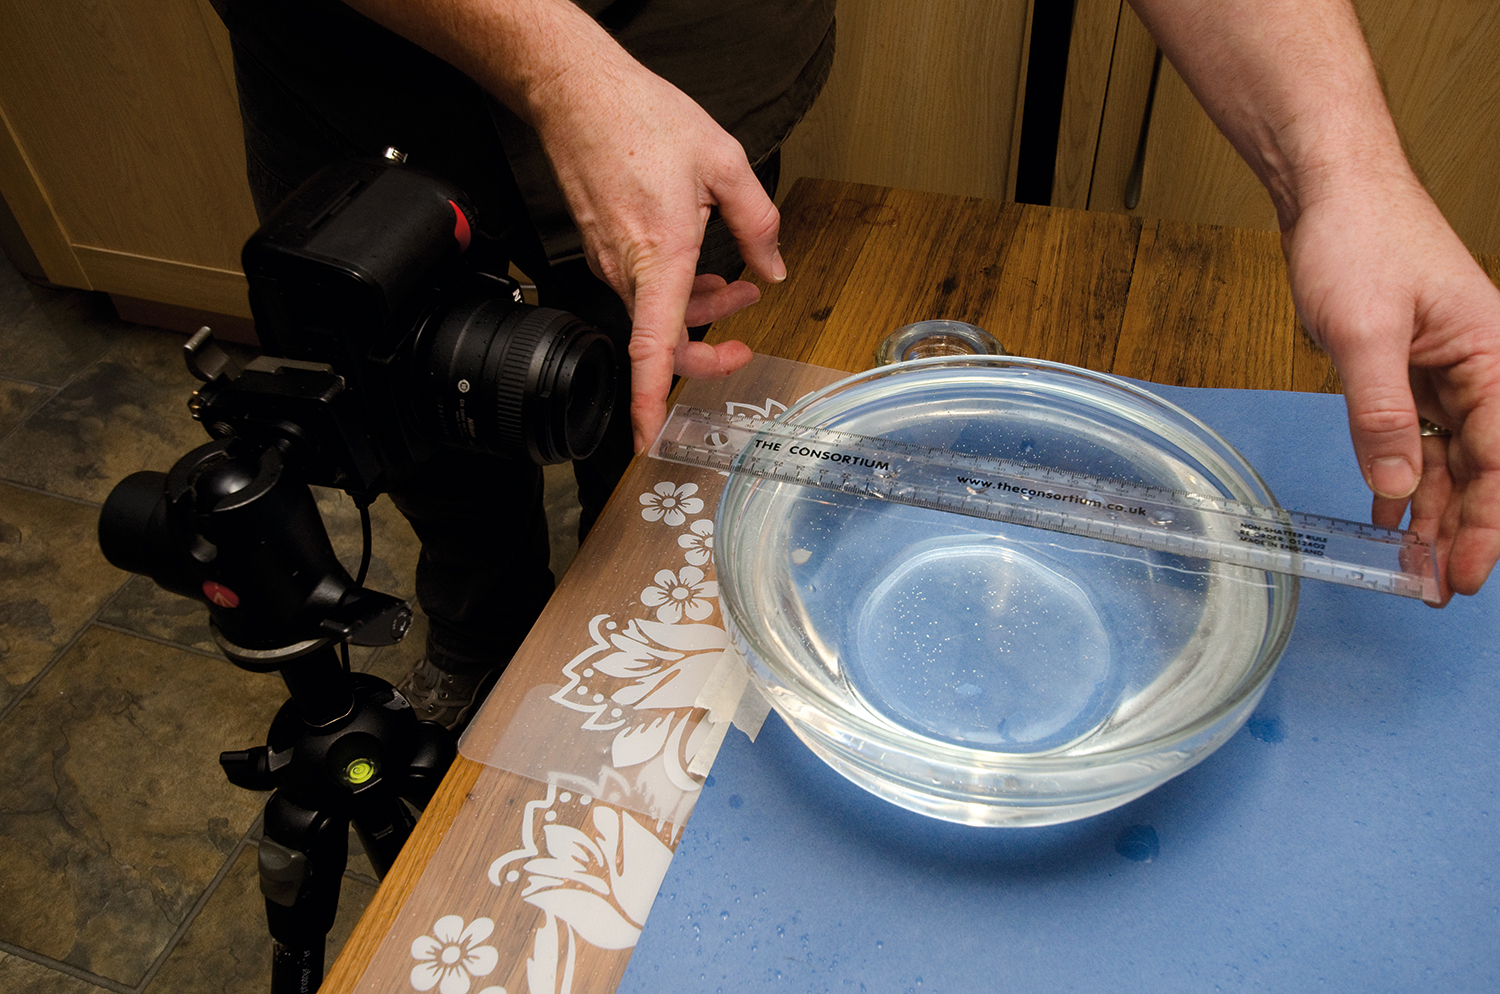
Place your camera on a tripod and angle the body down towards the water bowl by about five degrees. The view of the water should fill the frame. Place a ruler across the bowl and switch the lens to manual, then focus on the point where the water droplet will hit the surface. Switch the camera to manual and decrease the aperture to f/16.
04 Check the focus
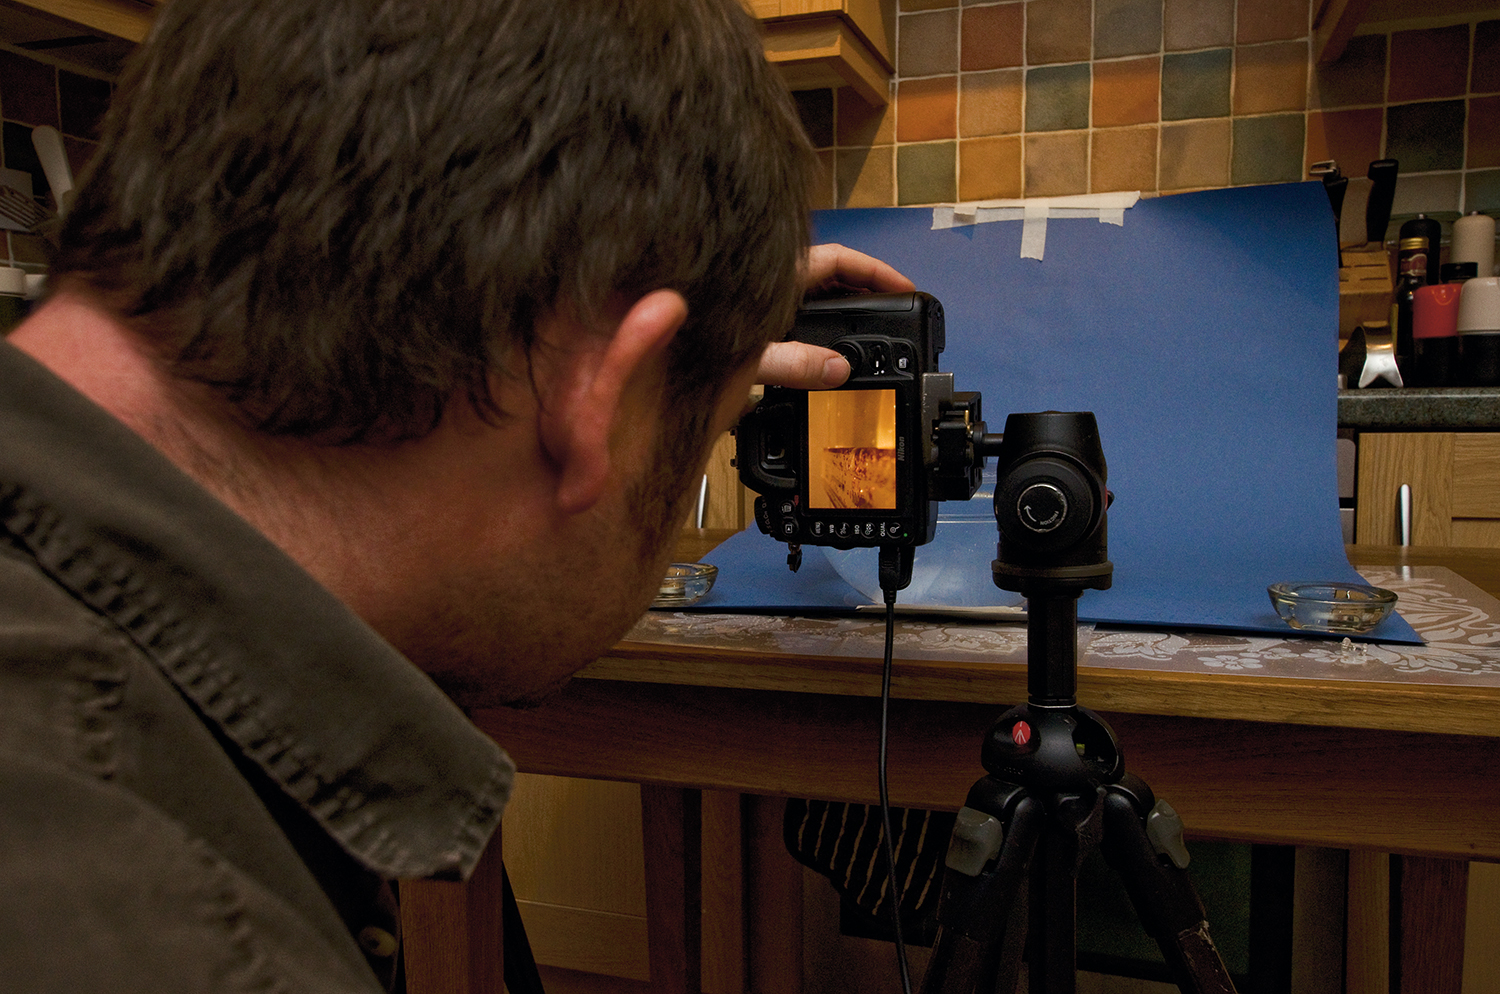
Adjust the shutter speed to get a good exposure. Take a shot. Check the image and see how many of the markings on the ruler are in focus. If less than a centimeter is in focus, increase the aperture to f/22. Connect a shutter release and make sure the room is as dark as possible. Set the shutter speed to 0.5 seconds, or slower.
05 Set the flash
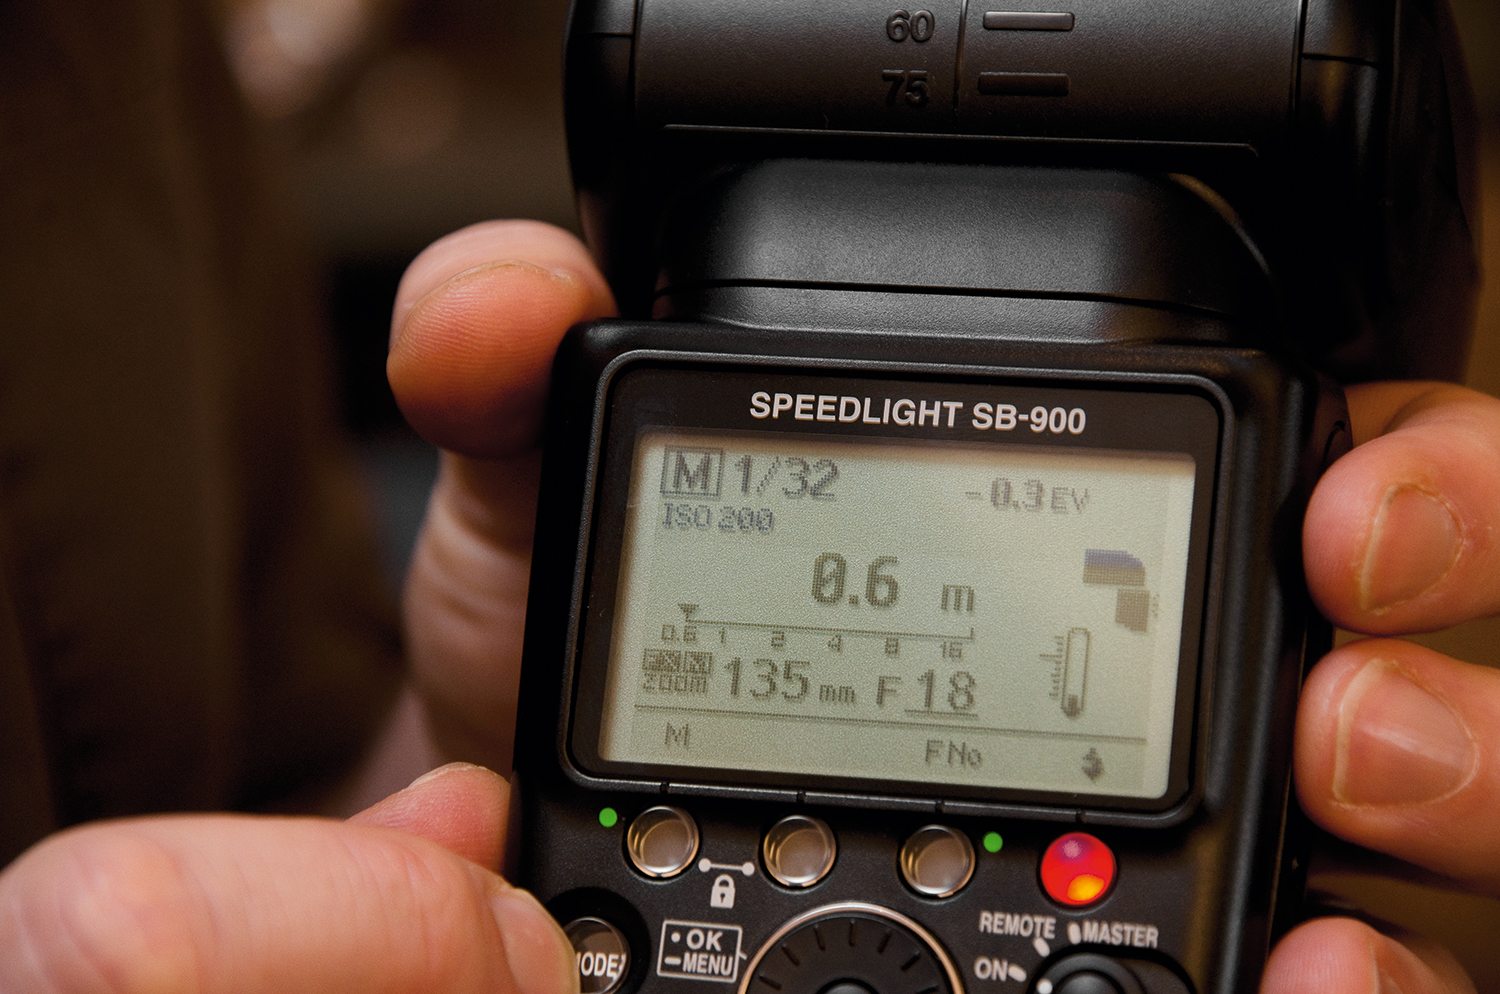
Put your off-camera flash to manual and adjust the power to 1/16. We’re going to expose our shot by manually firing the flash. Hold the flash about half a meter away at the side of the bowl, fire the shutter, and then press the flashgun’s Test button. Review the image – if it looks too bright, reduce the power of the flash to 1/32 and try again.
06 Get ready for the shot
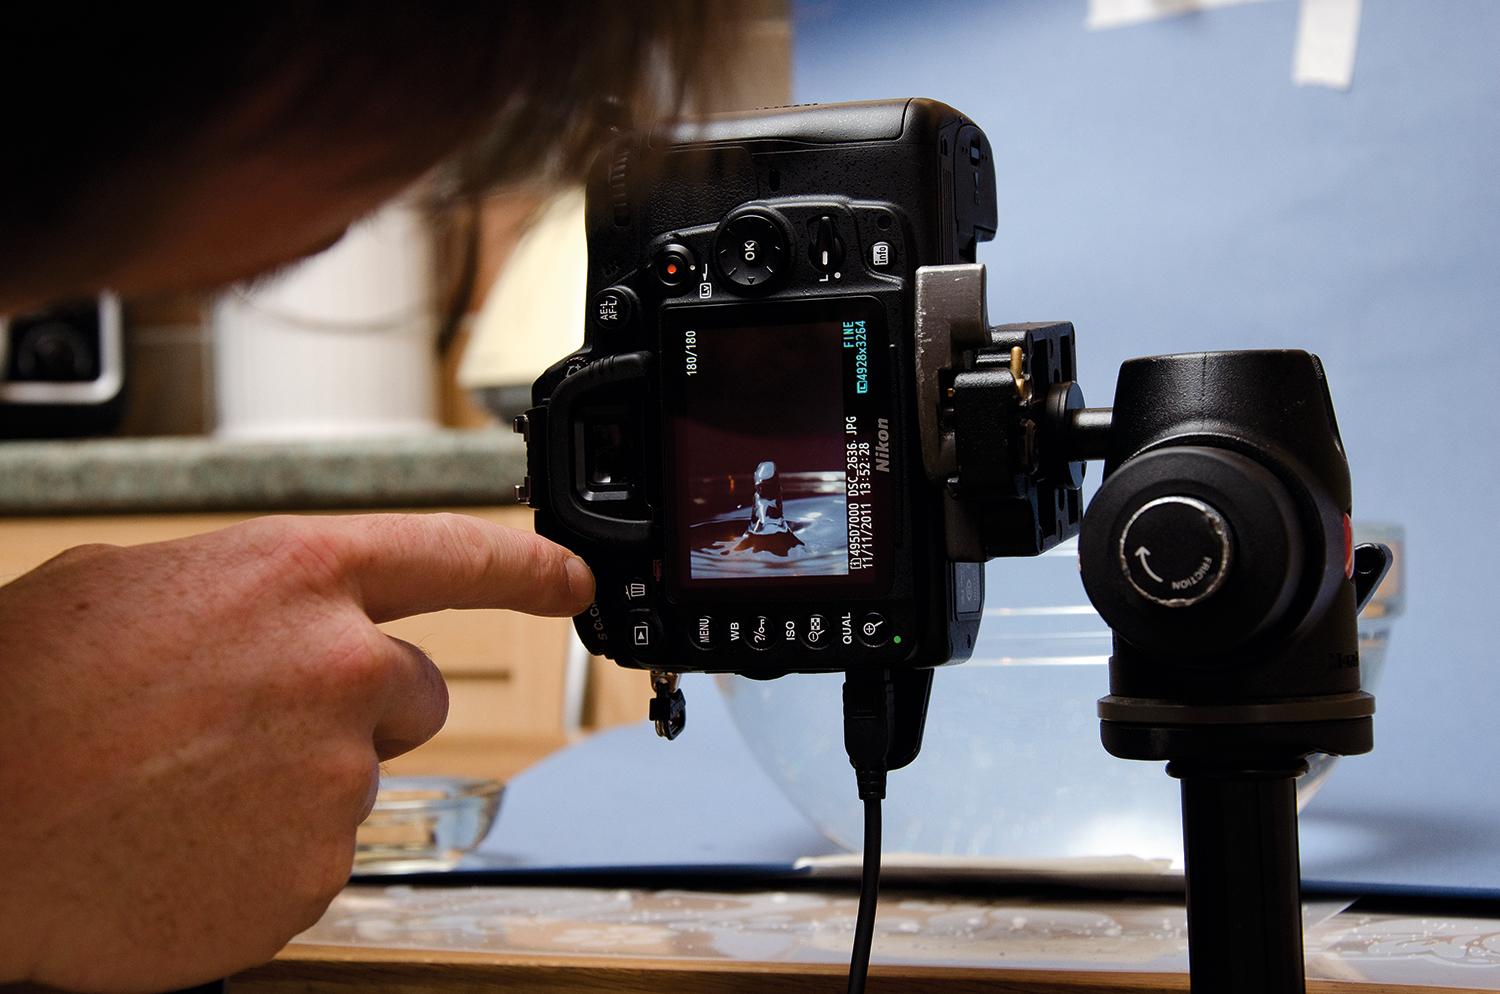
Repeat the testing process until you get a good exposure level for the shot of the ruler. At this point, remove the ruler before taking your first test photos. Peel back the tape that’s over the hole in the bottle, letting the water out in droplets. The next step takes a bit of trial and error, with timing being the key element.
07 Have a play
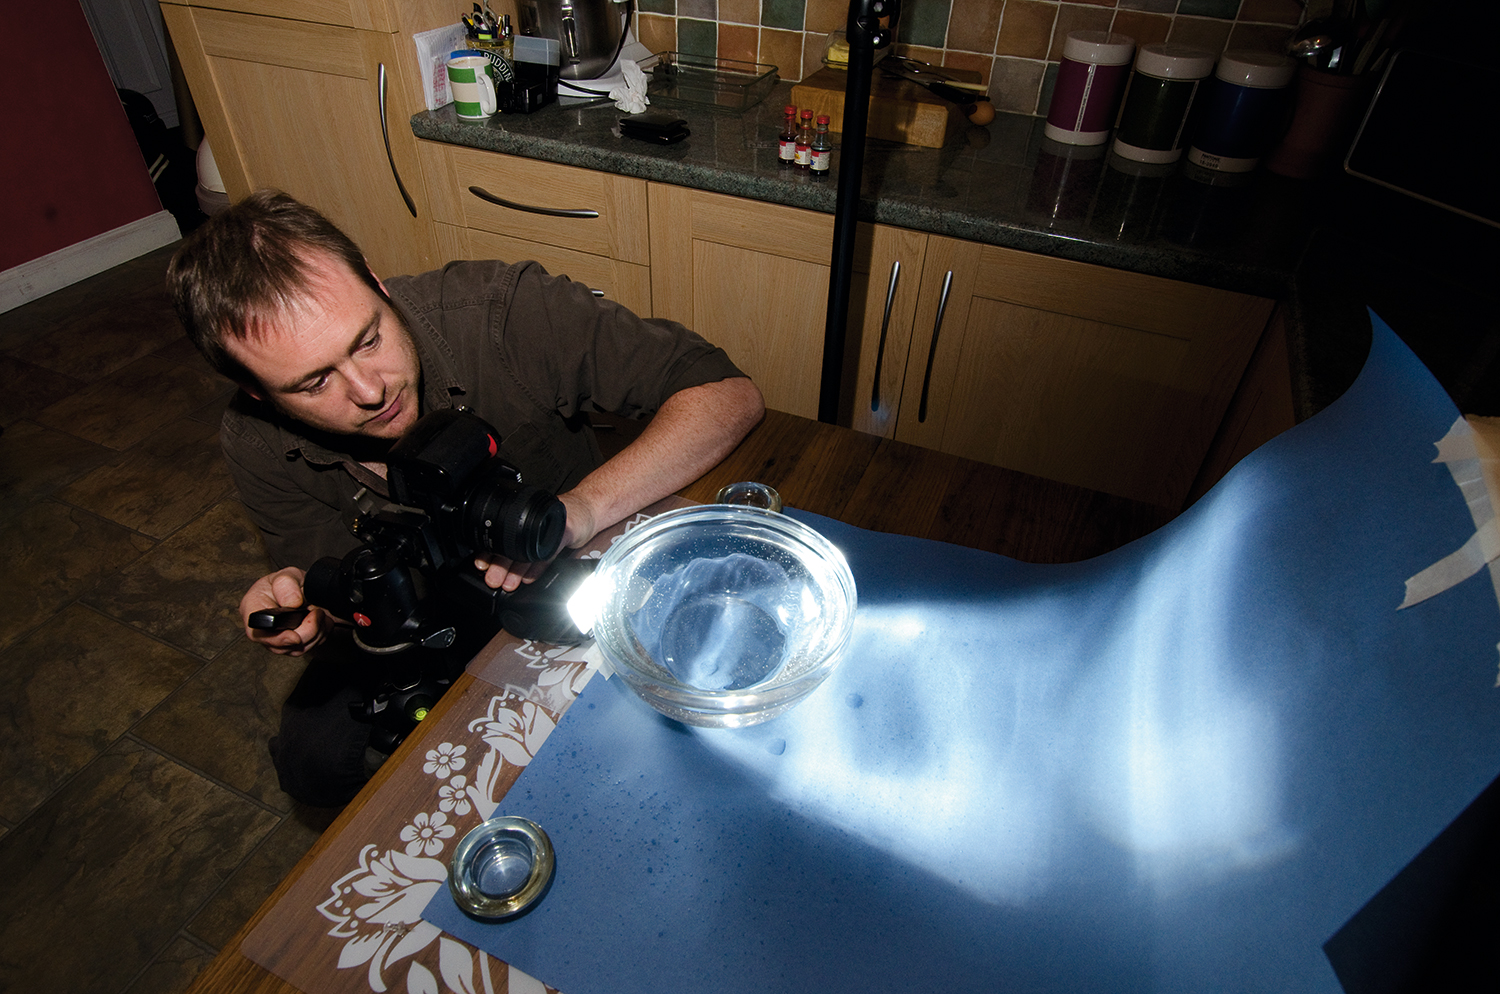
As the water hits the surface, you’ll see droplets form. At this point, release the shutter and fire the flash. Check the back of the camera to see the result. You’re aiming to fire the flash at the exact moment when the water hits the surface, so a few attempts will be needed in order to get the timing right – you should find a rhythm between drops.
08 Add color and interest
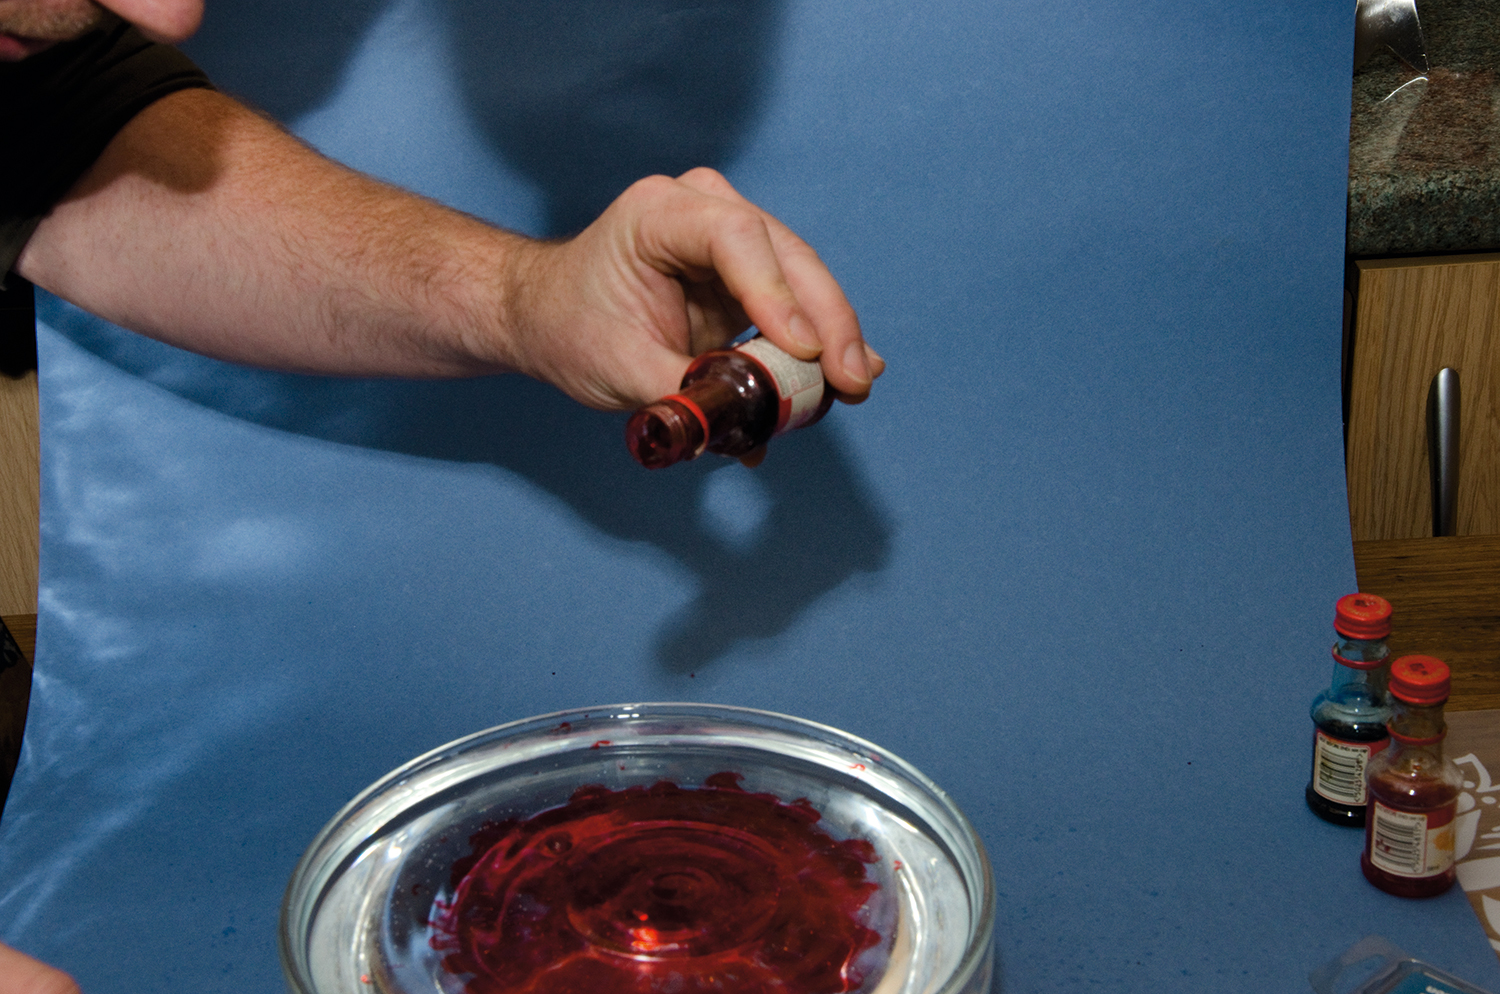
Adding food coloring to the water is a quick way to add an extra something to the image, but you’ll have to replace the water after every few drops. Alternatively, put a colored gel or transparent sweet wrapper over the flash, or get creative and make a multi-colored snoot to fit over the flash for more interesting color effects.
09 Edit your photo in ACR
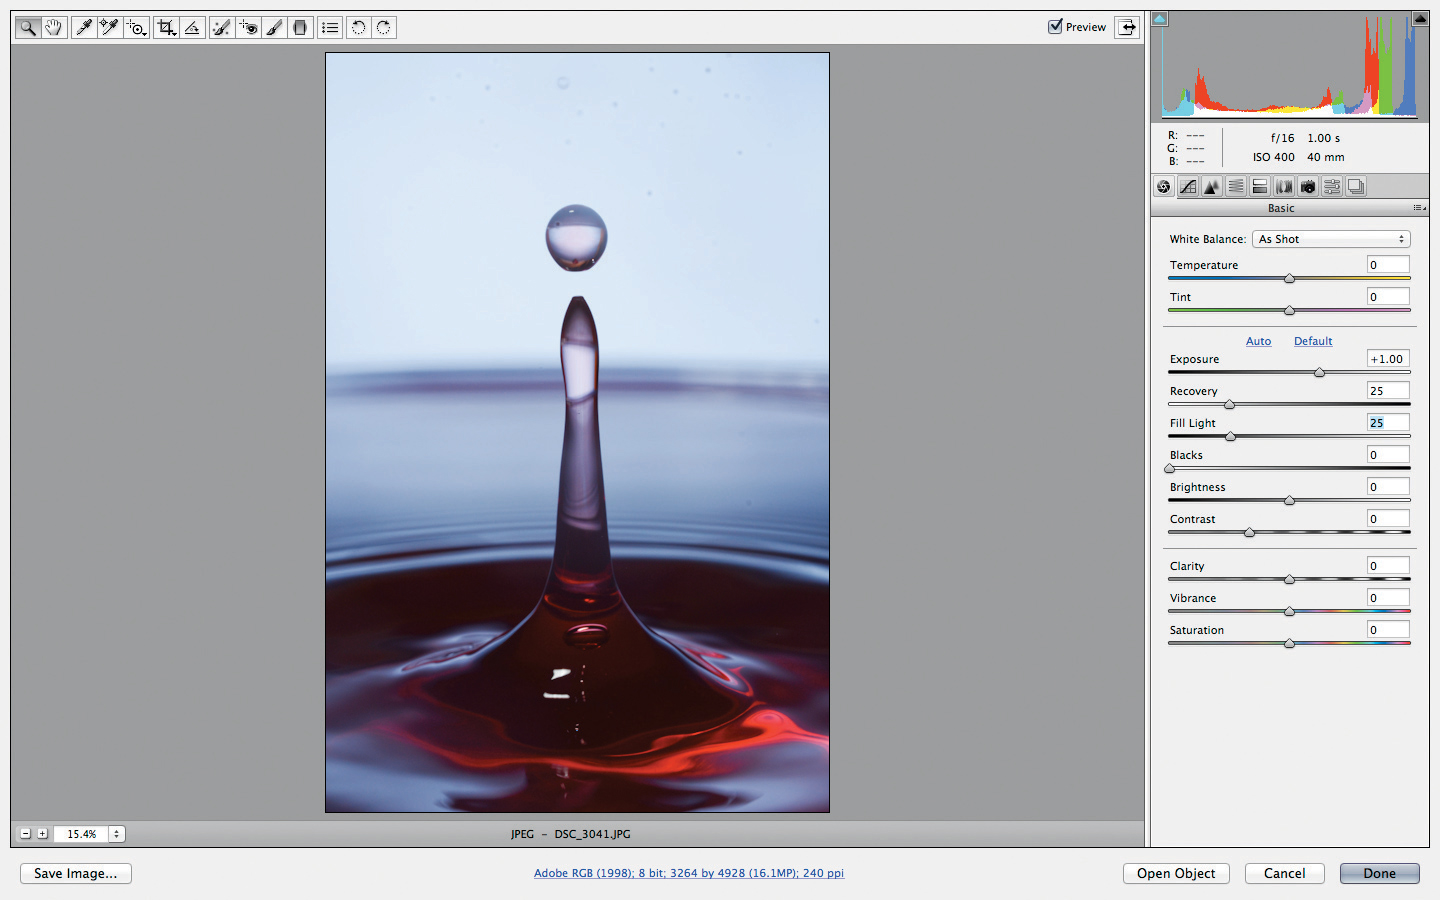
Select one of the photos and open it in Adobe Camera Raw (ACR). We’ll start by improving the exposure. Switch on the Shadow (U) and Highlight (O) clipping warnings and move the Exposure Slider to +0.5. Move the Recover slider to +20 and the Fill Light slider to +25. You should see greater detail in the water droplet.
10 Adjust in Elements
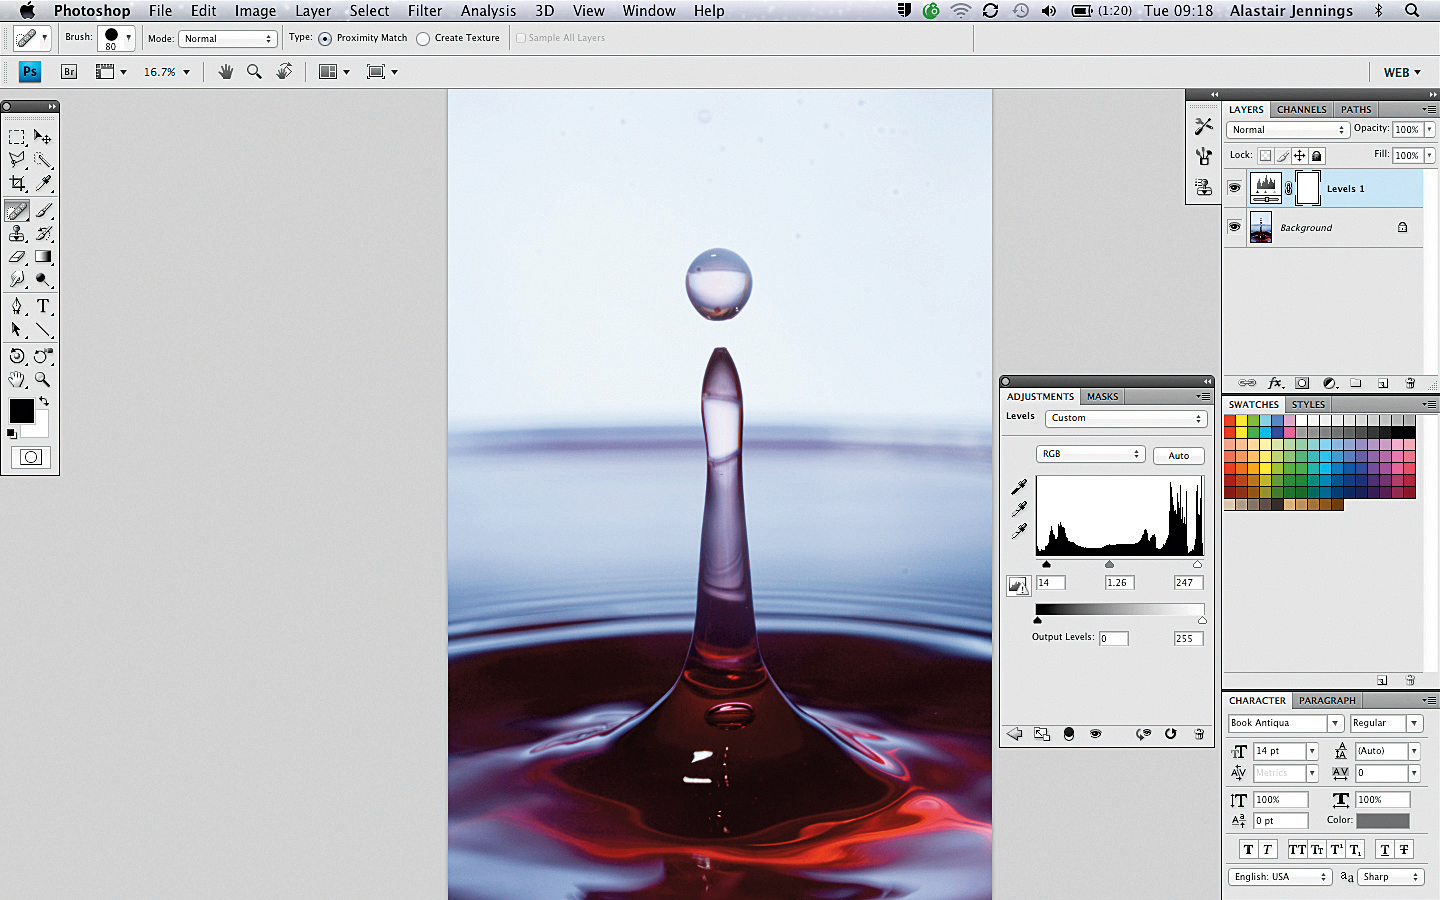
Click the Open Image button to exit ACR. Open Photoshop instead. Create a new Levels Adjustment Layer and move the Shadow and Highlight sliders to meet the edges of the histogram. Our water droplet looks too dark, so we’re going to move the middle slider to the left; if it looked too light, we’d move the slider to the right.
11 Boost the color
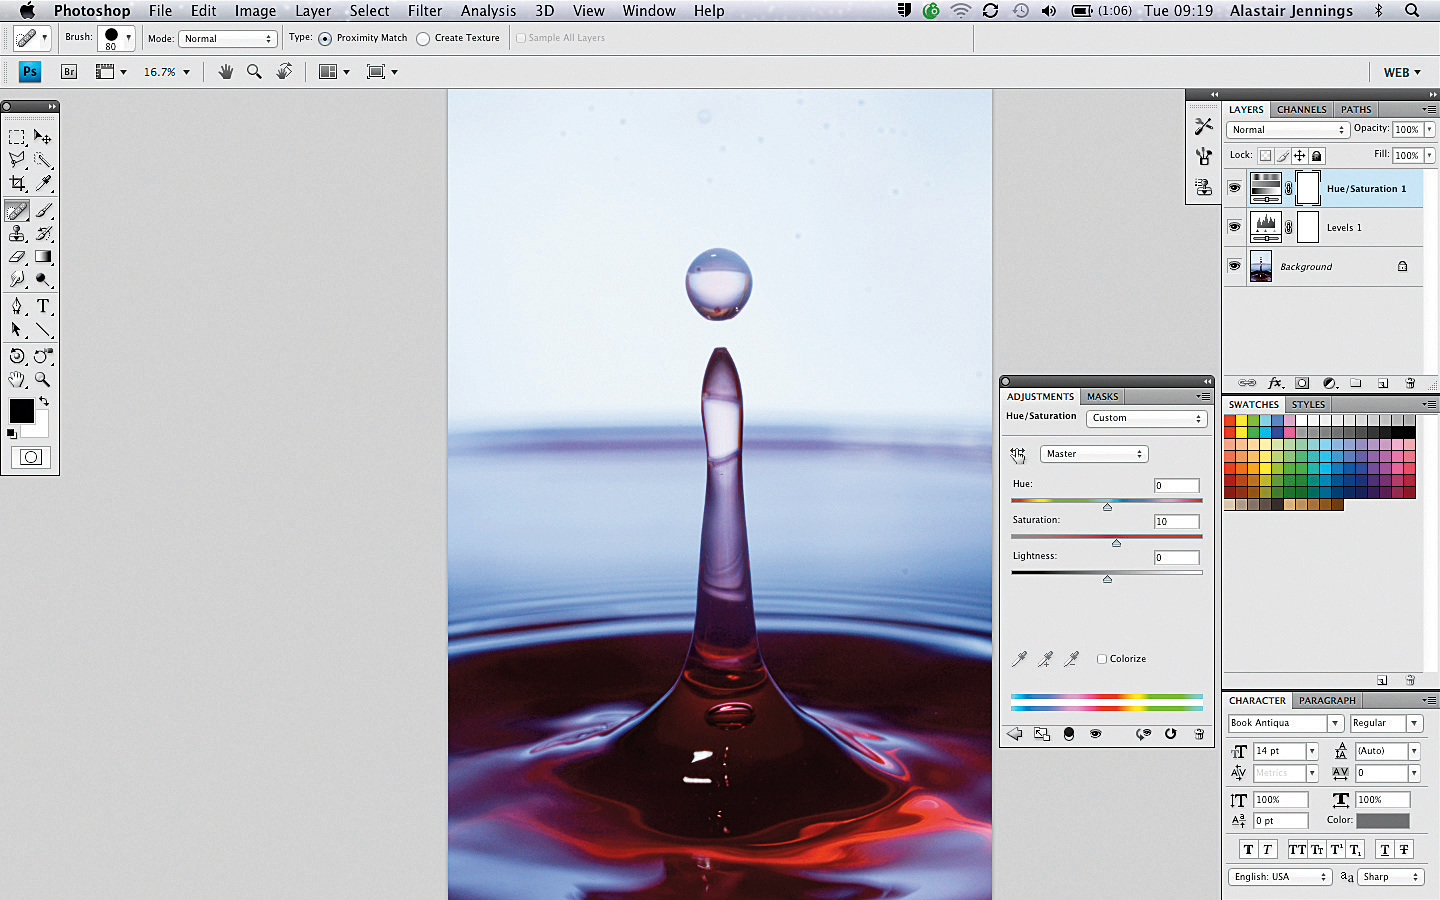
Create a new Hue/Saturation Adjustment Layer. Using the Edit dropdown menu, select Blue and increase the saturation to +15. Then select Green and set it to +10, and finally choose Yellow with a value of +5. Check that the image isn’t losing detail, and then boost the Master Saturation to +10. Now click OK.
12 Sharpen the detail
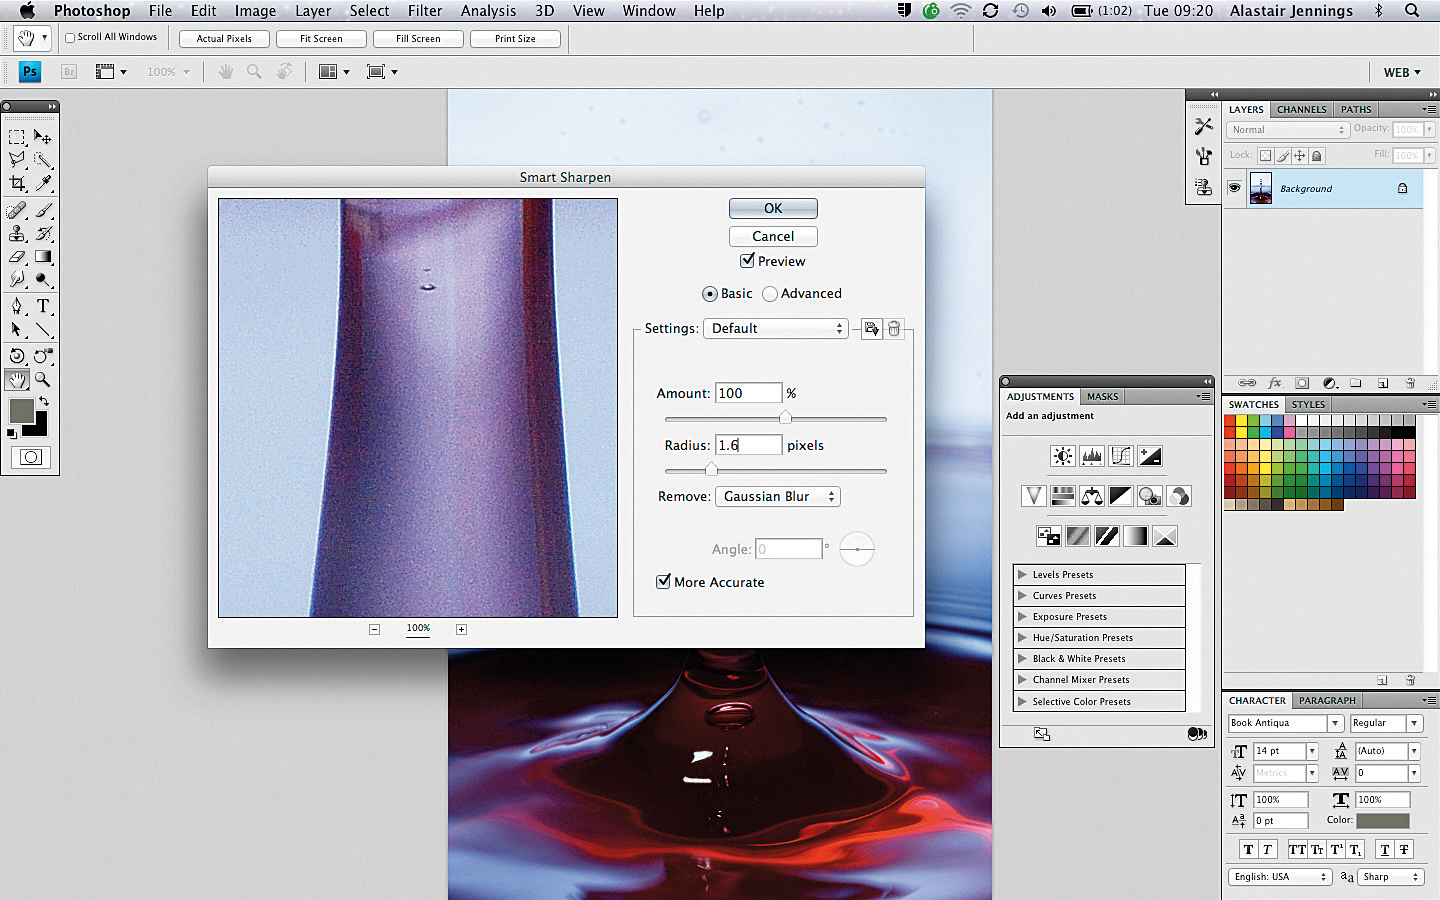
From the Layer options, select Flatten Image, then Enhance > Adjust Sharpness. Increase the Amount to 60% and the Radius to 1.2. Check that Gaussian Blur is selected in the Remove dropdown menu, and that More Refined is ticked. All that’s left to do is click OK to finish your final high-speed water droplet image!
More videos:
The best photography tips videos
Free lensing: get the Lensbaby look and take macro shots with a standard lens
Create colorful cross-polarization effects
Get the Digital Camera World Newsletter
The best camera deals, reviews, product advice, and unmissable photography news, direct to your inbox!
Digital Camera World is one of the leading authorities on camera and photography news, reviews, techniques, tutorials, comparisons, deals and industry analysis. The site doesn't just specialize in cameras, but all aspects of photography, videography and imaging – including camera phones, gimbals, lenses, lighting, editing software, filters, tripods, laptops, printers, photo books, desks, binoculars and more.
Whether you're using, looking to buy or trying to get the most out of a compact camera, action camera, camera drone, cinema camera, beginner camera or professional camera, Digital Camera World has a roster of experts with combined experience of over 100 years when it comes to cameras, photography and imaging.

