What is focus peaking?
Take advantage of additional Live View features to take control of manual focus.
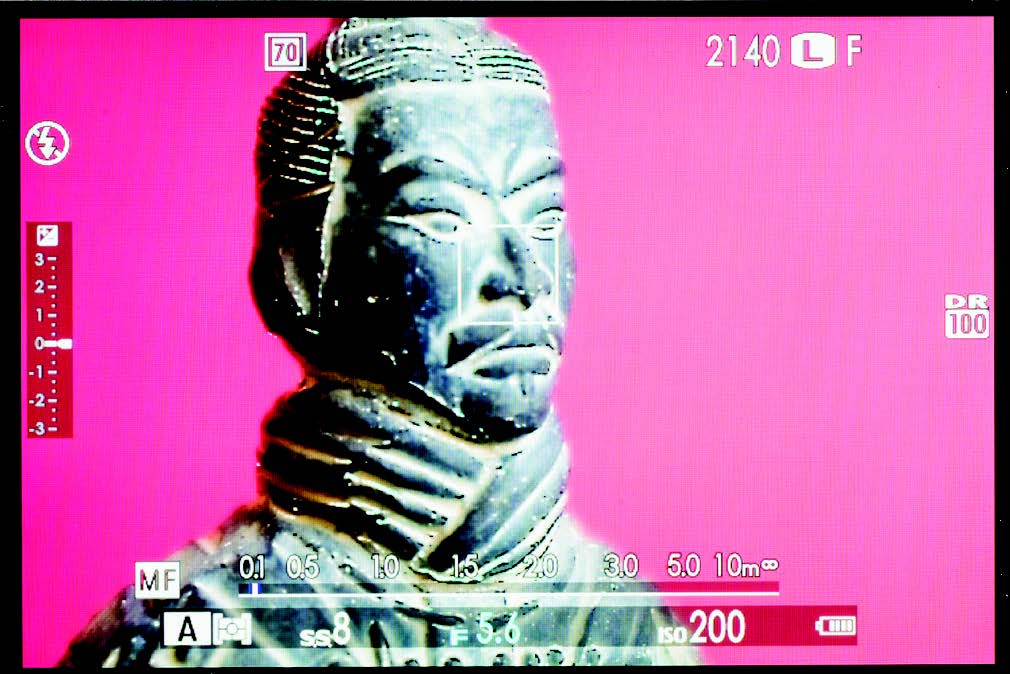
Digital cameras feature a number of manual focusing aids that are designed to make it easier to tell when the subject is sharp. Although the ability to magnify details on the Live View display is now commonplace, focus peaking is the (relatively) new kid on the block.
• See the Digital Camera World A-Z Dictionary of photography jargon
Focus peaking is a tool inherited from video cameras and is now widely found on mirrorless cameras. A small handful of DSLRs also list this function as Focus Assist for Live View. Focus peaking works on the principal that the sharpest areas have the highest or peak contrast, with the camera overlaying a white or coloured highlight on the edges and textures of objects on the Live View image to indicate this.
Read more: How to master manual focus
The overlay moves across the image in real time as you focus back and forth, so you can quickly see which areas are sharp. One of the advantages of using a mirrorless camera with an electronic viewfinder is that you don’t need to take your eye away from the eyepiece to look at the display in order to use focus peaking. Not only does this mean you can react faster, it also makes for more stable shots when you shoot handheld.
It’s not a foolproof system though. If you use a small aperture to deliver an extensive depth of field, for instance, then a larger amount of the scene may be picked out by focus peaking, and it can be harder to judge precisely where the sharpest point is.
Get to grips with focus peaking

1. Peaking colour
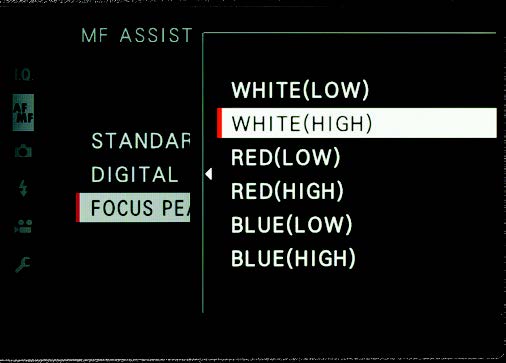
Focus peaking needs to be enabled in the camera menu, where you can tailor the peaking to the scene or subject you’re shooting. For instance, you can change the colour of the peaking highlights so that they contrast with colours in the image and are easier to see.
2. Peaking level
In addition to being able to change the colour, you can select different levels of peaking. There are typically two or three options available, such as high and low on this Fujifilm camera. A high level will produce a lot of highlights, while a low setting is more selective.
3. Split image
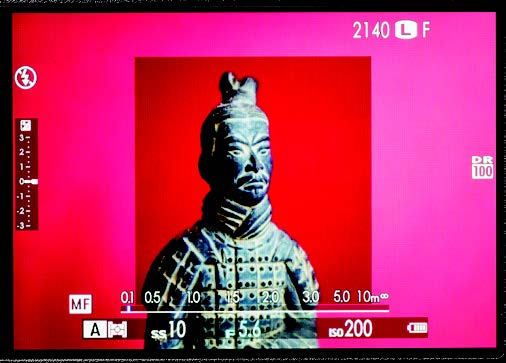
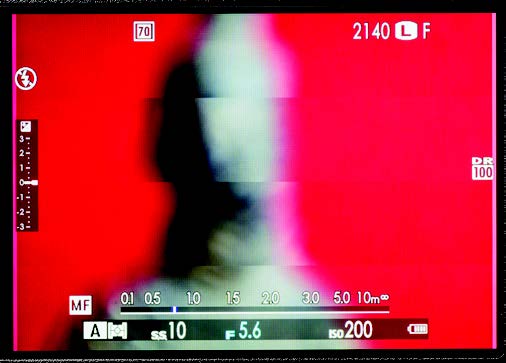
Some cameras have further Live View focusing aids. For instance, Fujifilm includes a colour ‘digital split image’ option in some recent X-series cameras. This is similar to old split image focus screens, and rangefinders, where you rotate the focusing ring until the separate parts of the image line up.
4. Magnify
It can be hard to judge whether the image is truly sharp unless you magnify details in the Live View image. Using the split image or focus peaking to get things close before enlarging the image to fine-tune the focus position is the most efficient way of doing this.
Read more:
How to master manual focus
How to take great photos: using the right equipment
The best DSLR cameras right now
Get the Digital Camera World Newsletter
The best camera deals, reviews, product advice, and unmissable photography news, direct to your inbox!
The sister print publication to this website, Digital Camera Magazine is Britain's best-selling photography publication – and it can also be purchased outside the United Kingdom as Digital Camera World.
Digital Camera Magazine is packed with more expert advice and more inspirational images than any other title, with the sole aim of helping you become a better photographer. Every issue we also bring you a selection of great gifts which are designed to help you get more from your photography – everything from tips cards and cheat sheets to free software and bookazines.
In addition to inspirational images, interviews, projects, mini tests and tutorials, each issue is packed with news, reviews and comparisons, as well as photographer vs photographer shootouts and head-to-head challenges using the best photo editing software.
The magazine is captained by Editor Niall Hampton.

