Your essential landscape editing checklist for Photoshop and Lightroom
Use these essential tools in Lightroom and Photoshop to enhance almost every landscape photograph
The best camera deals, reviews, product advice, and unmissable photography news, direct to your inbox!
You are now subscribed
Your newsletter sign-up was successful
Watch video: Essential landscape edits for Photoshop and Lightroom
Every shot requires its own tailor-made edits, but there are a few general edits that we can apply to most, if not all of our landscapes in Photoshop CC. The subject matter and the camera settings we tend to use for landscapes make some edits essential. So in this tutorial, we’ll go through some of the key edits you can make.
One such edit is lens correction. To some extent every lens we use will have flaws. With landscapes these flaws can be more noticeable because we often shoot with wide angles, and these tend to display greater fringing and barrel distortion. Luckily lens issues can be fixed in Lightroom or Camera Raw. To do this, we make use of the large database of lens profiles to automatically fix the problem.
Article continues below• Read more: Luminar AI review
We also tend to shoot landscapes with a narrow aperture, and this can bring a few more issues; with more of the scene in focus, the higher the chances of recording noticeable flaws. Any dust or marks on the sensor will be more obvious, especially if they appear in otherwise detail-less areas like a sky, and even more so if shooting into the sun. These are pretty simple to fix, but it’s better to have a clean sensor in the first place!
Another eternal problem with landscapes is the question of how to balance land and sky. In this regard we can use a combination of tonal tools to pull detail out of the shadows and rescue it in the highlights, resulting in a balanced, detail-rich landscape.
• See also: Why I dumped Lightroom CC and went back to Lightroom Classic
The best camera deals, reviews, product advice, and unmissable photography news, direct to your inbox!
01 Crop and straighten your shot
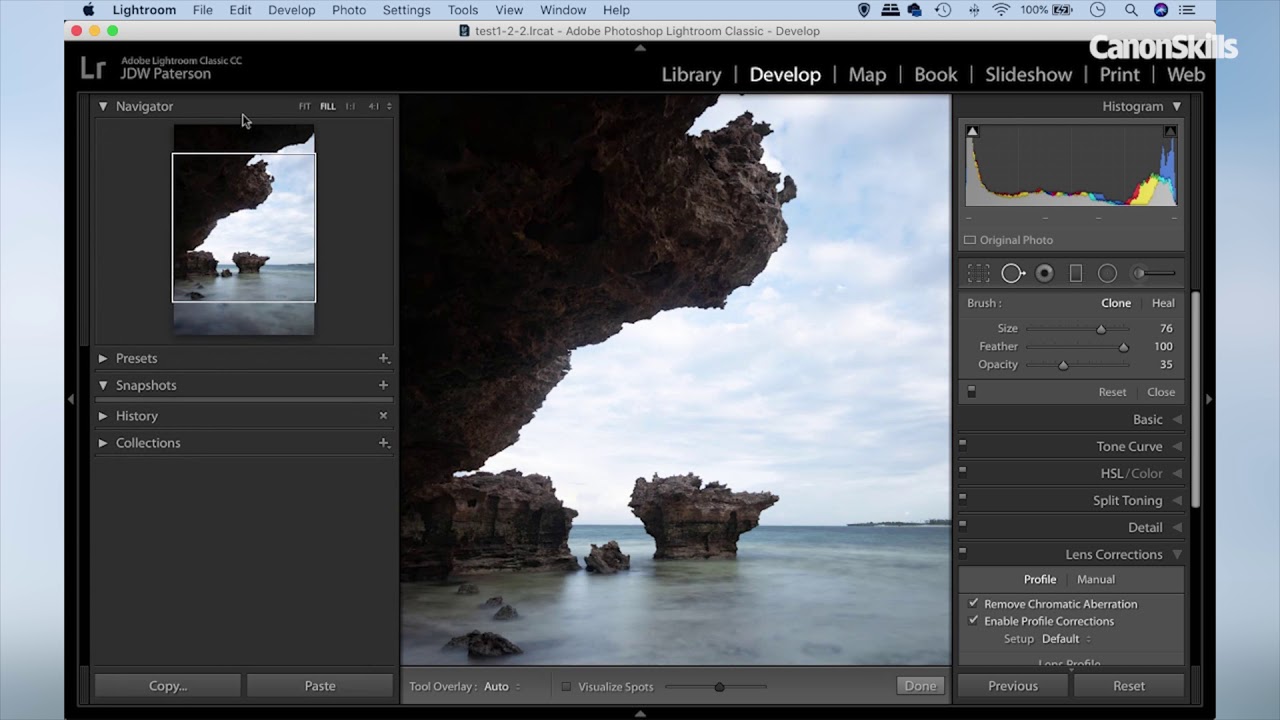
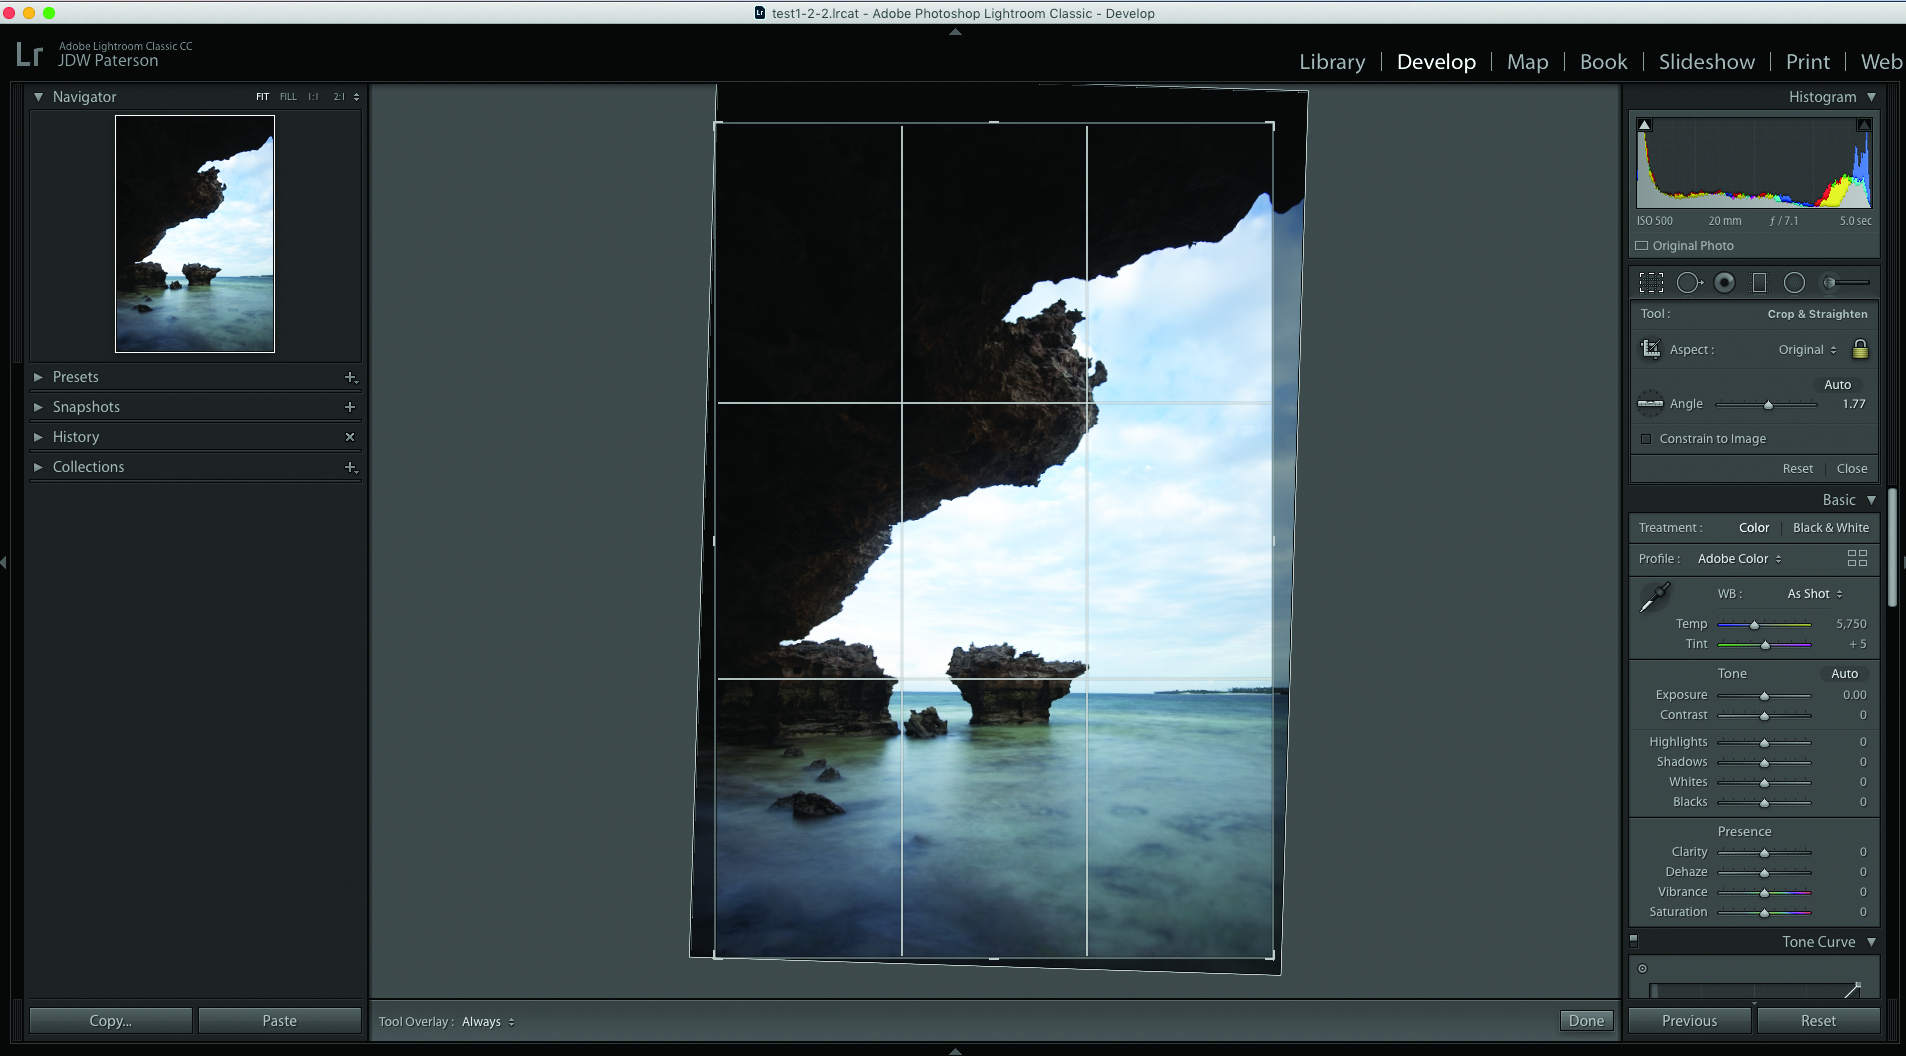
If your in-camera framing is perfect then great, skip this. But more often than not a crop might be needed. Import your image into Lightroom (or download our start image here), then head to the Develop module and grab the Crop tool. Drag the crop box and rotate if required to fix wonky horizon.
02 Correct lens flaws
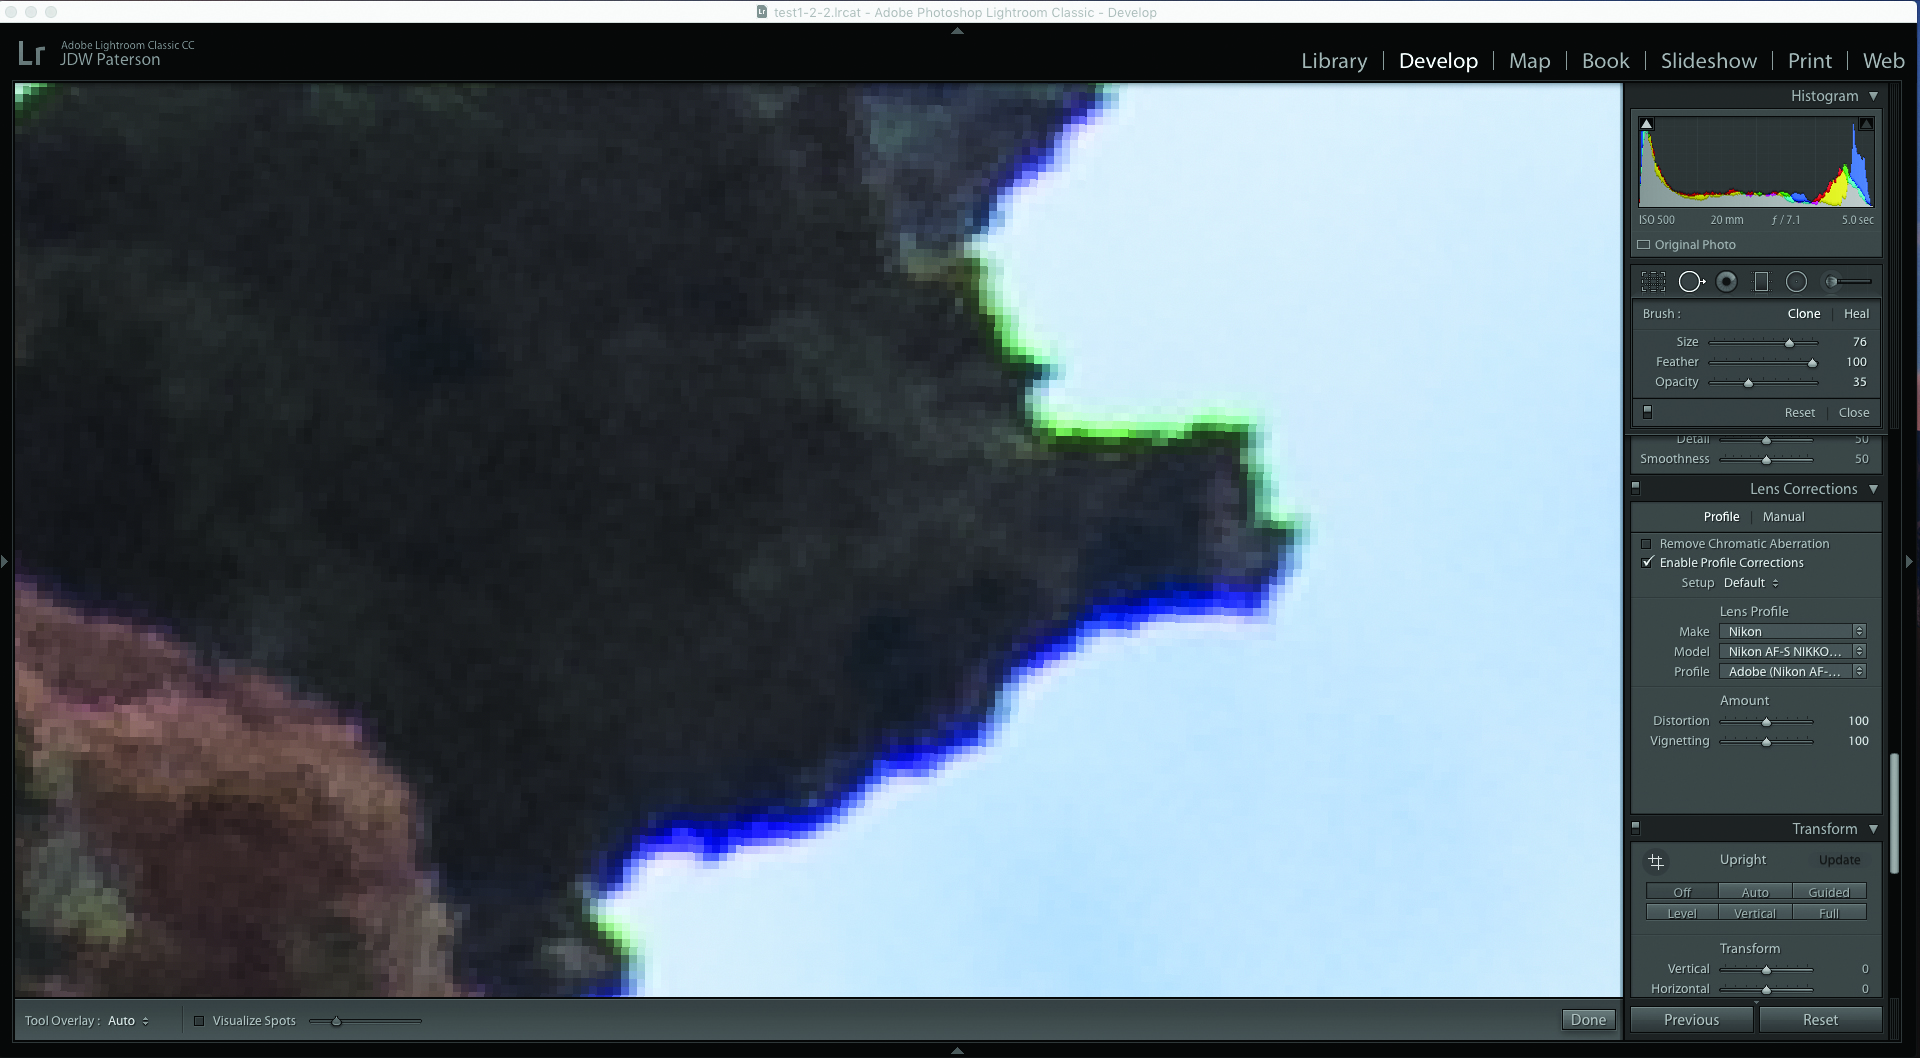
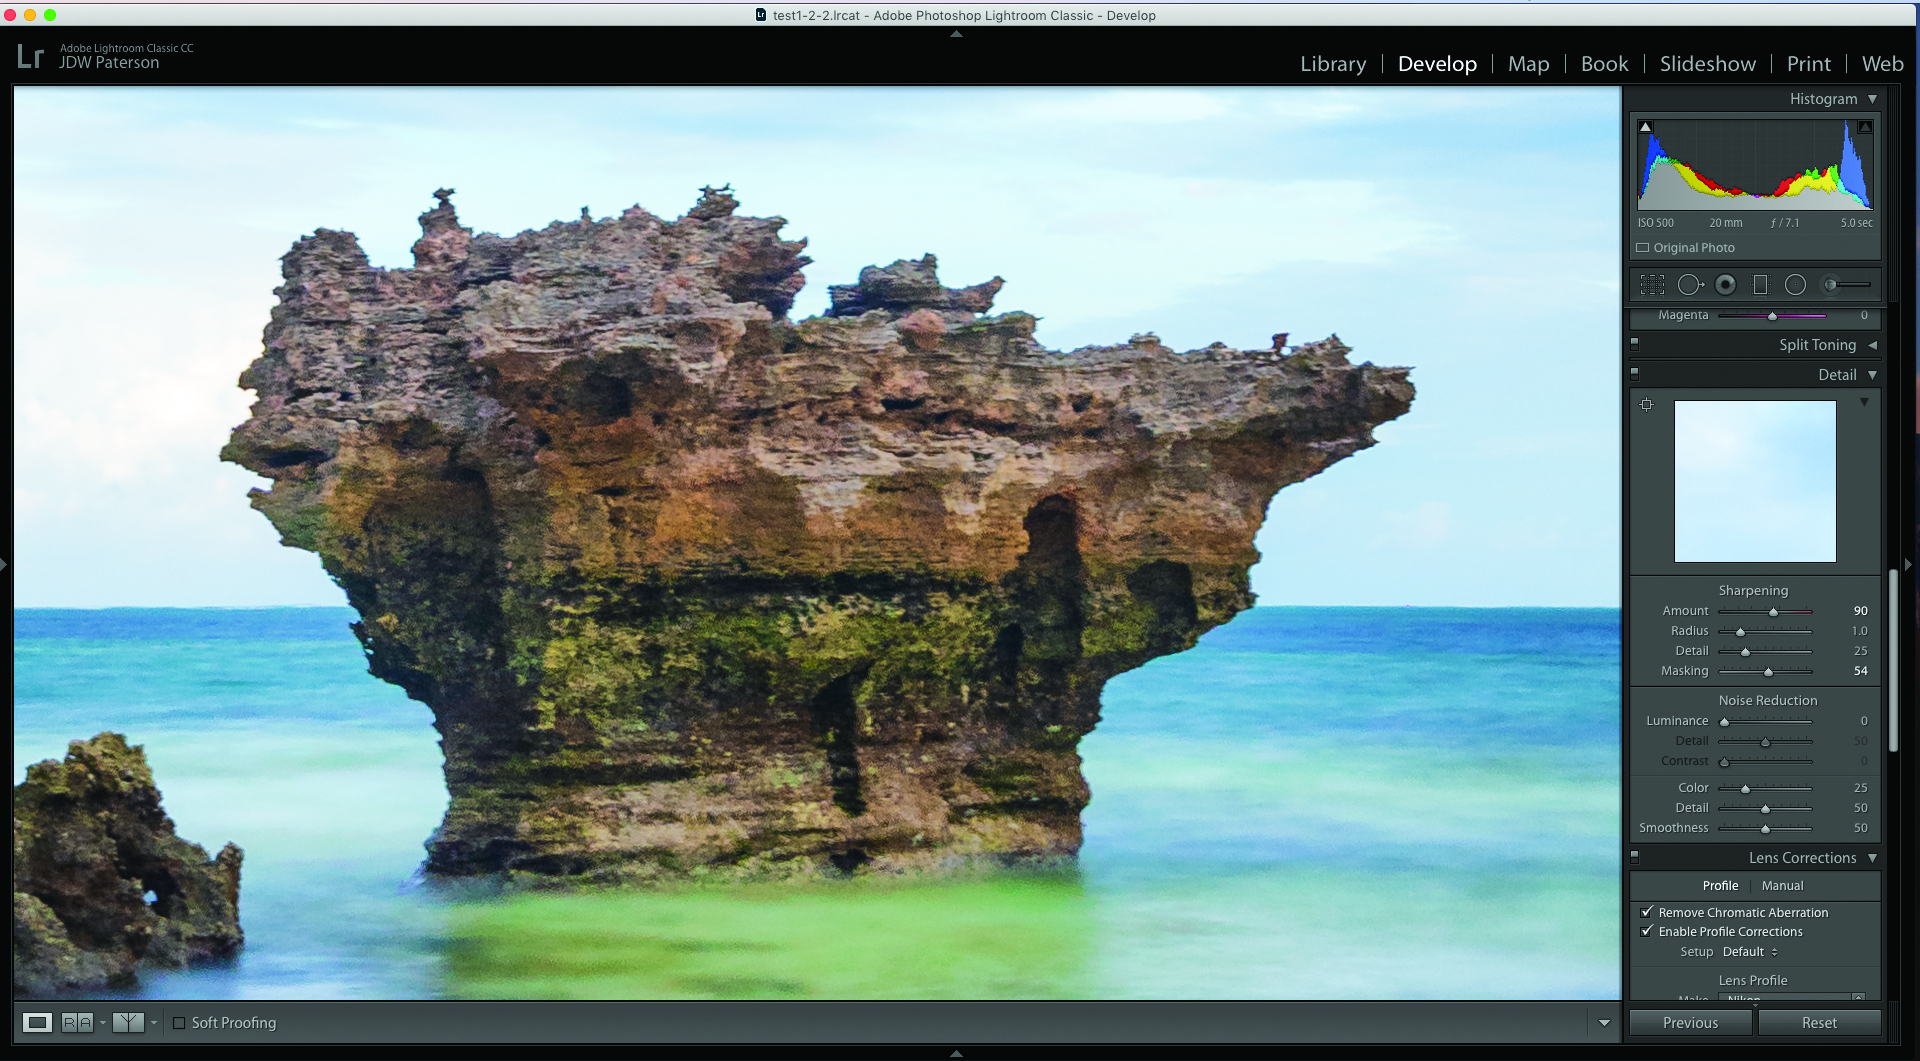
Color fringing can occur when bright skies meets land. Here, there’s a greenish fringe. To fix this, go to the Lens Correction panel in Lightroom’s Develop module, click Profile and check Remove Chromatic Aberration. Then, Enable Profile Corrections.
03 Retouch marks
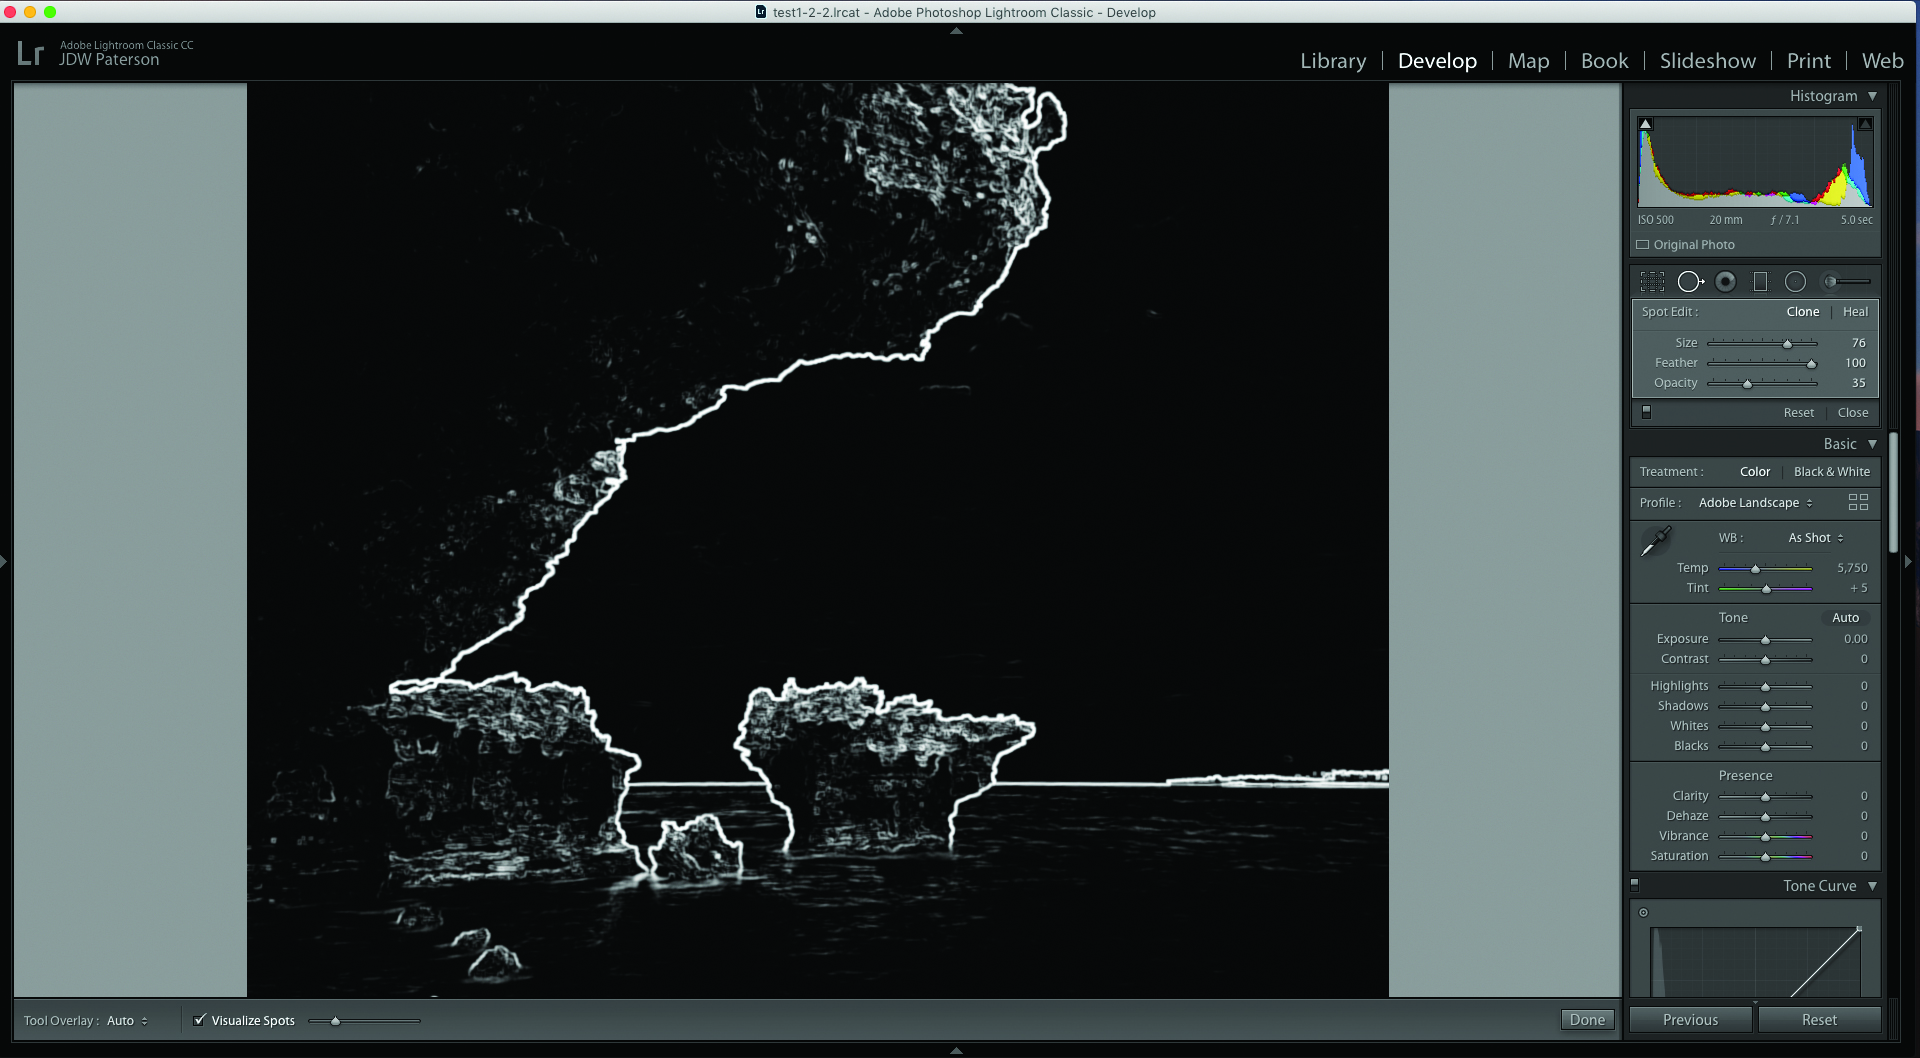
When shooting at narrower apertures for landscape photography, any sensor marks will be made worse. Grab the Spot Removal tool and check Visualize Spots at the bottom of the screen. Paint over any marks, then manually move the source point if you need to.
04 Enhance tones
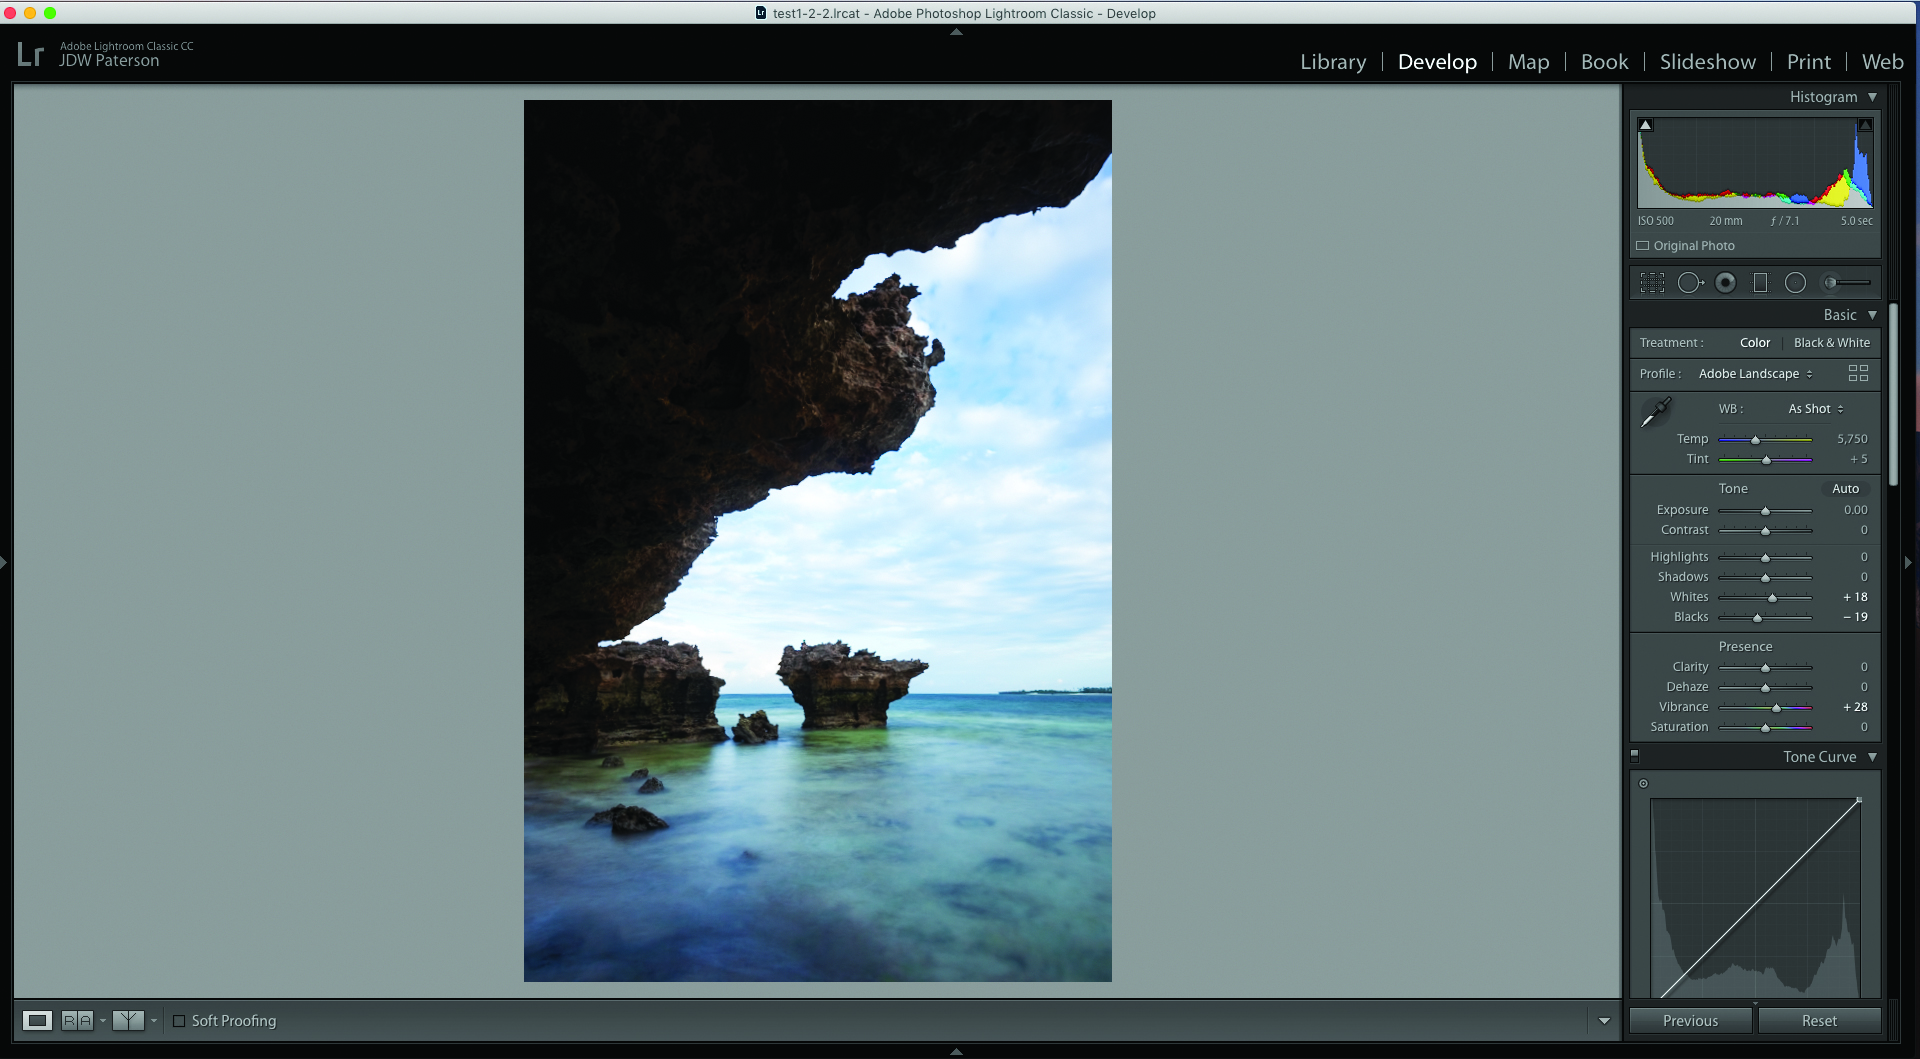
Go to the tonal sliders in the Basic panel. Hold Alt and drag the white and black sliders. If you hold Alt while dragging these you can see clipped pixels – drag to a point just before they appear. If the sky is too bright lower the Highlights, then alter Clarity and Vibrance.
05 Selective tweaks
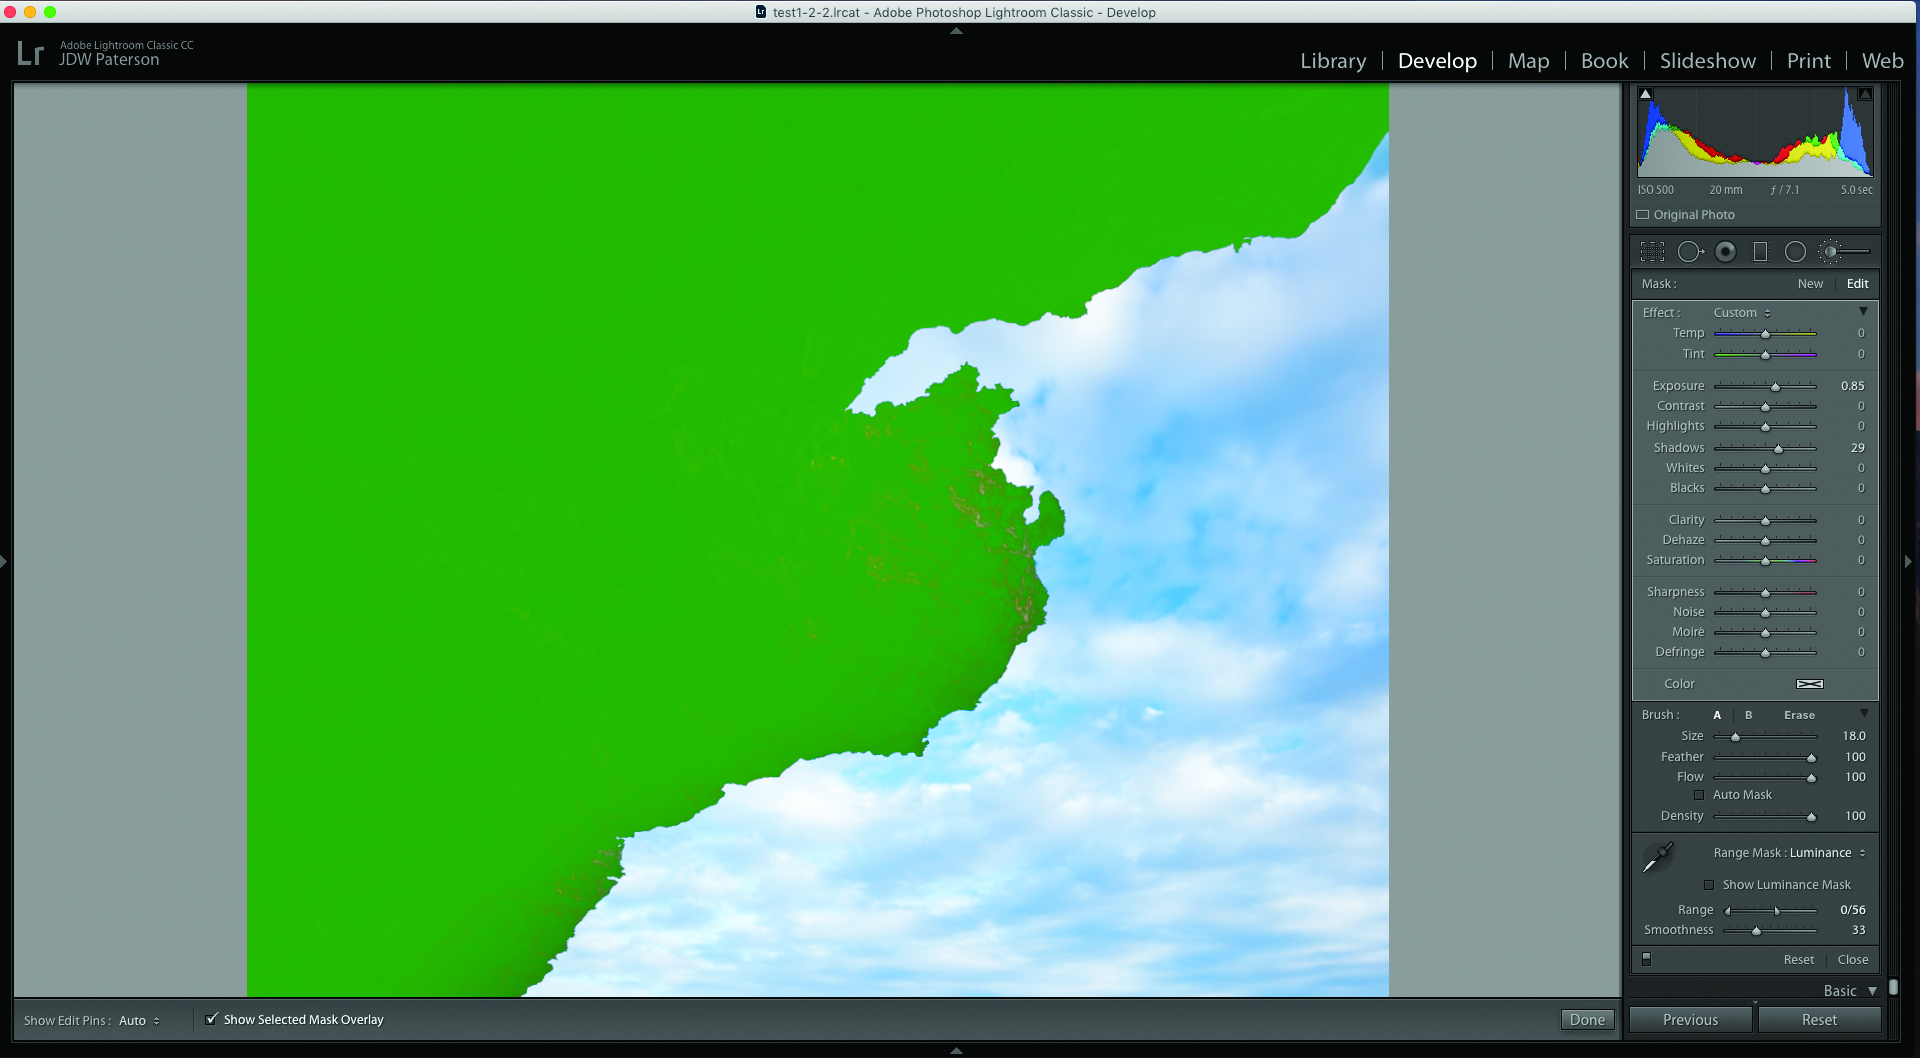
Use the Adjustment Brush to lift dark areas, like the rocks. Get it from the toolbar and paint over the area. Then, up the Exposure and Shadows to lift it. Go to the Range Mask controls and set Luminance, hold Alt and drag the white point inwards. This restricts the effect.
06 Apply sharpening
If you want to make any other local adjustments then hit N and begin painting again. Finally, head to the Detail Panel. Increase the Sharpening Amount to around 120 then hold Alt and drag the Masking slider across to restrict the sharpening to the fine details.
PhotoPlus: The Canon Magazine is the world's only monthly newsstand title that's 100% devoted to Canon, so you can be sure the magazine is completely relevant to your system.
Read more:
The best photo editing software: image editors for novices through to pros
The best photo-editing laptops: top laptops for photographers
10 best online photography courses – from beginner guides to masterclasses
The lead technique writer on Digital Camera Magazine, PhotoPlus: The Canon Magazine and N-Photo: The Nikon Magazine, James is a fantastic general practice photographer with an enviable array of skills across every genre of photography.
Whether it's flash photography techniques like stroboscopic portraits, astrophotography projects like photographing the Northern Lights, or turning sound into art by making paint dance on a set of speakers, James' tutorials and projects are as creative as they are enjoyable.
He's also a wizard at the dark arts of Photoshop, Lightroom and Affinity Photo, and is capable of some genuine black magic in the digital darkroom, making him one of the leading authorities on photo editing software and techniques.
