Zoo photography tips: how to get great pictures of animals
A telephoto zoom plus some clever practical tricks and editing processes equals great wildlife shots in zoos and safari parks
Watch the video: how to photograph animals in zoos and safari parks.
Animals make great subjects, but they’re not always easy to photograph, even in captivity. That said, zoos and wildlife parks are great places to hone your wildlife photography skills. They enable you to get closer to the animals than you would in the wild. For this tutorial, we went to the Cotswold Wildlife Park and Gardens, Oxfordshire, to show you how to get shots to be proud of.
• More photography tips: how to take pictures of anything
The first thing you’ll need is a telephoto lens. Something like a 70-300mm zoom would be ideal, particularly on an APS-C camera as they will give a focal length of about 450mm. This should be adequate even for larger enclosures, where animals are further away.
Longer focal lengths take a little practice, which is why environments like zoos are ideal. They also increase the risk of camera shake. As a quick guide, use the Reciprocal Rule, where you divide the effective focal length into ‘1’ to get the minimum ‘safe’ shutter speed.
For example, if you’re shooting at an effective focal length of 250mm, your minimum speed should be 1/250 sec. Lens stabilization on many camera lenses (and, indeed, on many mirrorless bodies) will help cut camera shake, but it can’t prevent subject movement. You’ll still need faster shutter speeds to capture moving animals.
We’d recommend shooting RAW files rather than JPGs, too. You won’t always have time to think about the perfect settings when you’re shooting, and RAWs give you more flexibility to edit settings later on.
1. Use Aperture Priority
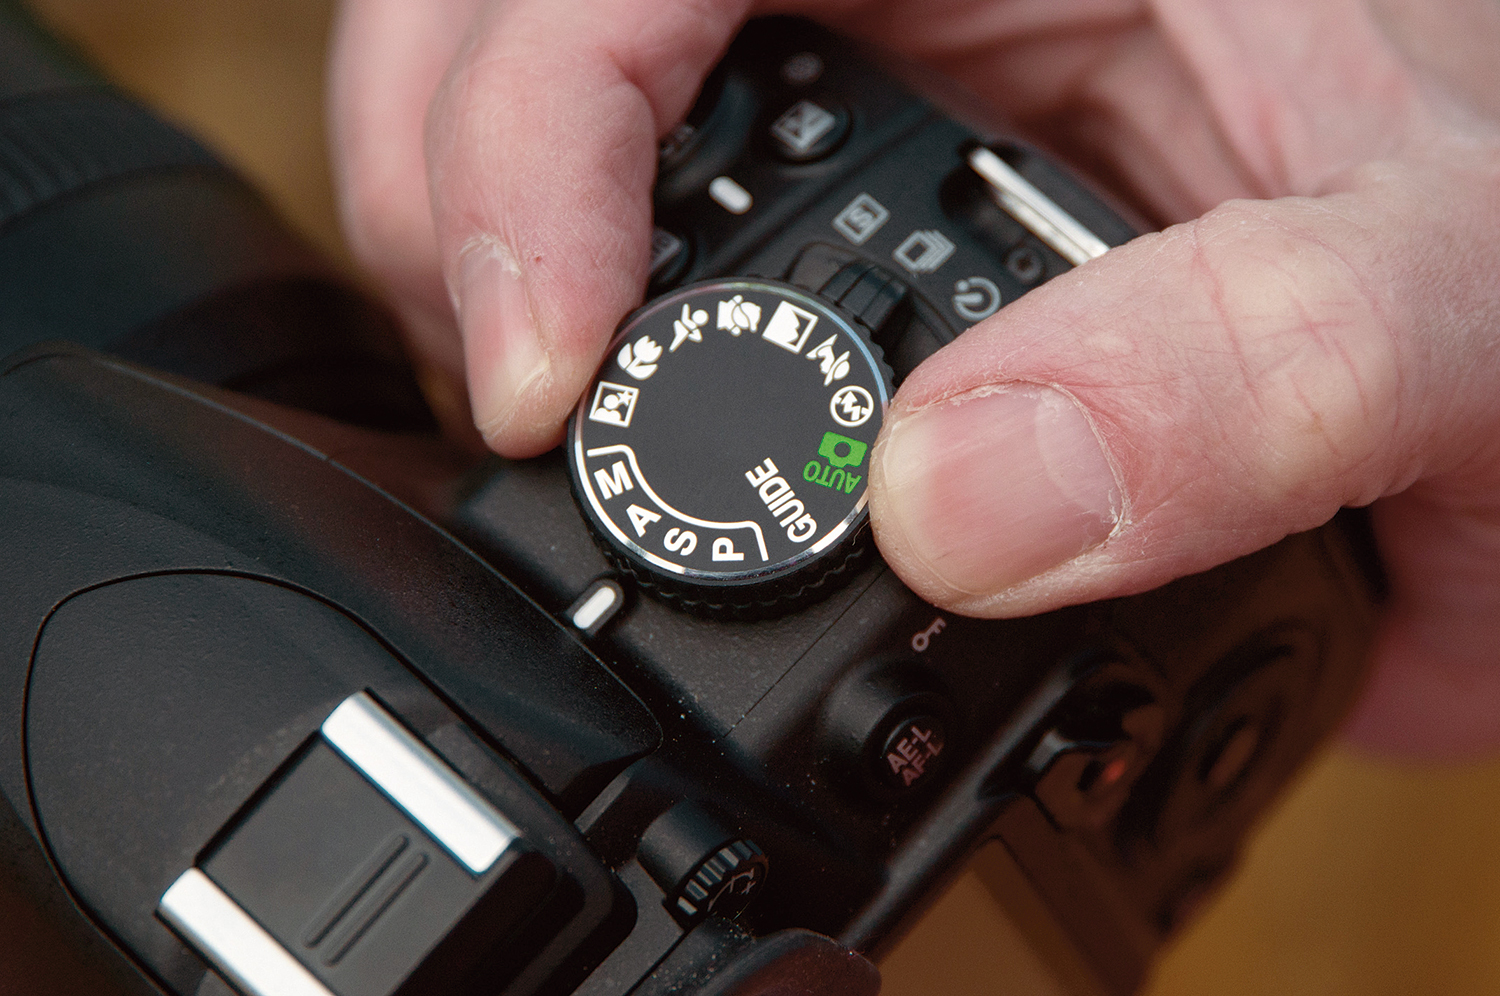
You might think that the obvious way to set a high shutter speed would be by using Shutter Priority mode. In fact, Aperture Priority is better. If you set the widest lens aperture (f/5.6 on the 300mm optic we’re using, for example) then you automatically get the fastest shutter speed available for the conditions.
2. Increase the ISO
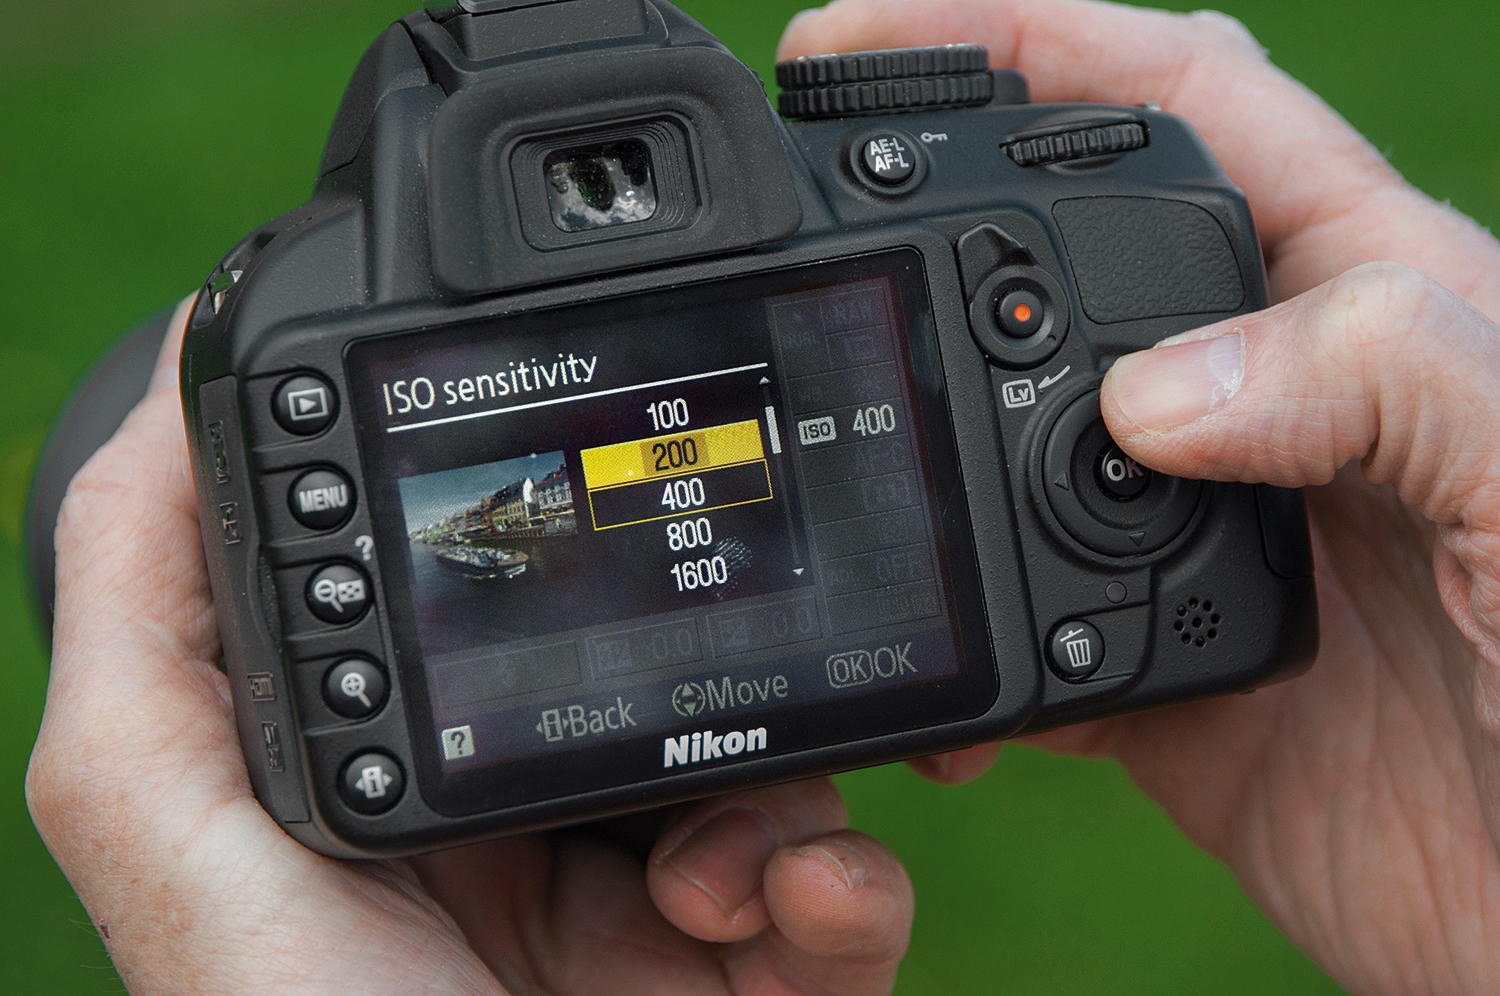
For relatively static subjects, a shutter speed of 1/250 sec is a workable minimum, but 1/500 sec or 1/1000 sec is better, especially if the animal is moving. To get these shutter speeds, you might need to increase the ISO. On reasonably bright days, ISO200 or ISO400 should be enough when you’re shooting at f/5.6.
3. Autofocus options
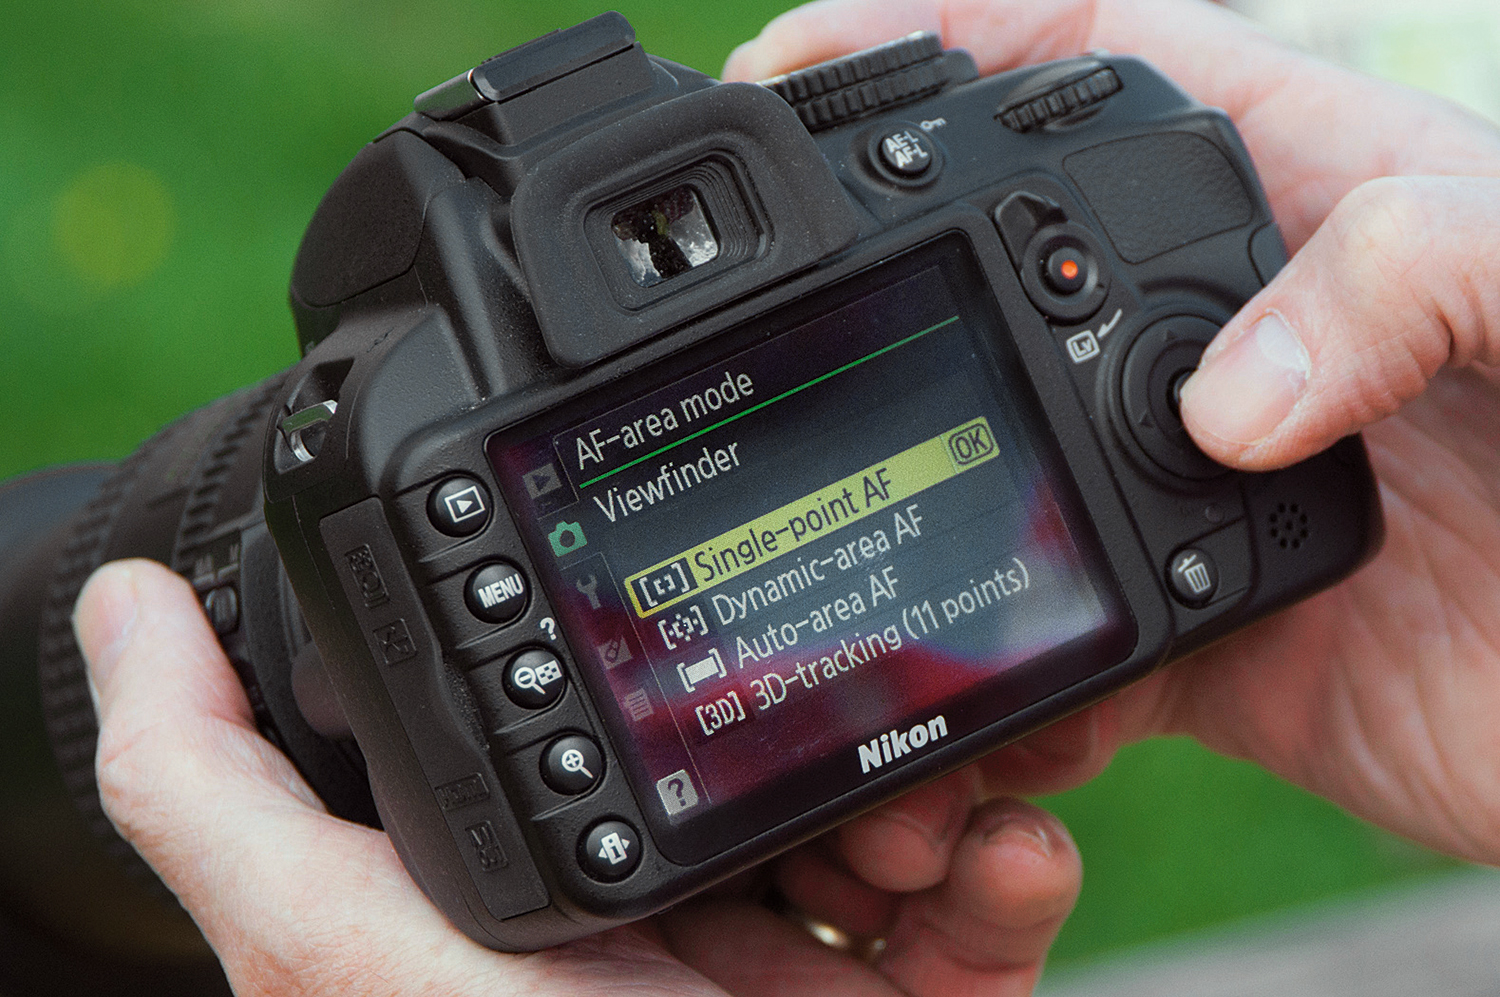
You might also need to check autofocus settings. One of the problems with the standard Auto-area AF mode is that you can’t always be sure what the camera is going to focus on. Instead, try Single-point AF and select AF-C (continuous) so that the camera keeps refocusing as your subject moves. Then choose the focus point yourself.
4. Set up a monopod
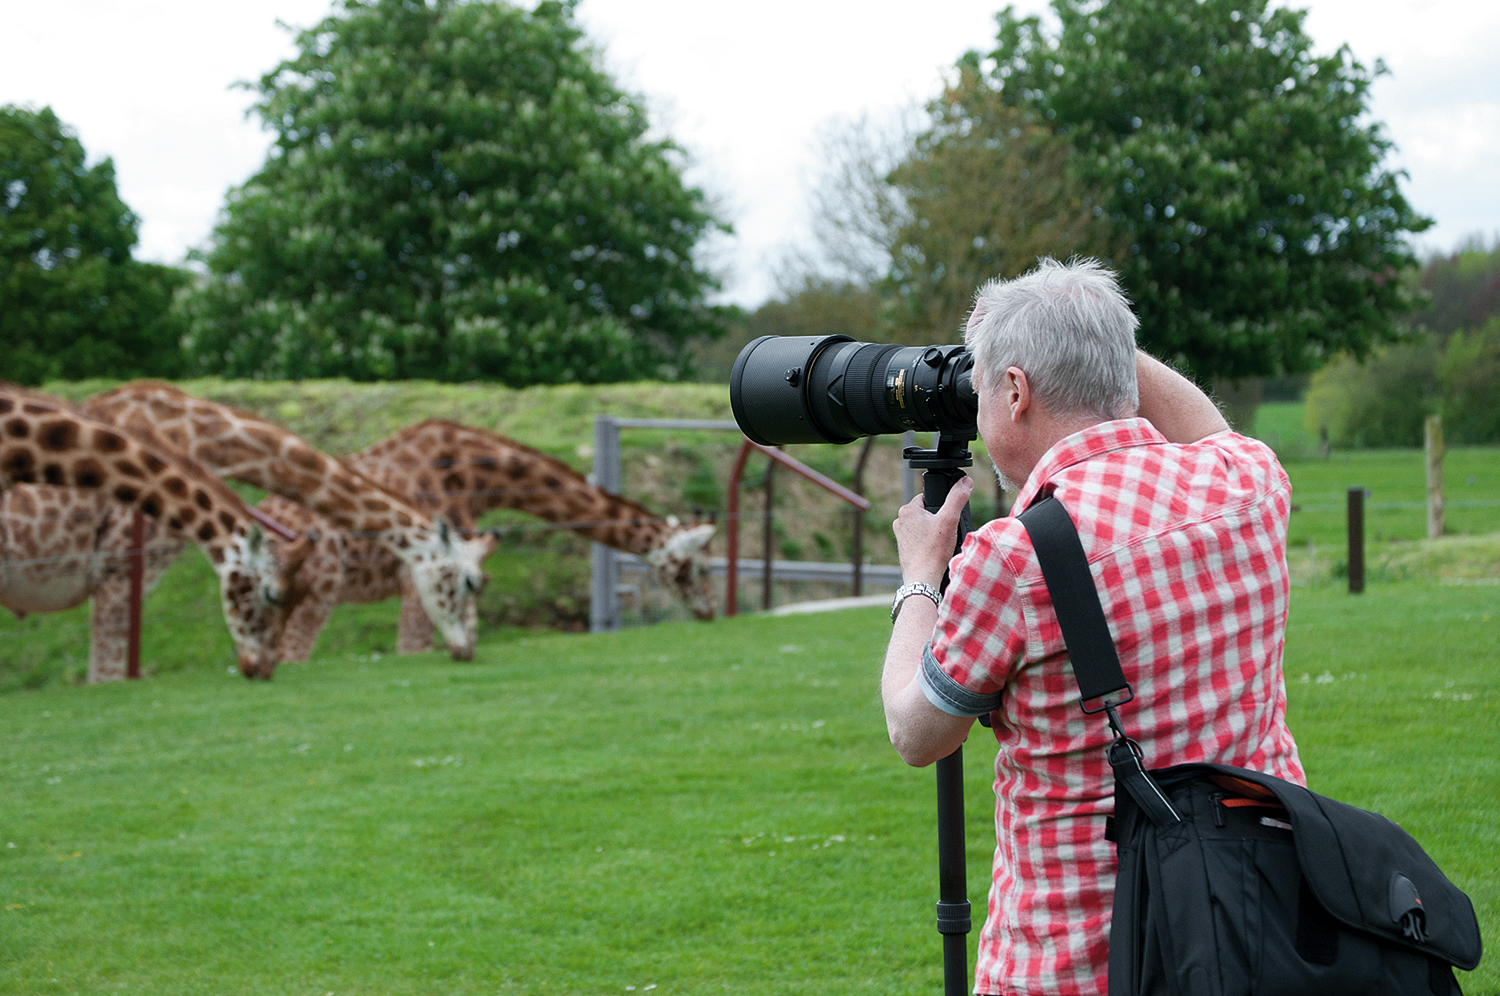
Even with faster shutter speeds, keeping your camera steady can be tricky. A monopod is a sound investment if you use longer lenses a lot. The 300mm f/2.8 we’ve got here is a monster, but even a light lens can feel heavy after a day’s shooting. The best monopods can take that weight easily, and make it easier to frame long-range shots more accurately.
5. Hide fences
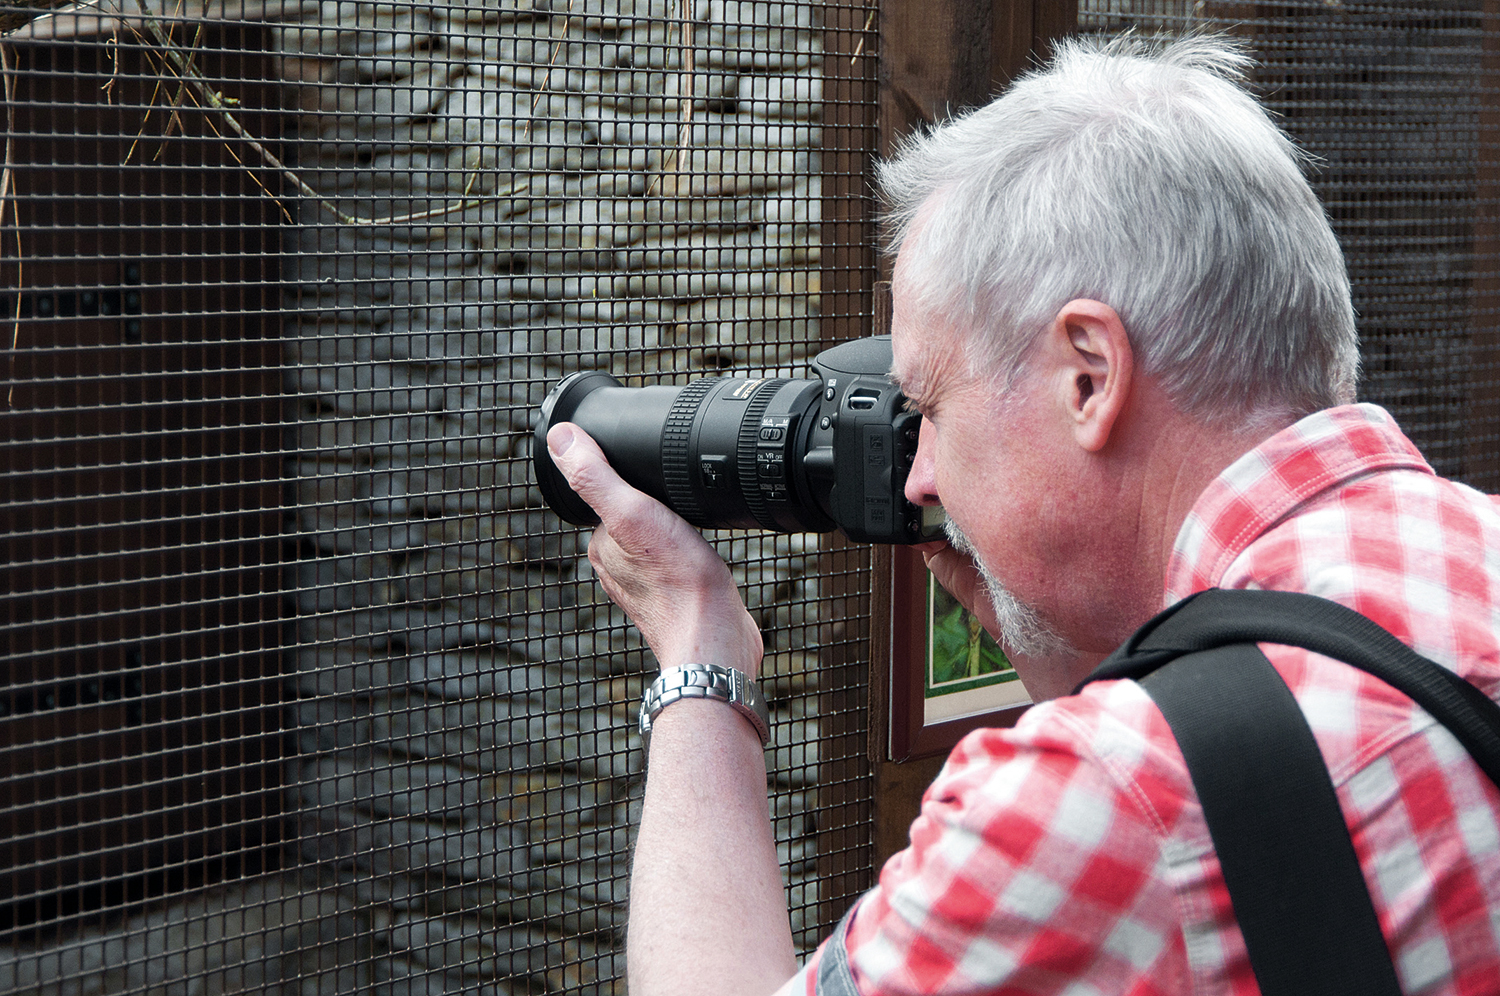
Where you’ve got animals in captivity, you also get cages. But if you get really close, the mesh of the fence will be so far out of focus that it disappears. You might lose a little contrast, but you can fix that in an image editor. This also works with glass – just rest the lens against the surface.
6. Shooting indoors
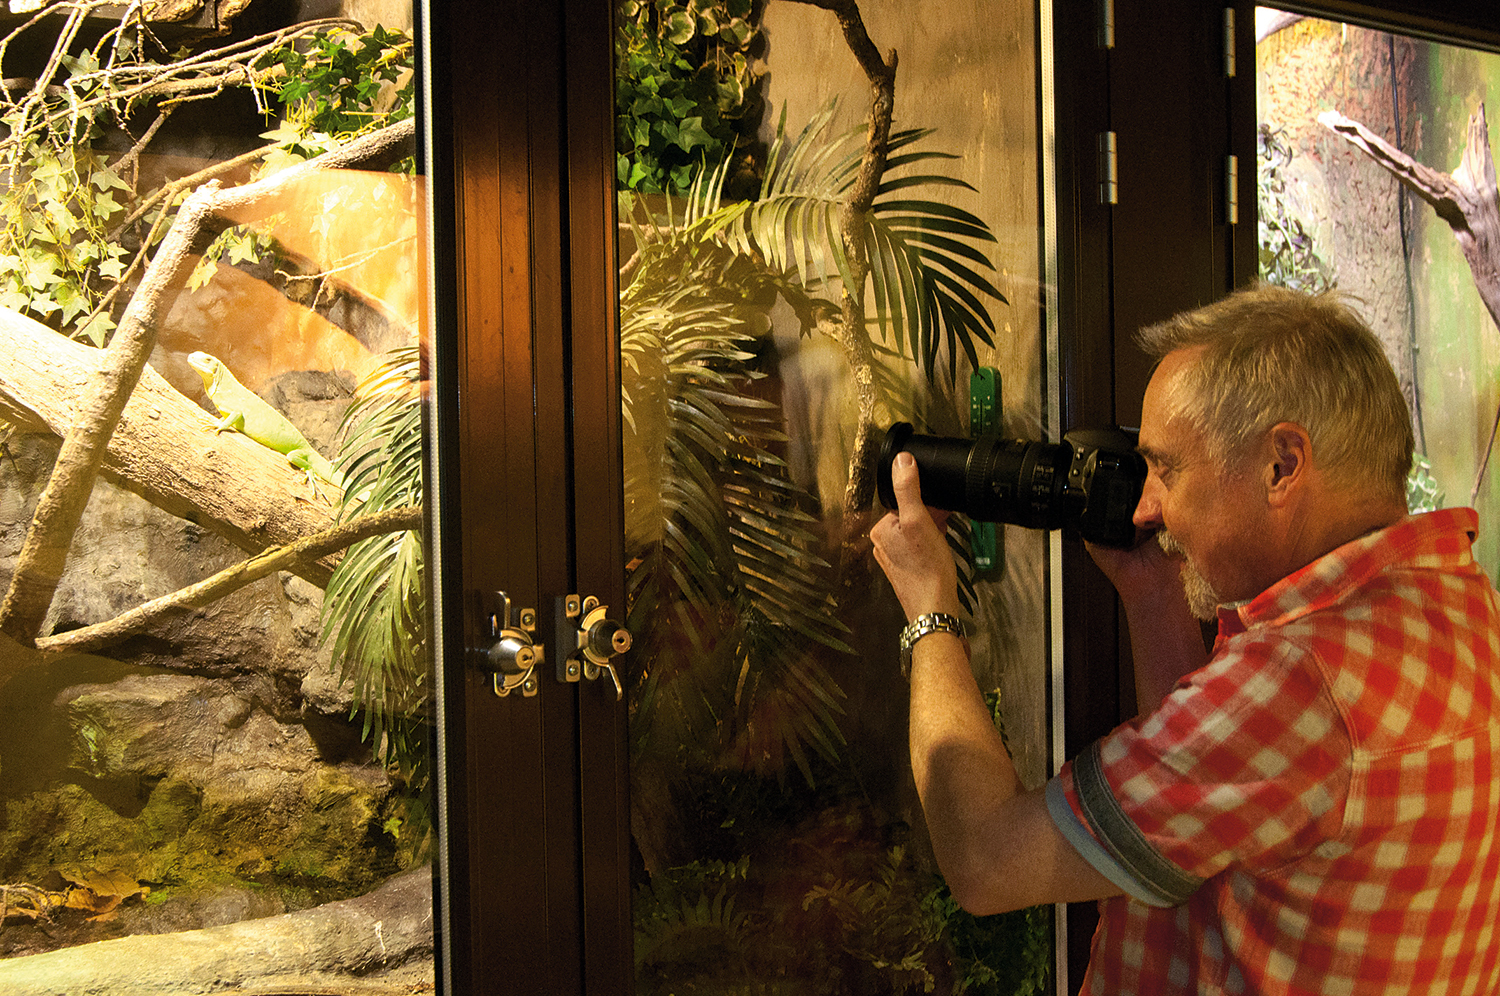
Like many centers, the Cotswold Wildlife Park has indoor exhibits. The artificial light in this reptile house poses problems with brightness, but increasing the ISO to 1600 keeps the shutter speed at 1/30 sec or above, which is fine for slow subjects. if you are shooting in RAW, you can fix the white balance later.
7. Check the exposure
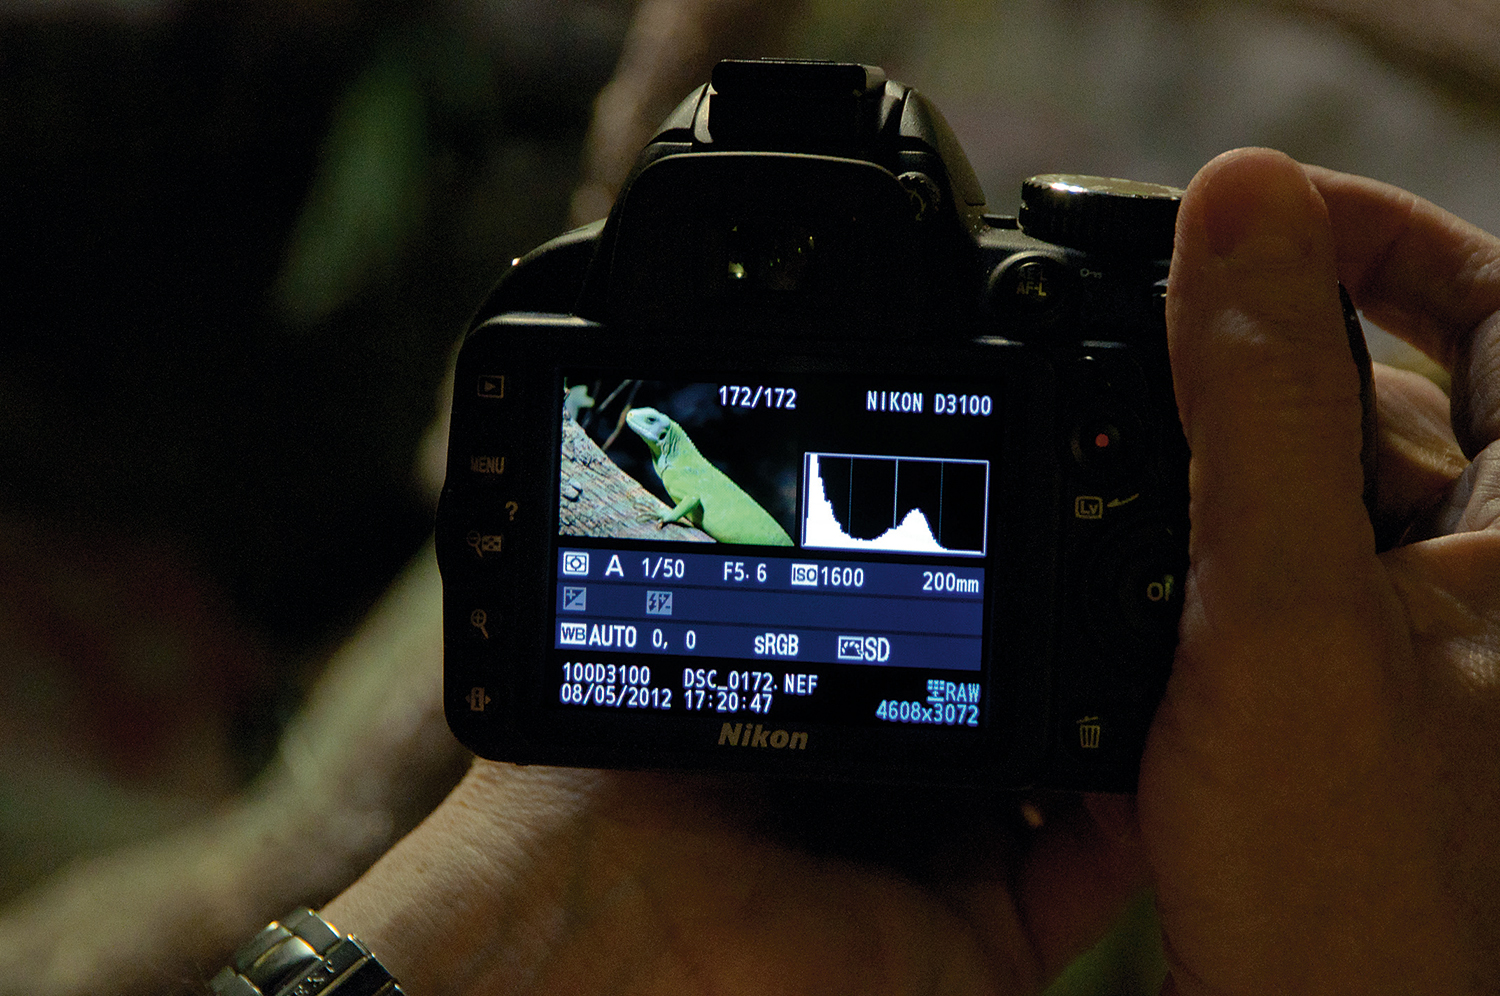
Assessing exposure can be tricky indoors, because the LCD is so bright that even underexposed shots look fine. When you play back your shot, check the histogram to make sure the exposure is okay. Apply compensation and reshoot if you need to – bright lights can make the camera underexpose.
8. Review your shots
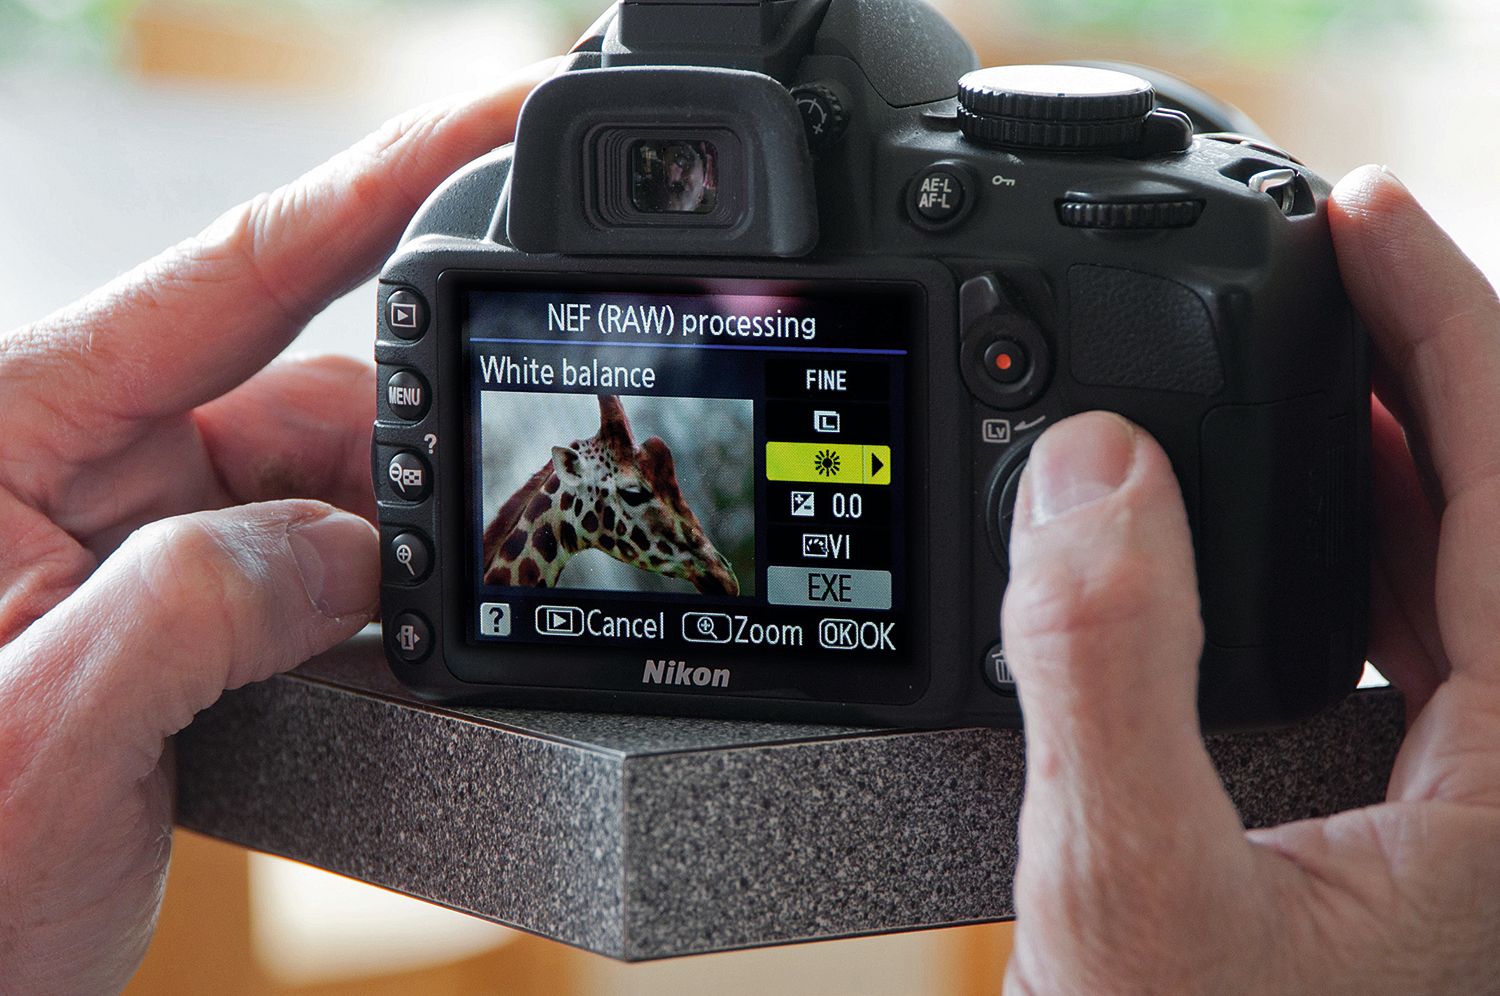
Finally, when you’re relaxing in the cafe after a long day’s shooting, take a proper look at your photos. Many systems will enable you to convert RAW files in-camera, saving new versions as JPGs. Now is your chance to experiment with exposure and White Balance settings for the indoor and outdoor shots.
More videos:
147 photography techniques, tips and tricks for taking pictures of anything
Pet photography tips: how to get great pictures of dogs
Focus stacking: how to get amazing depth of field in macro photography
Landscape photography composition: fill the frame with a wide angle lens
Get the Digital Camera World Newsletter
The best camera deals, reviews, product advice, and unmissable photography news, direct to your inbox!
Rod is an independent photography journalist and editor, and a long-standing Digital Camera World contributor, having previously worked as DCW's Group Reviews editor. Before that he has been technique editor on N-Photo, Head of Testing for the photography division and Camera Channel editor on TechRadar, as well as contributing to many other publications. He has been writing about photography technique, photo editing and digital cameras since they first appeared, and before that began his career writing about film photography. He has used and reviewed practically every interchangeable lens camera launched in the past 20 years, from entry-level DSLRs to medium format cameras, together with lenses, tripods, gimbals, light meters, camera bags and more. Rod has his own camera gear blog at fotovolo.com but also writes about photo-editing applications and techniques at lifeafterphotoshop.com
