Digital Camera World Verdict
With inkjet photo printing now seemingly fully matured there isn’t much to upgrade in a new printer, but Epson has probably done enough with the A3+ format SC-P600 to make it worth a closer look.
Pros
- +
Nine-colour printing with variable droplet size
- +
Great B&W print quality
- +
Excellent performance with matte and fine-art papers
Cons
- -
Gloss differential effect with gloss papers
- -
Switching between Photo Black and Matte Black consumes ink
- -
No roll paper holder
Why you can trust Digital Camera World
While new digital cameras tend to arrive at a rapid rate, it can be several years between an A3+ 13-inch printer and its updated model. After four years, the Epson SureColor SC-P600 is the successor to the venerable Stylus Pro R3000.
The new SC-P600 (the “P”, by the way, stands for “Photo”) is essentially the same as the out-going R3000, but comes in a revised casing and has a new inkset, extended connections to remote devices and a 6.8 cm LCD tilt-adjustable touch screen to control most functions. The SureColor range is progressively replacing the Stylus Pro line-up, with the A2+ format SC-P800 – under testing here right now – announced most recently.
The P600 is considerably more expensive than the Epson XP-970, too, so what does it have that the cheaper model doesn't?
We might concede that inkjet printers have reached a plateau of image realism where little else can be achieved apart from the usual user wish list of cheaper prices for both printer and inks combined with faster speed and larger capacity cartridges. However, any improvements are undoubtedly welcome.
The new UltraChrome HD pigment inkset (coded as a T7601 to T7609) comprises five colours (Cyan, Light Cyan, Yellow, Vivid Magenta and Vivid Light Magenta) and four blacks (Photo Black, Matte Black, Light Black and Light Black). The Photo Black and Matte Black share a channel and automatically interchange according to whatever media is selected to have eight inks running.
The D-Max of 2.84 is claimed by Epson to be the darkest for any pigment printer. In association with the new colourants, new resin encapsulation and high resolution, the print quality with pigments reaches to a new peak. For extra measure, the longevity ratings are expected to significantly increase, but we’ll need to await confirmation from Wilhelm Research.
The connections with Apple AirPrint and Google Cloud Print plus WiFi Direct (for smartphones, tablets and PCs) will appeal to the technically minded, but is likely to have little bearing when it comes down to making exhibition quality display prints.
Specifications
Printer Type: A3+ format (13 inches wide) for photo-quality prints via a nine-colour pigmented inkset (but eight cartridges in use at any one time with auto switching between matte black and photo black).
Maximum Resolution: 5760x1440 dpi.
Ink Cartridges: Individual per colour, 25.9 millilitre capacity. Epson UltraChrome HD pigments. Colours are photo black, matte black, cyan, light cyan, vivid magenta, vivid light magenta, yellow, light black and light light black. Smallest droplet size is 2.0 picolitres via ‘Variable Droplet Technology’.
Paper Sizes: Borderless printing on cut sheets from 149x100 mm up to A3+. Paper rolls up to 329 mm in width can be fitted. Customisable print sizes.
Interfaces: Hi-Speed USB 2.0, 100 Base-T Ethernet, WiFi. Epson iPrint Mobile App., Apple Airprint and Google Cloud Print.
Acoustic Noise: 48.2 dB (A).
Main Features: 6.85 cm LCD display panel with touch controls, Micro Piezo on-demand print head with 180 nozzles per colour, variable droplet sizing, five print quality/speed settings, Advanced B&W mode, auto matte/photo black ink switching (according to media type), head alignment and maintenance sensors.
Dimensions (WxHxD): 616x369x228 mm (closed).
Weight: 15.0 kilograms (without ink cartridges or media).

Design
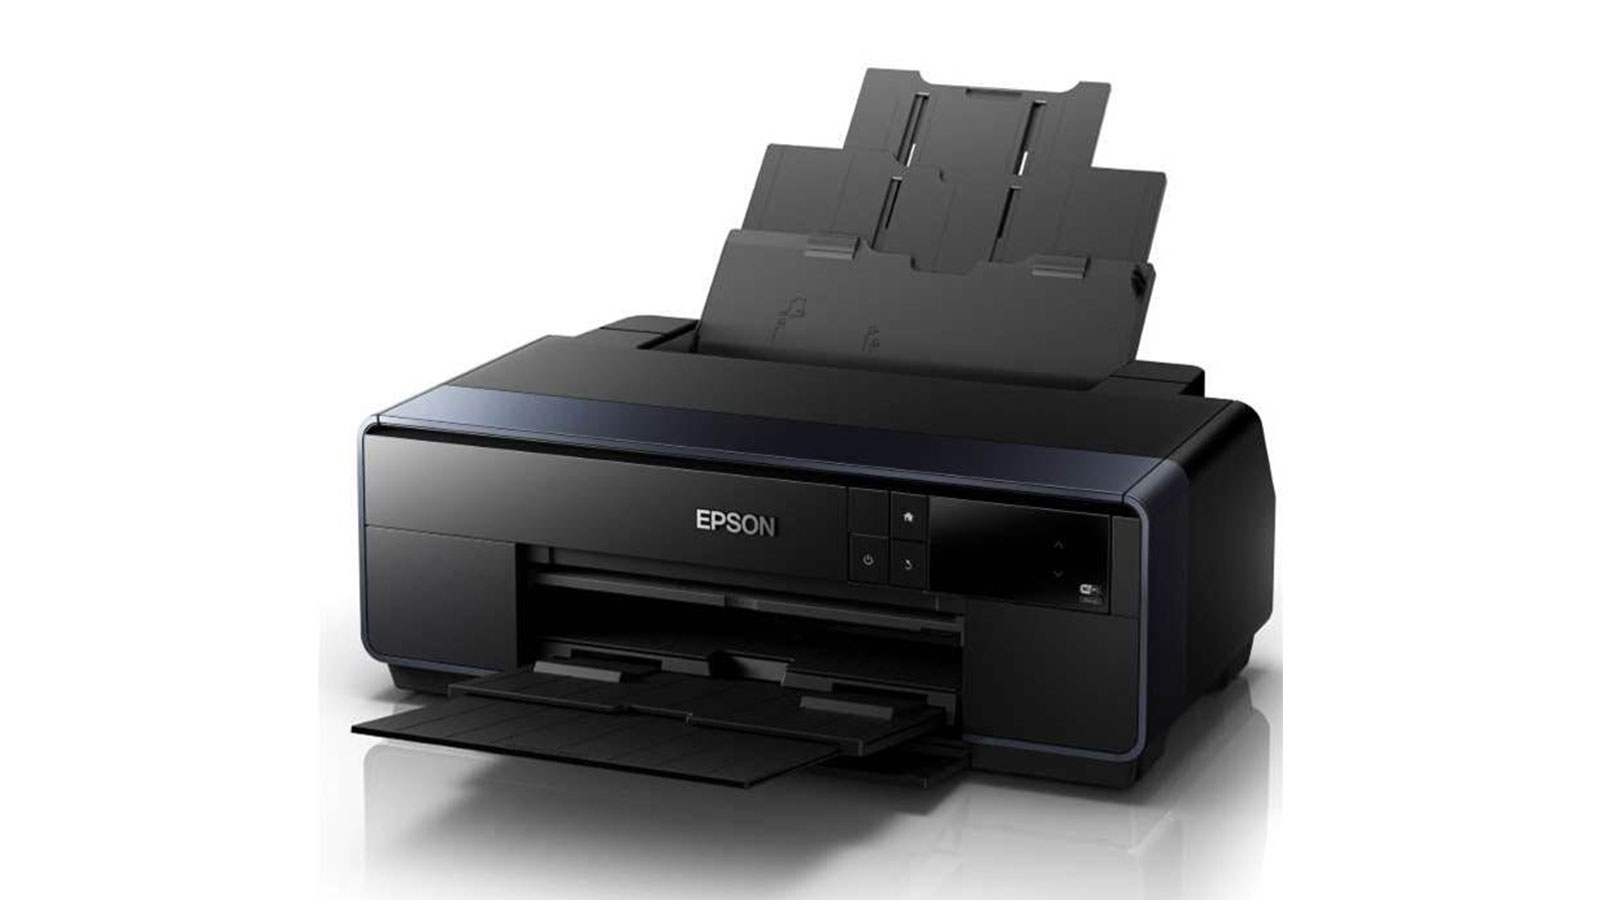
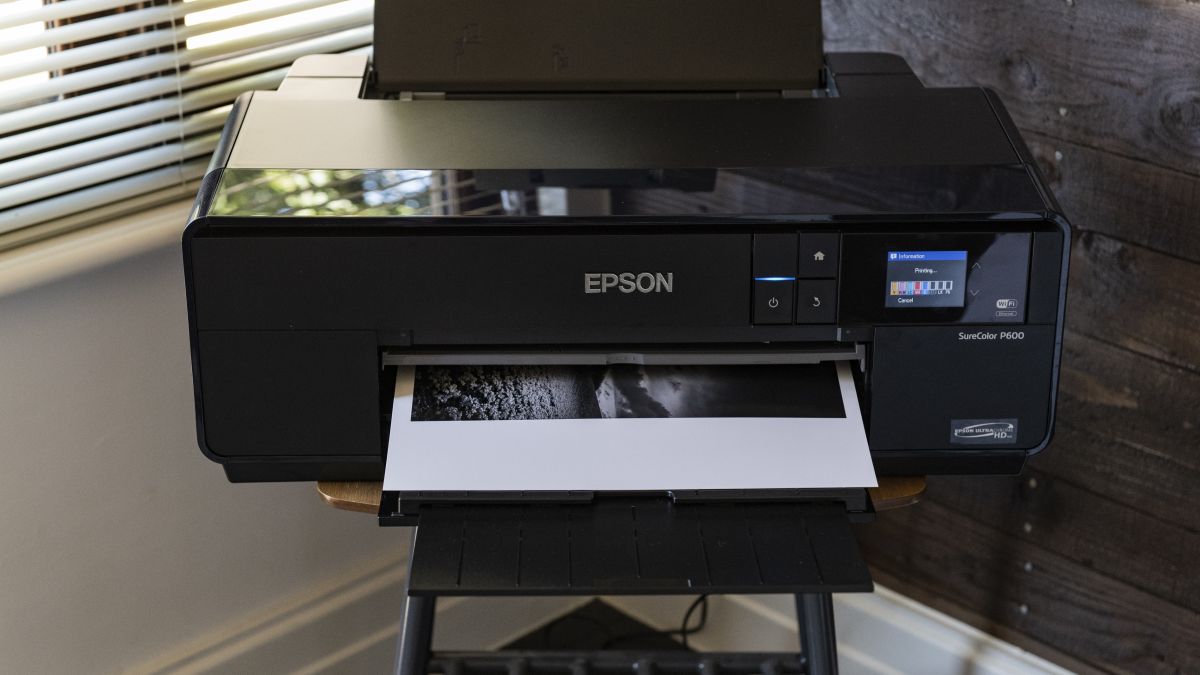
The sleek, black SureColor SC-P600 has a sturdy construction and is as elegant as a desktop printer can be. Weighing 15 kilograms, it’s easy enough to position on a sturdy desk and comfortable enough to carry over short distances. The top area is ideal for temporary placement of papers.
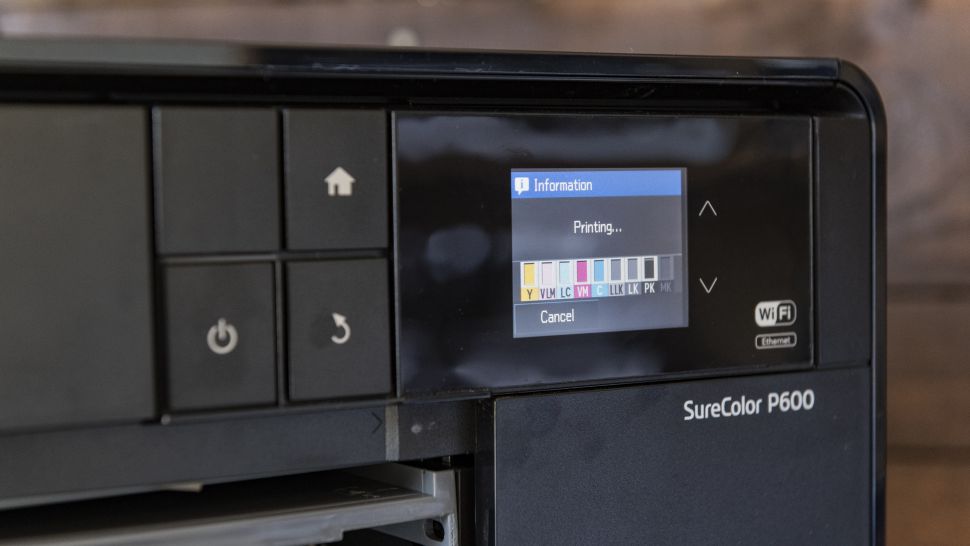
The LCD touch screen swivels out to 45 degrees. The top left button is a blank while the other three are for power on/off, back to previous menu, and home. The LCD menu attends to most functions, including media selection, WiFi connection, CD/DVD label printing, black ink selection and a low ink warning. Via ‘Administration’ and ‘Print Status Sheet’ there is even a usage history to report on the date of first usage, the number of prints and the A4 equivalent prints.
The default for sleep mode is three minutes. If no operation occurs during that period the printer goes to sleep but is awakened by any new action. The duration can be altered from one to 240 seconds via the LCD menu. Power supply may be set to ‘Off’ to leave the printer on continually or to a designated time.
Three paper feed systems are available, along with a CD/DVD tray. The auto sheet feeder attends to most printing operations, the front loader is designed for fine-art media up to 1.3 millimetres in thickness and heavyweight media, while a roll feeder can be attached at the rear.
General operation is relatively quiet apart from an occasional whir as the printer sorts out its routines. From time to time the printer will stop to have a ‘big think’, sometimes for a minute or so, to check everything and will then carry on.
Paper handling
The auto sheet mechanism takes hold of the paper, pushes it up and down to set the alignment and then proceeds. Accurate placement of paper in the auto sheet feeder as single sheets (or as stacked, fanned paper) is important, otherwise the printer may not pick up the paper or will take it straight through, add a dent and announce the failure with some beeps and a ‘Reload’ message.
The review printer proved to be inconsistent with the auto paper feeder, one day working perfectly and the next day causing frustration. Hopefully, this was just a glitch in this particular printer and not a common problem.
The front feed for fine-art and heavyweight papers requires a tray to be lowered and the rear output support platform opened. Paper is positioned and ‘Load’ pressed on the touch screen. The paper is drawn through to the rear outlet and, after a short wait, the printer instructs the tray to be returned to its normal position. The print file is then sent. Unlike some other printers, there are no margin restrictions applied.
The paper roll facility is essential for long banners, but for a metre long panorama the auto paper feeder is fine. Epson has ten-metre rolls of glossy (255 gsm) and semi-gloss (251 gsm) paper. Needless to say, it’s important to ensure adequate ink supply and preferably run a small test piece before committing. There is no auto paper cutter, but a faint line is printed to enable scissors to be used.
The roll paper facility allows banner prints up to 15 metres long. The ‘User Defined’ setting allows widths from 89 to 329 millimetres and lengths from 89 to 15,000 millimetres. Curiously, the user manual indicates a maximum roll length of 3276.7 millimetres, but only 1117.6 millimetres for Mac users.

Main panel
The ‘Main’ panel is the hub for printing. ‘Media Type’ has a listing for five categories with further options. These are ‘Photo Paper (4), ‘Matte Paper’ (2), ‘Fine Art Paper’ (3), ’Plain Paper’ (1) and ‘CD/DVD’ (2).
The range of ‘Print Quality’ is determined by the media type. This list covers ‘Speed’, ‘Quality’, ‘Max. Quality’ and ‘Quality Options’. The latter cover resolution and the choice of having ‘High Speed’ printing set to either ‘Off’ or ‘On’.
The modes of colour management include ‘Epson Standard (sRGB)’, ‘Adobe RGB’, ‘PhotoEnhance’, ‘ICM’ and ‘Off – No Colour Management’. The first two basic settings simply lock into the colour space of the image while ‘ICM’ follows through to ICC profiles. Although each approach produced satisfactory results, most Photoshop enthusiasts can opt for ‘Printer Manages Colours’ and lock in ICM values, or ‘Let Photoshop Manages Colours’ with the ‘Mode’ set to ‘Off – No Colour Adjustment’.
The ‘Size’ menu lists standard paper sizes and includes a ‘User Defined’ setting where a custom size can be established and saved. A right-click over any feature will bring up ‘Help’ and further details.
On the Epson Website there is an excellent RGB guide to colour printing compiled by Australia’s Training and Application Specialist. Simply search on “RGB Print Guide – Epson Australia”.
Test results
Gloss And Semi-Gloss
Test prints made on gloss and semi-gloss media had impact and vibrance approaching that of the dye-based printers, but also exhibited gloss differential (i.e. seeing the gloss surface of the paper where no ink resides). This has always been a problem with pigmented inks used on gloss or semi-gloss media. The only remedy is to use printers with a gloss optimiser cartridge, such as the Epson Stylus Pro 2000. The only disadvantage here is a slight dulling down of the surface. Prints made on papers like Epson Traditional Photo or Innova Fibraprint Gloss were substantial in weight and image quality.
Epson does offer a useful piece of advice for reducing the gloss differential on black and white prints. In the ‘Main’ panel and with ‘Advanced B&W’ selected, proceed to ‘Advanced’ and change the ‘Off’ default for ‘Highlight Optical Shift’ to ‘On’. This adds extra Light Light Black dots to the clear areas.
Matte Prints
If the SC-P600 does a creditable job with gloss and semi-gloss media, it’s at its very best with matte and fine-art papers. The depth of the black helps to anchor the colours.
The first test print was an A4 size B&W made on the Epson Fine Art Velvet paper. As a fine-art paper, this required the use of the front feeder. Maximum resolution was set for the B&W print and it took nine minutes and 45 seconds, but the result brought a ‘wow’ response. The front loader is super fussy about accurate paper alignment so if a repeated ‘Askew’ message appears, use the LCD screen to proceed to ‘Paper Setting’ and turn ‘Paper Skew Check’ to ‘Off’.
An A4 colour print – made with the ‘Quality’ setting – took 2:15 minutes. Epson’s Hot Press Bright has been a favourite media and for the A4 test print there was no hesitation in using the utmost resolution. There’s no point in settling for compromises when using a top printer and top paper combination. It took another 9:45 minutes, but produced another outstanding result.
Several prints were produced on A3 size Innova Fibraprint 280 gsm matte paper with 300x200 mm images. The profile for Epson UltraSmooth Fine Art Paper was initially adopted. At ‘Quality’, each print took 2:15 minutes via the front paper feed. The results were a touch yellow, but by using Adobe RGB mode (to match the print files) and taking out -5 Yellow, the colour was then spot on. This proved to be a most satisfactory arrangement without the need to chase down or create a custom ICC profile. A portfolio of prints on A3 could be comfortably produced at about six per hour via the front feed.
The ability to handle other (i.e. non-Epson) media was demonstrated with two A3+ sheets of Lumijet Radiant White 290 gsm (Hahnemühle) fine-art ink jet paper. At ‘Quality, level 4’ and with the profile for ‘Watercolor Paper – Radiant White’, it took four minutes with ‘High Speed’ switched on and nine minutes with ‘High Speed’ off. The results were most pleasing.
A custom ICC profile might extract a few more points, but getting a good result from a canned profile is most encouraging. The general recommendation is to work with ‘High Speed’ switched off to ensure better detail and shadow density. Doubling the print time is not an issue when the aim is quality and the print size is A3+.
Ascertaining the differences in print quality between the SC-P600 and Stylus Pro R3000 (or, indeed, any of Canon’s pigmented ink printers) using similar images, papers and appropriate ICC profiles without scientific apparatus can be difficult. For those who dwell on the finest of technicalities the Internet can provide precise data for D-Max, gamut, etc. comparisons. The rest of us tend to judge everything by eye.

B&W Printing
Black and white print enthusiasts are fully catered for, with the scope for either neutral results or warm, cool or sepia tonings via the Epson Advanced Black and White (ABW) control carried forward from the Stylus R3000. Apart from the gloss or matte black inks, the Light Black and Light Light Black combine to provide extensive tonality.
Devotees of monochrome will undoubtedly experiment to find the optimum settings for favourite papers and may find that assigning RGB mode to print files will deliver better outcomes than printing the same file converted to greyscale.
Photo Black and Matte share the same line and interchange automatically. When Photo Black is swapped to Matte Black it takes 1.5 minutes and uses one millilitre of ink, while going from Matte Black to Photo Black takes 3.5 minute and consumes 3.0 millimetres. However, the ‘Normal’ default changeover mode can be altered, via the LCD screen, to ‘Save’ mode for one millilitres spillage each way. The path is ‘System Administration’, ‘Printer Settings’ and ‘Black Ink Change Settings’.
Although there is a small saving in ink, Epson has taken a cautious approach whereby ‘Normal’ ensures a clean changeover. ‘Save’ can involve some risk of contamination. Epson at least provides the option. The ‘Save Ink’ setting is not mentioned in the manual. As regular changeover of black inks will result in wastage of costly ink, printing sessions need to be well organised.
Panoramic Prints
Paper rolls are the ideal way to produce banners or panoramic prints. However, the auto sheet feeder can still be used for long prints provided the paper is properly supported and the leading edge cut square for correct alignment (pull out the rear paper support only one extension for a wider support). A 1000x30 millimetres image made on a 1200x329 millimetres custom paper size didn’t present any difficulties.
The paper was cut from a 610 millimetres wide roll of Schroeller 230 gsm matte and the Epson Archival Matte profile adopted. Maximum resolution and ‘High Speed’ switched off (no comprises for a big print) may have led to a whopping 36 minutes of printing time, but the result was well worth the wait. Watching the print slowly emerge brought back memories of black and white prints appearing in a darkroom developer tray.
The remainder cut-off piece from the roll – which measured 281x1200 millimetres – was printed by the front feed. This is the better option for ensuring accurate loading on those panoramic prints when paper from the roll holder is not available.
Borderless printing is only available at set sizes of A4, A3, A3+, 100x148 millimetres, 9x13 centimetres, 10x15 centimetres, 13x18 centimetres and 20x25 centimetres. The front feed does not support borderless printing.
While an A3 borderless print at the ‘Speed’ resolution was produced in just three minutes, it took 16:45 minutes at the ‘Maximum Quality’ setting (i.e. level 5 and with ‘High Speed’ off). The difference between these two extremes was not immediately noticeable and requires a magnifier to appreciate the variation. The colour in both prints was identical, but the ‘Speed’ setting did create some banding in a clear blue sky.
Ink usage
An accurate assessment of the number of prints per ink set and cost per print would require keeping records of the area of prints created over many ink sets. Our calculations were based on one-and-a-half inksets, weighing full, empty and partially-used cartridges to find the total ink consumed and adding up the total area of printing.
Most printing was carried out at the ‘Quality’ setting. This resulted in a rough ink cost of about $4.25 / £3.25 / AU$6.30 for an A3 size print and $2.10 / £1.60 / AU$3.15 for an A4 print. These are based on a cartridge priced at $32 / £25 / AU$47.99. When the first low ink warning occurs there still remains plenty of ink to continuing printing. When the second reminder appears another four or five A4 prints are possible before the “Replace Cartridge” message appears. The cartridge to be replaced is noted on the printer’s screen and the computer monitor. Considering the high cost of ink, there is no point in changing ink until the final drop has been consumed.
Verdict
Despite a moderate outlay for this printer, relatively expensive inks and a black ink changeover system that still needs attention, the SureColor SC-P600 certainly knows how to turn out a top quality print. The 25.9 millilitres ink cartridges do mean longer usage before changeover, but this still doesn’t negate the relatively high cost of the ink.
The SC-P600 is at its very best on matte or fine-art papers. No surface problems, rich blacks to create a foundation for excellent colour, shadow details retained and very simple approaches to matching up everything to images on screen. Longer printing times are not an inconvenience when quality is the principal objective.
This printer should not be regarded as a general purpose ‘odd job’ model, but a ‘state-of-the-art’ machine for the very best work at moderate volumes. The CD/DVD label printing capacity, roll paper holder and remote printing capacity are nice features, but not likely to weigh heavily against the prime purpose of sheer quality printing.
The SC-P600 is the first of the “SureColor” branded printers from Epson and it’s a great start… plus a good cause to be looking forward to the other models coming in the series.
Read more:
The best photo printer in 2020`
The best large format printer for photographers, exhibitors and studios

