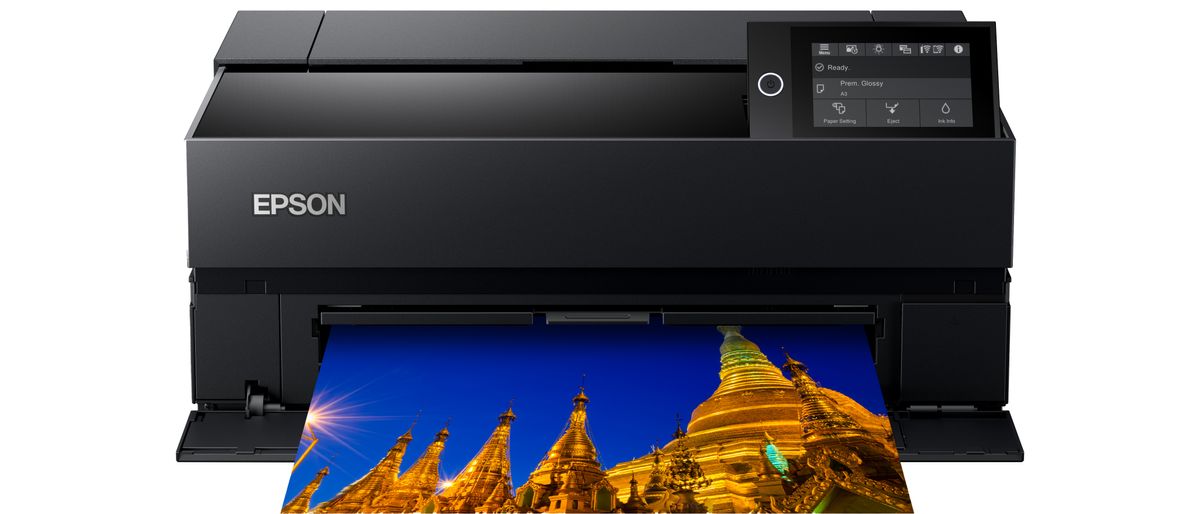
Digital Camera World Verdict
The Epson P700 gives superb results - and if quality is what you are after than this is one of the top choices for an A3+ photo printer. Thanks to its 10-ink pigment system, this large-format inkjet printer is certainly a significant step up from the older Epson P600. However, those doing regular printing may want to look at the bigger A2 Epson P900 - as its bigger, more cost effective ink tanks may well make for a better long-term investment.
Pros
- +
Excellent color accuracy
- +
10 pigment inks
- +
Paper roll feeder comes as standard
Cons
- -
‘Setup’ cartridges have a very limited lifespan
- -
Smaller ink cartridges than SC-P900
Why you can trust Digital Camera World
We have been waiting for the Epson SureColor P700 to arrive for quite some time. We had become accustomed to seeing new inkjet models arriving from Epson and Canon about every two years, but it has taken five years for the Epson SureColor P600 to be replaced.
Consequently, the SureColor P700 is a completely new printer rather than an upgrade, with features designed to further enhance the enjoyment of print-making. In Australia and New Zealand the printer is the P706; elsewhere it is known as the P700.
One of the key questions for photographers will remain the same, though: what can this quite expensive new printer do that a cheaper alternative like the Epson XP-970 can't?
Despite there being some limitations on how an inkjet printer can be designed and built, the SureColor P700 presents as a compact and attractive black box with panels and trays that either fold or slide out neatly. It will look appealing in an office or home study environment. Some care will be required with the shiny top lid, however, as it is prone to scratching and fingerprints. If you’re going to use the printer’s top as a temporary platform for paper or final print storage, it’s advisable to put a soft cloth down first.
Epson P700 vs P600
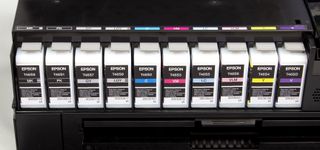
The new printer is about 30% smaller (at 515mm wide, 368mm high and 185mm deep) and lighter (at 12.7kg) than the old SureColor P600. There is a revised ten-ink T46Y system feeding to the MicroPiezo print head. The colors are matte black, gloss black, grey, light grey, cyan, light cyan, yellow, vivid magenta, vivid light magenta and violet. The inclusion of the violet ink is intended to improve gamut in blues.
The P700 has individual lines for the matte black and gloss black inks - like the larger-format 17-inch A2+ Epson SureColor P900 which was announced at the same time..
The SureColor P700 is the first 13-inch A3+ printer to include a replaceable maintenance box.
Normally waste ink from head cleaning cycles is dropped into an absorbent pad with printers of A3+ format and smaller. When the pad is saturated it needs to be replaced by a technician or some messy homemade effort applied to soak up the ink. The removable maintenance box is already commonplace in A2 and larger format printers, and when full, it is simply removed and replaced. All neat and tidy, and no mess Charlie!
Setting up the Epson P900
The well-packaged printer comes with initial ink cartridges, a power cable, user guide, CD/DVD disc tray, CD software disc and a spare maintenance box. All the inks are housed in a rather attractive manner, somewhat akin to an inviting big box of chocolates.
The setup routine for the SureColor P700 is straightforward and can be made easier by viewing the excellent P700 videos on YouTube. After removing all the blue securing tape, the printer is powered on and, by following the LCD on-screen instructions, the initialization process begins. Language, date and time are established and, taking care not to touch the chip, the well-shaken cartridges are inserted.
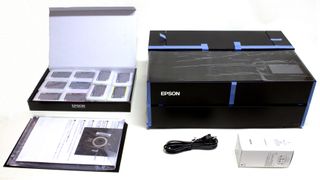
Although these cartridges are designated ‘Initial’, they contain the full 25ml as the standard replacement cartridges, unlike some early printers where “initial” meant just enough to get started. The 15-minute ink initialization process shouldn’t be interrupted by opening any panels, otherwise you’ll need to start from scratch with yet more ink consumed. At the end, a message appears which treads, “Some ink from the ink cartridges was used for filling ink to the tip of the nozzle”. In reality, a great deal of ink is used.
It should be noted that the SureColor P700 employs a line feed system from stationary 25ml capacity cartridges to the print head, rather than the use of smaller cartridges that feed direct to the print head by riding on top. In any line feed system, a fair amount of ink and shipping fluid is used to charge up the system, with some being directed to the replaceable maintenance box. All of this means that the ink levels after setup will not register as full and could be as low as 15-20% capacity. The maintenance box will be close to full, hence provision of the spare included in the package.
The final stage is the installation of software via the CD or a download from the Epson website. Apart from the printer driver, there is a user manual and several programs. Included is the Epson Media Installer that allows other Epson, third-party and custom profiles to be added to the printer. The connections are Hi-Speed USB 2.0, 100Base-T Ethernet or Wi-Fi – both the 2.4 and 5GHz bands.
Specifications
Model numbers: Epson SC-P700 in USA & Europe; Epson SC-P706 in Australasia
Inks/type: 10 pigment-based inks
Max print size: A3+/13x19-inch
Max print resolution: 5760x1440dpi
Input trays: 1x rear, 1x front, roll feeder
Scanner: None
Display screen: 4.3-inch color touchscreen
Interfaces: USB 3.0, Ethernet, Wi-Fi
Dimensions (WxDxH): 515 x 368 x 185mm
Weight: 12.6kg
The Epson P900 paper feeds
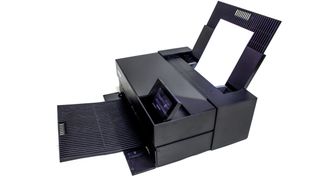
A rear paper tray for single sheets or up to 30 stacked sheets (generally not exceeding 300gsm) will be doing most of the work.
It has a center path for paper transport supported by two guides to limit paper skew problems. The support tray extension is partially slatted while the pull out paper receiving tray is fully slatted. This styling is another first.
The front feed is intended for papers or poster board from 300 to 1000gsm. This involves a much slower operation via several steps with ‘OK’ check points on the touchscreen. Paper remains on a flat, centrally guided pathway, being taken in from the front to protrude out the back and then drawn back in for printing. Adequate space should be allowed at the back to prevent large sheets of paper hitting a solid surface. A long print cannot be held on the receiving tray, so be ready to play wicket keeper. The internal light will help in assessing the ‘get ready’ position.
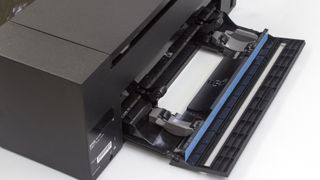
An included feature is a paper-roll facility that slides out from the rear of the printer. As there’s no internal cutter, a finished print must be rough cut with scissors and then trimmed accurately, along with the leading edge of the paper roll. Additionally, the paper roll is not a powered unit and will require a manual back roll to its starting point.
Although the maximum print length possible extends to 18m, rolls of 329mm (13 inches) wide paper are only 10m long. Epson has a reasonable range of 13-inch wide light-weight paper rolls. The need for extraordinary long prints – if only for “Happy Birthday” type banners – is not likely to be great, so the 10m roll should be adequate.
Panoramic prints on fine-art paper will require cutting down from 432mm or 610mm-wide rolls, or using A2 sheets cut to 594x329mm. The front paper loader should provide a better alignment compared to the rear feed. The front feed also accommodates the CD/DVD tray.
Touchscreen printing
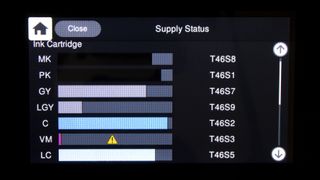
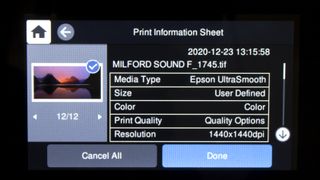
The 10.9cm touchscreen is a delight in providing access to the functions of the printer and will display the image being printed. Paper types and sizes (even user- defined) can be set, ink levels monitored, maintenance functions performed, remaining print time checked and the job history observed... along with the usual print panels on the computer screen.
Before even our very first test print, the ink-level panel showed very low levels and the warning, “It is almost time to replace ink cartridge(s)”. It is hardly a happy situation to encounter even before you’ve commenced printing to then need to acquire a set of replacement cartridges at a total cost of around $350. Perhaps Epson has assumed buyers will forgive this situation with the P700, however it is clearly a serious matter and a major negative among the many admirable new features of the printer.
When the first cartridge demanded replacement, the total area of prints created was tallied up as 1.334 square metres. The remaining cartridges and maintenance box were almost expended. These prints were a general mix of color, black and white, gloss and matte papers and experiments at different quality levels. Altogether, about 13 A3 or 26 A4 prints are possible before you’ll need to load the second ink set. This represents a very low output from the initial ink set.
These prints were a general mix of color, black and white, gloss and matte papers and experiments at different quality levels. Altogether, about 13 A3 or 26 A4 prints are possible before you’ll need to load the second ink set. This represents a very low output from the initial ink set.
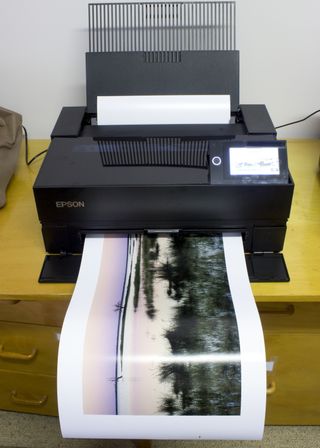
The maintenance box required replacement just a few prints later. An empty box weighs 90g and, when full, weighs 344g, representing 210ml of ink, plus 44ml of expended shipping fluid. That’s a lot of ink that doesn’t get used for printing! The replacement maintenance box will run for quite some time – just keep an eye on its status.
Printer operation is quiet and smooth apart from a cooling fan that kicks in occasionally, particularly when making large prints. No problems were encountered with the ‘canned’ print profiles working from RGB (1998) files via Photoshop and letting the printer look after color management. No head strikes occurred, the paper transport was accurate, with the few skewed sheets soon corrected after the notice appeared to retrieve and reload.
A clear panel over the print head allows observation of each print in progress, along with the LCD presenting the image being printed – both welcome features.
When a routine for a particular paper has been accepted it can be saved to a convenient name (e.g. “My Archival Matte”) for prompt recall. The paper size and print preview will not be included.
Fine definition for photographs also extends to text. A few pages from a photo book showed crisp, sharp captions in eight-point Garamond font.
On the print panels, further information on any setting can be accessed by right-clicking on the mouse with the cursor on the target.
Black Enhance Overcoat
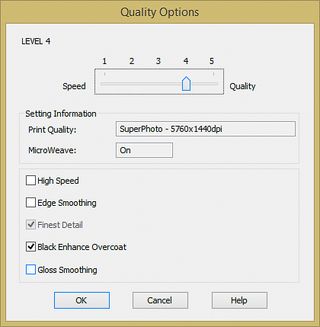
When the Black Enhance Overcoat box is selected (only available for the gloss, semi-gloss and lustre media surfaces), light grey ink is added to blacks to increase density and to reduce metamerism, bronzing and gloss differential. Black Enhance Overcoat is automatically applied to all quality levels except ‘Standard’, but can be switched off if not required (e.g. when printing an image with few or no blacks).
Gloss differential and bronzing are part and parcel of printing with pigmented inks on gloss or semi- gloss media because pigments reside on the surface whereas dyes are mostly absorbed. The SureColor P700 doesn’t employ a clear-coating gloss optimizer cartridge, but the Black Enhance Overcoat technology can help to reduce most of the problems that are only detectable if prints are inspected at a very low angle.
If the Black Enhance Overcoat mode is adopted, then the print times will be longer and more light grey ink used. For example, a 300x175mm image on A3 Epson Premium Photo Paper Glossy took five minutes with the Black Enhance Overcoat mode off and 7:30 minutes when it was on. Depending on the subject content, there may be no apparent difference in end results, so it’s very much a personal matter to determine if and when the Black Enhance Overcoat mode should be used.
Print life
Epson is confident prints from the SureColor P700 on top-quality paper and glass mounted will last up to 200 years for color and up to 400 years for black and white. We’ll need to await the final ratings from the likes of Wilhelm Research or Aardenburg for confirmation. In the meantime, Wilhelm Research has a rating for the old P600 of up to 200 years under glass and up to 300 years in dark storage.
It is important to note that these figures are achieved by accelerated testing under strict laboratory conditions – conditions that most of us cannot provide. Nevertheless, compared to other inks, it is rather impressive.
Epson Print Layout is a free program for both computer and mobile devices that is not only a stand-alone print organizer, but can also be used as an add-on to Photoshop via File>Automate. All settings for print making can be controlled from just one panel. It is an easy progam to work with and is well supported by YouTube tutorials.
There are five levels of print quality...
• Level 1 = Superfine at1440x720 dpi
• Level 2 = Quality at 1440x720 dpi
• Level 3 = Photo at 1440x1440 dpi
• Level 4 = SuperPhoto at 5760x1440 dpi (borderless not supported)
• Level 5 = Carbon Black at 5760x1440 dpi (borderless not supported)
Matte papers have Levels 3, 4 and 5 and fine-art media have Levels 4 and 5. As there is a considerable difference in the print times from Level 1 through to Level 5, it’s up to the individual to determine personal preferences in the balance between print times, ink usage and image quality. Quality does improve from Level 1 to Level 5, but for most people a compromise will exist in the mid-quality range. Shorter print times exist with matte and fine-art papers, whereas Level 5 on gloss or lustre paper can take a very long time... like 49 minutes for an A3+ print.
Although using maximum resolution settings like 5760x1440 dpi with High Speed turned off might seem the ultimate approach for a gallery-type print, it doesn’t necessarily lead to the best discernible image quality. Those longer print times may not be warranted. Prints on Epson gloss, semi-gloss or lustre papers using the high quality levels along with the Black Enhance Overcoat do have impact, but be prepared for long print times.
Test prints made on Epson Premium semi-gloss (251gsm) were a favorite as they displayed a good balance of surface sheen and texture, well suited to both hand viewing and glass framing.
Black & white printing
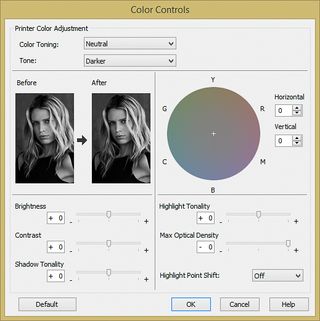
The P700’s Advanced Black And White printing mode allows total control. ‘Color Toning’ can be set to Neutral, Warm, Cool or Sepia, or to tint variations in-between. Tone can be adjusted as well via Brightness, Contrast, Shadow Tonality, Highlight Tonality, Maximum Optical Density and Highlight Point Shift. Personal settings may be saved for on-going use.
The P700 excels when it comes to making black-and-white prints. In order to reduce bronzing and gloss differential that can occur with high-level quality settings, it is better to adopt the Level 3 quality. Some splendid results were achieved on Epson Photo Paper Glossy at Level 3 (with Black Enhance Overcoat selected) with very little bronzing or gloss differential. A 300x220mm image made on A3 paper at Level 5 with Epson Hot Press Bright White Fine Art Matte paper took 6:45 minutes – black-and-white printing at its very best and no further comment required.
Low ink warning
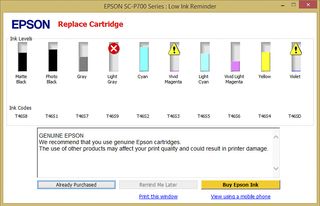
When an ink cartridge is low, the printer will pause and issue a double chime warning. The LCD will offer a choice to proceed or change the cartridge. After several chime warnings they cease, but the low-ink warnings continue until the “ink out” display appears. The first warning is very much an early one as quite a few more prints can be produced before replacement is enforced. Not surprisingly, the light grey cartridge was well ahead of the others in requiring replacement, while the violet and vivid magenta were way back in the field.
The 25ml cartridges for the P700 sell for $37.99 each, which works out at $1.52 per millilitre. Curiously though, the 50ml cartridges in the 17-inch SureColor P900 are priced at $41.99, which is 84c per millilitre. Clearly then, the P900 is far cheaper to run in the long term and this would suggest that the larger 17-inch printer with its capacity for A2 size prints could possibly be a better proposition for some users.
The ‘User Defined’ panel allows custom-sized papers from 88.9mm to 330.2mm in width and from 127mm up to a remarkable 18m in length. Borderless printing is available for custom sizes with the option of ‘Reduce Size Or Expand’.
Apart from the standard test procedures in evaluating an inkjet printer, it is always interesting to run a few extra tests. In this case, it was a sheet sized at 900x329mm that was cut and flattened from a 17-inch roll of Ilford Omnijet satin paper. Some preliminary test strips indicated that the Epson semi-gloss profile would work well.
The prospect of getting everything square at the rear feed and supporting the long piece of paper was daunting, but the printer took up the sheet readily. The Level 3 quality setting with the Black Enhance Overcoat facility were used and the printing took 26 minutes. There were no problems in paper transport and the result was very pleasing result.
The ICC profile for Epson’s Hot Press 330gsm paper was downloaded from the Epson website to ascertain how this top-class fine-art paper would perform with the P706. An A3+ image was printed from the front feed (although the rear feed would probably have been OK). At the Level 4 quality setting it took seven minutes and produced another pleasing result.
The SureColor P700 and its big brother P900 share many features, including exactly the same maintenance box and, apparently, exactly the same-dimensioned ink cartridges. The difference in the cartridges is the chip and the bladder size – 25ml for the P706 and 50ml for the P900. Now enthusiasts will be contemplating how wonderful it would be if the P900 cartridges could have been accommodated in the P700. This would not only help to ease the pain of the ink initialization situation, but also allow on-going printing costs to be halved. Alternatively, Epson could include a second set of inks in the packing box, even if it means extra dollars to make everything price competitive with the opposition.
Epson SureColor P700 verdict
Considering all the commendable features of the P700, it’s perhaps not so surprising that it’s currently the most expensive model in the A3+ printer category. Unfortunately, the running costs are high and are not helped by very small discounts on the recommended retail prices for the cartridges.
The Epson SureColor P700 can claim credit for being the first A3+ photo printer to introduce a maintenance box, along with other welcome features in a handsome unit that is capable of producing top quality prints.
Unfortunately, it can also claim to be the first A3+ printer that goes close to needing a new set of inks immediately after the initialization process. Potential buyers should be advised that they will be obliged to buy a set of inks with the printer acquisition.
In the end, it’s all about print quality and the ease and enjoyment of achieving that quality. Here is where this printer scores top marks. Overlook the initial ink situation, and the Epson SureColor P700 surely makes a very strong case for attention.
Read more:
• The best large format printer
• The best photo printing online: top services from around the web
• The best photo printer 2021: desktop photo printers compared
• Best wireless printers
• Everything photographers need to work at home
• The best portable printers
• The best all-in-one printer
• The best film scanners
• Best 3D printers
Australian Camera is the bi-monthly magazine for creative photographers, whatever their format or medium. Published since the 1970s, it's informative and entertaining content is compiled by experts in the field of digital and film photography ensuring its readers are kept up to speed with all the latest on the rapidly changing film/digital products, news and technologies. Whether its digital or film or digital and film Australian Camera magazine's primary focus is to help its readers choose and use the tools they need to create memorable images, and to enhance the skills that will make them better photographers. The magazine is edited by Paul Burrows, who has worked on the magazine since 1982.
