Home photography ideas: Blacklight body paint portraits
Create glowing portraits using a combination of ultraviolet light and neon body paint
Watch video: Home photography ideas – Toy soldiers and light painting!
Photography projects at home
• Home photography ideas
Useful home photography kit
• Best tripods
• Best lighting kits
• Best reflectors
• Best macro lenses
Blacklight photography involves shooting a subject under ultraviolet light. To the eye, this kind of illumination appears to emit very little light. That’s because the bluish UV light is at the limits of the visible spectrum, and much of the output is invisible.
However, the ultraviolet can cause white or neon colors to produce visible light, giving it a glow that looks great when used with body painting. In an ideal world, you'll be able to work with a model and a makeup artist – but with a willing member of your household, you can achieve great results at home.
Just as you don’t necessarily need to spend lots on models and MUAs, you don't have to shell out on expensive kit either. The body paint costs just a few bucks, and you can buy UV lights or bulbs online for very little. Then all you need is a willing subject, a paintbrush and a dark space to get creative in.
• Get more photoshoot ideas
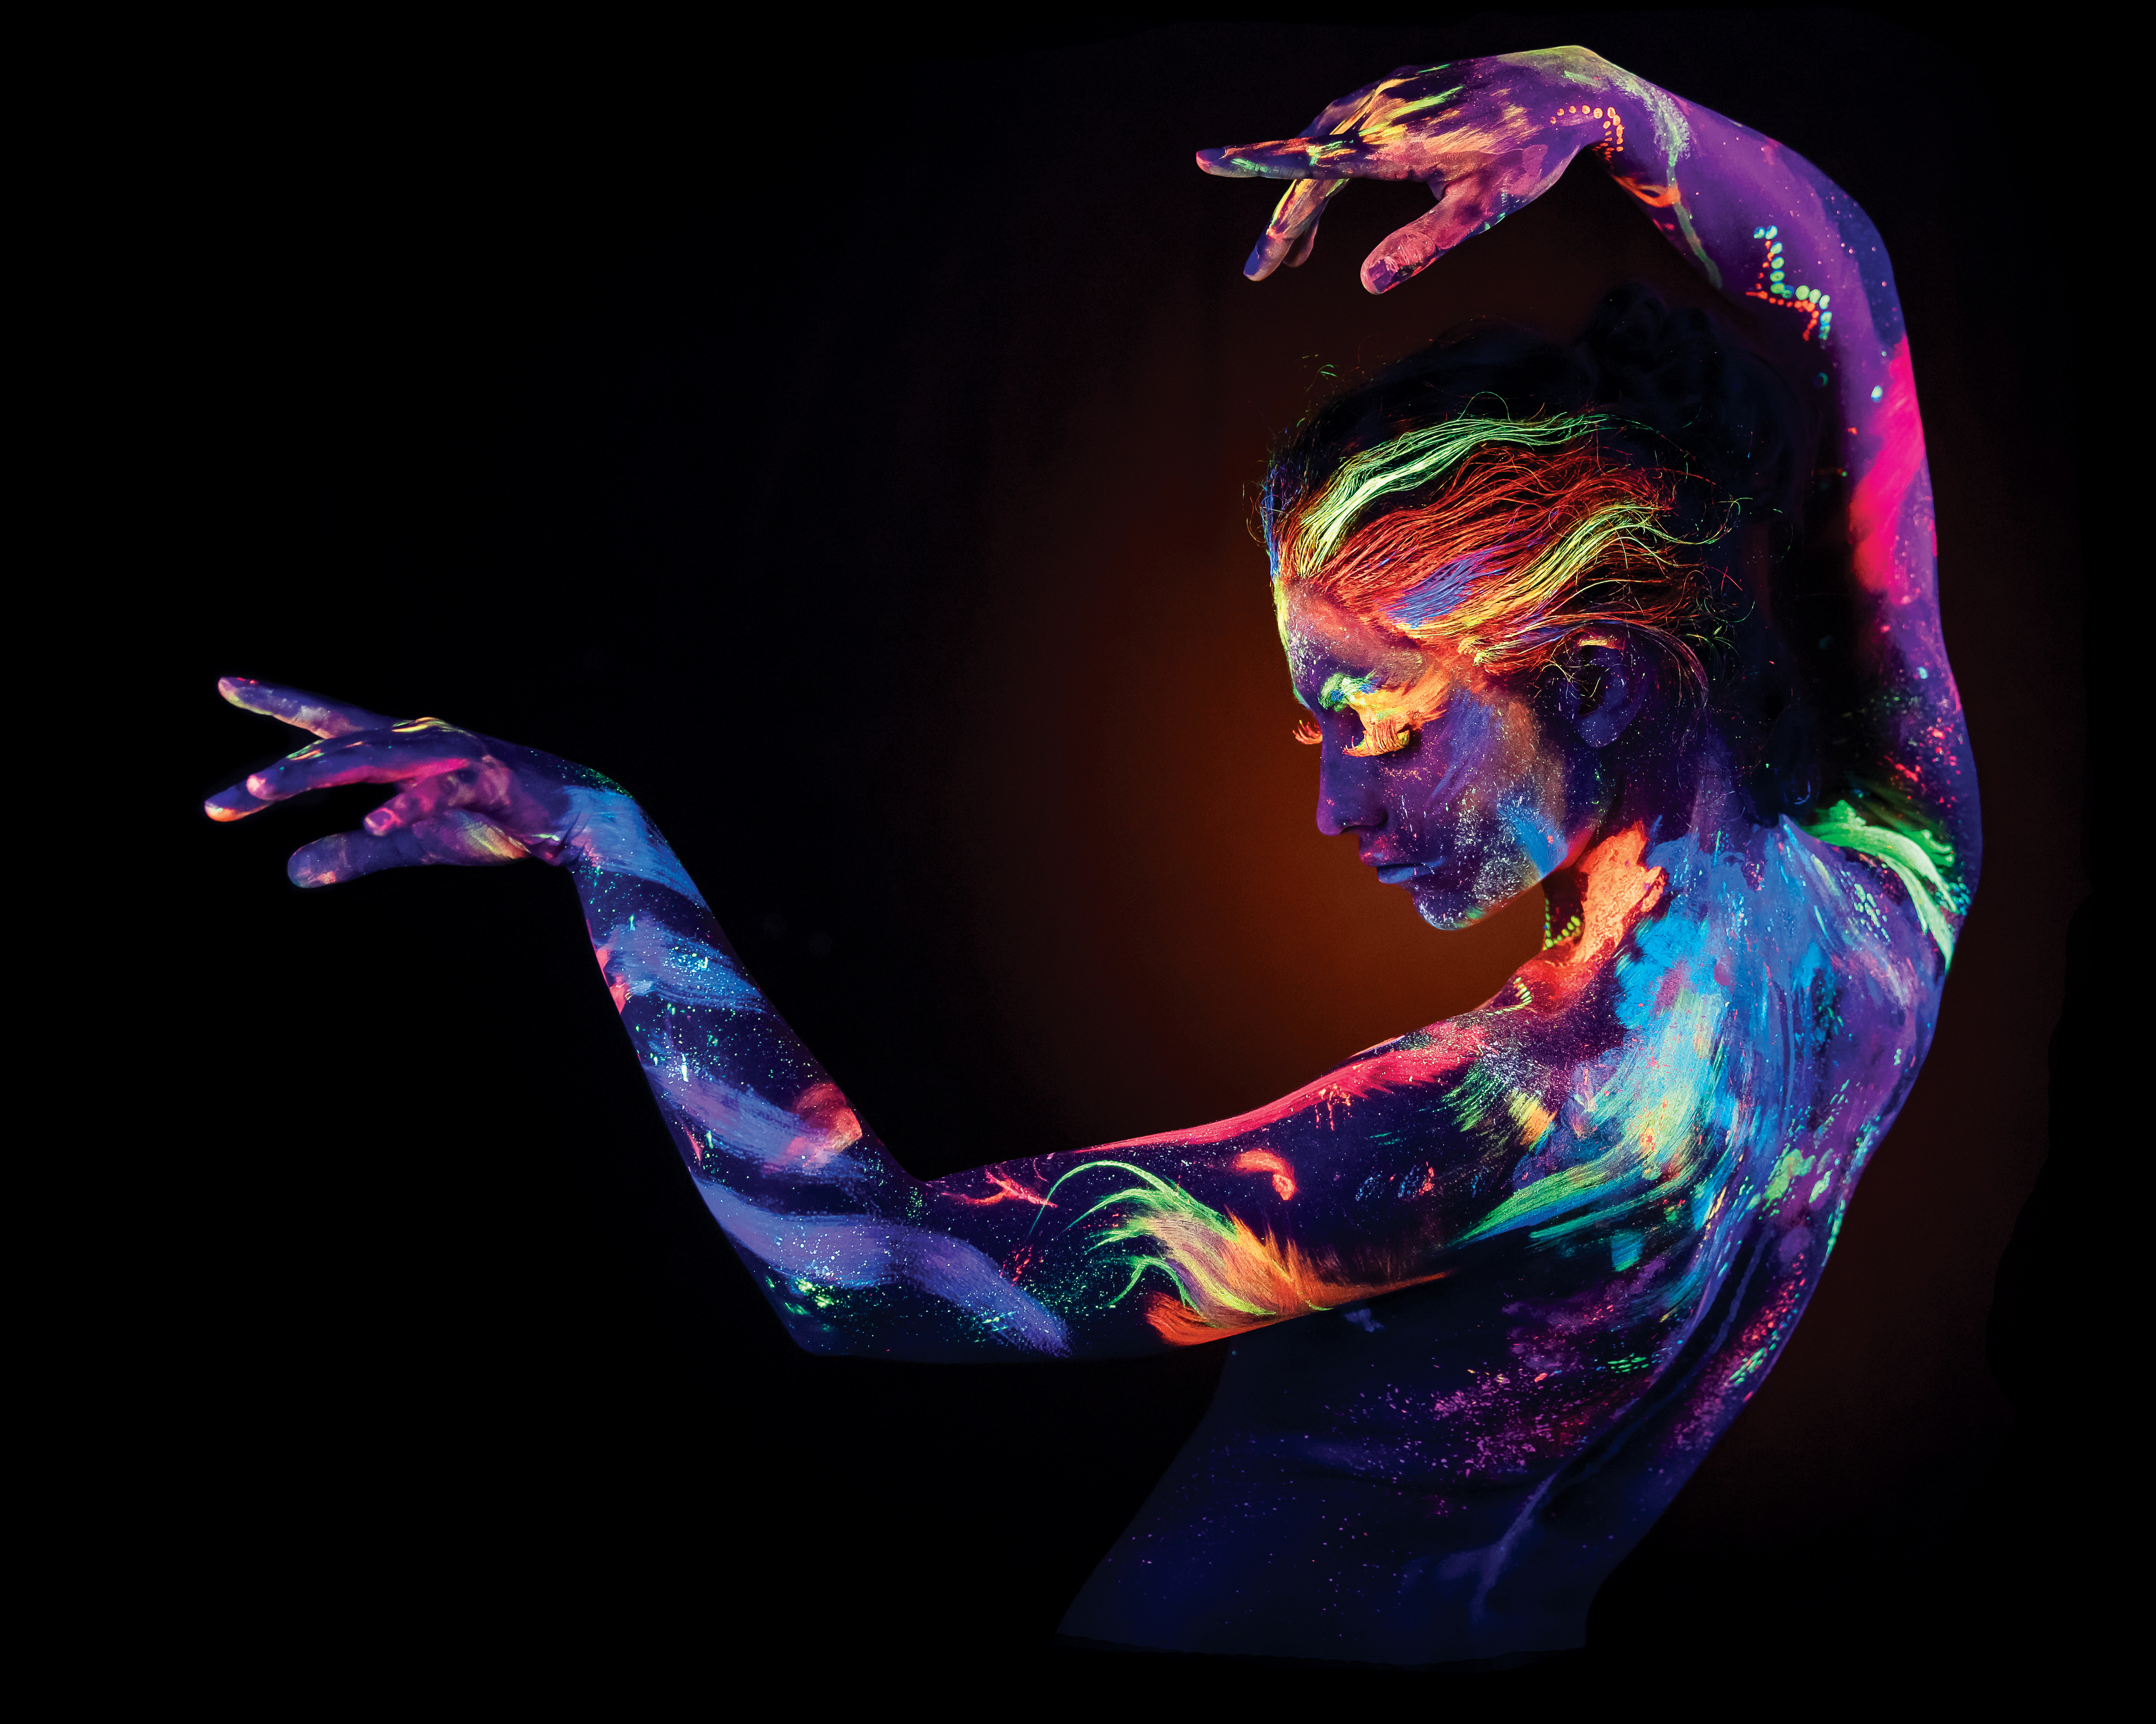
The main challenge is to overcome the low light, so all the usual low-light techniques come in to play. We may need to use a high ISO, a long exposure, a tripod, a wide aperture – or a combination of all of these – to overcome the problem of crafting a usable exposure in low light.
We’ll explain how it’s done here, from setting the scene and camera, to applying the lovely glowing paint to our subject!
• Best online photography courses
Blacklight portraits
01 UV light
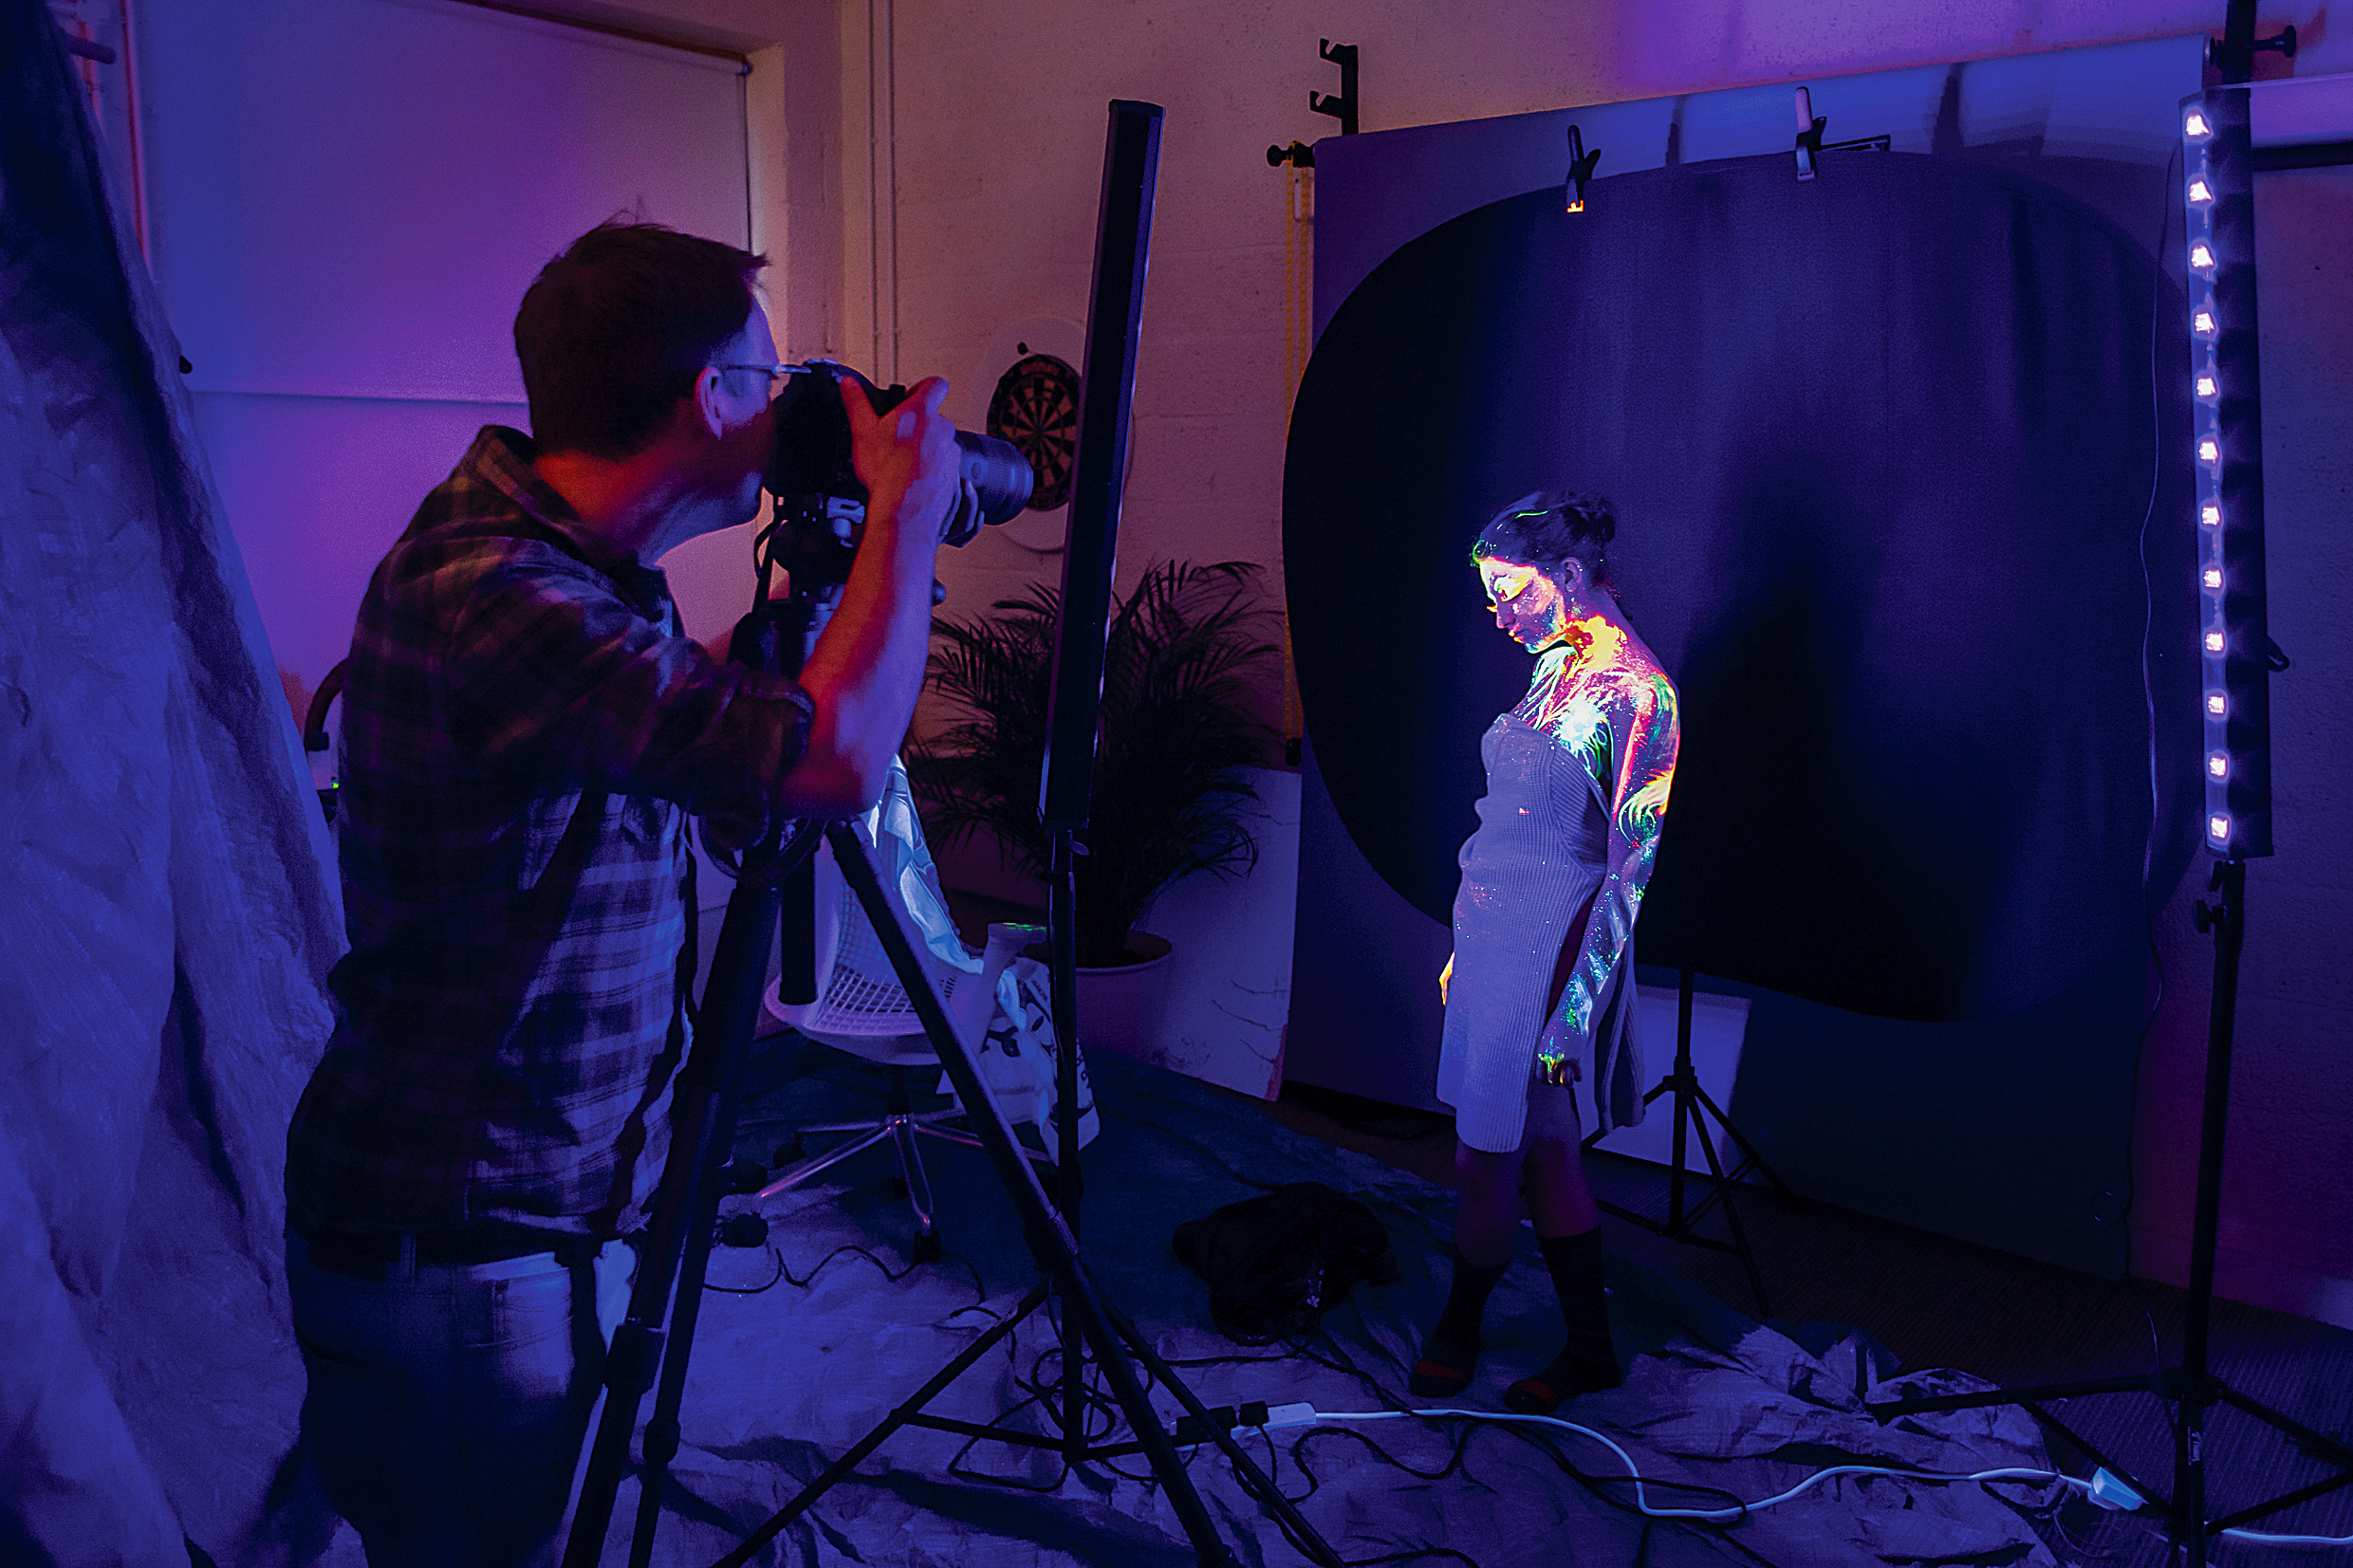
Ultraviolet light causes the pigments in phosphorescent paint to glow. We used two UV LED battens to illuminate our paints and subject, which were hired from a party company. Cheaper ultraviolet lights and bulbs are available online, too.
02 Body paint
Phosphorescent body paint can be bought online (search for UV Body Paint). As well as normal paints, you can also find mascara, nail varnish, hair spray and more. The brand that we used and recommend is Moon Glow body paint.
03 Tripod
UV lights typically have quite a low output, so you might need to lower your shutter speed in order to get a usable shot. A tripod or monopod lets you drop your shutter speed down as low as 1/30 sec – shooting any slower increases the risk of motion blur in your subject.
04 Camera
A camera with decent low-light performance enables you to capture usable shots at high ISOs – often necessary when shooting under the low output of UV lighting. A lens with a wide maximum aperture is also helpful in low light – the best portraits lenses tend to have fast apertures are ideal.
05 Still poses
Motion blur can be a problem in low light. It’s caused either by camera shake or movement in the subject during the exposure. Ask your subject to try to stay still while you take the picture, and fire off two or three frames at a time.
06 Coverage
It’s a good idea to cover the floor and your makeup area with tarps or old towels so that they don’t get splashed with paint. And, as with any shoot where the subject will be partially unclothed, ensure the environment is comfortable.
Body painting
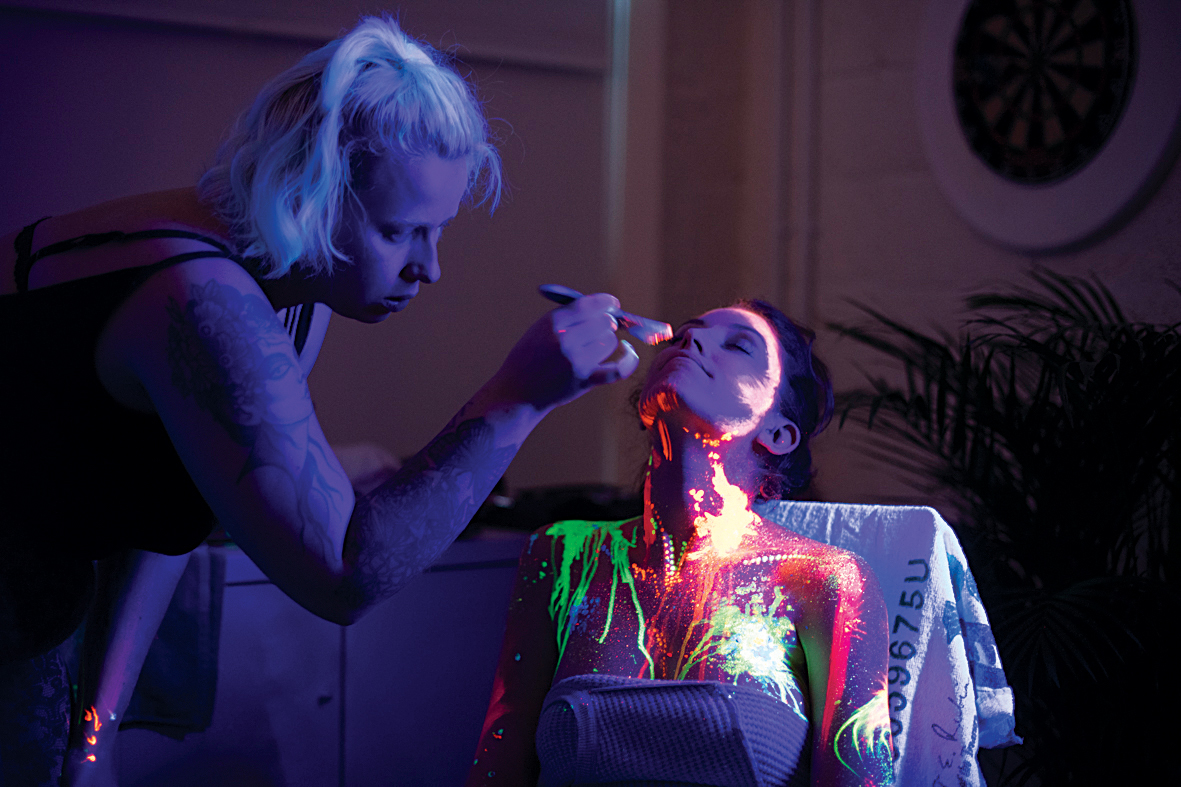
01 The makeup
It’s best to apply the UV paints under the UV light, so you get an idea of how the paint will look. Our makeup artist, Amelia, used a variety of drips, splashes and strokes. A hairdryer comes in handy for quickly drying out the paint after it’s been applied to skin.
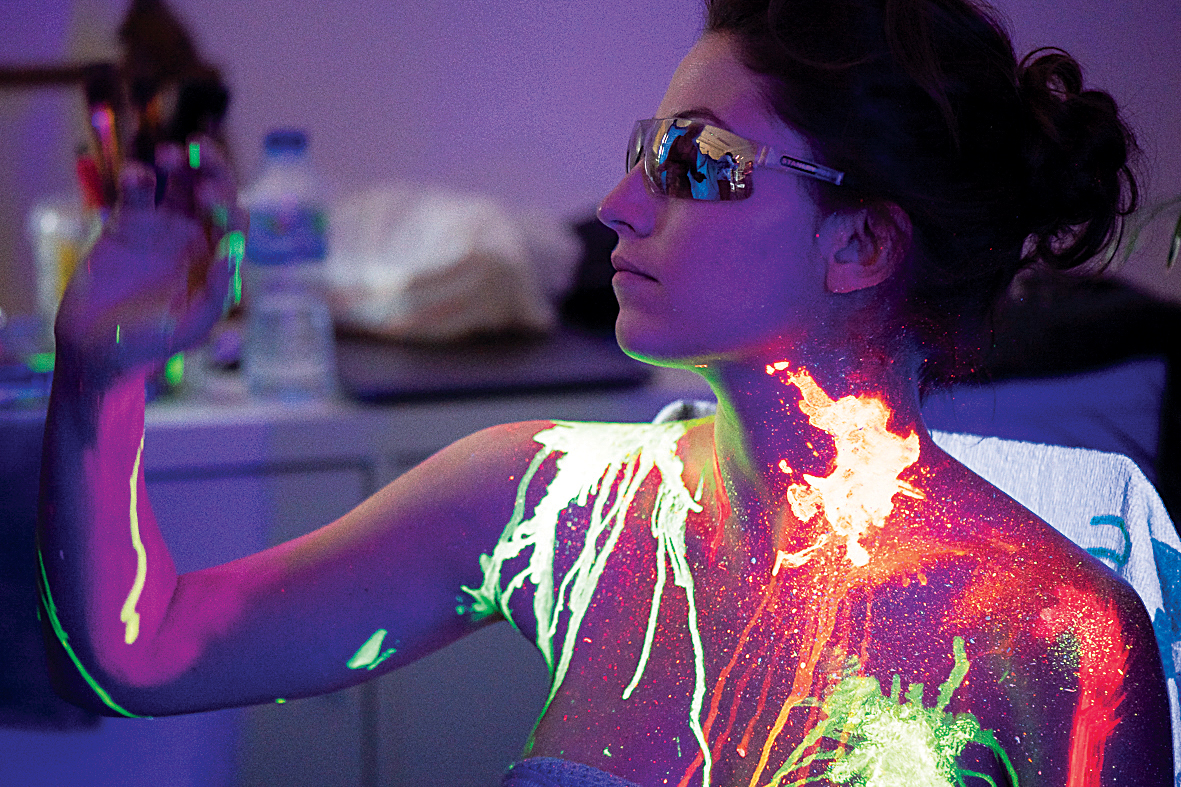
02 Safety glasses
Ultraviolet light can be damaging to the eyes, especially as we don’t experience discomfort when looking directly at UV sources. Constant exposure can lead to permanent damage, so our model, Bou, wore UV-blocking glasses during makeup.
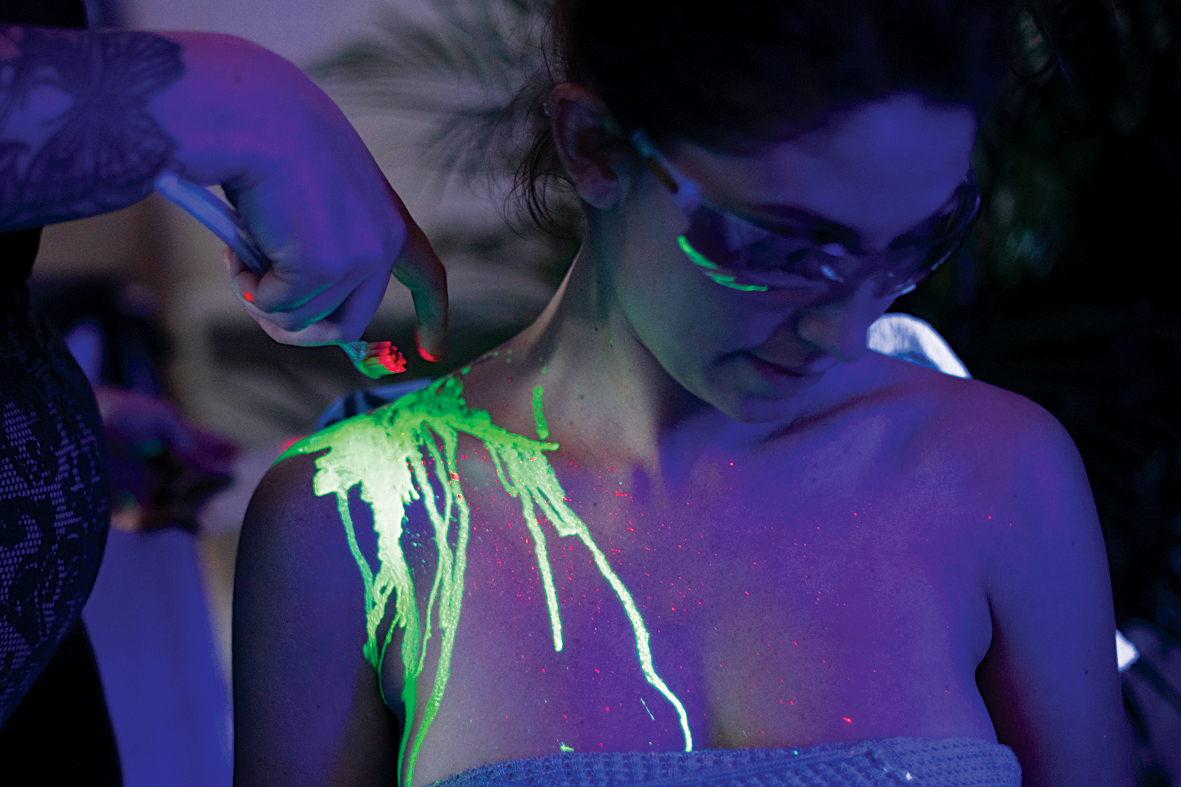
03 Speckled paint
A speckled paint effect can look great and is easy to do, even for a novice body painter – simply flick a paintbrush with your finger, then build it up with different colors. Too much paint can be overpowering, so make sure that you leave empty areas as well.
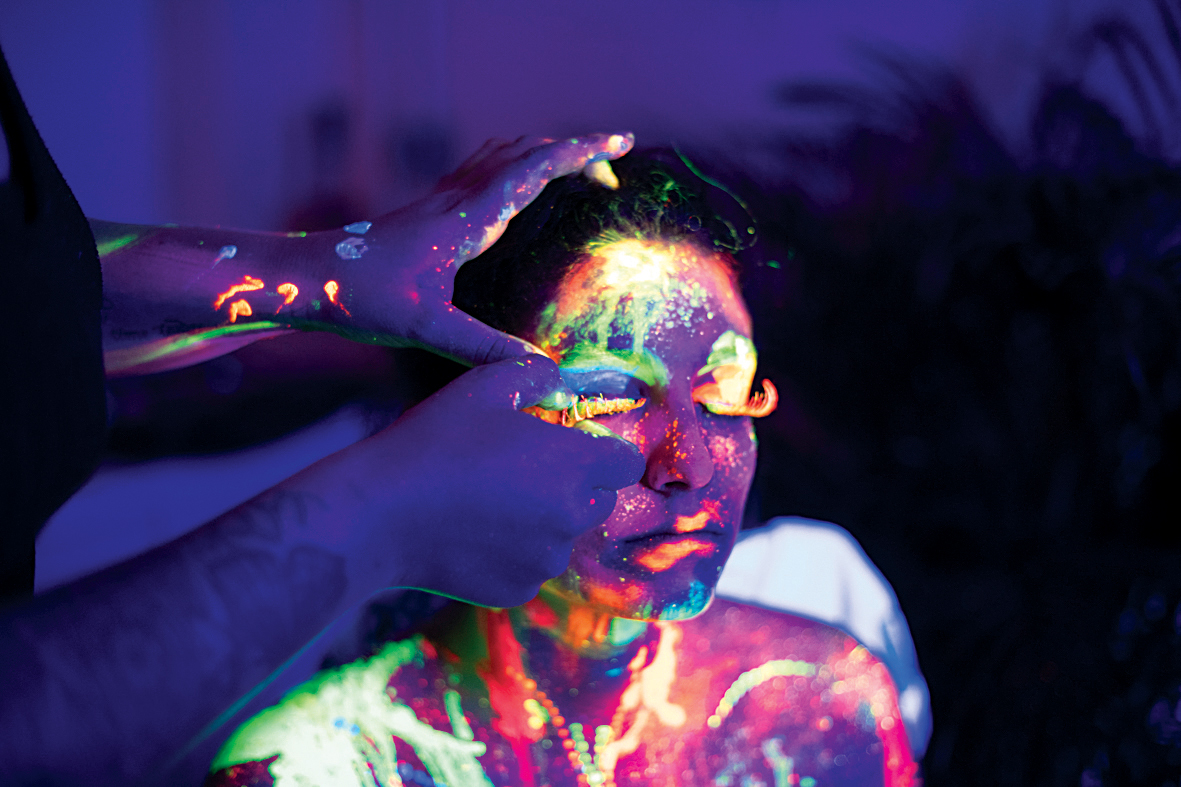
04 Fake lashes
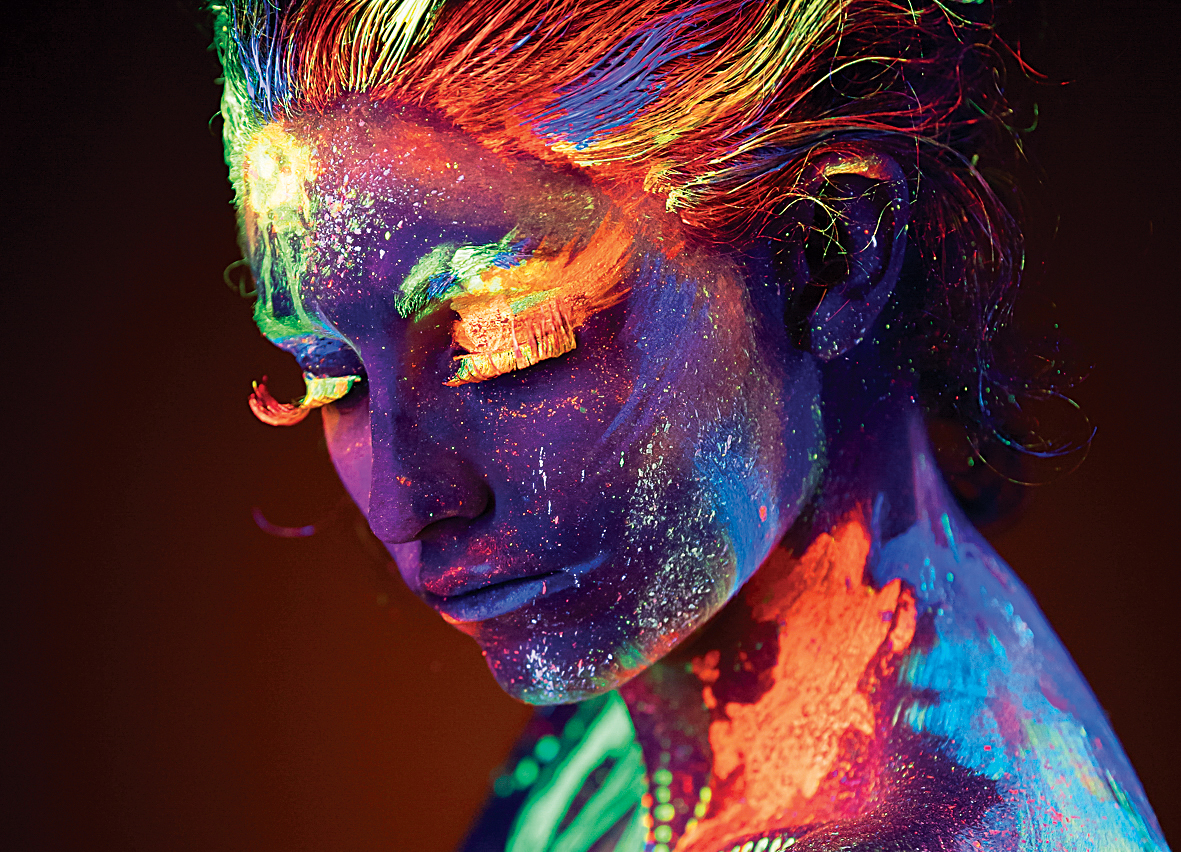
Eyes can come out as rather disturbing black holes in UV portraits, so fake lashes painted with UV mascara can be a good look – especially if you ask the subject to look down. We painted the lashes with the UV paints (allowing time to let them dry before the shoot).
Shooting in low light
01 Lens and settings
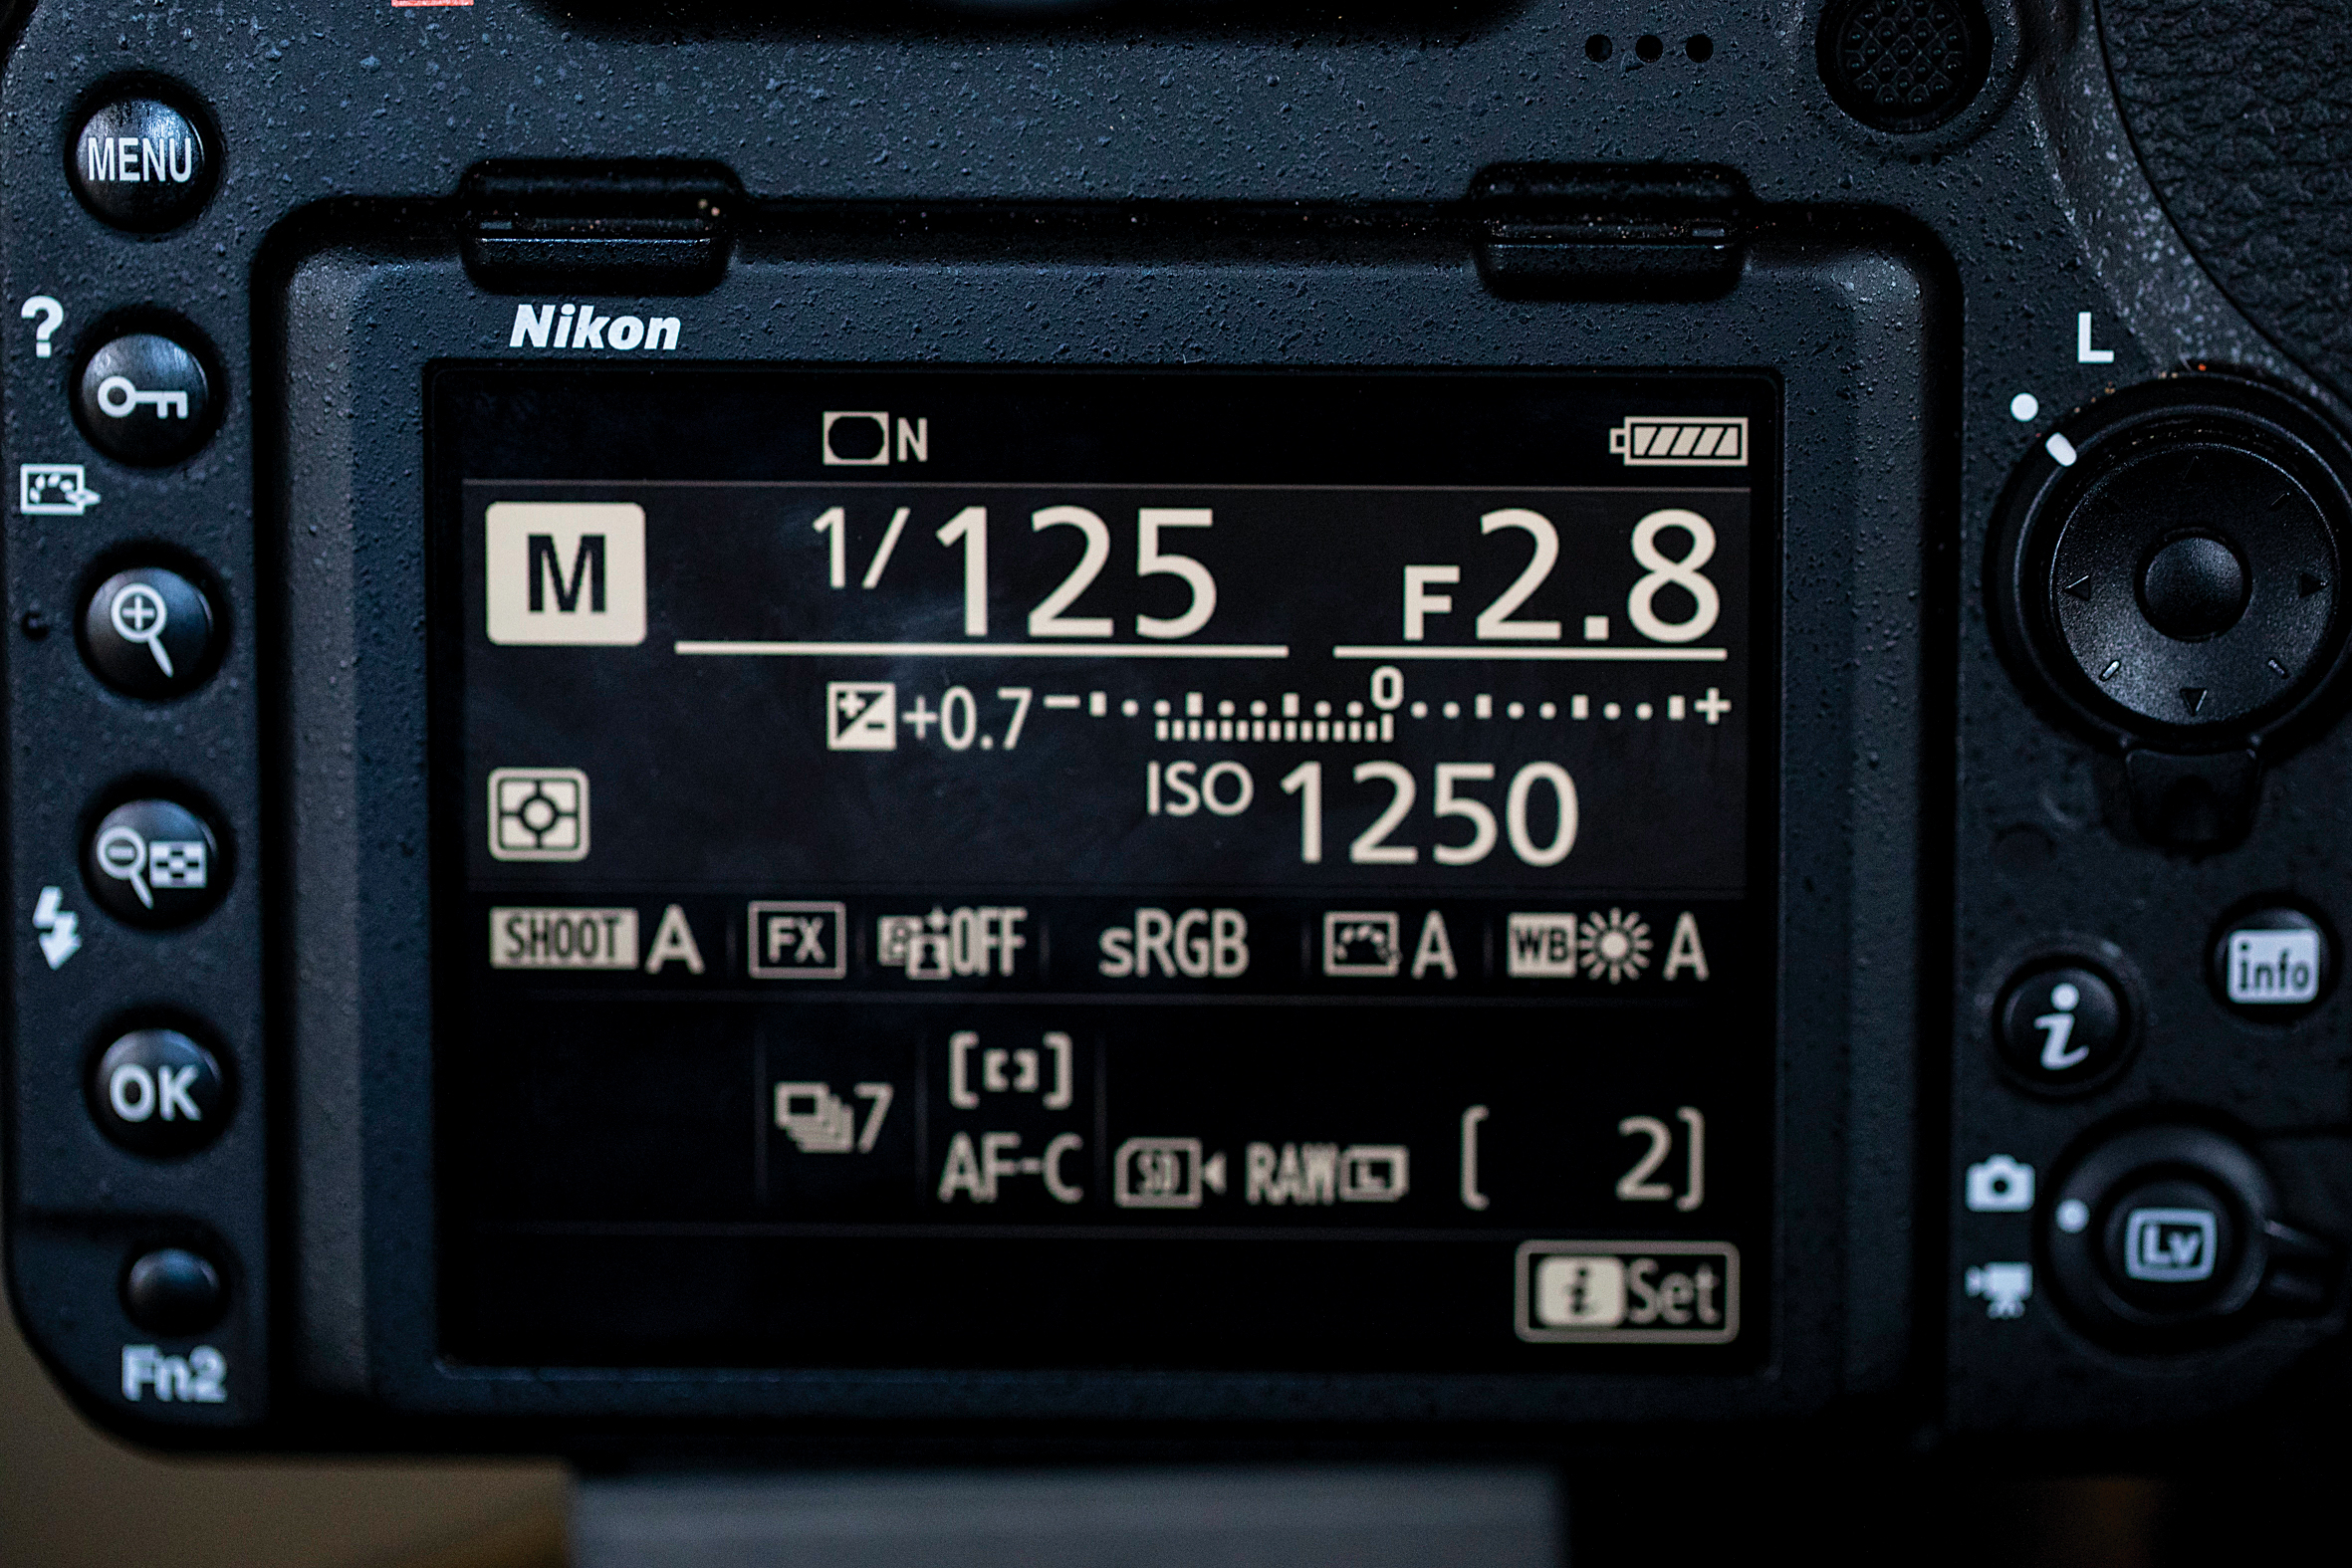
In a controlled setup it’s best to use manual exposure mode. We set 1/125 sec, f/2.8, ISO1250. If you don’t want to use manual, try aperture priority with a high ISO and wide aperture, and dial in negative exposure compensation if necessary. As noted, use a portrait lens according to your needs and space – an 85mm is perfect for headshots, while a 50mm will suit wider torso shots.
02 Precise focusing
When using a wide aperture the depth of field is very shallow, so precise focusing is crucial. Use the focus grid in your viewfinder to move the focus point over the eye that’s closest to the camera – or in this case the closest huge fake eyelash!
N-Photo: The Nikon Magazine is a monthly publication that's entirely dedicated to Nikon users. For the best news, reviews, projects and more, subscribe to N-Photo today!
Read more:
The best camera for portraits: cameras and lenses perfect for portraits
The best lens for portraits: our pick of the best 85mm lenses right now
Portrait photography tips: how to take perfect people pictures
Get the Digital Camera World Newsletter
The best camera deals, reviews, product advice, and unmissable photography news, direct to your inbox!
The lead technique writer on Digital Camera Magazine, PhotoPlus: The Canon Magazine and N-Photo: The Nikon Magazine, James is a fantastic general practice photographer with an enviable array of skills across every genre of photography.
Whether it's flash photography techniques like stroboscopic portraits, astrophotography projects like photographing the Northern Lights, or turning sound into art by making paint dance on a set of speakers, James' tutorials and projects are as creative as they are enjoyable.
He's also a wizard at the dark arts of Photoshop, Lightroom and Affinity Photo, and is capable of some genuine black magic in the digital darkroom, making him one of the leading authorities on photo editing software and techniques.
