How to use ND filters for long exposure photography during the day
Learn how to use ND filters to achieve long exposure photography during broad daylight
One of the great joys of photography is controlling your shutter speed – which will have a big impact on your photos when there’s something moving in shot.
Using a fast split-second shutter speed of 1/1000 sec will freeze most movement, such as the waterfall in our scene; when slowing the shutter speed down, any movement becomes blurred. The slower the shutter speed, the more the gushing water turns milky, helping to capture a sense of movement in the waterfall.
There are a few techniques you can use to obtain the longest possible exposure. Shoot in overcast conditions if shooting in daytime, or shoot before first or after last light. Select a narrow aperture to minimize the amount of light reaching your camera's sensor, such as f/16, and use the lowest possible ISO setting on your camera.
However, adding an ND filter will really slow down your shutter speeds – even when shooting in daylight.
• 10 things you need to know about camera filters!
01. Camera and lens
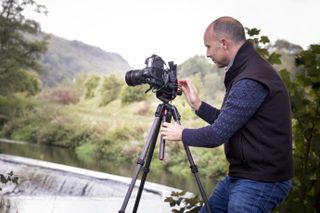
For this project we shot a picturesque waterfall that has fast-flowing water – ideal for a long-exposure shot. We’re using a full-frame Canon EOS 5D Mark III and shooting at a mid-range focal length on our Canon EF 24-70mm standard zoom lens. But any camera and standard zoom will do.
• Read more: Canon EF 24-70mm f/4L IS USM review
02. Tripod and remote control
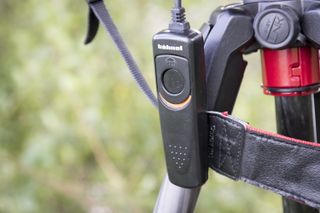
A tripod is essential for long exposures. If you shoot handheld with a slow shutter speed, you’ll get very shaky shots! We’re also using a remote shutter control, as the act of pressing the shutter button can cause camera movement and unwanted blur.
• Read more: Best tripods
03. Best shooting mode
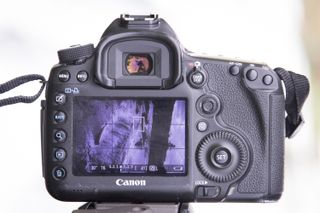
We’re shooting in aperture priority mode, with a narrow aperture to control the depth of field for our scene. It’s best to shoot at f/16 (rather than f/22) for optimum image quality, while still reducing the light reaching our sensor for the slowest possible shutter speed.
04. Low ISO setting
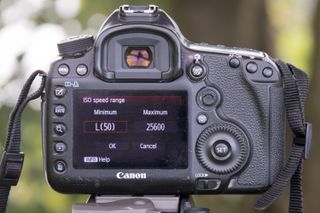
Choose the lowest ISO setting available on your camera. On our Canon EOS 5D Mark III we can shoot at ISO50, but even then we could only get a shutter speed of 1/15 sec. Quite slow, but not enough for really smooth waters.
05. ND filter for 30-second exposures
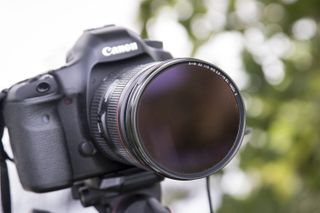
A neutral density (ND) filter is crucial, as these dark slabs of glass block the light reaching our sensor. This extends our exposure and increases the blur in moving water. NDs come in various strengths, such as 1-stop and 3-stop, but as it was daytime we used a B+W 1000x (10-stop) ND filter.
• Read more: Best ND grad filter kits
This enabled us to shoot at 10 stops slower than 1/15 sec, which would be a 1-minute exposure time, but we also dropped the aperture to f/16 for better image quality (as, at f/22, diffraction can cause sharpness to drop off at the edges).
Therefore our shutter speed was 30 seconds. This captured lots of lovely blur in the rushing water and, at that length of exposure, it’s captured a little movement in the clouds, as well as making the slower-moving water on top of the weir appear glassy and serene.
06. Compose and expose
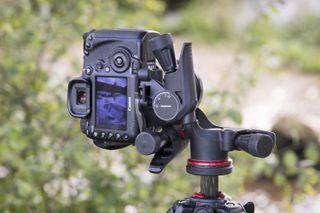
As we’re in aperture priority, with our ND filter on, the camera will simply adjust the shutter speed for a good exposure. Shooting in live view with exposure simulation means that you can see still your scene on the LCD, too, ideal for when composing and focusing.
More videos:
Photography tips videos
How to use an ND graduated filter for stunning landscape photography
How to use an ND filter for slow-shutter-speed seascapes
Get the Digital Camera World Newsletter
The best camera deals, reviews, product advice, and unmissable photography news, direct to your inbox!
The editor of PhotoPlus: The Canon Magazine, Peter 14 years of experience as both a journalist and professional photographer. He is a hands-on photographer with a passion and expertise for sharing his practical shooting skills. Equally adept at turning his hand to portraits, landscape, sports and wildlife, he has a fantastic knowledge of camera technique and principles. As you'd expect of the editor of a Canon publication, Peter is a devout Canon user and can often be found reeling off shots with his EOS 5D Mark IV DSLR.
