Liquify faces with Affinity Photo
Use the Liquify Persona to transform a portrait into an exaggerated caricature
Start here
• Affinity Photo tutorials
The tutorials
1. Affinity Photo vs Photoshop
2. RAW editing with Affinity Photo
3. Focus merge with Affinity Photo
4. Replace a sky in Affinity Photo
5. Moody mono in Affinity Photo
6. Six Affinity Photo landscape tips
7. Color correction in Affinity Photo
8. Live Filters in Affinity Photo
9. Create a classic wet plate look
10. Remove objects in Affinity Photo
11. Paint an abstract portrait
12. Enhance skintones in Affinity Photo
13. Create HDR in Affinity Photo
14. Replace a sky in Affinity Photo
15. Affinity Photo double exposures
16. Affinity Photo Denoise tool
17. Affinity Photo retouching
18. Restore old family portraits
19. Change clothes in Affinity Photo
20. Create super-charged sunsets
21. Fix faces with a flourish
22. Get creative with composites
23. Liquify faces with Affinity Photo
24. Make a tropical composite
25. Let it snow in Affinity Photo
26. Create an immaculate conception
Watch video: Liquify faces with Affinity Photo
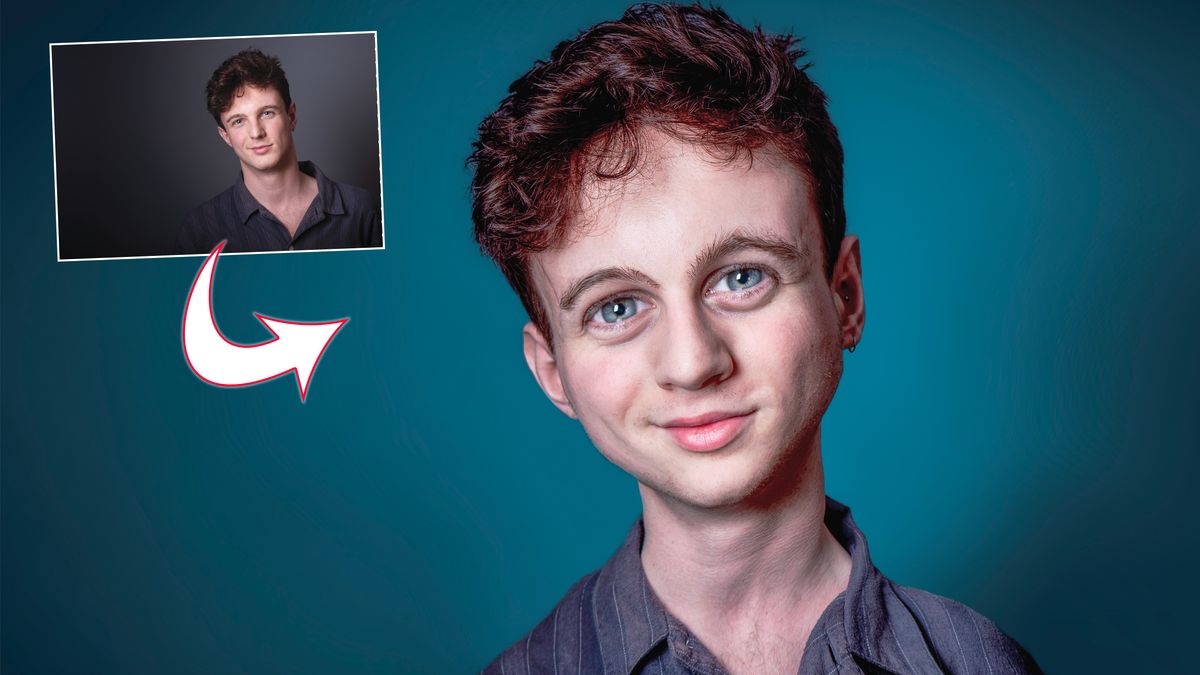
Editing images for comedic effect is wonderfully fun and can help you get used to some useful editing tools. In this tutorial we’ll look at how to transform a portrait, exaggerating features and enlarging the eyes to form an eye-catching caricature.
Affinity Photo’s Liquify Persona offers the tools we need for this. It lets us push, pull, expand, contract and reshape pixels in almost any way we like. Whether you need to make a subtle adjustment to the shape of a person or object, or transform a portrait like this, the Liquify Persona is the place to do it.
We’ve supplied a portrait for you to use but if you’d like to shoot your own then it’s best to place your subject against a plain backdrop, so that the backdrop won’t warp. We’ll use the Liquify tools to enlarge the eyes, bulge the forehead, slope the shoulders and stretch the nose. We’ll also make use of the Freeze and Thaw tools, which allow us to protect parts of the face while reshaping others. Once done, we’ll add a vibrant backdrop and boost the colours to finish off our over-the-top portrait, perfect for sharing on social media or as a joke for your friends.
Read more:
Step 1: Enlarge the eyes
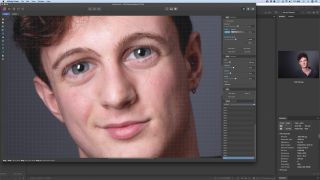
Open the portrait into Affinity Photo and duplicate the bottom layer with Cmd/Ctrl+J, then click on the Liquify Persona at the top left. Next, grab the Liquify Pinch tool from the toolbar on the left. Using a fairly large brush, click over the eyes and nose several times to enlarge them.
Step 2: Shrink the pupils
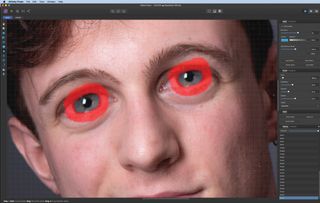
The pupils look too large now, but we can shrink them back down. Grab the Freeze tool from the toolbar and paint around the edges of the irises, then use the Punch tool to make the pupils smaller without affecting the surrounding eyes. Once done, use the Thaw tool to remove the ‘frozen’ area.
Step 3: Push and pull
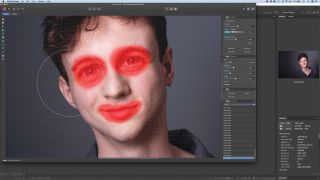
Paint over the eyes and mouth with the Freeze tool, then use the Push Forward tool to reshape the head. Pull the forehead upwards and out to make it bigger, squeeze in the chin to narrow it down, then enlarge the cheekbones and ears. Keep reshaping until everything comes together.
Step 4: Reshape the shoulders
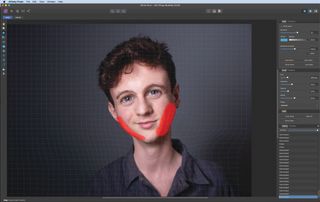
Next, we can reshape the body. Use the Push Forward tool to slope the shoulders and make the neck smaller (freeze the chin so it’s unaffected). Use a large brush tip and nudge the pixels gradually in short increments, rather than trying to push them too far in one go. Once done, hit Apply.
Step 5: Select the face
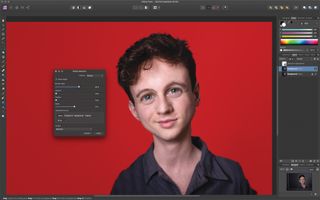
Grab the Selection Brush tool and check ‘Snap to Edges’ in the tool options, then paint over the subject to select it. Click the Refine button then increase the Border Width to include the edges of the hair. Set Output: Selection and hit Apply. Go to Select>Invert Pixel Selection.
Step 6: Recolour the backdrop
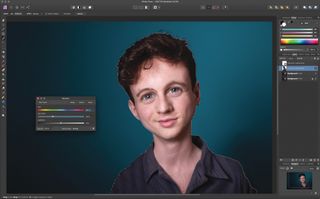
Click the Adjustment Button in the Layers panel and choose Recolour. Use the settings to recolour the backdrop, then hit Cmd/Ctrl+D to deselect. Add any final touches; we dodged and burned the face to boost the eyes and added a HDR effect using the Tone-Mapping Persona.
Quick tip
Often used for images of politicians and movie stars, a caricature is a depiction of a person in which their most striking features are exaggerated for comic effect. So think about which features you want to exaggerate. Here, for example, our subject has striking blue eyes and a strong jaw, so it makes sense to enlarge those eyes and accentuate the jawline.
About N-Photo magazine
This tutorial originally appeared in N-Photo, the monthly newsstand magazine for Nikon photographers. Why not subscribe to a print edition, and have the magazine delivered direct to your door every month?
Alternatively, we have a number of different digital options available, including:
• Apple app (for iPad or iPhone)
• Zinio app (multi-platform app for desktop or smartphone)
• PocketMags (multi-platform app ideal for Android devices)
• Readly (all-you-can-eat digital magazine subscription service)
If you wanted a printed version of any of our most recent issues we have a selection of back issues to choose from in our online store.
Read more:
• Photography tips and tutorial videos
• The best photo editing tools and accessories
• The best desktop computers for photo editing
• The best photo-editing laptops right now
• The best photo editing software today
Get the Digital Camera World Newsletter
The best camera deals, reviews, product advice, and unmissable photography news, direct to your inbox!
N-Photo: The Nikon Magazine is a monthly publication that's entirely dedicated to Nikon users. As a 100% independent magazine, you can be assured of unbiased opinion from a trustworthy team of devoted photography experts including editor Adam Waring and Deputy Editor Mike Harris.
Aimed at all users, from camera newcomers to working pros, every issue is packed with practical, Nikon-specific advice for taking better photos, in-depth reviews of Nikon-compatible gear, and inspiring projects and exciting video lessons for mastering camera, lens and Photoshop techniques.
Written by Nikon users for Nikon users, N-Photo is your one-stop shop for everything to do with cameras, lenses, tripods, bags, tips, tricks and techniques to get the most out of your photography.
