Photo therapy: the art of patience - why it's worth waiting!
With outdoor photography sometimes waiting for the right conditions and revisiting a scene offers the best possible images
I'm not a patient guy! This applies to me waiting in a fifty mile line at Starbucks and it most certainly describes my behaviour when out shooting photographs. This isn't something to be proud of, though I should point out it is only because I want to see results and be the best photographer I can be. There are times when patience pays off however and landscape photography in particular benefits from waiting.
• 16 essential landscape photography tips
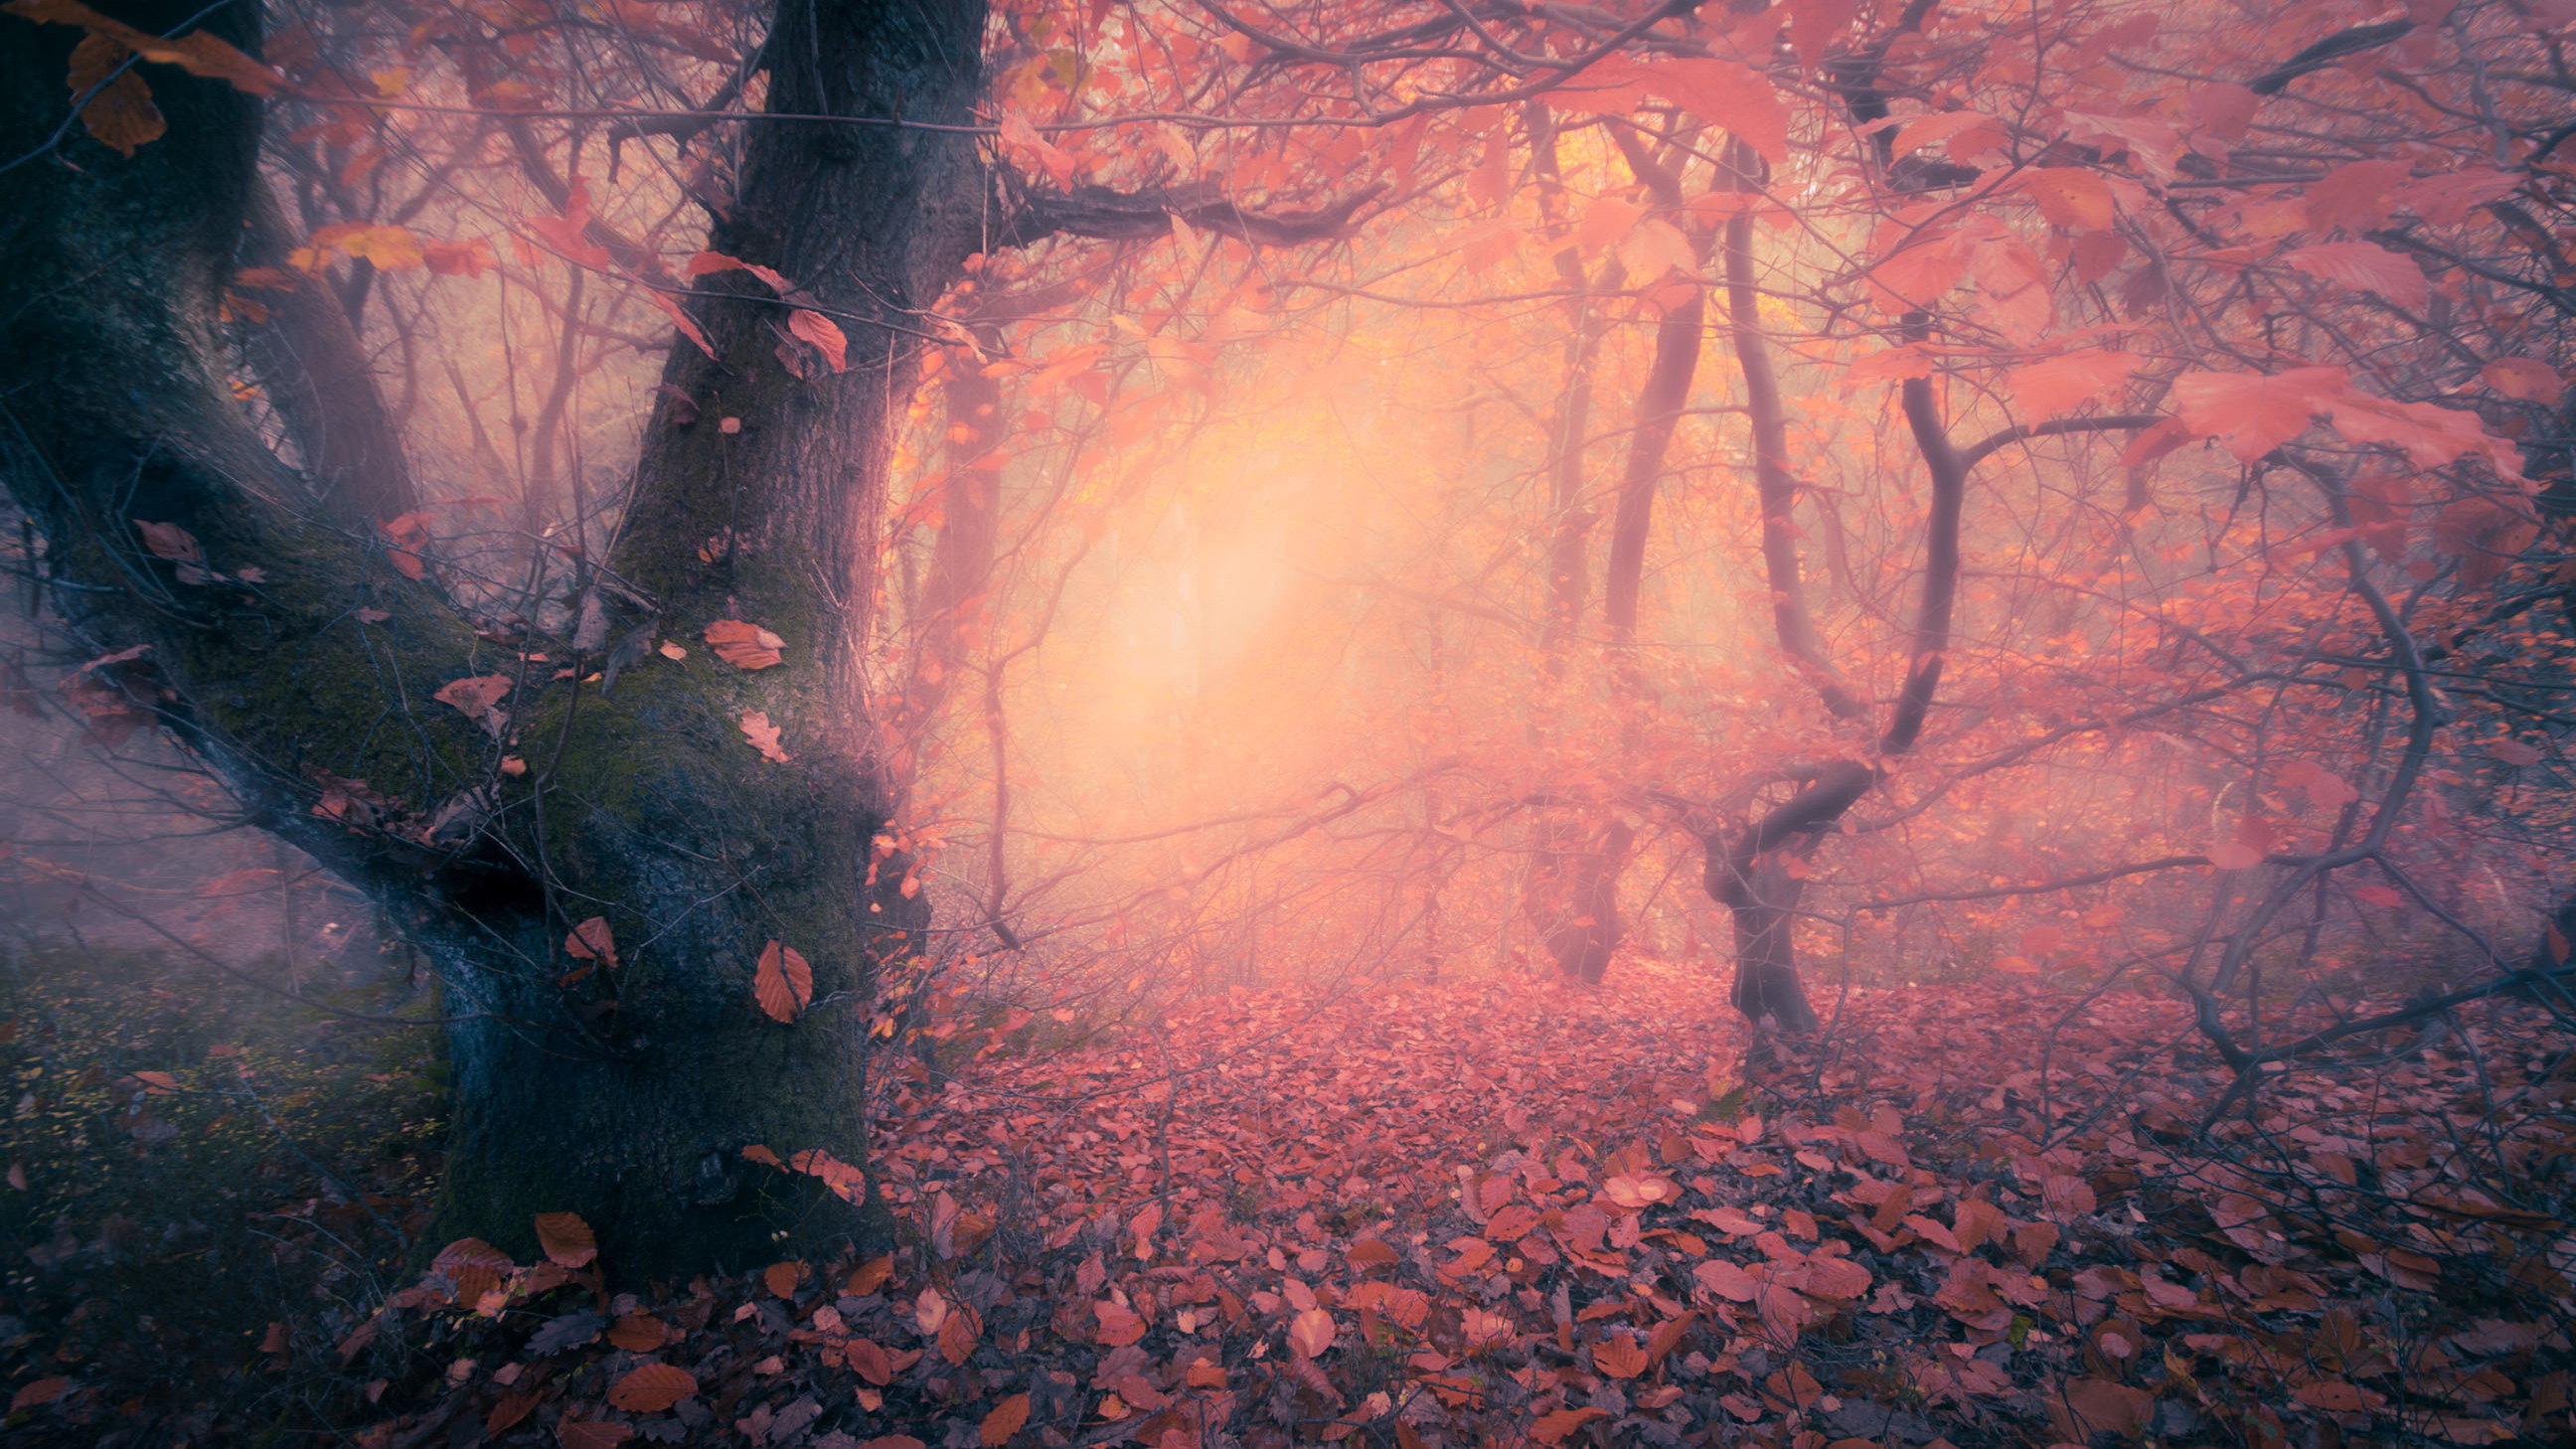
This can be difficult when you've dragged yourself out of bed for a sunrise, hauled kilograms of expensive photo gear into a forest, all with great expectations, only to be faced with a damp squib of a dawn. That happened to me at the location shown here. I'd wanted a misty sunrise, but there was no sunrise, nor was there mist. I was a bit disappointed to say the least.
I didn't give up and shot a few frames, but I knew there was nothing dramatic about to happen. The only option was to try again in a few days. I returned on a clearer day, but despite the promise of fog there wasn't much. I had a good view of the rising sun through the trees though, so we were half way there. After a further three attempts I finally got lucky!
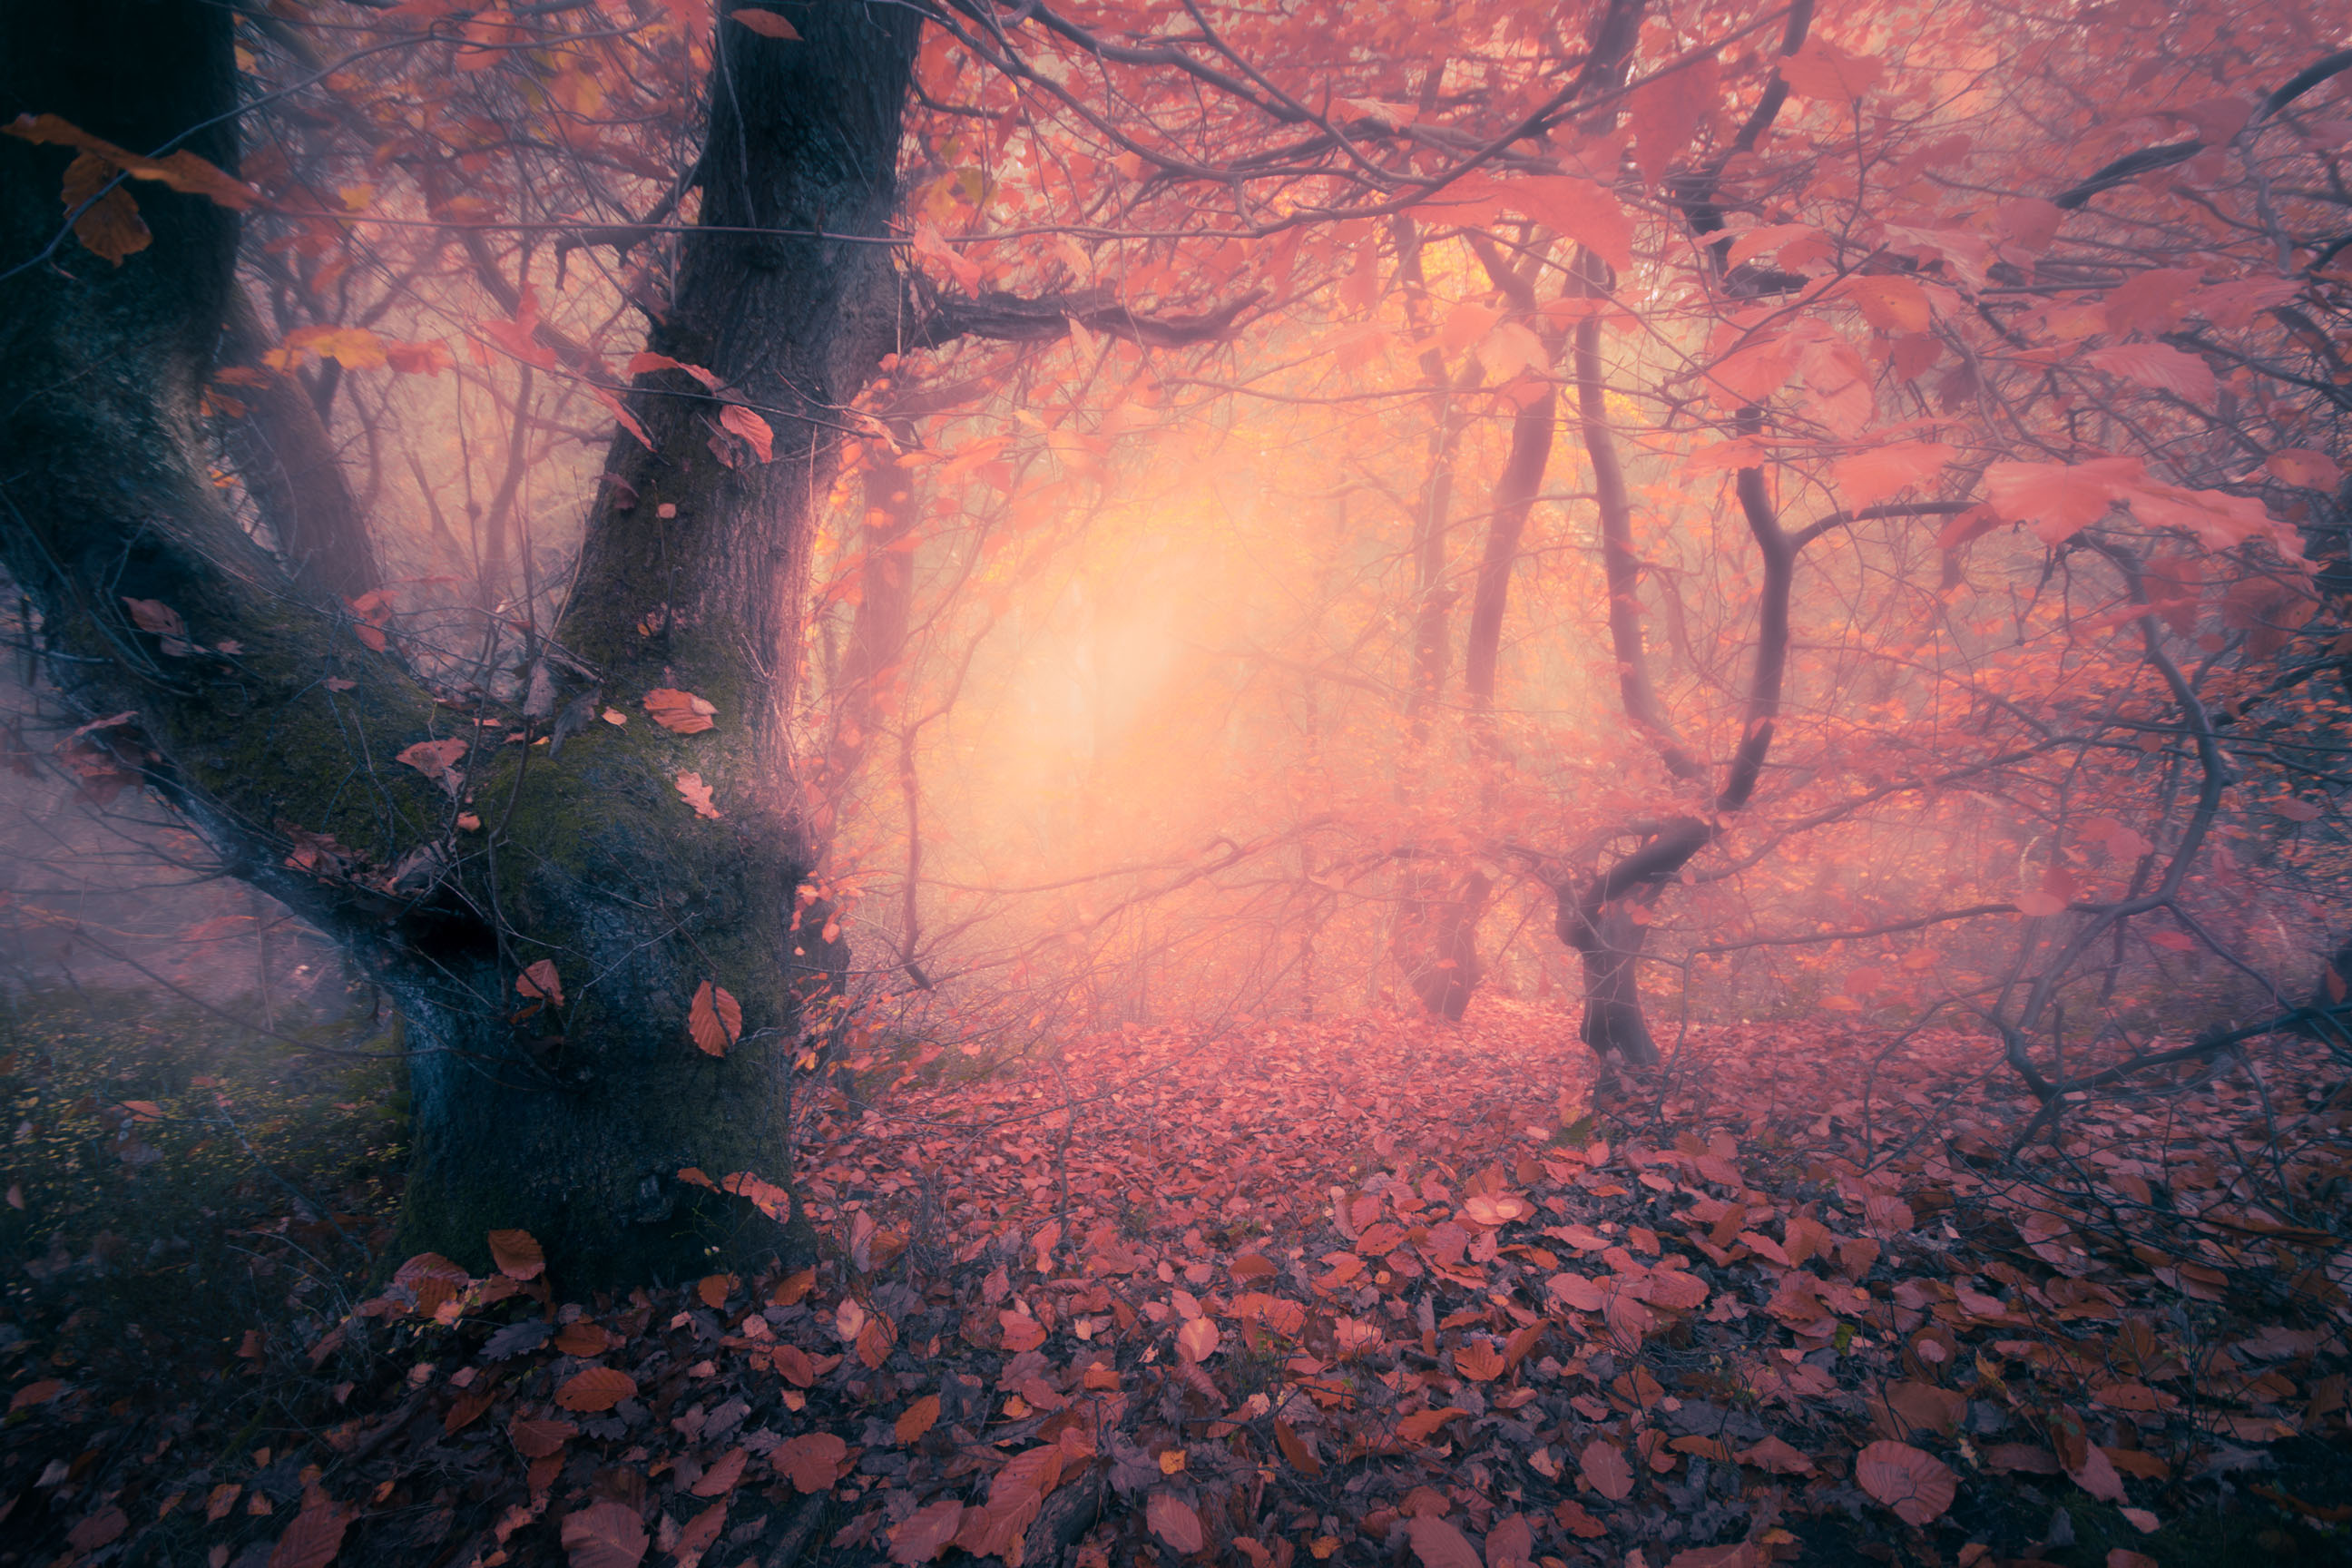
I really wanted to capture this tunnel of trees, filled with illuminated mist, ( I had this image in my mind and wanted to recreate it). So placed the camera close to ground level, mounted a Sigma 10-20mm lens and waited for the sun to appear at just the right angle. I'd have preferred a longer lens to compress perspective, but needed the wide angle-of-view to fit in the left hand tree.
In woodland photography be careful of empty spaces - a wide lens can capture too much foreground. Here that wasn't a problem as the leaf carpet was attractive but remember to try zooming to compress the scene.
Why the image works
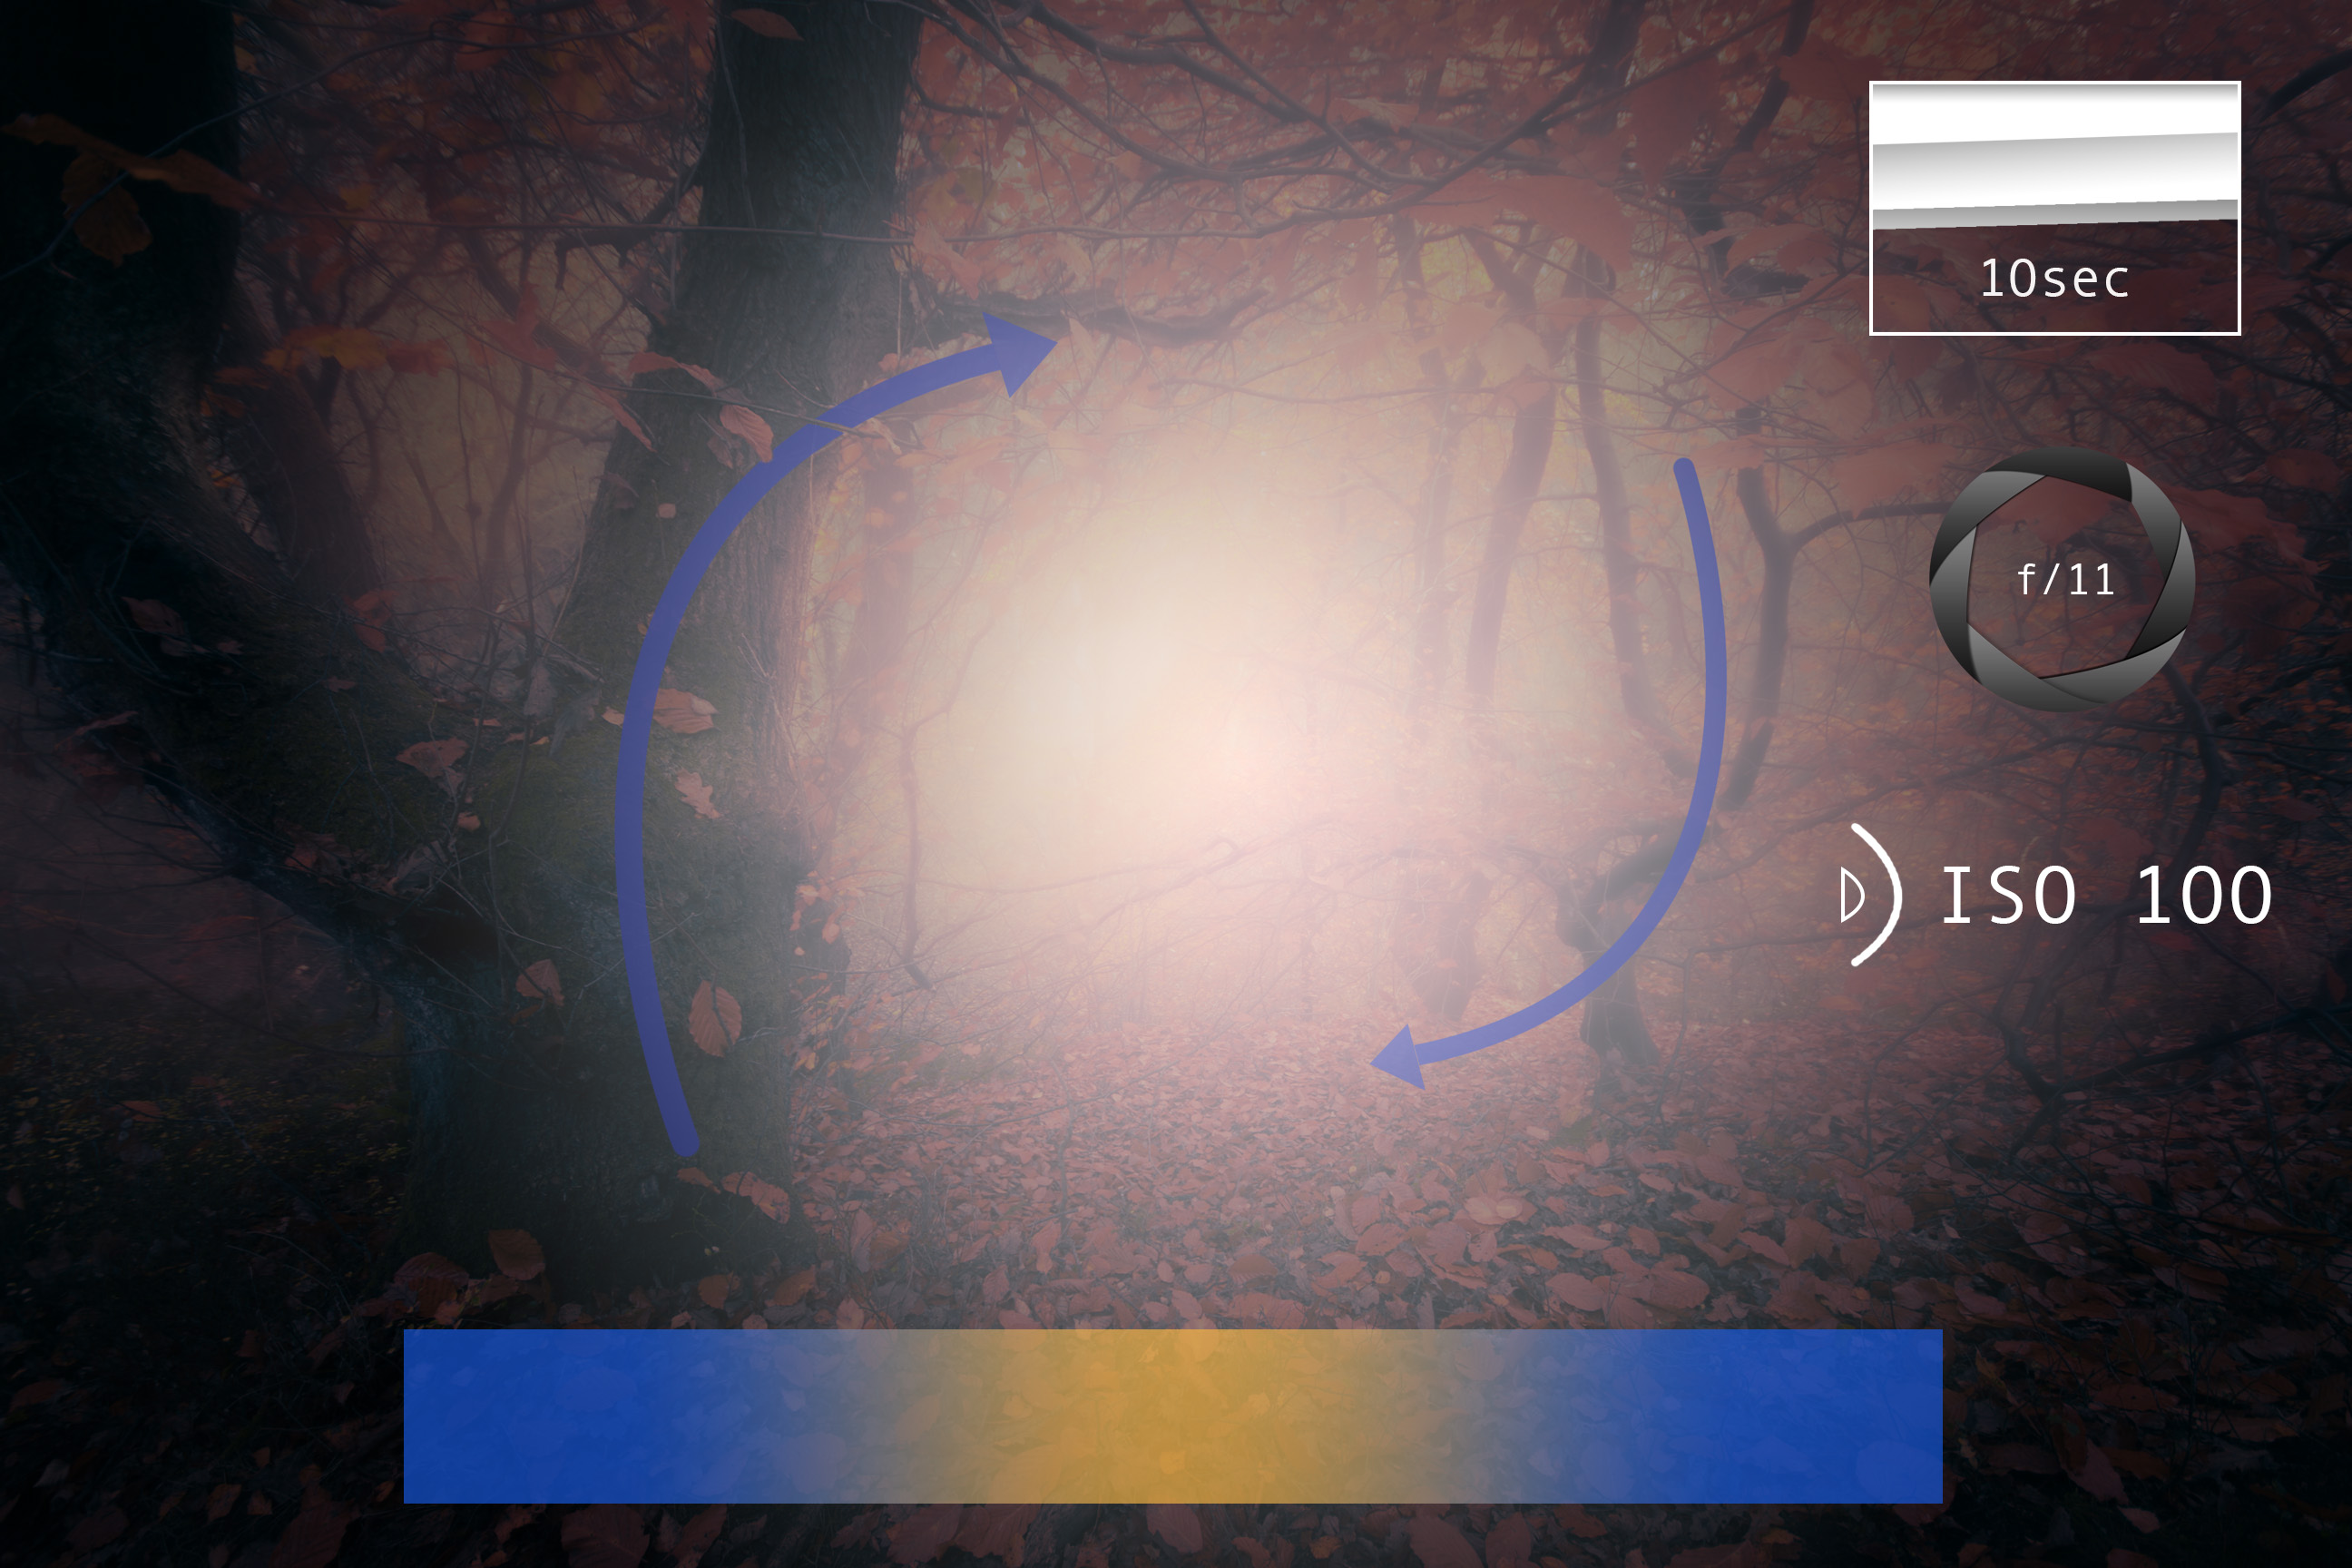
- Darker to lighter: the edges of the frame a much darker than the centre creating a tunnel-like effect. Enhance with vignetting.
- Leading lines: the trees form leading lines and guide the eye into the centre.
- Warm to cool: The frame has more blues (high Kelvin) colours at the edges and reds/yellows (low Kelvin) hues at the centre, creating direction and depth.
The magic of Dehaze
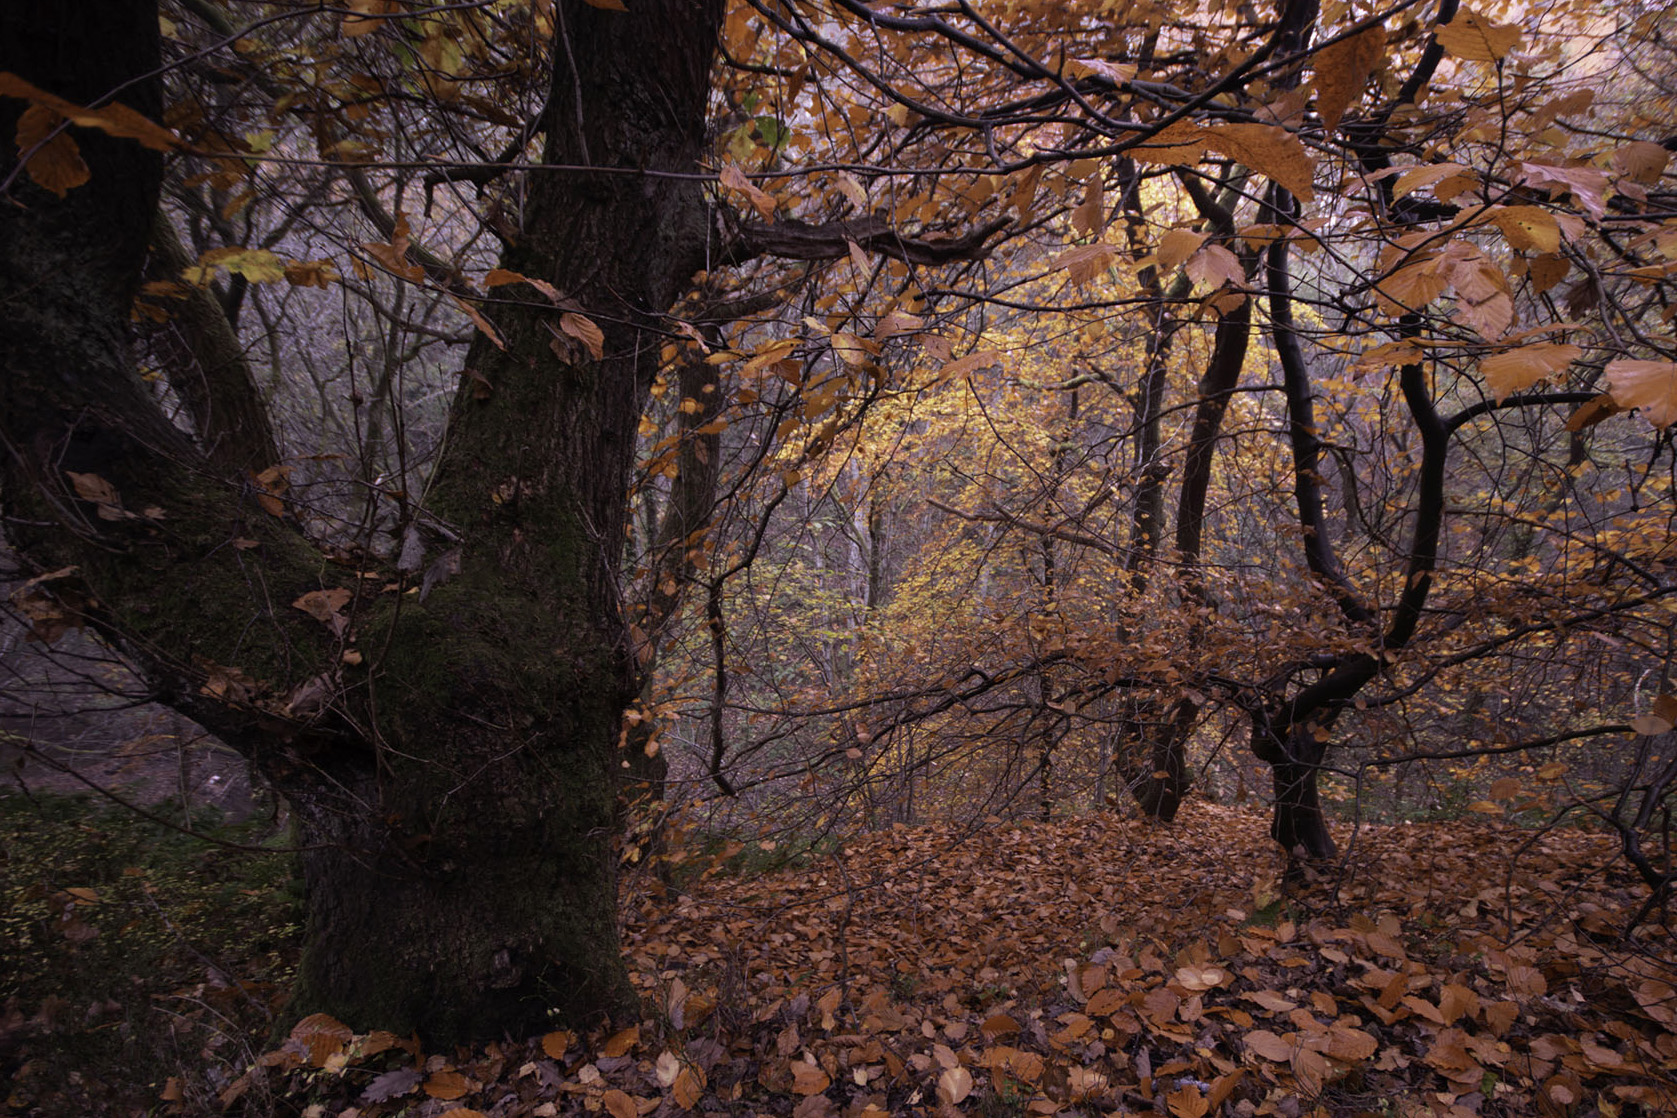
One of the best additions to Lightroom and Camera Raw in recent years has been the Dehaze Slider. It's fantastic for removing hazy mist or light fog but I'm far more enamored of it because of what happens if you drag it the other way. If there is even a little mist present Dehaze can drastically enhance this and create that thick fog feeling.
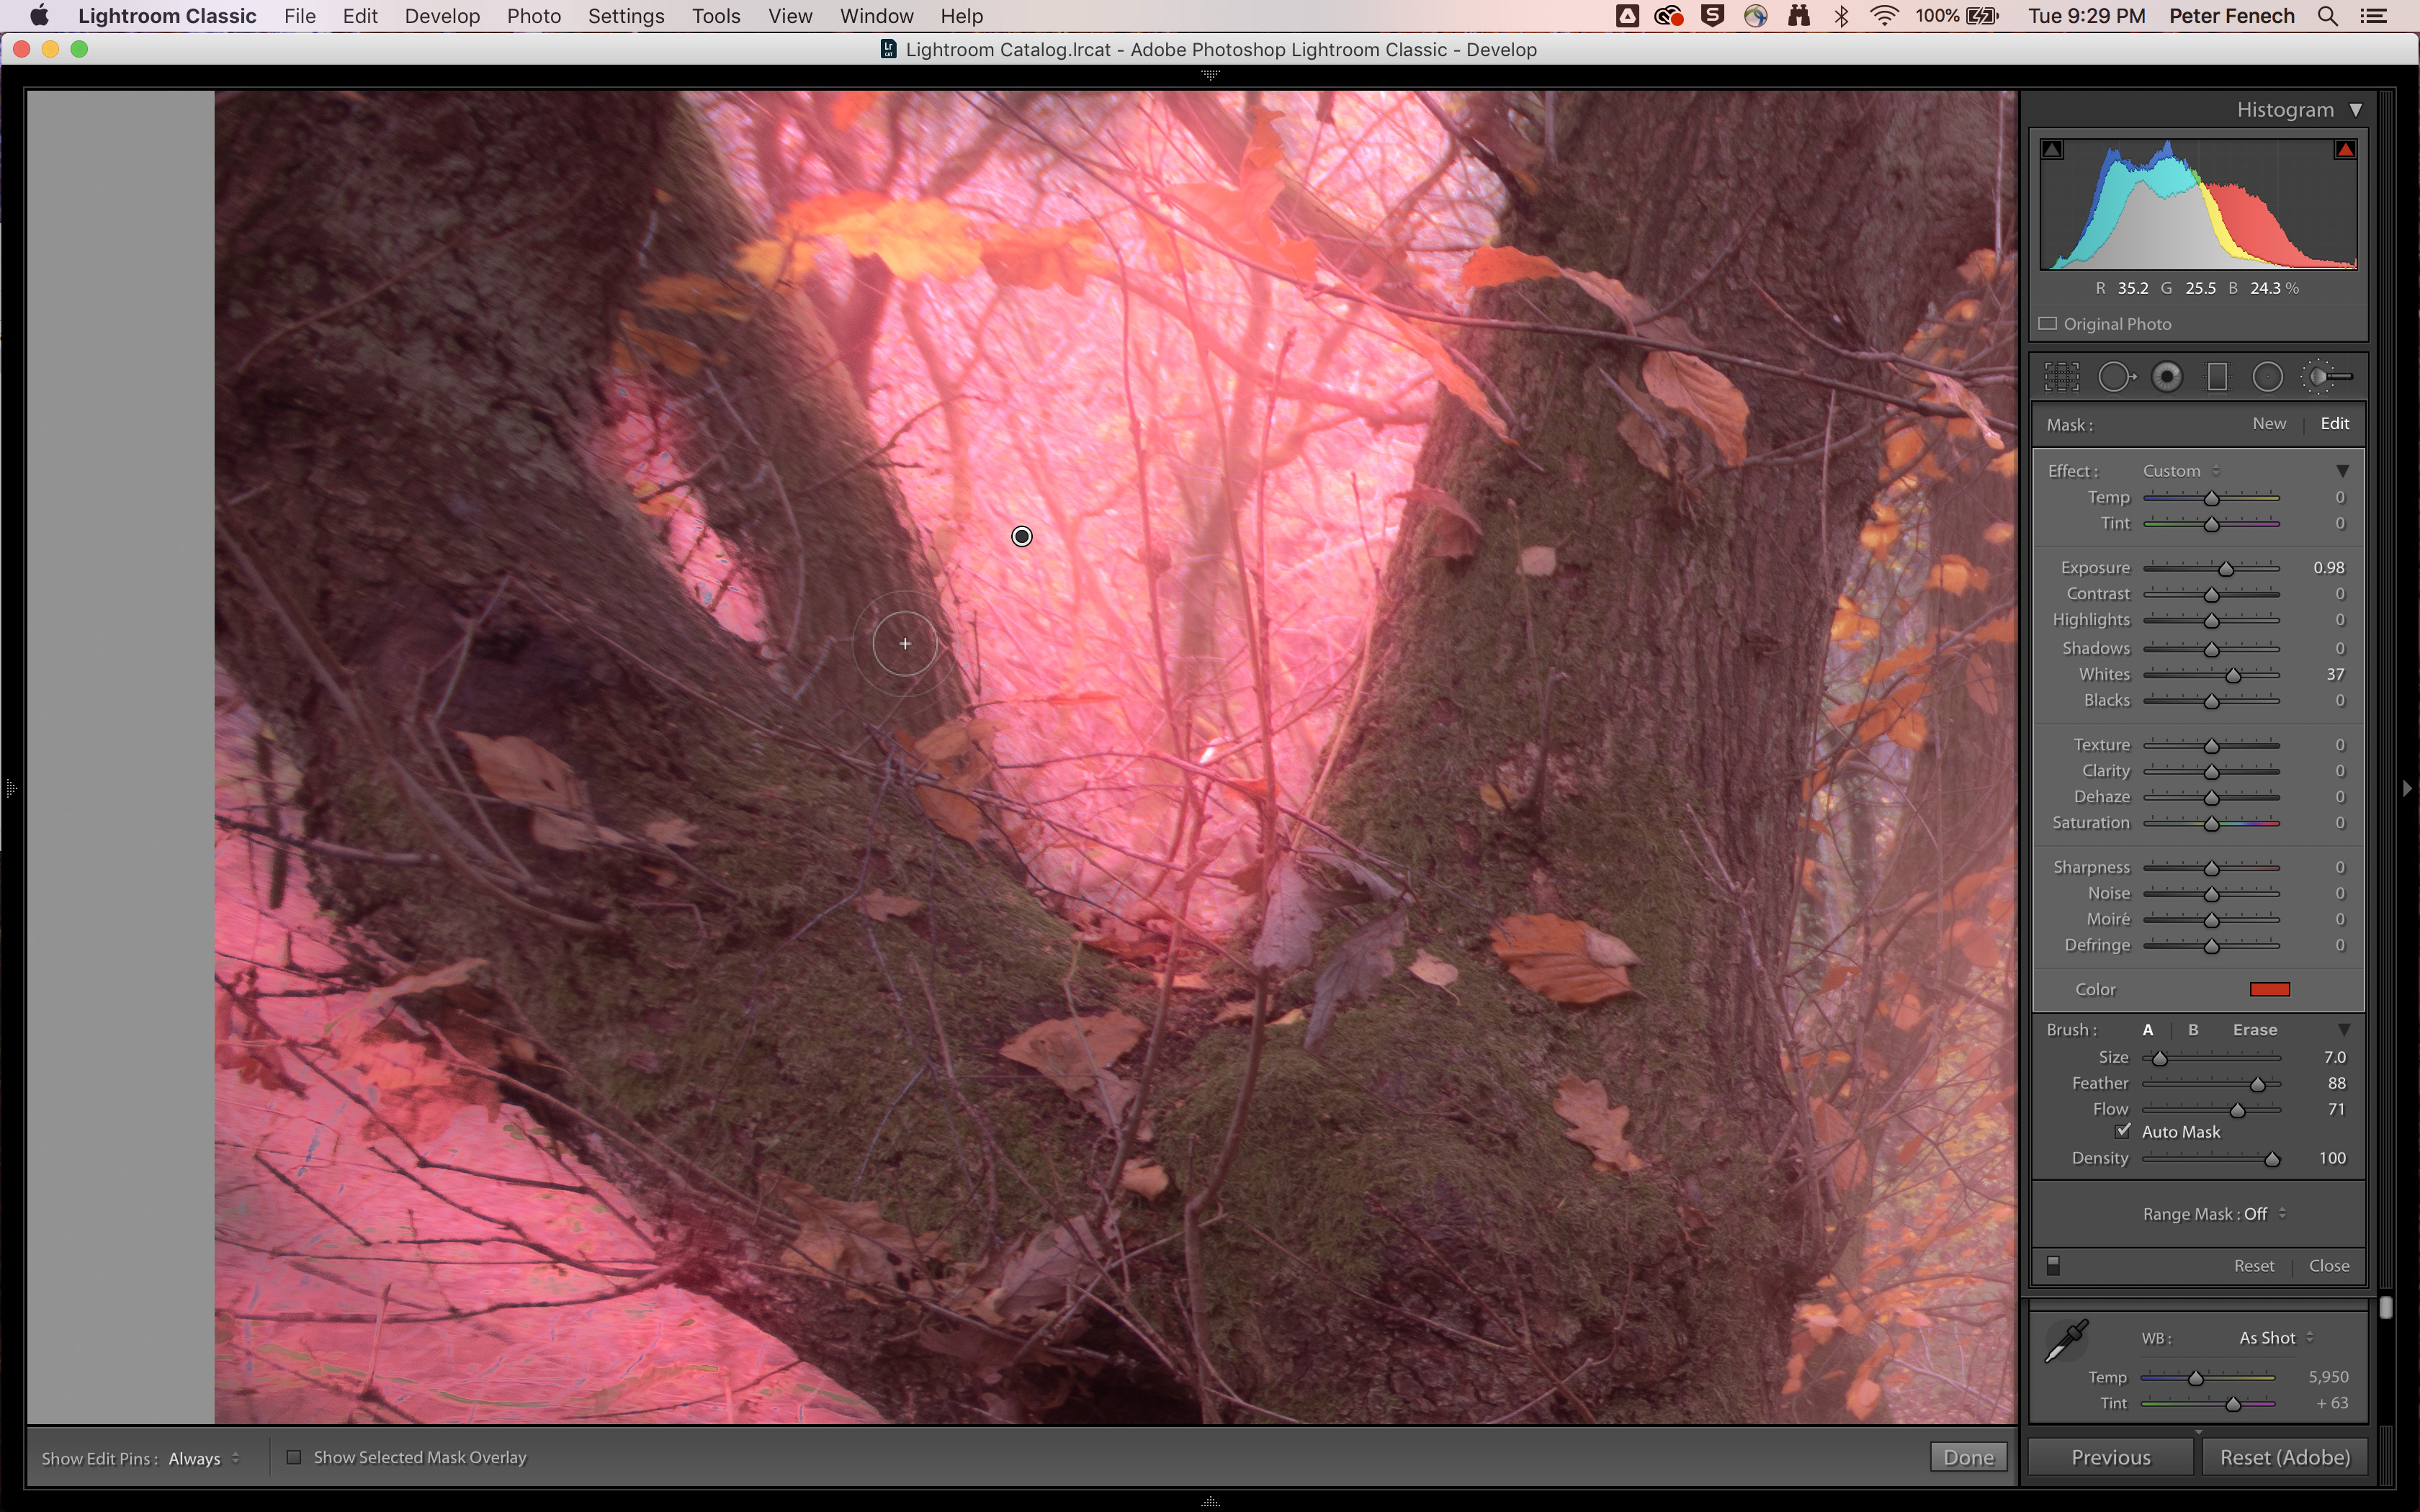
For this image I pulled the Slider to -66 to soften the whole scene and then used the Adjustment Brush (K) to add a little extra over the sun area. I then used the Auto Mask feature to selectively remove any unwanted application over the foreground trees.
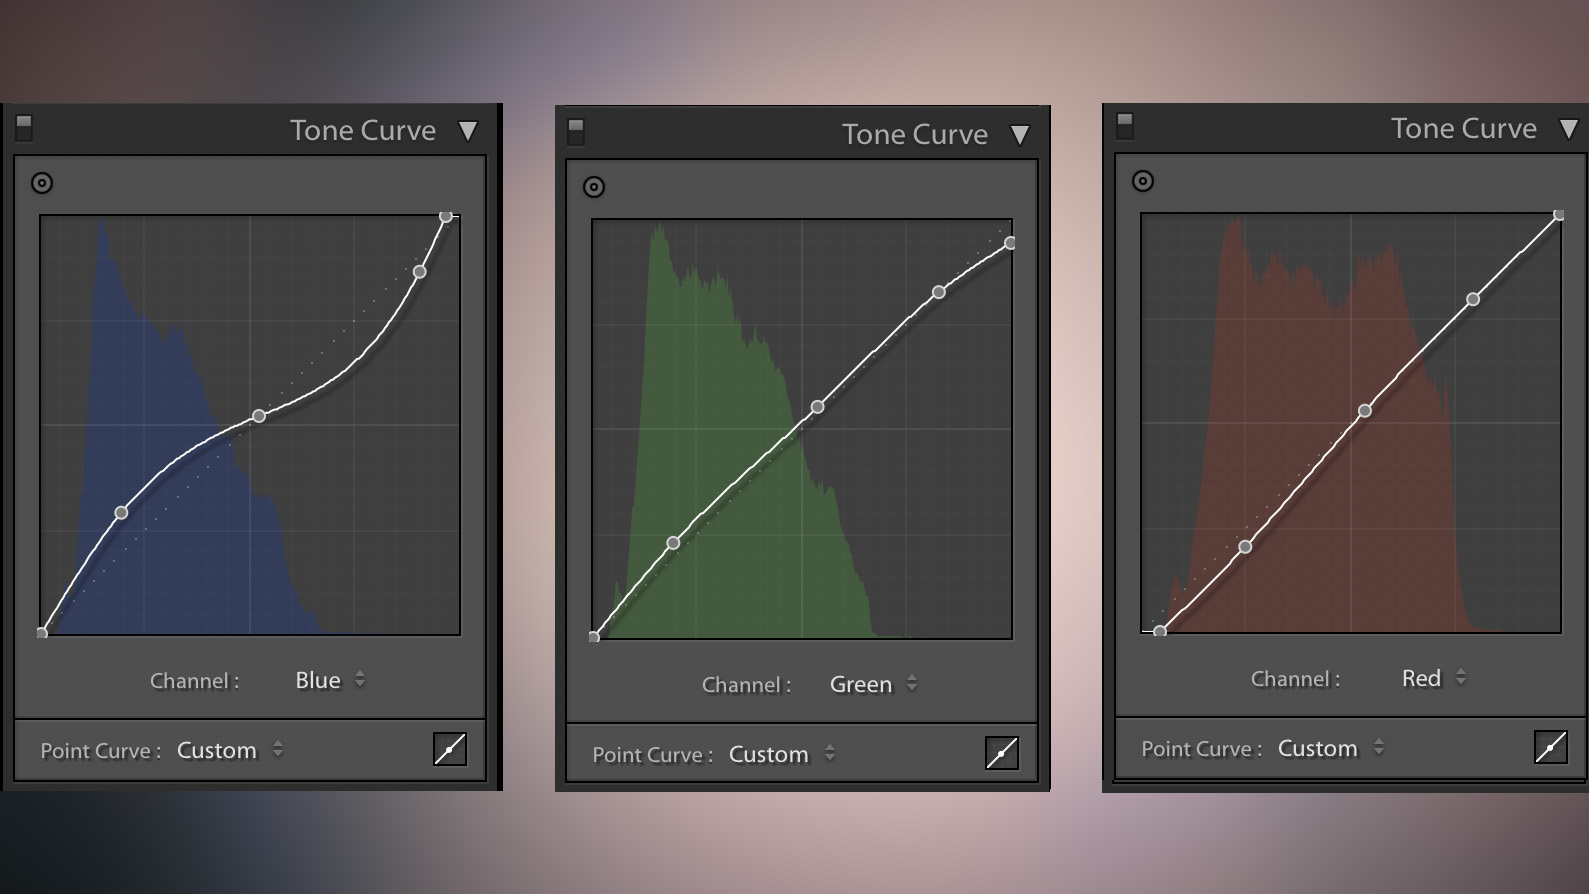
Conclusion - good things come to people that wait. Making sure you are in the right place at the right time is as much of an important photo skill as learning your camera settings. Take the time to assess what lighting and weather you are likely to find and make informed decisions based on that. If you can't get the conditions you want keep coming back (when possible). With each visit you gain a more detailed knowledge of how best to get drama in your images.
Digital Photographer is a monthly magazine, and the kitbag essential for enthusiasts and amateurs alike!
Inside, you'll find practical guides, shooting tips and techniques from working photographers, plus all the latest industry news.
Read more
The Photography Show announces second virtual photo festival
Landscapes with a difference: shoot amazing shallow scenics
The best full-frame compact cameras in 2021: a short list, but a great one!
Get the Digital Camera World Newsletter
The best camera deals, reviews, product advice, and unmissable photography news, direct to your inbox!
As the Editor for Digital Photographer magazine, Peter is a specialist in camera tutorials and creative projects to help you get the most out of your camera, lens, tripod, filters, gimbal, lighting and other imaging equipment.
After cutting his teeth working in retail for camera specialists like Jessops, he has spent 11 years as a photography journalist and freelance writer – and he is a Getty Images-registered photographer, to boot.
No matter what you want to shoot, Peter can help you sharpen your skills and elevate your ability, whether it’s taking portraits, capturing landscapes, shooting architecture, creating macro and still life, photographing action… he can help you learn and improve.

