Photography cheat sheet: how to use manual exposure mode
It's easier than you think to take your camera off auto mode and capture images more creatively – here's an infographic to help
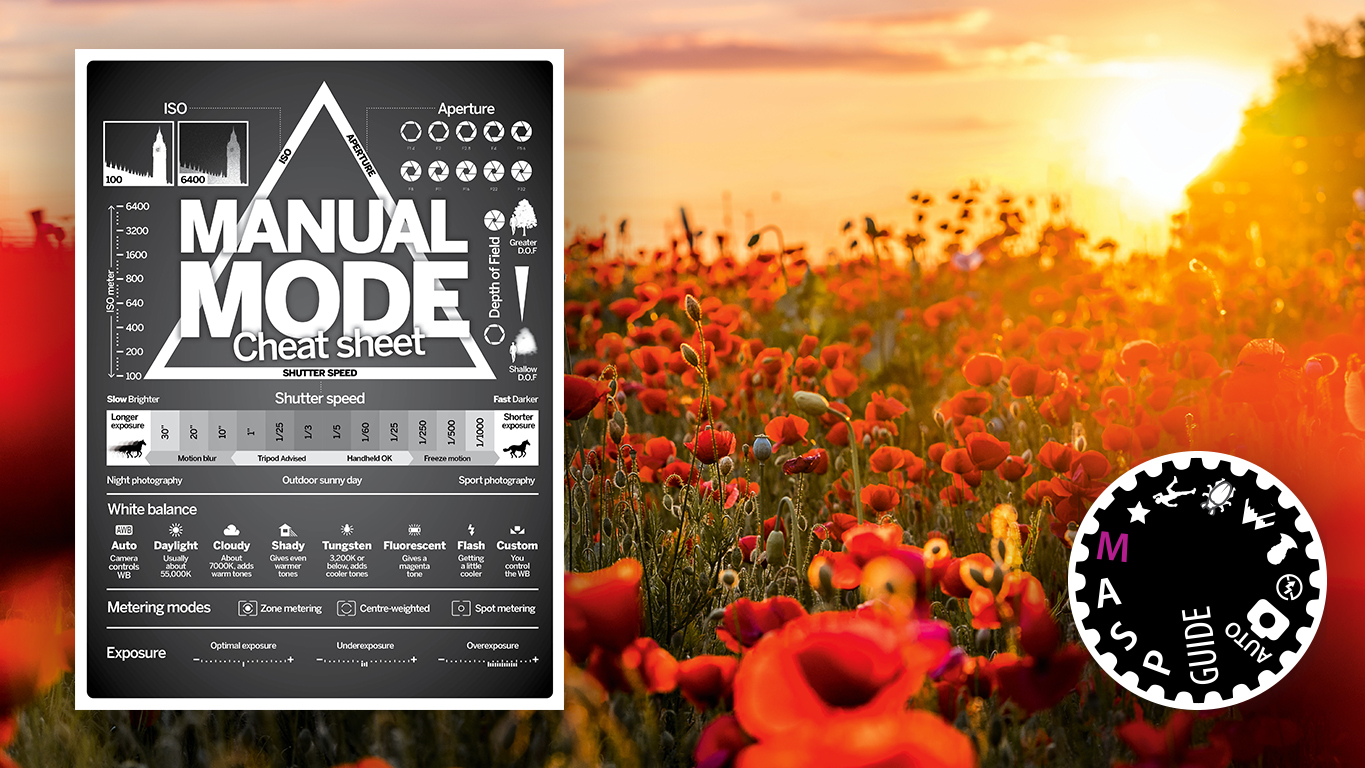
One of the top features found on the best cameras for photography are the semi-automatic exposure modes, such as Aperture Priority (A or Av on a camera’s mode dial) and Shutter Priority (S or Tv). These modes are ideal when starting out with photography, as they allow you to concentrate on elements such as focusing and composition.
However, full Manual mode will always give you greater control over the final look of your images and enable you to be more creative. Aperture, shutter speed and ISO all have an impact on the shots you take, so by controlling them individually you can come up with images that truly match your intent.
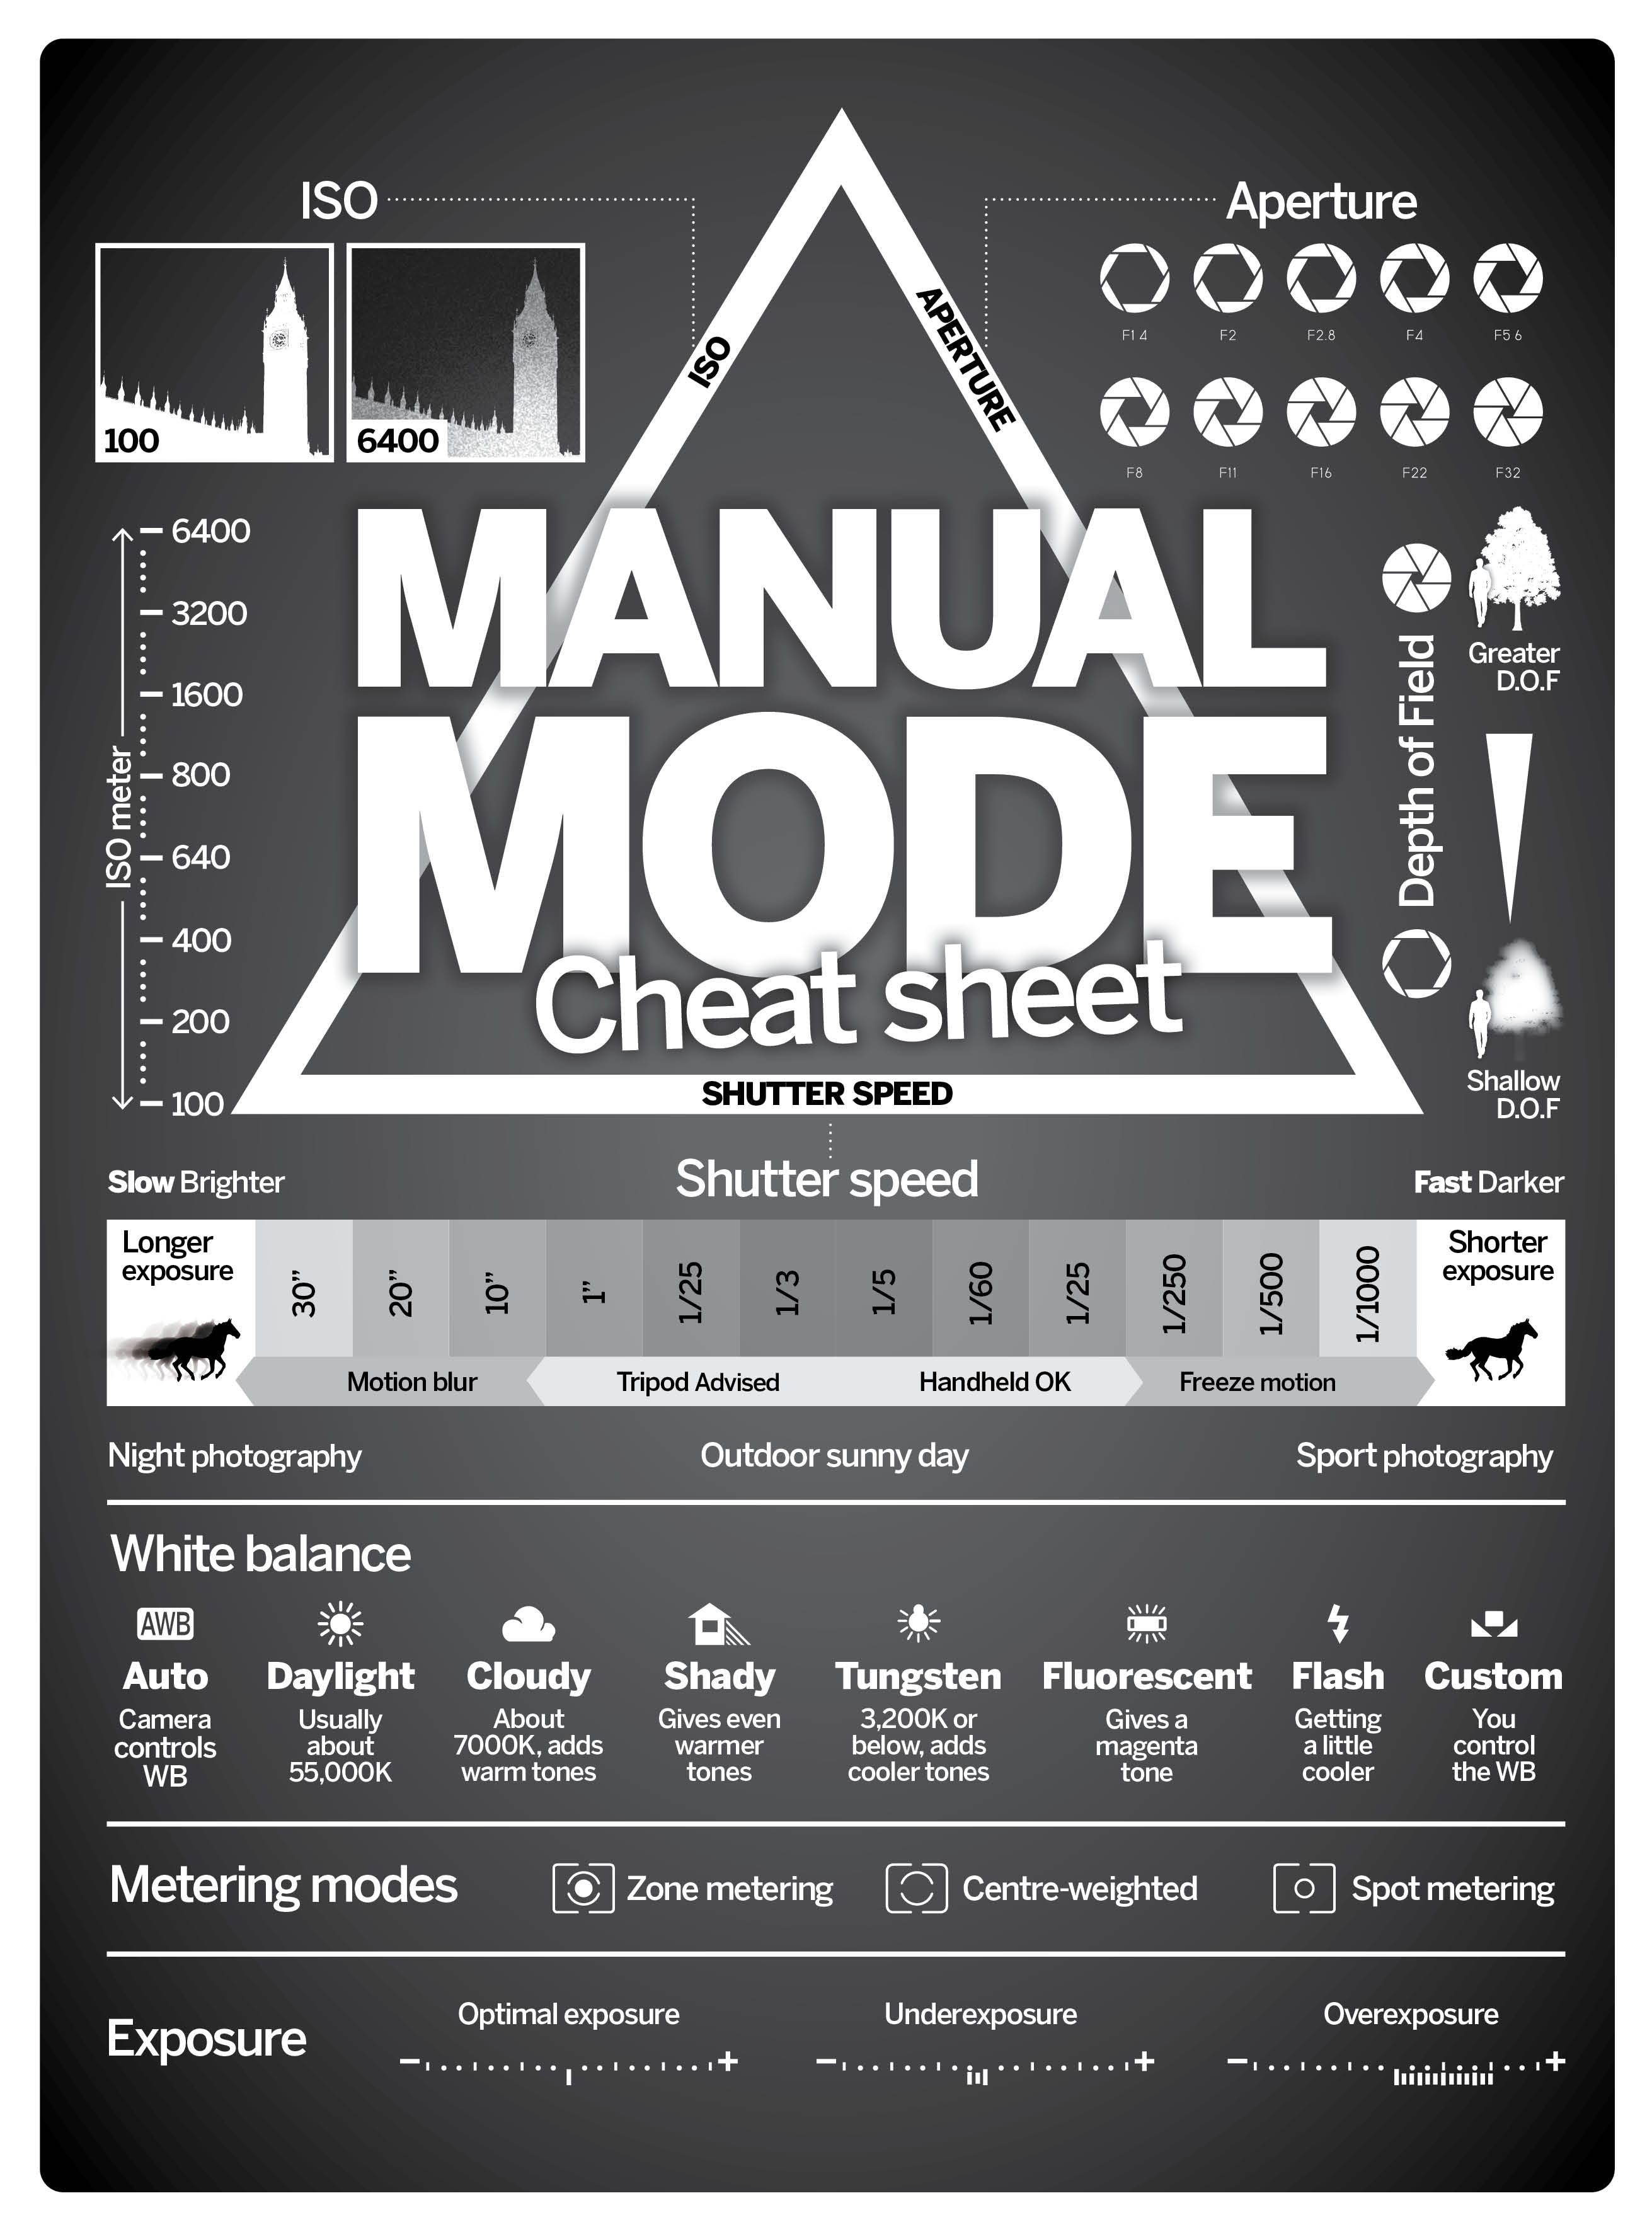
Here, discover a few advantages and tips for Manual mode, and check out our cheat sheet at the bottom for a handy reference guide you can save for later.
To go manual you need to understand exposure
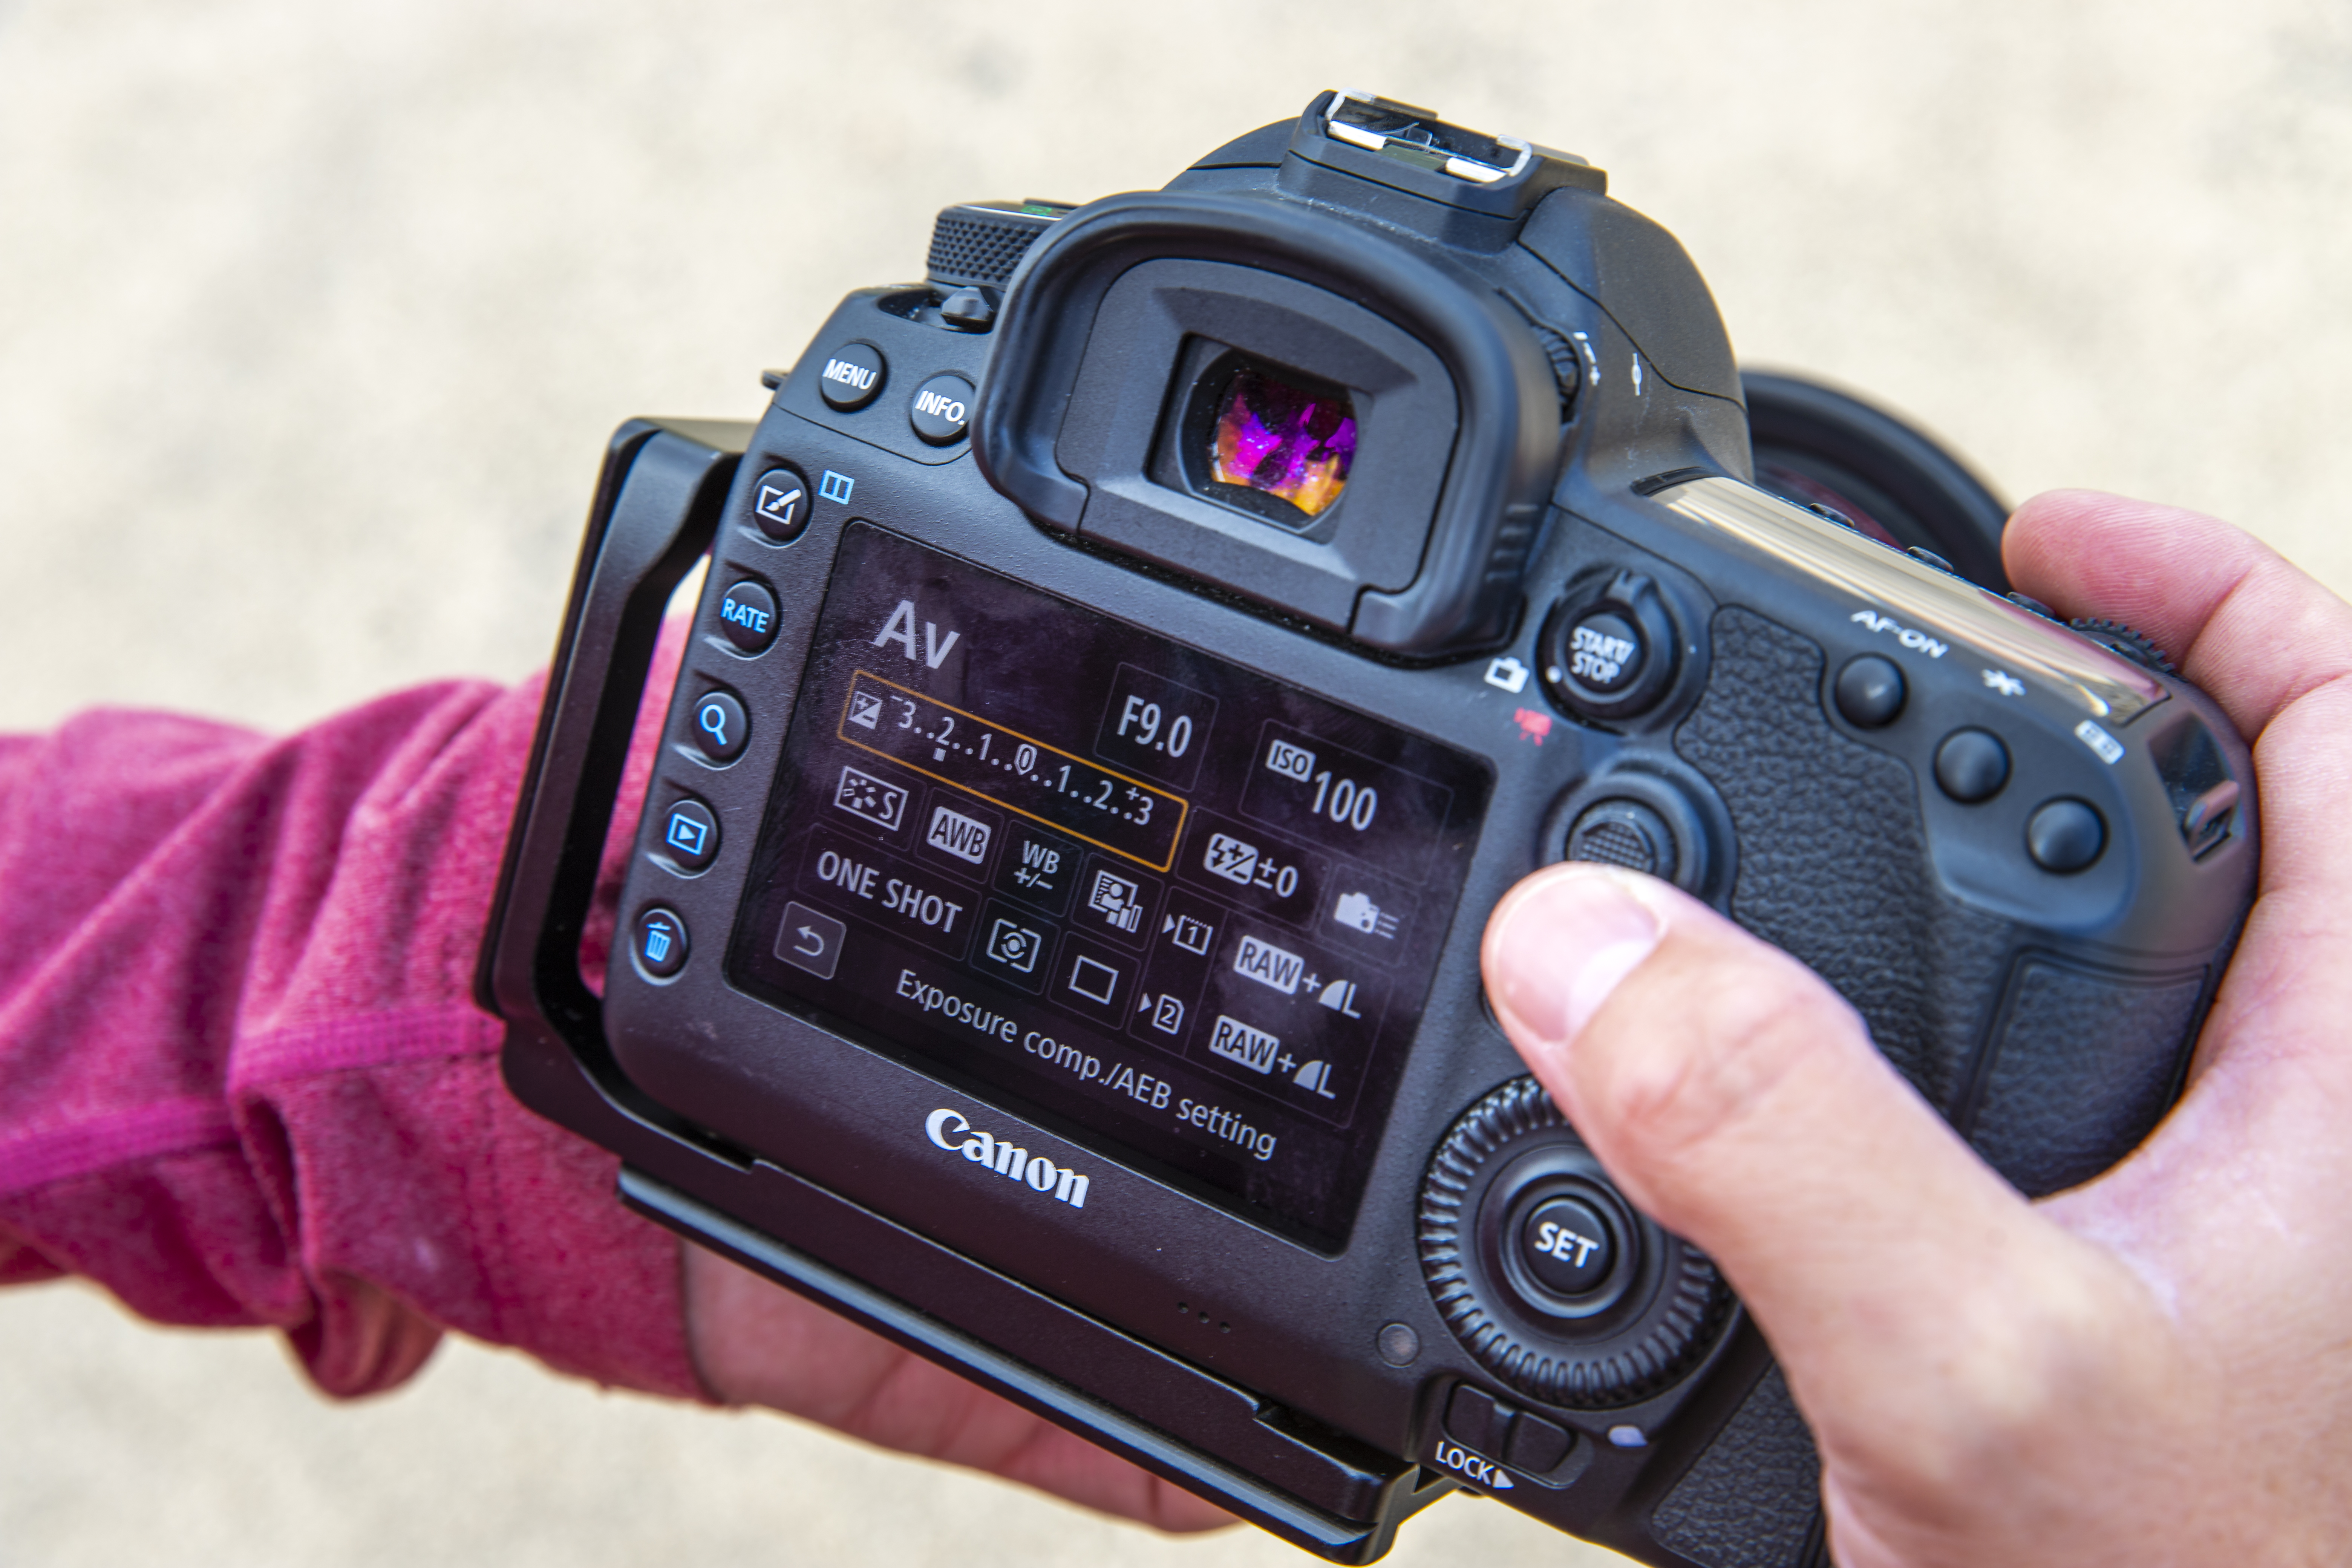
You don’t always have to go into Manual mode to take back control. If you prefer to stay in the semi-automatic modes but are noticing that your images are coming out a little brighter or darker than expected, you can make adjustments using exposure compensation. This enables you to force the camera to under or overexpose the image by a certain number of f-stops for a particular scene. Just be sure to return the exposure compensation setting back to zero when you’ve finished shooting, so the exposures aren’t affected in future images.
Many photographers are daunted by Manual, which is such a shame: Manual is a powerful mode that you really get to grips with (if you haven’t already). It’s almost essential for certain situations like high-contrast scenes or studio environments, and it will help you to leave nothing to chance with the images you’re creating – after all, modern cameras are great, but they can’t read your mind.
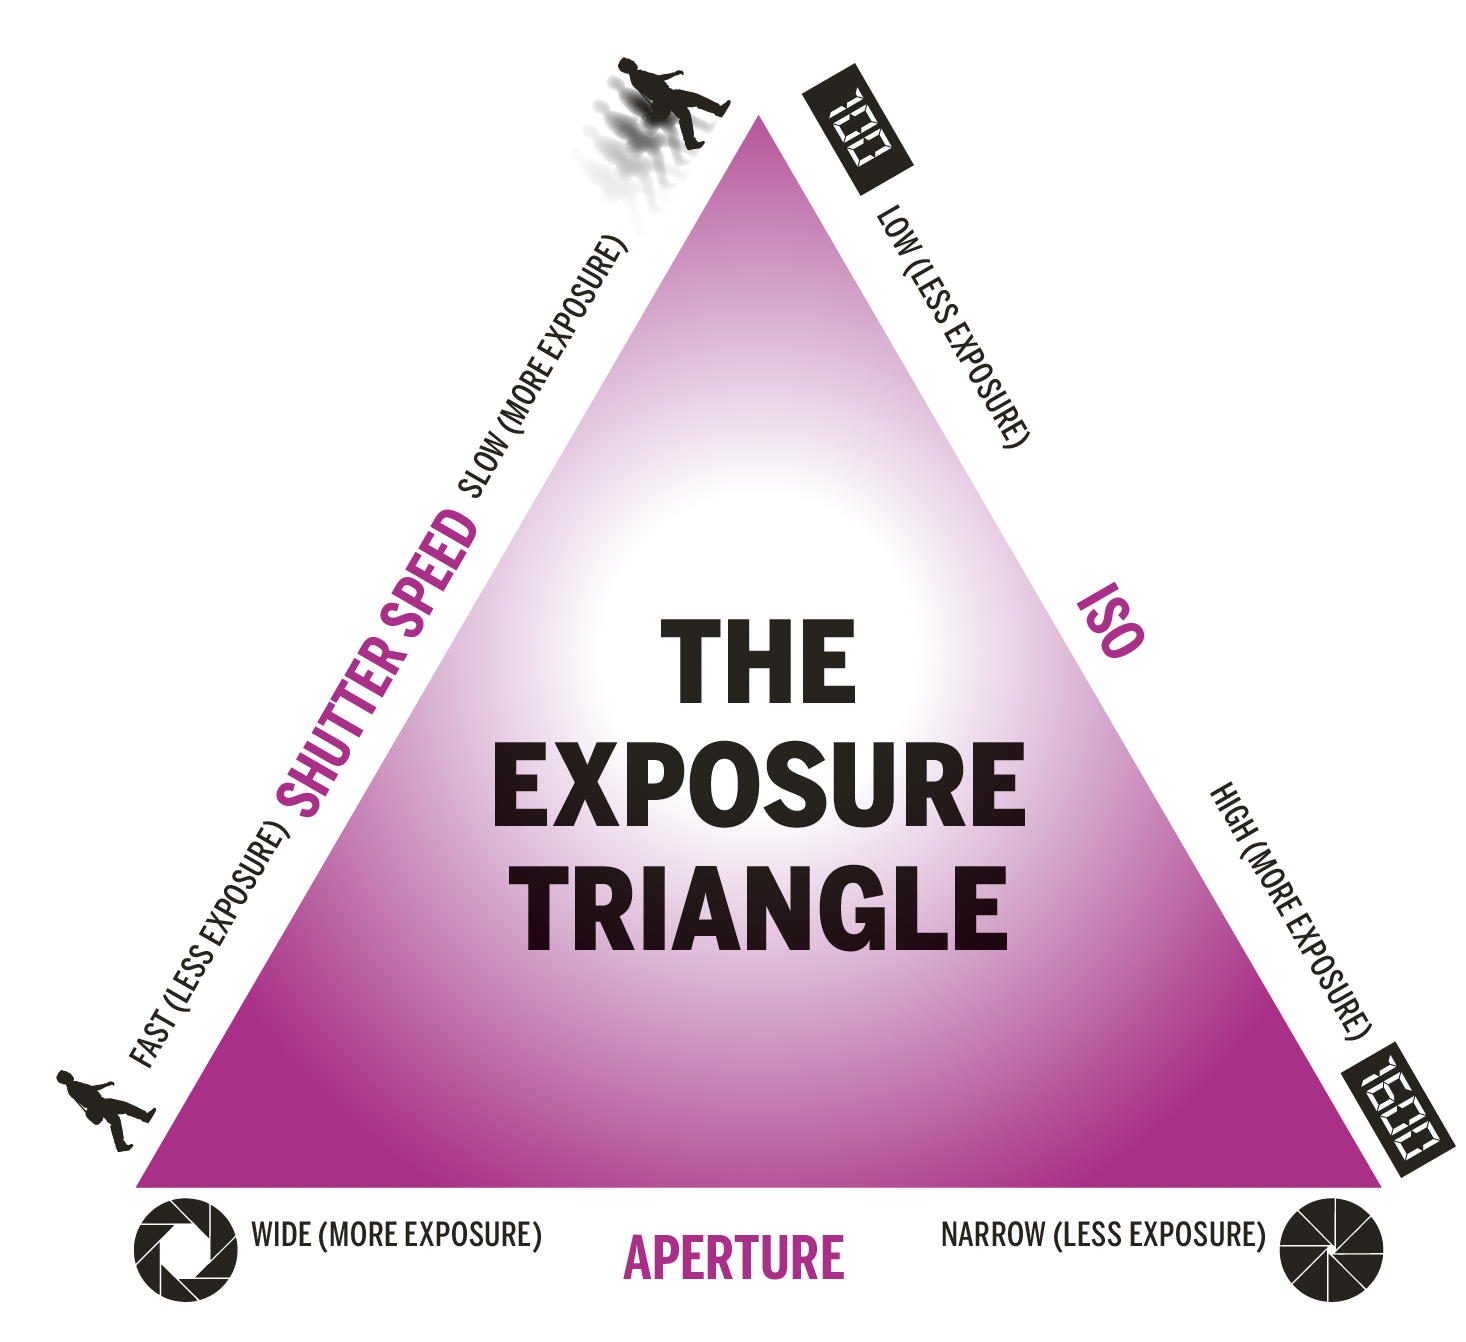
When you’re exposing for a particular scene, you’re actually carrying out a delicate balancing act. The aim is always to get just the right amount of light coming through the lens to hit the camera’s sensor, by adjusting three core variables: aperture, shutter speed and ISO. That's where the exposure triangle comes in.
If you’ve only ever used auto and semi-automatic modes before, you might not have noticed that when you change a setting, the camera is automatically changing the other variables too to create a balanced shot. For example, if you close the aperture, the camera will need to extend the shutter speed to let in more light, or boost the ISO to make the sensor more sensitive to light.
There’s always a bit of a compromise to be made, so to get the best creative results from your camera, refer to our exposure triangle explanation to see which variable you should change in any given circumstance.
Which camera metering mode should you use?
In your camera’s semi-automatic modes, such as Aperture Priority and Shutter Priority, you are able to input some of the exposure data – one or more of aperture, ISO and shutter speed. The camera will then use its built-in metering algorithms to work out the rest of the exposure to try to deliver a well-exposed shot. How the camera does this is affected by the metering mode that’s being used. We've already put together a metering mode cheat sheet; check that out if you need a refresher.
There are metering modes that scan the whole frame and try to work out the best exposure for a well-lit shot across the entire frame (often called Evaluative metering in Canon cameras or Matrix metering in Nikon). Then there are also modes like spot metering, which only take into account a very small part of the frame.
It’s worth noting that your choice of metering mode will affect your camera’s built-in light meter even when you’re using Manual mode, but it’ll be up to you to dial in the aperture, shutter speed and ISO settings to confirm whether you agree with the metering algorithm or you’d rather override it.
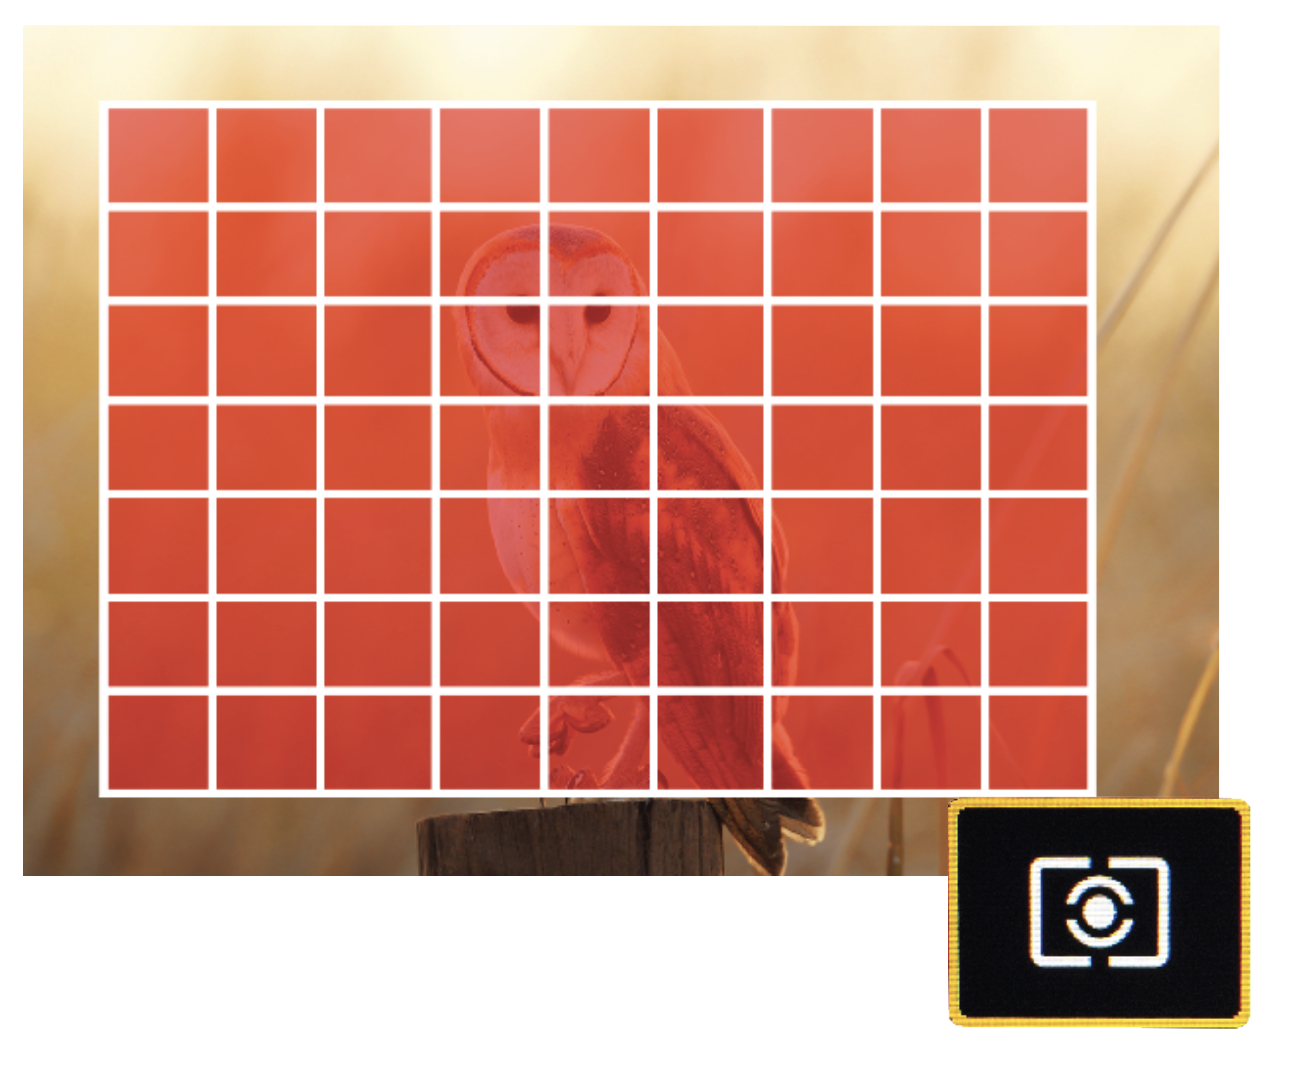
Zone metering
Often called Evaluative metering in Canon cameras or Matrix metering in Nikon cameras, this is essentially a zone-metering system that divides up a large portion of the frame into segments, and uses algorithms to deliver a well-exposed shot in a wide range of scenarios. Some of these systems can put a bias around your autofocus point to make sure this part of the image doesn’t clip. This is less useful when you want to intentionally underexpose or overexpose the picture for creative purposes.
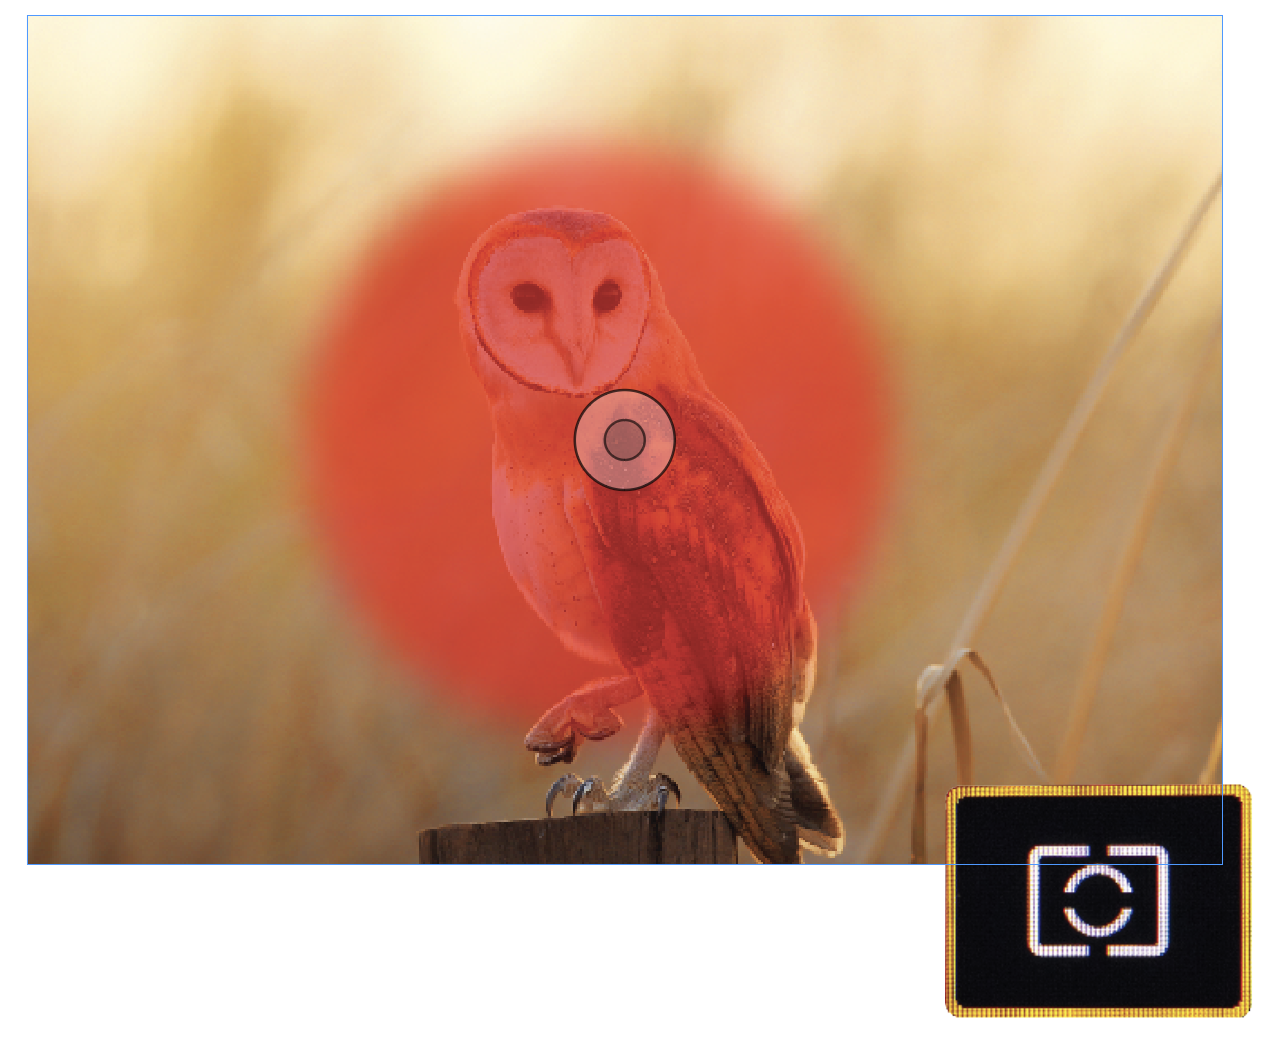
Centre-weighted
This mode works a similar way to zone-based metering modes, as the whole frame is scanned and taken into account, but here the exposure is heavily biased to correctly expose for the tones in the central area of your shot, to make sure these don’t become overexposed or underexposed. The diameter of the central area on a Nikon D500, for example, measures 8mm by default, or about six per cent of the frame, but can be changed to 6mm, 10mm or 13mm to give more or less weight to the central area.
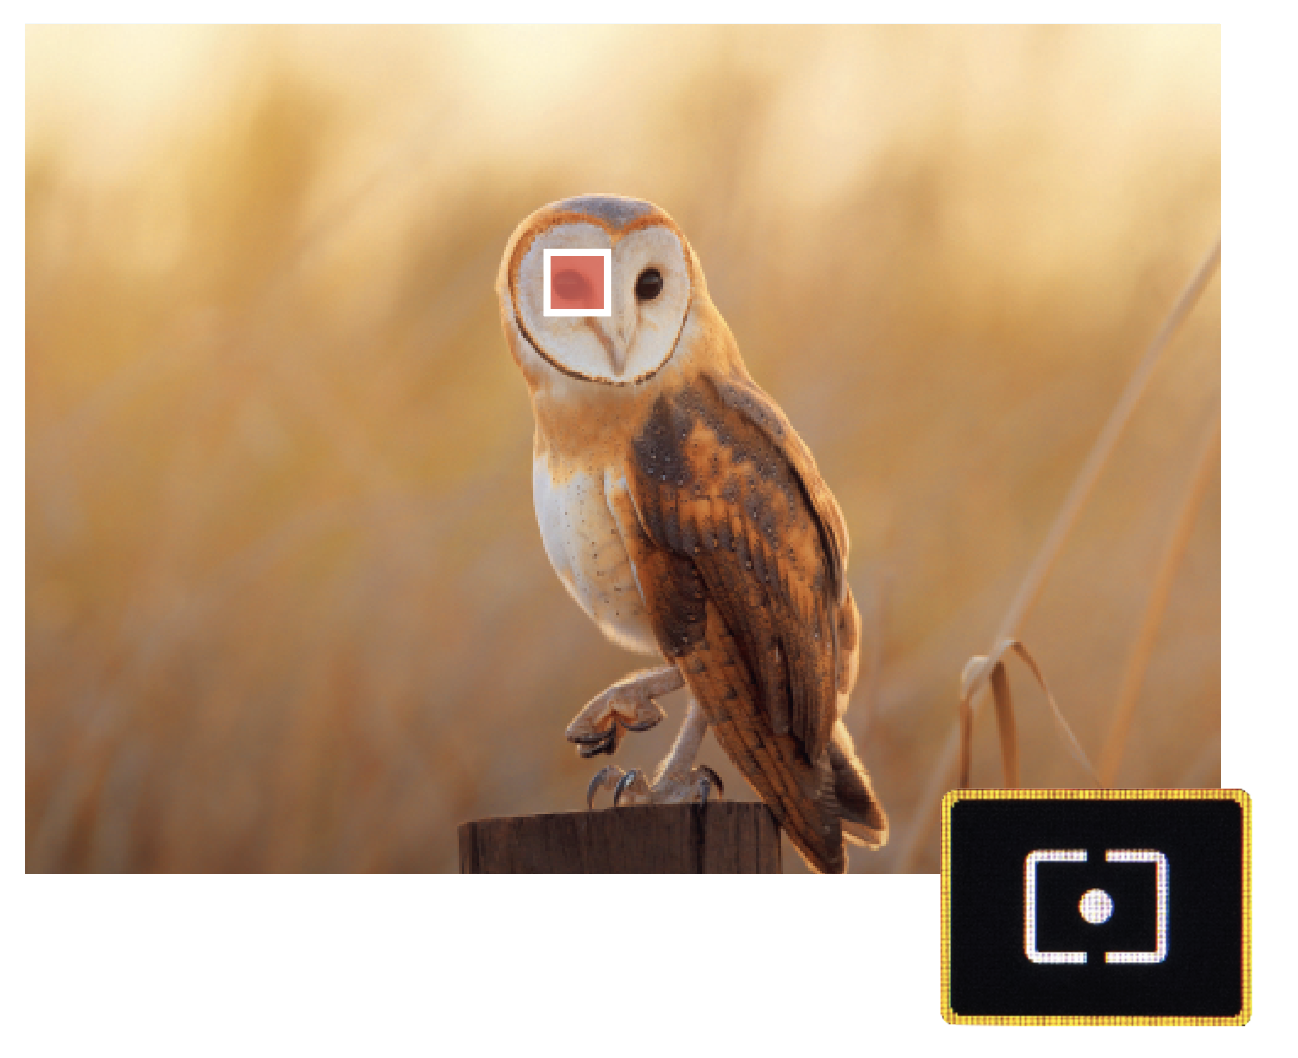
Spot metering
Spot metering systems reduce the area taken into consideration for exposure down to a small point. This is usually just one to four per cent of the centre of the frame, though some cameras let you set a spot point elsewhere on the screen or use the active AF point to spot-meter from. Some cameras have a Partial metering mode that covers a larger area of the frame (six to nine per cent), producing more consistent results than Spot metering – where slightly moving your frame can produce wildly different exposures.
Why set a manual white balance?
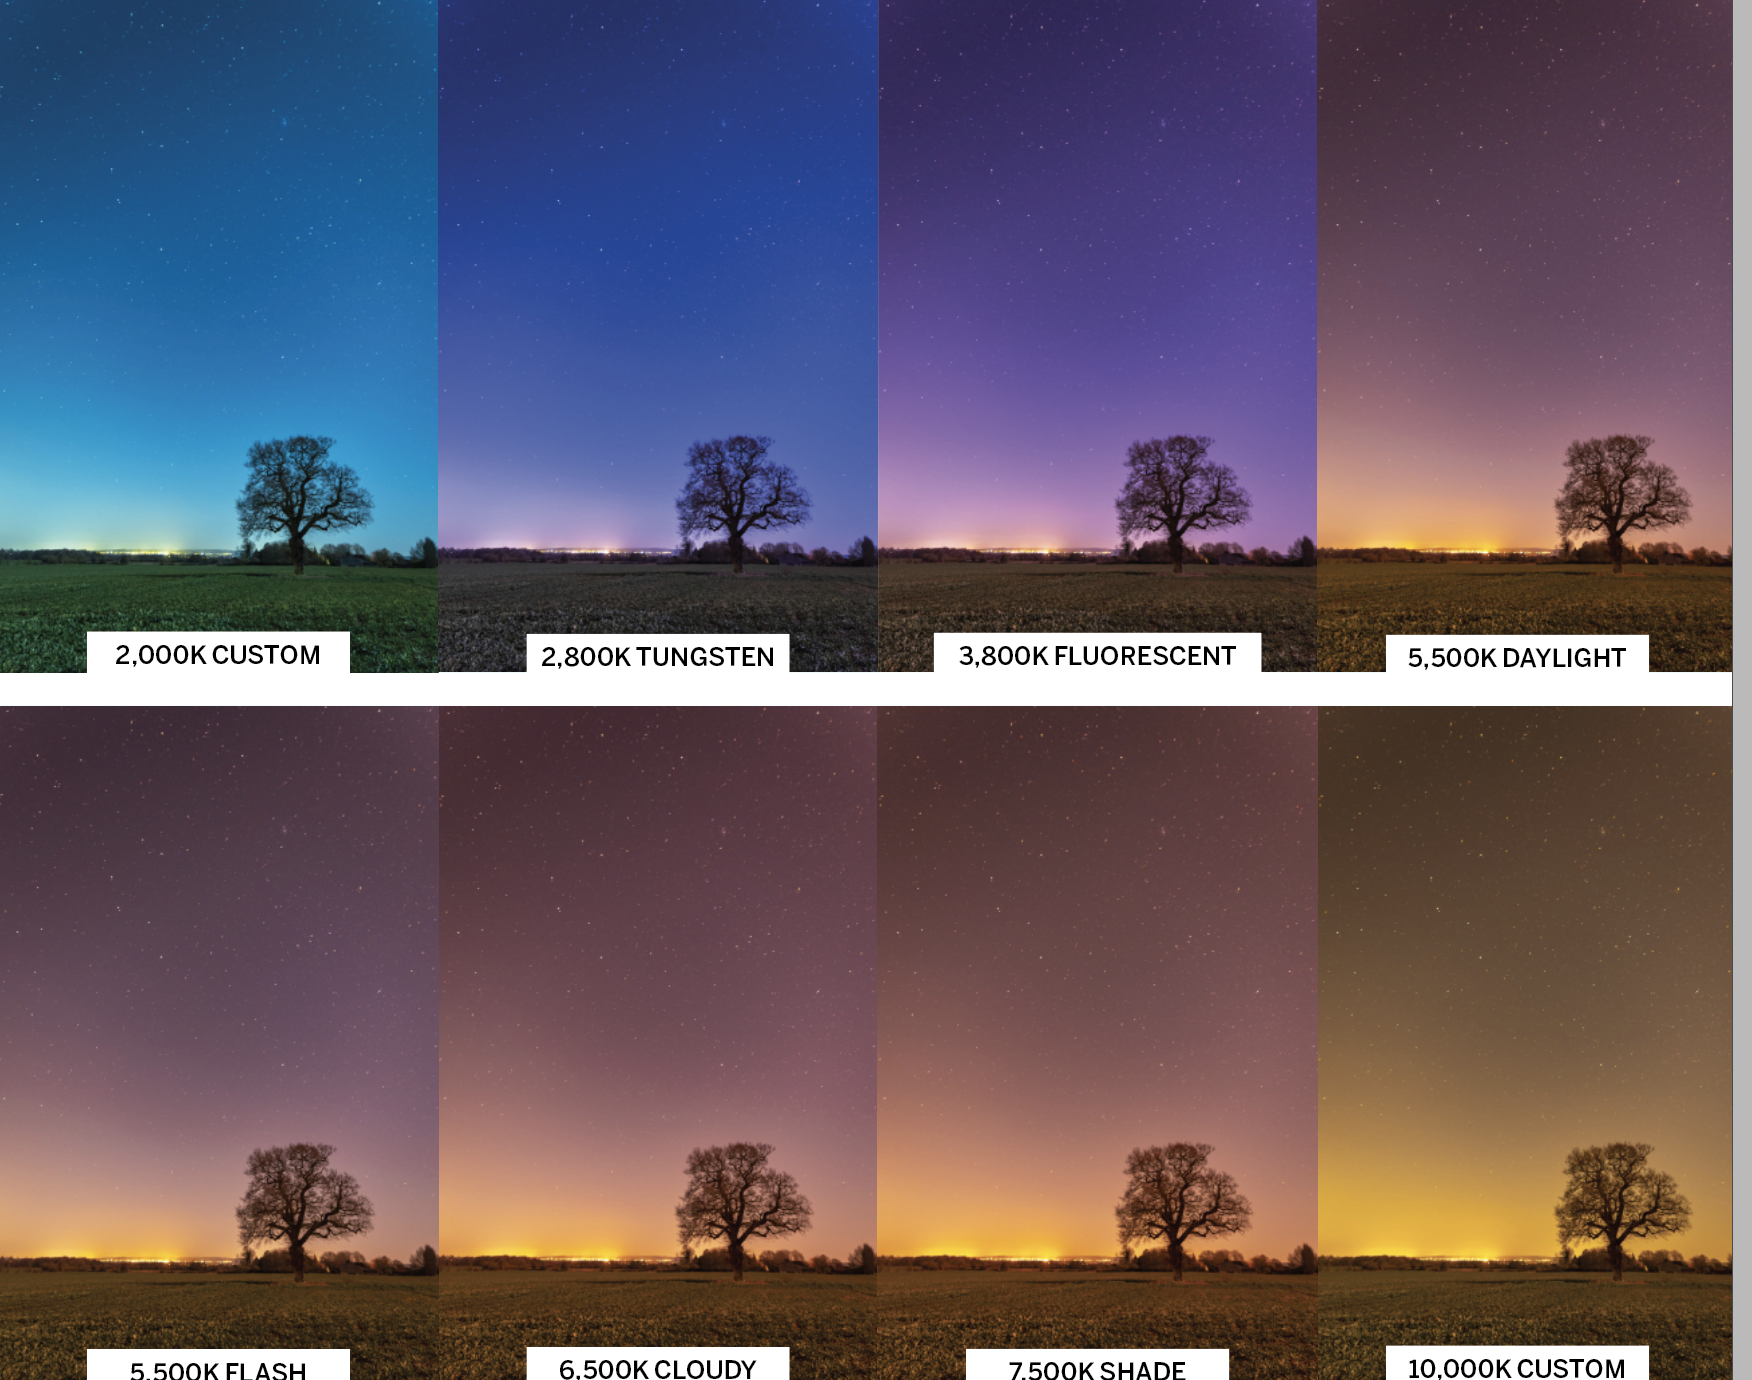
Color is an important part of photography and plays a significant role in the mood of your images. Your camera’s white balance can make an image appear warmer or cooler to correct for color casts, and can ensure that neutral hues in the shot, such as grey tones, look more natural.
Most cameras are set to automatically determine the white balance, but in any of the semi-automatic modes or Manual you can select it, or even set your own custom value. This can be handy when you want consistent results in a series of images, such as a time-lapse or a focus stack. We’d also highly recommend shooting RAW-format files, as this makes it much easier to change your white balance during editing.
It’s also worth experimenting with white balance when shooting for black and white, as the setting will also have an effect on the contrast of your mono tones.
Download our manual mode cheat sheet
Read more
Photography cheat sheets
The best professional cameras
What are the best camera lenses to buy?
Get the Digital Camera World Newsletter
The best camera deals, reviews, product advice, and unmissable photography news, direct to your inbox!
Lauren is a writer, reviewer, and photographer with ten years of experience in the camera industry. She's the former Managing Editor of Digital Camera World, and previously served as Editor of Digital Photographer magazine, Technique editor for PhotoPlus: The Canon Magazine, and Deputy Editor of our sister publication, Digital Camera Magazine. An experienced journalist and freelance photographer, Lauren also has bylines at Tech Radar, Space.com, Canon Europe, PCGamesN, T3, Stuff, and British Airways' in-flight magazine. When she's not testing gear for DCW, she's probably in the kitchen testing yet another new curry recipe or walking in the Cotswolds with her Flat-coated Retriever.
- Dan MoldDeputy Editor
