Use Lightroom's Range Masking for perfect exposure and colors
Louise Carey shows you how to use Range Masking in Lightroom Classic CC for perfect exposure and colors
The best camera deals, reviews, product advice, and unmissable photography news, direct to your inbox!
You are now subscribed
Your newsletter sign-up was successful
Watch video: Use Range Masks in Lightroom for specific adjustments
Creating the perfect blend of colors or the correct exposure can be tricky – especially when you have to edit around uneven tree lines, or a messy mixture of tones.
However, there’s a way to make specific edits without hours of painstakingly brushing in adjustment masks. When using the Radial Filter, Graduated Filter, or Adjustment Brush in Adobe Lightroom Classic, you have the option to introduce a Range Mask into the mix.
Article continues belowA Range Mask gives you the ability to limit your adjustment to a certain set of qualities. There are three possibilities: Luminance, Color and Depth. But we’ll specifically be looking at how to use Color and Luminance in this Lightroom editing tutorial.
You can download the 'Lightroom_before' image here, or use one of your own shots to follow along with this step-by-step tutorial – and don’t forget to check out the accompanying video for a few more tips and tricks.
01 Choose your tool
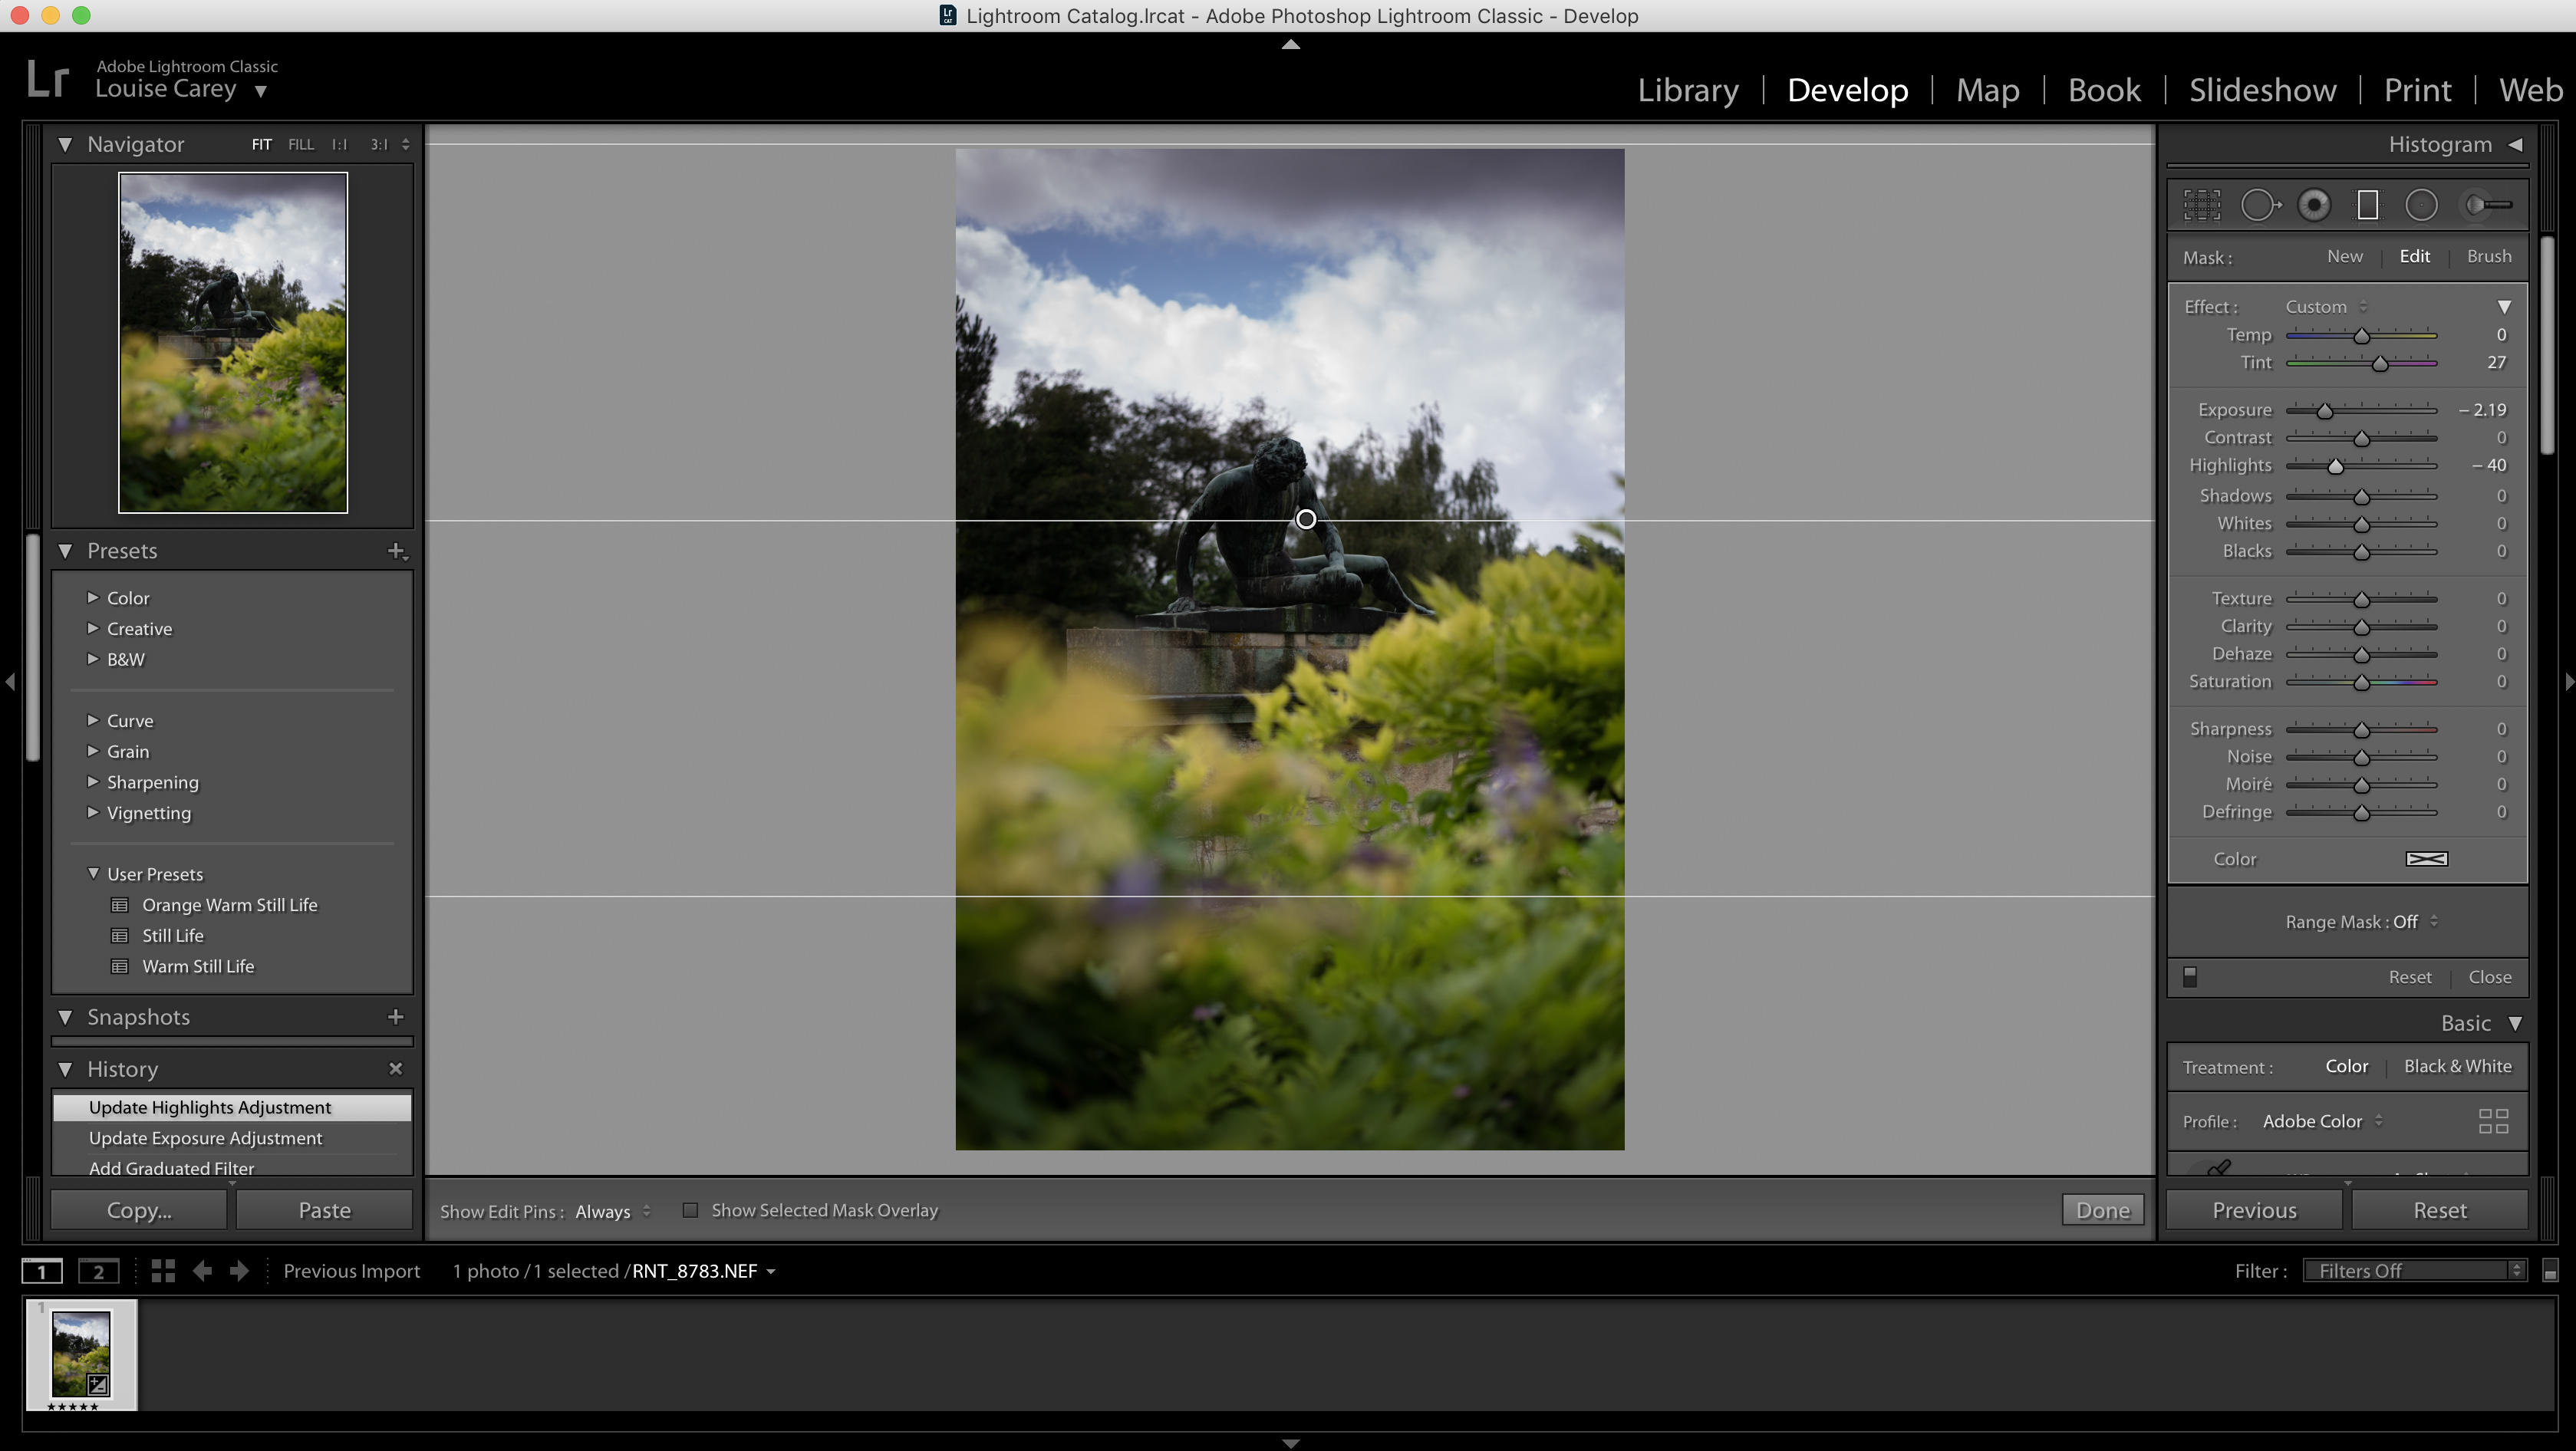
Select the Graduated Filter, Radial Filter or Adjustment Brush tool and make your selection. We used the Graduated Filter tool to darken the sky and make sure the foreground wasn't affected .
02 Use Luminosity Range Masks
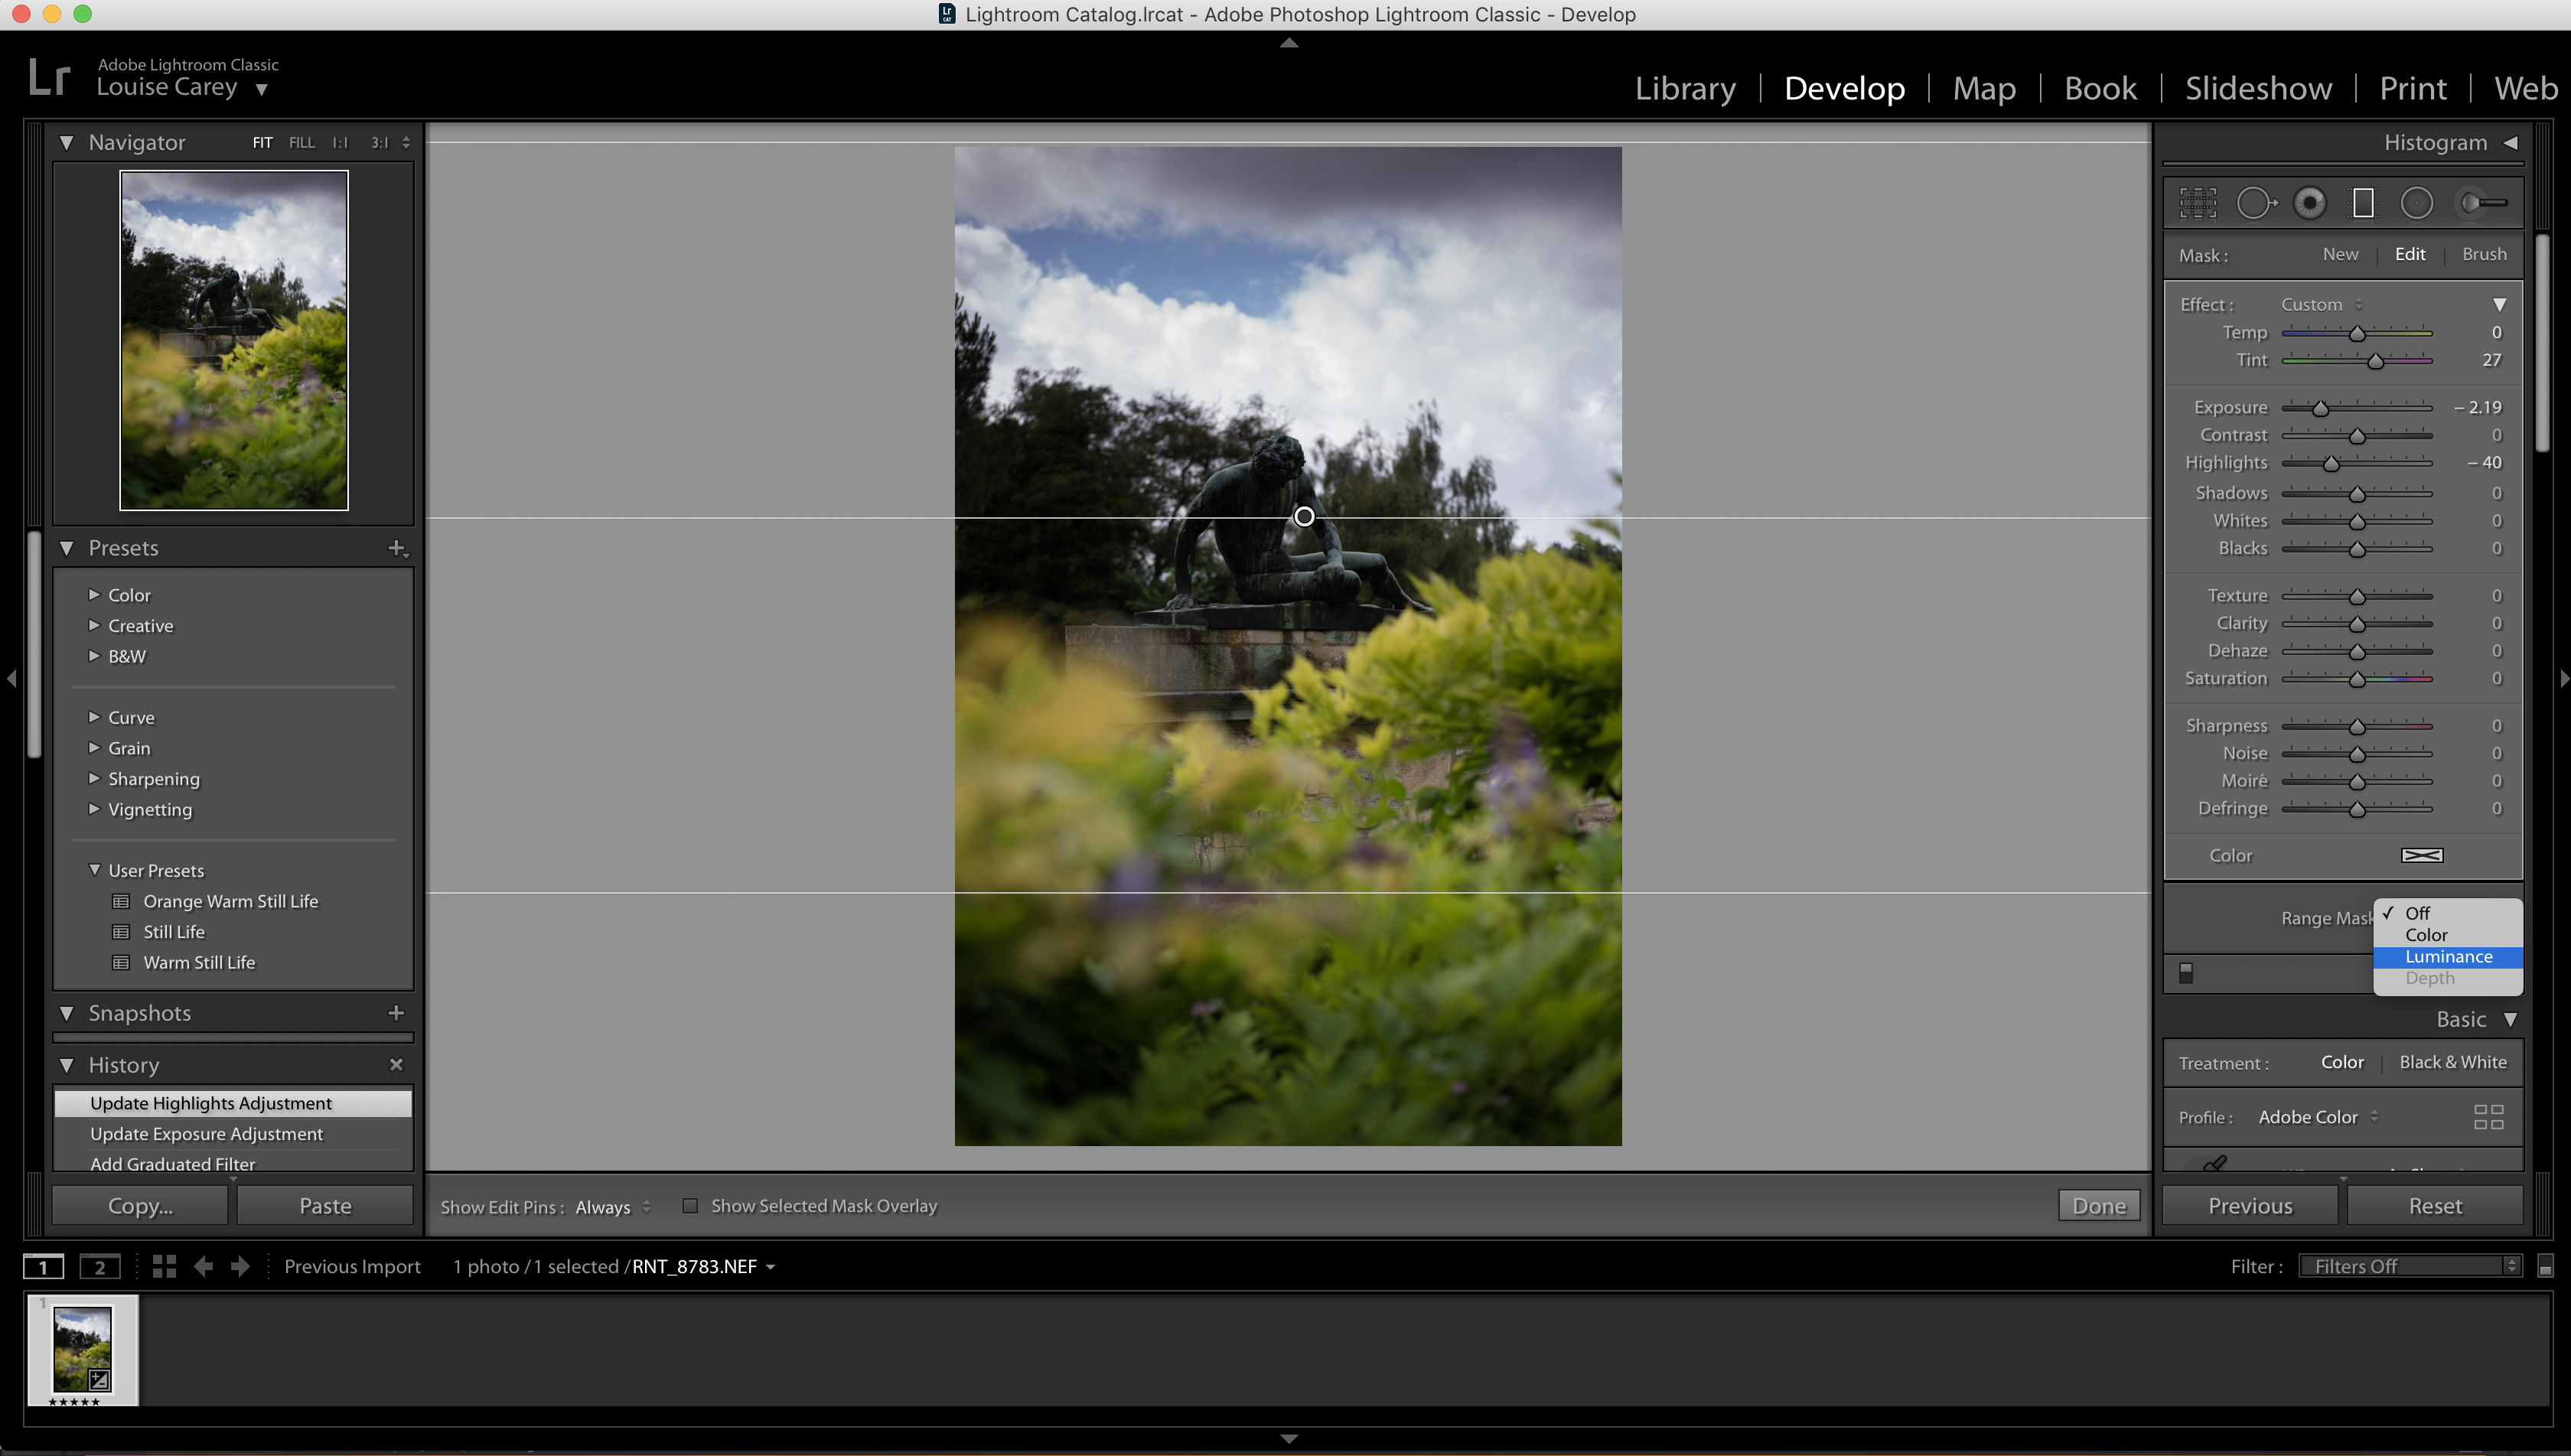
To ensure that the adjustment tool only affected the background, we went to the Range Mask drop down menu and selected Luminance. Then, we used the Eyedropper tool to select the background, so that only those tones are affected.
The best camera deals, reviews, product advice, and unmissable photography news, direct to your inbox!
03 Refine your selection
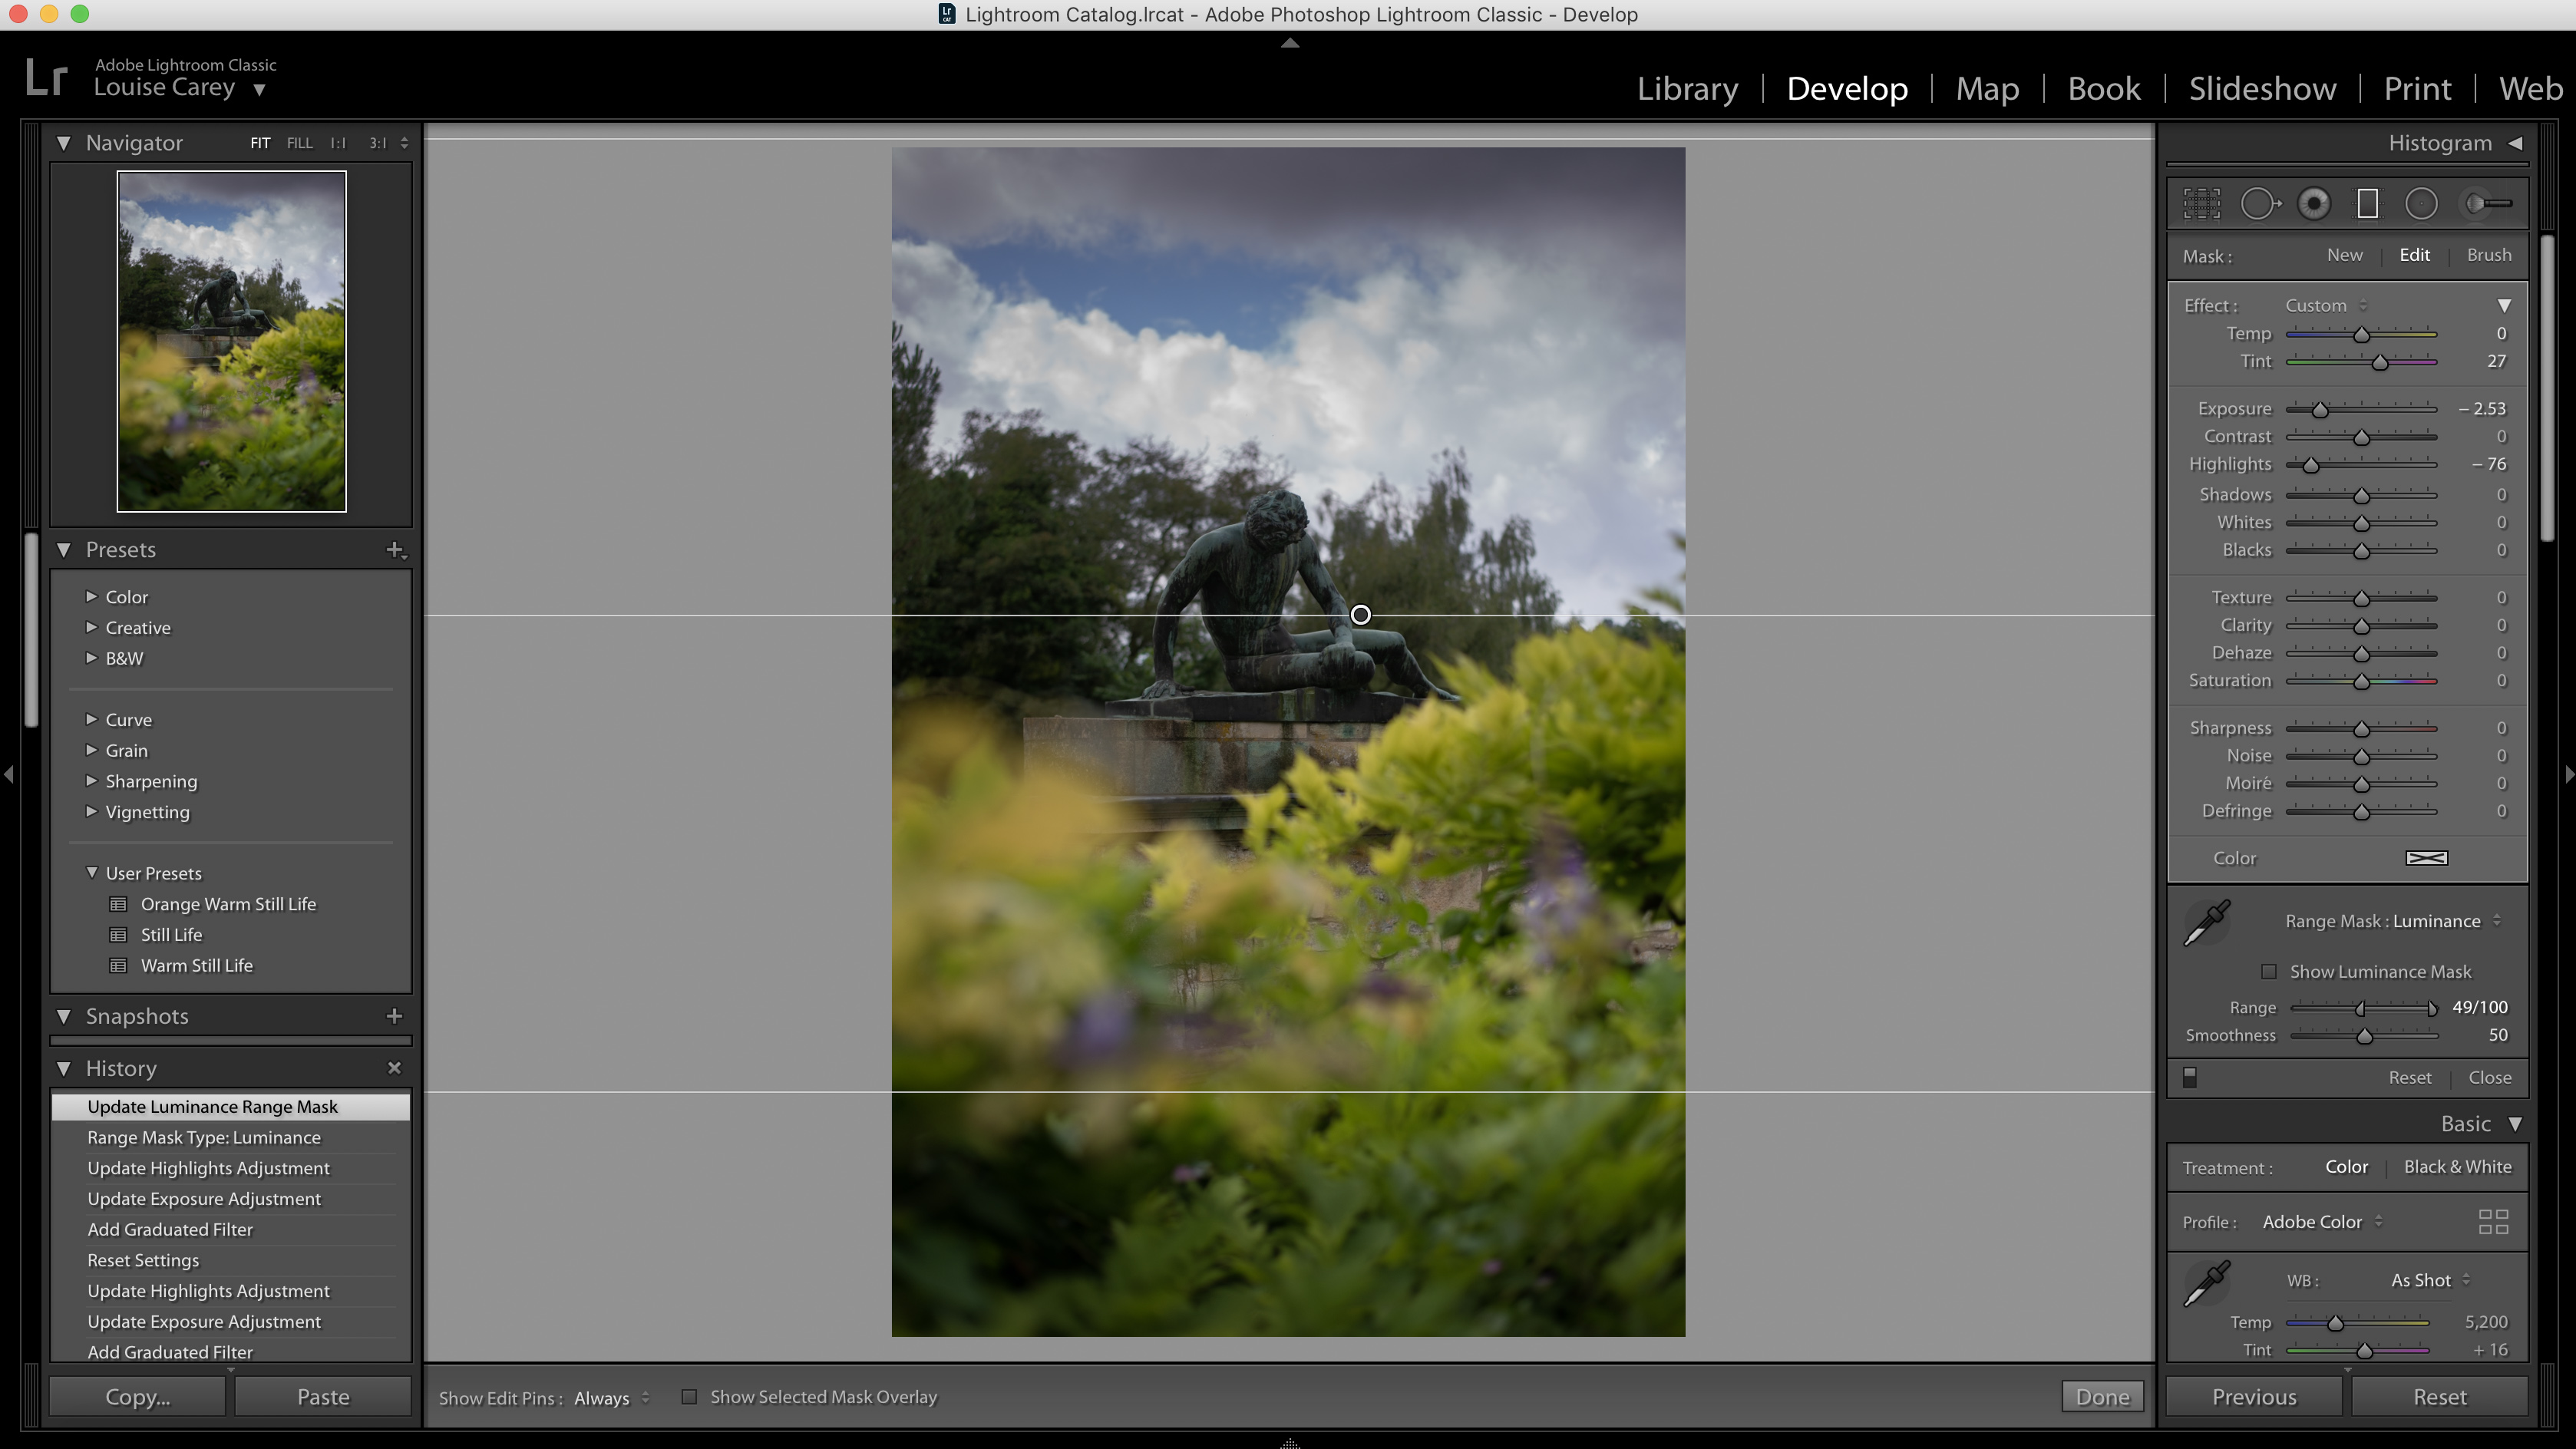
Using the Eyedropper tool affects the Range slider. You can then manually adjust this slider until you’re happy with the results. The larger the range, the more of your selection will be affected by the adjustments you’ve made.
04 Experiment with color
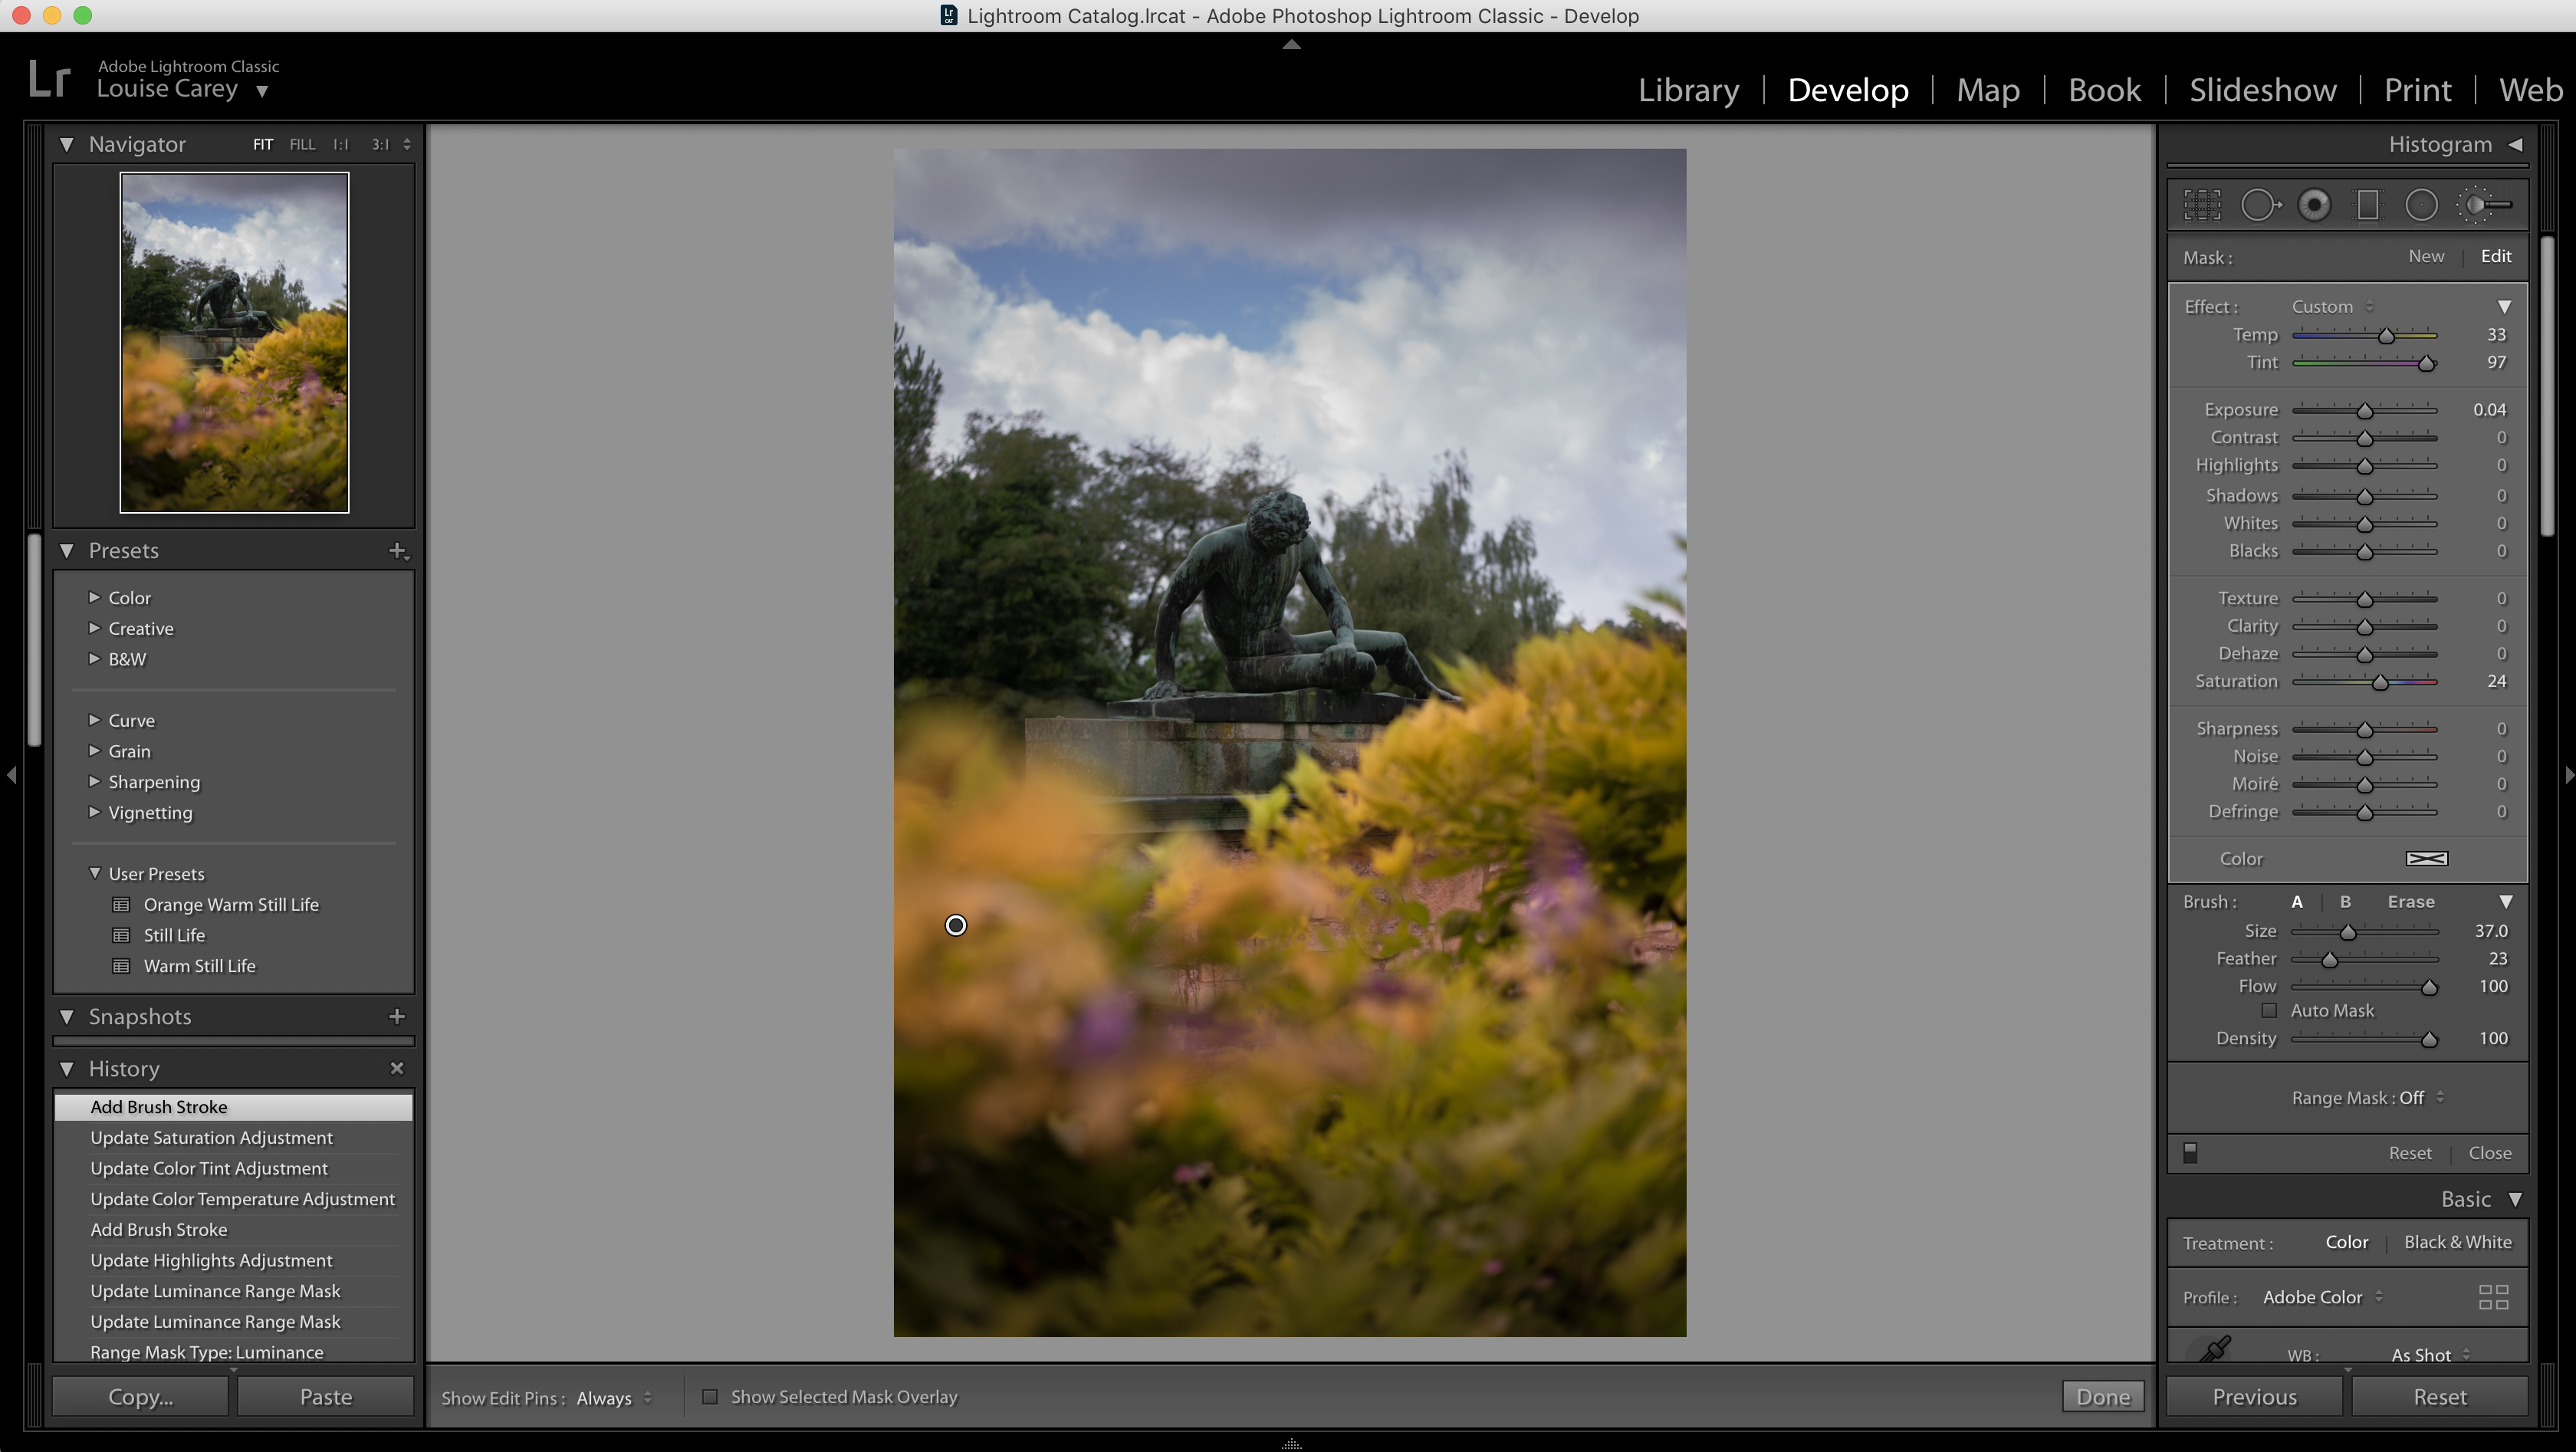
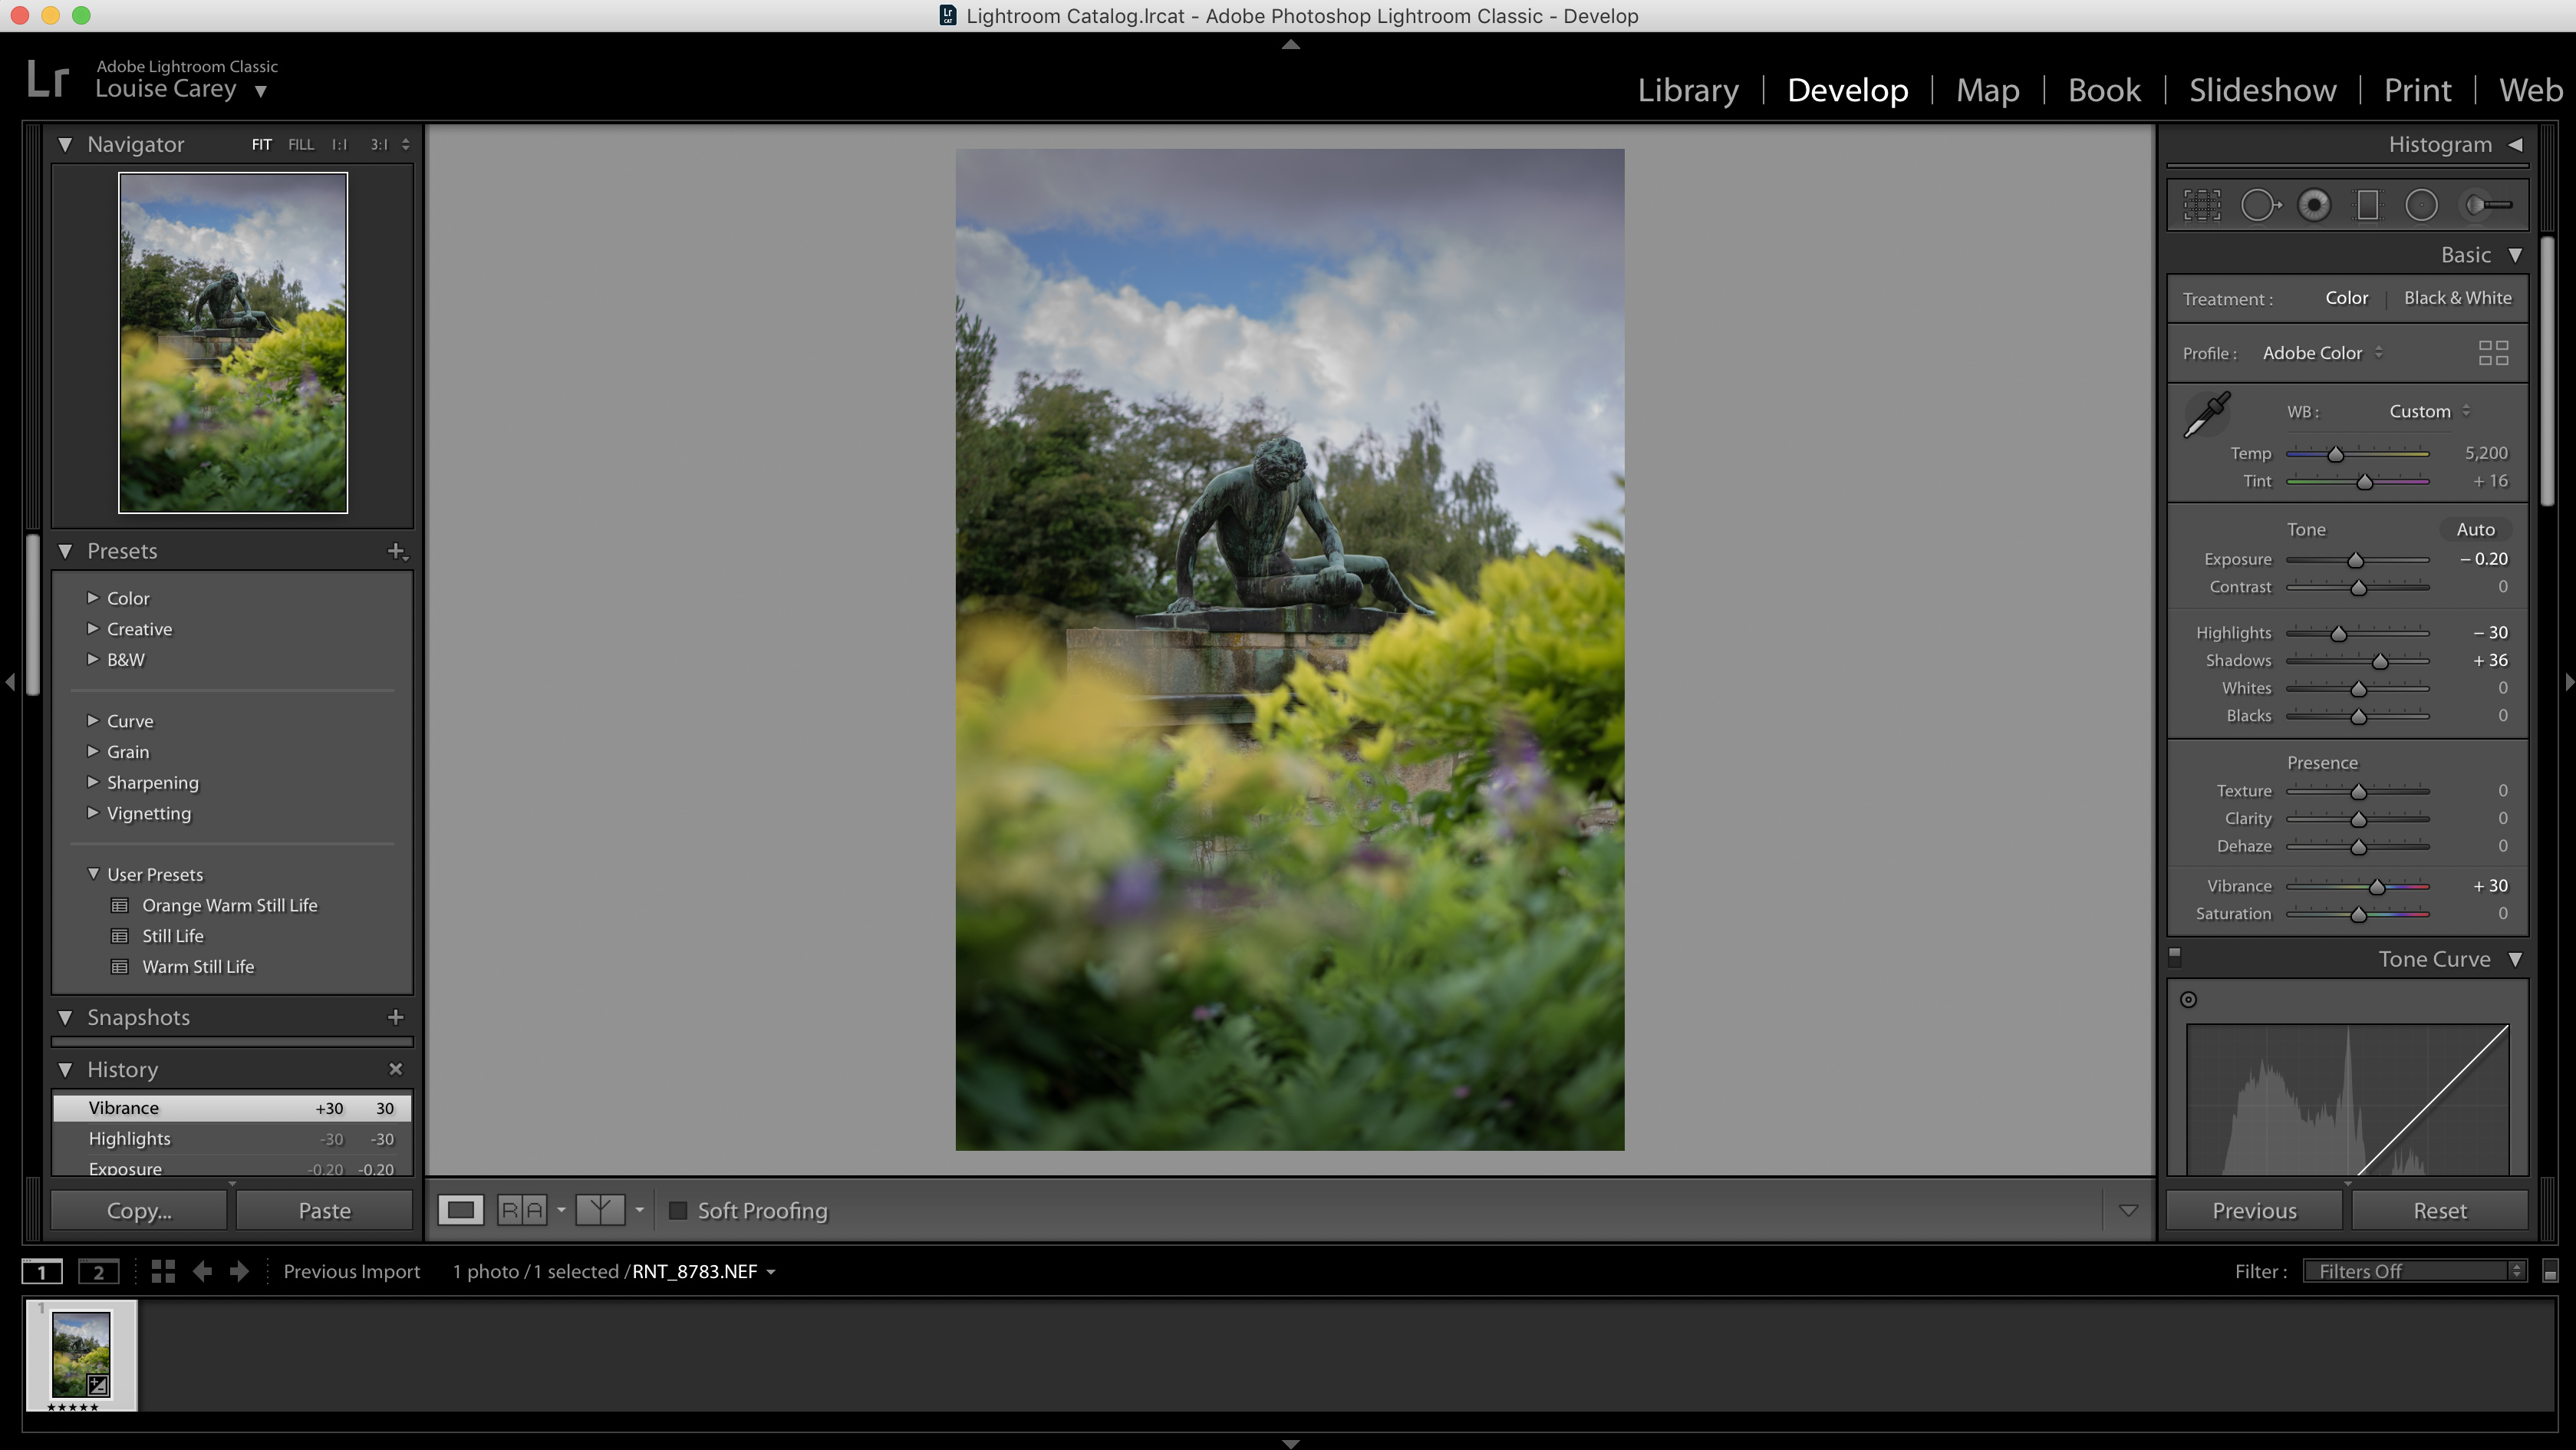
Range masks can also be used with color adjustments. We used the Radial Filter tool to boost the contrast and warmth of the foreground with the Temperature slider to increase the yellows.
05 Create a Color Range Mask
To ensure that only the foreground was affected, we chose a Color Range Mask and used the Eyedropper tool to select the tones in the foreground. This meant that the neutral colours were unaffected by the color adjustments that we’d made.
Now you can finish editing by exiting the adjustment tools and going to the Basic panel. We boosted the shadows to bring out the detail in the bird and increased the overall warmth in the image subtly with the Temperature slider.
PhotoPlus: The Canon Magazine is the world's only monthly newsstand title that's 100% devoted to Canon, so you can be sure the magazine is completely relevant to your system.
Read more:
The best photo editing software: image editors for novices through to pros
The best photo-editing laptops: top laptops for photographers
10 best online photography courses – from beginner guides to masterclasses
With over a decade of photographic experience, Louise arms Digital Camera World with a wealth of knowledge on photographic technique and know-how – something at which she is so adept that she's delivered workshops for the likes of ITV and Sue Ryder. Louise also brings years of experience as both a web and print journalist, having served as features editor for Practical Photography magazine and contributing photography tutorials and camera analysis to titles including Digital Camera Magazine and Digital Photographer. Louise currently shoots with the Fujifilm X-T200 and the Nikon D800, capturing self-portraits and still life images, and is DCW's ecommerce editor, meaning that she knows good camera, lens and laptop deals when she sees them.
